

Page 1
RS 8in1 Kameleon OM rev 10/9/03 4:11 PM Page 1
Page 2

8-IN-ONER
EMOTEPOWEREDBYKAMELEON
TABLE OF CONTENTS
Introduction . . . . . . . . . . . . . . . . . . . . . . . . . . . . . . . . . . . . . . . . . . . . . . . . . . . . . . . . . . . . . . . . 3
How Kameleon™ Works. . . . . . . . . . . . . . . . . . . . . . . . . . . . . . . . . . . . . . . . . . . . . . . . . . . . . . 3
Installing Batteries . . . . . . . . . . . . . . . . . . . . . . . . . . . . . . . . . . . . . . . . . . . . . . . . . . . . . . . . . . 4
Battery Use And Safety . . . . . . . . . . . . . . . . . . . . . . . . . . . . . . . . . . . . . . . . . . . . . . . . . . . . . . 4
About Battery Life. . . . . . . . . . . . . . . . . . . . . . . . . . . . . . . . . . . . . . . . . . . . . . . . . . . . . . . . . . 4
Installing Batteries In The Remote . . . . . . . . . . . . . . . . . . . . . . . . . . . . . . . . . . . . . . . . . . . . . 4
About The Finder Transmitter . . . . . . . . . . . . . . . . . . . . . . . . . . . . . . . . . . . . . . . . . . . . . . . . . 5
A Quick Look At The Controls . . . . . . . . . . . . . . . . . . . . . . . . . . . . . . . . . . . . . . . . . . . . . . . . . . 6
Key Functions . . . . . . . . . . . . . . . . . . . . . . . . . . . . . . . . . . . . . . . . . . . . . . . . . . . . . . . . . . . . . 8
Device Table . . . . . . . . . . . . . . . . . . . . . . . . . . . . . . . . . . . . . . . . . . . . . . . . . . . . . . . . . . . . . 12
Adjusting Brightness . . . . . . . . . . . . . . . . . . . . . . . . . . . . . . . . . . . . . . . . . . . . . . . . . . . . . . . 13
Programming A Device . . . . . . . . . . . . . . . . . . . . . . . . . . . . . . . . . . . . . . . . . . . . . . . . . . . . . . 14
Programming A DVD Player/VCR Combo . . . . . . . . . . . . . . . . . . . . . . . . . . . . . . . . . . . . . . . 16
Searching For Your Code. . . . . . . . . . . . . . . . . . . . . . . . . . . . . . . . . . . . . . . . . . . . . . . . . . . . . 17
Checking The Codes . . . . . . . . . . . . . . . . . . . . . . . . . . . . . . . . . . . . . . . . . . . . . . . . . . . . . . . . 18
Using Learning . . . . . . . . . . . . . . . . . . . . . . . . . . . . . . . . . . . . . . . . . . . . . . . . . . . . . . . . . . . . 19
Learning Precautions . . . . . . . . . . . . . . . . . . . . . . . . . . . . . . . . . . . . . . . . . . . . . . . . . . . . . . 19
Programming A Learning Key . . . . . . . . . . . . . . . . . . . . . . . . . . . . . . . . . . . . . . . . . . . . . . . . 20
Deleting A Single Learned Key. . . . . . . . . . . . . . . . . . . . . . . . . . . . . . . . . . . . . . . . . . . . . . . . 21
Deleting All Learned Keys In A Specific Mode . . . . . . . . . . . . . . . . . . . . . . . . . . . . . . . . . . . . 22
Changing Volume Lock . . . . . . . . . . . . . . . . . . . . . . . . . . . . . . . . . . . . . . . . . . . . . . . . . . . . . . 22
Locking Volume Control To One Mode . . . . . . . . . . . . . . . . . . . . . . . . . . . . . . . . . . . . . . . . . . 23
Unlocking Volume Control For A Single Device. . . . . . . . . . . . . . . . . . . . . . . . . . . . . . . . . . . . 23
Unlocking All Volume Control . . . . . . . . . . . . . . . . . . . . . . . . . . . . . . . . . . . . . . . . . . . . . . . . 24
Using Macros . . . . . . . . . . . . . . . . . . . . . . . . . . . . . . . . . . . . . . . . . . . . . . . . . . . . . . . . . . . . . . 25
Programming A Favorite Channel Macro . . . . . . . . . . . . . . . . . . . . . . . . . . . . . . . . . . . . . . . . 25
Programming A Master Power Macro In My System Mode . . . . . . . . . . . . . . . . . . . . . . . . . . . 26
Programming The COM MUTE Key . . . . . . . . . . . . . . . . . . . . . . . . . . . . . . . . . . . . . . . . . . . . . 27
Clearing A Macro . . . . . . . . . . . . . . . . . . . . . . . . . . . . . . . . . . . . . . . . . . . . . . . . . . . . . . . . . 28
Using Keymover . . . . . . . . . . . . . . . . . . . . . . . . . . . . . . . . . . . . . . . . . . . . . . . . . . . . . . . . . . . . 28
Programming Keymover . . . . . . . . . . . . . . . . . . . . . . . . . . . . . . . . . . . . . . . . . . . . . . . . . . . . 28
Restoring A Single Keymoved Key . . . . . . . . . . . . . . . . . . . . . . . . . . . . . . . . . . . . . . . . . . . . . 29
Restoring All Keymoved Keys In A Single Mode . . . . . . . . . . . . . . . . . . . . . . . . . . . . . . . . . . . 30
Programming Favorite Channel Scan. . . . . . . . . . . . . . . . . . . . . . . . . . . . . . . . . . . . . . . . . . 30
Using Channel Scan . . . . . . . . . . . . . . . . . . . . . . . . . . . . . . . . . . . . . . . . . . . . . . . . . . . . . . . . 32
Using My System Mode. . . . . . . . . . . . . . . . . . . . . . . . . . . . . . . . . . . . . . . . . . . . . . . . . . . . . . 32
Control Organization. . . . . . . . . . . . . . . . . . . . . . . . . . . . . . . . . . . . . . . . . . . . . . . . . . . . . . . 32
Programming My System Mode . . . . . . . . . . . . . . . . . . . . . . . . . . . . . . . . . . . . . . . . . . . . . . 33
Reassigning Device Keys . . . . . . . . . . . . . . . . . . . . . . . . . . . . . . . . . . . . . . . . . . . . . . . . . . . . 35
Using Commercial Skip . . . . . . . . . . . . . . . . . . . . . . . . . . . . . . . . . . . . . . . . . . . . . . . . . . . . . 36
Using The Default Settings . . . . . . . . . . . . . . . . . . . . . . . . . . . . . . . . . . . . . . . . . . . . . . . . . . 36
Programming Commercial Skip. . . . . . . . . . . . . . . . . . . . . . . . . . . . . . . . . . . . . . . . . . . . . . . 36
Setting The Tilt Switch . . . . . . . . . . . . . . . . . . . . . . . . . . . . . . . . . . . . . . . . . . . . . . . . . . . . . . 38
Disabling The Tilt Switch. . . . . . . . . . . . . . . . . . . . . . . . . . . . . . . . . . . . . . . . . . . . . . . . . . . . 38
Enabling The Tilt Switch . . . . . . . . . . . . . . . . . . . . . . . . . . . . . . . . . . . . . . . . . . . . . . . . . . . . 38
Setting The Finder Receiver . . . . . . . . . . . . . . . . . . . . . . . . . . . . . . . . . . . . . . . . . . . . . . . . . . 39
Disabling The Finder Receiver. . . . . . . . . . . . . . . . . . . . . . . . . . . . . . . . . . . . . . . . . . . . . . . . 39
Enabling The Finder Receiver . . . . . . . . . . . . . . . . . . . . . . . . . . . . . . . . . . . . . . . . . . . . . . . . 39
Restoring Factory Default Settings . . . . . . . . . . . . . . . . . . . . . . . . . . . . . . . . . . . . . . . . . . . . 40
Clearing All Custom Programming . . . . . . . . . . . . . . . . . . . . . . . . . . . . . . . . . . . . . . . . . . . . 40
Specifications . . . . . . . . . . . . . . . . . . . . . . . . . . . . . . . . . . . . . . . . . . . . . . . . . . . . . . . . . . . . . 41
About Upgrading . . . . . . . . . . . . . . . . . . . . . . . . . . . . . . . . . . . . . . . . . . . . . . . . . . . . . . . . . . . 42
Upgrade Procedure . . . . . . . . . . . . . . . . . . . . . . . . . . . . . . . . . . . . . . . . . . . . . . . . . . . . . . . . 42
Upgrade Exclusions . . . . . . . . . . . . . . . . . . . . . . . . . . . . . . . . . . . . . . . . . . . . . . . . . . . . . . . 42
Troubleshooting . . . . . . . . . . . . . . . . . . . . . . . . . . . . . . . . . . . . . . . . . . . . . . . . . . . . . . . . . . . . 43
Device Menu Screens
. . . . . . . . . . . . . . . . . . . . . . . . . . . . . . . . . . . . . . . . . . . . . . . . . . . . . . . 45
Care. . . . . . . . . . . . . . . . . . . . . . . . . . . . . . . . . . . . . . . . . . . . . . . . . . . . . . . . . . . . . . . . . . . . . . 57
Additional Information . . . . . . . . . . . . . . . . . . . . . . . . . . . . . . . . . . . . . . . . . . . . . . . . . . . . . . 57
2 Table Of Contents
RS 8in1 Kameleon OM rev 10/9/03 4:11 PM Page 2
Page 3

O
WNER’SMANUAL
Instruction To The User. . . . . . . . . . . . . . . . . . . . . . . . . . . . . . . . . . . . . . . . . . . . . . . . . . . . . . 58
Limited 90-Day Warranty . . . . . . . . . . . . . . . . . . . . . . . . . . . . . . . . . . . . . . . . . . . . . . . . . . . . 59
Manual De Deuño . . . . . . . . . . . . . . . . . . . . . . . . . . . . . . . . . . . . . . . . . . . . . . . . . . . . . . . . . . 60
Manufacturer’s Codes. . . . . . . . . . . . . . . . . . . . . . . . . . . . . . . . . . . . . . . . . . . . . . . . . . . . . . 118
Setup Codes For Audio Amplifiers . . . . . . . . . . . . . . . . . . . . . . . . . . . . . . . . . . . . . . . . . . . . 118
Setup Codes For Audio Receivers . . . . . . . . . . . . . . . . . . . . . . . . . . . . . . . . . . . . . . . . . . . . 118
Setup Codes For Cable Boxes . . . . . . . . . . . . . . . . . . . . . . . . . . . . . . . . . . . . . . . . . . . . . . . 119
Setup Codes For CD Players . . . . . . . . . . . . . . . . . . . . . . . . . . . . . . . . . . . . . . . . . . . . . . . . 120
Setup Codes For DVD Players . . . . . . . . . . . . . . . . . . . . . . . . . . . . . . . . . . . . . . . . . . . . . . . 121
Setup Codes For DVD Players, PlayStation2 And Xbox Models . . . . . . . . . . . . . . . . . . . . . . . 123
Setup Codes For DVD Player/VCR Combos. . . . . . . . . . . . . . . . . . . . . . . . . . . . . . . . . . . . . . 123
Setup Codes For Home-Theater-in-a-Box Devices . . . . . . . . . . . . . . . . . . . . . . . . . . . . . . . . 123
Setup Codes For PVRs. . . . . . . . . . . . . . . . . . . . . . . . . . . . . . . . . . . . . . . . . . . . . . . . . . . . . 124
Setup Codes For Satellite Receivers . . . . . . . . . . . . . . . . . . . . . . . . . . . . . . . . . . . . . . . . . . 124
Setup Codes For TVs . . . . . . . . . . . . . . . . . . . . . . . . . . . . . . . . . . . . . . . . . . . . . . . . . . . . . . 125
Setup Codes For TV/DVD Player Combos . . . . . . . . . . . . . . . . . . . . . . . . . . . . . . . . . . . . . . . 129
Setup Codes For TV/VCR Combos . . . . . . . . . . . . . . . . . . . . . . . . . . . . . . . . . . . . . . . . . . . . 129
Setup Codes For VCRs. . . . . . . . . . . . . . . . . . . . . . . . . . . . . . . . . . . . . . . . . . . . . . . . . . . . . 130
Setup Codes For Video Accessories . . . . . . . . . . . . . . . . . . . . . . . . . . . . . . . . . . . . . . . . . . . 132
INTRODUCTION
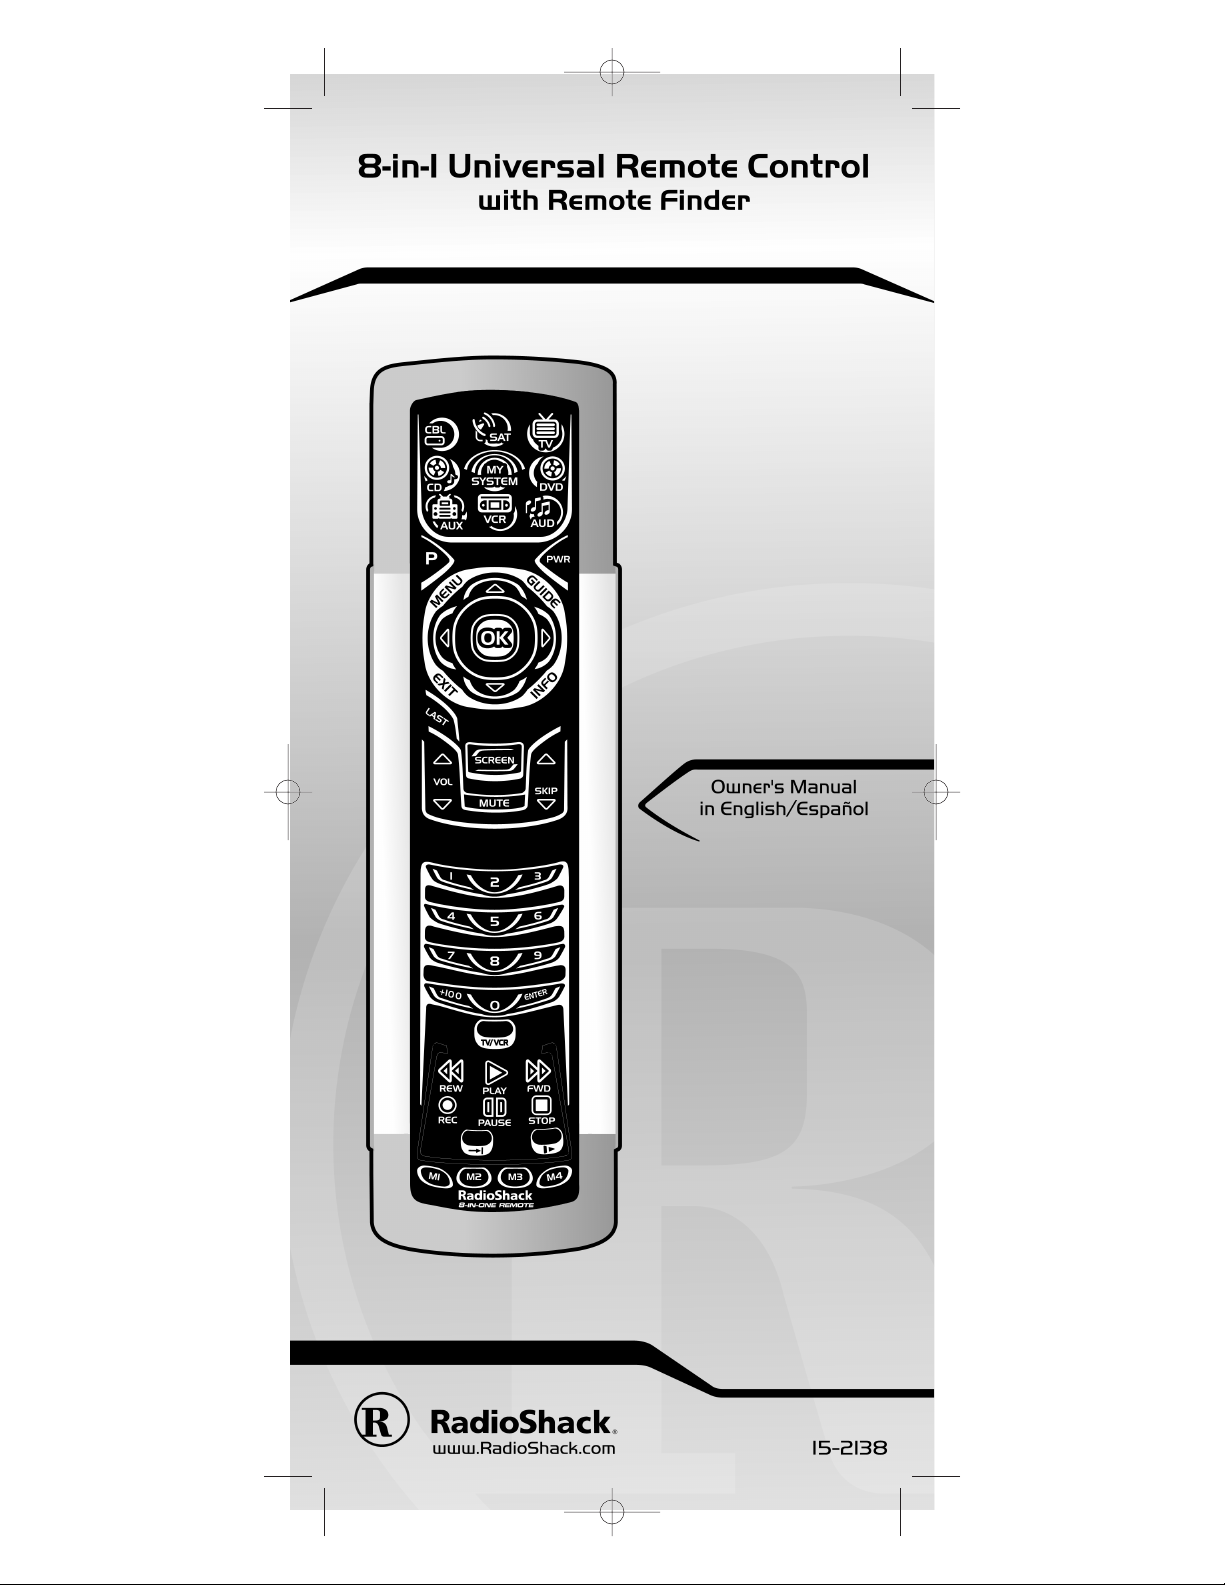
The RadioShack 8-in-One Remote powered by Kameleon™ is a
revolutionary universal remote control that uses Universal Electronics’
Kameleon Technology. It is designed to control up to eight home
entertainment devices,including TV, video,and audio components.
After installing four (4) new AAA alkaline batteries,you can immediately
use the remote to control an RCA TV,VCR,DVD Player, and Satellite
Receiver,a Motorola Cable Box,a Tivo PVR (DVR), and a Pioneer CD
Player and Audio Receiver. To control other brands,please perform the
instructions in Programming A Device on page 14.
HOW KAMELEON™ WORKS
The RadioShack 8-in-One Remote Powered By Kameleon provides the
versatility of an LCD remote control with the feel of a traditional push
button unit.The result is a stunning, bright display with engaging
animation and touch-sensitive graphics for the user.
The remote control includes convenient Menu Driven programming.
The displays are divided into two types of interactive screens: Device
Menus for normal remote control use, and Programming Menus for
feature setup. Acting like its namesake,Kameleon changes the Device
Menu for the device being selected. For example,selecting TV displays
a main menu that contains channel selection, volume control,and a
keypad. However,selecting a DVD player still displays a menu with
those same keys as the TV,but now navigation keys and transport controls are added for the DVD device.
continued on next page...
Table Of Contents/Introduction/How Kameleon Works 3
RS 8in1 Kameleon OM rev 10/9/03 4:11 PM Page 3
Page 4
8-IN-ONER
EMOTEPOWEREDBYKAMELEON
HOW KAMELEON™ WORKS (Continued)
Several devices have a second menu that can be accessed using
SCREEN (see Device Menu Screens, starting on page 45).For example,
TV has two menus: a main menu with extra feature keys for COM
MUTE, +100,ENTER, SLEEP,TV/VCR,and PIP functions, and a second
menu screen that adds navigation keys but removes the extra feature
keys.This way a user has the flexibility to use any menu screen that
works best for the selected device.
NOTE:Even though SCREEN is displayed in all modes, only TV, CD,and AUD
modes have a second menu screen.
Animated key graphics also provided enhanced operational feedback, so
the user can easily see what mode is active and when the commands are
communicating with a device.The end result of Kameleon technology is
a simple,elegant, and intelligent way of organizing a large number of
remote control keys for eight different devices.
INSTALLING BATTERIES
BATTERY USE AND SAFETY
• Use only fresh batteries of the required size and recommended type.
• Do not mix old and new batteries,different types of batteries (e.g.,
standard,alkaline, or rechargeable),or rechargeable batteries of
different capacities.
• If you do not plan to use the remote for an extended period,
remove the batteries.They can leak chemicals that can destroy
electronic parts.
WARNING: Dispose of old batteries promptly and properly. Do not burn or
bury them.
ABOUT BATTERY LIFE
As with all battery-operated devices,battery life will vary depending
on use, including frequency and duration of key presses on the
Kameleon screen.Battery life may be extended by:
• Reducing the brightness level of the display screen (see Adju stin g
Brightness on page 13).
• Disabling the Kameleon “tilt on”feature (see Setting The Tilt Switch
on page 38).
• Disabling the Kameleon Finder feature (see Setting The Finder
Receiver on page 39).
INSTALLING BATTERIES IN THE REMOTE
Your remote requires four AAA batteries (not supplied) for power.
4 How Kameleon Works/Installing Batteries
RS 8in1 Kameleon OM rev 10/9/03 4:11 PM Page 4
Page 5

O
WNER’SMANUAL
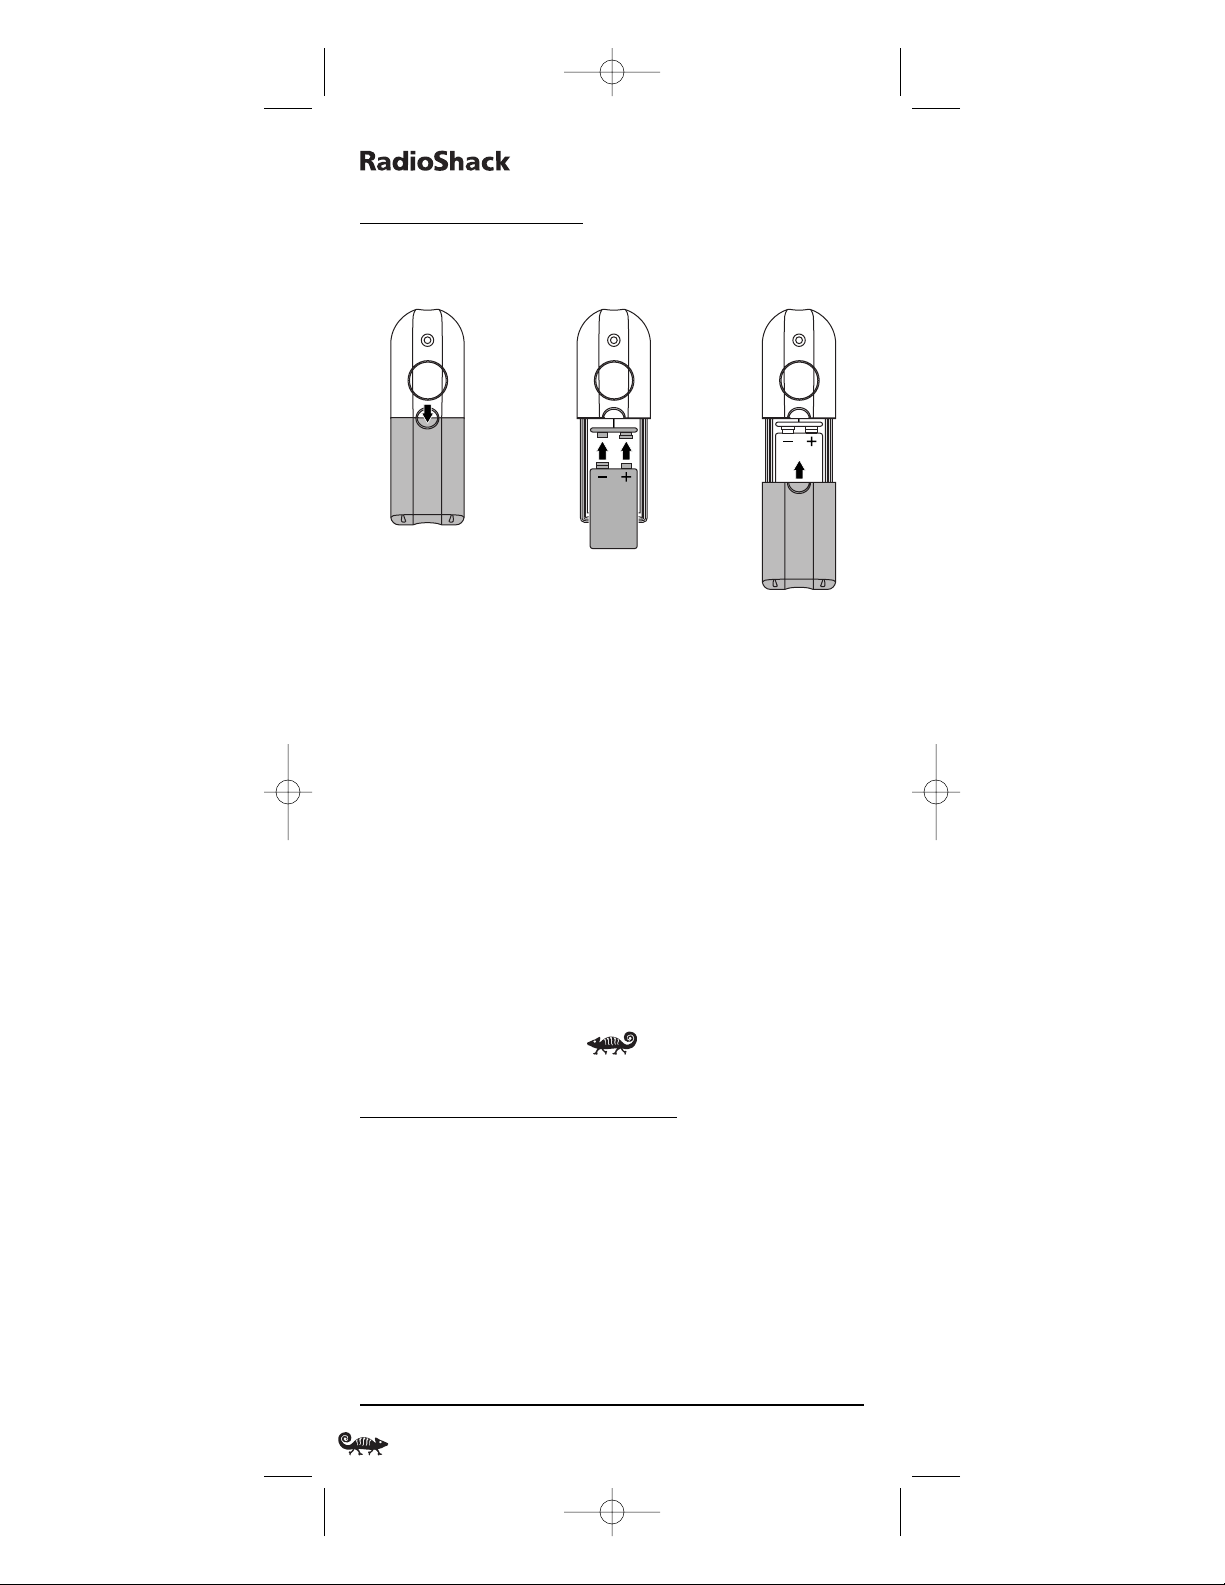
1. Push forward on the battery compartment cover (on the back of the
remote) and lift it off.
2. Slide the AAA batteries into the compartment as indicated by the
polarity symbols (+ and –) shown above.
3. Align the cover with the compartment opening and slide it back
into place.
4. If batteries are inserted correctly, the display will turn on and show all
keys.If a key is not pressed after 7 seconds,the display will turn off.
NOTE: The batteries will need replacement if one of the following conditions occurs:
1. The top IR segment flashes five times after pressing a key.
2. The Tilt Switch (if enabled, see page 38) no longer activates the remote and
only pressing a key turns on the display.
ABOUT THE FINDER TRANSMITTER
NOTE: If you do not plan to use the Finder Transmitter, store it away for future
use and skip this section.
Included in the package is a Finder Transmitter that you can use to
audibly locate a lost or misplaced RadioShack 8-in-One Remote.The
unit also comes with double-sided “hook and loop”tape for use in
mounting it on a TV cabinet side or other surface.
The Finder Transmitter requires a 9-volt battery for power.For best
performance and longest life,we recommend using a RadioShack
alkaline battery.
continued on next page...
Installing Batteries 5
❶
❸
❷
RS 8in1 Kameleon OM rev 10/9/03 4:11 PM Page 5
Page 6
8-IN-ONER
EMOTEPOWEREDBYKAMELEON
INSTALLING BATTERIES
ABOUT THE FINDER TRANSMITTER (CONTINUED)
INSTALLING A BATTERY IN THE FINDER TRANSMITTER
1. Press down on the battery compartment cover (on the front of the
Finder Transmitter) and slide it off.
2. Locate the snap harness and connect the 9-volt battery to mating
terminals.Then insert the battery and harness into the compartment.
3. Align the cover with the compartment opening and slide it back
into place.
OPERATING THE FINDER TRANSMITTER
1. Point the Finder Transmitter in the general direction of the lost
RadioShack 8-in-One Remote.
2. Press and hold the Finder Transmitter’s button until the lost RadioShack
8-in-One Remote emits a chirping sound to help you find it.
NOTE: If the RadioShack 8-in-One Remote does not emit a chirping sound,
verify the Finder Receiver is enabled (see page 39) and the battery is fresh.
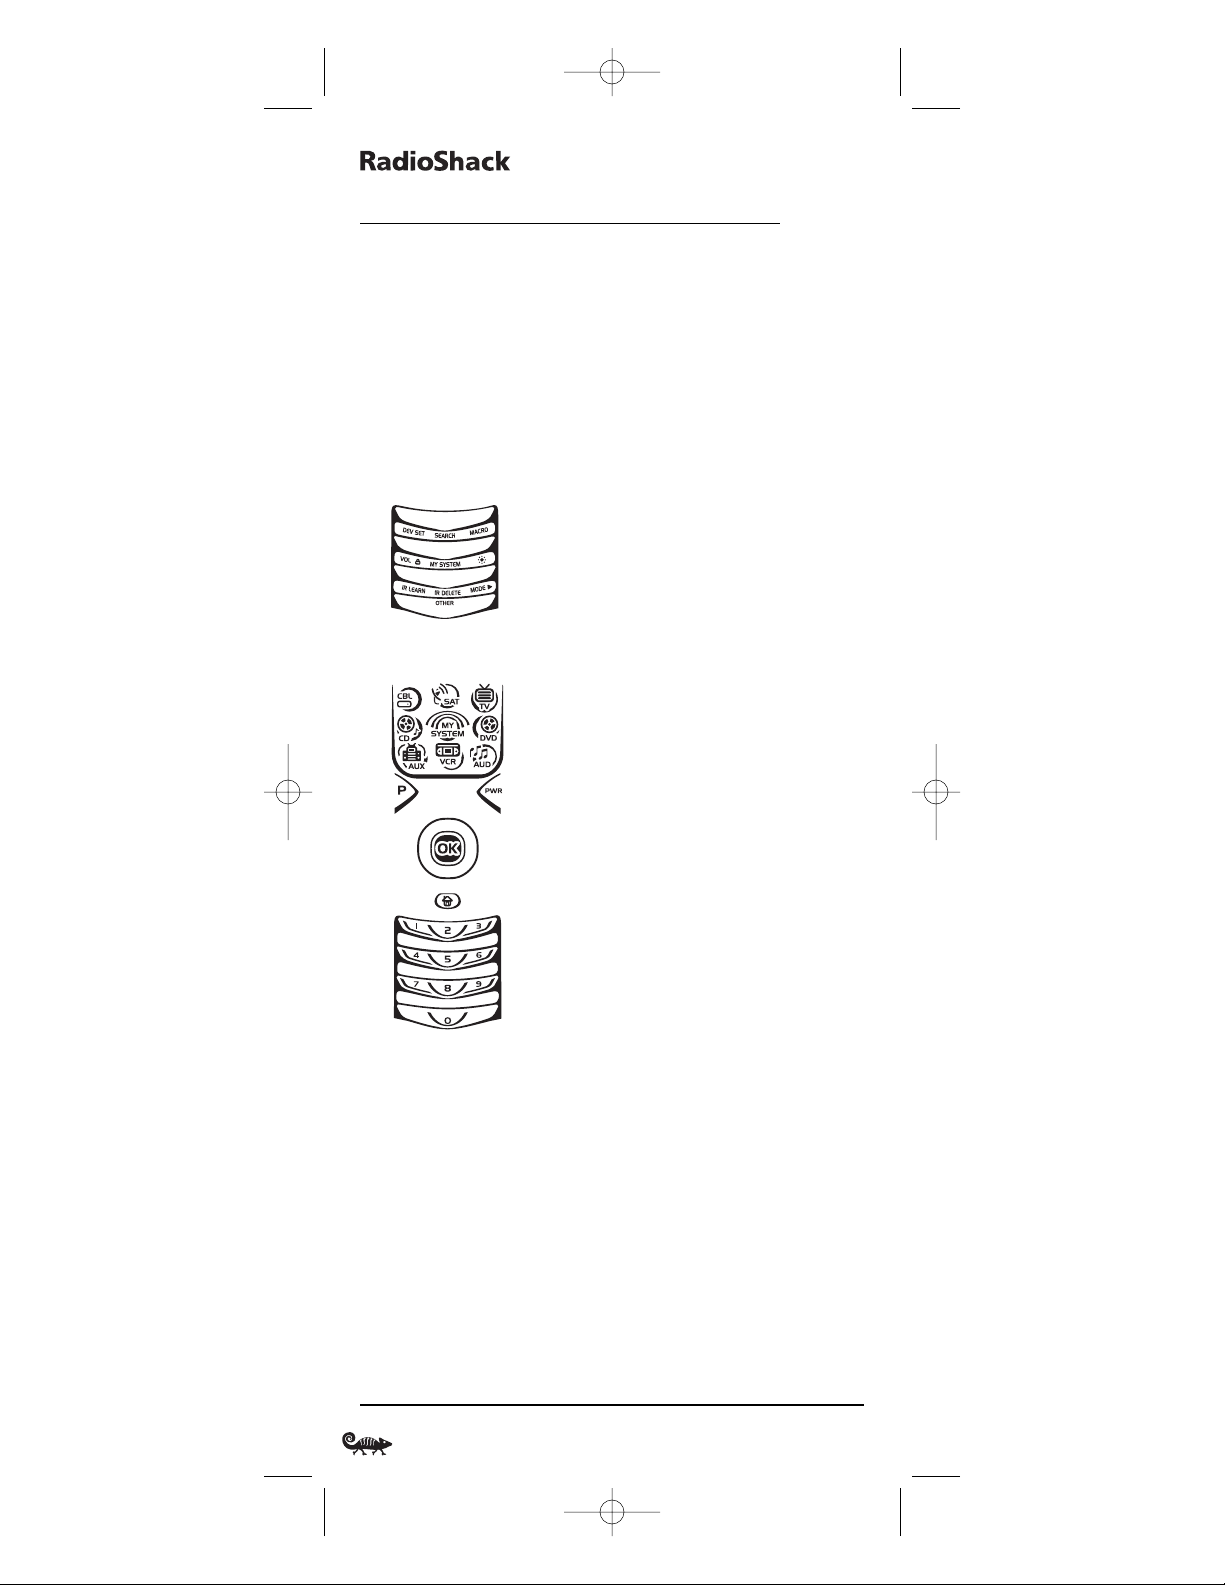
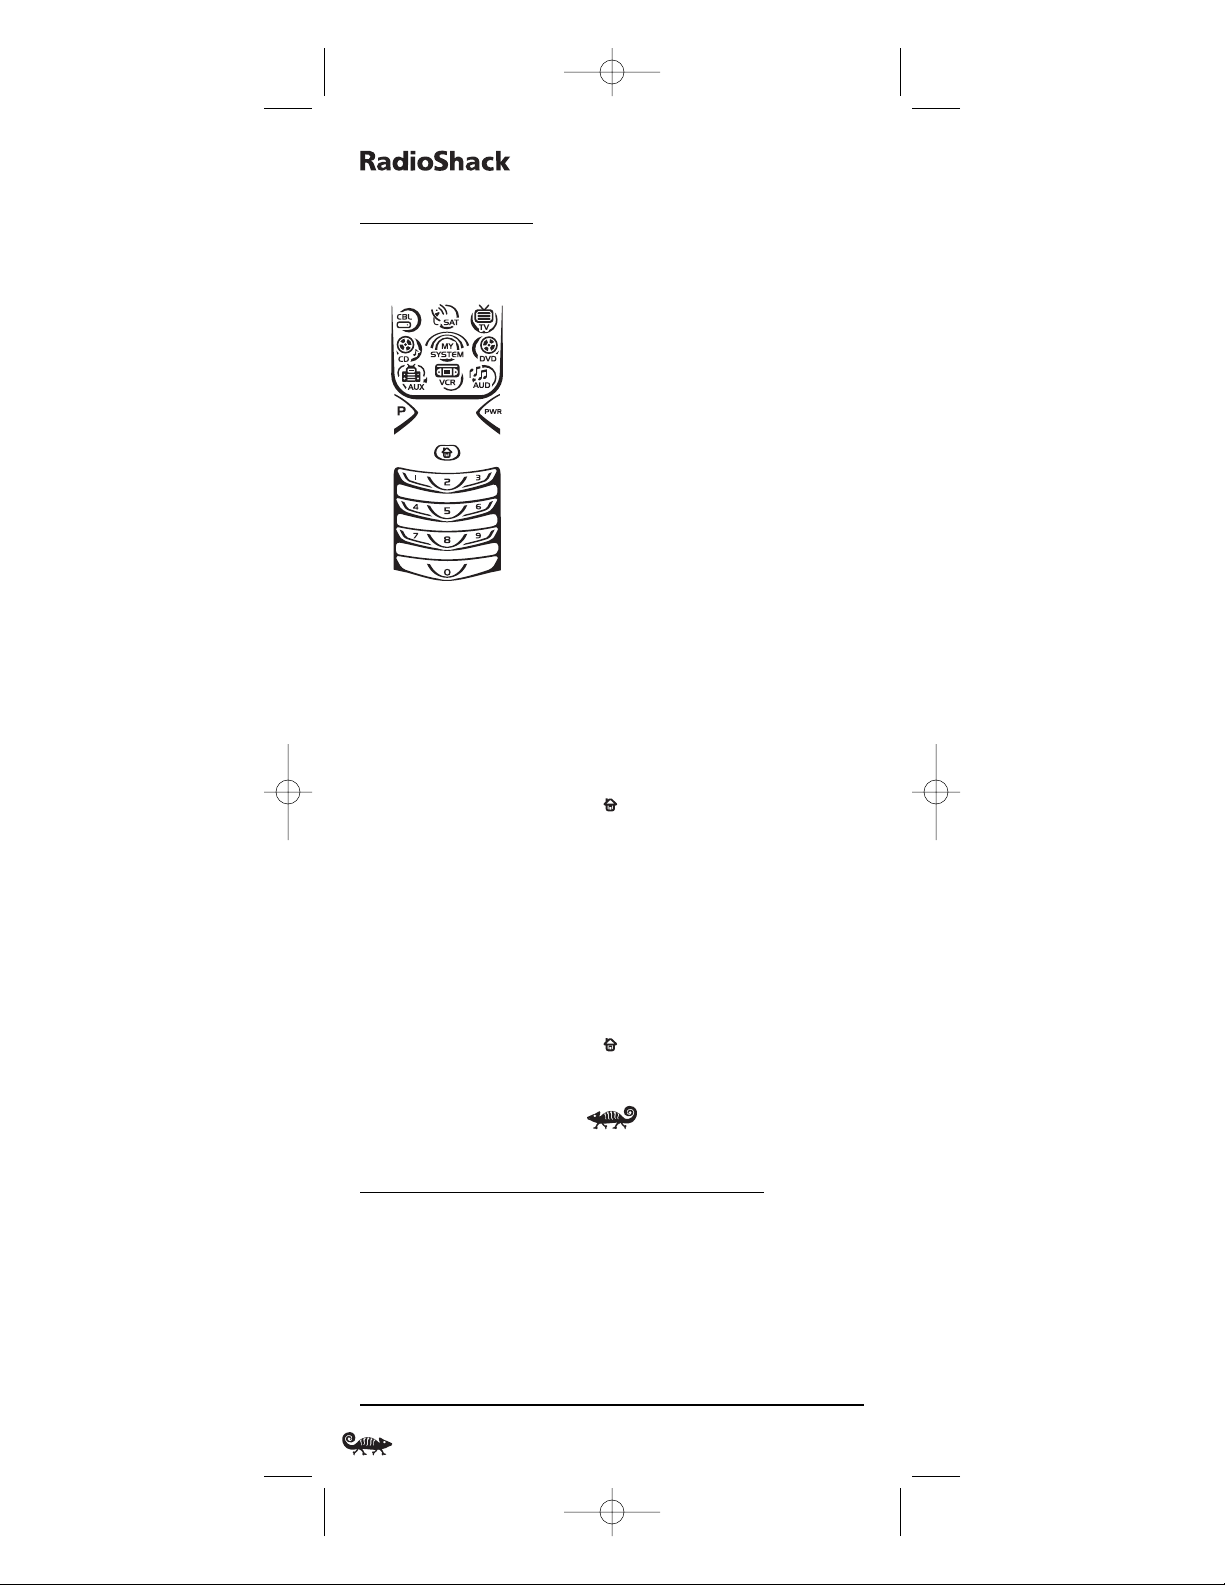
A QUICK LOOK AT THE CONTROLS
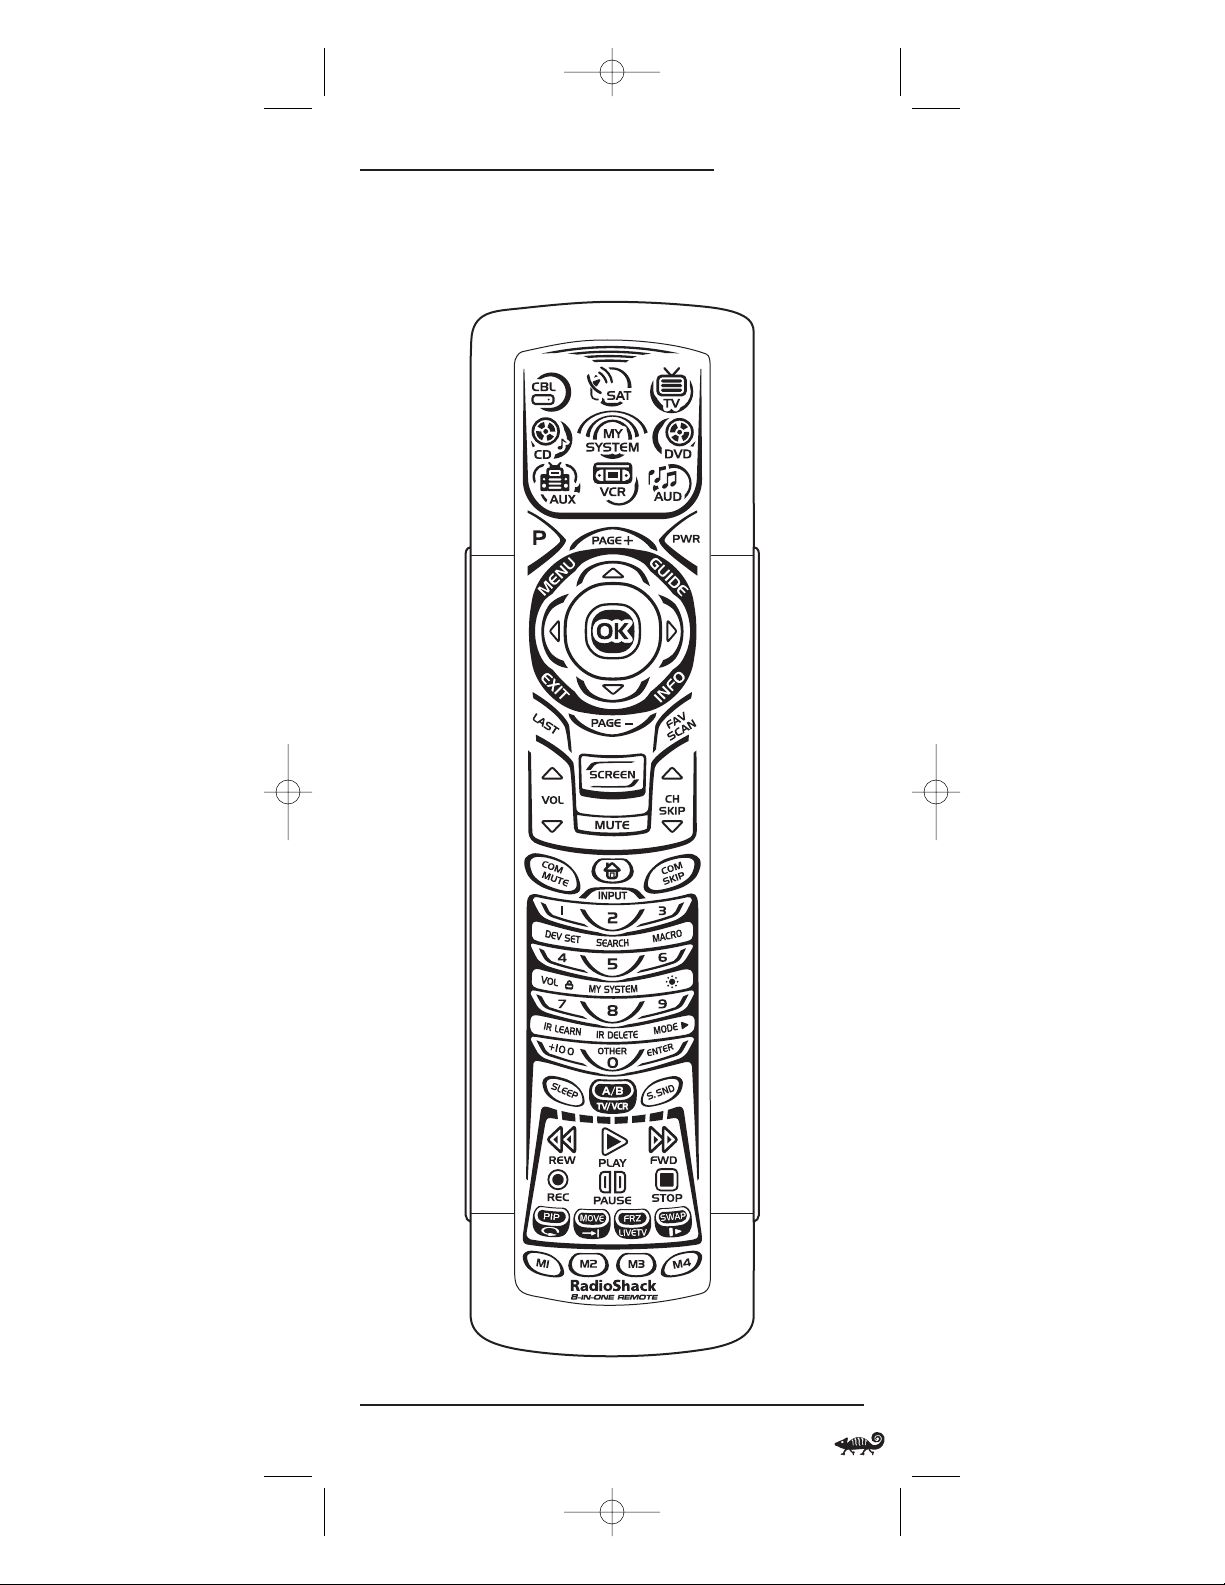
Use the illustration on the next page to locate controls and then study
the Key Functions to learn how they function.
NOTE: The illustration shows all remote control keys.In actual operation, only
active keys used by the selected device are displayed and non-active keys are
hidden. These controls work like the ones found on your original remote controls.
To find out what type of devices can be controlled by each device key
after programming,see the Device Table on page 12.
6 Installing Batteries/A Quick Look At The Controls
❶
❸
❷
RS 8in1 Kameleon OM rev 10/9/03 4:11 PM Page 6
Page 7
O
WNER’SMANUAL
To find out what keys appear when the program mode is activated or
when a device is selected,see the Device Menu Screens section starting
on page 45.Included are brief descriptions of how the keys work for
each displayed screen.
continued on next page...
A Quick Look At The Controls 7
RS 8in1 Kameleon OM rev 10/9/03 4:11 PM Page 7
Page 8

8-IN-ONER
EMOTEPOWEREDBYKAMELEON
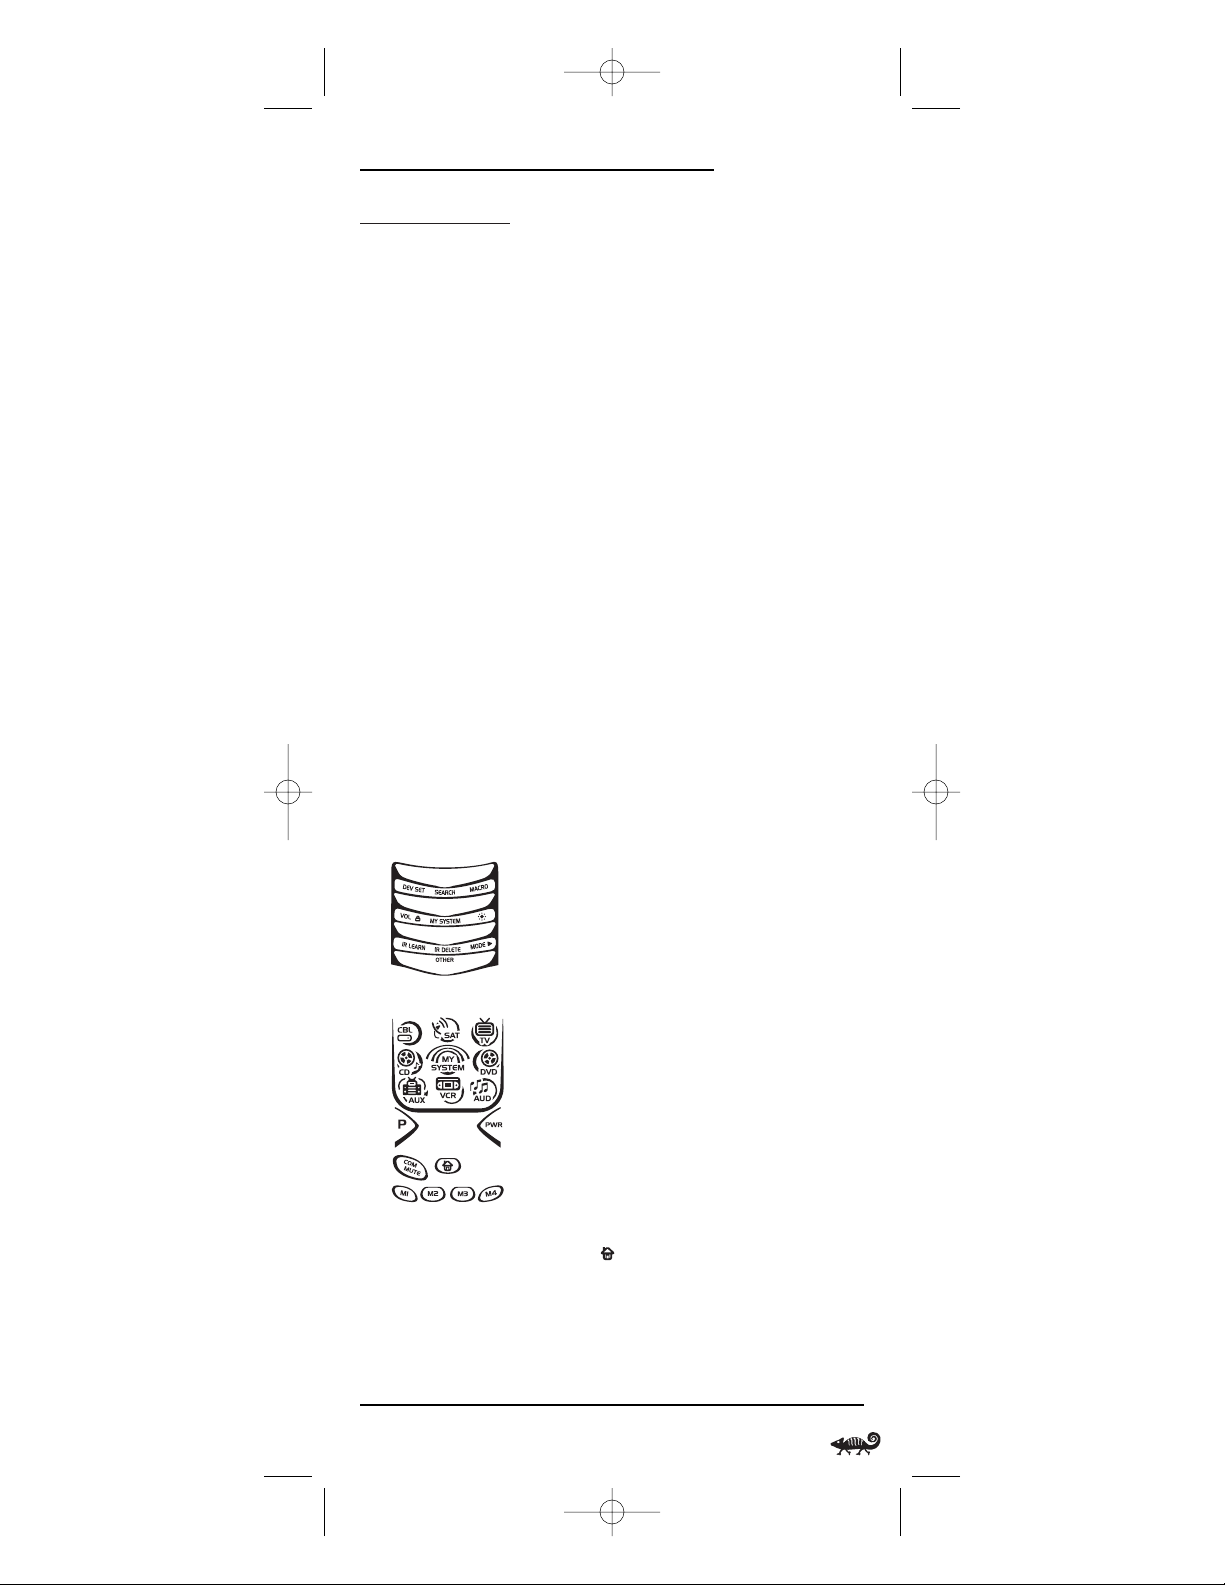
A QUICK LOOK AT THE CONTROLS (Continued)
KEY FUNCTIONS
When a key is pressed,the IR segments will
animate.Outgoing animation (see arrow)
indicates the remote is sending IR signals to a
selected device.
Incoming animation indicates the remote is
receiving IR signals from a device being
learned (see Using Learning on page 19).
During programming,the bottom IR segment
flashes to confirm setup actions.
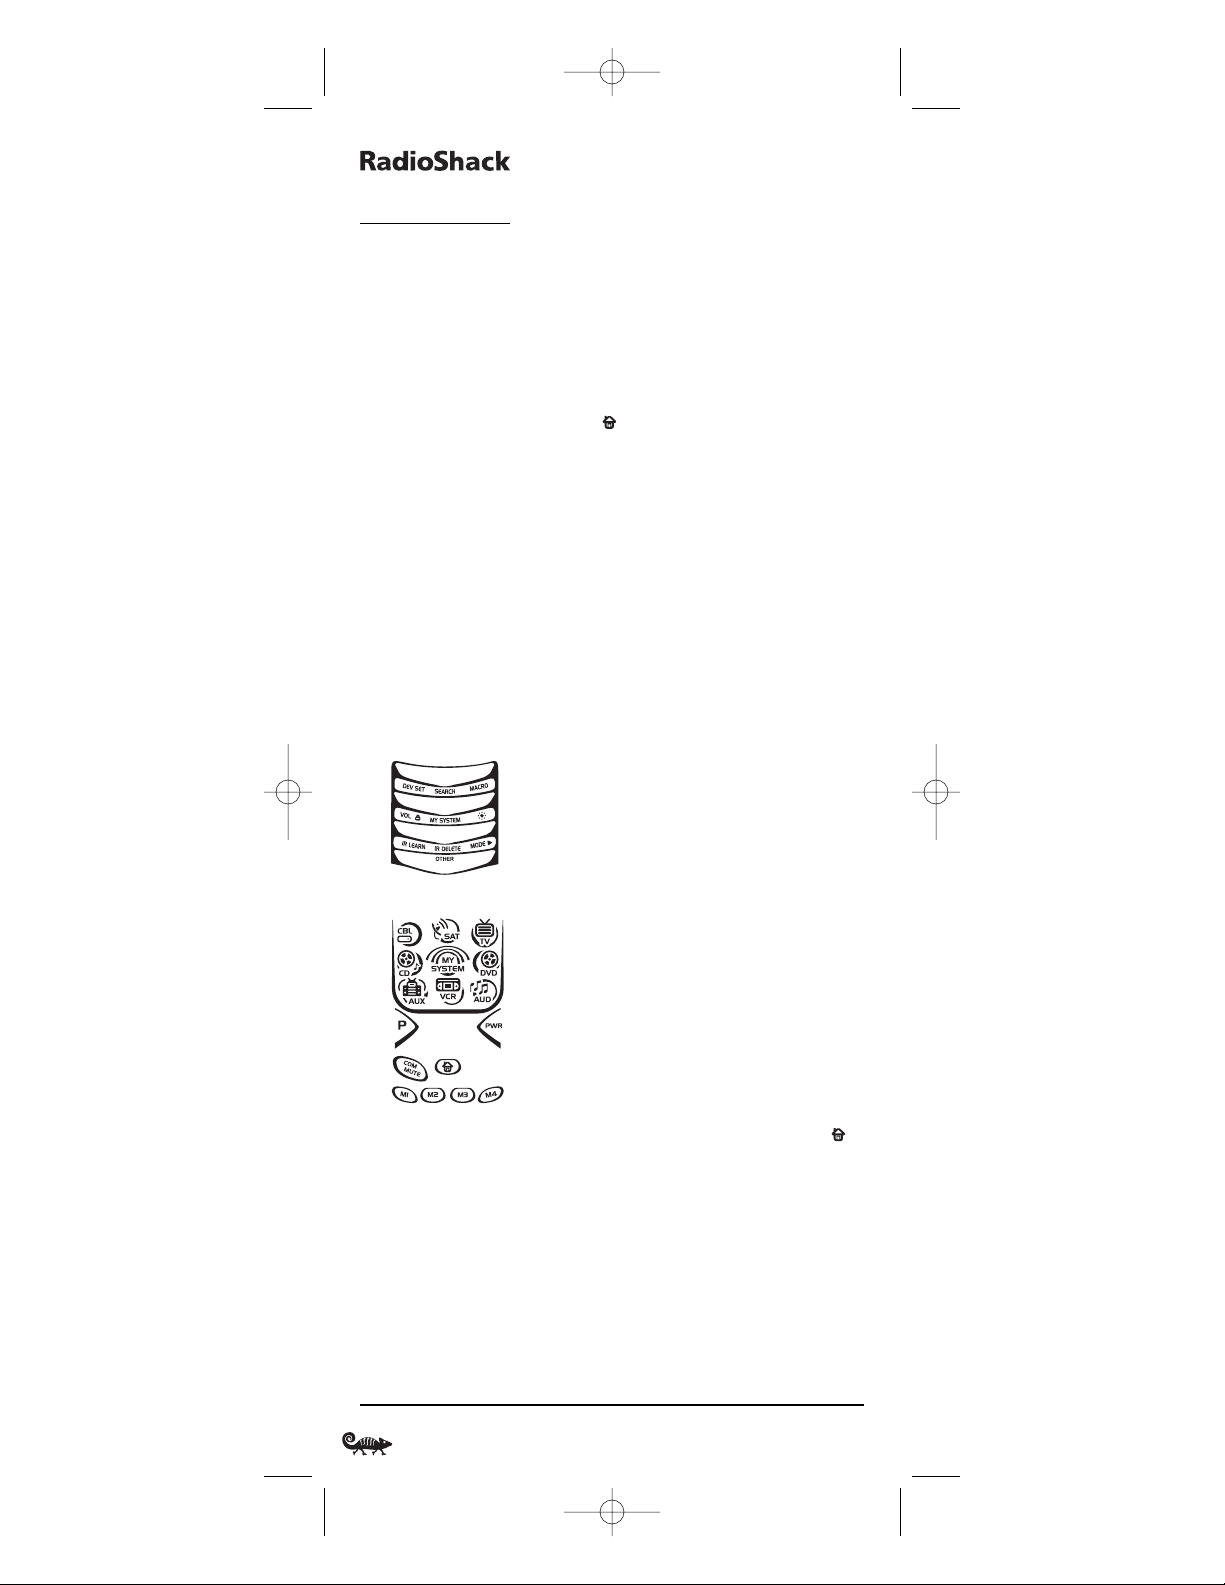
Press CBL,SAT, TV,DVD, AUD,VCR,AUX,or CD
once to select a device to control.The selected
device key will animate to indicate it is currently
active.Also see the Device Table on page 12.
After programming,press MY SYSTEM once to
select your custom system controls.See Us ing
My System Mode on page 32.
Use P to enable the programming screen.
In the CBL or SAT mode, use PAGE+ or PAGE-
to page up or page down through channels in
the program guide.
Press PWR once to turn on or off a selected
device.
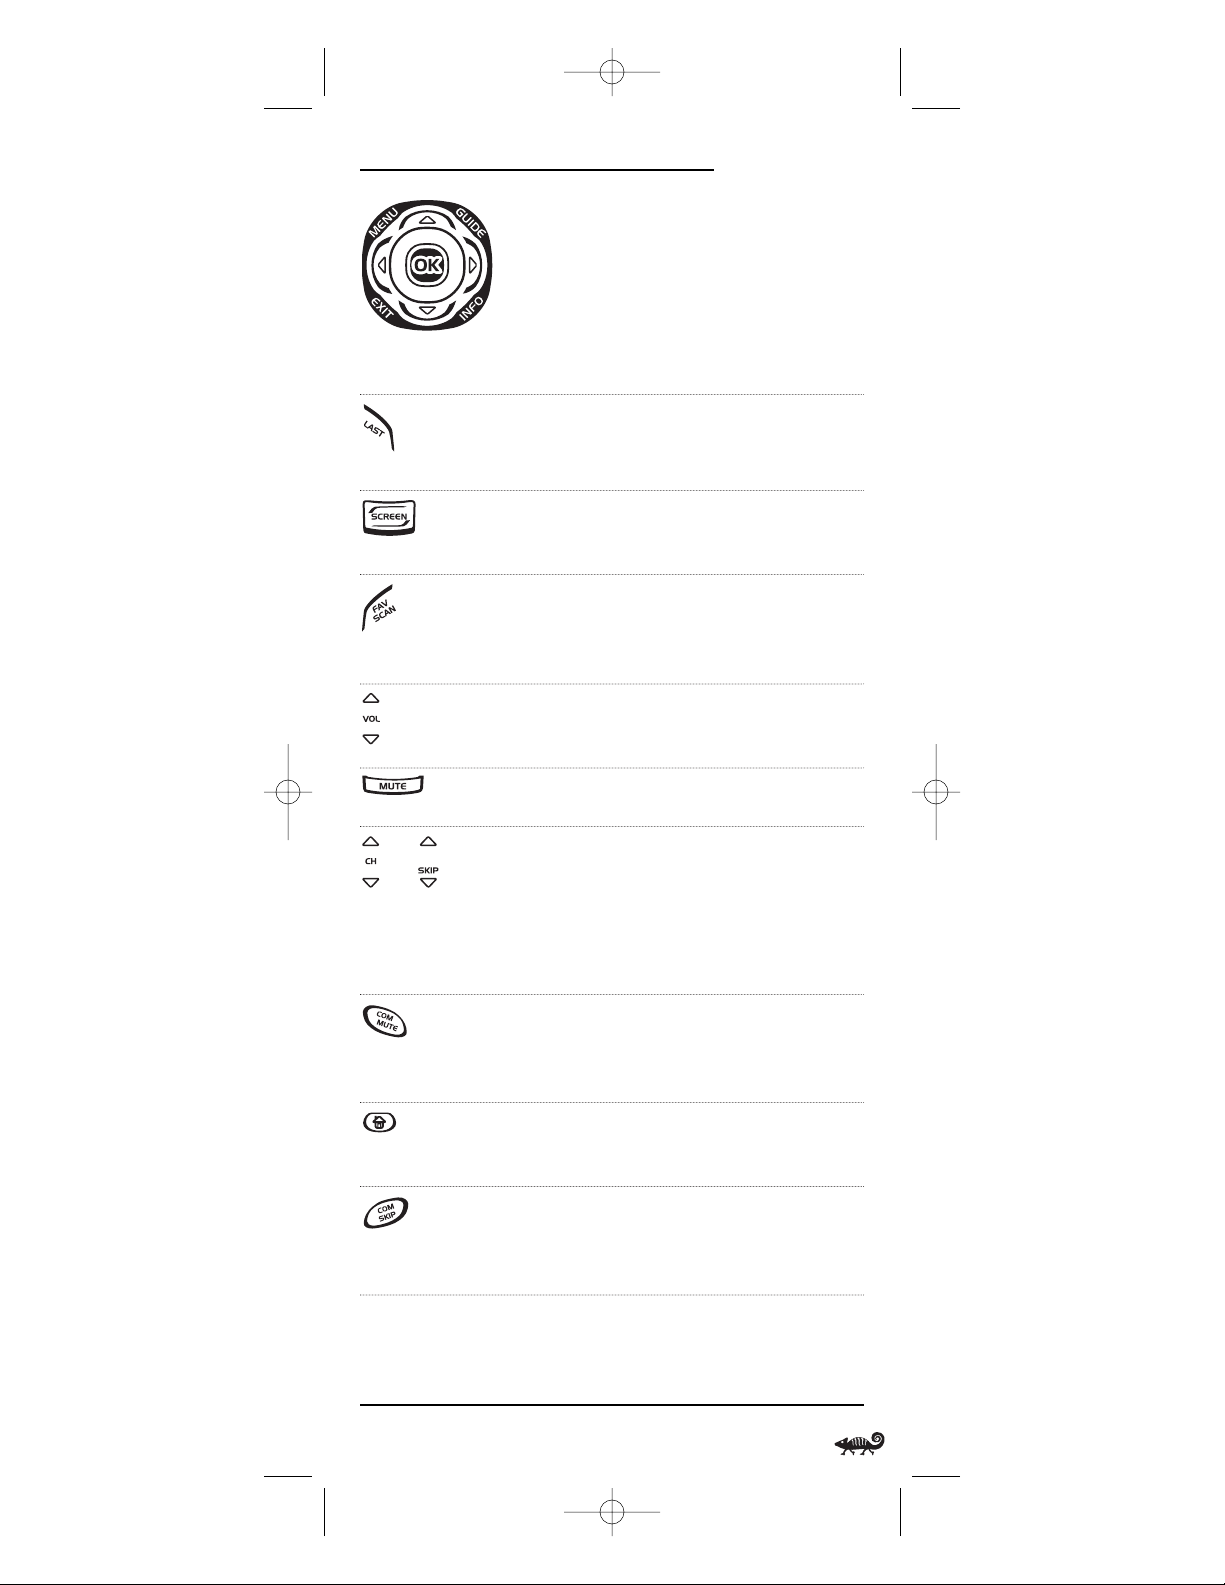
Use the navigation keys as follows:
Use MENU to display the your device’s main
menu. In the TV, CD,or AUD mode, the selected
device’s main menu screen will appear.
Use GUIDE to display your device’s program
guide, or setup or program menu.
In the TV, CD,or AUD mode, the selected
device’s main menu screen will appear.
Use INFO to display the current channel and
program information.
Use EXIT to exit from your device’s guide or
menu.
Use the cursor keys (▲ , ▼,,or) to
navigate through the program guide and
menu screens.
▲
▲
8 A Quick Look At The Controls
RS 8in1 Kameleon OM rev 10/9/03 4:11 PM Page 8
Page 9
O
WNER’SMANUAL
In the CD mode, use ▲ (or ▼) to select the
next (or previous) disc.
In the AUD mode, use ▲ (or ▼) to raise (or
lower) rear channel volume and use (or )
to balance audio left (or right).
Use OK to choose options from your device’s
menu or guide.
Press LAST once to recall the last channel.
In the CD or AUD mode,use LAST to repeat the
last track.
In the TV, CD,or AUD mode, use SCREEN to
view additional key screens for the selected
device.
In all modes except CD,DVD,and AUD,use
FAV SCAN to scan through all channels, or
after programming,to scan through 10
favorite channels.
Use VOL ▲ (or VOL▼) to raise (or lower)
volume for the selected device (also see
Changing Volume Lock on page 22).
Press MUTE once to turn the sound off or on.
In all modes except CD and DVD, use CH ▲
(or CH ▼) to select the next higher (or lower)
channel.
In the CD or DVD mode,use SKIP▲ (or
SKIP ▼) to select the next (or previous) track
or chapter.
After programming,in the CBL,SAT,TV,VCR,or
AUX mode use COM MUTE to drop the volume
to preset level and raise it back to its original
level. See Using Macros on page 25.
During programming,the home key will
appear. Use it to exit the program screen or to
return to the previous device key screen.
In the CBL, SAT,VCR,or AUX mode, use COM
SKIP to skip commercials on devices with PVR
capabilities (see Using Commercial Skip on
page 36).
continued on next page...
or
▲
▲
A Quick Look At The Controls 9
RS 8in1 Kameleon OM rev 10/9/03 4:11 PM Page 9
Page 10

8-IN-ONER
EMOTEPOWEREDBYKAMELEON
A QUICK LOOK AT THE CONTROLS
KEY FUNCTIONS (CONTINUED)
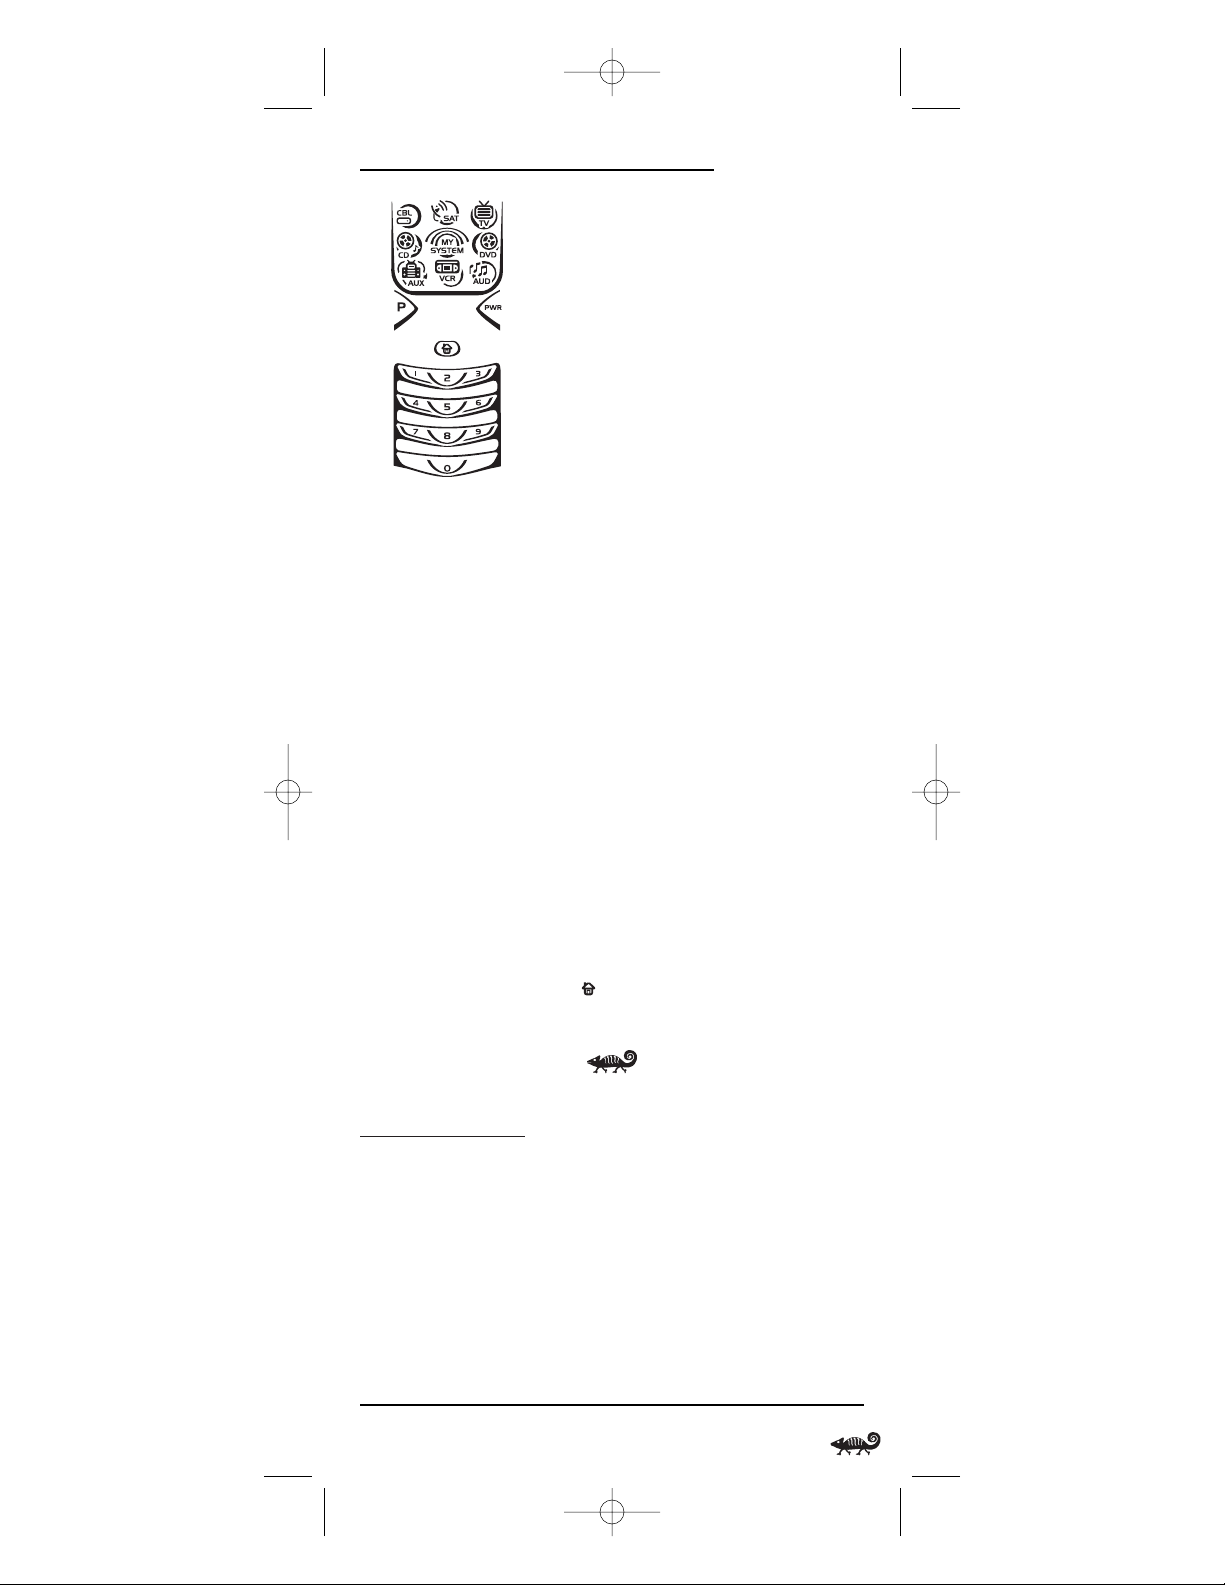
In all modes except AUD,use the number keys
(1 ~ 9 and 0) to directly select channels (e.g.,
009 or 031) or enter numbers.
In the AUD mode, INPUT will appear. Use the
number keys to directly select inputs 1 ~ 9
and 10.
For certain brands in all modes except CD,
press ENTER once after entering numbers (if
required on original remote control).
In the TV mode, use +100 to enter numbers
above 100 (if required on original remote control).In the CD or DVD mode, use +100 to
access tracks above 10 (if required on original
remote control).In the AUD mode,use +100
to change the radio band.
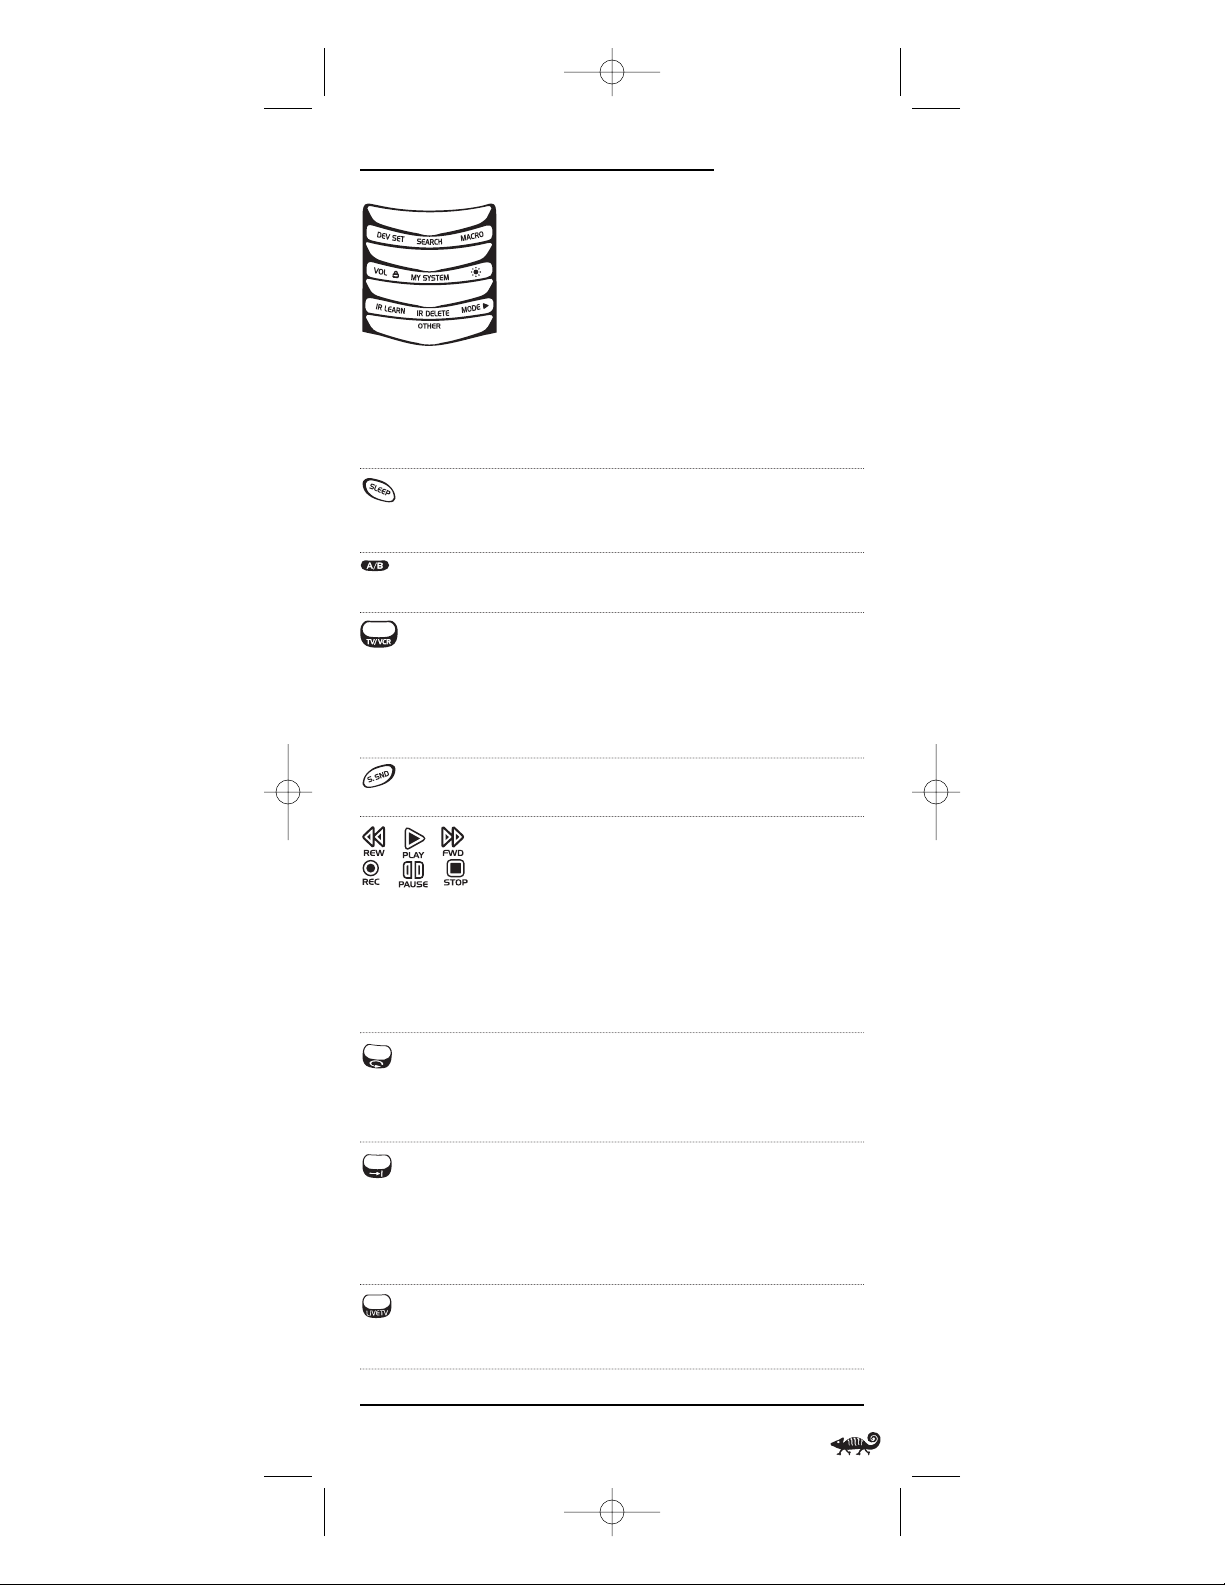
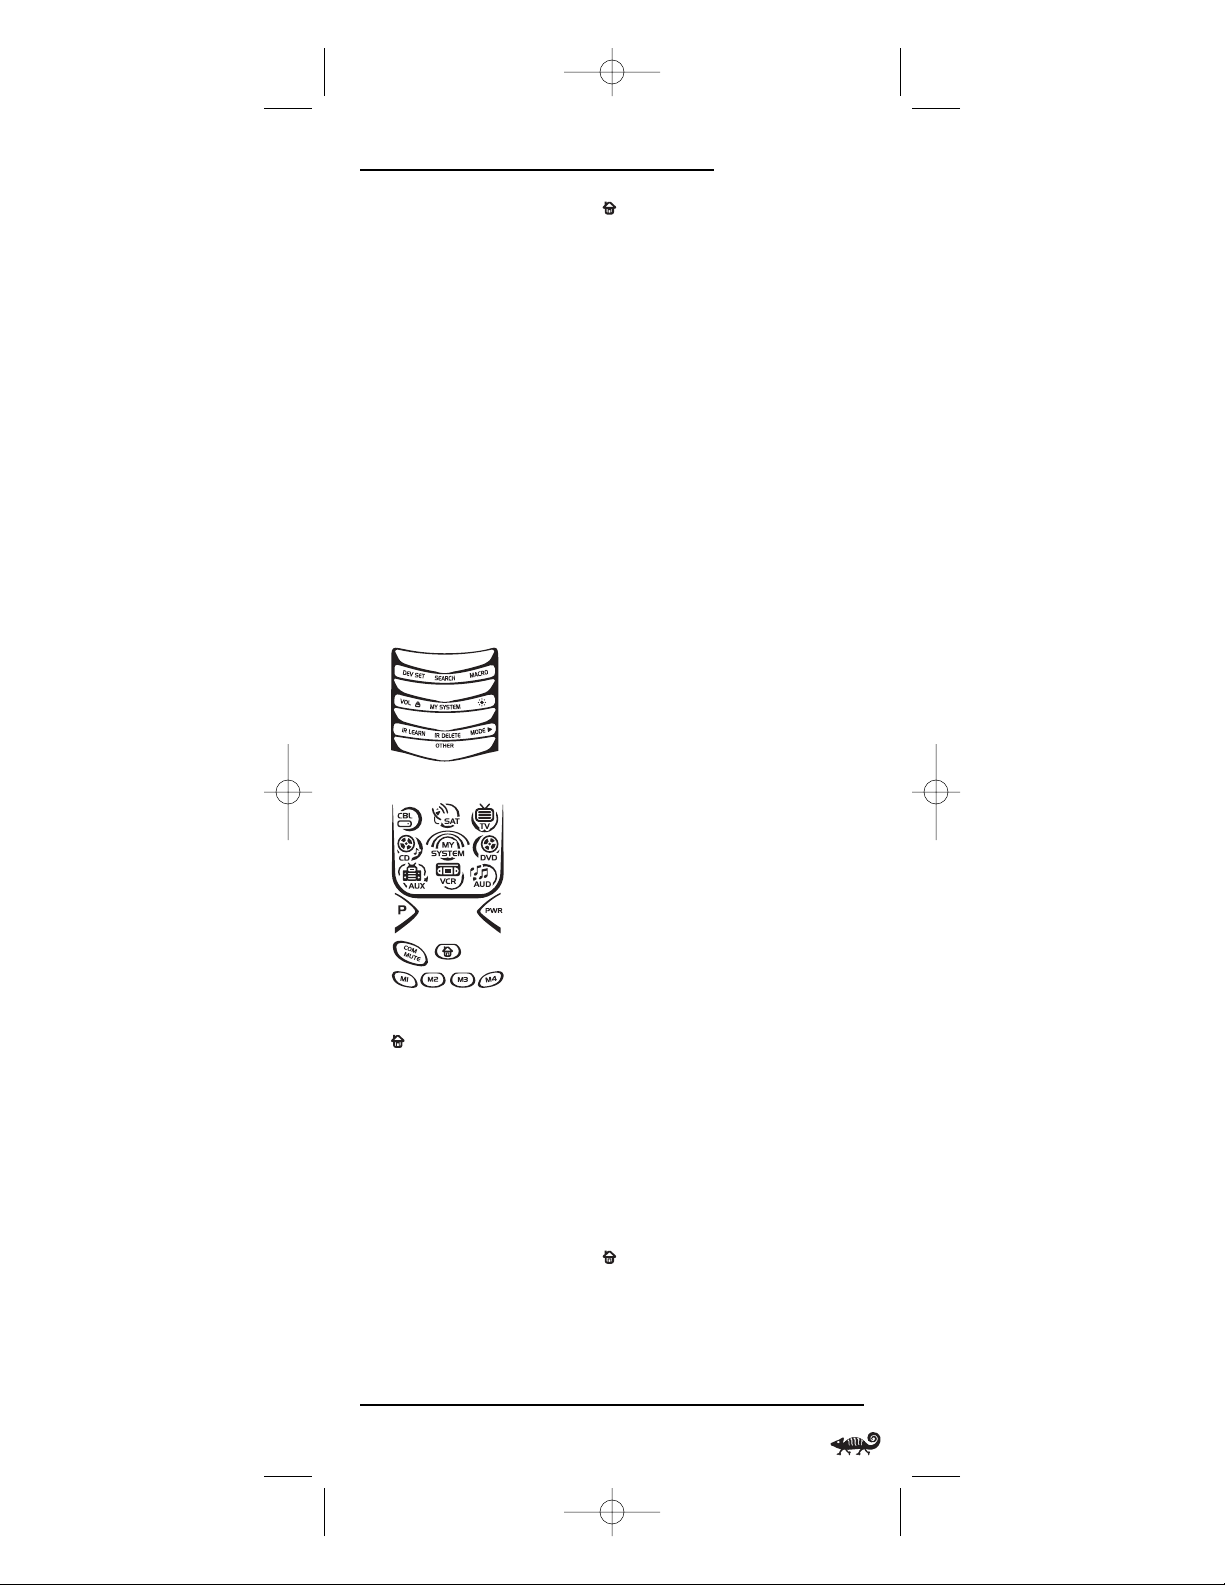
In the program mode,use the program keys to
personalize the remote control as follows:
Use DEV SET to program your device codes.See
Programming A Device on page 14.
Use SEARCH as an alternate way to set up a
device by searching available codes. See
Searching For Your Code on page 17.
Use MACRO to program a series of commands
on five available macro keys.See Using Macros
on page 25.
Use VOL to set volume controls for individual or global device use. See Changing Volume
Lock on page 22.
Use MY SYSTEM to create a custom mode with
favorite remote control keys from different
devices in your home theater system.See Usi ng
My System Mode on page 32.
Use to adjust the brightness level of the EL
display. See Adjusting Brightness on page 13.
Use IR LEARN and IR DELETE to add and delete
key functions learned from your original
device remote controls. See Using Learning on
page 19.
10 A Quick Look At The Controls
NOTE:Press above
the title to activate
a desired program.
For OTHER,press below
the title.
RS 8in1 Kameleon OM rev 10/9/03 4:11 PM Page 10
Page 11
O
WNER’SMANUAL
Use MODE to reassign an unused device key
to control a second device.See Reassigning
Device Keys on page 35.
Use OTHER to program other functions.See
Tabl e o f C on te nts on page 2 for sections on
Checking The Codes, Programming Favorite
Channel Scan,Using Keymover, Programming
Commercial Skip,Upg rading ,Restoring Default
Settings,or Clearing Programming.
In the CBL, SAT,VCR,or AUX mode, use SLEEP
to activate your device’s sleep timer (if one is
available for the device).
In the CBL or SAT mode, use A/B to act as your
cable box’s or satellite receiver’s A/B switch.
In the TV, VCR,or DVD mode, use TV/VCR to
switch the TV’s input to view TV or video
programs.
In the AUD mode, use TV/VCR to switch between
program and input.
In the AUD mode, use S.SND to turn surround
sound on or off.Also see cursor keys on page 8.
In the CD, DVD,AUD,VCR,or AUX mode,use the
transport keys (i.e.,REW,PLAY,FWD,PAUSE,
and STOP) to control the device’s transport.
Press REC twice to record a program on your
device (if the function is available).
In the CBL or SAT mode, use the transport keys
to control VOD (Video On Demand) or PVR, if
available on your cable/satellite service.
In the CBL, SAT,VCR,or AUX mode, use the
replay key to instantly replay the last 7 seconds
of a program you are watching (if the feature
is available).
In the CBL, SAT,or AUX mode,use the advance
key to skip past commercials or other uninteresting scenes (if the feature is available).
In the DVD or CD mode,use the advance key
to change discs.
In the CBL, SAT,VCR,or AUX mode, use LIVE TV
to switch between live TV and video programming (if the feature is available).
continued on next page...
▲
A Quick Look At The Controls 11
NOTE:Press above
the title to activate
a desired program.
For OTHER,press below
the title.
RS 8in1 Kameleon OM rev 10/9/03 4:11 PM Page 11
Page 12
8-IN-ONER
EMOTEPOWEREDBYKAMELEON
A QUICK LOOK AT THE CONTROLS
KEY FUNCTIONS (CONTINUED)
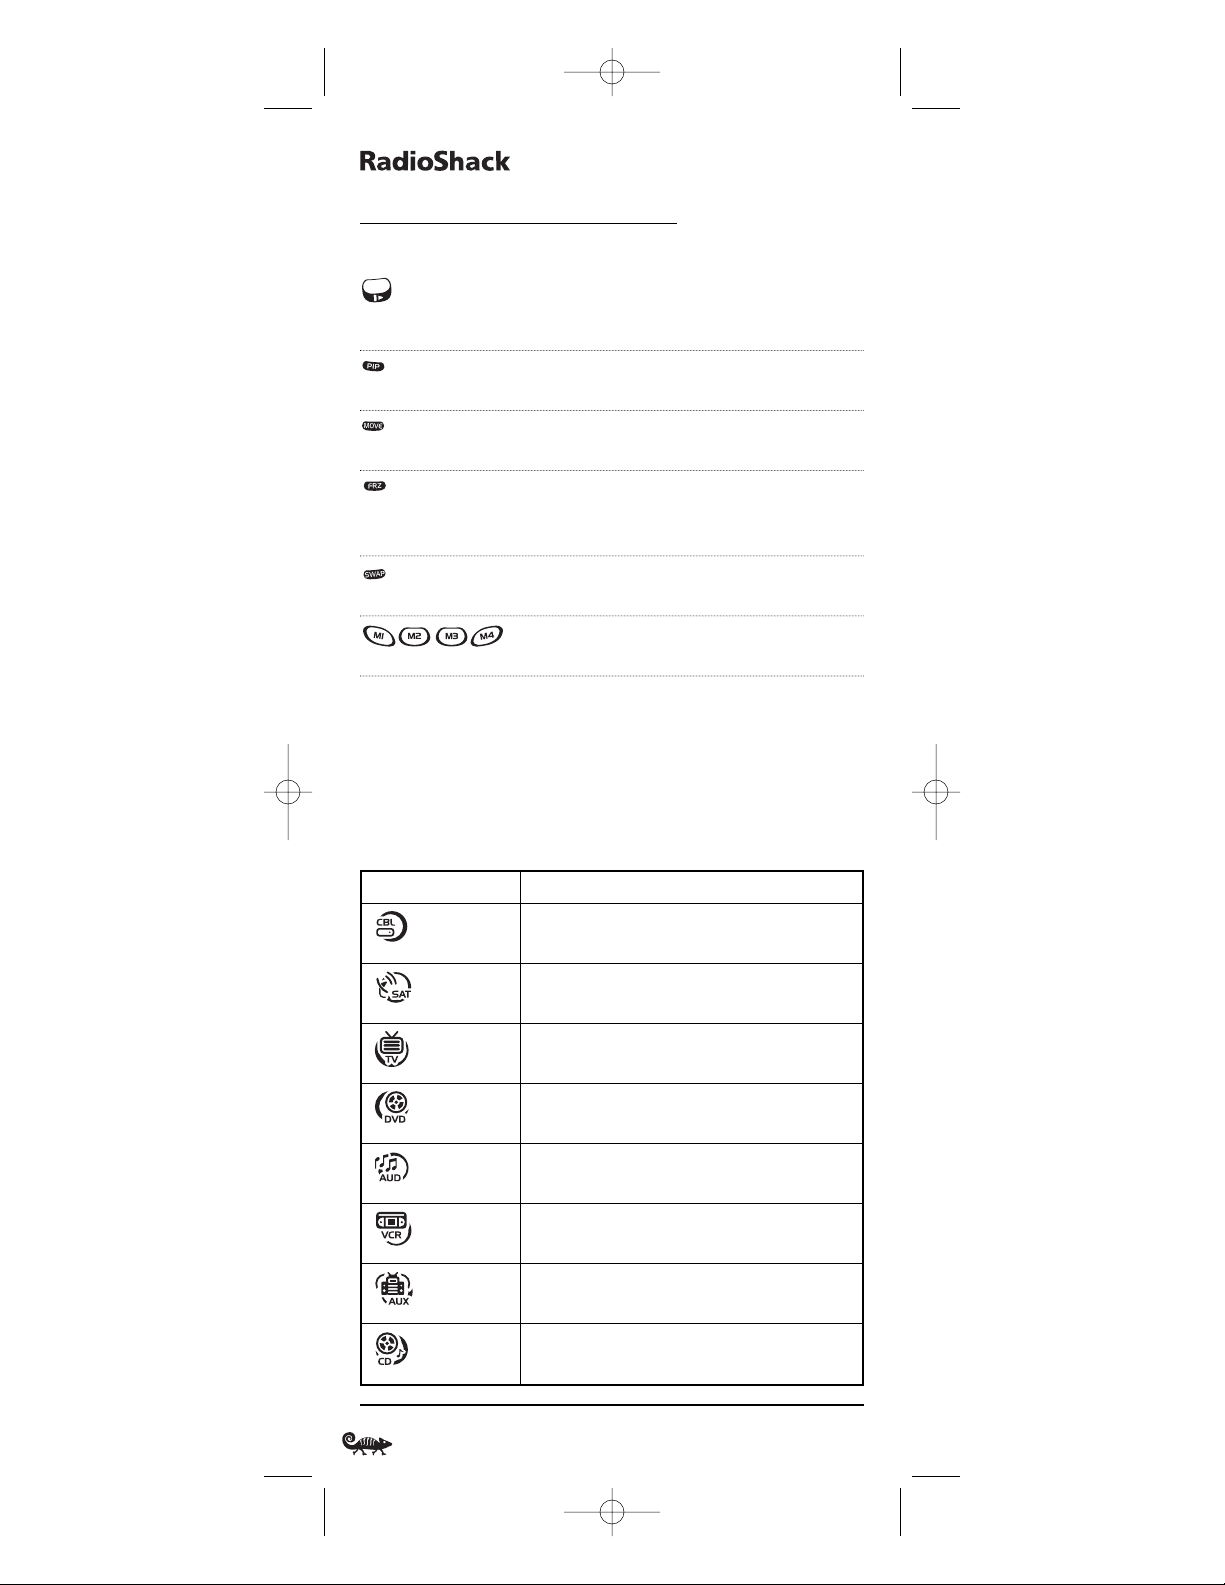
In the CBL, SAT,VCR, DVD,or AUX mode,use the
slow key to view slow motion video (if the
feature is available).
Use PIP to switch the Picture-In-Picture
feature on or off.
Use MOVE to move the window picture to
different places in the main picture.
Press FRZ once to capture a frame of video in
the main picture.Press it again to resume
normal viewing.
Use SWAP to switch images and sound
between the main and window pictures.
After programming,press M1 ~ M4 once to
run a macro (see Using Macros on page 25).
DEVICE TABLE
NOTE: Please refer to the table below when performing the instructions in
“Programming A Device”on page 14.
After programming,the RadioShack 8-in-One Remote will be able to
control the following types of devices:
12 A Quick Look At The Controls
DEVICE KEY CONTROLS THESE DEVICES
Cable Box (Converter) or Video Accessory
Satellite Receiver or Satellite/PVR Combo
Te l e v i s i o n
DVD Player, TV/DVD Player Combo,or
DVD/VCR Player Combo
Aud io Amplifier, Aud io Rec eive r, or
Home-Theater-in-a-Box (HTiB) Device
VCR,TV/VCR Combo,or PVR (DVR)
PVR (DVR),VCR,or TV/VCR Combo
CD Player or CD Recorder
RS 8in1 Kameleon OM rev 10/9/03 4:11 PM Page 12
Page 13

O
WNER’SMANUAL
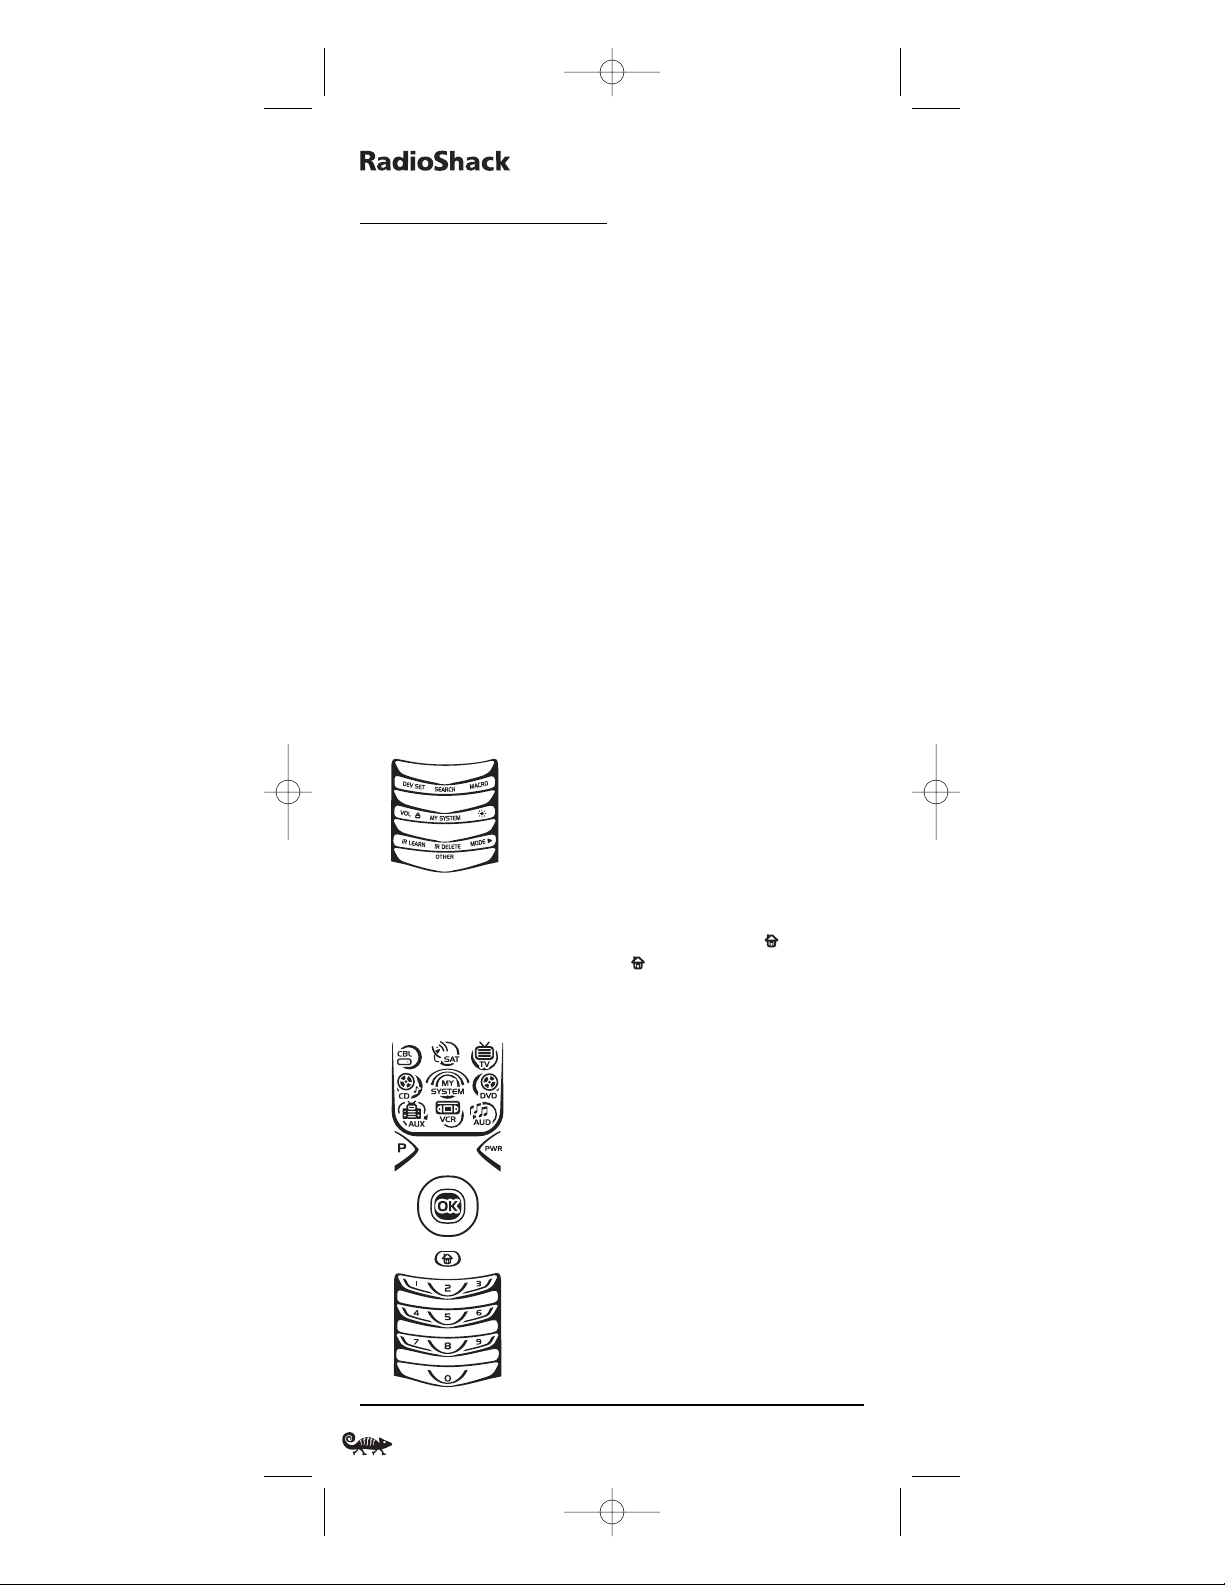
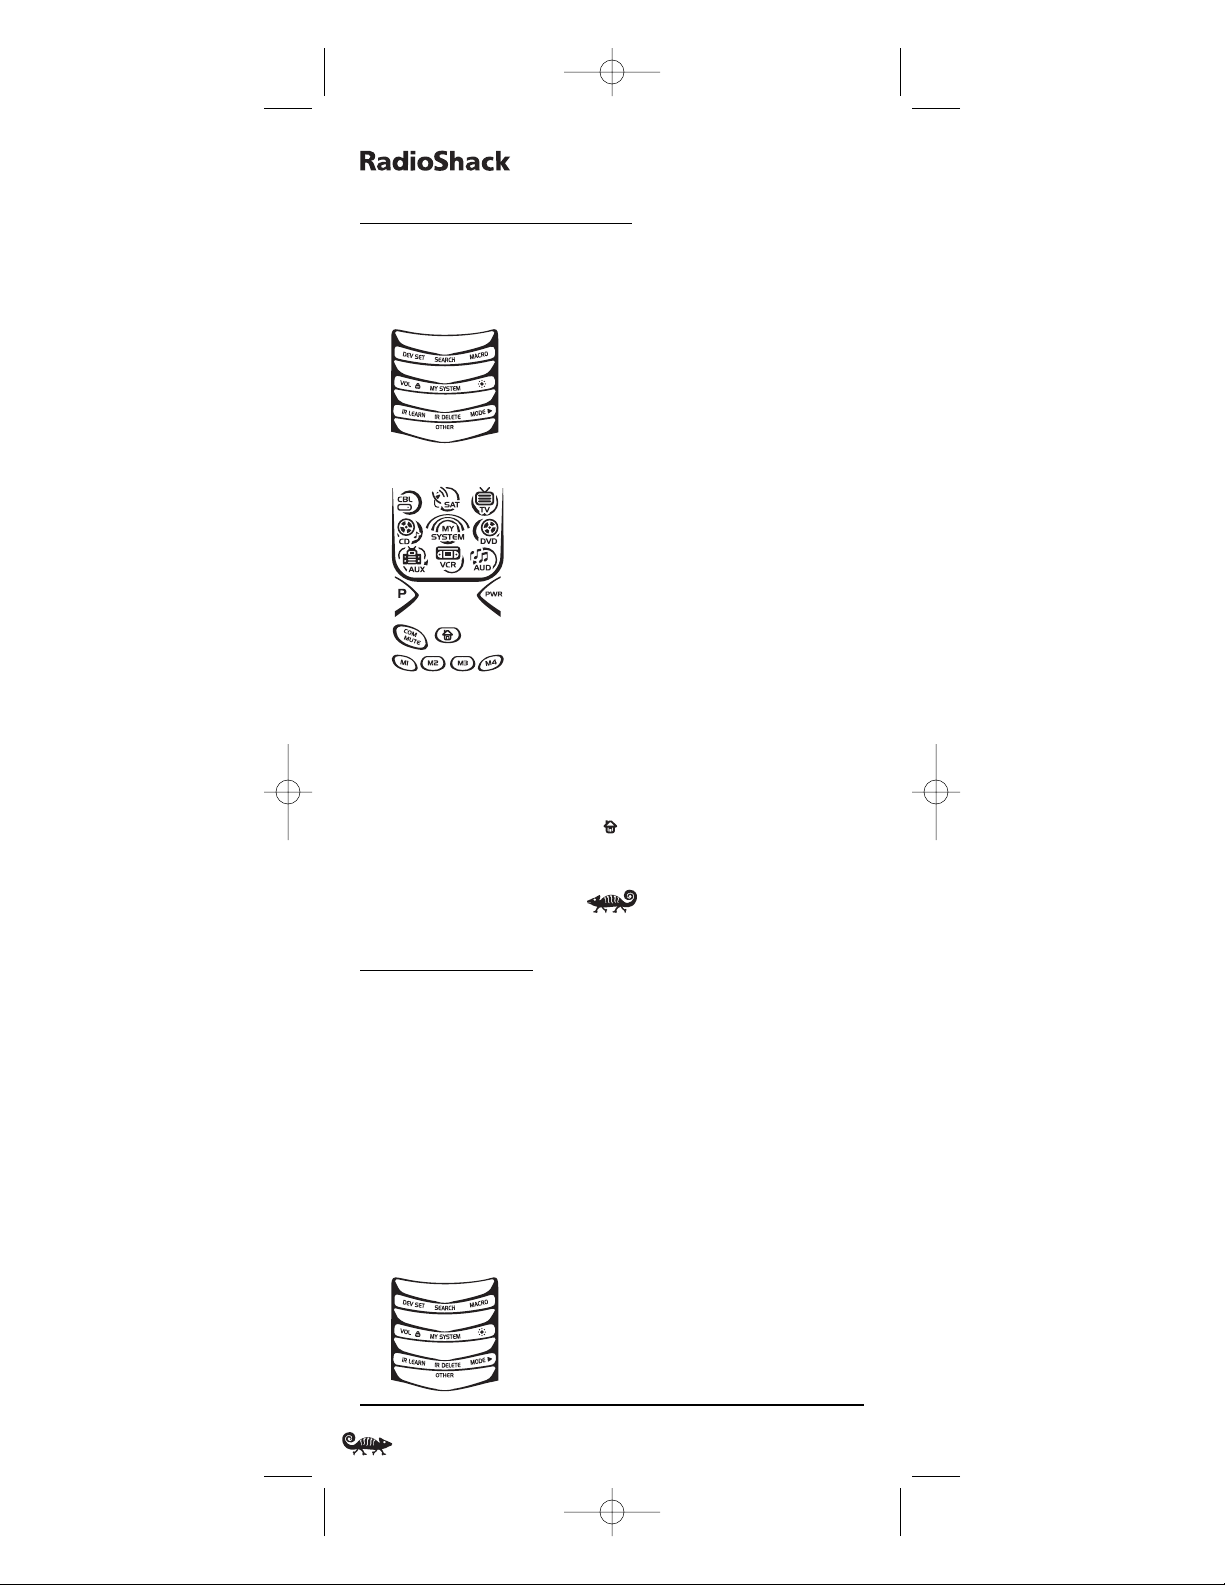
ADJUSTING BRIGHTNESS
The RadioShack 8-in-One Remote has five levels of brightness
adjustment and is set to the fourth one at the factory. To increase or
decrease the brightness,perform the following steps:
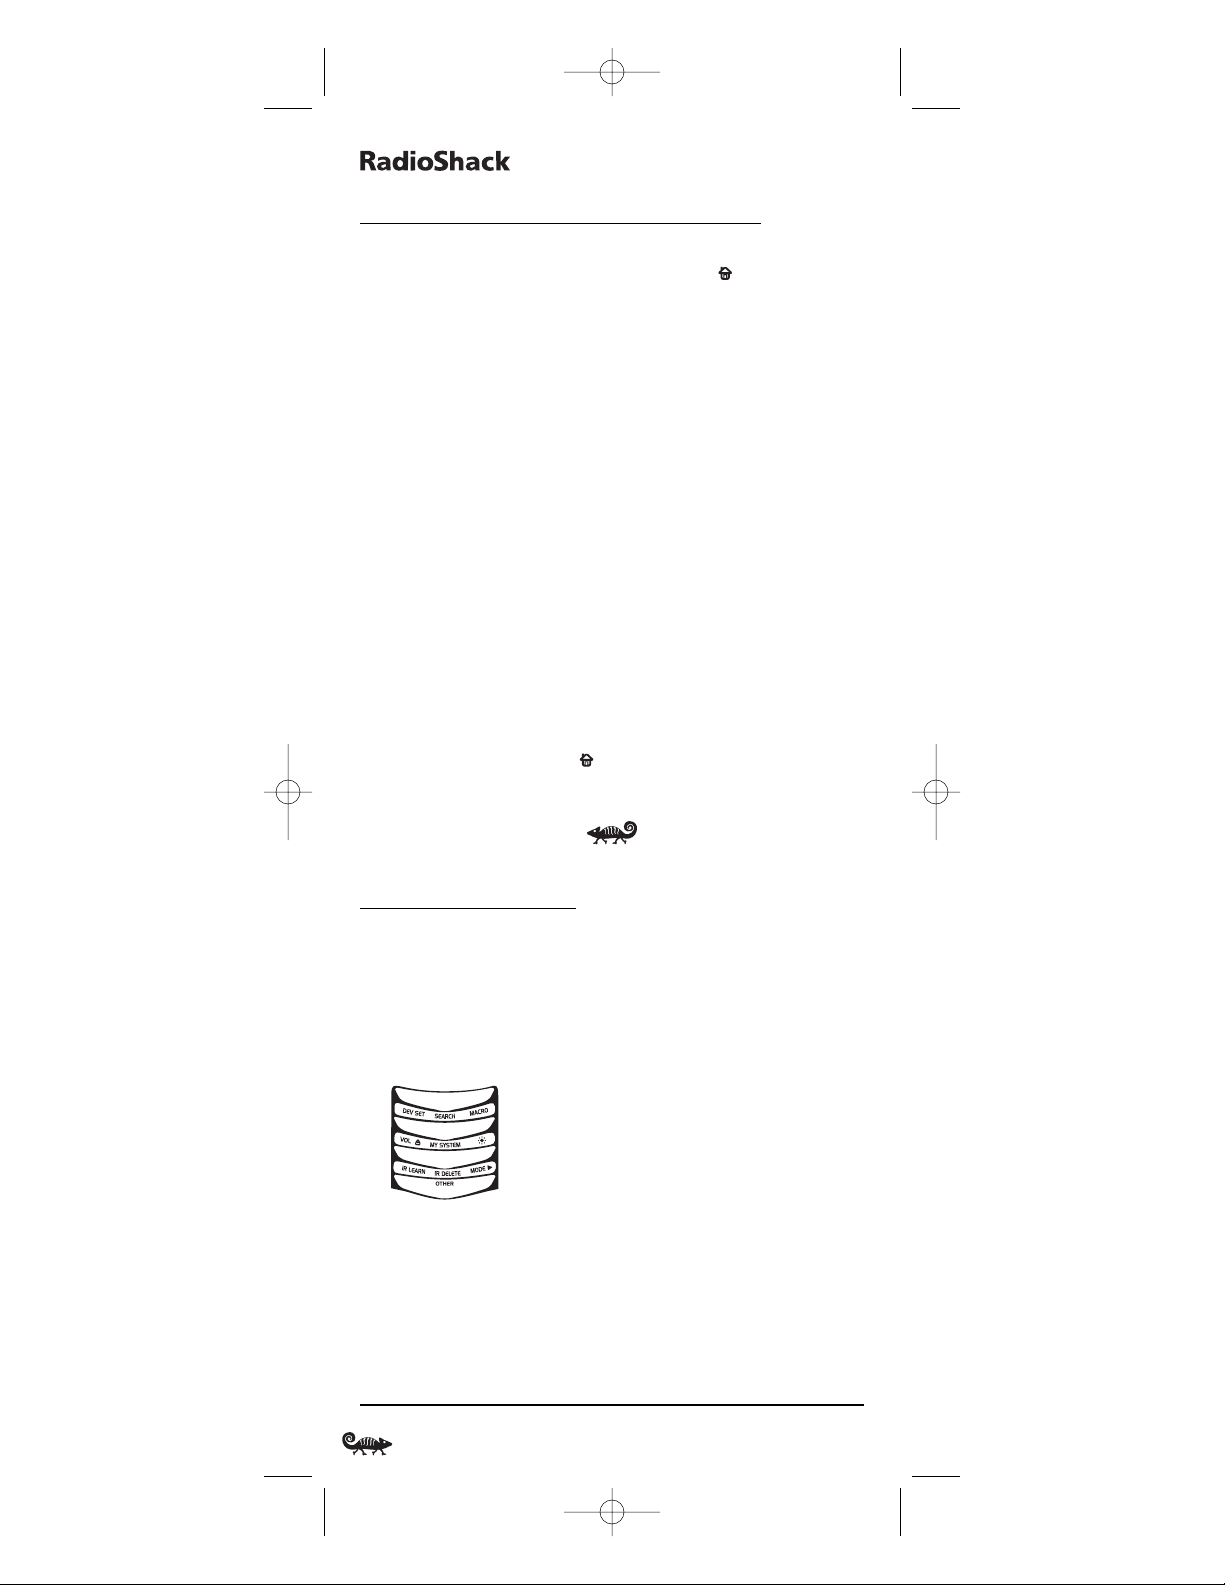
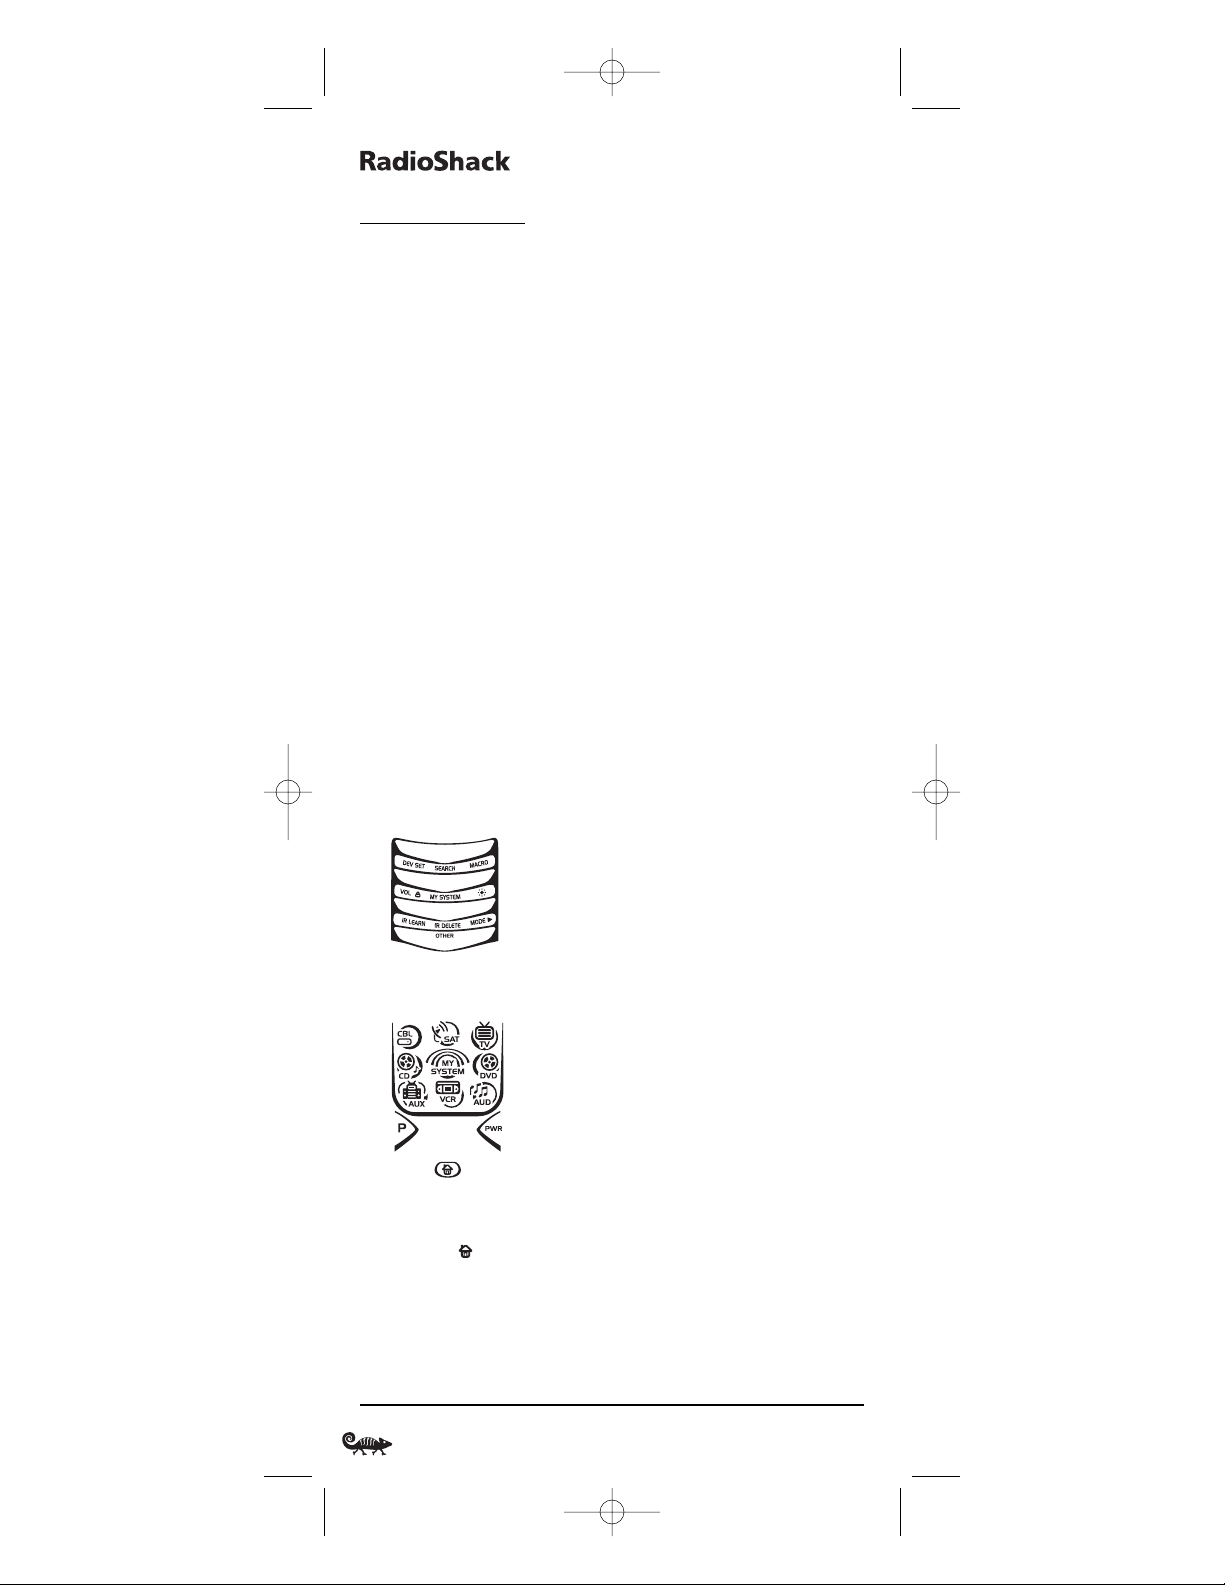
1. Press and hold Puntil the bottom IR segment flashes twice.
The program keys will appear:
NOTE: If the display turns off because of inactivity, you will need to start the
programming sequence again by repeating this step.
2. Press above once.The Brightness Programming screen will appear:
• To increase brightness, press ▲ one or more times.
• To decrease brightness, press ▼ one or more times.
3. When desired brightness is achieved,press twice to exit programming and return to the last-selected device menu screen.
NOTE: The remote includes a tilt switch that turns on the display when the
unit is moved. If desired, you can disable this feature. See “Setting The Tilt
Switch” on page 38.
Adjusting Brightness 13
RS 8in1 Kameleon OM rev 10/9/03 4:11 PM Page 13
Page 14
8-IN-ONER
EMOTEPOWEREDBYKAMELEON
PROGRAMMING A DEVICE
The RadioShack 8-in-One Remote is preset at the factory to operate
the following devices:
•Motorola Cable Box
• RCA TV,VCR,DVD Player, Satellite Receiver, CD Player, and
Audio Receiver
• ReplayTV PVR (DVR) using the AUX key
To control devices other than the default brands,perform the following
steps; otherwise skip this section:
NOTE: To control a DVD Player/VCR Combo, perform the instructions in
“Programming A DVD Player/VCR Combo” on page 16.
1. Turn on a desired device (e.g.,VCR or DVD player) and,if applicable,
insert media (e.g., cassette or disc).
NOTE: Please read steps 2 through 9 completely before proceeding. Before
starting step 2,review the “Manufacturer’s Codes”(starting on page 118).
Brands are listed alphabetically in order of the most popular codes first.
Highlight or write down the devices and the codes you wish to program.
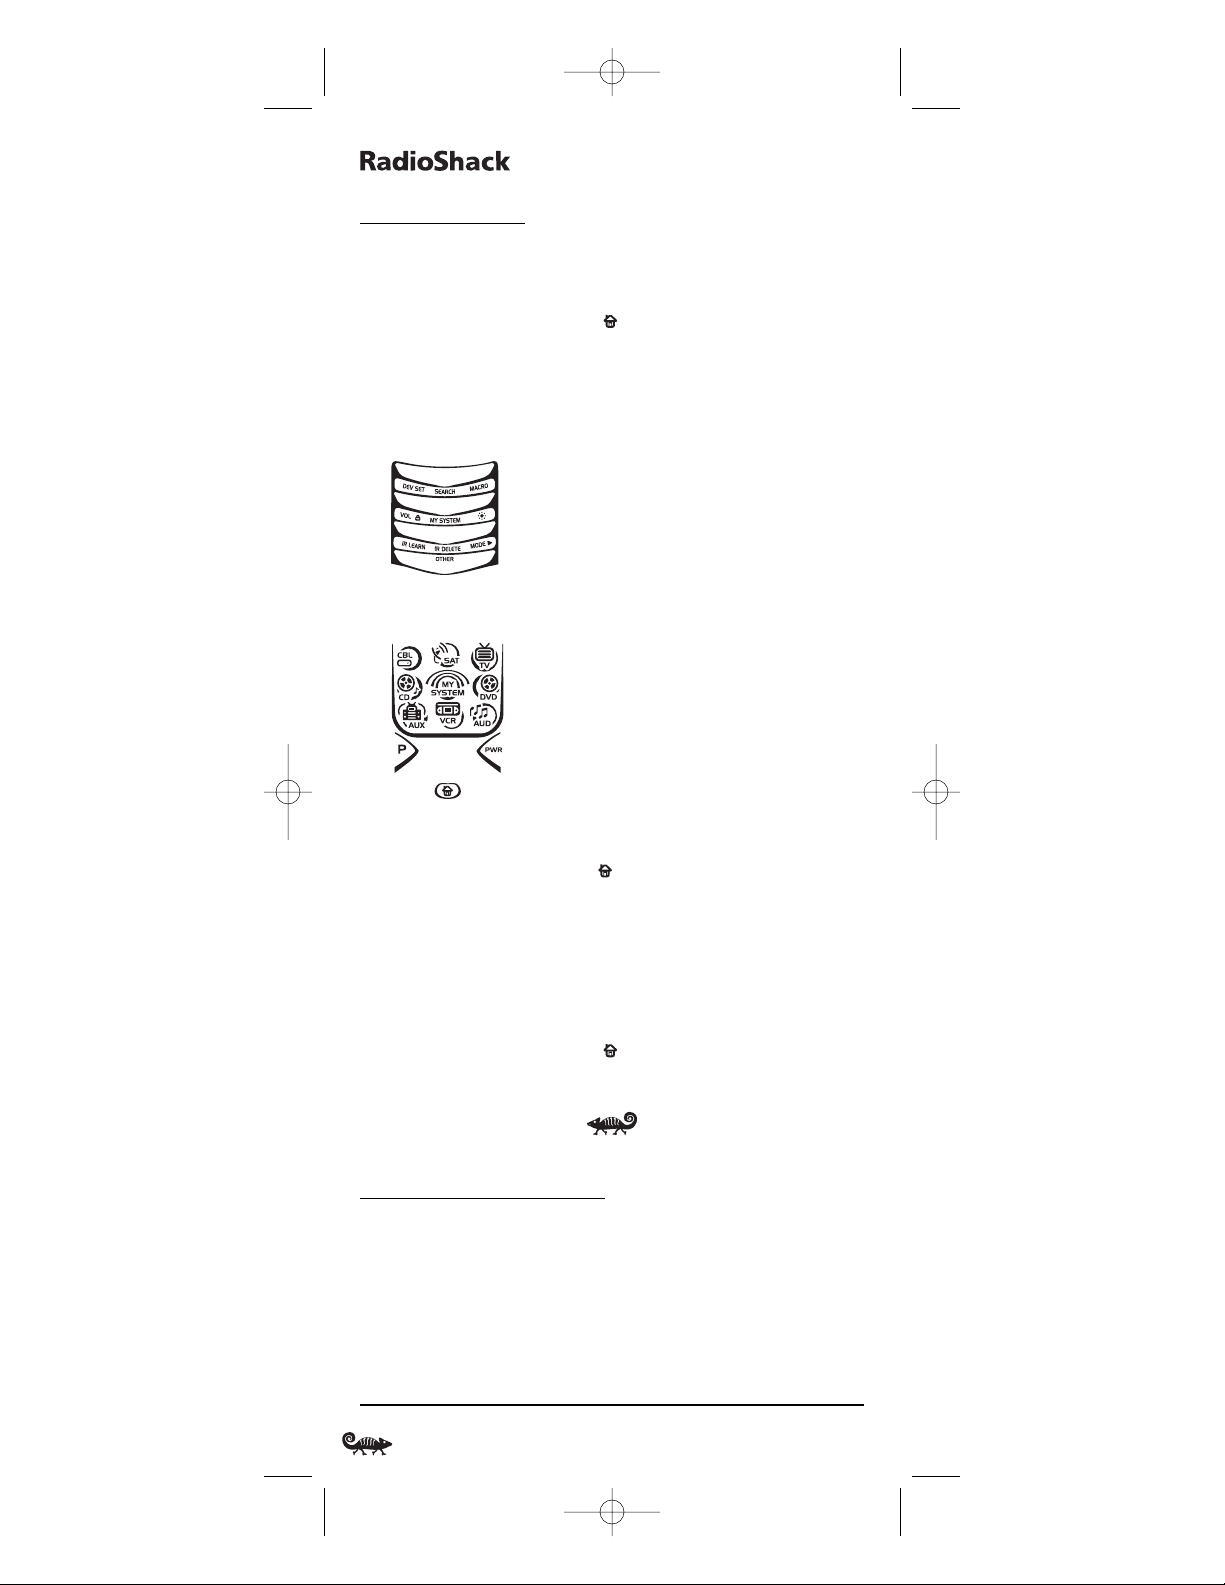
2. Press and hold Puntil the bottom IR segment flashes twice.
The program keys will appear:
NOTE: If the display turns off due to inactivity, the remote will exit programming and return to the last-selected device menu screen. To start programming
again,repeat this step.To stop programming at any time, press once to
return to the program keys screen.Press once more to exit completely.
3. Press above DEV SET once. The Device Setup programming screen
will appear:
14 Programming A Device
RS 8in1 Kameleon OM rev 10/9/03 4:11 PM Page 14
Page 15
O
WNER’SMANUAL
4. Press a device key once (i.e.,CBL, SAT, TV, DVD,AUD, VCR,AUX,or CD).
The selected device key will animate.
NOTE: Refer to the “Device Table”on page 12 when choosing a device key for
programming.
5. Use the Manufacturer’s Codes (starting on page 118) to locate the
type of device and brand name and then use the number keys to
enter the first four-digit code for your device. If performed correctly,
the bottom IR segment will flash twice.
NOTE: If the bottom IR segment displays one long flash instead,a mistake has
occurred.Try entering the same code again.
6. Aim the remote at the device and press PWR once. The device should
turn off. If it does not, repeat steps 5 and 6,trying each code for your
brand until you find one that works.If it still doesn’t work, try
Searching For Your Code on page 17.
7. If the code works,press OK once.The bottom IR segment flashes twice.
8. If desired,repeat steps 4 through 7 for each device you want to control.When finished, press twice to exit programming and return
to the last-selected device menu screen.
9. For future reference,write down each working device code in the
following boxes:
CBL Code:
Brand Name:________________________________
SAT Code:
Brand Name:________________________________
TV Code:
Brand Name:________________________________
DVD Code:
Brand Name:________________________________
AUD Code:
Brand Name:________________________________
VCR Code:
Brand Name:________________________________
AUX Code:
Brand Name:________________________________
CD Code:
Brand Name:________________________________
Programming A Device 15
RS 8in1 Kameleon OM rev 10/9/03 4:11 PM Page 15
Page 16
8-IN-ONER
EMOTEPOWEREDBYKAMELEON
PROGRAMMING A DVD PLAYER/VCR COMBO
NOTE: If you own a Sylvania TV/DVD Player Combo with a separate TV code
(see page 129), use the below steps to program it with these changes: in step 5 (on
the next page), enter 0675 as the DVD code; in step 8a, substitute TV for VCR;
and in step 8b enter 0171 as the TV code.
1. Turn on the DVD Player/VCR Combo and insert a DVD.
NOTE: Please read steps 2 to 8 completely before proceeding. Review the “Setup
Codes For DVD Player/ VCR Combos” (on page 123). Highlight or write down
the brand and the codes you wish to program.
2. Press and hold Puntil the bottom IR segment flashes twice.
The program keys will appear:
3. Press above DEV SET once. The Device Setup programming screen
will appear:
4. Press DVD once.The key will animate.
5. Use the Setup Codes For DVD Player/VCR Combos (on page 123) to
locate the brand name and use the number keys to enter the fourdigit code for your device.If performed correctly, the bottom IR
segment will flash twice.
NOTE: If the bottom IR segment displays one long flash instead,an error has
occurred.Try entering the same code again.
6. Aim the remote at the device and press PWR once. The device should
turn off. Press OK once to save the code. The bottom IR segment
flashes twice.
7. (Optional) If you’ve located a setup code that works, but it also has a
separate VCR code as listed on page 123, you’ll need to program it
into the remote to access VCR controls,as follows:
16 Programming A DVD Player/VCR Combo
RS 8in1 Kameleon OM rev 10/9/03 4:11 PM Page 16
Page 17
O
WNER’SMANUAL
a. Press VCR once.
b. Using the number keys,enter the four-digit VCR code for your
DVD Player/VCR Combo.If performed correctly, the bottom
IR segment will flash twice.
c. Press OK once. The bottom IR segment displays one long flash.
NOTE: If a VCR setup code is not listed,you can use the VCR key to program a
separate VCR or another device (see “Reassigning Device Keys”on page 35).
8. To exit programming, press twice. The display returns to the lastselected device menu screen.For future reference,write the working
code in the below boxes:
DVD Player/VCR Code:
Brand Name:________________________________
VCR Code (if used):
Brand Name:________________________________
SEARCHING FOR YOUR CODE
If your device does not respond to the RadioShack 8-in-One Remote
after trying all codes listed for your brand,or if your brand is not listed
at all, try searching for your code.
NOTE: Before performing a code search for a CD or DVD player or a VCR,turn
on the device and insert the required media.
For example, to search for a code for your TV:
1. Press and hold Puntil the bottom IR segment flashes twice.
The program keys will appear:
2. Press above SEARCH once. The Search Codes programming screen
will appear:
continued on next page...
Programming A DVD Player-VCR Combo/Searching For Your Code 17
RS 8in1 Kameleon OM rev 10/9/03 4:11 PM Page 17
Page 18
8-IN-ONER
EMOTEPOWEREDBYKAMELEON
SEARCHING FOR YOUR CODE (Continued)
3. Press a device key once (e.g.,TV). The selected device key will animate.
The device’s Main Menu screen will appear with still displayed.
4. Press PWR once to select it as the search test function.The Search
Programming screen will appear again.
NOTE:With PWR as the search test function,a “Power On” IR command will
be sent to the device each time a test code is sent.As a confirmation,the IR
segments will display an outgoing animation.
NOTE: If your device or its original remote control does not have a Power key,
select a different test function in this step (e.g., CH+,VOL+,PLAY,etc).
5. Aim the remote at the device (e.g.,TV) press ▲ one or more times
and stop when a working code performs the test function selected in
step 4.If desired,use
▼ to try a previous code.
NOTE: In the search mode,the remote control will send IR codes from its
library to the selected device, starting with the most popular code first.
6. To lock in the code, press OK once.The bottom IR segment flashes twice.
7. To search for codes of your other devices,repeat steps 3 to 6,but use
the appropriate device key and test function key for the device you
are searching for.
8. To exit programming, press twice. The display will return to the
last-selected device menu screen.
CHECKING THE CODES
If you have set up the RadioShack 8-in-One Remote using the
Searching For Your Code procedure (on the previous page),you may
need to find out which four-digit code is operating your equipment.
For example, to find out which code is operating your TV:
1. Press and hold Puntil the bottom IR segment flashes twice.
The program keys will appear:
2. Press below OTHERonce. The Other programming screen will appear:
18 Searching For Your Code/Checking The Codes
RS 8in1 Kameleon OM rev 10/9/03 4:11 PM Page 18
Page 19
O
WNER’SMANUAL
3. Using the number keys,enter 9 9 0. The bottom IR segment will
flash twice and the Code Verification screen will appear.
4. Press a desired device key once (i.e., CBL,SAT,TV, DVD,AUD,VCR,AUX,
or CD). The selected device key will animate.
5. To view the code for the first digit,press 1 once. Count the number of
times the bottom IR segment flashes (e.g.,three flashes = 3) and write
down the number in leftmost box in the TV code boxes on page 15.
NOTE: If a code digit is “0”, the bottom IR segment will not flash.
6. Repeat step 5 three more times for remaining digits.Use 2for the
second digit,3 for the third digit,and 4 for the fourth digit. Write
down the code digits in the remaining TV code boxes on page 15.
NOTE: If you enter an invalid number (e.g., 7) or key (e.g., PLAY), the bottom
IR segment will display one long flash and return to the “Other” programming
screen. Start again with step 2 above.
7. To check for codes of other devices,repeat steps 4 to 6,but substitute
the appropriate device key for each device you are checking.Write
down the device’s code digits in the appropriate code boxes on page 15.
8. To exit programming, press twice. The display will return to the
last-selected device menu screen.
USING LEARNING
The RadioShack 8-in-One Remote includes a Learning feature so you can
add functions that are unique to your home entertainment devices (e.g.,
VCR Tracking Up or Down). However, there are some considerations:
LEARNING PRECAUTIONS
• Your original remote controls must be in working order for learning to work properly.
• Learned keys are mode specific, so each one can store a unique
function for each mode.
continued on next page...
Checking The Codes/Using Learning 19
RS 8in1 Kameleon OM rev 10/9/03 4:11 PM Page 19
Page 20
8-IN-ONER
EMOTEPOWEREDBYKAMELEON
USING LEARNING
LEARNING PRECAUTIONS (CONTINUED)
• Learned keys can be used in macros (see Using Macros on page 25).
• Do not use the following keys for learning:P, SCREEN, M1~ M4,
FAV SCAN, COM SKIP,COM MUTE,or any device key.
• Learning capacity is approximately 16 to 25 keys,depending on
the code being learned.
• If both learned and keymoved functions are assigned to the same
key, the last programmed function will be stored.
• A learned function cannot be used as a source for Keymover (see
Using Keymover on page 28).
• Certain device codes are not learnable,including multi-frequency
types, some high-frequency ones,and other unusual formats.
• For optimum learning, avoid high levels of ambient light such as
natural sunlight or energy-efficient fluorescent lights.
NOTE: Please have your original remote controls handy before programming
learning. Be sure to press each teaching key within 5 seconds of the previous entry.
Otherwise, the RadioShack 8-in-One Remote will exit the programming mode.
PROGRAMMING A LEARNING KEY
1. Press and hold Puntil the bottom IR segment flashes twice.
The program keys will appear:
2. Press above IR LEARN once. The IR Learn programming screen
will appear:
3. Press a device key once (i.e.,CBL, SAT, TV, DVD,AUD, VCR,AUX,or CD)
to assign a mode for learning.The selected device menu screen,
including , will be displayed.
4. Place the RadioShack 8-in-One Remote head-to-head (about 2"
apart, as shown on the next page) from your original remote
control.Also locate the key (on your original remote control) that will
serve as the teaching function.
20 Using Learning
RS 8in1 Kameleon OM rev 10/9/03 4:11 PM Page 20
Page 21

O
WNER’SMANUAL
5. On the RadioShack 8-in-One Remote,select and press a desired key
where the learned function will be stored.The IR segments will display
an incoming animation, continue for three revolutions, and then the
entire display will turn off.
After the display is off, press and hold the teaching key (on your original remote control) until the display (on the RadioShack 8-in-One
Remote) turns on again.The bottom IR segment will flash twice
when the code is successfully captured.
NOTE: If the bottom IR segment displays one long flash, a learning error has
occurred. Try repeating this step again until a successful capture occurs.
If the function is still not captured,press twice to exit programming and
review the “Learning Precautions” on page 19. If needed, also see
“Troubleshooting”on page 43.After review, start programming again at step 1.
6. To learn other functions, repeat steps 3 through 5 as desired.
7. To exit programming, press twice. The display will return to the
last-selected device menu screen.
DELETING A SINGLE LEARNED KEY
1. Press and hold Puntil the bottom IR segment flashes twice.
The program keys will appear:
2. Press above IR DELETE once. The IR Delete programming screen
will appear:
3. Press a device key once (i.e.,CBL, SAT, TV,DVD,AUD, VCR,AUX,or CD)
for the mode where the learned key to be deleted resides.The selected
device menu screen, including , will be displayed.
4. Press the learned key to be deleted twice. Upon deletion, the bottom
IR segment will flash twice as confirmation.The program keys will
appear again.
continued on next page...
2"
Using Learning 21
RS 8in1 Kameleon OM rev 10/9/03 4:11 PM Page 21
Page 22
8-IN-ONER
EMOTEPOWEREDBYKAMELEON
USING LEARNING
DELETING A SINGLE LEARNED KEY (CONTINUED)
5. If desired,repeat steps 2 through 4 to delete another learned key.
6. Exit programming by pressing once. The display will return to the
last-selected device menu screen.
DELETING ALL LEARNED KEYS IN A SPECIFIC MODE
1. Press and hold Puntil the bottom IR segment flashes twice.
The program keys will appear:
2. Press above IR DELETE once. The IR Delete programming screen
will appear:
3. Press a device key once (i.e.,CBL, SAT, TV,DVD,AUD, VCR,AUX,or CD)
for the mode where the learned keys to be deleted reside.The selected
device menu screen, including , will be displayed.
4. Press the same device key (as in step 3) once.Upon deletion,the bottom
IR segment will flash twice as confirmation.The program keys will
appear again.
5. If desired,repeat steps 2 through 4 to delete other learned keys from
another mode.
6. Exit programming by pressing once. The display will return to the
last-selected device menu screen.
CHANGING VOLUME LOCK
The RadioShack 8-in-One Remote is set at the factory for independent
volume control of each selected device.
However, you may change the Volume Lock setting to Global Volume
Lock so that a device’s volume will be locked to one mode (e.g.,to
control TV volume in all other modes).After that,if desired, you can
perform Individual Volume Unlock on a selected device to set its
volume control for independent operation.
22 Using Learning/Changing Volume Lock
RS 8in1 Kameleon OM rev 10/9/03 4:11 PM Page 22
Page 23

O
WNER’SMANUAL
LOCKING VOLUME CONTROL TO ONE MODE (GLOBAL VOLUME LOCK)
1. Press and hold Puntil the bottom IR segment flashes twice.
The program keys will appear:
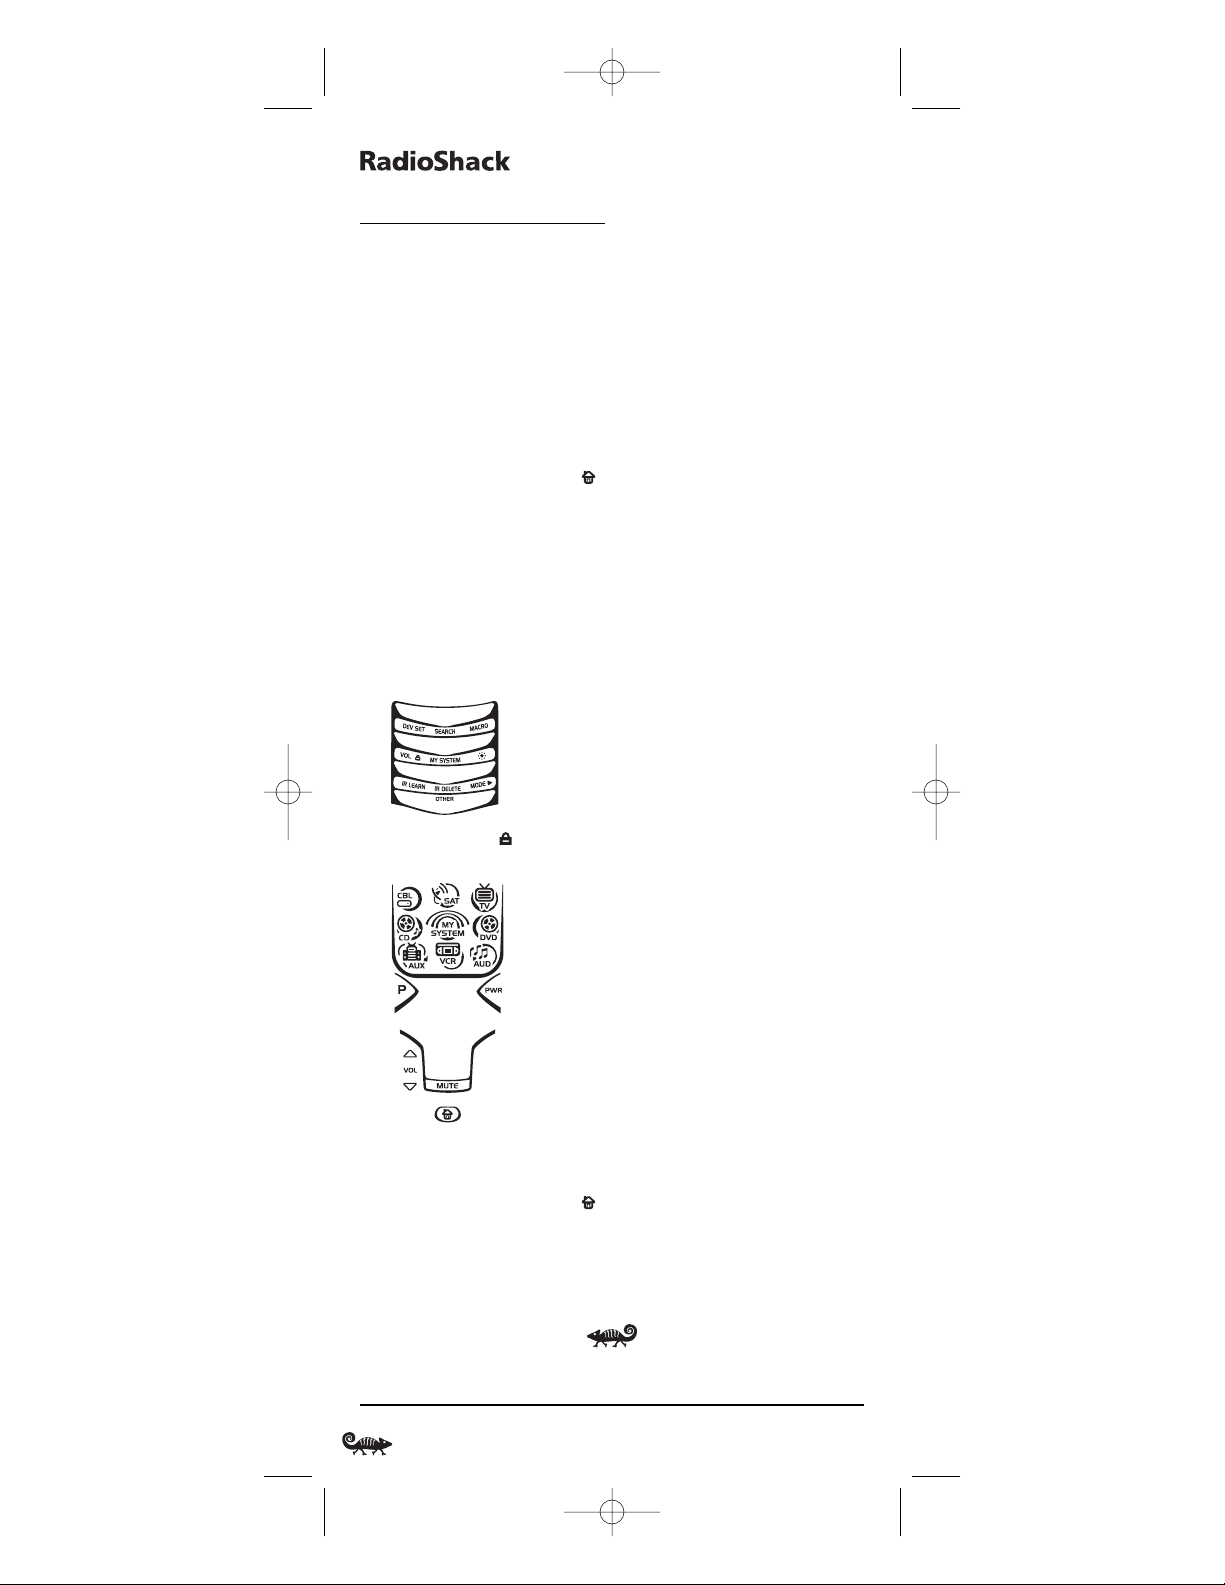
2. Press above VOL once. The Volume L oc k programming screen
will appear:
3. Press a device key once (i.e.,CBL, SAT, TV, DVD,AUD, VCR,AUX,or CD)
where you want the volume controls locked to.The bottom IR
segment will flash twice and the program keys will appear again.
4. To exit programming, press once. The display will return to the
last-selected device menu screen.Now, when you press VOL ▲,VOL▼,
or MUTE, the selected device’s volume will be controlled in any mode.
UNLOCKING VOLUME CONTROL FOR A SINGLE DEVICE (INDIVIDUAL VOLUME UNLOCK)
1. Press and hold Puntil the bottom IR segment flashes twice.
The program keys will appear:
2. Press above VOL once. The Volume L oc k programming screen
will appear:
continued on next page...
Changing Volume Lock 23
RS 8in1 Kameleon OM rev 10/9/03 4:11 PM Page 23
Page 24
8-IN-ONER
EMOTEPOWEREDBYKAMELEON
CHANGING VOLUME LOCK
UNLOCKING VOLUME CONTROL FOR A SINGLE DEVICE (INDIVIDUAL VOLUME
UNLOCK), CONTINUED
3. Press VOL▼ once. Then press a device key once (i.e.,CBL, SAT,TV,
DVD, AUD,VCR, AUX,or CD) where you want the volume controls
unlocked.The bottom IR segment will flash four times and the
program keys will appear again.
4. If desired,repeat steps 1 through 3 (of this section) for each device
that you want volume to be unlocked.
5. To exit programming, press once. The display will return to the
last-selected device menu screen.
6. Now, after you select a device that has volume unlocked,pressing
VOL ▲,VOL▼,or MUTEwill control the device’s volume only in its
own mode.
UNLOCKING ALL VOLUME CONTROL (RESTORING DEFAULT SETTING)
1. Press and hold Puntil the bottom IR segment flashes twice.
The program keys will appear:
2. Press above VOL once. The Volume Lo ck programming screen
will appear:
3. Press VOL ▲ once.The bottom IR segment will flash four times and
the program keys will appear again.
4. To exit programming, press once. The display will return to the
last-selected device menu screen.
5. Volume will again be independently controlled according to its
default states for all programmed devices.
24 Changing Volume Lock
RS 8in1 Kameleon OM rev 10/9/03 4:11 PM Page 24
Page 25
O
WNER’SMANUAL
USING MACROS
The RadioShack 8-in-One Remote includes six macro keys: M1 through
M4, COM MUTE,and PWR.Each one can be set up to perform a repetitive,
time-consuming operation with the press of a single key.
NOTES:A macro programmed onto the PWR key can only be accessed in the MY
SYSTEM mode. Pressing it in any other mode will only send a “Power On/Off”
IR command to the selected device. The COM MUTE key can be programmed as a
two-state rotating macro. See “Programming The COM MUTE Key”on page 27.
A macro can be used to control a home theater operation,to set a
favorite channel, or for other multiple functions you would like to control
with one key press.Moreover,each macro key can hold up to 15 key
presses total.
NOTE: Programming a new macro over an existing one will erase the
original macro.
PROGRAMMING A FAVORITE CHANNEL MACRO
With so many channels available on your cable or satellite system,you
can program a macro that directly selects a favorite channel with one
key press.For example,let’s assume your favorite cable programs are
on channel 71.Use the following instructions to program a macro for
direct access of this channel:
NOTE: The following example assumes all equipment is turned off and that the
TV is connected through the Cable Box with TV tuning set to channel 3.
1. Press and hold Puntil the bottom IR segment flashes twice.
The program keys will appear:
2. Press above MACRO once. The Macro programming screen will appear:
3. Press an open macro key (e.g.,M1,M2, M3,or M4).The last-selected
device menu screen, including , will be displayed.
4. Enter a desired macro sequence of up to 15 key presses.For this
example, press TV once, followed by PWR once, and then enter 0 3 for
the TV’s channel number. Next,press CBL once, followed by PWR
once, and then enter 0 7 1 for the Cable Box’s channel number.
continued on next page...
Using Macros 25
RS 8in1 Kameleon OM rev 10/9/03 4:11 PM Page 25
Page 26
8-IN-ONER
EMOTEPOWEREDBYKAMELEON
USING MACROS
PROGRAMMING A FAVORITE CHANNEL MACRO (CONTINUED)
NOTE: If there are more than 15 key presses in the sequence, the bottom IR segment will display a long flash,denoting an error. The display will return to the
last-selected device menu screen. To program the macro, start again with step 3.
5. To save the macro,press and hold P until the bottom IR segment
flashes twice.The program keys will appear again.
6. Exit programming by pressing once. The display will return to the
last-selected device menu screen.
7. Now, if you aim the remote at the devices selected in step 4 and press
the programmed macro key once,the TV will turn on and tune to
channel 3.Then, the Cable Box will turn on and tune to channel 071.
PROGRAMMING A MASTER POWER MACRO IN MY SYSTEM MODE
A macro can be programmed onto the PWR key to turn on or off as
many as seven home theater devices.
NOTE: This following example assumes the Home Theater system contains a
Satellite Receiver, a DVD Player, an Audio Receiver, and a TV.
1. Press and hold Puntil the bottom IR segment flashes twice.
The program keys will appear:
2. Press above MACRO once. The Macro programming screen will appear:
3. Press PWR once.The last-selected device menu screen,including ,
will be displayed.
4. Enter the macro sequence.For this example,press SAT once, followed
by PWR once. Next,press DVD once, followed by PWR once. Then press
AUD once, followed by PWR once. Finally, press TV once, followed by
PWR once, and then MY SYSTEM once.
5. To save the power macro,press and hold P until the bottom IR segment
flashes twice.The program keys will appear again.
26 Using Macros
RS 8in1 Kameleon OM rev 10/9/03 4:11 PM Page 26
Page 27
O
WNER’SMANUAL
6. Exit programming by pressing once. The display will return to the
last-selected device menu screen.
7. To test the power macro,first make sure all home theater devices
selected in step 4 are turned on.Aim the remote control at the
devices and press MY SYSTEM once, followed by PWR once. The
devices should turn off in this order: Satellite Receiver,DVD Player,
Audio Receiver, and TV.
To turn on the devices on again in the same order as above,press
PWR once.
PROGRAMMING THE COM MUTE KEY
If desired,a two-state rotating macro can be programmed onto the COM
MUTE key, so a key press will drop volume (in the CBL,SAT,TV, VCR,or
AUX mode) to a preset level during a commercial.When the program
resumes,another key press will raise it back to the original level.
1. Press and hold Puntil the bottom IR segment flashes twice.
The program keys will appear:
2. Press above MACRO once. The Macro programming screen will appear:
3. Press COM MUTE once.The last-selected device menu screen,including
,will be displayed.
4. Enter the first macro sequence by pressing TV once,then press VOL
▼
four times (to lower the volume four steps).
5. To save the macro,press and hold P until the bottom IR segment
flashes twice.The program keys will appear again.
6. To program the second macro,repeat steps 2 through 5, but substitute
VOL ▲ for VOL▼ this time (to raise the level four steps).
7. Exit programming by pressing once. The display will return to the
last-selected device menu screen.
continued on next page...
Using Macros 27
RS 8in1 Kameleon OM rev 10/9/03 4:11 PM Page 27
Page 28
8-IN-ONER
EMOTEPOWEREDBYKAMELEON
USING MACROS (Continued)
CLEARING A MACRO
1. Press and hold Puntil the bottom IR segment flashes twice.
The program keys will appear:
2. Press above MACRO once. The Macro programming screen will appear:
3. Select the macro key to be cleared and press it once.The last-selected
device menu screen will be displayed.
4. Press and hold Puntil the bottom IR segment flashes twice.
The program keys will appear again.
5. Exit programming by pressing once. The display will return to the
last-selected device menu screen.
USING KEYMOVER
The RadioShack 8-in-One Remote includes a Keymover feature that
allows you to map (or copy) keys from one mode (i.e.,source mode) to
another mode (i.e., destination mode).
NOTE: Do not use any of the device keys as a source or destination key.
PROGRAMMING KEYMOVER
For example, if your DVD player does not have volume control,you can
map those keys (i.e., VOL ▲,VOL▼,and MUTE) from the TV mode to
DVD mode as follows:
1. Press and hold Puntil the bottom IR segment flashes twice.
The program keys will appear:
28 Using Macros/Using Keymover
RS 8in1 Kameleon OM rev 10/9/03 4:11 PM Page 28
Page 29

O
WNER’SMANUAL
2. Press below OTHERonce. The Other programming screen will appear:
3. Using the number keys, enter 9 9 4.The bottom IR segment will
flash twice.
4. For the source mode,press a desired device key once (i.e.,CBL,SAT,
TV, DVD,AUD, VCR, AUX,or CD). For this example,press TV once. The
selected source device menu screen, including , will be displayed.
5. For the source key, press a key to be moved once.For this example
press VOL ▲ once.
6. For the destination mode, press a desired device key once (i.e., CBL,
SAT,TV,DVD, AUD,VCR, AUX,or CD).For this example,press DVD once.
The selected destination device menu screen, including , will
be displayed.
7. For the destination key,press a key to be moved once. For this example
press VOL ▲ once.Upon keymoving,the bottom IR segment will flash
twice as confirmation.The program keys will appear again.
8. Repeat steps 2 through 7 two more times to map the remaining
volume control keys, substituting VOL▼ and MUTE as source and
destination keys in steps 5 and 7.
9. Exit programming by pressing once. The display will return to the
last-selected device menu screen.
Upon completion of the above procedure,you can now use your
RadioShack 8-in-One Remote to control the TV’s volume and mute in
the DVD mode,as well as in the TV mode.
RESTORING A SINGLE KEYMOVED KEY
1. Press and hold Puntil the bottom IR segment flashes twice.
The program keys will appear:
continued on next page...
Using Keymover 29
RS 8in1 Kameleon OM rev 10/9/03 4:11 PM Page 29
Page 30
8-IN-ONER
EMOTEPOWEREDBYKAMELEON
USING KEYMOVER
RESTORING A SINGLE KEYMOVED KEY (CONTINUED)
2. Press below OTHERonce. The Other programming screen will appear:
3. Using the number keys, enter 9 9 4.The bottom IR segment will
flash twice.
4. Press the destination mode once where the keymoved key is stored.
Then press the destination key twice.Upon key restoration,the
bottom IR segment will flash twice as confirmation.The program
keys will appear again.
5. If desired,repeat steps 2 through 4 to restore another key.
6. Exit programming by pressing once. The display will return to the
last-selected device menu screen.
RESTORING ALL KEYMOVED KEYS IN A SINGLE MODE
1. Perform steps 1 through 3 of Programming Keymover on the
previous page.
2. Press the destination mode twice where the keymoved keys are
stored.Upon key restoration,the bottom IR segment will flash twice
as confirmation.The program keys will appear again.
3. Exit programming by pressing once. The display will return to the
last-selected device menu screen.
PROGRAMMING FAVORITE CHANNEL SCAN
In the CBL, SAT,TV, VCR,or AUX mode, the RadioShack 8-in-One
Remote can store a list of up to 10 favorite channels,in any order,that
will be immediately scanned when you press FAV SCAN once (see Usi ng
Channel Scan on page 32).
NOTE: Favorite channels can only be programmed for one mode. After programming, if FAV SCAN is pressed while in another mode,the remote control will start
a normal channel scan instead (if applicable to the selected device).
30 Using Keymover/Programming Favorite Channel Scan
RS 8in1 Kameleon OM rev 10/9/03 4:12 PM Page 30
Page 31

O
WNER’SMANUAL
1. Press and hold Puntil the bottom IR segment flashes twice.
The program keys will appear:
2. Select a Favorite Channel Mode by pressing CBL, SAT,TV,VCR,or AUX
once.The bottom IR segment flashes once as the selected device
key animates.
3. Press below OTHERonce. The Other programming screen will appear:
4. Using the number keys, enter 9 9 6.The bottom IR segment will flash
twice and the Favorite Channel programming screen will appear.
NOTE: If the bottom IR segment displays one long flash, an error has occurred.
Try repeating this step.
5. Using the number keys,enter a favorite channel number (e.g.,0 1 2).
Then press P once.
NOTE: If the original remote control required pressing an Enter key to change the
channel, also press the ENTER key after the channel number (e.g., 0 1 2 ENTER).
6. If desired,repeat step 5 for each channel to be stored,up to a total of
10 channels.
NOTE: After storing 10 channels,the remote control will exit the Favorite
Channel programming screen and again display the program keys.
7. To exit programming with less than 10 favorite channels stored,
press and hold P until the bottom IR segment flashes twice.
The display will return to the last-selected device menu screen.
Programming Favorite Channel Scan 31
RS 8in1 Kameleon OM rev 10/9/03 4:12 PM Page 31
Page 32

8-IN-ONER
EMOTEPOWEREDBYKAMELEON
USING CHANNEL SCAN
In the CBL, SAT,TV,VCR,or AUX mode, use FAV SCAN to start a 3-second
scan of all favorite channels (if programmed – see Programming Favorite
Channel Scan on page 30) and/or all channels for the selected mode.
1. If Favorite Channel Scan has been set up,skip to step 2. Otherwise,
press CBL, SAT,TV, VCR,or AUX once.The bottom IR segment flashes
once as the selected device key animates.
2. Press FAV SCAN once.The IR segments will display outgoing anima-
tion as each channel is changed.
•IfFavorite Channel Scan has been set up,scanning of favorite
channels will start and cycle through stored channels for 3 minutes
or until any key press stops it.
•IfFavorite Channel Scan has not been set up,scanning will start
with the current channel, then proceed to the next channel up
and cycle through all channels for 3 minutes or until stopped by
pressing any key.
3. To stop scanning channels at any time,press any key once.
USING MY SYSTEM MODE
The RadioShack 8-in-One Remote includes a custom Home Theater
mode. After MY SYSTEM is programmed, it will allow you to access four
groups of remote control keys without having to change device modes.
CONTROL ORGANIZATION
ABOUT CONTROL GROUPS
For Home Theater programming, the remote’s keys are grouped by type
of control into the following four control groups:
Video Playback Group:Transport controls (REW, PLAY,FWD,
REC, PAUSE,and STOP)
Volume Co nt rols Grou p: VOL ▲, VOL▼,and MUTE
Channel Controls Group: CH
▲,CH ▼, INPUT,number keys (0 ~ 9),
TV/VCR, FAV SCAN,ENTER,and LAST
Menu Controls Group:Cursor controls (
▲, ▼,,and ),
OK, PAGE+,PAGE-, MENU, INFO,GUIDE,
and EXIT
ABOUT DEVICE MODES
Moreover, the above Control Groups can be used in the following modes:
Video Playback Group: CBL, SAT, DVD,AUD, VCR,AUX,and CD
Volume Co nt rols Grou p: CBL, SAT, TV,DVD, AUD,VCR, AUX,and CD
▲
▲
32 Using Channel Scan/Using My System Mode
RS 8in1 Kameleon OM rev 10/9/03 4:12 PM Page 32
Page 33

O
WNER’SMANUAL
Channel Controls Group: CBL, SAT, TV,DVD, VCR,and AUX
Menu Controls Group: CBL, SAT, TV,DVD, AUD,VCR, AUX,and CD
FACTORY DEFAULT SETTINGS
At the factory, the Control Groups are assigned the following modes as
default settings:
Video Playback Group: DVD
Volume Co nt rols Grou p: AUD
Channel Controls Group: CBL
Menu Controls Group: CBL
If the default settings fit your needs,you can skip programming this
mode. Otherwise,perform the steps in the following section to assign
device modes to the Control Groups.
PROGRAMMING MY SYSTEM MODE
1. Press any device key once (i.e.,CBL, SAT, TV, DVD, AUD,VCR, AUX,or
CD). The selected device key will animate.
2. Press and hold Puntil the bottom IR segment flashes twice.
The program keys will appear:
3. Press above MY SYSTEM once. The Video Playback programming
screen will appear:
NOTE: For steps 3 through 7, if a device key is animated, it is assigned to its
respective function group. To continue programming the My System mode, you
must select a device key, even if it is the same one that is currently animated.
continued on next page...
Using My System Mode 33
RS 8in1 Kameleon OM rev 10/9/03 4:12 PM Page 33
Page 34

8-IN-ONER
EMOTEPOWEREDBYKAMELEON
USING MY SYSTEM MODE
PROGRAMMING MY SYSTEM MODE (CONTINUED)
4. To assign a mode to the Video Playback group,press a device key
once (i.e.,CBL, SAT, TV,DVD, AUD, VCR,AUX,or CD). Then the Vo l u m e
Controls programming screen will appear:
5. To assign a mode to the Vo lu me Control s group,press a device key
once. Then the Channel Controls programming screen will appear:
6. To assign a mode to the Channel Controls group,press a device key
once. Then the Menu Controls programming screen will appear:
7. To assign a mode to the Menu Controls group, press a device key
once. Since My System programming is now complete, the program
keys will appear again.
8. Exit programming by pressing once. The display will return to the
last-selected device menu screen.
34 Using My System Mode
RS 8in1 Kameleon OM rev 10/9/03 4:12 PM Page 34
Page 35

O
WNER’SMANUAL
REASSIGNING DEVICE KEYS
The RadioShack 8-in-One Remote can be set to control a second
device. For example,to control a TV, a Cable Box,and two DVD Players,
you can reassign the unused AUX key to operate the second DVD Player
as follows:
1. Press and hold Puntil the bottom IR segment flashes twice.
The program keys will appear:
2. Press above MODE once. The Mode Mover programming screen
will appear:
3. For the source mode,press a device key once (i.e.,CBL, SAT,TV, DVD,
AUD, VCR,AUX,or CD). For this example, press DVD once.The selected
device menu screen, including , will be displayed.
NOTE: Only one device can be assigned to an unused device key at a time.
4. For the destination mode, press a device key once (i.e.,CBL, SAT,TV,
DVD, AUD,VCR, AUX,or CD).For this example,press AUX once. Upon
reassignment,the bottom IR segment will flash twice as confirmation. The program keys will appear again.
5. For this example, the AUX key is now ready to be set up to control
your second DVD player. See Programming A Device on page 14.
If desired,repeat steps 2 through 5 to reassign another device.
6. Exit programming by pressing once.The display will return to the
last-selected device menu screen.
▲
Reassigning Device Keys 35
RS 8in1 Kameleon OM rev 10/9/03 4:12 PM Page 35
Page 36

8-IN-ONER
EMOTEPOWEREDBYKAMELEON
USING COMMERCIAL SKIP
The RadioShack 8-in-One Remote includes a unique feature for skipping past commercials on recorded programs when using a PVR
(DVR) or VCR. This features works in the CBL, SAT, VCR,or AUX mode
and you can use the default settings or program custom ones..
USING THE DEFAULT SETTINGS
The COM SKIP key is preprogrammed to perform the Commercial Skip
function of your original remote control (if available).
To use the default setting, simply aim the remote at the desired device,
and press COM SKIP once for each skip of two commercials.
PROGRAMMING COMMERCIAL SKIP
To customize Commercial Skip settings, perform the following steps:
1. Turn on a desired device (e.g.,VCR or PVR) and view the commercials you want to skip. Then position the media back to the start of
first commercial in the sequence.
2. Press the appropriate assigned device key once (i.e.,CBL, SAT,VCR,or
AUX). The selected device key will animate.
3. Press and hold Puntil the bottom IR segment flashes twice.
The program keys will appear:
4. Press below OTHERonce. The Other programming screen will appear:
36 Using Commercial Skip
RS 8in1 Kameleon OM rev 10/9/03 4:12 PM Page 36
Page 37

O
WNER’SMANUAL
5. Using the number keys,enter 9 7 4. The The bottom IR segment will
flash twice and the Commercial Skip programming screen will appear:
6. Select a Commercial Skip mode by pressing CBL,SAT,VCR,or AUX once.
7. Press FFWD once and watch for the end of a commercial sequence that
typically may have four to six commercials and last 2 to 3 minutes in
real time.As it ends, press PLAY once.
NOTE:Ifthe time between FFWD and PLAY key presses exceeds 30 seconds, the
program will ignore your action. The bottom IR segment will display a long
flash to denote the time limit has been exceeded and the screen will return to
the Program Keys menu.You will need to start again at step 4 and perform this
step within 30 seconds.
NOTE:Although FFWD and PLAY keys are used in programming this step,
other keys may be used depending on how they functioned on the original
remote control.
8. To save the settings,press and hold Puntil the bottom IR segment
flashes twice.The program keys will appear again.
9. Exit programming by pressing once.The display will return to the
last-selected device menu screen.
Using Commercial Skip 37
RS 8in1 Kameleon OM rev 10/9/03 4:12 PM Page 37
Page 38

8-IN-ONER
EMOTEPOWEREDBYKAMELEON
SETTING THE TILT SWITCH
The RadioShack 8-in-One Remote contains a Tilt Switch that activates
the display when the unit is moved.If desired,you can disable it so
only pressing a key will turn on the display.
NOTE: Disabling the Tilt Switch can help conserve battery life.
DISABLING THE TILT SWITCH
1. Press and hold Puntil the bottom IR segment flashes twice.
The program keys will appear:
2. Press below OTHERonce. The Other programming screen will appear:
3. Using the number keys, enter 9 8 5. The The bottom IR segment will
flash four times,confirming the Tilt Switch is disabled. The program
keys will appear again.
4. Exit programming by pressing once.The display will return to the
last-selected device menu screen.
ENABLING THE TILT SWITCH
1. Perform steps 1 and 2 of the previous section, Disabling The Tilt Switch.
2. Using the number keys, enter 9 8 5.The The bottom IR segment will
flash twice, confirming the Tilt Switch is enabled.The program keys
will appear again.
3. Exit programming by pressing once.The display will return to the
last-selected device menu screen.
38 Setting The Tilt Switch
RS 8in1 Kameleon OM rev 10/9/03 4:12 PM Page 38
Page 39

O
WNER’SMANUAL
SETTING THE FINDER RECEIVER
The RadioShack 8-in-One Remote comes with a Finder Transmitter that
can be used to quickly locate the main remote if it is accidentally lost
or misplaced.At the factory, the Finder Receiver (inside the remote) is
set to wake up every few seconds,listen for a signal from the Finder
Transmitter, and then emit an audible alert to pinpoint the location of
the main remote.This is a great feature,but it does use extra battery
power.If you do not plan to use the Finder Transmitter,we recommend
turning off the remote’s Finder Receiver to conserve battery life.
DISABLING THE FINDER RECEIVER
1. Press and hold Puntil the bottom IR segment flashes twice.
The program keys will appear:
2. Press below OTHERonce. The Other programming screen will appear:
3. Using the number keys, enter 9 7 2.The The bottom IR segment
will flash four times, confirming the Finder Receiver is disabled.
The program keys will appear again.
4. Exit programming by pressing once.The display will return to the
last-selected device menu screen.
ENABLING THE FINDER RECEIVER
1. Perform steps 1 and 2 of the previous section,Disabling The
Finder Receiver.
2. Using the number keys, enter 9 7 2.The The bottom IR segment will
flash twice, confirming the Finder Receiver is enabled. The program
keys will appear again.
3. Exit programming by pressing once.The display will return to the
last-selected device menu screen.
Setting The Finder Receiver 39
RS 8in1 Kameleon OM rev 10/9/03 4:12 PM Page 39
Page 40

8-IN-ONER
EMOTEPOWEREDBYKAMELEON
RESTORING FACTORY DEFAULT SETTINGS
The RadioShack 8-in-One Remote includes a Setup Code Reset program.
You can use it to restore all your programmed codes to factory settings
and delete all custom programming.
IMPORTANT: Executing this program will erase all code settings (except
upgraded codes) and all custom settings for My System, Macros, Learned
Keys,Reassigned Device Keys,Keymoved Keys,Favorite Channels,and all
device settings.
1. Press and hold Puntil the bottom IR segment flashes twice.
The program keys will appear:
2. Press below OTHERonce. The Other programming screen will appear:
3. Using the number keys, enter 9 7 7.The bottom IR segment will flash
twice, pause and flash twice again to confirm restoration.
4. Exit programming by pressing once.The display will return to the
last-selected device menu screen.
CLEARING ALL CUSTOM PROGRAMMING
The RadioShack 8-in-One Remote contains a Custom Programming
Reset program.You can use it to remove all custom programming,
except your setup codes and reassigned device keys.
IMPORTANT: Executing this program will erase all custom settings for My
System,Macros,Learned Keys,Keymoved Keys,and Favorite Channels.
40 Restoring Factory Default Settings/Clearing All Custom Programming
RS 8in1 Kameleon OM rev 10/9/03 4:12 PM Page 40
Page 41

O
WNER’SMANUAL
1. Press and hold Puntil the bottom IR segment flashes twice.
The program keys will appear:
2. Press below OTHERonce. The Other programming screen will appear:
3. Using the number keys, enter 9 8 0.The bottom IR segment will flash
twice, pause and flash twice again to confirm restoration.
4. Exit programming by pressing once.The display will return to the
last-selected device menu screen.
SPECIFICATIONS
Remote Power . . . . . . . . . . . . . . . . . . . . . . . . . . . . . . . . (4) AAA Batteries
Finder Transmitter Power . . . . . . . . . . . . . . . . . . . . . . . . . (1) 9 V Battery
Finder Transmitter to Remote Range . . . . . . . . . . . . . . . . . 30 ft (9.1 m)
Remote Dimensions
(H x W x D). . . . . . . . . . . . . . . . . . . . . . . . . . . . . . 9.44 x 2.64 x 1.02 in.
(H x W x D) . . . . . . . . . . . . . . . . . . . . . . . . . . . . . . 240 x 67.2 x 26 mm
Finder Transmitter Dimensions
(H x W x D). . . . . . . . . . . . . . . . . . . . . . . . . . . . . . . . 4.8 x 1.6 x 0.92 in.
(H x W x D) . . . . . . . . . . . . . . . . . . . . . . . . . . . . . . . . 120 x 40 x 23 mm
Remote Weight (no batteries). . . . . . . . . . . . . . . . . . . . . . 0.4 lb (181.4 g)
Finder Transmitter Weight (no battery). . . . . . . . . . . . . . . 0.1 lb (45.4 g)
NOTE: Specifications are typical. Individual units might vary.Specifications
are subject to change and improvement without notice.
Clearing All Custom Programming/Specifications 41
RS 8in1 Kameleon OM rev 10/9/03 4:12 PM Page 41
Page 42

8-IN-ONER
EMOTEPOWEREDBYKAMELEON
ABOUT UPGRADING
Your RadioShack 8-in-One Remote has the largest infrared code
library available and contains a unique feature that allows new codes
to be added to its memory over the phone.In a matter of seconds,your
remote will quickly and reliably record the new information without
complex plugs, adapters,or attachments.
This means that as you buy new entertainment devices in the future,
the RadioShack 8-in-One Remote will never become obsolete.Simply
call our consumer help-line, and one of our customer service representatives will assist you through the entire process of upgrading your
RadioShack 8-in-One Remote.
Consumer Help-Line: (800) 950-7044
NOTE: RadioShack reserves the right to replace a returned remote-control with a
new one of equal or superior functionality.
UPGRADE PROCEDURE
1. Call our Consumer Help-Line at: (800) 950-7044 on any business day,
between 9:00 A.M. and 5:30 P.M., EST.
2. Our customer service agent will ask for and record the brand
name(s) and model number(s) of your device(s).Then the agent will
lead you through the upgrade procedure by asking you to place your
telephone’s speaker next to the PWR key on the RadioShack 8-in-One
Remote (see below).
NOTE: Only use a land-line phone for the upgrade procedure. Do not use a
mobile phone,because it will not transmit the signals correctly.
In a matter of seconds,new setup codes for your device(s) will be
transmitted through the telephone and stored in your RadioShack
8-in-One Remote.
3. After your RadioShack 8-in-One Remote has been successfully
upgraded by telephone, stay on the line.Our customer service agent
will ensure that your unit is working properly with your device(s)
and answer any other questions you may have.
UPGRADE EXCLUSIONS
• Home entertainment or home automation devices controlled by
radio frequency (RF/UHF), wired, or ultrasonic remote controls.
Only devices controlled by infrared remote controls are covered.
• Home entertainment or home automation devices not controlled
by remote controls.
42 Upgrade Exclusions
RS 8in1 Kameleon OM rev 10/9/03 4:12 PM Page 42
Page 43

O
WNER’SMANUAL
• Broken or defective product.
• Products that operate over 100 kHz.
• Infrared keyboards a nd infrared pointing devices (such as
mouse substitutes).
• All products for sale and/or use outside the continental United
States,Hawaii,Alaska,or Canada.
TROUBLESHOOTING
PROBLEM: No display at all times.
SOLUTION: Replace batteries with four new AAA alkaline batteries.
PROBLEM: No display when programming.
SOLUTION: Display has turned off due to inactivity.Start programming
again and do not pause while performing instructions.
PROBLEM: Remote Finder does not work.
SOLUTION: Replace battery with new 9-volt alkaline battery; also
veri fy Finder Receiver is enabled (see page 39).
PROBLEM: During programming,the bottom IR segment displays a
long flash.
SOLUTION: An invalid entry has occurred.Check the keys to be
pressed and start program again.
PROBLEM: How do I stop programming?
SOLUTION: Press once to return to the program keys screen.
Press it once more to exit completely.
PROBLEM: The unit does not control home entertainment devices
or commands are not working properly.
SOLUTION: Try all listed codes for the device brands being set up.
Make sure they can be operated with an infrared
remote control.
PROBLEM: Tried Searching For Your Code method and still could
not find a working code.
SOLUTION: Perform Restoring Factory Default Settings on page 40.
Then repeat Searching For Your Code on page 17.
PROBLEM: Cannot program a macro onto M1~ M4,PWR,or COM
MUTE keys.
SOLUTION: Make sure the total number of key presses being
programmed is less than 15.
continued on next page...
Upgrade Exclusions/Troubleshooting 43
RS 8in1 Kameleon OM rev 10/9/03 4:12 PM Page 43
Page 44

8-IN-ONER
EMOTEPOWEREDBYKAMELEON
TROUBLESHOOTING (Continued)
PROBLEM: Power macro does not work.
SOLUTION: First press MY SYSTEM once,then press PWR once.
PROBLEM: Favorite channel function does not work properly.
SOLUTION: Some devices (e.g.,Cable Boxes or Satellite Receivers)
use two-digit channel numbers.During programming,
press ENTER or OKonce after entering a channel number
(e.g., 0 2 ENTER for channel 2).See Programming
Favorite Channel Scan on page 30.
PROBLEM: Changing channels does not work properly.
SOLUTION: If the original remote control required pressing ENTER
to change channels, then press ENTER on the remote
control after entering channel numbers.
PROBLEM: No remote control of volume.
SOLUTION: See Changing Volume Lock on page 22 to lock/unlock
volume.
PROBLEM: Bottom IR segment flashes when pressing a key, but
home entertainment device does not respond.
SOLUTION: Make sure the remote is aimed at your home entertainment
device and is not farther away than 15 feet.
PROBLEM: CH ▲ and CH ▼ do not work for your RCA TV.
SOLUTION: Due to RCA design (1983-1987), only the original
remote control will operate these functions.
PROBLEM: Pressing SCREEN one or more times in CBL,SAT,DVD,
VCR, AUX,or MY SYSTEM mode does not display a
secondary menu screen.
SOLUTION: Although SCREEN is displayed,for these modes, there
are no additional menu screens.
44 Troubleshooting
RS 8in1 Kameleon OM rev 10/9/03 4:12 PM Page 44
Page 45

O
WNER’SMANUAL
DEVICE MENU SCREENS
PROGRAMMING MAIN MENU
Pressing and holding P displays the Programming Main Menu screen.
Use the program keys to program device control (DEV SET),code search
(SEARCH), home theater mode (MY SYSTEM), volume lock (VOL ),
macros (MACRO),display brightness ( ), function learning
(IR LEARN and IR DELETE), device key reassignment (MODE ), or
other functions (OTHER).
See the Tab le of Contents on page 2 to locate a section of interest.
▲
Device Menu Screens 45
RS 8in1 Kameleon OM rev 10/9/03 4:12 PM Page 45
Page 46

8-IN-ONER
EMOTEPOWEREDBYKAMELEON
DEVICE MENU SCREENS (Continued)
AUD MAIN MENU
Pressing AUD once displays the AUD Main Menu screen.After device
programming, use these keys to remotely control your Audio Receiver’s
or Amplifier’s volume and stations, select source inputs,operate transport functions on a built-in CD player (or DVD player, if HTiB device),
and access menu or preset functions.
Pressing SCREEN once will display a secondary AUD Menu (as shown
on the next page).
46 Device Menu Screens
RS 8in1 Kameleon OM rev 10/9/03 4:12 PM Page 46
Page 47

O
WNER’SMANUAL
AUD MENU
Pressing SCREEN once (on the AUD Main Menu,as shown on the
previous page) displays a secondary AUD Menu screen.Use these
keys to remotely control your Audio Receiver’s or Amplifier’s volume,
stations, and surround functions.
Pressing SCREEN once more returns the display to the AUD Main Menu
screen.
Device Menu Screens 47
RS 8in1 Kameleon OM rev 10/9/03 4:12 PM Page 47
Page 48

8-IN-ONER
EMOTEPOWEREDBYKAMELEON
DEVICE MENU SCREENS (Continued)
AUX MAIN MENU
Pressing AUX once displays the AUX Main Menu screen.After device
programming,use these keys to remotely control all your device’s
common features,such as volume and channels,and menu,guide,and
navigation functions.
48 Device Menu Screens
RS 8in1 Kameleon OM rev 10/9/03 4:12 PM Page 48
Page 49

O
WNER’SMANUAL
CBL MAIN MENU
Pressing CBL once displays the CBL Main Menu screen.After Cable Box
programming,use these keys to remotely control all your device’s
common features,such as volume and channels,and menu,guide,and
navigation functions.
Device Menu Screens 49
RS 8in1 Kameleon OM rev 10/9/03 4:12 PM Page 49
Page 50

8-IN-ONER
EMOTEPOWEREDBYKAMELEON
DEVICE MENU SCREENS (Continued)
CD MAIN MENU
Pressing CD once displays the CD Main Menu screen.After device
programming,use these keys to remotely control your CD player’s
common features, such as transport keys and skip,menu,and
random functions.
Pressing SCREEN once will display a secondary CD Menu (as shown on
the next page).
50 Device Menu Screens
RS 8in1 Kameleon OM rev 10/9/03 4:12 PM Page 50
Page 51

O
WNER’SMANUAL
CD MENU
Pressing SCREEN once (on the CD Main Menu,as shown on the
previous page) displays a secondary CD Menu screen.Use these keys
to remotely control your CD player’s navigation functions.
Pressing SCREEN once more returns the display to the CD Main
Menu screen.
Device Menu Screens 51
RS 8in1 Kameleon OM rev 10/9/03 4:12 PM Page 51
Page 52

8-IN-ONER
EMOTEPOWEREDBYKAMELEON
DEVICE MENU SCREENS (Continued)
DVD MAIN MENU
Pressing DVD once displays the DVD Main Menu screen.After device
programming,use these keys to remotely control all your DVD player’s
common features, such as transport keys and menu, navigation,
subtitle, and audio functions.
52 Device Menu Screens
RS 8in1 Kameleon OM rev 10/9/03 4:12 PM Page 52
Page 53

O
WNER’SMANUAL
MY SYSTEM MAIN MENU
After mode programming, pressing MY SYSTEM once displays the My
System Main Menu screen. Use these keys to remotely access all
common features and functions of your home theater system. For
details, see Using My System Mode on page 32.
Device Menu Screens 53
RS 8in1 Kameleon OM rev 10/9/03 4:12 PM Page 53
Page 54

8-IN-ONER
EMOTEPOWEREDBYKAMELEON
DEVICE MENU SCREENS (Continued)
TV MAIN MENU
Pressing TV once displays the TV Main Menu screen.After device
programming,use these keys to remotely control all your TV’s common features,such as volume and channels,and last channel, menu,
and information/display functions.
Pressing SCREEN once will display a secondary TV Menu (as shown on
the next page).
54 Device Menu Screens
RS 8in1 Kameleon OM rev 10/9/03 4:12 PM Page 54
Page 55

O
WNER’SMANUAL
TV MENU
Pressing SCREEN once (on the TV Main Menu,as shown on previous
page) displays a secondary TV Menu screen. Use these keys to remotely
control all your TV’s common menu features.
Pressing SCREEN once more returns the display to the TV Main
Menu screen.
Device Menu Screens 55
RS 8in1 Kameleon OM rev 10/9/03 4:12 PM Page 55
Page 56

8-IN-ONER
EMOTEPOWEREDBYKAMELEON
DEVICE MENU SCREENS (Continued)
VCR MAIN MENU
Pressing VCR once displays the VCR Main Menu screen.After device
programming,use these keys to remotely control all your TV’s
common features, such as volume and channels,and last channel,
menu, and information/display functions,and VCR transport controls.
56 Device Menu Screens
RS 8in1 Kameleon OM rev 10/9/03 4:12 PM Page 56
Page 57

O
WNER’SMANUAL
CARE
• Keep the remote dry.If the remote gets wet, wipe it dry immediately.
• Handle the remote gently and carefully. Don’t drop it.
• Use and store the remote only in normal temperature environments.
• Keep the remote away from dust and dirt.
• Wipe the remote with a damp cloth to keep it looking new.
Modifying or tampering with internal parts can cause damage and
invalidate the warranty. If your remote is not performing as it should,
please contact us at:
www.radioshack.com
or visit your local RadioShack store for help.
ADDITIONAL INFORMATION
© 2003 Universal Electronics.No part of this publication may be
reproduced, transmitted, transcribed,stored in any retrieval system,or
translated to any language, in any form or by any means,electronic,
mechanical, magnetic, optical,manual, or otherwise, without the
prior written permission of Universal Electronics Inc.Kameleon is a
trademark (registration pending) of Universal Electronics.
© 2002 RadioShack Corporation.All Rights Reserved.RadioShack and
RadioShack.com are trademarks used by RadioShack Corporation.
The RadioShack 8-in-One Remote Powered By Kameleon is compatible
for use in North America. This product uses technologies licensed
under one or more of the following U.S. patents:6,496,135; 6,330,091;
6,195,033; 6,097,309; 6,014,092; 5,959,751; 5,953,144; 5,686,891;
5,638,050; 5,532,463; 5,515,052; 5,481,256; 5,414,761; 5,255,313;
5,228,077; 4,959,810; and patents pending.
M6123
Care/Additional Information 57
RS 8in1 Kameleon OM rev 10/9/03 4:12 PM Page 57
Page 58

8-IN-ONER
EMOTEPOWEREDBYKAMELEON
INSTRUCTION TO THE USER
This equipment has been tested and found to comply with the limits
for a class B digital device,pursuant to part 15 of the FCC Rules. These
limits are designed to provide reasonable protection against harmful
interference in a residential installation.This equipment generates,uses
and can radiate radio frequency energy and if not installed and used in
accordance with the instructions,may cause harmful interference to
radio communications.However, there is no guarantee that interference
will not occur in a particular installation. If this equipment does cause
harmful interference to radio or television reception, which can be determined by turning the equipment off and on,the user is encouraged to
try to correct the interference by one or more of the following measures:
• Reorient or relocate the receiving antenna.
• Increase the separation between the equipment and receiver.
• Connect the equipment into an outlet on a circuit different from
that to which the receiver is connected.
• Consult the dealer or an experienced radio/TV technician for help.
This equipment has been verified to comply with the limits for a class
B computing device,pursuant to FCC Rules.In order to maintain compliance with FCC regulations,shielded cables must be used with this
equipment.Operation with non-approved equipment or unshielded
cables is likely to result in interference to radio and TV reception.
The user is cautioned that changes and modifications made to the
equipment without the approval of manufacturer could void the user's
authority to operate this equipment.
LIMITED 90-DAY WARRANTY
This product is warranted by RadioShack against manufacturing
defects in material and workmanship under normal use for ninety
(90) days from the date of purchase from RadioShack company-owned
stores and authorized RadioShack franchisees and dealers.
EXCEPT AS PROVIDED HEREIN,RadioShack MAKES NO EXPRESS
WARRANTIES AND ANY IMPLIED WARRANTIES, INCLUDING
THOSE OF MERCHANTABILITY AND FITNESS FOR A PARTICULAR
PURPOSE,ARE LIMITED IN DURATION TO THE DURATION OF THE
WRITTEN LIMITED WARRANTIES CONTAINED HEREIN. EXCEPT
AS PROVIDED HEREIN, RadioShack SHALL HAVE NO LIABILITY OR
RESPONSIBILITY TO CUSTOMER OR ANY OTHER PERSON OR
ENTITY WITH RESPECT TO ANY LIABILITY,LOSS OR DAMAGE
CAUSED DIRECTLY OR INDIRECTLY BY USE OR PERFORMANCE OF
THE PRODUCT OR ARISING OUT OF ANY BREACH OF THIS WARRANTY, INCLUDING, BUT NOT LIMITED TO,ANY DAMAGES
58 Instruction To The User/Limited 90-Day Warranty
RS 8in1 Kameleon OM rev 10/9/03 4:12 PM Page 58
Page 59

O
WNER’SMANUAL
RESULTING FROM INCONVENIENCE,LOSS OF TIME,DATA, PROPERTY, REVENUE, OR PROFIT OR ANY INDIRECT, SPECIAL,INCIDENTAL, OR CONSEQUENTIAL DAMAGES,EVEN IF RadioShack HAS
BEEN ADVISED OF THE POSSIBILITY OF SUCH DAMAGES.
Some states do not allow limitations on how long an implied warranty
lasts or the exclusion or limitation of incidental or consequential damages, so the above limitations or exclusions may not apply to you.
In the event of a product defect during the warranty period, take the
product and the RadioShack sales receipt as proof of purchase date to
any RadioShack store.RadioShack will, at its option,unless otherwise
provided by law: (a) correct the defect by product repair without
charge for parts and labor; (b) replace the product with one of the
same or similar design; or (c) refund the purchase price.All replaced
parts and products,and products on which a refund is made,become
the property of RadioShack. New or reconditioned parts and products
may be used in the performance of warranty service. Repaired or
replaced parts and products are warranted for the remainder of the
original warranty period. You will be charged for repair or replacement
of the product made after the expiration of the warranty period.
This warranty does not cover: (a) damage or failure caused by or
attributable to acts of God, abuse, accident,misuse, improper or
abnormal usage,failure to follow instructions, improper installation or
maintenance,alteration,lightning or other incidence of excess voltage
or current; (b) any repairs other than those provided by a RadioShack
Authorized Service Facility; (c) consumables such as fuses or batteries;
(d) cosmetic damage; (e) transportation, shipping or insurance costs;
or (f) costs of product removal,installation, set-up service adjustment
or reinstallation.
This warranty gives you specific legal rights,and you may also have
other rights which vary from state to state.
RadioShack Customer Relations,
200 Taylor Street, 6th Floor,
Fort Worth, TX 76102
Cat. No.15-2138 07/02
Fort Worth, Texas 76102
Limited 90-Day Warranty 59
RS 8in1 Kameleon OM rev 10/9/03 4:12 PM Page 59
Page 60

8-IN-ONET
ELECONTROLACCIONADO PORKAMELEON
ÍNDICE DE MATERIAS
Introducción . . . . . . . . . . . . . . . . . . . . . . . . . . . . . . . . . . . . . . . . . . . . . . . . . . . . . . . . . . . . . . . 61
Cómo Funciona Kameleon™. . . . . . . . . . . . . . . . . . . . . . . . . . . . . . . . . . . . . . . . . . . . . . . . . 61
Instalación de las Baterías . . . . . . . . . . . . . . . . . . . . . . . . . . . . . . . . . . . . . . . . . . . . . . . . . . 62
Uso y Seguridad de las Baterías. . . . . . . . . . . . . . . . . . . . . . . . . . . . . . . . . . . . . . . . . . . . 62
Acerca de la Vida de las Baterías. . . . . . . . . . . . . . . . . . . . . . . . . . . . . . . . . . . . . . . . . . . 62
Instalación de las Baterías en el Control Remoto . . . . . . . . . . . . . . . . . . . . . . . . . . . . . . . 62
Acerca del Transmisor Localizador . . . . . . . . . . . . . . . . . . . . . . . . . . . . . . . . . . . . . . . . . . 63
Una Mirada Rápida a los Controles . . . . . . . . . . . . . . . . . . . . . . . . . . . . . . . . . . . . . . . . . . . 64
Funciones de las Teclas . . . . . . . . . . . . . . . . . . . . . . . . . . . . . . . . . . . . . . . . . . . . . . . . . . 66
Tabla de Dispositivos . . . . . . . . . . . . . . . . . . . . . . . . . . . . . . . . . . . . . . . . . . . . . . . . . . . . 70
Ajuste del Brillo la Pantalla . . . . . . . . . . . . . . . . . . . . . . . . . . . . . . . . . . . . . . . . . . . . . . . . . . 71
Programación de un Dispositivo (Aparato) . . . . . . . . . . . . . . . . . . . . . . . . . . . . . . . . . . . . . 72
Programación de un Aparato Combinado DVD/Videograbadora (VCR) . . . . . . . . . . . . . . 74
Búsqueda de su Código . . . . . . . . . . . . . . . . . . . . . . . . . . . . . . . . . . . . . . . . . . . . . . . . . . . . . 75
Verificación de los Códigos . . . . . . . . . . . . . . . . . . . . . . . . . . . . . . . . . . . . . . . . . . . . . . . . . . 76
Uso de la Función Aprendizaje. . . . . . . . . . . . . . . . . . . . . . . . . . . . . . . . . . . . . . . . . . . . . . . . 77
Precauciones sobre la Función Aprendizaje. . . . . . . . . . . . . . . . . . . . . . . . . . . . . . . . . . . . 77
Programación de una Tecla de Aprendizaje. . . . . . . . . . . . . . . . . . . . . . . . . . . . . . . . . . . . 78
Borrar Función de una Sola Tecla Aprendida. . . . . . . . . . . . . . . . . . . . . . . . . . . . . . . . . . . 79
Borrar Función de Todas las Teclas Aprendidas en un Modo Específico. . . . . . . . . . . . . . . 80
Cambio del Bloqueo del Volumen . . . . . . . . . . . . . . . . . . . . . . . . . . . . . . . . . . . . . . . . . . . . . 80
Bloqueo del Control de Volumen a Un Modo . . . . . . . . . . . . . . . . . . . . . . . . . . . . . . . . . . . 81
Desbloqueo del Control de Volumen para un Solo Dispositivo . . . . . . . . . . . . . . . . . . . . . . 81
Desbloqueo de Todo el Control de Volumen . . . . . . . . . . . . . . . . . . . . . . . . . . . . . . . . . . . . 82
Uso de los Macros . . . . . . . . . . . . . . . . . . . . . . . . . . . . . . . . . . . . . . . . . . . . . . . . . . . . . . . . . . 83
Programación de un Macro de Canal Favorito. . . . . . . . . . . . . . . . . . . . . . . . . . . . . . . . . . 83
Programación de un Macro Maestro de Encendido en el Modo Mi Sistema . . . . . . . . . . . . 84
Programación de la Tecla COM MUTE . . . . . . . . . . . . . . . . . . . . . . . . . . . . . . . . . . . . . . . . 85
Borrar Función de un Macro . . . . . . . . . . . . . . . . . . . . . . . . . . . . . . . . . . . . . . . . . . . . . . 86
Uso de la función Keymover. . . . . . . . . . . . . . . . . . . . . . . . . . . . . . . . . . . . . . . . . . . . . . . . . . 86
Programación de la Función Keymover . . . . . . . . . . . . . . . . . . . . . . . . . . . . . . . . . . . . . . . 86
Restauración de una Sola Tecla Mudada . . . . . . . . . . . . . . . . . . . . . . . . . . . . . . . . . . . . . 87
Restauración de Todas las Teclas Mudadas en un Solo Modo . . . . . . . . . . . . . . . . . . . . . . 88
Programación de una Exploración de Canales Favoritos. . . . . . . . . . . . . . . . . . . . . . . . . . 88
Uso de la Exploración de Canales. . . . . . . . . . . . . . . . . . . . . . . . . . . . . . . . . . . . . . . . . . . . . 90
Uso del Modo My System (Mi Sistema). . . . . . . . . . . . . . . . . . . . . . . . . . . . . . . . . . . . . . . . . 90
Organización de los Controles. . . . . . . . . . . . . . . . . . . . . . . . . . . . . . . . . . . . . . . . . . . . . . 90
Programación del Modo My System. . . . . . . . . . . . . . . . . . . . . . . . . . . . . . . . . . . . . . . . . . 91
Reasignación de las Teclas de Dispositivos . . . . . . . . . . . . . . . . . . . . . . . . . . . . . . . . . . . . 93
Uso del Salto de Comerciales . . . . . . . . . . . . . . . . . . . . . . . . . . . . . . . . . . . . . . . . . . . . . . . . 94
Uso de los Valores Fijados en Fábrica. . . . . . . . . . . . . . . . . . . . . . . . . . . . . . . . . . . . . . . . 94
Programación del Salto de Comerciales . . . . . . . . . . . . . . . . . . . . . . . . . . . . . . . . . . . . . . 94
Fijación del Interruptor de Inclinación . . . . . . . . . . . . . . . . . . . . . . . . . . . . . . . . . . . . . . . . . 96
Desactivación del Interruptor de Inclinación . . . . . . . . . . . . . . . . . . . . . . . . . . . . . . . . . . . 96
Activación del Interruptor de Inclinación. . . . . . . . . . . . . . . . . . . . . . . . . . . . . . . . . . . . . . 96
Fijación del Receptor Localizador . . . . . . . . . . . . . . . . . . . . . . . . . . . . . . . . . . . . . . . . . . . . . 97
Desactivación del Receptor Localizador . . . . . . . . . . . . . . . . . . . . . . . . . . . . . . . . . . . . . . 97
Activación del Receptor Localizador . . . . . . . . . . . . . . . . . . . . . . . . . . . . . . . . . . . . . . . . . 97
Restauración de los Valores Fijados en la Fábrica. . . . . . . . . . . . . . . . . . . . . . . . . . . . . . . 98
Remoción de Toda la Programación al Gusto . . . . . . . . . . . . . . . . . . . . . . . . . . . . . . . . . . . 99
Especificaciones . . . . . . . . . . . . . . . . . . . . . . . . . . . . . . . . . . . . . . . . . . . . . . . . . . . . . . . . . . . 99
Acerca de la Actualización . . . . . . . . . . . . . . . . . . . . . . . . . . . . . . . . . . . . . . . . . . . . . . . . . . 100
Procedimiento de Actualización. . . . . . . . . . . . . . . . . . . . . . . . . . . . . . . . . . . . . . . . . . . . . . 100
Exclusiones a las Actualizaciones . . . . . . . . . . . . . . . . . . . . . . . . . . . . . . . . . . . . . . . . . . . . 100
Localización de Fallas. . . . . . . . . . . . . . . . . . . . . . . . . . . . . . . . . . . . . . . . . . . . . . . . . . . . . . 101
Pantallas de Menúes de Dispositivos
. . . . . . . . . . . . . . . . . . . . . . . . . . . . . . . . . . . . . . . . . 103
Cuidado. . . . . . . . . . . . . . . . . . . . . . . . . . . . . . . . . . . . . . . . . . . . . . . . . . . . . . . . . . . . . . . . . . 115
Información Adicional. . . . . . . . . . . . . . . . . . . . . . . . . . . . . . . . . . . . . . . . . . . . . . . . . . . . . . 115
60 Índice De Materias
RS 8in1 Kameleon OM rev 10/9/03 4:12 PM Page 60
Page 61

MANUAL DE DUEÑO
Instrucción para el Usuario . . . . . . . . . . . . . . . . . . . . . . . . . . . . . . . . . . . . . . . . . . . . . . . . . 116
Garantía Limitada de 90 Días . . . . . . . . . . . . . . . . . . . . . . . . . . . . . . . . . . . . . . . . . . . . . . . 116
Códigos del Fabricante. . . . . . . . . . . . . . . . . . . . . . . . . . . . . . . . . . . . . . . . . . . . . . . . . . . . . 118
Códigos de Configuración para Amplificadores de Audio . . . . . . . . . . . . . . . . . . . . . . . . . . 118
Códigos de Configuración para Receptores de Audio . . . . . . . . . . . . . . . . . . . . . . . . . . . . . 118
Códigos de Configuración para Cajas/Convertidores de Cable . . . . . . . . . . . . . . . . . . . . . . 119
Códigos de Configuración para Reproductores de CDs . . . . . . . . . . . . . . . . . . . . . . . . . . . . 120
Códigos de Configuración para Reproductores DVD . . . . . . . . . . . . . . . . . . . . . . . . . . . . . . 121
Códigos de Configuración para Reproductores DVD, y Consolas de Videojuegos
PlayStation2 y Xbox. . . . . . . . . . . . . . . . . . . . . . . . . . . . . . . . . . . . . . . . . . . . . . . . . . . . . . . 123
Códigos de Configuración para Aparatos Combinados DVD/Videograbadora . . . . . . . . . . . . 123
Códigos de Configuración para Dispositivos Sistema de Teatro en Casa. . . . . . . . . . . . . . . 123
Códigos de Configuración para PVRs (Grabadores Personales/Digitales en Disco Duro) . . . 124
Códigos de Configuración para Receptores de Satélite . . . . . . . . . . . . . . . . . . . . . . . . . . . . 124
Códigos de Configuración para Televisores . . . . . . . . . . . . . . . . . . . . . . . . . . . . . . . . . . . . . 125
Códigos de Configuración para Aparatos Combinados TV/Reproductor DVD . . . . . . . . . . . . 129
Códigos de Configuración para Aparatos Combinados TV/Videograbadora . . . . . . . . . . . . . 129
Códigos de Configuración para Videograbadoras . . . . . . . . . . . . . . . . . . . . . . . . . . . . . . . . 130
Códigos de Configuración para Accesorios de Vídeo . . . . . . . . . . . . . . . . . . . . . . . . . . . . . . 132
INTRODUCCIÓN
El Control Remoto 8 en Uno de RadioShack, impulsado por Kameleon™,es un control
remoto universal revolucionario que usa la tecnología Kameleon de Universal
Electronics. Está diseñado para controlar hasta ocho dispositivos de entretenimiento
en el hogar,incluyendo el televisor,y los componentes de vídeo y de audio.
Después de instalar cuatro (4) baterías alcalinas nuevas de tamaño AAA (no vienen
incluidas),el control remoto se puede usar de inmediato para controlar un televisor,
una videograbadora (VCR),un reproductor DVD y un receptor de satélite de la
marca RCA,una caja/convertidor de cablevisión Motorola, un Tivo PVR (DVR),
y un reproductor de CDs y receptor de audio de la marca Pioneer.Para controlar
otras marcas,sírvase llevar a cabo las instrucciones de la Programación de un
Dispositivo (Aparato) en la página 72.
CÓMO FUNCIONA KAMELEON™
El Control Remoto 8 en Uno de RadioShack, impulsado por Kameleon, proporciona
la versatilidad de un control remoto con LCD (pantalla de cristal líquido) con la
sensación de una unidad tradicional en la que se oprimen botones. Para el usuario,
el resultado es una magnífica pantalla brillante con una animación cautivadora y
gráficas sensibles al tacto.
El control remoto incluye una cómoda programación Accionada por Menúes.Las
visualizaciones están divididas en dos tipos de pantallas interactivas:Menúes de
Dispositivos para el uso normal a control remoto,y Menúes de Programación para
configurar las funciones.Actuando como lo indica su nombre,el Kameleon cambia
el Menú de Dispositivo según el dispositivo que se selecciona.Por ejemplo,al seleccionar TV aparece un menú principal que contiene la selección de canales,control
de volumen,y un teclado.Sin embargo, si se selecciona un reproductor de DVD
sigue apareciendo un menú con las mismas teclas que TV, pero ahora se añaden las
teclas de navegación y los controles de transporte para el DVD.
continúa en la siguiente página…
Índice De Materias/Introducción/Cómo Funciona Kameleon 61
RS 8in1 Kameleon OM rev 10/9/03 4:12 PM Page 61
Page 62

8-IN-ONET
ELECONTROLACCIONADO PORKAMELEON
CÓMO FUNCIONA KAMELEON™ (Continuación)
Varios dispositivos tienen un segundo menú que se puede acceder usando la tecla
SCREEN (pantalla) (vea Pantallas de Menúes de Dispositivos,comenzando en la página
103). Por ejemplo, TV tiene dos menúes: un menú principal con teclas de atributos
adicionales para las funciones COM MUTE,+100,ENTER,SLEEP,TV/VCR,y PIP,y una
segunda pantalla de menú que añade teclas de navegación pero que quita las teclas de
atributos adicionales.De esta manera, un usuario tiene la flexibilidad de usar
cualquier pantalla de menú que funcione mejor para el dispositivo seleccionado.
NOTA: A pesar de que SCREEN se muestra en todos los modos,sólo los modos TV,CD,y AUD
tiene una segunda pantalla de menú.
Las gráficas de teclas animadas también proporcionan una retroalimentación
realzada de la operación,de manera que el usuario pueda ver fácilmente cuál es el
modo activo y el momento en que los mandos se están comunicando con un dispositivo.El resultado final de la tecnología Kameleon es una manera sencilla,
elegante,e inteligente de organizar un número grande de teclas de control remoto
para ocho dispositivos diferentes.
INSTALACIÓN DE LAS BATERÍAS
USO Y SEGURIDAD DE LAS BATERÍAS
• Utilice únicamente baterías frescas del tamaño requerido y del tipo
recomendado.
• No mezcle baterías viejas y nuevas,diferentes tipos de baterías (v.g., estándar,
alcalinas, o recargables),ni baterías recargables de diferentes capacidades.
• Si no va a usar el control remoto durante un largo tiempo, quítele las baterías.
Éstas pueden derramar substancias químicas que pueden destruir los componentes electrónicos.
ADVERTENCIA: Deseche las baterías viejas rápida y adecuadamente.No las queme
ni las entierre.
ACERCA DE LA VIDA DE LAS BATERÍAS
Al igual que con todos los dispositivos que funcionan con baterías (pilas),la vida
de las baterías varía de acuerdo con el uso,incluyendo la frecuencia y la duración
con que se oprimen las teclas en la pantalla Kameleon.La vida de las baterías se
puede extender mediante:
• Reducción del nivel de brillo de la pantalla (vea Ajuste del Brillo la Pantalla en la
página 71).
• Desactivación de la función “inclinación encendida” en el Kameleon (vea
Fijación del Interruptor de Inclinación en la página 96).
• Desactivación de la función de Localizador del Kameleon (vea Fijación del
Receptor Localizador en la página 97).
INSTALACIÓN DE LAS BATERÍAS EN EL CONTROL REMOTO
Su control remoto necesita cuatro baterías AAA (no vienen incluidas) para funcionar.
62 Cómo Funciona Kameleon/Instalación de las Baterías
RS 8in1 Kameleon OM rev 10/9/03 4:12 PM Page 62
Page 63

MANUAL DE DUEÑO
1. Empuje adelante en la cubierta del compartimento de baterías hacia abajo (en el
respaldo del control remoto) y levántela.
2. Deslice las baterías AAA en el compartimento como se indica por los símbolos de
polaridad (+ y –) que se muestran arriba.
3. Alinee la tapa con la abertura del compartimento y deslícela de nuevo en su lugar.
4. Si las baterías se insertan correctamente, la pantalla se encenderá y mostrará
todas las teclas.Si no se oprime ninguna tecla después de 7 segundos, se apaga la
pantalla.
NOTA: Hay que cambiar las baterías si alguna de las siguientes condiciones se presenta:
1. El segmento infrarrojo superior parpadea cinco veces después de que se presione una
tecla.
2. El Interruptor de Inclinación (si está activado,vea la página 96) ya no activa el control
remoto y éste solamente se enciende si se presiona una de la teclas en la pantalla.
ACERCA DEL TRANSMISOR LOCALIZADOR
NOTA: Si no tiene planeado utilizar el Transmisor Localizador,guárdelo para un uso
futuro y sáltese esta sección.
Incluido en el paquete está un Transmisor Localizador que puede usarse para
localizar en forma audible un Control Remoto 8 en Uno de RadioShack que se le
haya perdido. La unidad también viene con una cinta de “gancho y aro” por ambos
lados que se usa para montarla en el costado de un gabinete de televisor o en otra
superficie.
El Transmisor Localizador utiliza una batería de 9 voltios para funcionar.Para
obtener el mejor funcionamiento y mayor duración,le recomendamos que use las
baterías alcalinas RadioShack.
continúa en la siguiente página…
Instalación de las Baterías 63
❶
❸
❷
RS 8in1 Kameleon OM rev 10/9/03 4:12 PM Page 63
Page 64

8-IN-ONET
ELECONTROLACCIONADO PORKAMELEON
INSTALACIÓN DE LAS BATERÍAS
ACERCA DEL TRANSMISOR LOCALIZADOR (CONTINUACIÓN)
INSTALACIÓNDELABATERÍAENELTRANSMISOR LOCALIZADOR
1. Presione la tapa del compartimento de la batería hacia abajo (está en el frente del
Transmisor Localizador) y deslícela para sacarla.
2. Encuentre el arnés de presión y conecte la batería de 9 voltios a los terminales
correspondientes. Después inserte la batería y el arnés en el compartimento.
3. Alinee la tapa con la abertura del compartimento y deslícela de nuevo en su lugar.
CÓMO FUNCIONA EL TRANSMISOR LOCALIZADOR
1. Apunte el transmisor localizadoren la dirección general que piense que este el
control remoto 8 en Uno de RadioShack.
2. Presione y mantenga presionado el boton de el transmisor hasta que el control
remoto 8 en Uno de RadioShack,comeinze a emitir un sonido de chirrido.
El sonido le ayudara a encontrar el control perdido.
NOTA: Si el Control Remoto 8 en Uno de RadioShack no emite un sonido de chirrido,
verifique que el Transmisor Localizador esté activado (vea la página 96) y que la batería
esté fresca.
UNA MIRADA RÁPIDA A LOS CONTROLES
Utilice la ilustración en la siguiente página para localizar los controles y estudiar las
Funciones de las Teclas y así aprender cómo funcionan.
NOTA: La ilustración muestra todas las teclas del control remoto.En la operación real, sólo
se muestran las teclas activas que usa el dispositivo seleccionado, y las teclas no activadas
permanecen ocultas. Estos controles funcionan igual a los que se hallan en sus controles
remotos originales.
Para saber qué tipo de dispositivo se puede controlar por cada tecla de dispositivo
después de la programación,vea la Tabla de Dispositivos en la página 70.
64 Instalación de las Baterías/Una Mirada Rápida a los Controles
❶
❸
❷
RS 8in1 Kameleon OM rev 10/9/03 4:12 PM Page 64
Page 65

MANUAL DE DUEÑO
Para saber cuáles son las teclas que aparecen cuando se activa el modo de programa
o cuando se selecciona un dispositivo,vea la sección Pantallas de Menúes de
Dispositivos comenzando en la página 103.Se incluyen descripciones breves de
cómo funcionan las teclas en cada pantalla presentada.
continúa en la siguiente página…
Una Mirada Rápida a los Controles 65
RS 8in1 Kameleon OM rev 10/9/03 4:12 PM Page 65
Page 66

8-IN-ONET
ELECONTROLACCIONADO PORKAMELEON
UNA MIRADA RÁPIDA A LOS CONTROLES (Cont’n)
FUNCIONES DE LAS TECLAS
Cuando se presiona una tecla,los segmentos infrarrojos
se animarán. La animación de salida (vea la flecha)
indica que el control remoto está enviando señales
infrarrojas a un dispositivo seleccionado.
La animación de entrada indica que el control remoto
está recibiendo señales infrarrojas del dispositivo que
está aprendiendo (vea Uso de la Función Aprendizaje en
la página 77).
Durante la programación,el segmento infrarrojo
inferior parpadea para confirmar las acciones de la
configuración.
Presion e CBL, SAT,TV, DVD,AUD,VCR,AUX, o CD una vez
para seleccionar el dispositivo que se va a controlar. La
tecla del dispositivo seleccionado se animará para
indicar que está activo en este momento.También vea
la Tabla de Dispositivos en la página 70.
Después de la programación,presione MY SYSTEM una
vez para seleccionar los controles de su sistema a la
medida. Consulte Uso del Modo My System
(Mi Sistema) en la página 90.
Use la P para activar la pantalla de programación.
En el modo CBL o SAT, use PAGE+ o PAGE- para
avanzar o para retroceder a través de los canales en la
guía de programas.
Presion e PWR una vez para encender apagar un dispositivo seleccionado.
Use las teclas de navegación de la siguiente manera:
Use MENU para mostrar el menú principal de su disposi-
tivo.En el modo TV,CD, o AUD,aparecerá la pantalla del
menú principal del dispositivo seleccionado.
Use GUIDE (guía) para mostrar la guía de programas de
su dispositivo, o el menú de configuración o de programación. En el modo TV,CD, o AUD,aparecerá la pantalla
del menú principal del dispositivo seleccionado.
Use INFO (información) para mostrar la información
actual del canal y del programa.
Use EXIT (salida) para salirse de la guía o del menú de
su dispositivo.
Use las tecl as de curs or (
▲ ,▼, , o ) para navegar
a través de la guía de programas y de las pantallas de
menúes.
▲
▲
66 Una Mirada Rápida a los Controles
RS 8in1 Kameleon OM rev 10/9/03 4:12 PM Page 66
Page 67

MANUAL DE DUEÑO
En el modo CD, use ▲ (o ▼) para seleccionar el disco
siguiente (o anterior).
En el modo AUD, use
▲ (o ▼) para subir (o bajar)
el volumen del canal trasero y use (o ) para
balancear el audio izquierdo (o derecho).
Use OK para escoger las opciones en el menú o en la
guía de su dispositivo.
Presion e LAST (último) una vez para recobrar el último
canal visto.
En el modo CD o AUD, use LAST para repetir la última
pista.
En el modo TV, CD, o AUD, use SCREEN (pantalla)
para ver las pantallas de teclas adicionales para el
dispositivo seleccionado.
En todos los modos, excepto CD, DVD,y AUD,use FAV
SCAN (exploración de canales favoritos) para explorar
todos los canales, o después de programarlos,
para explorar los 10 canales favoritos.
Use VOL
▲ (or VOL▼) para subir (o bajar) el volumen
en el dispositivo seleccionado (también vea Cambio del
Bloqueo del Volumen en la página 80).
Presion e MUTE (enmudecer) una vez para apagar o
encender el sonido.
En todos los modos excepto en CD y DVD, use CH
▲ (o
CH
▼ ) para seleccionar el siguiente canal con número
más alto (o más bajo).
En el modo CD o DVD, use SKIP
▲ (o SKIP ▼) para
seleccionar el capítulo siguiente (o anterior).
Después de la programación,en los modos CBL,SAT,
TV, VCR,o AUX use COM MUTE para bajar el volumen al
nivel prefijado en la fábrica y para subirlo de nuevo a su
nivel original.Vea Uso de los Macros en la página 83.
Durante la programación,aparecerá la tecla de base
(una casa). Úsela para salirse de la pantalla de programación o para volver a la pantalla de la tecla de
dispositivo anterior.
En los modos CBL, SAT, VCR,o AUX,use COM SKIP para
saltarse los comerciales en los dispositivos que tengan
capacidades de PVR (grabadora personal /digital en
disco duro).Vea Uso del Salto de Comerciales en la
página 94.
continúa en la siguiente página…
o
▲
▲
Una Mirada Rápida a los Controles 67
RS 8in1 Kameleon OM rev 10/9/03 4:12 PM Page 67
Page 68

8-IN-ONET
ELECONTROLACCIONADO PORKAMELEON
UNA MIRADA RÁPIDA A LOS CONTROLES
FUNCIONES DE LAS TECLAS (CONTINUACIÓN)
En todos los modos, excepto AUD, use las teclas
numéricas (1 ~ 9 y 0) para seleccionar directamente
los canales (v.g., 009ó 031) o teclee los números.
En el modo AUD, aparecerá INPUT (entrada). Use las
teclas numéricas para seleccionar directamente las
entradas 1 ~ 9 y 10.
Para ciertas marcas,en todos los modos excepto en CD,
presione ENTER (selecccionar) una vez después de
introducir los números (si así se requería en el control
remoto original).
En el modo TV, use +100 para introducir números
superiores al 100 (si así se requería en el control remoto
original). En los modos CD o DVD, use +100 para
acceder a las pistas superiores a 10 (si así se requería en
el control remoto original). En el modo AUD,use +100
para cambiar la banda (estación) de radio.
En el modo programa, use las teclas de programa para
personalizar el control remoto de la siguiente manera:
Use DEV SET (configuración de dispositivo) para programar los códigos de su dispositivo.Vea Programación
de un Dispositivo (Aparato) en la página 72.
Use SEARCH (búsqueda) como una forma alternativa
para configurar un dispositivo mediante los códigos
disponibles de búsqueda.Vea Búsqueda de su Código en
la página 75.
Use MACRO para programar una serie de mandos en las
cinco teclas de macro disponibles.Vea Uso de los
Macros en la página 83.
Use VOL para fijar los controles del volumen para
uso individual o global de los dispositivos.Vea Cambio
del Bloqueo del Volumen en la página 80.
Use MY SYSTEM para crear un modo a la medida con
las teclas de control remoto favoritas de diferentes
dispositivos en su sistema de teatro en casa.Vea Uso
del Modo My System (Mi Sistema) en la página 90.
Use para ajustar el nivel de brillo de la pantalla EL
(electroluminiscente).Vea Ajuste del Brillo la Pantalla
en la página 71.
Use IR LEARN (aprender infrarrojo) e IR DELETE
(borrar infrarrojo) para añadir y para borrar las funciones de las teclas que se aprendieron de los controles
remotos de sus dispositivos originales.Vea Uso de la
función Aprendizaje en la página 77.
68 Una Mirada Rápida a los Controles
NOTA: Presione sobre el
título para activar un
programa deseado. Para
OTHER (otro), presione
debajo del título.
RS 8in1 Kameleon OM rev 10/9/03 4:12 PM Page 68
Page 69

MANUAL DE DUEÑO
Use MODE (modo) para reasignar una tecla de
dispositivo no usada para controlar un segundo
dispositivo. Vea Reasignación de las Teclas de
Dispositivos en la página 93.
Use OTHER (otra) para programar otras funciones.
Ve a e l Índice de Materias en la página 60 para ver las
secciones sobre Verificación de los Códigos,
Programación de una Exploración de Canales Favoritos,
Uso de la Función Keymover,Programación del Salto de
Comerciales,Actualización, Restauración de los Valores
Fijados en Fábrica,o Remoción de la Programación.
En los modos CBL, SAT, VCRo AUX, use SLEEP (dormir)
para activar el cronómetro de dormido de su
dispositivo (si éste tiene uno disponible).
En los modos CBL o SAT, use A/B para que funcione
como el interruptor A/B de su caja de cablevisión o de
su receptor de satélite.
En los modos TV, VCR,o DVD, use TV/VCR para conmu-
tar la entrada del televisor con el fin de ver programas
de TV o de Vídeo.
En el modo AUD, use TV/VCR para conmutar entre los
programas de TV y lo que entra por la videograbadora.
En el modo AUD, use S.SND para encender o para
apagar el sonido circundante (envolvente).Vea también
las teclas de cursor en la página ?.
En los modos CD, DVD,AUD, VCR,o AUX,use las teclas
de transporte, (es decir, REW, PLAY, FWD, PAUSE,y
STOP) para controlar el transporte de la cinta o disco en
el dispositivo. Presione REC dos veces para grabar un
programa en su dispositivo (si la función está
disponible).
En los modos CBL o SAT,use las teclas de transporte
para controlar el VOD (Vídeo a Petición) o el PVR
(Grabadora Personal en Disco Duro),si están
disponibles en su servicio por cable/satélite.
En los modos CBL, SAT, VCR,o AUX
, use la tecla de
reproducir para que instantáneamente se reproduzcan
los últimos 7 segundos de un programa que usted está
viendo (si está función está disponible).
En los modos CBL, SAT,o AUX, use la tecla de avanzar
para saltarse los comerciales pasados u otras escenas
no interesantes (si esta función está disponible).
En los modos DVD o CD, use la tecla de avanzar para
cambiar discos.
En los modos CBL, SAT, VCR,o AUX,use LIVE TV (TV en
vivo) para conmutar entre los programas de TV
en vivo y de vídeo (si la función está disponible).
continúa en la siguiente página…
▲
Una Mirada Rápida a los Controles 69
NOTA: Presione sobre el
título para activar un
programa deseado. Para
OTHER (otro), presione
debajo del título.
RS 8in1 Kameleon OM rev 10/9/03 4:12 PM Page 69
Page 70

8-IN-ONET
ELECONTROLACCIONADO PORKAMELEON
UNA MIRADA RÁPIDA A LOS CONTROLES
FUNCIONES DE LAS TECLAS (CONTINUACIÓN)
En los modos CBL, SAT, VCR,DVD,o AUX, use la tecla de
lentitud para ver el vídeo en cámara lenta (si la
función está disponible).
Use PIP para encender o apagar la función Imagen En
Imagen (Picture in Picture).
Use MOVE para mover la ventanilla a lugares distintos
en la pantalla principal.
Presion e FRZ una vez para capturar un cuadro de vídeo
en la imagen principal.Presiónelo de nuevo para
reanudar la imagen normal.
Use SWAP(permutación) para pasar las imágenes y
sonidos entre la imagen principal y la de la ventanilla.
Después de la programación,presione M1 ~ M4
una vez para activar un macro (vea Uso de los Macros
en la página 83).
TABLA DE DISPOSITIVOS
NOTA: Por favor consulte la tabla de abajo al seguir las instrucciones de “Programación de
un Dispositivo (Aparato)”en la página 72).
Después de la programación,el Control Remoto 8 en Uno de RadioShack podrá
controlar los siguientes tipos de dispositivos:
70 Una Mirada Rápida a los Controles
TECLA DE DISPOSITIVO CONTROLA ESTOS DISPOSITIVOS
Caja (Convertidor) de Cablevisión o Accesorio
de Vídeo
Receptor de Satélite o Combinación Satélite/PVR
Televisión
Reproductor DVD, Combinación TV/Repr. DVD,
Combinación DVD/VCR
Amplificador de Sonido, Receptor de Audio, o
Dispositivo Sistema de Teatro en Casa (HTiB)
VCR,Combinación TV/VCR, o PVR (DVR)
PVR (DVR),VCR, o Combinación TV/VCR
Reproductor de CDs o Grabadora de CDs
RS 8in1 Kameleon OM rev 10/9/03 4:12 PM Page 70
Page 71

MANUAL DE DUEÑO
AJUSTE DEL BRILLO LA PANTALLA
El Control Remoto 8 en Uno de RadioShack tiene cinco niveles de ajuste de brillo;
en la fábrica se le pone en el cuarto nivel de brillo (el primero siendo el mas bajo).
Para incrementar o disminuir el brillo,siga estos pasos:
1. Presione y mantenga presionada la P hasta que el segmento infrarrojo inferior
parpadee dos veces.Aparecerán las teclas de programación:
NOTA: Si la pantalla se apaga por inactividad, tendrá que volver a comenzar la
secuencia de programación repitiendo este paso nuevamente.
2. Presione arriba de el titulo una vez.Aparecerá la pantalla de Programación
del Brillo:
• Para aumentar el brillo, presione
▲ una vez o más.
• Para disminuir el brillo, presione
▼ una vez o más.
3. Cuando obtenga el brillo deseado,presione dos veces para salirse de la programación y volver a la última pantalla de menúes del dispositivo seleccionado.
NOTA: El control remoto incluye un interruptor de inclinación que enciende la pantalla
cuando se mueve la unidad. Si gusta,puede desactivar esta función.Vea “Fijación del
Interruptor de Inclinación” en la página 96.
Ajuste del Brillo la Pantalla 71
RS 8in1 Kameleon OM rev 10/9/03 4:12 PM Page 71
Page 72

8-IN-ONET
ELECONTROLACCIONADO PORKAMELEON
PROGRAMACIÓN DE UN DISPOSITIVO (APARATO)
El Control Remoto 8 en Uno de RadioShack está programado en la fábrica para que
opere los siguientes dispositivos:
• Caja de cablevisión Motorola
• TV, VCR, reproductor DVD, receptor de Satélite, reproductor CD,y receptor de
audio marca RCA
• ReplayTV PVR (DVR) usando la tecla AUX
Para controlar dispositivos diferentes a las marcas fijadas en la fábrica,lleve a cabo
los siguientes pasos; de otra forma puede saltarse esta sección:
NOTA: Para controlar un aparato combinado DVD/ Videograbadora (VCR),lleve a cabo
las instrucciones en “Programación de un Aparato Combinado DVD/Videograbadora
(VCR)”en la página 74.
1. Encienda el dispositivo deseado (v.g., la videograbadora o el reproductor de
DVDs) y, si fuese necesario, póngale el medio que usa (v.g., casete o disco).
NOTA: Antes de proceder, por favor lea los pasos 2 al 9 completamente.Antes de comenzar
con el paso 2, revise los “Códigos del Fabricante” (comenzando en la página 118). Las marcas aparecen en la lista en orden alfabético y con los códigos más populares primero.Realce
o anote los nombres de los dispositivos y los números de los códigos que desea programar.
2. Presione y mantenga presionada la P hasta que el segmento infrarrojo inferior
parpadee dos veces.Aparecerán las teclas de programación:
NOTA: Si la pantalla se apaga por inactividad, el control remoto se saldrá de la programación y volverá a la pantalla de menúes del último dispositivo seleccionado. Para
comenzar la secuencia de programación de nuevo,repita este paso. Para suspender la
programación en cualquier momento,presione una vez para volver a la pantalla de
las teclas de programación.Presione una vez más para salir completamente.
3. Presione arriba de el titulo DEV SET una vez.Aparecerá la pantalla de programación para la Configuración de Dispositivos:
72 Programación de un Dispositivo (Aparato)
RS 8in1 Kameleon OM rev 10/9/03 4:12 PM Page 72
Page 73

MANUAL DE DUEÑO
4. Presione una tecla de dispositivo una vez (es decir, CBL,SAT, TV,DVD,AUD,VCR,
AUX o CD). La tecla del dispositivo seleccionado se animará.
NOTA: Vea la “Tabla de Dispositivos”en la página 70 al seleccionar una tecla de dispositivo para prog ramarla.
5. Use los Códigos del Fabricante (comenzando en la página 118) para localizar el
tipo de dispositivo y la marca y entonces use las teclas numéricas para introducir
el primer código de cuatro dígitos para su dispositivo. Si se realiza correctamente,
el segmento infrarrojo inferior parpadeará dos veces.
NOTA: Si el segmento infrarrojo inferior muestra un parpadeo largo en lugar de lo
anterior, es que ha ocurrido un error.Vuelva a introducir el mismo código una vez más.
6. Apunte el control remoto al dispositivo y presione la tecla PWRuna vez.El dispositivo deberá apagarse.Si no lo hace, repita los pasos 5 y 6,probando cada uno de
los códigos de su marca hasta que encuentre uno que funcione.Si aún así no
funciona, pruebe con la sección Búsqueda de su Código en la página 75.
7. Si el código funciona,presione la tecla OKuna vez.El segmento infrarrojo inferior
parpadea dos veces.
8. Si lo desea,repita los pasos 4 al 7 para cada dispositivo que desee controlar.
Cuando termine,presione dos veces para salirse de la programación y volver
a la pantalla del menú del último dispositivo seleccionado.
9. Para referencia futura,anote cada uno de los códigos de los dispositivos que
funcionan en los cuadrados de abajo:
Código CBL:
Marca:______________________________________________
Código SAT:
Marca:______________________________________________
Código TV:
Marca:______________________________________________
Código DVD:
Marca:______________________________________________
Código AUD:
Marca:______________________________________________
Código VCR:
Marca:______________________________________________
Código AUX:
Marca:______________________________________________
Código CD:
Marca:______________________________________________
Programación de un Dispositivo (Aparato) 73
RS 8in1 Kameleon OM rev 10/9/03 4:12 PM Page 73
Page 74

8-IN-ONET
ELECONTROLACCIONADO PORKAMELEON
PROGRAMACIÓN DE UN APARATO
COMBINADO DVD/VIDEOGRABADORA
NOTA: Si es dueño de un aparato combinado TV/Reproductor DVD marca Sylvania con un
código de TV separado (vea la página 129), use los pasos de abajo para programarlo con
estos cambios: en el paso 5, introduzca 0675 como el código DVD; en el paso 8a,use VCR en
lugar de TV; y en el paso 8b introduzca 0171 como el código de TV.
1. Encienda el aparato combinado DVD/Videograbadora e inserte un DVD.
NOTA: Antes de proceder, por favor lea los pasos 2 al 8 completamente.Revise los
“Códigos de Configuración para Aparatos Combinados DVD/Videograbadora”
(en la página 123). Realce o anote los nombres de los dispositivos y los números de los
códigos que desea programar.
2. Presione y mantenga presionada la P hasta que el segmento infrarrojo inferior
parpadee dos veces.Aparecerán las teclas de programación:
3. Presione arriba de el titulo DEV SET una vez.Aparecerá la pantalla de programación para la Configuración de Dispositivos:
4. Presione DVD una vez. La tecla se animará.
5. Use los Códigos de Configuración para Aparatos Combinados DVD/Videograbadora
(en la página 123) para localizar la marca y use las teclas numéricas para introducir el código de cuatro dígitos de su dispositivo.Si se realiza correctamente,el
segmento infrarrojo inferior parpadeará dos veces.
NOTA: Si el segmento infrarrojo inferior muestra un parpadeo largo en lugar de lo anterior,es que ha ocurrido un error. Vuelva a introducir el mismo código una vez más.
6. Apunte el control remoto al dispositivo y presione la tecla PWRuna vez.El dispositivo deberá apagarse. Presione OK una vez para guardar el código.El segmento
infrarrojo inferior parpadeará dos veces.
7. (Opcional) Si ya localizó un código de configuración que funciona,pero también
tiene un código VCR por separado en la lista en la página 123, tendrá que programárselo al control remoto para tener acceso a los controles de la VCR, como sigue:
74
Programación de un Aparato Combinado DVD-VCR
RS 8in1 Kameleon OM rev 10/9/03 4:12 PM Page 74
Page 75

MANUAL DE DUEÑO
a. Presione VCR una vez.
b. Utilizando las teclas numéricas, introduzca el código VCR de cuatro dígitos
para su aparato combinado DVD/Videograbadora (VCR).Si se realiza correctamente,el segmento infrarrojo inferior parpadeará dos veces.
c. Presione la tecla OK una vez.El segmento infrarrojo inferior muestra un
parpadeo largo.
NOTA: Si un código de configuración de VCR no está en la lista, usted puede usar la tecla
VCR para programar una VCR por separado u otro dispositivo (vea “Reasignación de las
Teclas de Dispositivos”en la página 93).
8. Para salirse de la programación, presione dos veces. La imagen volverá a la
pantalla del menú del último dispositivo seleccionado.Para referencia futura,
escriba el código que funcionó en los siguientes espacios:
Código de DVD/VCR:
Marca:______________________________________________
Código VCR (si se usó):
Marca:______________________________________________
BÚSQUEDA DE SU CÓDIGO
Si su dispositivo no le responde al Control Remoto 8 en Uno de RadioShack
después de haber probado todos los códigos listados para su marca,o si su marca
no está listada en lo absoluto, trate de buscar su código.
NOTA: Antes de llevar a cabo la búsqueda de un código para un reproductor de CD o DVD,
o de una VCR, encienda el dispositivo e inserte el medio de grabación requerido.
Por ejemplo, para buscar un código para su televisor:
1. Presione y mantenga presionada la P hasta que el segmento infrarrojo inferior
parpadee dos veces.Aparecerán las teclas de programación:
2. Presione arriba de el titulo SEARCH (búsqueda) una vez.Aparecerá la pantalla de
programación de los Códigos de Búsqueda:
continúa en la siguiente página…
Programación de un Aparato Combinado DVD-VCR/Búsqueda de su Código
75
RS 8in1 Kameleon OM rev 10/9/03 4:12 PM Page 75
Page 76

8-IN-ONET
ELECONTROLACCIONADO PORKAMELEON
BÚSQUEDA DE SU CÓDIGO (Continuación)
3. Presione una tecla de dispositivo una vez (v.g., TV). La tecla del dispositivo selec-
cionado se animará.La pantalla del Menú Principal del dispositivo aparecerá
mostrando todavía.
4. Presione la tecla PWR una vez para seleccionarla como la función de prueba en la
búsqueda.Aparecerá de nuevo la pantalla de Programación de la Búsqueda.
NOTA:Con la tecla PWR como la función de prueba en la búsqueda, se enviará al disposi-
tivo un mando infrarrojo de “Encenderse”cada vez que se le envíe un código de prueba.
Como confirmación,los segmentos infrarrojos mostrarán una animación de salida.
NOTA: Si su dispositivo o el control remoto original de ese dispositivo no tiene una tecla
de encendido (Power), escoja una función de prueba diferente en este paso (v.g.,CH+,
VOL+, PLAY, etc.).
5. Apunte el control remoto al dispositivo (v.g., el TV) y presione ▲ una vez o más y
deténgase cuando uno de los códigos que funcionó lleva a cabo la función de
prueba seleccionada en el paso 4.Si desea,use
▼ para probar un código previo.
NOTA: En el modo de búsqueda, el control remoto enviará códigos infrarrojos desde su
base de datos hacia el dispositivo seleccionado, comenzando con el código más popular
primero.
6. Para seleccionar el código, presione OK una vez. El segmento infrarrojo inferior
parpadea dos veces.
7. Para buscar los códigos de sus otros dispositivos,repita los pasos 3 a 6, pero use
la tecla apropiada del dispositivo así como la tecla de la función de prueba para el
dispositivo que va a buscar.
8. Para salirse de la programación, presione dos veces. La imagen volverá a la
pantalla del menú del último dispositivo seleccionado.
VERIFICACIÓN DE LOS CÓDIGOS
Si configuró el Control Remoto 8 en Uno de RadioShack usando el procedimiento
de Búsqueda de su Código (en la página 75), tal vez tenga que averiguar cuál es el
código de cuatro dígitos que está operando su equipo. Por ejemplo, para descubrir
cuál código está operando su televisor:
1. Presione y mantenga presionada la P hasta que el segmento infrarrojo inferior
parpadee dos veces.Aparecerán las teclas de programación:
2. Presione debajo de el titulo OTHER (otra) una vez.Aparecerá la pantalla de
programación Other:
76 Búsqueda de su Código/Verificación de los Códigos
RS 8in1 Kameleon OM rev 10/9/03 4:12 PM Page 76
Page 77

MANUAL DE DUEÑO
3. Usando las teclas numéricas, introduzca 9 9 0.El segmento infrarrojo inferior
parpadeará dos veces y se cambia a la pantalla de Verificación de Códigos.
4. Presione la tecla del dispositivo deseado una vez (es decir,CBL, SAT, TV, DVD,AUD,
VCR, AUX,o CD).La tecla del dispositivo seleccionado se animará.
5. Para ver el código del primer dígito,presione el 1 una vez.Cuente el número de
veces que el segmento infrarrojo inferior parpadea (v.g., tres parpadeos = 3) y
anote el número en el cuadrado en la extrema izquierda de los espacios para el
código de TV en la página 73.
NOTA: Si uno de los dígitos del código es el “0”, el segmento infrarrojo inferior
no parpadeará.
6. Repita el paso 5 por tres veces más para los dígitos que faltan. Use el 2 para el
segundo dígito, 3para el tercero,y 4 para el cuarto.Anote los dígitos del código
en los espacios que quedan para el código de TV en la página 73.
NOTA: Si introdujo un número inválido (v.g., 7) o una tecla inválida (v.g., PLAY), el
segmento infrarrojo inferior mostrará un parpadeo largo y volverá a la pantalla de
programación “Other”. Vuelva a comenzar con el paso 2 de arriba.
7. Para verificar los códigos de otros dispositivos,repita los pasos 4 a 6, pero sustituya la tecla del dispositivo apropiado por la del dispositivo que esté verificando.
Anote los dígitos del código del dispositivo en los espacios apropiados para el
código en la página 73.
8. Para salirse de la programación, presione dos veces. La imagen volverá a la
pantalla del menú del último dispositivo seleccionado.
USO DE LA FUNCIÓN APRENDIZAJE
El Control Remoto 8 en Uno de RadioShack incluye una función de Aprendizaje
para que usted pueda añadir funciones que son únicas a los dispositivos de su
entretenimiento en el hogar (v.g., exploración hacia adelante o hacia atrás de su
VCR).Sin embargo, hay algunas consideraciones:
PRECAUCIONES SOBRE LA FUNCIÓN APRENDIZAJE
• Sus controles remotos originales tienen que estar trabajando bien para que la
función de aprendizaje funcione adecuadamente.
• Las teclas aprendidas son específicas al modo,de manera que cada una puede
guardar una función única para cada modo.
continúa en la siguiente página…
Verificación de los Códigos/Uso de la Función Aprendizaje 77
RS 8in1 Kameleon OM rev 10/9/03 4:12 PM Page 77
Page 78

8-IN-ONET
ELECONTROLACCIONADO PORKAMELEON
USO DE LA FUNCIÓN APRENDIZAJE
PRECAUCIONES SOBRE LA FUNCIÓN APRENDIZAJE (CONTINUACIÓN)
• Las teclas aprendidas se pueden usar en macros (vea Uso de los Macros en la
página 83).
• No use las siguientes teclas para el aprendizaje: P, SCREEN, M1 ~ M4, FAV SCAN,
COM SKIP, COM MUTE,ni ninguna tecla de dispositivo.
• La capacidad de aprendizaje es aproximadamente de 16 a 25 teclas, dependiendo del código que se esté aprendiendo.
• Si ambas funciones, de aprendizaje y de mudanza,se asignan a la misma tecla,
sólo se guardará la última función programada.
• Una función aprendida no se puede usar como origen para la función
Keymover (mudanza) (vea Uso de la función Keymover en la página 86).
• Algunos códigos de dispositivos no se pueden aprender, incluyendo los tipos
de multifrecuencias,algunos de alta frecuencia,y otros formatos inusuales.
• Para un aprendizaje óptimo,evite niveles altos de luz ambiental como la luz del
sol o las luces fluorescentes de consumo eficiente de energía.
NOTA: Por favor, tenga a la mano sus controles remotos originales antes de programar el
aprendizaje.Asegurese de presionar cada tecla antes de que pasen 5 segundos después de la
introducción anterior. Si no, el Control Remoto 8 en Uno de RadioShack se saldrá del modo
de programación.
PROGRAMACIÓNDEUNATECLA DE APRENDIZAJE
1. Presione y mantenga presionada la P hasta que el segmento infrarrojo inferior
parpadee dos veces.Aparecerán las teclas de programación:
2. Presione arriba de el titulo IR LEARN (aprendizaje infrarrojo) una vez.Aparecerá
la pantalla de programación IR Learn:
3. Presione una tecla de dispositivo una vez (es decir, CBL,SAT, TV,DVD, AUD,VCR,
AUX,o CD) para asignar un modo para el aprendizaje.Aparecerá la pantalla del
menú del dispositivo seleccionado,incluyendo .
4. Coloque el Control Remoto 8 en Uno de RadioShack cabeza contra cabeza (a unos
5 centímetros de distancia,como se muestra en la siguiente página) de su control
remoto original.También ubique la tecla (en su control remoto original) que
servirá como la función a enseñar.
78 Uso de la Función Aprendizaje
RS 8in1 Kameleon OM rev 10/9/03 4:12 PM Page 78
Page 79

MANUAL DE DUEÑO
5. En el Control Remoto 8 en Uno de RadioShack,seleccione y presione la tecla
deseada donde se guardará la función aprendida.Los segmentos infrarrojos
mostrarán una animación de llegada que continuará por tres revoluciones y
después toda la pantalla se apagará.
Después de que se apague la pantalla,presione y mantenga presionada la tecla que
va a enseñar la función (en su control remoto original) hasta que la pantalla (en el
Control Remoto 8 en Uno de RadioShack) se vuelva a encender. El segmento infrarrojo inferior parpadeará dos veces cuando se tenga éxito al capturar el código.
NOTA: Si el segmento infrarrojo inferior muestra un parpadeo largo,ha ocurrido un error
de aprendizaje.Pruebe repitiendo este paso de nuevo hasta que haya una captura exitosa.
Si todavía no se captura la función, presione dos veces para salirse de la programación
y revisar las “Precauciones sobre la Función Aprendizaje” en la página anterior.Si fuese
necesario,consulte también “Localización de Fallas”en la página 101. Después de la
revisión, comience a programar desde el paso 1.
6. Para aprender otras funciones,repita los pasos 3 a 5 las veces necesarias.
7. Para salir de la programación, presione dos veces.La imagen volverá a la
pantalla del menú del último dispositivo seleccionado.
BORRAR FUNCIÓN DE UNA SOLA TECLA APRENDIDA
1. Presione y mantenga oprimida la P hasta que el segmento infrarrojo inferior
parpadee dos veces.Aparecerán las teclas de programación:
2. Presione arriba de el titulo IR DELETE (borrado infrarrojo) una vez.Aparecerá la
pantalla de programación IR Delete:
3. Presione la tecla de un dispositivo una vez (es decir,CBL, SAT,TV,DVD,AUD,VCR,
AUX,o CD)para el modo donde reside la tecla aprendida que se va a borrar.
Aparecerá la pantalla del menú del dispositivo seleccionado, incluyendo .
4. Presione dos veces la tecla aprendida que se va a borrar. Tras el borrado, el segmento infrarrojo inferior parpadeará dos veces como confirmación.Las teclas de
programación aparecerán de nuevo.
continúa en la siguiente página….
5 cm
Uso de la Función Aprendizaje 79
RS 8in1 Kameleon OM rev 10/9/03 4:12 PM Page 79
Page 80

8-IN-ONET
ELECONTROLACCIONADO PORKAMELEON
USO DE LA FUNCIÓN APRENDIZAJE
BORRAR FUNCIÓN DE UNA SOLA TECLA APRENDIDA (CONTINUACIÓN)
5. Si lo desea,repita los pasos 2 al 4 para borrar otra tecla aprendida.
6. Salga de la programación presionando una vez. La imagen volverá a la pantalla
del menú del último dispositivo seleccionado.Ahora, cuando presione la tecla que
tenia una función aprendida,la tecla mandara su función original.
BORRAR FUNCIÓNDETODAS LAS TECLAS APRENDIDAS EN UN MODO ESPECÍFICO
1. Presione y mantenga presionada la P hasta que el segmento infrarrojo inferior
parpadee dos veces.Aparecerán las teclas de programación:
2. Presione arriba de el titulo IR DELETE (borrado infrarrojo) una vez.Aparecerá la
pantalla de programación IR Delete:
3. Presione una tecla de dispositivo una vez (es decir, CBL,SAT, TV,DVD,AUD,VCR,
AUX o CD) para el modo donde residen las teclas aprendidas que se van a borrar.
Aparecerá la pantalla del menú del dispositivo seleccionado, incluyendo .
4. Presione la misma tecla de dispositivo (como en el paso 3). Tras el borrado, el
segmento infrarrojo inferior parpadeará dos veces como confirmación.Las teclas
de programación aparecerán de nuevo.
5. Si lo desea,repita los pasos 2 a 4 para borrar otras funciones aprendidas de otro
de los modos.
6. Salga de la programación presionando una vez. La imagen volverá a la pantalla
del menú del último dispositivo seleccionado.Ahora, cuando presione una tecla
que tenia una función aprendida,la tecla mandara su función original.
CAMBIO DEL BLOQUEO DEL VOLUMEN
El Control Remoto 8 en Uno de RadioShack se programa en la fábrica para que
haya un control independiente del volumen en cada dispositivo seleccionado.
Sin embargo,usted puede cambiar la programacion del Bloqueo del Volumen a la de
Bloqueo Global de Volumen de tal manera que el volumen de un dispositivo quede
bloqueado a un modo (v.g., para controlar el volumen del televisor en todos los
otros modos).Después de esto, si gusta,puede llevar a cabo un Desbloqueo
Individual de Volumen en un dispositivo seleccionado para fijarle el control de
volumen como una operación independiente.
80 Uso de la Función Aprendizaje/Cambio del Bloqueo del Volumen
RS 8in1 Kameleon OM rev 10/9/03 4:12 PM Page 80
Page 81

MANUAL DE DUEÑO
BLOQUEO DEL CONTROL DE VOLUMEN A UN MODO (BLOQUEO GLOBAL DE VOLUMEN)
1. Presione y mantenga presionada la P hasta que el segmento infrarrojo inferior
parpadee dos veces.Aparecerán las teclas de programación:
2. Presione arriba de el titulo VOL una vez. Aparecerá la pantalla de programación de Bloqueo de Volumen:
3. Presione la tecla de un dispositivo una vez (es decir, CBL,SAT,TV, DVD,AUD, VCR, AUX,
o CD) en el que quiere bloquear los controles del volumen. El segmento infrarrojo
inferior parpadeará dos veces, y las teclas de programación aparecerán de nuevo.
4. Para salirse de la programación, presione una vez. La imagen volverá a la
pantalla del menú del último dispositivo seleccionado.Ahora, cuando presione
VOL
▲,VOL▼,o MUTE (enmudecer), controlará el volumen del dispositivo selec-
cionado en el paso numero 3,independientemente del modo seleccionado.
DESBLOQUEO DEL CONTROL DE VOLUMEN PARA UN SOLO DISPOSITIVO
(DESBLOQUEO INDIVIDUAL DE VOLUMEN)
1. Presione y mantenga presionada la P hasta que el segmento infrarrojo inferior
parpadee dos veces.Aparecerán las teclas de programación:
2. Presione arriba de el titulo VOL una vez. Aparecerá la pantalla de programación de Bloqueo de Volumen:
continúa en la siguiente página…
Cambio del Bloqueo del Volumen 81
RS 8in1 Kameleon OM rev 10/9/03 4:12 PM Page 81
Page 82

8-IN-ONET
ELECONTROLACCIONADO PORKAMELEON
CAMBIO DEL BLOQUEO DEL VOLUMEN
DESBLOQUEO DEL CONTROL DE VOLUMEN PARA UN SOLO DISPOSITIVO
(DESBLOQUEO INDIVIDUAL DE VOLUMEN, CONTINUACIÓN)
3. Presione VOL▼ una vez.Después presione la tecla de un dispositivo una vez
(es decir,CBL, SAT,TV,DVD,AUD,VCR,AUX,o CD) donde quiere desbloquear los
controles del volumen.El segmento infrarrojo inferior parpadeará cuatro veces y
las teclas de programación aparecerán de nuevo.
4. Si gusta,repita los pasos 1 a 3 (de esta sección) por cada uno de los dispositivos
en los que quiere desbloquear el volumen.
5. Para salirse de la programación, presione una vez. La imagen volverá a la
pantalla del menú del último dispositivo seleccionado.
6. Ahora,después de que seleccione un dispositivo que tiene desbloqueado el
volumen, si presiona VOL
▲, VOL▼,o MUTE controlará el volumen del dispositivo
únicamente en el modo seleccionado.
DESBLOQUEO DE TODO EL CONTROL DE VOLUMEN (RESTAURACIÓN DE LOS
PARÁMETROS DE FÁBRICA)
1. Presione y mantenga presionada la P hasta que el segmento infrarrojo inferior
parpadee dos veces.Aparecerán las teclas de programación:
2. Presione arriba de el titulo VOL una vez.Aparecerá la pantalla de programación de Bloqueo de Volumen:
3. Presione VOL
▲ una vez. El segmento infrarrojo inferior parpadeará cuatro veces,
y las teclas de programación aparecerán de nuevo.
4. Para salirse de la programación, presione una vez. La imagen volverá a la
pantalla del menú del último dispositivo seleccionado.
5. El volumen se controlará de nuevo en forma independiente de acuerdo con los
parámetros de fábrica de todos los dispositivos programados.
82 Cambio del Bloqueo del Volumen
RS 8in1 Kameleon OM rev 10/9/03 4:12 PM Page 82
Page 83

MANUAL DE DUEÑO
USO DE LOS MACROS
El Control Remoto 8 en Uno de RadioShack incluye seis teclas macro: M1 a M4,
COM MUTE,y PWR. Cada una se puede configurar para que realice una operación
repetitiva,que desperdicia tiempo, con sólo presionar una sola tecla.
NOTA: Un macro programado en la tecla PWR sólo es accesible en el modo MY SYSTEM.
Si se presiona en cualquier otro modo sólo enviará un comando infrarrojo de
“Encender/Apagar” al dispositivo seleccionado.
NOTA:La tecla COM MUTE se puede programar como un macro giratorio de dos etapas.
Vea “Programación de la Tecla COM MUTE”en la página 85.
Un macro se puede usar para controlar las operaciones de teatro/cine en el hogar,
para fijar un canal favorito, o para otras funciones múltiples que a usted le gustaría
controlar con sólo presionar una tecla.Más aún, cada macro puede guardar hasta
15 presiones de tecla en total.
NOTA: La programación de un nuevo macro por encima de uno existente borrará el
macro original.
PROGRAMACIÓNDEUNMACRO DE CANAL FAVORITO
Con tantos canales disponibles en su sistema de cable o de satélite, usted puede
programar un macro que seleccione directamente un canal favorito con sólo
presionar una tecla. Por ejemplo, supongamos que sus programas favoritos de cable
están en el canal 71. Use las siguientes instrucciones para programar un macro que
le dé acceso directo a este canal:
NOTA: El siguiente ejemplo supone que todo el equipo está apagado y que el televisor está
conectado a través de la Caja/ Convertidor de cablevisión, y que el televisor está fijado al
canal 3.
1. Presione y mantenga presionada la P hasta que el segmento infrarrojo inferior
parpadee dos veces.Aparecerán las teclas de programación:
2. Presione arriba de el titulo MACRO una vez.Aparecerá la pantalla de programación de Macros:
3. Presione una tecla de macro vacía (v.g., M1, M2,M3 ó M4). Aparecerá la pantalla
de menúes del último dispositivo seleccionado,incluyendo .
4. Introduzca la secuencia de un macro deseado hasta de 15 presiones de tecla.Para
este ejemplo,presione TV una vez,seguida de PWR una vez,y luego introduzca 0 3
del número de canal de TV. Después presione CBL una vez, seguida de PWR una
vez,y luego introduzca 0 7 1 para el número de canal de la Caja /Convertidor
de Cablevisión.
continúa en la siguiente página…
Uso de los Macros 83
RS 8in1 Kameleon OM rev 10/9/03 4:12 PM Page 83
Page 84

8-IN-ONET
ELECONTROLACCIONADO PORKAMELEON
USO DE LOS MACROS
PROGRAMACIÓNDEUNMACRO DE CANAL FAVORITO (CONTINUACIÓN)
NOTA: Si hay más de 15 presiones de tecla en la secuencia,el segmento infrarrojo inferior mostrará un parpadeo largo,indicando un error.La imagen volverá a la pantalla del
menú del último dispositivo seleccionado.Para programar el macro,vuelva a empezar
con el paso 3.
5. Para guardar el macro,presione y mantenga oprimida la P hasta que el segmento
infrarrojo inferior parpadee dos veces.Las teclas de programación aparecerán de
nuevo.
6. Salga de la programación presionando una vez. La imagen volverá a la pantalla del menú del último dispositivo seleccionado.
7. Ahora,si apunta el control remoto a los dispositivos que seleccionó en el paso 4 y
presiona la tecla del macro programado una vez, el televisor se encenderá y sintonizará el canal 3.Después,la caja/convertidor de cablevisión se encenderá y sintonizará el canal 071.
PROGRAMACIÓNDEUNMACRO MAESTRO DE ENCENDIDO EN EL MODO
MI SISTEMA
Se puede programar un macro en la tecla PWR para encender o apagar hasta siete
dispositivos del teatro/cine en el hogar.
NOTA: El siguiente ejemplo supone que el sistema de teatro/cine en el hogar contiene un
receptor de satélite,un reproductor de DVDs, un receptor de audio,y un TV.
1. Presione y mantenga presionada la P hasta que el segmento infrarrojo inferior
parpadee dos veces.Aparecerán las teclas de programación:
2. Presione arriba de el titulo MACRO una vez.Aparecerá la pantalla de programación de Macros:
3. Presione PWR una vez.Aparecerá la pantalla de menúes del último dispositivo
seleccionado, incluyendo
.
4. Introduzca la secuencia del macro.Para este ejemplo,presione SAT una vez,
seguida de PWR una vez.Luego, presione DVD una vez, seguida de PWRuna vez.
Después presione AUDuna vez,seguida de PWR una vez.Finalmente, presione TV
una vez,seguida de PWR una vea,y entonces MY SYSTEM una vez.
5. Para guardar el macro de la alimentación,presione y mantenga oprimida la P
hasta que el segmento infrarrojo inferior parpadee dos veces.Las teclas de
programación aparecerán de nuevo.
84 Uso de los Macros
RS 8in1 Kameleon OM rev 10/9/03 4:12 PM Page 84
Page 85

MANUAL DE DUEÑO
6. Salga de la programación presionando una vez. La imagen volverá a la
pantalla del menú del último dispositivo seleccionado.
7. Para probar el macro de la alimentación (PWR),primero cerciórese de que todos
los dispositivos del teatro/cine en el hogar seleccionados en el paso 4 estén encendidos.Apunte el control remoto a los dispositivos y presione MY SYSTEMuna vez,
seguida de PWR una vez.Los dispositivos deben apagarse en este orden: Receptor
de Satélite,Reproductor DVD, Receptor de Audio, y TV.
Para encender los dispositivos de nuevo en el mismo orden al anterior, presione
PWR una vez.
PROGRAMACIÓNDELATECLA COM MUTE
Si se desea, se puede programar un macro giratorio de dos etapas en la tecla COM
MUTE (enmudecer comerciales), de tal manera que al presionar la tecla una vez se
baja el volumen (en los modos CBL,SAT,TV, VCR o AUX) a un nivel prefijado durante
un comercial.Cuando se reanuda el programa,otra presión de la tecla vuelve a
subir el volumen a su nivel original.
1. Presione y mantenga presionada la P hasta que el segmento infrarrojo inferior
parpadee dos veces.Aparecerán las teclas de programación:
2. Presione arriba de el titulo MACRO una vez.Aparecerá la pantalla de programación de Macros:
3. Presione COM MUTE una vez.Aparecerá la pantalla de menúes del último dispositivo seleccionado, incluyendo .
4. Introduzca la primera secuencia del macro presionando TV una vez,luego
presione VOL
▼ cuatro veces (para bajar el volumen 4 pasos).
5. Para guardar el macro,presione y mantenga oprimida la P hasta que el segmento
infrarrojo inferior parpadee dos veces.Las teclas de programación aparecerán de
nuevo.
6. Para programar el segundo macro,repita los pasos 2 a 5, pero en lugar de usar
VOL
▼, use VOL▲ esta vez (para subir el nivel cuatro pasos).
7. Salga de la programación presionando una vez. La imagen volverá a la
pantalla del menú del último dispositivo seleccionado.
continúa en la siguiente página...
Uso de los Macros 85
RS 8in1 Kameleon OM rev 10/9/03 4:12 PM Page 85
Page 86

8-IN-ONET
ELECONTROLACCIONADO PORKAMELEON
USO DE LOS MACROS (Continuación)
BORRAR FUNCIÓNDEUNMACRO
1. Presione y mantenga presionada la P hasta que el segmento infrarrojo inferior
parpadee dos veces.Aparecerán las teclas de programación:
2. Presione arriba de el titulo MACRO una vez.Aparecerá la pantalla de programación de Macros:
3. Seleccione la tecla del macro que se va a borrar y presiónela una vez.Aparecerá la
pantalla de menúes del último dispositivo seleccionado.
4. Presione y mantenga oprimida la P hasta que el segmento infrarrojo inferior
parpadee dos veces.Las teclas de programación aparecerán de nuevo.
5. Salga de la programación presionando una vez. La imagen volverá a la
pantalla del menú del último dispositivo seleccionado.
USO DE LA FUNCIÓN KEYMOVER
El Control Remoto 8 en Uno de RadioShack incluye una función Keymover (que
muda las teclas) que le permite detallar (o copiar) teclas de un modo (es decir, el
modo origen) a otro modo (es decir, el modo destino).
NOTA: No use ninguna de las Teclas de Dispositivo como tecla origen ni como tecla destino.
PROGRAMACIÓNDELAFUNCIÓN KEYMOVER
Por ejemplo, si su reproductor DVD no tiene control de volumen,puede copiar
esas teclas (es decir, VOL
▲, VOL ▼,y MUTE) desde el modo TV hasta el modo DVD
como sigue:
1. Presione y mantenga presionada la P hasta que el segmento infrarrojo inferior
parpadee dos veces.Aparecerán las teclas de programación:
86 Uso de los Macros/Uso de la Función Keymover
RS 8in1 Kameleon OM rev 10/9/03 4:12 PM Page 86
Page 87

MANUAL DE DUEÑO
2. Presione debajo de el titulo OTHER (otra) una vez.Aparecerá la pantalla de
programación Other:
3. Usando las teclas numéricas, introduzca 9 9 4.El segmento infrarrojo inferior
parpadeará dos veces.
4. Para el modo origen, presione la tecla del dispositivo deseado una vez (es
decir, CBL, SAT, TV,DVD, AUD, VCR, AUX,o CD). Para este ejemplo,presione TV
una vez.Aparecerá la pantalla del menú del dispositivo de origen seleccionado,
incluyendo .
5. Para la tecla de origen, presione la tecla que se va a mudar una vez.Para este
ejemplo, presione VOL
▲ una vez.
6. Para el modo destino, presione la tecla del dispositivo deseado una vez (es
decir, CBL,SAT, TV, DVD, AUD,VCR, AUX, o CD).Para este ejemplo, presione DVD
una vez.Aparecerá la pantalla del menú del dispositivo de destino seleccionado,
incluyendo .
7. Para la tecla de destino, presione la tecla que se va a mudar una vez.Para este
ejemplo, presione VOL
▲ una vez. Tras haber mudado la tecla, el segmento infrar-
rojo inferior parpadeará dos veces como confirmación. Las Teclas de
Programación aparecerán de nuevo.
8. Repita los pasos 2 al 7 dos veces más para copiar el resto de las teclas del control
del volumen, sustituyendo VOL
▼ y MUTE como teclas de origen y destino en los
pasos 5 y 7.
9. Salga de la programación presionando una vez. La imagen volverá a la
pantalla del menú del último dispositivo seleccionado.
Al terminar el procedimiento anterior, podrá usar su Control Remoto 8 en Uno de
RadioShack para controlar el volumen y la función de enmudecer del televisor en el
modo DVD, así como también en el modo TV.
RESTAURACIÓN DE UNA SOLA TECLA MUDADA
1. Presione y mantenga presionada la P hasta que el segmento infrarrojo inferior
parpadee dos veces.Aparecerán las teclas de programación:
continúa en la siguiente página…
Uso de la Función Keymover 87
RS 8in1 Kameleon OM rev 10/9/03 4:12 PM Page 87
Page 88

8-IN-ONET
ELECONTROLACCIONADO PORKAMELEON
USO DE LA FUNCIÓN KEYMOVER
RESTAURACIÓN DE UNA SOLA TECLA MUDADA (CONTINUACIÓN)
2. Presione debajo de el titulo OTHER (otra) una vez.Aparecerá la pantalla de
programación Other:
3. Usando las teclas numéricas, introduzca 9 9 4.El segmento infrarrojo inferior
parpadeará dos veces.
4. Presione el modo de destino una vez donde está guardada la tecla que se mudó.
Después presione la tecla de destino dos veces.Tras la restauración de la tecla, el
segmento infrarrojo inferior parpadeará dos veces como confirmación.Las teclas
de programación aparecerán nuevamente.
5. Si gusta,repita los pasos 2 al 4 para restaurar otra tecla.
6. Salga de la programación presionando una vez. La imagen volverá a la
pantalla del menú del último dispositivo seleccionado.Ahora, cuando presione la
tecla que tenia una función mudada, la tecla mandara su función original.
RESTAURACIÓNDETODAS LAS TECLAS MUDADAS EN UN SOLO MODO
1. Lleve a cabo los pasos 1 a 3 de Programación de la Función Keymover que
comienzan en la página anterior.
2. Presione el modo de destino dos veces donde están guardadas las teclas que se
mudaron.Tras la restauración de la tecla,el segmento infrarrojo inferior
parpadeará dos veces como confirmación.Las teclas de programación
aparecerán nuevamente.
3. Salga de la programación presionando una vez. La imagen volverá a la
pantalla del menú del último dispositivo seleccionado.
4. Ahora,cuando presione una tecla que tenia una función mudada, la tecla mandara su función original.
PROGRAMACIÓN DE UNA
EXPLORACIÓN DE CANALES FAVORITOS
En los modos CBL, SAT,TV, VCR,o AUX, el Control Remoto 8 en Uno de RadioShack
puede guardar una lista de hasta 10 canales favoritos,en cualquier orden, que serán
explorados inmediatamente cuando usted presione FAV SCAN una vez (vea la sigu-
iente sección,Uso de la Exploración de Canales).
88
Uso de la Función Keymover/Programación de una Exploración de Canales Favoritos
RS 8in1 Kameleon OM rev 10/9/03 4:12 PM Page 88
Page 89

MANUAL DE DUEÑO
NOTA: Los canales favoritos sólo se pueden programar para un modo.Después de la
programación,si se presiona FAV SCAN mientras se está en otro modo,el control remoto
comenzará una exploración (recorrido) de canales normal (si esto es aplicable al modo
seleccionado).
1. Presione y mantenga presionada la P hasta que el segmento infrarrojo inferior
parpadee dos veces.Aparecerán las teclas de programación:
2. Seleccione un Modo de Canales Favoritos presionando CBL,SAT,TV, VCR, o AUX
una vez.El segmento infrarrojo inferior parpadea una vez al tiempo que se anima
la tecla del dispositivo seleccionado.
3. Presione debajo de el titulo OTHER (otra) una vez.Aparecerá la pantalla de
programación Other:
4. Usando las teclas numéricas, introduzca 9 9 6. El segmento infrarrojo inferior
parpadeará dos veces.y mostrará la pantalla de programación de Canales Favoritos.
NOTA: Si el segmento infrarrojo inferior muestra un parpadeo largo,ha ocurrido un
error. Haga la prueba repitiendo este paso.
5. Utilizando las teclas numéricas, introduzca el número de uno de sus canales
favoritos (v.g., 0 1 2).Después presione la P una vez.
NOTA: Si el control remoto original requería que se presionara una tecla de Enter para
cambiar el canal,también presione la tecla ENTER (intro) después de introducir el
número del canal (v.g., 0 1 2 ENTER).
6. Si gusta,repita el paso 5 por cada canal que se vaya a guardar,hasta un total de
10 canales.
NOTA: Después de guardar 10 canales,el control remoto se saldrá de la pantalla de
programación de Canales Favoritos y volverá a mostrar las teclas de programación.
7. Para salirse de la programación con menos de 10 canales favoritos guardados,
presione y mantenga presionada la Phasta que el segmento infrarrojo inferior
parpadee dos veces.La imagen volverá a la pantalla del menú del último
dispositivo seleccionado.
Programación de una Exploración de Canales Favoritos
89
RS 8in1 Kameleon OM rev 10/9/03 4:12 PM Page 89
Page 90

8-IN-ONET
ELECONTROLACCIONADO PORKAMELEON
USO DE LA EXPLORACIÓN DE CANALES
En los modos CBL, SAT, TV,VCR,o AUX, use la tecla FAV SCAN para iniciar una
exploración de todos sus canales favoritos cada 3 segundos (siempre que ya lo haya
programado – vea Programación de una Exploración de Canales Favoritos en la
página 88) y/o todos los canales para el modo seleccionado.
1. Presione CBL,SAT, TV, VCR,o AUX una vez.El segmento infrarrojo inferior
parpadea una vez al tiempo que se anima la tecla del dispositivo seleccionado.
2. Presione FAV SCAN una vez.Los segmentos infrarrojos se animarán al ir cam-
biando de canal.
• Si se configuró la Exploración de Canales Favoritos,comenzará la explo-
ración (recorrido) de los canales favoritos y se hará el ciclo a través de los
canales guardados durante 3 minutos o hasta que se le detenga presionando
cualquier tecla.
• Si no se configuró la Exploración de Canales Favoritos,la exploración
comenzará con el canal actual,después procederá al siguiente canal
ascendente y hará el ciclo a través de todos los canales durante 3 minutos o
hasta que se le detenga presionando cualquier tecla.
3. Para suspender la exploración de canales en cualquier momento, presione
cualquier tecla una vez.
USO DEL MODO MY SYSTEM (MI SISTEMA)
El Control Remoto 8 en Uno de RadioShack incluye un modo de Teatro/Cine en
Casa al gusto.Después de que MY SYSTEM se haya programado,éste le permitirá
acceder cuatro grupos de teclas de control remoto sin tener que cambiar de modo
de dispositivo.
ORGANIZACIÓN DE LOS CONTROLES
ACERCA DE LOS GRUPOS DE CONTROL
Para la programación del Teatro/Cine en Casa,las teclas del control remoto están
agrupadas por tipo de control dentro de los siguientes cuatro grupos de control:
Grupo de reproducción de vídeo: Controles de transporte (REW, PLAY, FWD,
REC, PAUSE,y STOP)
Grupo de controles de volumen: VOL
▲, VOL▼,y MUTE
Grupo de controles de canales: CH
▲, CH ▼,INPUT,teclas numéricas (0 ~ 9),
TV/VCR, FAV SCAN, ENTER,y LAST
Grupo de controles de menú:Controles del cursor:(
▲, ▼,,y ),OK,
PAGE+, PAGE-, MENU,INFO, GUIDE,y EXIT
A
CERCA DE LOS GRUPOS DE DISPOSITIVOS
Más aún, los Grupos de Control de arriba se pueden usar en los siguientes modos:
Grupo Reproductor de Vídeo: CBL, SAT, DVD,AUD, VCR, AUX,y CD
Grupo de Controles de Volumen: CBL, SAT,TV, DVD,AUD, VCR, AUX,y CD
Grupo de Controles de Canal: CBL, SAT, TV,DVD, VCR,y AUX
Grupo de Controles de Menú: CBL, SAT,TV, DVD, AUD, VCR, AUX, y CD
▲
▲
90 Uso de la Exploración de Canales/ Uso del Modo My System
RS 8in1 Kameleon OM rev 10/9/03 4:12 PM Page 90
Page 91

MANUAL DE DUEÑO
VALORES FIJADOS EN LA FÁBRICA
En la fábrica, a los Grupos de Control se les asignan los siguientes modos como fijaciones originales:
Grupo de Reproducción de Vídeo: DVD
Grupo de Controles de Volumen: AUD
Grupo de Controles de Canales: CBL
Grupo de Controles de Menú: CBL
Si los valores de fábrica se ajustan a sus necesidades, puede saltarse este modo de
programación.De otra forma, lleve a cabo los pasos en la siguiente sección para
asignar los modos de dispositivos a los Grupos de Control.
PROGRAMACIÓN DEL MODO MY SYSTEM
1. Presione cualquier tecla una vez (es decir,CBL, SAT, TV, DVD,AUD, VCR, AUX,o CD).
La tecla del dispositivo seleccionado se animará.
2. Presione y mantenga presionada la P hasta que el segmento infrarrojo inferior
parpadee dos veces.Aparecerán las teclas de programación:
3. Presione arriba de el titulo MY SYSTEM una vez.Aparecerá la pantalla de programación del Reproductor de Vídeo:
NOTA: Para los pasos 3 a 7, si una tecla de dispositivo está animada,se le asigna a su
grupo de funciones respectivo. Para continuar programando el modo My System,tiene
que seleccionar una tecla de dispositivo, aunque se trate de la misma que está animada
en este momento.
continúa en la siguiente página…
Uso del Modo My System 91
RS 8in1 Kameleon OM rev 10/9/03 4:12 PM Page 91
Page 92

8-IN-ONET
ELECONTROLACCIONADO PORKAMELEON
USO DEL MODO MY SYSTEM (MI SISTEMA)
PROGRAMACIÓN DEL MODO MY SYSTEM (CONTINUACIÓN)
4. Para asignar un modo al grupo de Reproducción de Vídeo, presione una tecla de
dispositivo una vez (es decir,CBL, SAT,TV,DVD,AUD,VCR,AUX,o CD). Entonces
aparecerá la pantalla de programación de los Controles del Volumen:
5. Para asignar un modo al grupo de Controles de Volumen, presione una tecla de
dispositivo una vez. Entonces aparecerá la pantalla de programación de los
Controles del Canales:
6. Para asignar un modo al grupo de Controles de Canales, presione una tecla de
dispositivo una vez. Entonces aparecerá la pantalla de programación de los
Controles del Menú:
7. Para asignar un modo al grupo de Controles del Menú,presione una tecla de
dispositivo una vez. En tanto que la programación de My System está completa
ahora, las teclas de programación aparecerán nuevamente.
8. Salga de la programación presionando una vez. La imagen volverá a la
pantalla del menú del último dispositivo seleccionado.
92 Uso del Modo My System
RS 8in1 Kameleon OM rev 10/9/03 4:12 PM Page 92
Page 93

MANUAL DE DUEÑO
REASIGNACIÓN DE LAS TECLAS DE DISPOSITIVOS
El Control Remoto 8 en Uno de RadioShack se puede configurar para que controle
un segundo dispositivo.Por ejemplo,para controlar una TV, una Caja de
Cablevisión, y dos reproductores de DVDs,usted puede reasignar la tecla AUX no
usada para operar un segundo Reproductor DVD, de la siguiente manera:
1. Presione y mantenga presionada la P hasta que el segmento infrarrojo inferior
parpadee dos veces.Aparecerán las teclas de programación:
2. Presione arriba de el titulo MODE (modo) una vez.Aparecerá la pantalla de
programación que muda (cambia) el modo:
3. Para el modo origen,presione una tecla de dispositivo una vez (es decir, CBL,SAT,
TV, DVD,AUD, VCR, AUX,o CD).Para este ejemplo,presione DVDuna vez.Aparecerá
la pantalla del menú del dispositivo seleccionado,incluyendo .
NOTA: Sólo un dispositivo se puede asignar a la tecla de un dispositivo no usado a la vez.
4. Para el modo destino,presione la tecla de un dispositivo una vez (es decir,CBL,
SAT,TV,DVD,AUD, VCR,AUX,o CD). Para este ejemplo, presione AUX una vez.Tras
la reasignación,el segmento infrarrojo inferior parpadeará dos veces como
confirmación. Las teclas de programación aparecerán de nuevo.
5. Para este ejemplo,la tecla AUX está lista para programarse para que controle su
segundo reproductor de DVD.Vea la Programación de un Dispositivo (Aparto) en
la página 72. Si lo desea,repita los pasos 2 a 5 para reasignar otro dispositivo.
6. Salga de la programación presionando una vez. La imagen volverá a la
pantalla del menú del último dispositivo seleccionado.
▲
Reasignación de las Teclas de Dispositivos 93
RS 8in1 Kameleon OM rev 10/9/03 4:12 PM Page 93
Page 94

8-IN-ONET
ELECONTROLACCIONADO PORKAMELEON
USO DEL SALTO DE COMERCIALES
El Control Remoto 8 en Uno de RadioShack incluye una función única que le
permite saltarse comerciales en los programas grabados cuando se usa una PVR
(DVR) o VCR.Este atributo funciona en los modos CBL, SAT, VCR,o AUX y usted
puede usar los valores de fábrica o programar algunos a la medida.
USO DE LOS VALORES FIJADOS EN FÁBRICA
La tecla COM SKIP está preprogramada para realizar la función de Salto de
Comerciales de su control remoto original (si ésta está disponible).
Para usar los valores de fábrica, simplemente apunte el control remoto al dispositivo
deseado y presione COM SKIPuna vez por cada salto de dos comerciales.
PROGRAMACIÓN DEL SALTO DE COMERCIALES
Para modificar los valores del Salto de Comerciales al gusto,lleve a cabo los
siguientes pasos:
1. Encienda el dispositivo deseado (v.g.,VCR o PVR) y vea los comerciales que
quiere saltarse.Entonces coloque el medio (cinta,disco) de regreso en el principio
del primer comercial en la secuencia.
2. Presione la tecla del dispositivo asignado apropiado una vez (es decir, CBL,SAT,
VCR,o AUX).La tecla del dispositivo seleccionado se animará.
3. Presione y mantenga presionada la P hasta que el segmento infrarrojo inferior
parpadee dos veces.Aparecerán las teclas de programación:
4. Presione debajo de el titulo OTHER (otra) una vez.Aparecerá la pantalla de
programación Other:
94 Uso del Salto de Comerciales
RS 8in1 Kameleon OM rev 10/9/03 4:12 PM Page 94
Page 95

MANUAL DE DUEÑO
5. Usando las teclas numéricas, introduzca 9 7 4.La pantalla parpadeará dos veces y
cambiará a la pantalla de programación de Salto de Comerciales:
6. Seleccione un modo de Salto de Comerciales presionando CBL,SAT, VCR,o AUX
una vez.
7. Presione FFWD una vez y espere el final de una secuencia de comerciales que generalmente puede tener de cuatro a seis comerciales y que dura de 2 a 3 minutos
en tiempo real.Al ir terminado,presione PLAY una vez.
NOTA: Si el tiempo entre las presiones de las teclas FFWD y PLAY excede 30 segundos, el
programa ignorará su acción. El segmento infrarrojo inferior mostrará un parpadeo
largo para indicar que el tiempo límite ha sido excedido y que la pantalla volverá al
menú de las Teclas de Programación. Tendrá que comenzar de nuevo en el paso 4 y llevar a cabo este paso en menos de 30 segundos.
NOTA: Si bien las teclas FFWD y PLAY se usan para programar este paso, otras teclas
podrían usarse dependiendo de cómo funcionaban en el control remoto original.
8. Para guardar los valores fijados,presione y mantenga presionada la P hasta que
el segmento infrarrojo inferior parpadee dos veces.Aparecerán las teclas de
programación nuevamente.
9. Salga de la programación presionando una vez. La imagen volverá a la
pantalla del menú del último dispositivo seleccionado.
Uso del Salto de Comerciales 95
RS 8in1 Kameleon OM rev 10/9/03 4:12 PM Page 95
Page 96

8-IN-ONET
ELECONTROLACCIONADO PORKAMELEON
FIJACIÓN DEL INTERRUPTOR DE INCLINACIÓN
El Control Remoto 8 en Uno de RadioShack contiene un Interruptor de Inclinación
que enciende la pantalla cuando se mueve la unidad. Si gusta,puede desactivar esta
función para que se encienda la pantalla únicamente mediante la presión de una tecla.
NOTA: Si desactiva el Interruptor de Inclinación puede ayudar a conservar la vida de las baterias.
DESACTIVACIÓNDELINTERRUPTOR DE INCLINACIÓN
1. Presione y mantenga presionada la P hasta que el segmento infrarrojo inferior
parpadee dos veces.Aparecerán las teclas de programación:
2. Presione debajo de el titulo OTHER (otra) una vez.Aparecerá la pantalla de
programación de Other:
3. Usando las teclas numéricas, introduzca 9 8 5.La pantalla parpadeará cuatro
veces,confirmando que el Interruptor de Inclinación está desactivado.Las teclas
de programación aparecerán nuevamente.
4. Para salirse de la programación, presione una vez. La imagen volverá a la
pantalla del menú del último dispositivo seleccionado.
ACTIVACIÓN DEL INTERRUPTOR DE INCLINACIÓN
1. Lleve a cabo los pasos 1 y 2 de la sección anterior, Desactivación del Interruptor
de Inclinación.
2. Usando las teclas numéricas, introduzca 9 8 5.La pantalla parpadeará dos veces,
confirmando que el Interruptor de Inclinación se ha activado.Las teclas de
programación aparecerán nuevamente.
3. Salga de la programación presionando una vez. La imagen volverá a la
pantalla del menú del último dispositivo seleccionado.
96 Fijación del Interruptor de Inclinación
RS 8in1 Kameleon OM rev 10/9/03 4:12 PM Page 96
Page 97

MANUAL DE DUEÑO
FIJACIÓN DEL RECEPTOR LOCALIZADOR
El Control Remoto 8 en Uno de RadioShack viene con un Transmisor Localizador que
se puede usar para encontrar rápidamente el control remoto principal si éste se perdió
accidentalmente o no se puede hallar. En la fábrica, el Receptor Localizador (dentro del
control remoto) está fijado para que «despierte» cuando transcurren unos cuantos
segundos, espera y escucha la señal del Transmisor Localizador,y después emite una
alerta de sonido para indicar con toda precisión la ubicación del control remoto principal. Esta es una función sensacional, pero usa energía adicional de la batería.Si no
tiene planeado usar el Transmisor Localizador, le recomendamos que apague el
Receptor Localizador en el control remoto para conservar la vida de la batería.
DESACTIVACIÓNDELRECEPTOR LOCALIZADOR
1. Presione y mantenga presionada la P hasta que el segmento infrarrojo inferior
parpadee dos veces.Aparecerán las teclas de programación:
2. Presione debajo de el titulo OTHER (otra) una vez.Aparecerá la pantalla de
programación Other:
3. Usando las teclas numéricas, introduzca 9 7 2. La pantalla parpadeará cuatro
veces,confirmando que el Receptor Localizador está desactivado.Las teclas de
programación aparecerán de nuevo.
4. Salga de la programación presionando una vez. La imagen volverá a la
pantalla del menú del último dispositivo seleccionado.
ACTIVACIÓN DEL RECEPTOR LOCALIZADOR
1. Lleve a cabo los pasos 1 y 2 de la sección anterior, Desactivación del Receptor
Localizador.
2. Usando las teclas numéricas, introduzca 9 7 2.La pantalla parpadeará dos veces,
confirmando que el Receptor Localizador está activado.Las teclas de programación
aparecerán de nuevo.
3. Salga de la programación presionando una vez. La imagen volverá a la
pantalla del menú del último dispositivo seleccionado.
Fijación del Receptor Localizador 97
RS 8in1 Kameleon OM rev 10/9/03 4:12 PM Page 97
Page 98

8-IN-ONET
ELECONTROLACCIONADO PORKAMELEON
98 Restauración de los Valores Fijados en la Fábrica
RESTAURACIÓN DE LOS
VALORES FIJADOS EN LA FÁBRICA
El Control Remoto 8 en Uno de RadioShack incluye un programa de Reposición de
los Códigos de Configuración.Usted lo puede usar para restaurar todos sus códigos
programados a los valores fijados en la fábrica y así borrar toda la programación a
la medida.
IMPORTANTE: Al ejecutar este programa se borrarán todas las fijaciones de los
códigos (excepto los códigos actualizados) y todos los parámetros modificados a la
medida para My System, Macros,Teclas Aprendidas, Teclas Reasignadas de
Dispositivos, Teclas mudadas con la función Keymover, Canales Favoritos, y todas
las fijaciones de los dispositivos.
1. Presione y mantenga presionada la P hasta que el segmento infrarrojo inferior
parpadee dos veces.Aparecerán las teclas de programación:
2. Presione debajo de el titulo OTHER (otra) una vez.Aparecerá la pantalla de
programación Other:
3. Usando las teclas numéricas, introduzca 9 7 7.El segmento infrarrojo inferior
parpadeará dos veces,hará una pausa y de nuevo parpadeará dos veces para
confirmar la restauración.
4. Salga de la programación presionando una vez. La imagen volverá a la
pantalla del menú del último dispositivo seleccionado.
RS 8in1 Kameleon OM rev 10/9/03 4:12 PM Page 98
Page 99

MANUAL DE DUEÑO
REMOCIÓN DE TODA LA PROGRAMACIÓN AL GUSTO
El Control Remoto 8 en Uno de RadioShack contiene un programa de Restitución de
la Programación al Gusto. Usted puede usarlo para quitar toda la programación al
gusto,excepto sus códigos de configuración y las teclas reasignadas de dispositivos.
IMPORTANTE: Si ejecuta este programa borrará todas las fijaciones al gusto en My
System, Macros, Teclas Aprendidas, Teclas Mudadas,y Canales Favoritos.
1. Presione y mantenga presionada la P hasta que el segmento infrarrojo inferior
parpadee dos veces.Aparecerán las teclas de programación:
2. Presione debajo de el titulo OTHER (otra) una vez.Aparecerá la pantalla de
programación Other:
3. Usando las teclas numéricas, introduzca 9 8 0.El segmento infrarrojo inferior
parpadeará dos veces,hará una pausa y de nuevo parpadeará dos veces para
confirmar la restauración.
4. Salga de la programación presionando una vez. La imagen volverá a la
pantalla del menú del último dispositivo seleccionado.
ESPECIFICACIONES
Baterías del control remoto. . . . . . . . . . . . . . . . . . . . . . . . . . . . . . . . . (4) Baterías AAA
Baterías del Transmisor Localizador. . . . . . . . . . . . . . . . . . . . . . . . . (1) Batería de 9 V
Alcance del Transmisor Localizador al Control Remoto . . . . . . . . . . . . . . . . . . 12.2 m
Dimensiones del control remoto (H x A x P) . . . . . . . . . . . . . . 240 x 67.2 x 26 mm
Dimensiones del Transmisor Localizador (H x A x P). . . . . . . . . 120 x 40 x 23 mm
Peso del control remoto (sin baterías) . . . . . . . . . . . . . . . . . . . . . . . . . . . . . . . . 181.4 g
Peso del Transmisor Localizador (sin baterías). . . . . . . . . . . . . . . . . . . . . . . . . . 45.4 g
NOTA: Las especificaciones son típicas. Las unidades individuales podrían variar.Las
especificaciones quedan sujetas a cambios y mejoras sin previo aviso.
Remoción de Toda la Programación al Gusto/Especificaciones 99
RS 8in1 Kameleon OM rev 10/9/03 4:12 PM Page 99
Page 100

8-IN-ONET
ELECONTROLACCIONADO PORKAMELEON
ACERCA DE LA ACTUALIZACIÓN
Su Control Remoto 8 en Uno de RadioShack tiene la biblioteca de códigos infrarrojos
más grande que hay disponible y contiene una función única que permite que se
añadan nuevos códigos a su memoria a través del teléfono.En cuestión de segundos,
su control remoto anotará rápida y fiablemente la nueva información sin necesidad
de enchufes,adaptadores o accesorios complejos.
Esto significa que cuando usted vaya adquiriendo nuevos dispositivos de entretenimiento en el futuro,su Control Remoto 8 en Uno de RadioShack nunca se convertirá en algo obsoleto.Simplemente llame a nuestra línea de ayuda al consumidor, y
uno de nuestros representantes de servicio al cliente le asistirá a través de todo el
proceso de actualización de su Control Remoto 8 en Uno de RadioShack.
Línea de Ayuda al Consumidor: (800) 950-7044
NOTA: RadioShack se reserva el derecho de reemplazar un control remoto devuelto por
uno de funcionalidad igual o superior.
PROCEDIMIENTO DE ACTUALIZACIÓN
1. Llame a nuestra Línea de Ayuda al Consumidor al: (800) 950-7044 cualquier día
hábil, entre las 9:00
A.M. y las 5:30 P.M., hora del Este (EST).
2. Nuestro agente de servicio al cliente le va a pedir y va a tomar nota del (de los)
nombre(s) y número(s) de modelo de su(s) dispositivo(s).Entonces el agente le
llevará a través del procedimiento de actualización pidiéndole que coloque el
auricular del teléfono junto a la tecla PWR en el Control Remoto 8 en Uno de
RadioShack (vea la ilustración abajo).
NOTA: Sólo use teléfonos con línea terrestre para el procedimiento de actualización.No
use teléfonos móviles, porque no transmitirán las señales correctamente.
En cuestión de segundos, se transmitirán nuevos códigos de configuración para
su(s) dispositivo(s) a través del teléfono y se guardarán en su Control Remoto 8
en Uno de RadioShack.
3. Una vez que su Control Remoto 8 en Uno de RadioShack haya sido actualizado
exitosamente a través del teléfono,siga en la línea. Nuestro agente de servicio al
cliente se asegurará de que su unidad esté trabajando adecuadamente con su(s)
dispositivo(s) y le contestará las preguntas que usted pueda tener.
EXCLUSIONES A LAS ACTUALIZACIONES
• Los dispositivos de entretenimiento o de automatización en el hogar que estén
controlados por radiofrecuencia (RF/UHF),por controles remotos cableados,
o ultrasónicos. Sólo lo dispositivos controlados por los controles remotos
infrarrojos están cubiertos.
• Los dispositivos de entretenimiento o de automatización en el hogar que no
estén controlados por controles remotos.
• Productos rotos o defectuosos.
• Productos que operen por encima de los 100 kHz.
100 Acerca de la Actualización
RS 8in1 Kameleon OM rev 10/9/03 4:12 PM Page 100
 Loading...