

Page 1
RF Wireless
Headphone System
OWNER’S MANUAL
33-1219
© 2003 RadioShack Corporation. All Rights Reserved. RadioShack and RadioShack.com are trademarks
used by RadioShack Corporation.
Page 2

THE FCC WANTS YOU TO KNOW
• This equipment has been tested and found to comply with the limits for a
Class B digital device, pursuant to Part 15 of the FCC Rules. These limits
are designed to provide reasonable protection against harmful interference
in a residential installation. This equipment generates, uses, and can
radiate radio frequency energy and, if not installed and used in accordance
with the instructions, may cause harmful interference to radio
communications.
• Your headphones might cause TV or radio interference even when
operating properly. To determine whether your headphones are causing
the interference, turn off your headphones. If the interference goes away,
your headphones are causing it. Try to eliminate the interference by:
• Moving your headphones’ transmitter away from the receiver
• Connecting your headphones’ transmitter to an outlet that is on a different
electrical circuit different from the receiver
• Consult your local RadioShack store for help.
• If you cannot eliminate the interference, the FCC requires that you stop
using your headphones.
• Changes or modifications not expressly approved by RadioShack may
cause interference and void the userís authority to operate the equipment.
Limited Ninety-Day Warranty
This product is warranted by RadioShack against manufacturing defects in
material and workmanship under normal use for ninety (90) days from the
date of purchase from RadioShack company-owned stores and authorized
RadioShack franchisees and dealers. EXCEPT AS PROVIDED HEREIN,
RadioShack MAKES NO EXPRESS WARRANTIES AND ANY IMPLIED
WARRANTIES, INCLUDING THOSE OF MERCHANTABILITY AND FITNESS
FOR A PARTICULAR PURPOSE, ARE LIMITED IN DURATION TO THE
DURATION OF THE WRITTEN LIMITED WARRANTIES CONTAINED
HEREIN. EXCEPT AS PROVIDED HEREIN, RadioShack SHALL HAVE NO
LIABILITY OR RESPONSIBILITY TO CUSTOMER OR ANY OTHER PERSON
OR ENTITY WITH RESPECT TO ANY LIABILITY, LOSS OR DAMAGE
CAUSED DIRECTLY OR INDIRECTLY BY USE OR PERFORMANCE OF THE
PRODUCT OR ARISING OUT OF ANY BREACH OF THIS WARRANTY,
INCLUDING, BUT NOT LIMITED TO, ANY DAMAGES RESULTING FROM
INCONVENIENCE, LOSS OF TIME, DATA, PROPERTY, REVENUE, OR
PROFIT OR ANY INDIRECT, SPECIAL, INCIDENTAL, OR CONSEQUENTIAL
DAMAGES, EVEN IF RadioShack HAS BEEN ADVISED OF THE
POSSIBILITY OF SUCH DAMAGES.
Some states do not allow limitations on how long an implied warranty lasts or
the exclusion or limitation of incidental or consequential damages, so the above
limitations or exclusions may not apply to you.
In the event of a product defect during the warranty period, take the product
and the RadioShack sales receipt as proof of purchase date to any RadioShack
store. RadioShack will, at its option, unless otherwise provided by law: (a)
†correct the defect by product repair without charge for parts and labor; (b)
replace the product with one of the same or similar design; or (c) refund the
purchase price. All replaced parts and products, and products on which a
refund is made, become the property of RadioShack. New or reconditioned
parts and products may be used in the performance of warranty service.
Repaired or replaced parts and products are warranted for the remainder of
the original warranty period. You will be charged for repair or replacement of
the product made after the expiration of the warranty period.
This warranty does not cover: (a) damage or failure caused by or attributable
to acts of God, abuse, accident, misuse, improper or abnormal usage, failure
to follow instructions, improper installation or maintenance, alteration, lightning
or other incidence of excess voltage or current; (b) any repairs other than
those provided by a RadioShack Authorized Service Facility; (c) consumables
such as fuses or batteries; (d) cosmetic damage; (e) transportation, shipping
or insurance costs; or (f) costs of product removal, installation, set-up service
adjustment or reinstallation.
This warranty gives you specific legal rights, and you may also have other
rights which vary from state to state.
Owner’s Manual
RadioShack Customer Relations, 200 Taylor Street, 6th Floor, Fort Worth, TX 76102
12/99
Page 3

Owner’s Manual
Note: Sound distortion also may be an indication that the batteries require
replacement. Do not install more than one Transmitter in any single location.
Two or more Transmitters operating in the same area will cause severe
interference and sound distortion.
EVERYBODY LISTEN UP
There is no limit to the number of Receiver (Headphones) which can receive
sound signals from the Transmitter.
SPECIFICATIONS
Operating Voltage
Transmitter 12 Volt DC
Receiver (Headphones) 3V DC (Two 1.5 V AAA Batteries)
Receiver (Headphones) Frequency 50 Hz - 18,000 Hz
Distortion 2%
S/N Ratio 50 dB (A)
Approximate Operating Range 100 feet
Approximate Dimensions
Transmitter 7" W x 4" D x 7.5" H
Approximate Weight
Transmitter 0.50 lb
Receiver (Headphones) 0.33 lb
QUESTIONS?
Welcome to the world of RadioShack. The product you have purchased has
been carefully engineered and manufactured to give you dependable
operation. Read this manual before operating this unit to become familiar
with its features and obtain the performance that will bring you continued
enjoyment for many years. Please retain this manual for future reference.
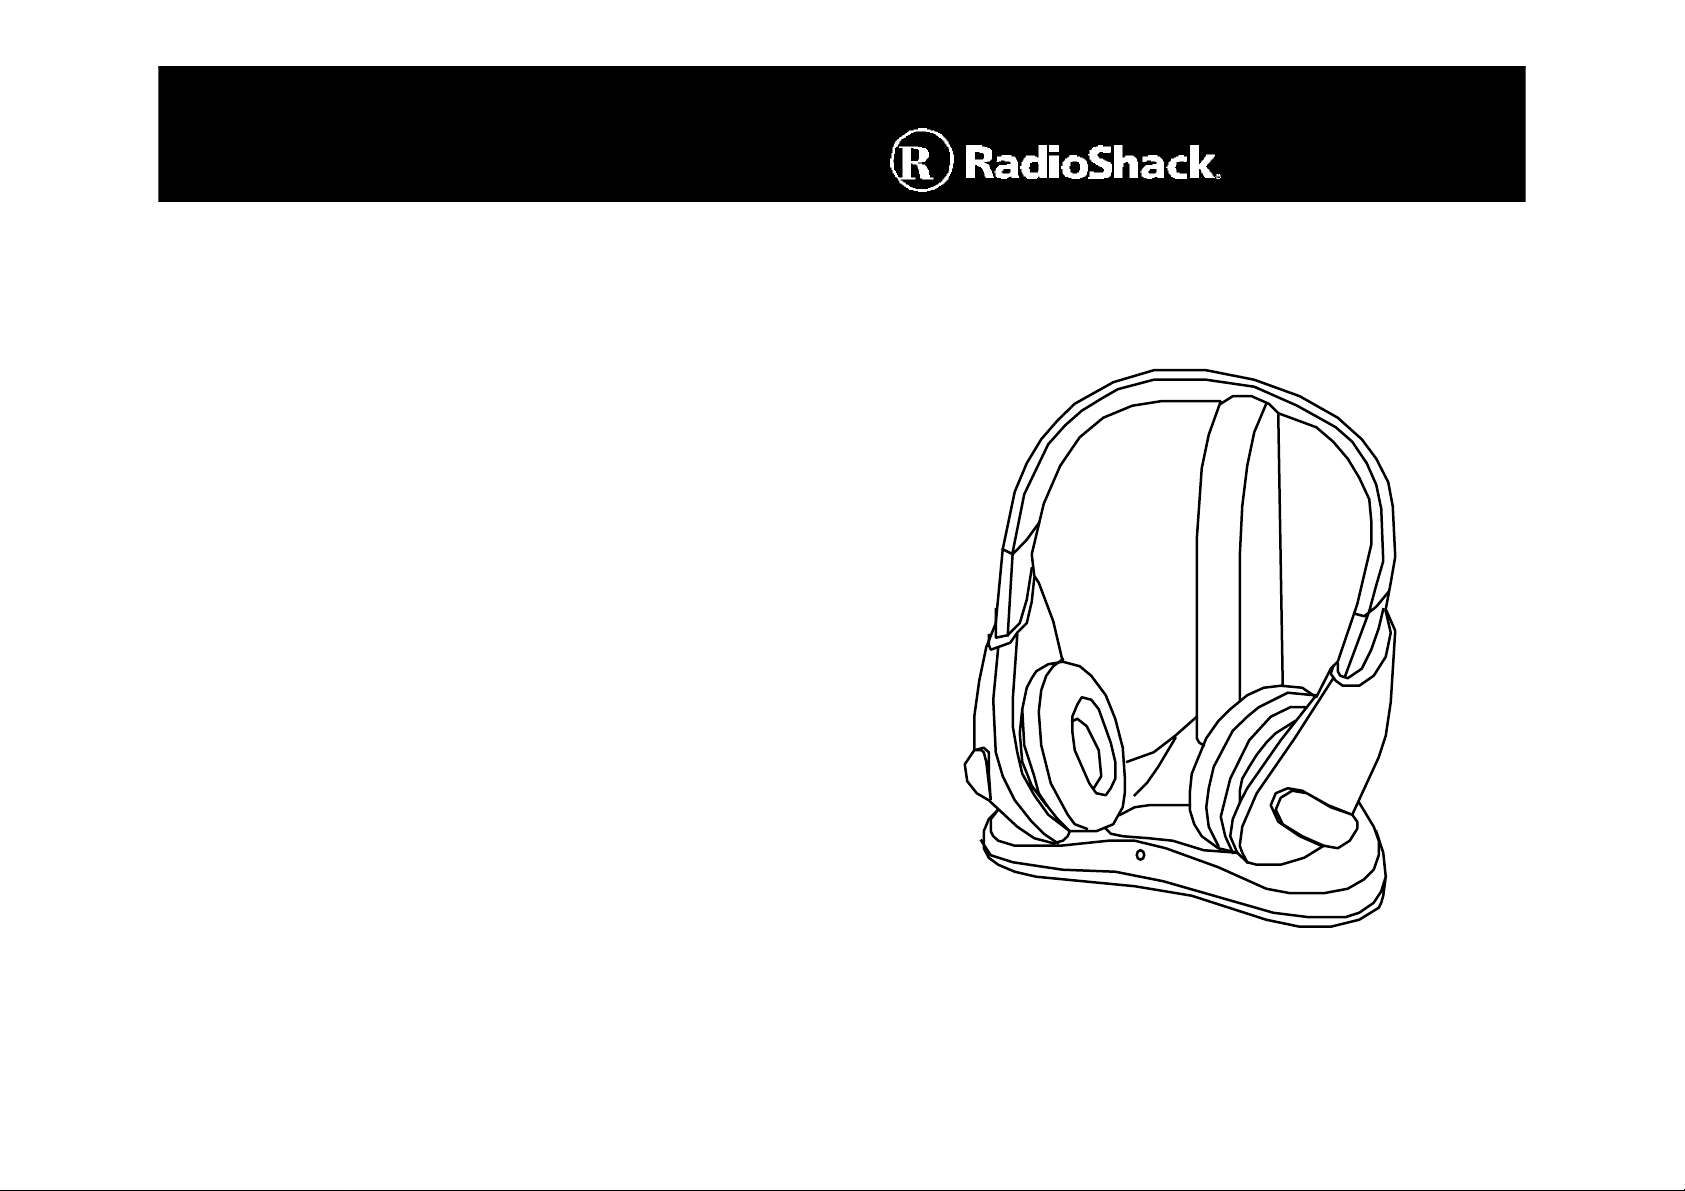
LOCATION OF CONTROLS
5
7
Transmitter Base
1
2
ON OFF
Underside Of
Transmitter
8
Headphones
4
9
3
10
6
11
If you have any questions about the Wireless Headphones, use the store
locator feature on RadioShack’s website (www.radoshack.com),or
call 1-800-The Shack (843-7422) and follow the menu options.
1. AC/DC Input Jack *
2. Audio Cord *
3. ON/OFF Switch *
4. Red LED Power Indicator Light
5. Battery Compartment
6. Headphone ON/OFF & Right Earphone Volume Control (R)
* Underside of Transmitter Base
7. Red LED Power Indicator
Light
8. Left Earphone Volume
Control (L)
9. AC/DC Power Adaptor
10. 3.5mm to 6.3m Audio Jack
11. 3.5mm to RCA Stereo Jack
14
Page 4

33-1219
Owner’s Manual
BATTERY INSTALLATION
Open the battery compartment by sliding the compartment cover in the
direction of the arrow printed on the cover. Install two AAA alkaline batteries
in accordance with the polarity symbol ( + ) diagram printed on the base of
the compartment.
Replace the battery compartment cover.
Note: There is a short, black ribbon attached to the interior of the battery
compartment. Install the batteries on top of this ribbon and place the excess
ribbon on top of the batteries. This ribbon will facilitate future battery
replacement (i.e., to remove the batteries, simply grab the exposed ribbon
and pull upwards).
Battery Notes
Follow these precautions when using batteries in this device:
1. Use only the size and type of batteries specified.
2. Be sure to follow the correct polarity when installing the batteries as indicated in the
battery compartment. Reversed batteries may cause damage to the device.
3. Do not mix different types of batteries together (e.g. Alkaline and Carbon-zinc) or old
batteries with fresh ones.
4. If the device is not to be used for a long period of time, remove the batteries to prevent
damage or injury from possible battery leakage.
5. Do not try to recharge batteries not intended to be recharged; they can overheat and
rupture. (Follow battery manufacturer’s instructions.)
A FINAL WORD ABOUT THOSE AAA BATTERIES.
PLUGGING IN & TURNING ON
1. Locate a 120 volt AC outlet no more than approximately five feet from the
sound system and plug the Transformer on the end of the AC/DC Power
Cord into the outlet.
(This Transformer converts standard 120 volt AC household current into
12 volt DC current).
2. Plug the other end of the AC/DC Power Cord into the AC/DC input jack
on the underside of the Transmitter base.
3. Plug the Audio Cord leading from the underside of the Transmitter base
into the audio output jack on your sound system. Sound system jacks
typically are labeled “audio out,” “earphones” or “phones.”
Note: With some sound systems, it will be necessary to install the
supplied 1/4" adapter on the end of the Audio Cord in order to make the
connection to the audio output jack.
4. Turn the sound system on.
5. Turn the Transmitter on. The ON/OFF Switch is located on the underside
of the Transmitter base.
The red LED will light confirming that the Transmitter is receiving power.
If the LED does not light, make certain that all connections have been
properly made.
6. Turn the Headphones ON. (This same control adjusts the volume on the
right earphone).
The red LED will light confirming that the batteries are providing power to
the Headphones.
7. Adjust the headband so that it fits comfortably.
8. Adjust the left and right volume controls on the Headphones. (In the
event of insufficient volume, check the volume control on the sound
system).
To preserve the life of the batteries, always turn the Headphones OFF when
not in use. If the red LED does not light when the headset is turned on, it is
an indication that the batteries are not supplying sufficient power. Make
certain the batteries have been properly installed or replace them with fresh
batteries.
DOESN’T SOUND RIGHT TO ME
If you experience static or distortion in the Headphones:
1. Check all connections.
2. If applicable, make certain the sound system is tuned properly.
3. Make certain you are within approximately 100 feet of the Transmitter.
32
 Loading...