

Page 1
www.radioshack.com
Q
Q
Q
Q
UICK
UICK
UICK
UICK
S
S
S
S
TART
TART
TART
TART
ENGLISHENGLISH
™
5NKO"(NCVDGF"5ECPPGT
Refer to your Owner’s Manual for complete instructions.
25-3097
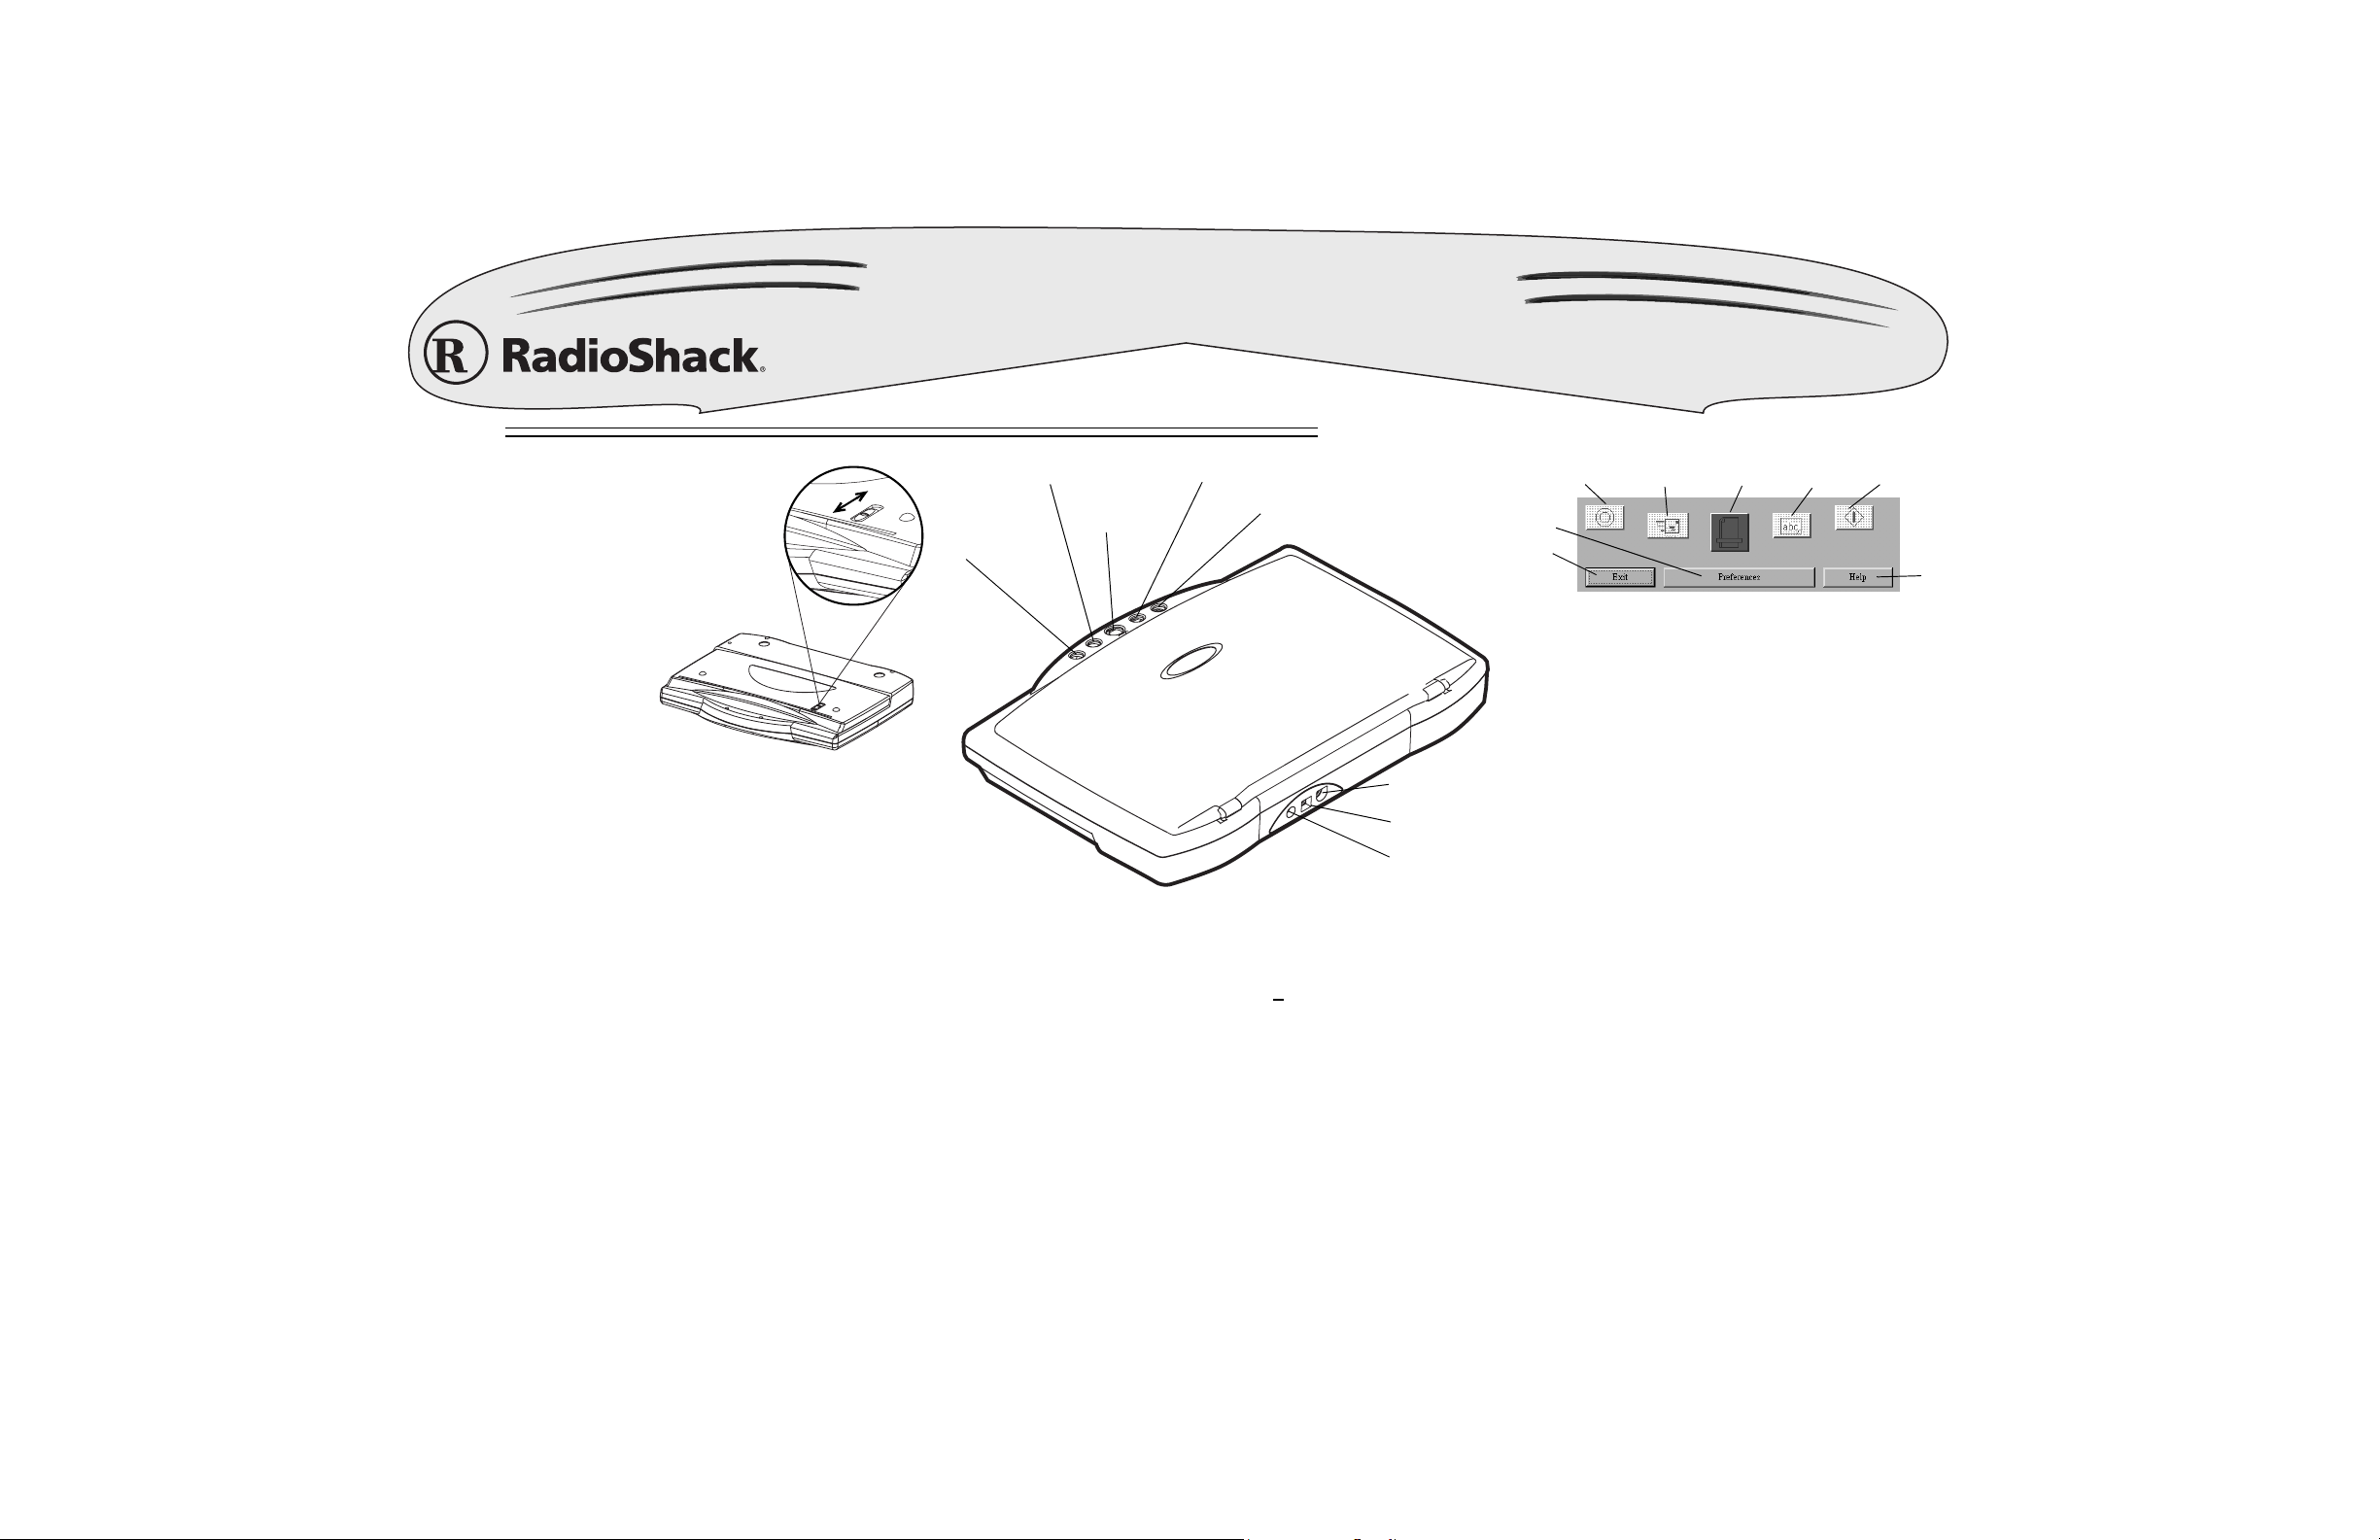
30"".QEMKPI17PNQEMKPI"VJG"5ECPPGT
Your scanner has a lock to
protect it during shipment or
while you move it.
1. Slide the lock on the bottom
of the scanner toward
to unlock it.
2. T o protect the scanner when
you move or ship it, slide the
lock toward
40""%QPPGEVKPI"#%"2QYGT
Plug the supplied 12V, 1250 mA AC adapter's barrel plug into the
power jack on the back of the scanner. Then plug the other end of
the AC adapter into a standard AC outlet. The LED on the front of
the scanner lights when the scanner is turned on.
50""+PUVCNNKPI"5QHVYCTG
50""+PUVCNNKPI"5QHVYCTG
1. Start Windows (98 or later) and quit all other applications.
1. Start Windows (98 or later) and quit all other applications.
2. Insert the software CD into your CD-ROM drive. The CD starts
2. Insert the software CD into your CD-ROM drive. The CD starts
automatically. To manually start the CD, double click My
automatically. To manually start the CD, double click My
Computer on your desktop, and then double click your CD
Computer on your desktop, and then double click your CD
drive.
drive.
3. Follow the on-screen instructions to install the desired
3. Follow the on-screen instructions to install the desired
interfaces included on the CD.
interfaces included on the CD.
4. After you complete installing interfaces, Windows prompts you
4. After you complete installing interfaces, Windows prompts you
to restart your computer by clicking
to restart your computer by clicking
5. Insert the USB cable's flat plug into your computer's USB port
5. Insert the USB cable's flat plug into your computer's USB port
and the square plug into the USB port on the back of the
and the square plug into the USB port on the back of the
scanner. Windows (except Windows XP) automatically installs
scanner. Windows (except Windows XP) automatically installs
the software and the scanner icon appears on the taskbar.
the software and the scanner icon appears on the taskbar.
See “Troubleshooting” in your Owner’s Manual for help.
See “Troubleshooting” in your Owner’s Manual for help.
••••
.
ŽŽŽŽ
Bottom View
Finish
Finish
.
.
(OCR)
WWWW
(Scan)
(Scan)
YYYY
YYYY
(Copy/Print)
XXXX
60""+PKVKCVG"69#+0"VQ"(KPF"5ECPPGT"%QOOCPFU
1. Open your TWAIN application (see your Owner’s Manual for a
complete list of applications), select
Source. . .
86%#6FDQQHU
86%#6FDQQHU, and then click
86%#6FDQQHU86%#6FDQQHU
2. Select
3. Select
4. Under
7H[W#+2&5,
7H[W#+2&5,
7H[W#+2&5,7H[W#+2&5,
'RFXPHQW#²#)DV W HU
'RFXPHQW#²#)DV W HU
'RFXPHQW#²#)DV W HU'RFXPHQW#²#)DV W HU
&XVWRP111
&XVWRP111
&XVWRP111&XVWRP111
5. Under
6. Click
scanning.
to open the
File
and then
General
Scan Page For
; )D[ LQJ/#)LOLQJ#RU#&RS\LQJ
)D[LQJ/#)LOLQJ#RU#&RS\ LQJ; %ODFN#)#:KLWH#3KRWR
)D[LQJ/#)LOLQJ#RU#&RS\ LQJ)D[LQJ/#)LOLQJ#RU#&RS\ LQJ
.
Scan Configuration:
Preview
to preview changes and then
Acquire
to adjust the scanning options and configuration.
; &RORU#'RFXPHQW#²#%HWWHU#4XDOLW\>#
&RORU#'RFXPHQW#²#%HWWHU#4XDOLW\>#
&RORU#'RFXPHQW#²#%HWWHU#4XDOLW\>#&RORU#'RFXPHQW#²#%HWWHU#4XDOLW\>#
(E-Mail)
V
V
VV
(Custom)
UUUU
Power Jack
USB
OPTION
File
and then
Select Source. . .
Select
to open the
, select from the following options: (GLWLQJ#
select the
dialogue box. Select
.
USB Scanner
%ODFN#)#:KLWH#3KRWR; &RORU#
%ODFN#)#:KLWH#3KRWR%ODFN#)#:KLWH#3KRWR
Mode:, Res:
Scan
Select
, and
to finish
Size:
Preferences
Port
Jack
window.
(GLWLQJ#
(GLWLQJ#(GLWLQJ#
&RORU#
&RORU#&RORU#
.
Custom
Exit
70""5ECPPKPI
1. Place the paper face down on the scanner. Line up
the corner of the paper with the arrow at the inside
corner of the scanner’s glass.
2. Double-click
screen scanner control panel appears.
3. Click
press
appears.
4. Under
adjustments under
5. Click
80""%QR[KPI12TKPVKPI
1. Place the paper face down on the scanner. Line up
the corner of the paper with the arrow at the inside
corner of the scanner’s glass.
2. Double-click
screen scanner control panel appears.
3. Click
press
one second to scan the image.
4. After the image is scanned, wait at least ten seconds
for the
5. Set the
6. To select your printer, click
desired printer.
7. Click
E-Mail Scan OCR
on the Windows taskbar. The on-
qqqq
on the on-screen scanner control panel, or
pppp
YYYY
on the scanner. The
Scanner Settings
General
to scan the image.
Scan
ýon the Windows taskbar. The on-
qqqq
on the on-screen scanner control panel or
tttt
on the scanner's control pad for more than
XXXX
Print
box to appear.
Picture Position
. The document is sent to your printer.
OK
USB Scanner
, make any necessary
and
and the number of
Printer
Copy/Print
Advanced
and select the
.
Copies:
Help
box
.
RadioShack Corporation
Fort Worth, Texas 76102
RadioShack and RadioShack.com are trademarks used by RadioShack Corporation.
© 2002 RadioShack Corporation. All Rights Reserved.
Printed in China
08A02
 Loading...