

Page 1
75$"78-"(CZ1/QFGO
25-3090
%106'065
Installing the Fax/Modem ................................ 1
Windows 98 ................................................. 1
Windows 2000 ............................................. 2
Windows ME ................................................ 3
Windows XP .... ..................... ..................... .. 4
Uninstalling the Fax/Modem Driver ................. 5
Windows 98 ................................................. 5
Windows 2000 ............................................. 5
Windows ME ................................................ 6
Windows XP .... ..................... ..................... .. 6
Installing SuperVoice ...................................... 7
Operation ........................................................ 7
Parts and Accessories .................................... 8
"+/2146#06"
#
If an icon appears at the end of a paragraph, go
to the box on that page with the corresponding
icon for pertinent information.
— Warning
Rý
.... — Caution
± — Note
#
— Important
#
°°°°
— Hint
OWNER’S MANUAL — Please read before using this equipment.
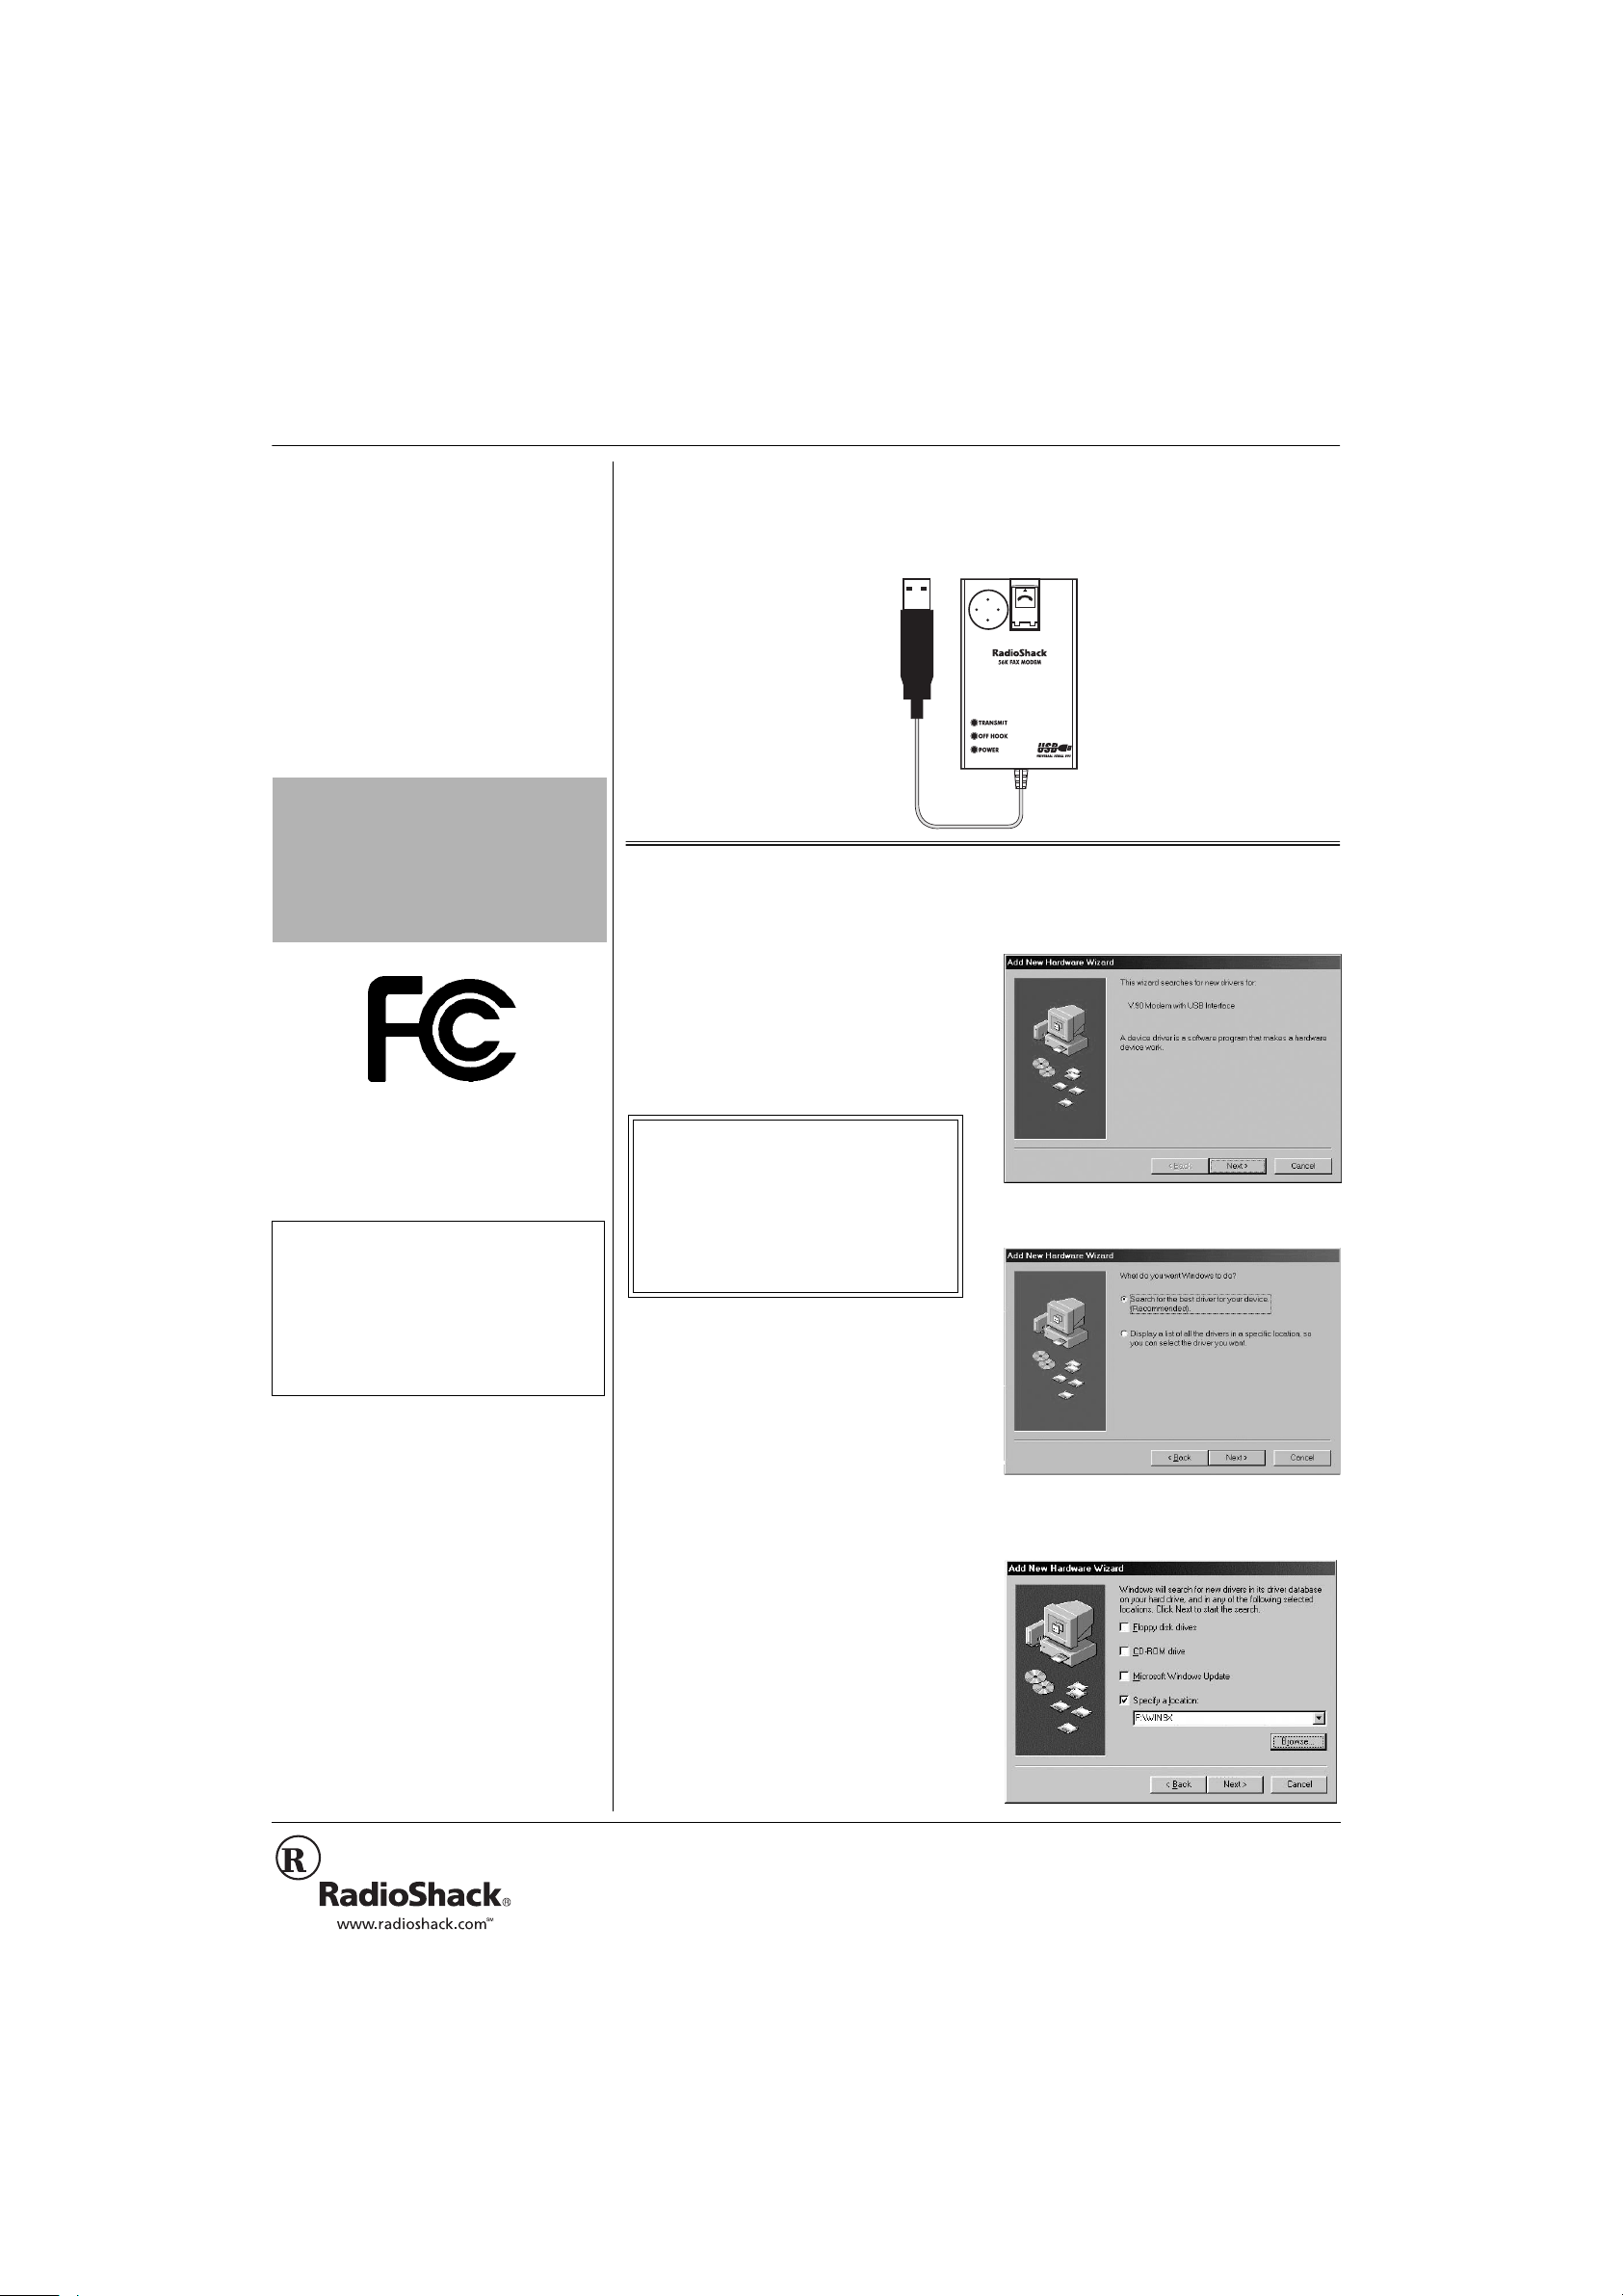
Thank you for purchasing the RadioShack USB 56K Fax/Modem. It lets you easily connect a
notebook or desktop computer running Microsoft Windows 98, 2000, ME, or XP to the
Internet, and to send and receive faxes or e-mail. It is light and compact, so it fits conveniently
in your pocket. It complies fully with USB specification 1.1(0) and comes complete with a builtin USB cable, a USB extension cable, and an RJ11 cable.
• Designed for both notebook
and desktop PCs
• Complies with 56Kbps
modem ITU V.90 standard
• Fax rates up to 14,400 bps
(%%"&'%.#4#6+10"1("
%10(14/+6;
This device complies with Part 15 of the
FCC Rules
following two conditions: (1) this device may
not cause harmful interference, and (2) this
device must accept any interference
received, including interference that may
cause undesired operation.
. Operation is subject to the
supplied USB extension cable if
necessary. The
Wizard
• Supports ITU-V . 80 video
conferencing
• Plug and play
• Low power consumption
• Power, on-hook, and
transmit LED indicators
Add New Hardware
screen appears.
ý±
±"016'"±"
If you need a longer USB cable, connect the
supplied USB extension cable’s USB jack to
the fax/modem’s USB plug by matching the
USB icons on the fax/modem’s USB plug and
the extension cable. Then connect the
extension cable’s USB plug to the computer’s
USB port.
Product: USB 56K Fax/Modem
Model: 25-3090
Responsible
Party:
Phone: 817-415-3200
RadioShack
100 Throckmorton
Fort Worth, TX 76102
+056#..+0)"6*'"(#:1
/1&'/
Before connecting the fax/modem, verify
that your computer’s processor is an Intel
Pentium or compatible, running Windows
98/98SE, Windows 2000, Windows ME, or
Windows XP, and has an available USB
port.
9+0&195";:
1. Turn on your computer.
2. Flip up the phone line jack cover on the
fax/modem. With the locking tab facing
up, insert one end of the supplied RJ-11
cable plug into the phone line jack until
it clicks. Then connect the other end to
the telephone line wall jack.
4. Click
appears.
5. Select
device (Recommended),
The following screen appears.
. The following screen
Next
Search for the best driver for your
then click
Next
.
3. Connect the fax/modem’s USB plug to
your computer’s USB port, using the
2002 RadioShack Corporation.
©
RadioShack and RadioShack.com are trademarks
All Rights Reserved.
used by RadioShack Corporation.
Page 2
Installing the Fax/Modem
Installing the Fax/Modem
6. Insert the supplied driver installation CD
in your computer, then select
location
. The path is
F:\Win9X
is the CD drive). Click
Next
Specify a
(where F:
.
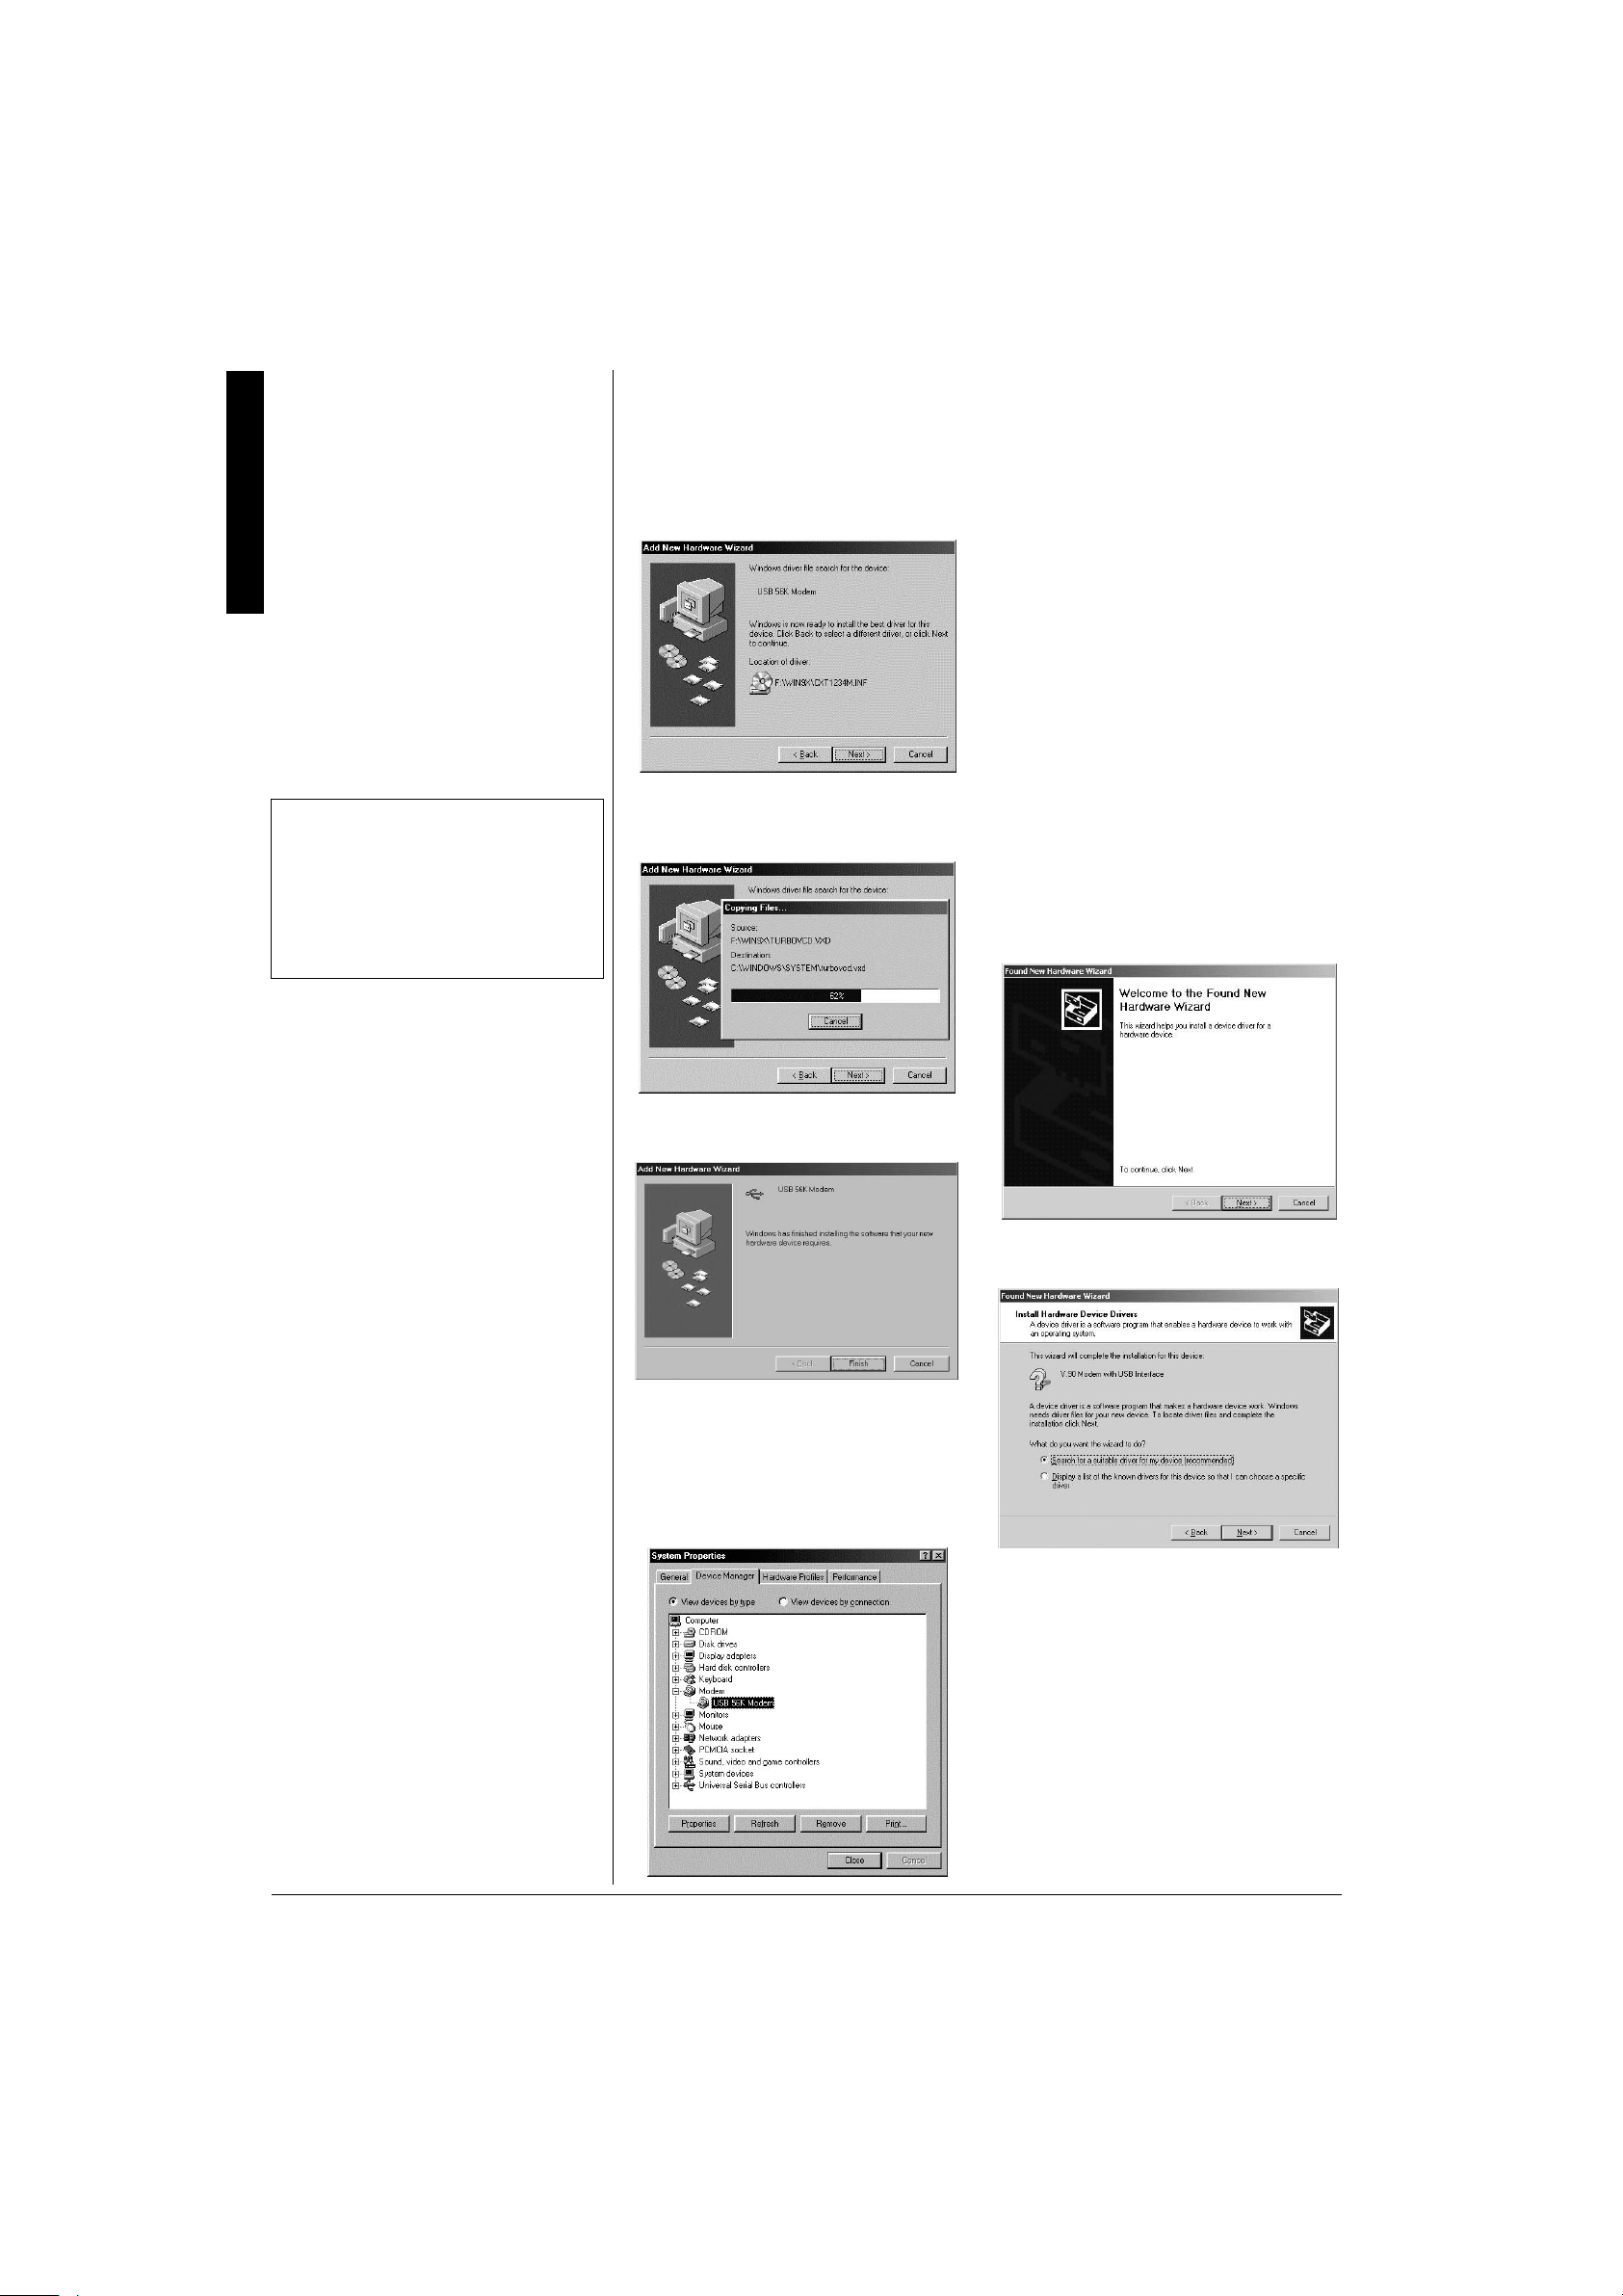
7. Windows 98 searches for the USB 56K
Modem driver. The following screen
appears.
12. Click OK. The orange PW indicator on
the fax/modem lights, indicating that the
fax/modem is now ready to use. You
can use an existing fax/modem
program or use the supplied
SuperVoice software to send fax, email, or surf the Internet. (See “Installing
SuperVoice” on Page 7.)
9+0&195"4222
1. Turn on your computer.
2. Flip up the phone line jack cover on the
fax/modem and with the locking tab
facing up, insert one end of the supplied
RJ-11 cable plug into the phone line
jack until it clicks. Then connect the
other end to the telephone line wall
jack.
±"016'"±"
If you need a longer USB cable, connect the
supplied USB extension cable’s USB jack to
the fax/modem’s USB plug by matching the
USB icons on the fax/modem’s USB plug and
the extension cable. Then connect the
extension cable’s USB plug to the computer’s
USB port.
8. Verify the driver location, then click
. Windows automatically copies the
Next
driver onto your computer.
9. After copying the modem driver, the
following screen appears.
3. Connect the fax/modem’s USB plug to
your computer’s USB port, using the
supplied USB extension cable if
necessary.
±
4. Windows 2000 recognizes the device
and the
Found New Hardware Wizard
screen appears.
5. Click
. The following screen
Next
appears.
10. Click
. Windows automatically
Finish
locates and copies the remaining files.
11. After installation, verify that
appears under the
Modem
Manager
Control Panel/System/Device Manager
tab by clicking
USB 56K
Device
Start/Settings/
2
.
Page 3
6. Select
Search for a suitable driver for my
device (recommended)
, then click
The following screen appears.
Next
.
13. Click
. The orange PW indicator
Finish
lights and the following screen appears.
Installing the Fax/Modem
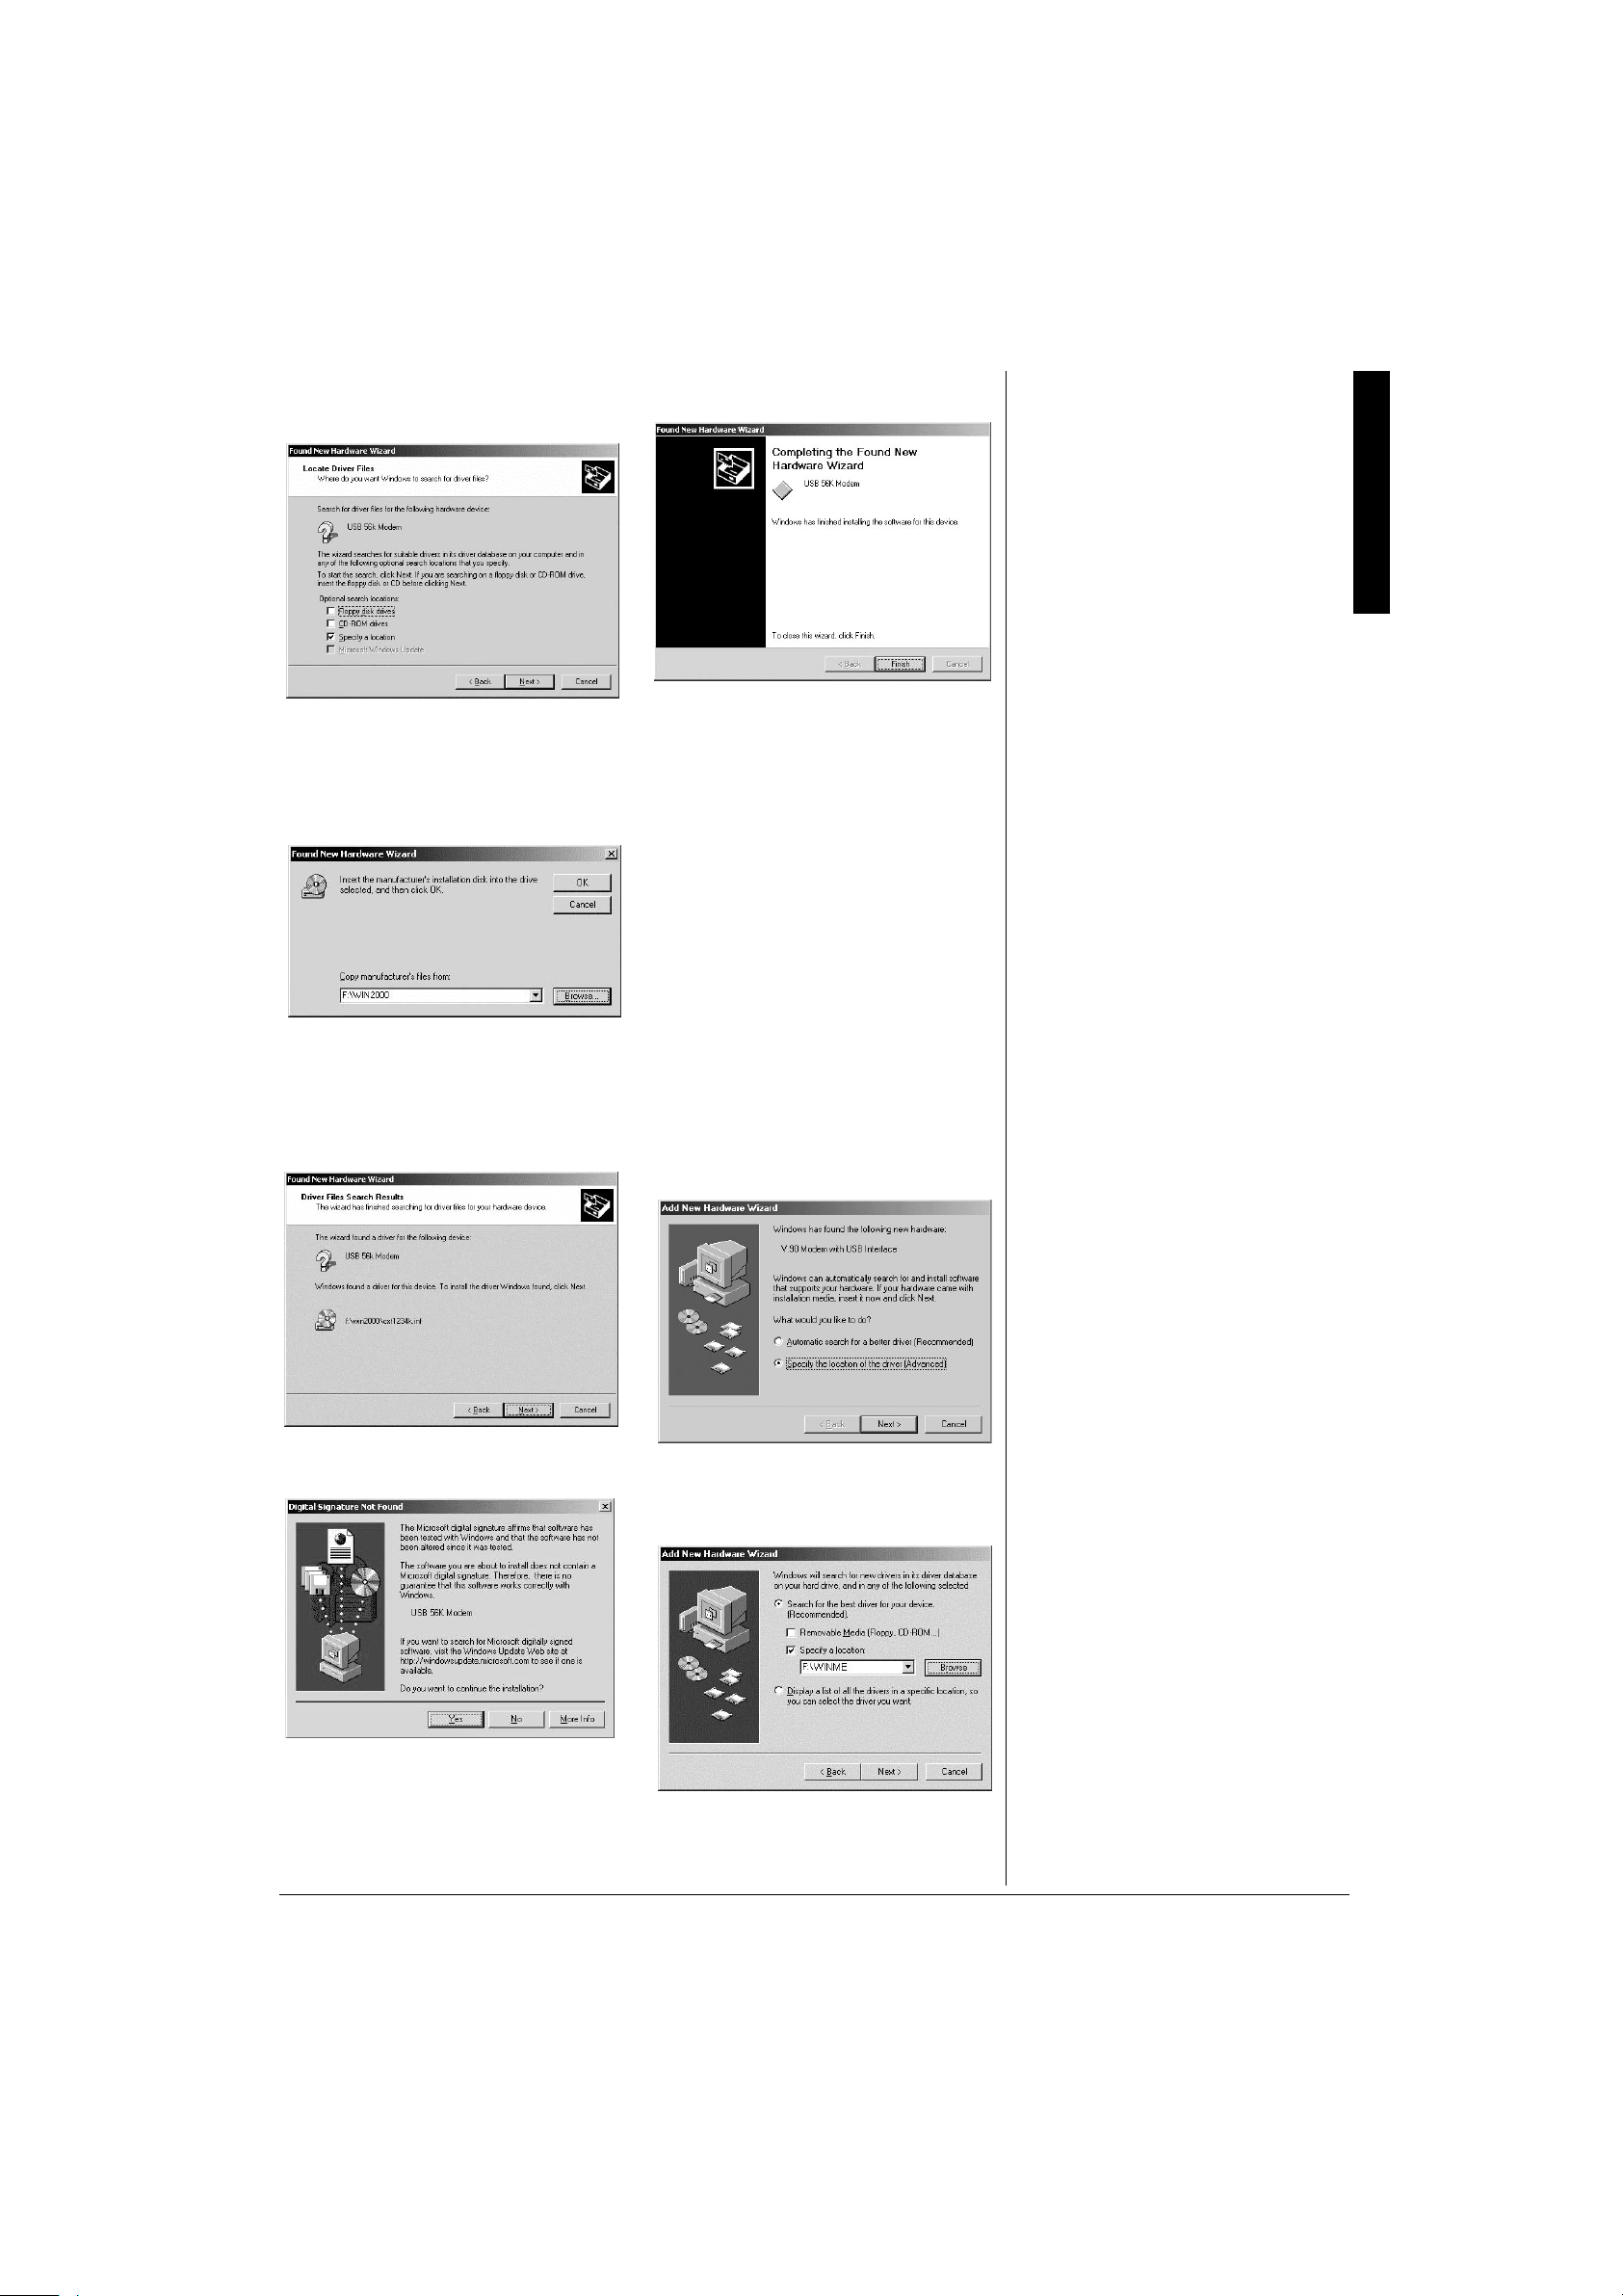
7. Insert the supplied driver installation CD
in the CD-ROM drive and select
a location
8. Click
.
. The following screen
Next
Specify
appears.
9. Click
The path is
to select the file location.
Browse
F:\WIN2000
(where F: is the
CD drive).
10. Windows 2000 locates the driver and
the following screen appears.
14. Click
. The fax/modem is ready to
Finish
use. You can use an existing fax/
modem program or the supplied
SuperVoice software to send fax, email,
or surf the Internet. (See “Installing
SuperVoice” on Page 7).
9+0&195"/'
1. Turn on your computer.
2. Flip up the phone line jack cover on the
fax/modem and with locking tab facing
up, insert one end of the supplied RJ-11
cable plug into the phone line jack until
it clicks. Then connect the other end to
the telephone line wall jack.
3. Connect the fax/modem’s USB plug to
your computer’s USB port using the
supplied USB extension cable if
necessary. Windows ME recognizes the
device and
screen appears.
Add New Hardware Wizard
1 1. Click
Signature Not Found
12. Click
to continue. The
Next
Digital
screen appears.
to continue the installation.
Yes
Windows 2000 automatically copies the
driver and related files into the
computer. The device installation is
complete after copying the driver files.
4. Select
Specify the location of the driver
(Advanced)
, then click
Next
. The
following screen appears.
5. Insert the supplied driver installation CD
in the CD-ROM drive and select
for the best driver for your device
Search
3
Page 4

Installing the Fax/Modem
(Recommended)
Enter
F:\WinME
and
Specify a location
.
where F is the CD drive.
device and the
Wizard
screen appears.
Found New Hardware
6. Click
. The following screen
Next
appears.
7. Verify the driver location and click
Windows ME automatically copies the
driver and related files to the computer.
The following screen appears.
Next
4. Insert the supplied driver inst allation CD
.
and select
location (Advanced).
5. Click
Install from a list or specific
. The following screen
Next
appears.
8. Click
. The orange PW indicator
Finish
on the fax/modem lights, indicating it is
ready to use.
9. You can use your existing fax/modem
program or the supplied SuperVoice
software to send fax, email, or surf the
Internet. (See “Installing SuperVoice”
on Page 7.)
9+0&195":2"
1. Turn on your computer.
2. Flip up the phone line jack cover on the
fax/modem and with locking tab facing
up, insert one end of the supplied RJ-11
cable plug into the phone line jack until
it clicks. Connect the other end to the
telephone line wall jack.
3. Connect the fax/modem’s USB plug to
your computer’s USB port, using the
supplied USB extension cable if
necessary. Windows XP recognizes the
6. Select
Search for the best driver in these
and
locations
search
Include this location in the
. Enter
F:\WINXP
(where F: is the
CD-ROM drive).
7. Click
. Windows XP searches and
Next
recognizes the device’s driver, then the
Hardware Installation
screen appears.
4
Page 5

8. Select
Continue Anyway
automatically copies the driver and
related files into the computer. The
following screen appears.
. Windows
3. Select
USB 56k Modem
Remove
screen appears.
. The
and click
Add/
Confirm File Deletion
9. Click
on the fax/modem lights, indicating it is
ready to use. Y ou can use your existing
program or use the supplied
SuperVoice software to send fax, email,
or surf the Internet. To use the supplied
SuperVoice software, see “Installing
SuperVoice” on Page 7.
. The orange PW indicator
Finish
70+056#..+0)"6*'"
(#:1/1&'/"&4+8'4
9+0&195";:"
1. Click
Start/Settings/Control Panel
Control Panel
screen appears.
. The
4. Click
Properties
5. Click
. The
Yes
OK
Add/Remove Programs
dialog box appears.
to remove the driver.
9+0&195"4222
1. Click
2. Select
Start/Settings/Control Panel
Add/Remove Programs
Remove Programs
.
. The
screen appears.
Uninstalling the Fax/Modem DriverUninstalling the Fax/Modem Driver
Add/
2. Click the
The
Add/Remove Program Properties
screen appears.
Add/Remove Programs
icon.
3. Select
4. Click
USB 56K Modem
Change/Remove
automatically removed from your
system.
to exit the Add/Remove
Close
Programs function.
, then click
. The modem driver is
5
Page 6

Uninstalling the Fax/Modem Driver
9+0&195"/'
1. Click
2. Select
Start/Settings/Control Panel
Add/Remove Programs
Remove Programs Properties
appears.
.
. The
screen
Add/
9+0&195":2
1. Click
Start/Control Panel
screen appears.
Panel
. The
Control
3. Select
Remove
USB 56K Modem
. The modem driver is
, then click
automatically removed from your
system.
4. Click OK to exit the Add/Remove
Programs function.
Add/
2. Select
Add or Remove Programs
Add or Remove Programs
appears.
3. Select
USB 56K Modem
Change/Remove
, then click
. The modem is
automatically removed from your
system.
4. Click
to exit the Add or Remove
Close
Programs function.
. The
screen
6
Page 7

+056#..+0)"
±"016'"±"
• For detailed features and use of the
SuperVoice software, refer to the complete
manual on the SuperVoice CD. After
installation, click on the SuperVoice icon,
then click Manual in the SuperVoice dialog
box.
• Be sure to exit the SuperVoice program
before disconnecting the modem from the
USB port.
572'481+%'"
After installing the driver, you can use your
computer’s existing fax/modem program or
install SuperVoice.
1. Insert the SuperVoice CD into your
computer’s CD-ROM drive. The
from these Languages
2. Select a language from the list and click
. The
Next
want to install
±
Select
screen appears.
Select the Software that you
screen appears.
5. Then the following screen appears.
If the installation program cannot locate
Windows may prompt you to
a file,
insert your Windows CD-ROM. If this
occurs, insert the Windows CD-ROM
and click
I
f your computer did not come with a
Windows CD-ROM,
OK
.
you will need to
find the missing file on your hard drive.
i Note the name of the missing file and
click
OK
.
3. Click
SuperVoice
Install Program
. The
SuperVoice
screen appears,
prompting you to install the program to
C:\SUPERVOC\.
4. Click
Proceed
. Follow the on-screen
instructions to install the program. The
Install Program
screen appears.
ii Open Windows Explorer and search
for the missing file. Note the path of
the file and close Windows explorer.
iii In the SuperVoice installation dialog
box
Copy Windows Files
BROWSE
and navigate to the missing
click
file’s location to continue the
installation.
6. Enter the applicable information, then
click
Proceed
automatically installed and the
Fax Printer
7. Click
. The files are
Add PIC
message appears.
. The SuperVoice icon appears
OK
on your Windows desktop and the
program is now ready to use.
12'4#6+10
To send faxes or e-mail using SuperVoice or
another fax/modem program, select
as the printer. The program prompts
Printer
you for recipient information.
PIC Fax
Installing SuperVoice
When transmitting faxes or e-mail, the green
indicator lights.
TR
When the telephone line is on-hook, the
yellow
indicator lights.
OH
7
Page 8

2#465"#0&"#%%'5514+'5
Parts and accessories are available at your local RadioShack store. Accessories are also available online at www.radioshack.com. Parts
and accessories are available but not limited to the following.
A USB extension cable comes in handy if the provided
USB extension cable is not long enough.
Attach up to four additional ports with a 4-Port USB Hub.
Limited Ninety-Day Warranty
This product is warranted by RadioShack against manufacturing defects in material and workmanship under normal use for ninety (90) days from the date of purchase from RadioShack companyowned stores and authorized RadioShack franchisees and dealers. EXCEPT AS PROVIDED
HEREIN, RadioShack MAKES NO EXPRESS WARRANTIES AND ANY IMPLIED WARRANTIES,
INCLUDING THOSE OF MERCHANTABILITY AND FITNESS FOR A PARTICULAR PURPOSE,
ARE LIMITED IN DURATION TO THE DURATION OF THE WRITTEN LIMITED WARRANTIES
CONTAINED HEREIN. EXCEPT AS PROVIDED HEREIN, RadioShack SHALL HAVE NO LIABILITY OR RESPONSIBILITY TO CUSTOMER OR ANY OTHER PERSON OR ENTITY WITH RESPECT TO ANY LIABILITY, LOSS OR DAMAGE CAUSED DIRECTLY OR INDIRECTLY BY USE
OR PERFORMANCE OF THE PRODUCT OR ARISING OUT OF ANY BREACH OF THIS WARRANTY, INCLUDING, BUT NOT LIMITED TO, ANY DAMAGES RESULTING FROM INCONVENIENCE, LOSS OF TIME, DATA, PROPERTY, REVENUE, OR PROFIT OR ANY INDIRECT,
SPECIAL, INCIDENT AL, OR CONSEQUENTIAL DAMAG ES, EVEN IF Radio Shack HAS BEEN ADVISED OF THE POSSIBILITY OF SUCH DAMAGES.
Some states do not allow limitations on how long an implied warranty lasts or the exclu sion or limit ation of incidental or consequential damages, so the above limitations or exclusions may not apply to
you.
In the event of a product defect during the warranty period, take the product and the RadioShack
sales receipt as proof of purchase date to any RadioShack store. RadioShack will, at its option, unless otherwise provided by law: (a) correct the defect by product repair without charge for parts and
labor; (b) replace the product with one of the same or similar design; or (c) refund the purchase
price. All replaced parts and products, and products on which a refund is made, become the property of RadioShack. New or reconditioned parts and products may be used in the performance of
warranty service. Repaired or replaced parts and products are warranted for the remainder of the
original warranty period. You will be charged for repair or replacement of the product made after the
expiration of the warranty period.
This warranty does not cover: (a) damage or failure caused by or attributable to acts of God, abuse,
accident, misuse, improper or abnormal usage, failure to follow instructions, improper installation or
maintenance, alteration, lightning or other incidence of excess voltage or current; (b) any repairs
other than those provided by a RadioShack Authorized Service Facility; (c) consumables such as
fuses or batteries; (d) cosmetic damage; (e) transportation, shipping or insurance costs; or (f) costs
of product removal, installation, set-up service adjustment or reinstallation.
This warranty gives you specific legal rights, and you may also have other rights which vary from
state to state.
RadioShack Customer Relations, 200 Taylor Street, 6th Floor, Fort Worth, TX 76102
12/99
RadioShack Corporation
Fort Worth, Texas 76102
25-3090
06A02
Printed in Taiwan
 Loading...