

Page 1
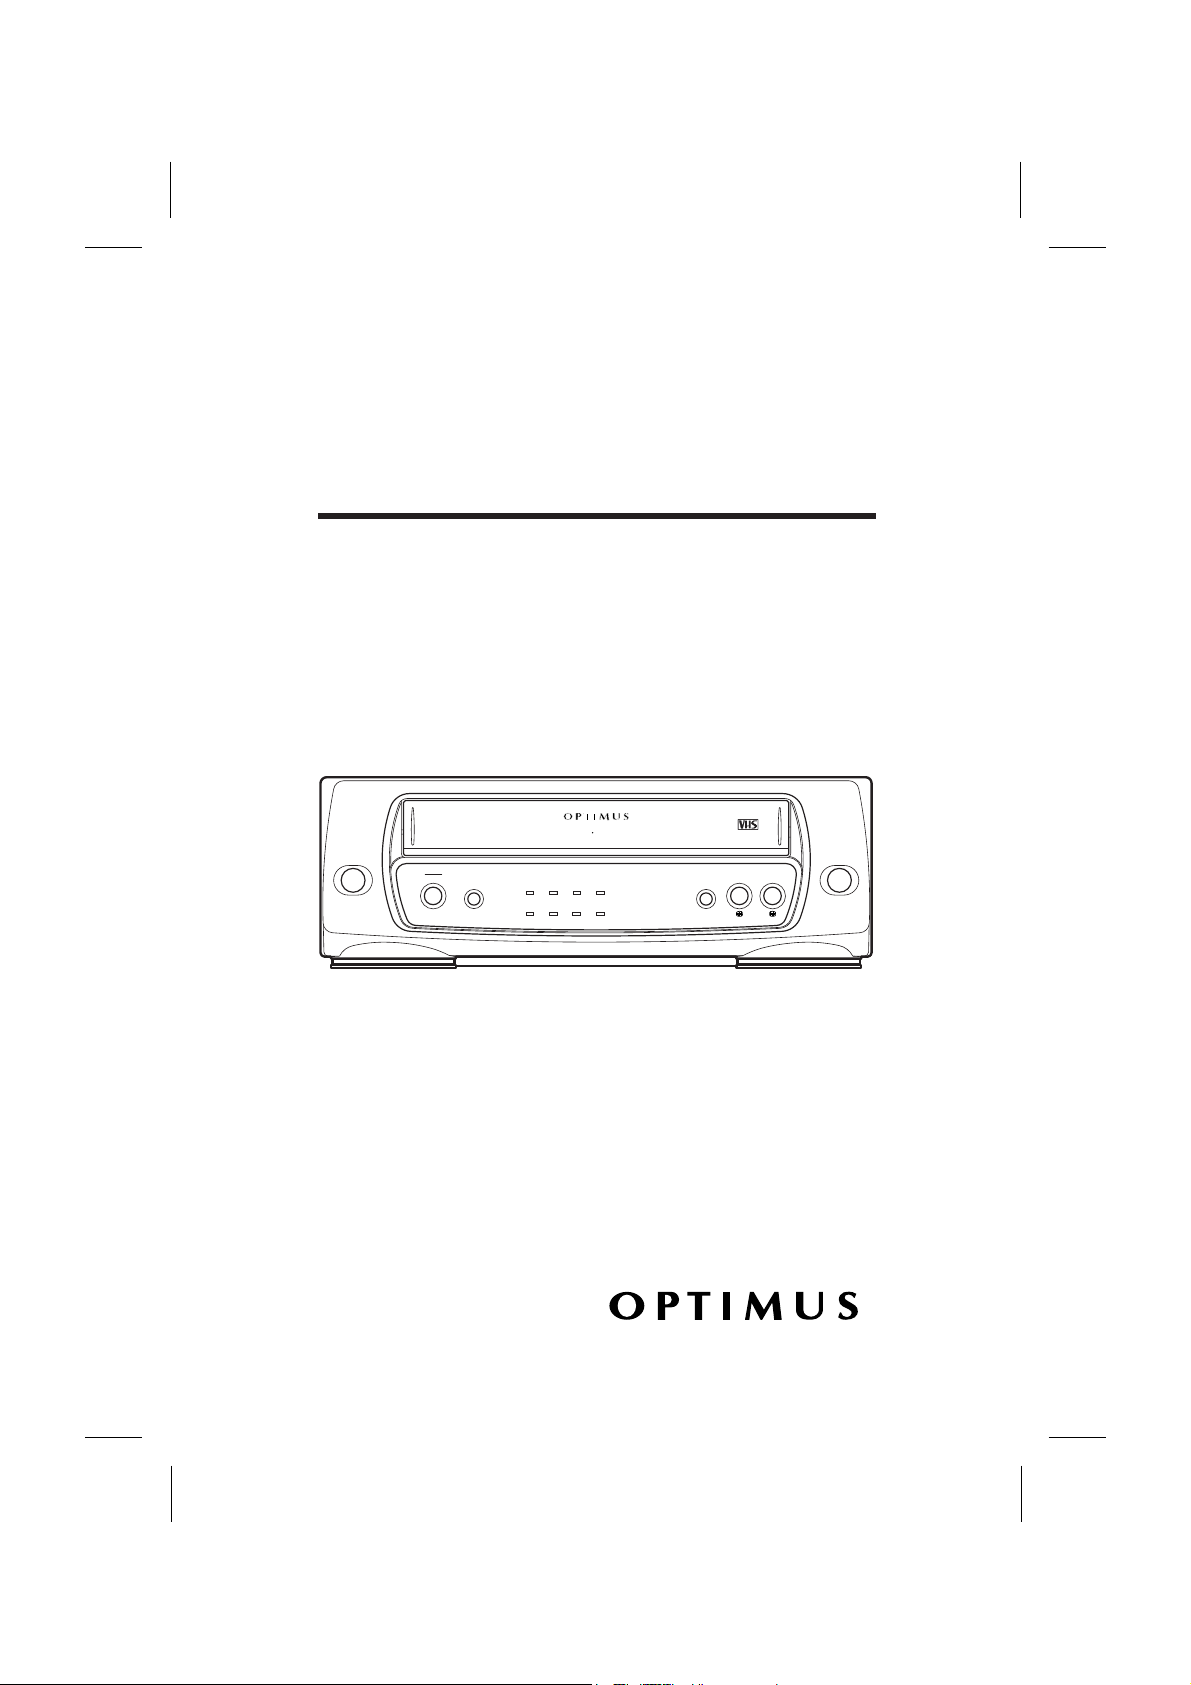
OWNERÕS MANUAL
Model 40
AC-DC Video Cassette Player
Please read before using this equipment.
¨
POWER
STOP
STILL
REWIND
PLAY
POWER
EJECT
REWIND PLAY FAST F
-
FAST F
-
REPEATA-
REPEATA-
CST.INDEWTV/ VCP
VIDEO CASSETTE PLAYER
MODEL 40
AC
/DC 12V OPERATION DIGITAL AUTO TRACKING
Cat. No. 16-430
Page 2

Your Optimus Model 40 AC-DC Video
Cassette Player (VCP) is lightweight,
easy to use, and has many convenient
features, its dual power options let you
enjoy it almost anywhere Ñ at home or
the office, or even in your vehicle. The
VCPÕs compact size and front-loading
design are especially ideal for vans, RVs
or campers, and the supplied remote
control lets you control it from a distance.
Its other features include:
Automatic Power-On Ñ automatically
turns on the VCPÕs power when you
load a video cassette.
Quick Start Mechanism Ñ automatically starts playback when you load a video
cassette.
Automatic Play Speed Selection Ñ
senses the tapeÕs recording speed and
automatically adjusts the VCP for proper
playback.
Automatic Rewind Ñ rewinds the tape
when it reaches the end.
Visual Search Ñ lets you play a tape at
a faster speed to quickly locate a
specific portion of the tape.
Freeze-Frame Ñ lets you pause the
tape during playback so you can view a
single frame.
Automatic Repeat Ñ lets you set the
VCP to automatically rewind and replay
the video tape when it reaches the end.
Digital Auto Tracking Ñ automatically
aligns the playback heads to the recorded track.
Dew Protection System Ñ keeps the
VCP from playing a tape when the system senses moisture on the tape heads.
Soft-Touch Controls Ñ let you easily
control the VCPÕs functions.
Note: The remote control requires two
AAA batteries (not supplied) for power.
We recommend that you carefully read
this ownerÕs manual. It was prepared to
assist you with the initial setup procedures and to guide you in the everyday
operation of the VCP.
We recommend you record your VCPÕs
serial number here. The number is on
the back of the VCP.
Serial Number:
FEATURES
2
© 1999 Tandy Corporation.
All Rights Reserved.
Optimus and RadioShack are registered trademark used by Tandy Corporation.
Page 3
This symbol is intended to alert you to
the presence of uninsulated dangerous voltage within the productÕs enclosure that might be of sufficient
magnitude to constitute a risk of electric shock. Do not open the productÕs
case.
This symbol is intended to inform you
that important operating and maintenance instructions are included in the
literature accompanying this product.
Warning: Do not use controls or adjustments not specified in this manual. If you
remove the cover or attempt to service
this unit, you might expose yourself to
dangerous voltage.
3
CAUTION: TO REDUCE THE RISK OF
ELECTRIC SHOCK, DO NOT REMOVE
COVER OR BACK. NO USER-SERVICEABLE PARTS INSIDE. REFER SERVICING
TO QUALIFIED PERSONNEL.
RISK OF ELECTRIC SHOCK
DO NOT OPEN
CAUTION
Warning: To reduce the risk of
fire or electric shock, do not
expose this appliance to rain or
moisture.
Page 4
IMPORTANT SAFETY INSTRUCTIONS
These simple precautions will help ensure that
you get many years of safe enjoyment from your
new product.
Read Instructions Ð Read all of the safety and
operating instructions before operating the
product.
Retain Instructions Ð Keep all safety and
operating instructions for future reference.
Heed Warnings Ð Follow warnings on the
product and in the operating guide.
Follow Instructions Ð Follow all operating and
use instructions.
Cleaning Ð Unplug this product from the wall
outlet before cleaning. Do not use liquid cleaners
or aerosol cleaners. Use a damp cloth for
cleaning.
Attachments Ð Do not use attachments not
recommended by product manufacturer as they
may cause hazards.
Water and Moisture Ð Do not use this product
near waterÑfor example, near a bathtub, wash
bowl, sink, or laundry tub, in a wet basement, or
near a swimming pool.
Accessories Ð Do not place product on an
unstable cart, stand, tripod, bracket, or table.
Product may fall, causing serious injury to a child
or adult, and serious damage to the product. Use
only with a cart, stand, tripod, bracket, or table
recommended by the manufacturer or sold with
the product. Any mounting of product should
follow manufacturerÕs instructions and should
use a mounting accessory recommended by
manufacturer.
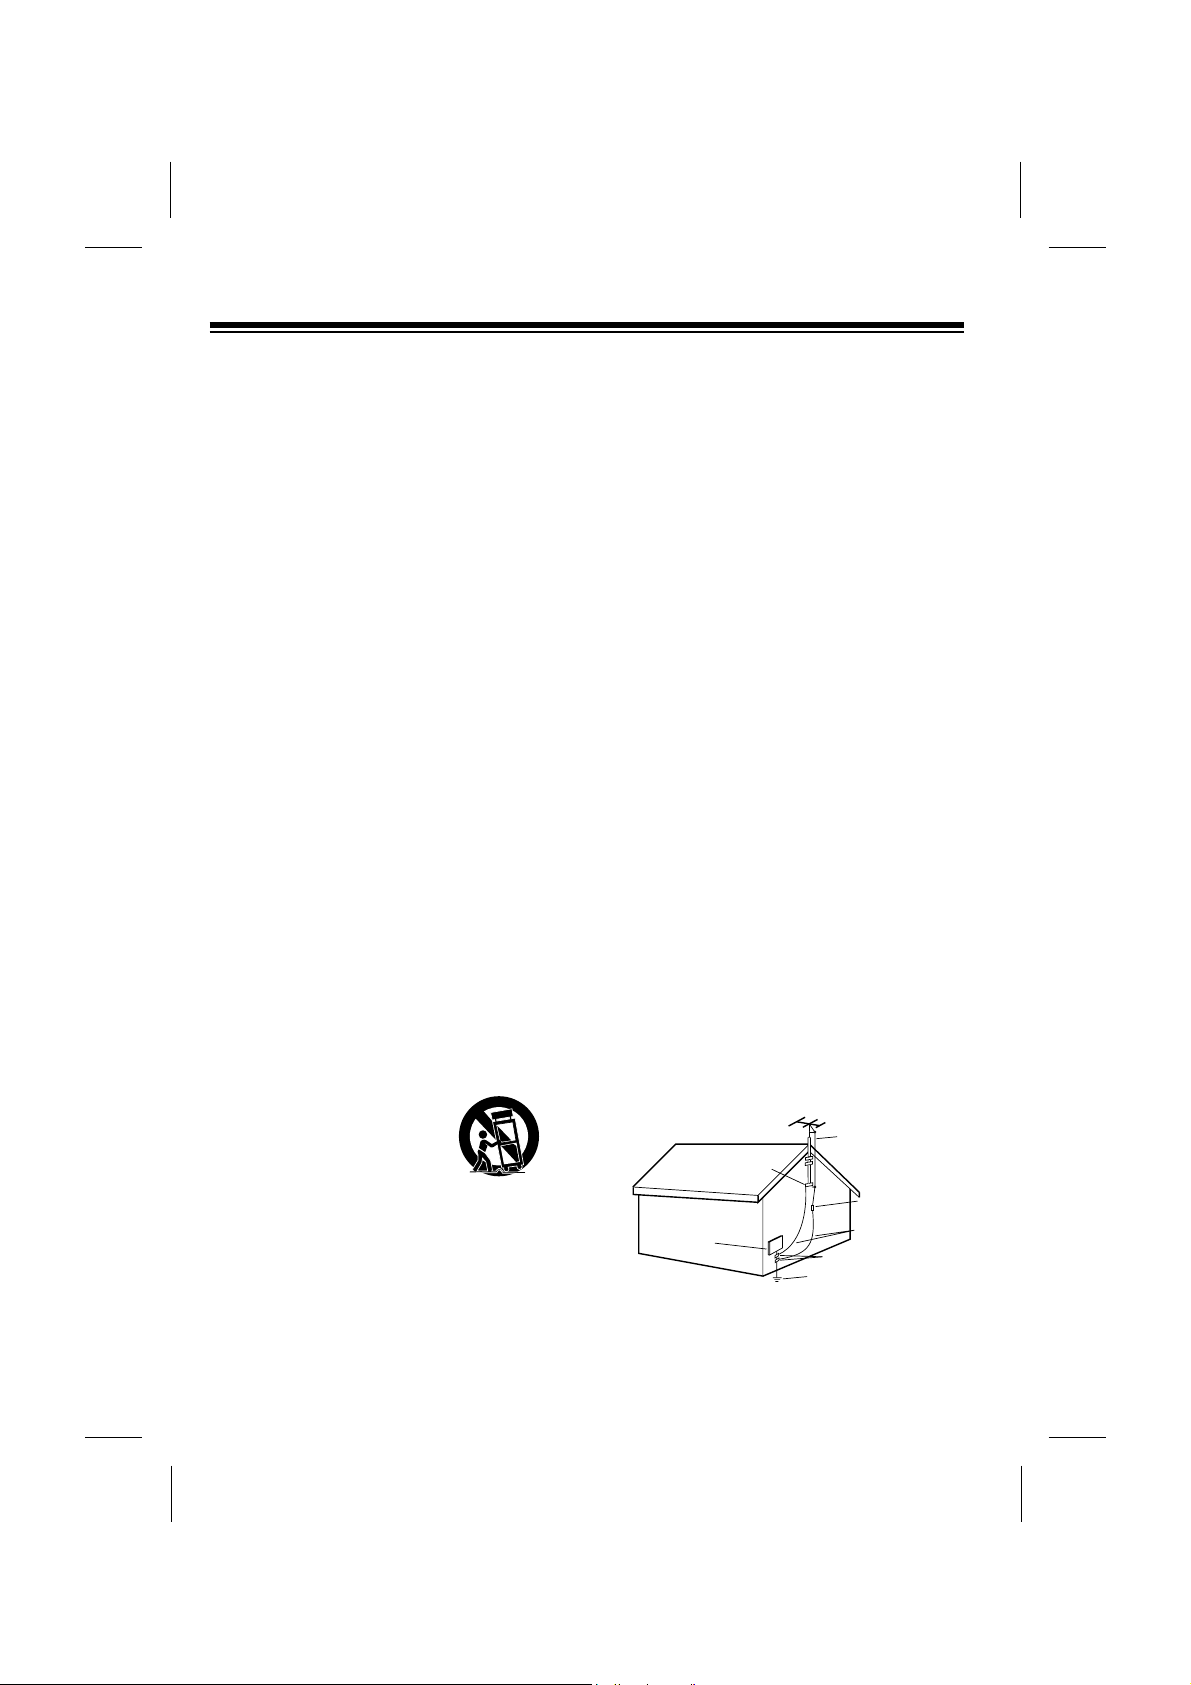
Transporting Product Ð Move
product and cart combinations
with care. Quick stops, excessive
force, and uneven surfaces may
cause product and cart
combination to overturn.
Ventilation Ð Slots and openings in cabinet must
not be blocked or covered. They are provided for
ventilation, to ensure reliable operation, and to
protect from overheating. Never block openings
by placing product on a bed, sofa, rug, or other
similar surface. Do not place product in built-in
installation such as a bookcase or rack unless
proper ventilation is provided or manufacturerÕs
instructions have been adhered to.
Power Sources Ð Operate product only from
type of power source indicated on marking label.
If you are not sure of the type of power supply to
your home, consult your product dealer or local
power company. For products intended to
operate from battery power or other sources,
refer to manual.
Line-Cord Polarization Ð Product is equipped
with a polarized alternating-current line plug (a
plug having one blade wider than the other). As a
safety feature, this plug will fit into power outlet
only one way. If youÕre unable to insert plug fully
into outlet, try reversing the plug. If plug still fails
to fit, contact an electrician to replace your
obsolete outlet. Do not defeat safety purpose of
polarized plug.
Power-Cord Protection Ð Route power-supply
cords so they are not likely to be walked on or
pinched by items placed upon or against them,
paying particular attention to cords at plugs,
convenience receptacles, and the point where
they exit from product.
Outdoor Antenna Grounding Ð If an outside
antenna or cable system is connected to this
product, be sure antenna or cable system is
grounded so as to provide some protection
against voltage surges and built-up static
charges. Article 810 of the National Electrical
Code (USA), ANSI/NFPA 70 provides
information on grounding of mast and supporting
structure, grounding of lead-in wire to an antenna
discharge unit connection to grounding
electrodes, and requirements for grounding
electrode.( See Fig. 1 below. )
4
Antenna Lead-in Wire
Antenna Discharge Unit
NEC Section 810-20
Grounding Conductors
NEC Section 810-21
Ground Clamps
Power Service Grounding
Electrode System
NEC Art 250, Part H
Ground
Clamp
Electric Service
Equipment
NEC: National Electrical Code
Antenna grounding per NEC Code, ANSI/NFPA 70
Fig. 1
Page 5

Lightning Ð For added protection for this product
during a lightning storm, or when product is left
unattended and unused for long periods of time,
unplug it from the wall outlet and disconnect
antenna or cable system. This will prevent
damage to product due to lightning and power line
surges.
Power Lines Ð An outside antenna system should
not be located in the vicinity of overhead power
lines or other electric light or power circuits, or
where it can fall into such power lines or circuits.
When installing an outside antenna system, take
extreme care to keep from touching such power
lines or circuits, as contact with them might be
fatal.
Overloading Ð Do not overload wall outlets,
extension cords or integral convenience
receptacles, as this can result in risk of fire or
electric shock.
Object and Liquid Entry Ð Never push objects of
any kind into this product through openings, as
they may touch dangerous voltage points or shortout parts that could result in fire or electric shock.
Never spill liquid of any kind on product.
Servicing Ð Do not attempt to service this product
yourself, as opening or removing covers may
expose you to dangerous voltage or other
hazards. Refer all servicing to qualified service
personnel.
Wall or Ceiling Mounting Ð Mount product to wall
or ceiling only as recommended by manufacturer.
Replacement Parts Ð When replacement part(s)
are required, be sure service technician has used
replacement part(s) specified by manufacturer or
have same characteristics as original part(s).
Unauthorized substitutions may result in fire,
electric shock, or other hazards.
Damage Requiring Service Ð Unplug this product
from the wall outlet and refer servicing to qualified
service personnel under these conditions:
a. If power-supply cord or plug is damaged.
b. If liquid has been spilled or objects have fallen
into product.
c. If product has been exposed to rain or water.
d. If product doesnÕt operate normally by following
handbook instructions. Adjust only those
controls covered by handbook instructions;
improper adjustment of other controls may
result in damage and often requires extensive
work by a qualified technician to restore
product to normal operation.
e. If product has been dropped or cabinet has
been damaged.
f. If product exhibits a distinct change in
performance.
Heat Ð Keep product away from heat sources
such as radiators, heat registers, stoves, or other
products (including amplifiers) that produce heat.
Safety Check Ð Upon completion of any service
or repairs to this product, ask service technician to
perform safety checks to determine that product is
in proper operating condition.
5
Page 6

CONTENTS
Preparation .................................................................................................................5
Accessories............................................................................................................5
Choosing a Location ...................................................................................................5
Making Connections ..............................................................................................6
Connecting a Standard TV...............................................................................7
Connecting a TV Monitor .................................................................................8
Connecting a VCR ...........................................................................................9
Setting the Channel Switch..................................................................................10
Connecting Power................................................................................................10
Using AC Power.............................................................................................10
Using Vehicle Battery Power .........................................................................11
Dew Protection System........................................................................................12
Installing the Remote ControlÕs Batteries.............................................................12
VCP Status Display..............................................................................................13
How to Access Menu ...........................................................................................13
Operation ..................................................................................................................14
Using the Remote Control....................................................................................14
Playing a Video Tape...........................................................................................14
Fast-Forward/Rewind ..........................................................................................15
Visual Search.................................................................................................15
Freeze-Frame ......................................................................................................16
Auto Repeat Playback .........................................................................................16
Adjusting Tracking ...............................................................................................16
Watching Broadcast TV .......................................................................................17
Copying a Video Tape .........................................................................................17
Troubleshooting.......................................................................................................18
Care and Maintenance .............................................................................................20
Cleaning the Video Heads ...................................................................................21
Video Tape Tips...................................................................................................21
Replacing the Fuse ..............................................................................................22
The FCC wants You to Know...............................................................................22
Specifications...........................................................................................................23
6
Page 7
PREPARATION
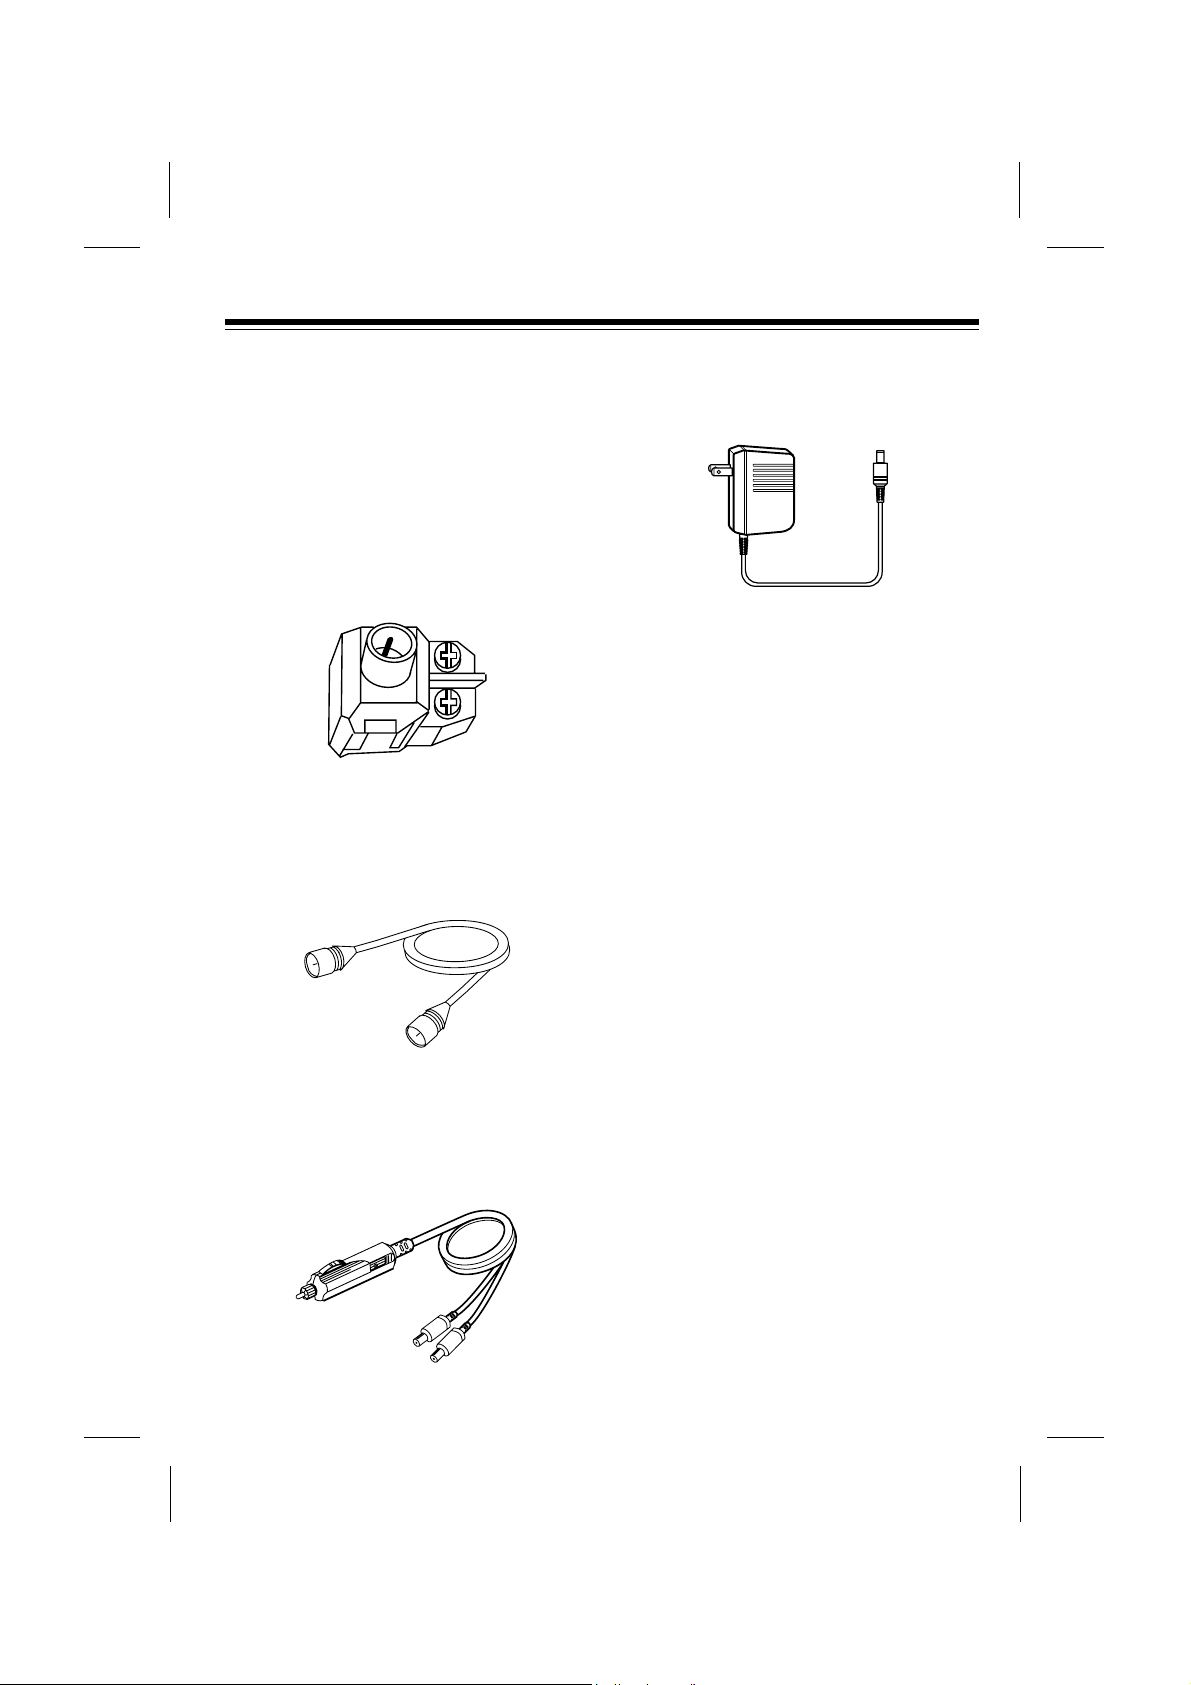
ACCESSORIES
Your VCP includes the following connection accessories. Be sure to unpack all
of them before you throw away the
packing material.
300-to-75-ohm Adapter Ñ connects a
300-ohm antenna wire to the VCPÕs
ANT.IN terminal.
75-ohm Coaxial Cable Ñ connects the
VCPÕs RF.OUT terminal to your TVÕs 75-
ohm antenna terminal.
VCP/TV DC Power Cord Ñ lets you
power the VCP and a portable TV (not
supplied) from your vehicleÕs cigarette
lighter socket.
AC Adapter Ñ lets you power the VCP
from a standard AC outlet.
CHOOSING A LOCATION
For safe and effective operation of your
VCP, consider the following when you
choose an installation location.
¥ Place the VCP away from direct
sunlight and heat sources, such as
radiators and heat vents.
¥ Do not place the VCP in a dusty or
humid area.
¥ Do not block the VCPÕs ventilation
holes. For example, do not push the
back of the VCP against a padded
surface.
¥ Place the VCP on a flat surface,
away from strong vibrations or
magnetic fields.
¥ Do not put anything on top of the
VCP.
7
Page 8

MAKING CONNECTIONS
You can connect your VCP to a TV monitor, a VCR (video cassette recorder), or
both. To help you make the right
connections:
¥ If connection a TV, use the connec-
tions de-scribed in ÒConnecting a
Standard TVÓ on Page 7.
A Òstandard TVÓ can receive broadcast TV signals from an antenna or
cable system, and can be tuned to
different channels to view the broadcasts. It does not have separate
audio and video input jacks.
¥ If connection a monitor or TV/moni-
tor, use the connections described
in ÒConnect-ing a TV/MonitorÓ on
Page 8. (An additional audio/video
cable is required.)
A ÒTV/monitorÓ is like a standard TV,
but it also has separate audio and
video input jacks. Using the separate audio and video input jacks
results in a better quality picture and
sound.
¥ If you want to connect a VCR to the
VCP for copying tapes, use the connections described in ÒConnecting a
VCRÓ on Page 9. (An additional
audio/video cable is required.)
Note to the CATV System Installer:
This reminder is provided to call the
CATV system installerÕs attention to article 820-40 of the NEC that provides
guidelines for proper grounding and, in
particular, specifies that the cable
ground shall be connected to the grounding system of the building, as close to
the point of cable entry as practical.
8
Page 9

Connecting a Standard TV
Follow these steps to connect the VCP to a standard TV that has a 75-ohm cable jack
(but does not have separate audio and video input jacks).
1. Make sure the TV is off, then disconnect the antenna or cable wire from your TVÕs
VHF antenna terminal and connect it to the VCPÕs ANT.IN terminal.
Notes:
¥ If your antenna has a 300-ohm wire, connect the wire to the 300-ohm screw
terminals on the supplied 300-to-75-ohm adapter. Then connect the adapterÕs
75-ohm connector to the VCPÕs ANT.IN terminal.
¥ If you have a VHF/UHF splitter connected to your TV, disconnect the antenna
wire from the splitterÕs input terminal and leave the splitter connected to the TV.
¥ If you have a separate UHF antenna, leave the UHF antenna wire connected to
the TV.
2. Using the supplied 75-ohm coaxial cable, connect the VCPÕs RF.OUT terminal to
the TVÕs VHF antenna terminal (or the splitterÕs input terminal).
9
3
DC IN 12V
4
CHANNEL
RF.OUT
ANT.IN
VIDEO
OUT
AUDIO
OUT
300-ohm 75-ohm
UHF
VHF
75-Ohm coaxial cable
MODEL 40
75-Ohm Coaxial Cable
Adapter
(300-to-75-Ohm)
VHF 300-Ohm
Twin Lead
VHF/UHF Antenna
OR
TV
Page 10

Connecting a TV Monitor
To connect your VCP to a TV monitorÕs separate audio and video input jacks, connect
the VCPÕs AUDIO and VIDEO OUT jacks to the TV monitorÕs audio and video input
jacks using video-quality shielded cable (not supplied).
Caution: You must use video-quality cable for this type of connection. Do not use
standard audio cable. Your local RadioShack store sells the proper type of cable.
10
3
DC IN 12V
4
CHANNEL
RF.OUT
ANT.IN
VIDEO
OUT
AUDIO
OUT
300-ohm 75-ohm
UHF
VHF
OUT
IN
AUDIO VIDEO
Audio
IN
Video
IN
From Antenna
TV/Monitor
Video
OUT
Audio
OUT
MODEL 40
Page 11

Connecting a VCR
To connect your VCP to a VCR so you can copy video tapes, connect the VCPÕs AUDIO and VIDEO OUT jacks to the VCRÕs audio and video input jacks using video-
quality shielded cable (not supplied). Then see ÒCopying a Video TapeÓ on Page 17 to
find out how to copy a tape.
Notes:
¥ You must use video-quality cable for this type of connection. Do not use standard
audio cable. Your local RadioShack store sells the correct type of cable.
¥ You can connect the VCRÕs audio/video output jacks to your TVÕs input jacks
using another video-quality shielded cable or antenna output jack using 75-ohm
cable. This lets you watch a tape while you copy it (see ÒCopying a Video TapeÓ
on Page 17).
11
3
DC IN 12V
4
CHANNEL
RF.OUT
ANT.IN
VIDEO
OUT
AUDIO
OUT
CH.4
CH.3
OUT TO TV
IN FROM ANT
IN
OUT
AUDIO VIDEO
VHF
UHF
From
VIDEO OUT
From
AUDIO OUT
To
Audio Input
To
Video Input
MODEL 31
VCR
Page 12

SETTING THE CHANNEL
SWITCH
CHANNEL, on the back of the VCP, de-
termines on which channel (3 or 4) a
standard TV receives the VCPÕs signal.
Set CHANNEL to 3 for channel 3, or 4 for
channel 4.
Notes:
¥ If possible, set CHANNEL to a chan-
nel on which you do not receive regular television broadcasts.
¥ The CHANNEL setting has no effect
on the audio and video outputs, nor
does it affect a standard TVÕs operation when the VCP is not playing a
tape.
CONNECTING POWER
Using the supplied adapters, you can
power your VCP from either a standard
AC outlet or your vehicleÕs cigarettelighter socket.
Cautions:
¥ If you use the VCP in areas of high
humidity or move it from a cold area
to a warm one, allow it to warm up
for about 2 hours before you plug it
in and operate it. This allows any
damaging moisture to completely
evaporate.
¥ If moisture has formed inside the
VCP, it might not operate after you
connect power (see ÒDew Protection
SystemÓ on Page 12).
Using AC Power
The supplied AC adapter lets you power
the VCP from a standard AC outlet.
Cautions:
¥ The supplied AC adapter provides
14 volts DC power and delivers 850
milliamps and has a plug that properly fits the VCPÕs DC IN 12V jack.
Using an adapter that does not meet
these specifications could damage
the VCP, your TV monitor, or the
adapter.
¥ When you unplug the AC adapter,
grasp the adapterÕs plug, not its
cord.
¥ Always plug the AC adapter into the
VCP before you plug it into the AC
outlet. Always unplug the AC
adapter from the outlet before you
unplug it from the VCP.
12
3
DC IN 12V
4
CHANNEL
RF.OUT
ANT.IN
VIDEO
OUT
AUDIO
OUT
Channel Selector Switch
Page 13

To use AC power, connect the AC adapterÕs barrel plug to the VCPÕs DC IN 12V
jack, then plug the AC adapterÕs power
cord into a standard AC outlet.
Using Vehicle Battery Power
The supplied DC adapter lets you power
your VCP and a portable TV (not
supplied) from your vehicleÕs cigarettelighter socket.
Cautions:
¥ The TV you use must have a DC 12-
volt jack (with the center tip set to
positive) that accepts the adapterÕs
5.5 mm outer diameter/2.1 mm inner
diameter plug.
¥ Before plugging the power cordÕs
cigarette-lighter plug into your vehicleÕs cigarette-lighter socket, be
sure the knurled ring at the plugÕs tip
is screwed firmly onto the plug.
¥ Always plug the DC adapter into the
VCP and TV before you plug it into
the cigarette-lighter socket. Always
unplug the DC adapter from the
cigarette-lighter socket before you
unplug it from the VCP and TV.
¥ The VCP continues to draw a small
amount of current from the vehicleÕs
battery even after you turn it off, so
be sure to disconnect the DC
adapter from the cigarette-lighter
socket when you are not using the
VCP and TV, to prevent your vehicleÕs battery from being drained.
The DC power cord has two barrel plugs
on one end and a cigarette-lighter plug
on the other end. To connect DC power,
plug one of the adapterÕs barrel plugs
into the VCPÕs DC IN 12V jack, and plug
the other into the TVÕs DC 12-volt jack.
Then connect the cigarette-lighter plug
into the vehicleÕs cigarette-lighter socket.
Note: If the DC adapter does not provide
power, check the fuse. See ÒReplacing
the FuseÓ on page 22.
13
3
DC IN 12V
4
CHANNEL
RF.OUT
ANT.IN
VIDEO
OUT
AUDIO
OUT
Cigarette-Lighter
Socket
MODEL 40
TV
3
DC IN 12V
4
CHANNEL
RF.OUT
ANT.IN
VIDEO
OUT
AUDIO
OUT
MODEL 40
Page 14

DEW PROTECTION
SYSTEM
Your VCPÕs dew protection system helps
prevent damage caused by moisture that
can form on the VCPÕs tape heads.
When the system senses moisture on
the tape head(s), the DEW indicator
turns on and the VCP does not let you
play a tape.
Caution: To avoid damaging the VCP
mechanism, do not try to load a tape
while the DEW indicator is on.
If DEW indicator turns on, disconnect the
VCPÕs power for about 2 hours, then
plug it back in. If the DEW indicator does
not light, you can proceed with normal
operation. If the DEW indicator turns on
again, try unplugging the VCP for
another 2 hours, or take it to your local
RadioShack store for assistance.
INSTALLING THE REMOTE
CONTROLÕS BATTERIES
The remote control requires two AAA
batteries (not supplied) for power. For the
best performance and longest battery life,
we recommend alkaline batteries, such
as RadioShack Cat. No. 23-558.
1. Remove the battery compartment
cover, by sliding it in the direction of
the arrow.
2. Place the batteries in the compartment as indicated by the polarity
symbols (+ and Ð) marked inside the
compartment.
Cautions:
¥ Use only fresh batteries of the
required size and type.
¥ Do not mix old and new batteries,
different types of batteries (standard, alkaline, or rechargeable),
or rechargeable batteries of different capacities.
14
Indicator
POWER
STOP
STILL
REWIND
PLAY
POWER
EJECT
REWIND PLAY FAST F
-
FAST F
-
REPEATA-
REPEATA-
CST.INDEW
DEW
TV/ VCP
VIDEO CASSETTE PLAYER
MODEL 40
AC
/DC 12V OPERATION DIGITAL AUTO TRACKING
Page 15

3. Replace the cover.
Notes:
¥ If you will not be using the remote
control for a month or more, remove
the batteries.
¥ You can use the remote control up
to a distance of about 23 feet (7
meters) in front of the VCP. If it does
not operate properly within this distance, replace the batteries.
Warning: Always dispose of old batteries promptly and properly.
VCP STATUS DISPLAY
VCP Status Displays tell you the status of
the tape inserted and VCP function.
VCP Status Display appears on the TV
when a VCP function starts, like when
you select a different VCP mode. For
example, pressing STOP while the VCP
is in PLAY mode show STOP in the
display. Press DISPLAY on the remote at
any time (except special effect playback
mode) to see the status display.
① ②
③
① Tape speed display
EP = Extend Play
LP = Long Play
SP = Standard Play
② Current mode of operation display
STOP, PLAY, FF(Fast Forward) etc.
③ Real-time tape counter display
Note:
¥ If the VCP status display does not
appear on the TV screen, check the
FUNCTION OSD option on the
MENU. Select ON to see the
display.
HOW TO ACCESS MENU
1. Press MENU to see menu.
2. Press the SELECT ▼ or ▲ to use
choose desired option to be changed.
Then you set desired mode by
pressing the OK button repeatedly.
3. Press MENU to exit menu, or wait a
few minutes and the VCR returns to
normal operation.
AUTO REPEAT
If you want to play back tape repeatedly,
set AUTO REPEAT option to ON. (See
ÒAuto Repeat PlaybackÓ on page 16.)
F.(Function) OSD
Switches the VCP status display ON or
OFF.
15
PLAY SP
Ð1:35:45
MENU
AUTO REPEAT OFF
F.OSD ON
SELECT: ▼▲, OK END:MENU
Page 16

OPERATION
USING THE REMOTE
CONTROL
The buttons on the remote control function the same as those on the front of the
VCP. To use the remote control, be sure
the front end of it is pointing with a clear
path toward the middle of the VCPÕs front
panel, then press the desired button(s).
PLAYING A VIDEO TAPE
1. Turn on the TV or TV/monitor. If you
connected a TV using the VCPÕs
RF.OUT jack, tune the TV to the
same channel (3 or 4) to which you
set the VCPÕs CHANNEL switch. If
you connected a TV/monitor using
the VCPÕs AUDIO and VIDEO OUT
jacks, switch the TV/monitor to the
video setting.
2. Press POWER to turn on the VCP.
The red POWER indicator lights. Or,
to use the VCPÕs auto power on feature, you can skip this step.
3. To load a video cassette tape, insert
the tape halfway into the VCPÕs cassette door with the main label facing
up and the spine label facing out.
Then gently push on the center of
the tapeÕs spine until the VCP pulls
the tape all the way in. The CST.IN
indicator lights, then the PLAY
indicator lights and the tape
automatically begins to play.
4. To stop the tape during play, press
STOP. The PLAY indicator turns off
and the tape stops.
To start playback again, press PLAY.
16
POWER
STOP
STILL
REWIND
PLAY
POWER
EJECT
REWIND PLAY FAST F
-
FAST F
-
REPEATA-
REPEATA-
CST.INDEWTV/ VCP
VIDEO CASSETTE PLAYER
MODEL 40
AC
/DC 12V OPERATION DIGITAL AUTO TRACKING
EJECT
POWER
PLAY
STOP
REWIND FAST-F
TV/VCPA-REPEAT MENU
TRACKING
SELECT
DISPLAY
OK
POWER
STOP
STILL
REWIND
PLAY
POWER
EJECT
REWIND PLAY FAST F
-
FAST F
-
REPEATA-
REPEATA-
CST.INDEWTV/ VCP
VIDEO CASSETTE PLAYER
MODEL 40
AC
/DC 12V OPERATION DIGITAL AUTO TRACKING
CST.IN Indicator
POWER
STOP
STILL
POWER
EJECT
REWIND
DEWTV/ VCP
POWER
STOP
STILL
POWER
EJECT
REWIND
DEWTV/ VCP
Page 17

5. To eject the tape, press EJECT. The
CST.IN indicator flashes then turns
off and the VCP ejects the tape.
6. Press POWER to turn off the VCP.
The red POWER indicator turns off.
FAST-FORWARD/REWIND
To fast-forward or rewind the tape at
high speed, with the tape stopped, press
FAST-F or REWIND. The FAST-F or
REWIND indicator lights, and the tape
fast-forwards or rewinds.
No picture appears on the TV/monitor
when you fast-forward or rewind the
tape from a stopped position.
The VCP automatically stops the tape
when it reaches the end and rewinds the
tape to the beginning.
To stop the tape at any time during fastforwarding or rewinding, press STOP.
Or, to stop fast-forwarding and rewinding
and automatically begin play, press
PLAY. The tape stops, the PLAY
indicator lights, then the tape begins to
play.
Visual Search
Your VCP lets you view a tape at a faster
speed than normal playback to help you
find a particular section on the tape.
Visual search works in either direction.
To use visual search, press PLAY to begin normal playback, then press FAST-F
to search forward or REWIND to search
backward. The PLAY indicator lights
along with the FAST-F or REWIND
indicator, and the tape begins to play
forward or backward at a high speed.
During visual search, there is no sound
and the picture quality is not as good as
during normal playback.
Press STOP to stop the tape, or PLAY to
stop visual search and resume normal
playback.
17
POWER
STOP
STILL
POWER
EJECT
REWIND
DEWTV/ VCP
REWIND FAST F
-
REPEATA-
STILL
POWER REWIND PLAY FAST F
-
REPEATA-
CST.INDEWTV/ VCP
Page 18

Note:
¥ Tapes recorded at the EP (extended
play) speed provide the best picture
during visual search.
FREEZE-FRAME
The VCP lets you stop (ÒfreezeÓ) the tape
to view a single frame. To use freezeframe, during normal play, press STILL.
During freeze-frame, there is no sound
and the picture quality is not as good as
during normal playback.
After about 5 minutes, the VCP automatically stops. To stop the tape sooner,
press STOP. To resume normal playback, press PLAY.
Note: Tapes recorded at the EP speed
provide the best picture during freezeframe.
AUTO REPEAT
PLAYBACK
You can set the VCP to continuously
play, rewind, then repeat a tape. To set
the VCP for auto repeat playback, before
or during normal playback, press
A-REPEAT so the A-REPEAT indicator
lights.
The tape automatically rewinds when it
reaches the end, then begins to play
again.
To end auto-repeat, press A-REPEAT
so the A-REPEAT indicator turns off.
ADJUSTING TRACKING
When tape playback begins on your
VCP, its built-in tracking control
automatically aligns the playback heads
to the recorded track.
18
POWER
STOP
STILL
POWER
EJECT
REWIND
DEWTV/ VCP
REWIND FAST F
-
REPEATA-
Page 19

For poor quality or worn tapes, you might
need to further adjust the VCPÕs tracking.
To adjust the picture tracking manually,
press and hold down TRACKING ▼ or ▲
until the picture improves.
WATCHING
BROADCAST TV
To watch broadcast TV if you connected
the TV using the VCPÕs RF.OUT jack,
simply press TV/VCP to turn off the
TV/VCP indicator, then tune to the
desired station on the TV.
COPYING A VIDEO TAPE
If you connected a VCR to the VCP (see
ÒConnecting a VCRÓ on Page 9), you can
use your VCP to play back a video cassette tape while the VCR records (copies) it.
Follow these steps to copy a video cassette tape.
1. Load a pre-recorded tape into the
VCP.
2. Load a blank video cassette, or one
you want to record over, into the
VCR.
3. If the VCR has an input select
switch, set it to the video setting.
Note: If the VCR does not have an
input select switch and you later
want to record VHF/UHF/cable
channels on the VCR, you might
need to disconnect the VCP from
the VCRÕs audio/video input jacks.
4. Select the desired recording speed
on the VCR.
5. Begin recording on the VCR.
6. Press PLAY on the VCP to begin
tape playback.
7. To watch the tape while you copy it,
turn on the TV or TV monitor. If you
connected a TV using the VCRÕs
RF.OUT jack, tune the TV to the
same channel (3 or 4) to which you
set the VCRÕs CHANNEL switch.
Copyright Information: Most material
performed in public, such as concerts,
plays, and movies, or distributed on prerecorded video tapes is copyrighted. The
unauthorized recording or duplication of
copyrighted material is a violation of the
copyright laws of most countries and
such duplication may result in fines and/
or imprisonment. Note, however, that in
the United States, it is not a violation of
U.S. copyright laws for a consumer to
record a broadcast television program
for private (in-home) viewing.
19
TV/VCPA-REPEAT MENU
TRACKING
SELECT
DISPLAY
OK
Page 20

TROUBLESHOOTING GUIDE
If your VCP is not performing as it should, these suggestions might help. If you still
cannot solve the problem, take the VCP to your local RadioShack store for assistance.
20
Symptom
No power.
Picture is poor during
playback.
Noise during playback.
No picture during playback.
Interference in the playback
picture.
Possible Cause
Power is not connected.
Power is turned off.
Fuse is blown.
The TV is not set to the
proper channel.
The TVÕs fine tuning is not
set correctly.
The VCP is not tracking
properly.
Video heads are dirty.
The TV is not tuned to the
proper channel.
The VCP is not tracking
properly.
Remedy
Plug the AC adapter into
an AC outlet or connect the
DC adapter to your vehicleÕs
cigarette-lighter socket.
Press POWER so its red
indicator lights.
See ÒReplacing the FuseÓ
on Page 22.
Tune the TV to the same
channel to which the VCPÕs
CHANNEL switch is set.
Fine-tune your TV.
Manually adjust tracking.
See ÒCleaning the Video
HeadsÓ on Page 21.
Tune the TV to the same
channel to which the VCPÕs
CHANNEL switch is set.
Manually adjust tracking.
Page 21

21
Symptom
Control buttons do not work
when the power is on and a
video cassette is inserted.
Cannot see broadcast TV
programs.
The remote control does not
work.
Possible Cause
Condensation on video
heads/dew protection
system is active.
Connections are incorrect.
The batteries in the remote
control are week or dead.
Remedy
Unplug the VCP for about 2
hours, or until DEW does not
turn on when you plug it in,
then proceed.
Recheck the connections.
Replace the batteries.
Page 22

CARE AND MAINTENANCE
Your Optimus Model 40 AC-DC Video Cassette Player is an example of superior
design and craftsmanship. The following suggestions will help you care for the VCP
so you can enjoy it for years.
Keep the VCP dry. If it gets wet, wipe it dry immediately. Liquids might
contain minerals that can corrode the electronic circuits.
Use and store the VCP only in normal temperature environments. Temperature extremes can shorten the life of electronic devices damage
the remote controlÕs batteries, and distort or melt plastic parts.
Keep the VCP away from dust and dirt, which can cause premature
wear of parts.
Handle the VCP gently and carefully. Dropping it can damage circuit
boards and cases and can cause the VCP to work improperly.
Use only fresh batteries of the required size and type in the remote control. Batteries can leak chemicals that damage your remote controlÕs
electronic parts.
Wipe the VCP with a damp cloth occasionally to keep it looking new.
Do not use harsh chemicals, cleaning solvents, or strong detergents to
clean it.
Modifying of tampering with VCPÕs internal components can cause a malfunction and
might invalidate its warranty and void your FCC authorization to operate it. If your
VCP is not performing as it should, take it to your local RadioShack store for
assistance.
22
Page 23

CLEANING THE VIDEO
HEADS
Dirty video heads can cause the VCPÕs
picture to be blurred during playback,
even when the video signal is clear. We
recommend that you clean the heads
only when such problems occur. For
proper head cleaning, follow the instructions in a head-cleaning kit, such as Radio Shack Cat. No. 44-1203, or take the
VCP to your local RadioShack store for
regular servicing.
VIDEO TAPE TIPS
Although a video cassette tape is built for
durability, you should handle it with care.
¥ Keep the video cassette in its
protective box when you are not
using it.
¥ Do not store video cassettes in high-
temperature, high-humidity locations. Store them in a cool, dry, dustfree environment.
¥ Store your video cassettes on their
ends, not on their sides. This
prevents improper setting of the
cassetteÕs spools.
¥ A video cassetteÕs tape can become
wound too tightly around the
cassetteÕs spools after numerous
playings. This can cause the
cassette to improperly load and
automatically eject when you load it.
On most video cassette, there is a
brake-release plunger on the
bottom-center of the cassette. Use
the tip of a pen or pencil to press the
plunger. This loosens the tape.
23
Brake-Release Plunger
Page 24

REPLACING THE FUSE
If the VCP does not operate when the DC
adapter is connected, the fuse inside the
adapter might be blown. Follow these
steps to replace it.
1. Unscrew the knurled ring at the
plugÕs tip by turning it counterclockwise, then turn over the adapterÕs
cigarette lighter plug so the fuse fails
out.
2. If the wires inside the fuse is broken,
replace the fuse with one of the
same type (11/4 x 1/4 -inch 5-amp
fuse, such as RadioSjack Cat. No.
270-1011). When you screw on the
tip, be sure the knurled ring is
screwed firmly onto the plug.
THE FCC WANTS YOU TO
KNOW
Your VCP might cause TV or radio interference even when it is operating properly. To determine whether your VCP is
causing the interference, turn off your
VCP. If the interference goes away, your
VCP is causing it. Try to eliminate the interference by:
¥ Moving your VCP away from the TV
or radio.
¥ Connecting your VCP to an outlet
that is on a different electrical circuit
from the TV or radio.
¥ Contacting your local RadioShack
store for help.
24
Knurled Ring
Fuse
Page 25

SPECIFICATIONS
GENERAL
Television System....................................................................NTSC, US TV Standard
Tape Width.........................................................................................................1/2 Inch
Tape Speed....................................................................................SP 1.31 Inches/Sec
LP 0.65 Inches/Sec
EP 0.43 Inches/Sec
RF Converter .............................................................................Built-In VHF Converter
Converter Output....................................................................................Channel 3 or 4
Antenna Input/Output Terminals ........................................................................F-Type
Video/Audio Output............................................................................Phono Connector
Power Requirement.......................................................AC 120 V ±10%, 60 Hz ±0.5%
DC 12 V (13.2-13.8)
Power Consumption..............................................................................About AC 11 W
About DC 11 W
Dimensions (HWD).............................................................37/10 X 103/5 X 124/5 Inches
(94 x 270 x 325 mm)
Weight. ..........................................................................................................6 lbs 4 oz.
(2.9 Kg)
ELECTRICAL
Video Output Level..............................................................................................1 Vp-p
Video Output Impedance .................................................................................75 ohms
Audio Output Level.........................................................................................Ð7.8 dBm
Video S/N Ratio:
SP ................................................................................................More than 43 dB
LP/EP...........................................................................................More than 42 dB
Audio S/N Ratio:
SP ................................................................................................More than 42 dB
LP/EP...........................................................................................More than 40 dB
Specifications are typical; individual units might vary. Specifications are subject to
change and improvement without notice.
25
Page 26

RadioShack Limited Warranty
This product is warranted by RadioShack against manufacturing defects in material and
workmanship under normal use for ninety (90) days from the date of purchase from RadioShack
companyowned stores and authorized RadioShack franchisees and dealers. EXCEPT AS
PROVIDED HAREIN, RadioShack MAKES NO EXPRESS WARRANTIES FOR A PARTICULAR
PURPOSE, ARE LIMITED IN DURATION TO THE DURATION OF THE WRITTEN LIMITED
WARRANTIES CONTAINED HEREIN. EXCEPT AS PROVIDED HEREIN, RadioShack SHALL
HAVE NO LIABILITY OR RESPONSIBILITY TO CUSTOMER OR ANY OTHER PERSON OR
ENTITY WITH RESPECT TO ANY LIABILITY, LOSS OR DAMAGE CAUSED DIRECTLY OR
INDIRECTLY BY USE OR PERFORMANCE OF THE PRODUCT OR ARISING OUT OF ANY
BREACH OF THIS WARRANTY, INCLUDING, BUT NOT LIMITED TO, ANY DAMAGES
RESULTING FROM INCONVENIENCE, LOSS OF TIME, DATA, PROPERTY, REVENUE, OR
PROFIT OR ANY INDIRECT, SPECIAL, INCIDENTAL, OR CONSEQUENTIAL DAMAGES, EVEN
IF RadioShack HAS BEEN ADVISED OF THE POSSIBILITY OF SUCH CAMAGES.
Some states do not allow the limitations on how long an implied warranty lasts or the exclusion of
incidental or consequential damages, so the above limitations or exclusions may not apply to you.
In the event of a product defect during the warranty period, take the product and the RadioShack
sales receipt as proof of purchase date to any RadioShack store. RadioShack will, at its option,
unless otherwise provided by law: (a) correct the defect by product repair without charge for parts
and labor; (b) replace the product with one of the same or similar design; or (c) refund the purchase
price. All replaced parts and products, and products on which a refund is made, become the property
of RadioShack. New or reconditioned parts and products and products are warranted for the
remainder of the original warranty period. You will be charged for repair or replacement of the
product made after the expiration of the warranty period.
This warranty does not cover: (a) damage or failure caused by or attributable of God, abuse,
accident, misuse, improper or abnormal usage, failure to follow instructions, improper installation or
maintenance, alteration, lightning or other incidence of excess voltage or current; (b) any repairs
other than those provided by a RadioShack Authorized Service Facility; (c) consumables such as
fuses or batteries; (d) cosmetic damage; (e) transportation, shipping or insurance costs; or (f) costs
of product removal, installation, set-up service adjustment or reinstallation.
This warranty gives you specific legal rights, and you may also have other rights which vary from
state to state.
RadioShack Customer Relations, Dept. W, 100 Throckmorton St., Suite 600, Fort Worth, TX 761202
We Service What We Sell
3/97
RadioShack
A Division of Tandy Corporation
Fort Worth, Texas 76102
12A98 Printed in Korea
 Loading...