


CTCSS/DCS
Programmable CTCSS/DCS
Wide band/narrow band selectable
End-tone detection
DTMF encode/decode
PTT ID
Password
Firmware update
Dual time slot for point to point
Dual time slot for repeater
5 watt output power
Call detection
Call prompt
Remote monitor/Emergency alarm
Contact view and edit
Message view and edit
Call info view and edit
SN、Equipment ldentitly Code for device vertification
PC programmable function
1750Hz tone

Getting Familiar
Overview
Turn on radio
Adjust the volume
Main functions
Double Wait Switch
Key usage
Launch and Receiver Calls
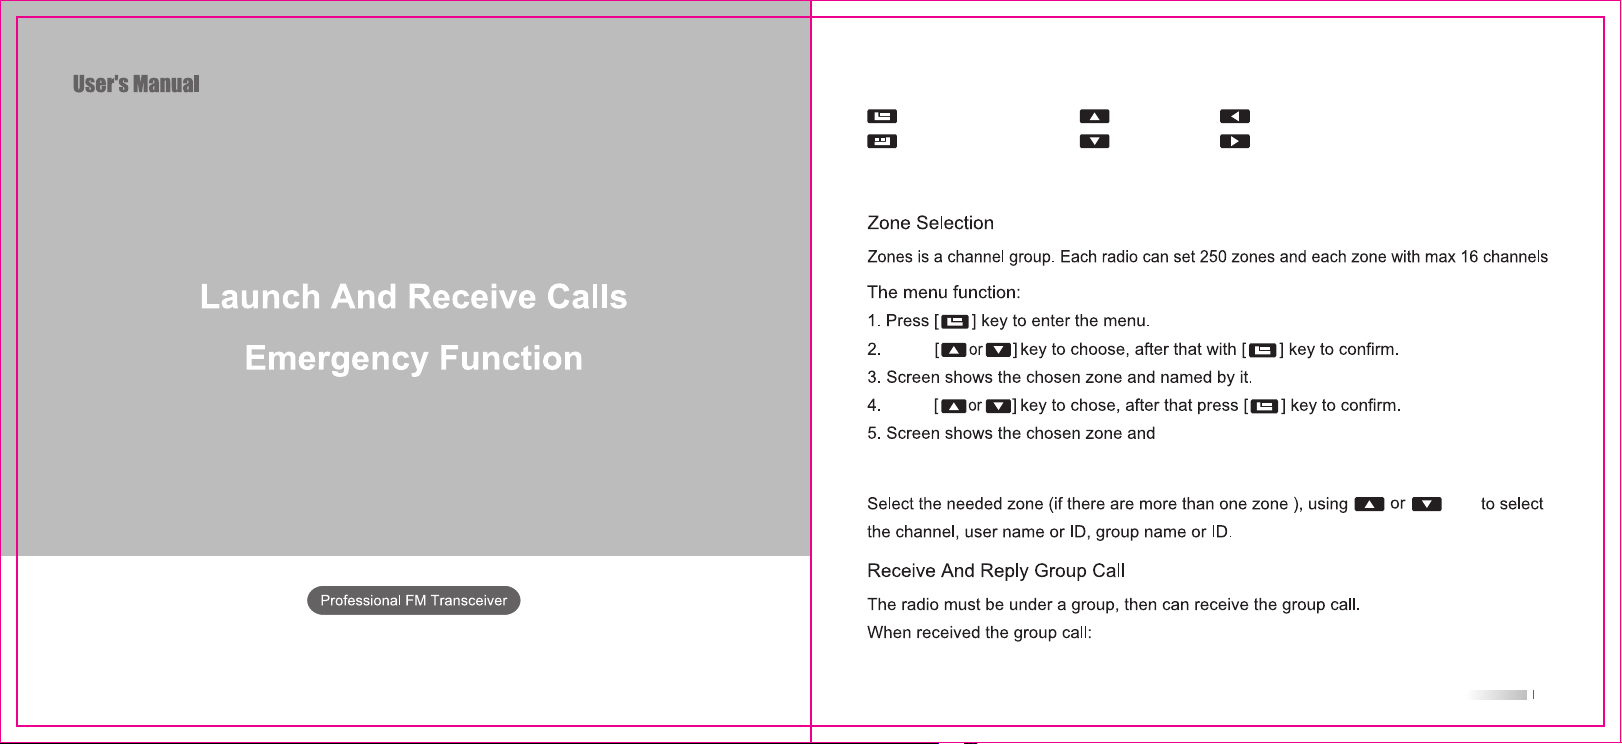
Zone Selection
Seletion of channels,User ID or Group ID
Receive and reply group call
Receive and reply single call
Receive all calls
Launch a radio call
Group call
Single call
All call
Use a one-touch call to initiate a group call or a single call
Emergency alarm function
Receive an emergency alert
Reply to an emergency alert
01
04
04
04
05
10
12
12
12
12
12
13
14
14
15
15
16
17
18
18
19
Send an emergency alert
Send an emergency alert with call
Send an emergency alert with voice followed
Exit the emergency mode
Menu function operation
Character input
English alphabet mode
Chinese typing
Numbers input mode
Menu Aplication
Radio Check
Send radio check
Monitor
Start Monitor
Contacts setting
Group call with contacts
Single call with contacts
Call Log
Checking new call's number
Missed Call
ID Storing Missed Call's Alias or ID
Deleting Calling Log’s Record
Call prompt operation
19
20
21
22
24
24
24
25
25
26
26
26
27
27
28
29
30
31
31
31
32
32
33

Receive and confirm call prompts
Start call alert from contact list
Message
Edit and send text messages
Send a Quick Text
Use a one-touch call key to send quick text
Manage failed text messages
Resend text messages
Forward text messages
Editing messages
Manage text messages sent
View sent text messages
Send a sent message
Receive text messages
View message
Manage received messages
Check messages in your inbox
Reply messages in your Inbox
Delete messages in the Inbox
Delete all messages in your Inbox
Encryption
Basic Encryption
DTMF
33
33
34
34
35
36
36
37
37
37
38
39
39
40
41
41
41
42
43
43
44
44
44
Secrecy
Radio Disable(Digital mode)
Radio Enable(Digital mode)
Scan list
View members in scan list
Scan instructions and methods
Start and stop scanning
Scan reply
Set
Radio Set
CTCSS/DCS
Set Squelch level
Set Power Level
Talkaround
Wide and narrow band
Busy Lock
TOT
VOX
Double Wait
Encrypt
Power Save
Beep
All Tone
45
45
46
47
47
47
48
48
49
50
50
52
52
53
53
54
54
55
56
56
57
57
57
Turn on/off Key Beep
Backlight
Keypad Lock
Indicator
Passwd Lock
Mode
Screen
Language
Radio Info
Radio ID
Dev. Info
Radio Cfg
RX Freq
Tx Freq
Ch Name
Color Code
Slot
Special function
Online update
Factory Reset Defaults
Sepcification
58
58
59
59
60
60
61
61
62
62
62
63
63
64
65
65
66
66
66
67
68

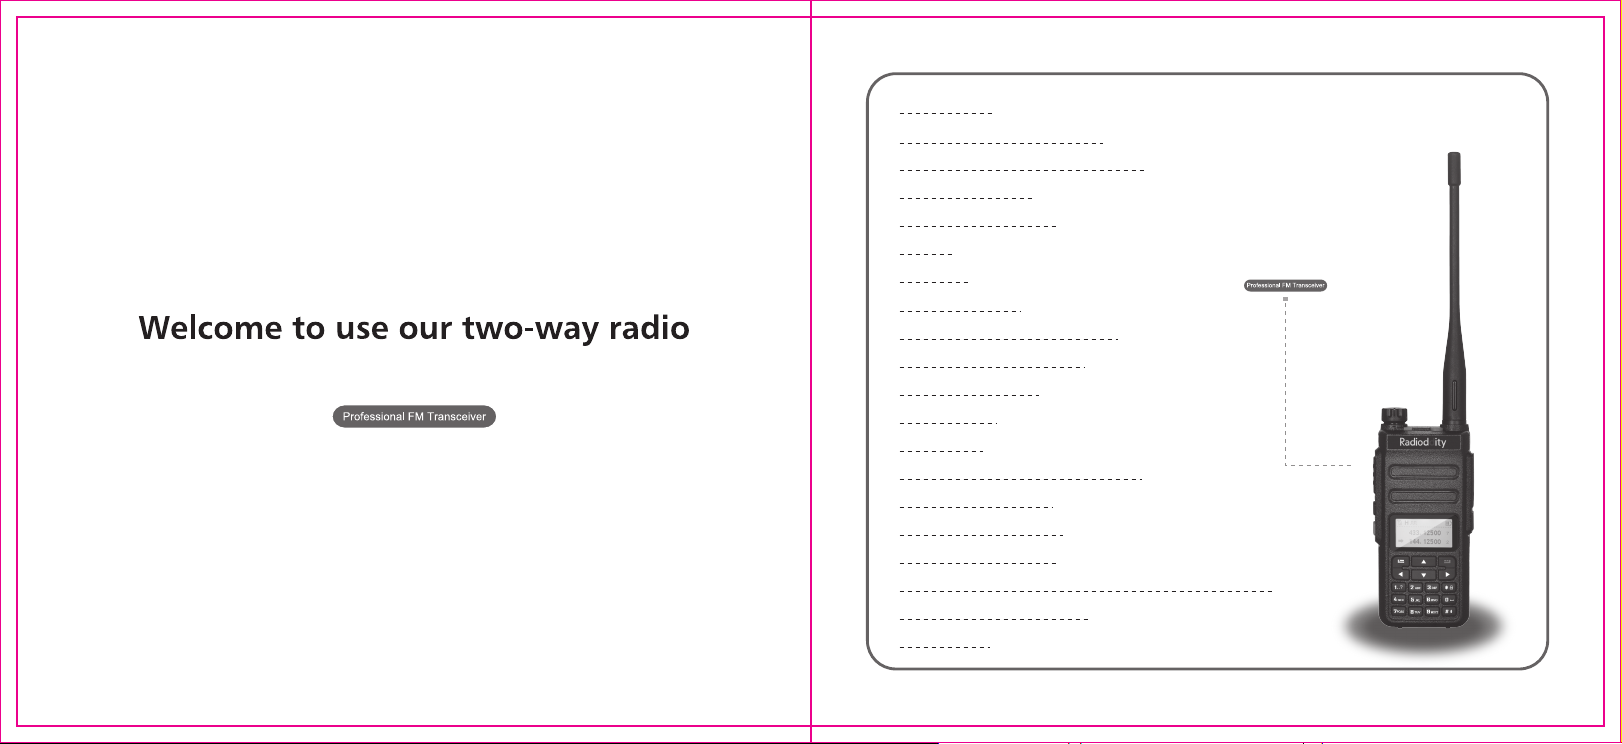
Getting familiar
Power/ Volume knob
LED indicator light
Side key 3
Emergency alarm key
Antenna
PTT
Side key 1
Side key 2
Programming connector
Microphone connector
Note:Long-press or short-press of Side Key 1/Side Key 2/Side Key 3(Emergency alarm key) can be
programmed by software for following functions: 1,unassigned 2, all Alert Tone on 3,Emergency On
,.
?
ABC DEF
GHI
JKL
MNO
TUV
PQRS
WXYZ
4,Emergency Off 5, High/Low Power 6,Monitor 7,Nuisance Delete 8, One Touch Access 1
9,One Touch Access 2 10,One Touch Access 3 11,One Touch Access 4 12,One Touch Access 5
13,One Touch Access 6 14,Repeater/Talkaround 15,Scan On/Off 16, Privacy On/Off 17,Vox On/Off
18,Zone Select 19,Battery Indication 20,Lone Work On/Off 21,Phone Exit
0201
Safety and Overview
Overview
Turn on radio
Turn the volume control knob clockwise until you hear a "click" sound with a brief start-up
tone, andyou will see picture or the custom characters. The LED blinks green and the screen
lights up.
Note: If the radio tone / prompt is disabled, there is no power on tone. To turn off the radio, turn
the knob counterclockwise until you hear a "click" sound. Custom characters can be set in
software.
Adjust the volume
Turn the volume control knob clockwise to increase the volume of radio. To decrease the
volume, turn the knob counterclockwise.
0403

Main functions
First menu Second menu
Contact
New Contact
Contact
Manual Dial
Inbox
Message
New Message
Outbox
Function description Remark
Contact list, software edit or new contact add or call record
contact add, up to 256 contacts
Manually create a new contact, enter the number, alias, tone,
if the current input number are samewith one of contact list,
just overwrite the old contact information
Enter the other party ID number (up to 8-bit, full call ID fixed
to 16777215) and then press the Enter key. You can realize
call alert, radio check, remote monitor, radio active , radio kill,
the above functions can be open in software
Inbox: meaasge received latest, the maximum storage amount
is 16, if you continue to receive, loop to cover the storage
Delete all:delete all messages received
Text edit, the maximum input of 144 characters or 72 Chinese
characters. You can input "#" key to switch inpumode: abc
(lowercase letters) / ABC (capital letters) / 123 (number) / py
(Pinyin), after enter the message, press the Enter key to
proceed with the operation
Store the latest sent messages, the maximum storage amount
is 16
digital channel only
digital channel only
digital channel only
digital channel only,
this function can be
set in software
digital channel only,
this function can be
set in software
digital channel only,
this function can be
set in software
digital channel only,
this function can be
set in software
Draft Draft list, the maximum can store 16 messages
You can write in advance in software, the maximum can store
Quick Text
Outing
call logs
set radio set CTCSS/DCS
Answered
Missed
32 messages. Each message can enter a maximum of 144
characters or 72 Chinese characters
Dialed call list: the maximum number of calls can be stored
in 32 latest record. The record can be viewed, you can also
store to Contact by operation
Delete all: delete all records for the list
Answered Call List: the maximum number of calls can be
stored in 32 latest record. The record can be viewed, you
can also store to Contact by operation
Delete all: delete all records for the list
Missed Call List: the maximum number of calls can be stored
in 32 latest record. The record can be viewed, you can also
store to Contact by operation
Delete all: delete all records for the list
Squelch
C CDC/DCS: set both Encoding and Decoding;
R CDC/DCS: only set Decoding;T CDC/DCS:
only set Encoding;Press“*”key to switch CTCSS
/DCS;press“#”key to switch positive (N)/reverse
(I) in DCS. You can also input manually nonstandard CTCSS/DCS by keypad, Press the
confirm key to confirm, press the return key to
return
Strict/Normal: Strict signal is 6dBm bigger than
Normal
digital channel only,
this function can be
set in software
digital channel only,
this function can be
set in software
digital channel only,
this function can be
set in software
digital channel only,
this function can be
set in software
digital channel only,
this function can be
set in software
analog channel only
this function can be
set in software
0605

Tx Power
Talkaround
Band
Busy Lock
TOT
VOX
Double Wait
Encrypt
High/Low,High:5W,Low:1.5W
Talkaround on/off: this function is valid only after
tick “Allow Talkaround”in software
Narrow/wide band available in analog mode.
Wide band::25KHZ,Narrow band:12.5KHZ
off/carry(QT/CC). Off: busy lock is off;Carry:Match
Carrier Press PTT Prohibited; QT/CC: Match QT
/CC Press PTT Prohibited
OFF / 15S / ... / 495S optional, there is warning
when close to 10 seconds before limit time.
Transmitting is prohibited when limit time is up
Off/on. Level 1 to 10 can be set in software
(General Setting-VOX Sensitivity). level 1 is the
highest level of sensitivity, and level 10 is the
lowest level of sensitivity
Off/Double wait/Single wait optional
Off: turn off dual standby,radio into single band mode
Double Wait:main channel and sub-channel rotation
scan,effective reception will lock the call, Press the
PTT key to comunicate with other party.Battery
saving is invalid now.
Single Wait:Up and down channels through the
keyboard switch, the machine only receives and
transmits on the main channel
Off/On.Open the encryption function, both sides
of radio can comunicate when match same
encryption key
this function can
be set in software
this function can
be set in software
analog channel only
this function can
be set in software
this function can
be set in software
digital channel only,
this function can be
set in software
Power save
Beep
Backlight
Keypad lock
indicator
Passwd Lock
Mode
Screen
Language
Radio IDRadio Info
Off/On, Saving ratio is 1: 4
All Tone/Call Permit/Key Beep optional
Always/5/10/15/ sec optional
Manual/5/10/15/ sec optional.Select Manual, long
press "*" key for 3 seconds lock; Press the "menu"
button immediately press "*" key to unlock
Off/On,When indicator off (transmit indicator,
receiving indicator, power-on indicator, etc.)
does not work
Enter power on password, power on password
(off / on) / new password (change password, the
maximum input 6 digit)
CH NO.(Channel Number)/CH Name(Channel
Name can be set in software)/CH Freq(show
RX frequency)
Picture (can be loaded 128 * 64 BMP picture) /
preset characters (two lines, can be set in
software)
English / Chinese optional, Chinese and English
display switching, including menu, call prompts,
Call Logs and all other interfaces
8-bit ID number, maximum 16776415
Power saving is
ineffective when
radio is in Double
Wait mode
this function can
be set in software
this function can
be set in software
this function can
be set in software
this function can
be set in software
this function can
be set in software
this function can
be set in software
Digital channel only
0807

Zone
Radio Cfg
Zone
Dev. Info
Rx Freq
Tx Freq
Ch Name
Color Code
Zone list,can support up to 250 zones
Model information, serial number, CPS version,
hardware version, firmware version, DSP version,
programming time
enter frequency manually in key pad
enter frequency manually in keypad
enter channel name manually in keypad,support
English/Chinese
Color code 0~15 optional
Slot
slot 1/2 optional
digital channel only,
cannot be set in
analog channel
digital channel only,
cannot be set in
analog channel
Double Wait Switch
Press [ ] button to switch the main channel, points main channel. Double wait can
be set Manually.(Flow: Menu - Set - Radio Set-Double Wait (Off/ Double Wait / Single Wait)).
When double wait is off,radios works under single band mode. When single wait is
selected, radio operates on the main channel, and sub-channel does not receive the signal.
When double wait is selected, main channel and sub-channel receiving scan one by one.
When scanning effective reception of the signal, radio locked and work.If channel locked is
not main channel, points to the temporary working channel, then press PTT, temporary
Channel transmit.Timing time is up, icon disappears. No temporary icon, press PTT ,
point to the main channel transmission.
Note: In double wait mode, the power saving function is invalid. At this time, even if the
power saving function is turned on, radio is in no power saving state and radio standby time
is shortened. Since double wait mode is in the main and sub-channel scanning state, DTMF,
Scan, lone worker,ARTS auxiliary function does not work.
Scan
On/Of
Scan list
On / Off, only the current channel is equipped with a scan
list toturn on scan function. Side key can be set "scan on /
off" in the software
show current scan list, can just view
this function can
be set in software
this function can
be set in software
1009
Key usage
Menu Key/Confirm Key
Back Key
Up key
Down Key
Launch And Receive Calls
Move
Move
then return to the selected Zone screen
Selection Of Channels,User ID Or Grouo ID
Left Key/ Main Channel Switch Key
Right Key
key
12
1. LED indicator is green color.
2. Display area: the first line shows "Group Call", the middle shows Call group alias, the
bottom shows call ID and call icon (digital mode only).
3. Hold radio in a vertical position and keep it at a distance of 1 to 2 inches (2.5 to 5.0 cm)
from the mouth.
4. Press the [PTT] key to reply to the call and the LED light is red.
5. Release the [PTT] key to receive.
6. If there is no voice activity within a predetermined time period, the call end.
1. LED indicator is green color.
2. Display area: the first line shows "Single Call", the middle shows "Single Call", the bottom
shows call ID and call icon (digital mode only).
3. Hold the radio in a vertical position and keep it at a distance of 1 to 2 inches (2.5 to 5.0 cm)
from the mouth. If the "channel free indication tone" function is enabled, the receiver will
hear a short beep when the radio transmitting release PTT key, indicating that the channel
is idle and waiting for a reply. (Channel idle tone can be set in software-general setting).
4. Press PTT key to reply the call, and the LED indicator is red.
5. Release PTT key to receive.
1. LED indicator becomes green.
2. Display area: the first line shows "All Call", the middle shows "All Call", the bottom shows
call ID and call icon (digital mode only).
3. After all call end, the radio returns to the screen before receiving all call. If "channel
free indication tone" function is enabled, the receiver will hear a short beep when PTT
button isreleased by radio transmitting, indicating that the channel is in use,can not reply all
call.
Channel switch
1413

Group call
The radios should be in same group if want to make a group call
1. Press or key to switch channel, and use the active call group alias or ID to select
the channel.
2. Hold radio in a vertical position and keep it at a distance of 1 to 2 inches (2.5 to 5.0 cm)
from the mouth.
3. Press PTT button to initiate the call,LED indicator is red, screen displays the group alias
or ID, and icon .
4. Release PTT key to receive, and when the target radio reply, the LED indicator lights green.
Group Call, call group alias, and launch radio alias or ID are displayed on the screen.
5. If the "channel free indication tone" function is enabled, the receiver will hear a short beep
when the target radio releases PTT key, indicating that the channel is idle and waiting for
a reply. Press PTT key to reply, or if there is no voice activity within a predetermined time
period, the call end.
6. The radio returns the screen before receiving the call. You can also initiate a group call from
your Contacts.
Single Call
1. Press or key to switch channel, and use the active call group alias or ID to select
the channel.
2. Hold radio in a vertical position and keep it at a distance of 1 to 2 inches (2.5 to 5.0 cm)
from the mouth.
3.In the display area: the first line shows a Single Call, the middle display user alias, the
bottom display ID and call icon (digital mode only).
4. Release PTT key to receive, and when the target radio reply, the LED indicator lights green.
5. If the "channel free indication tone" function is enabled, the receiver will hear a short beep
when the target radio releases PTT key, indicating that the channel is idle and waiting for
a reply. Press PTT key to reply, or if there is no voice activity within a predetermined time
period, the call end.
6. You will hear a short tone, the screen shows the call end.
You can also use the side keys to set up a One Touch Access or contacts to initiate a single
call or a quick contact access via a keyboard entry to find the desired target radio.
All Call
This function allows you to send signals to all users on the channel. The radio must be
programmed to allow you to use this function.
1. Press or key to switch channel, and use the active all call group alias or ID to
select the channel.
2. Hold the radio in a vertical position and keep it at a distance of 1 to 2 inches (2.5 to 5.0 cm)
from the mouth.
3. Press PTT button to initiate the call and the LED light is red. The screen displays all call,
all call alias or all call ID, and call icon .
The user on the channel can not reply to all call.
1615

Use a one-touch call to initiate a group call or a single call
The One-Touch Call function allows you to easily to make a group or single call to a predefined
alias or ID. This function can be assigned to short programming or long programming keys.
You can assign only one alias or ID to a one-touch call key, and the radio can have multiple
programmed one-touch keys.
1. Initiate a group call or a single call to a predefined alias or ID by pressing a preprogrammed
one-touch call key.
2. Hold radio in a vertical position and keep it at a distance of 1 to 2 inches (2.5 to 5.0 cm)
from the mouth.
3. Press PTT button to initiate the call and the LED light is red. The screen displays the group
/ user alias or ID, as well as icon. .
4. Release PTT key to receive, and when the target radio reply, the LED indicator lights green.
5. If the "channel free indication tone" function is enabled, the receiver will hear a short beep
when the target radio releases PTT key, indicating that the channel is idle and waiting for
a reply. Press PTT key to reply, or if there is no voice activity within a predetermined time
period, the call end.
Emergency alarm function
Emergency alerts are used to indicate an emergency situation.You can initiate an emergency
call at any time or on any screen, even if there is activity on the currentchannel.
Note: The emergency function is set in digital emergency alarm system of the signaling
system in the software and should be in the group call channel.
Your radios supports three emergency alerts:
• Emergency alert
• Emergency alerts and calls
• Emergency alert and voice
Receive an emergency alert
1. Receive an emergency alert time code, the number of alerts received, and the received
alert, which alternates with the sender's alias or ID.
2. A beep sounds and the LED flashes red.
3. If activated, your radio will automatically acknowledge an emergency alert. When an
emergency alert is received by radio, the screen displays a prompt that an emergency
alert has been received until an acknowledgment is sent and exit emergency mode.
You will not be able to receive any other prompts or display any other calls until you
exit the screen that received the emergency alert.
Note: Short press the [back] key, then press the preprogrammed alarm off key to clear
the prompt for receiving an emergency alert and exit the emergency mode.
17 18

Reply to an emergency alert
When receiving an emergency alert:
1. Press any key to stop all audible alerts that receive an emergency alert.
2. Hold the radio in a vertical position and keep it at a distance of 1 to 2 inches (2.5 to 5.0
cm) from the mouth. If the "channel free indication tone" function is enabled, the receiving
radio will hear a short beep when radio release PTT button, indicating that the channel is
now available.
3. Press PTT key to initiate a call with an emergency call. LED indicator light is red. The
radio is in emergency call mode.
4. Release [PTT] key to receive, and when the emergency call initiates the radio reply, the
LED will light green. You will see group call, group ID, and launch radio ID on the screen.
5. After the call ends, short press [back] key, then press the preprogrammed alarm off key
to clear all prompts that received an emergency call and exit the emergency mode.
6. The radio returns to the main screen.
Send an emergency alert
This feature allows you to send an emergency alert, which is a non-voice signal that will
trigger a prompt on another radio. Only the emergency alarm channel contact is group call
number can send an emergency alert.
1. Press the preprogrammed alarm on key.
2. The screen displays issue an alarm that alternates with the radio ID. The LED indicator
light is red and then the emergency call interface is displayed.
3. When an emergency alert is received, an emergency call beep is issued. The screen
displays an emergency alert that has been received. After all retry times have been
exhausted, a beep is issued and then exit the emergency alarm mode.
4. The radio exits the emergency alert mode and returns to the main screen. If your radio is
set to "all tones off", it will not display any voice or visual prompt in emergency call mode.
Send an emergency alert with call
This feature allows you to send an emergency alert to another radio. After confirming, the two
radios communicate via a preprogrammed emergency channel.
1. Press the preprogrammed alarm on key.
2. The screen displays issue an alarm that alternates with the radio ID. The LED indicator
light is red and then the emergency call interface is displayed.
3. When an emergency alert call is received, an emergency alarm beep is issued and the
LED flashes green. The screen display alarm has been received.
4. Hold radio in a vertical position and keep it at a distance of 1 to 2 inches (2.5 to 5.0 cm)
from the mouth.
5. Press [PTT] button to initiate a call, the LED indicator is red, and the call group icon
appears on the screen.
6. Release the [PTT] button to receive.
7. If the "channel free indication tone" function is enabled, the receiving radio will hear a short
beep when the target intercom releases the [PTT] key, indicating that the channel is idle
and waiting for a reply. Press PTT key to reply,Or press the preprogrammed alarm off key
to exit the emergency mode.
8. The radio returns to the main screen. If your radio is set to "all tones off", it will not display
2019

any voice or visual prompts in the emergency call mode and will not receive any response
(call) from the target radio until you press [PTT] to initiate the call. If your radio is set to "call
permit", it will not display any voice or visual prompts in emergency call mode or when you
receive a call from the target radio. A prompt is displayed only when you press [PTT] key to
initiate or respond to a call.
Send an emergency alert with voice followed
This feature allows you to send an emergency alert to another radio. Your radio microphone
is automatically activated, allowing you to communicate with other radio without pressing the
[PTT] key. This activated microphone state is called "emergency microphone". If you press
[PTT] during the preprogrammed emergency microphone transmitting, the radio ignores [PTT]
and remains in the emergency mode.
Note: If you press [PTT] key during an emergency microphone transmitting and continue
pressing the key after the end of the emergency microphone, the radio continues to transmit
until you release [PTT] key.
1. Press the preprogrammed alarm on key.
2. The screen displays issue an alarm, the LED indicator is red and the emergency alarm
call interface is displayed.
3. After screen display the emergency alarm is successful, speak to the microphone clearly.
After the emergency microphone has been activated, the radio automatically transmits the
signal without pressing [PTT] key until the emergency microphone time ends.
4. At the time of launch, the LED indicator light is red and the alarm call interface is displayed.
5. After the end of the emergency microphone time, the radio automatically stops sending
the signal. To launch again, press the [PTT] key.
If your radio is set to "all tones", it will not display any voice or visual prompts in the emergency
call mode and will not receive any response from the target radio until the preprogrammed
emergency microphone time is over and you press [PTT] key. If your intercom is set to "call
permit", it will not display any voice or visual prompts when you use an emergency microphone
to initiate a call in emergency call mode or when the target radio responds after a preprogrammed
emergency microphone time. These prompts appear only when you press [PTT] key.
There are two situations where this can occur:
• When the radio channel is changed in the emergency mode, the emergency mode is exited.
If an emergency alert is activated on the new channel, the radio restarts the emergency call.
• In the emergency call start / launch mode, press the preprogrammed alarm on key. This
will cause the radio to exit the current state and then restart the emergency call.
Exit the emergency mode
When one of the following occurs, radio exits the emergency mode:
• The maximum number of attempts to send alerts has been reached
• Press the preprogrammed alarm off key
• Press [PTT] key. Can not exit alarm mode
Note: If turn off radio, the radio exits emergency mode. When you turn on radio again,
the radio will not restart emergency mode.
2221

Menu operation
Settings
Menu function operation
Character input
You can use the 3x4 alphanumeric keyboard to access radio functions. When using the
keyboard to enter user aliases or text messages, radios contains three modes: 1. English
alphabet mode, 2. Chinese input method mode, 3. Numbers input mode. When using the
keyboard to enter an ID, Can only use digital mode.
English alphabet mode:
Users have to press a key several times for getting some characters. The following table
shows the number of times a key needs to be pressed to get the desired character.
Key 1 2 3 4 5 6 7 8 9 10 11 12 13
1 1 . ! , @ - : ? () ~ / [] # <> = * + $ % ’ ` & | _^ { }
2 a b c 2 A B C
3 d e f 3 D E F
4 g h i 4 G H I
5 j k l 5 J K L
6 m n o 6 M N O
7 p q r s 7 P Q R S
8 t u v 8 T U V
9 w x y z 9 W X Y Z
0 0 Space
* *
# Press # to switch input mode
24

move
Press [ ] button to select the pinyin, press [ or ] key to select the up and down
line, the user can press [ or ] key to select the Chinese character, through [ ]
key to return to the phonetic selection. Press [ ] key to select the corresponding Chinese
characters and displayed them in the editing area, at this time the Chinese character input is
completed, Pinyin input interface disappears. Press * to display *, press 0 to display the space,
and press # to switch the input mode.
Numbers input mode:
Press the numeric keys to display the corresponding digits in the numbers input mode, press
* to display *, and press # to switch the input mode.
up or down
move
Radio Check
This feature applies only to single call user aliases or IDs.
Send Radio Check
This feature applies only to single call user aliases or IDs.Using menu:
Move
Move
Move
2625

Move
Move single call
move
move
Move
2827

Move
single call contact
Move
Move
7. If the "Channel Idle Beep" function is enabled, the receiver will hear a short beep when the
target radio releases the [PTT] key, indicating that the channel is idle and waiting for a reply.
Press the call key (PTT) to reply. If there is no voice activity during the pre-programmed group
call hang time, the call end.
Move
single call
move
move
4. Hold radio in a vertical position and keep it at a distance of 1 to 2 inches (2.5 to 5.0 cm)
from the mouth.
5. Press [PTT] button to initiate the call and the LED indicator is lit red. The first line shows
"single call" user alias or ID, the second line shows single call alias, the third line shows
single call number and call icon .
6. Release [PTT] key to receive. When the target radio responds, the LED is lit green and
the screen displays the ID of the transmitting radio.
7. If the "channel free indication tone" function is enabled, the receiver will hear a short beep
when the target radio releases [PTT] key, indicating that the channel is idle and waiting for
a reply. Press call key (PTT) to reply. If there is no voice activity during preprogrammed
single call hang time, the call ends.
8. You will hear a short tone, the screen shows the call is terminated.
3029

Move
Move
5. Press [ or ] key to view the list and press [PTT] key to start a single call with the
currently selected alias or ID.
Whenever you miss call, two way radio will display a not answered call, select view or view later.
move
Move
Move
Move
Move
Deleting Calling Log’s Record
1. Press [ ] button to enter the menu mode.
2. Press [ or ] key to call record, and then press [ ] button to select.
3. Press the [ or ] key to the desired list, and then press [ ] button to select.
3231

4. Press [ or ] key to the desired alias or ID, and then press [ ] button to select.
5. Press [ or ] to delete the entry? , And then press [ ] button to select whether
delete the entry.
6. Select "Yes" to press [ ] button to delete the entry, the screen appears with the entry
deleted; or select "No" and press [ ] button to return to the previous screen.
When you select a call list but there are no entries, the screen will show that the list is empty,
and if the keyboard tone is on, a low tone tone will sound.
Call prompt operation
Call prompt allows you to prompt a specific radio user to call you back at a possible time.
This feature is only available for single call user aliases or IDs and can be used through the
menu via contacts or manual dialing.
Move
move
Move
Message function
Your radio can receive data, such as text messages from another radio, with a maximum
length of 144 characters.
Receive and confirm call prompts
When you receive a call prompt, the screen displays a call prompt that alternately displays
the alias or ID of the transmitting radio.
1. You will hear the tone repeat sound.
2. Press and release the [PTT] key to confirm the prompt, or press [ ] key or [ ] to
select "Ignore?" to exit the call prompt.
Move
Edit and send text messages
Use menu function:
1. Press [ ] button to enter menu.
2. Press [ or ] key to enter message, and then press the [ ] button to select.
3. Press [ or ] to write the message, and then press the [ ] button to select.
4. A flashing cursor appears,using keyboard to input messages. Press [ ] key to move
left, press [ ] key to move right,when editing area have contents,press [ ] key to delete
any useless characters, otherwise return to the previous menu when there is no content.
5. After writing the message, press [ ] button to select Send or Save or Clear.
6. During editing, you can switch the input method by pressing [#] key.
3433

7. After selecting Send, press [ or ] key to desired alias or ID, and then press [ ]
button to select.
Or press [ or ] key to manual dial, then press [ ] button to select, enter user
ID and press [ ] button.
8. The screen displays the message: <user / group alias or ID> to confirm that the message
is being sent.
9. If the message is sent successfully, a beep will sound and the screen shows message is
sent successfully.
Or if the message is not sent, a loud tone beeps, and the screen displays a message sending
failure. If the message is not sent, radio returns to the retransmission selection screen.
Send a Quick Text
Radio supports up to 32 pre-made SMS messages programmed by the agent:
When you have predefined a text message, you can edit each message before sending it.
1. Press [ ] button to enter menu.
2. Press [ or ] key to enter message, and then press the [ ] button to select.
3. Press [ or ] to Quick Text, and then press the [ ] button to select.
4. Press [ or ] to required Quick Text, and then press the [ ] button to select.
5. A flashing cursor appears,using keyboard to input messages. Press [ ] key to move
left, press [ ] key to move right,when editing area have contents,press [ ] key to
delete any useless characters, otherwise return to the previous menu when there is no
content.
6. After writing the message, press [ ] button to select Send or Save or Clear.
7. During editing, you can switch the input method by pressing [#] key.
8. After selecting Send, press [ or ] key to desired alias or ID, and then press [ ]
button to select.
Or press [ or ] key to manual dial, then press [ ] button to select, enter user ID
and press [ ] button.
9. The screen displays the message: <user / group alias or ID> to confirm that the message
is being sent.
10. If the message is sent successfully, a beep will sound and the screen shows message is
sent successfully.
Or if the message is not sent, a loud tone beeps, and the screen displays a message sending
failure. If the message is not sent, radio returns to the retransmission selection screen.
Use a one-touch call key to send quick text
1. Send a pre-made SMS to a predefined alias or ID by preprogramming one-touch call key.
2. The screen displays message: <user / group name or ID>,confirm that the message is
being sent.
3. If the message is sent successfully, a beep will sound and the screen shows message is
sent.
Or if you can not send text messages, screen displays failed to send message. If message
failed to send, radio returns to the retransmission selection screen.
Manage failed text messages
In the retransmission selection screen, you can choose from the following options:
3635

• Resend
• Forward
• edit
Resend text messages
1. Press [ ] to resend the same message to the same user / group name or ID.
2. If the message is sent successfully, a beep will sound, and the screen displays the message
has been sent or if you can not send the message, the screen displays failed to send message.
Forward text messages
Select Forward a text message to another user / group name or ID.
1. Press [ or ] key to forward, and then press [ ] button to select.
2. Press [ or ] key to the desired alias or ID, and then press [ ] button to select.
Or press [ or ] key to manual dial, then press [ ] button to select, enter user ID
and press [ ] button.
3. The screen displays message: <user / group name or ID> to confirm that the message is
being sent.
4. If the message is sent successfully, a beep will sound, and screen displays the message
has been sent or if you can not send the message, a beep will sound,the screen displays
failed to send message.
Editing messages
Select Edit to edit a text message before sending a text message.
Note: You can not edit the subject line if you have a subject line (a text message received
from an e-mail program).
1. Press [ or ] key to edit, and then press [ ] button to select.
2.A flashing cursor appears,using keyboard to input messages. Press [ ] key to move
left, press [ ] key to move right,when editing area have contents,press [ ] key to
delete any useless characters, otherwise return to the previous menu when there is no
content.
3. After writing the message, press [ ] button to select Send or Save.
4. During editing, you can switch the input method by pressing [#] key.
5. After selecting Send, press [ or ] key to desired alias or ID, and then press [ ]
button to select.
Or press [ or ] key to manual dial, then press [ ] button to select, enter user ID
and press [ ] button.
6. The screen displays the message: <user / group alias or ID> to confirm that the message
is being sent.
7. If the message is sent successfully, a beep will sound and the screen shows message is
sent successfully.
Or if the message is not sent, a loud tone beeps, and the screen displays failed to send
message.
Manage text messages sent
Once message is sent to another radio, it will be saved to "Outbox". Messages sent after
sending are always added to the top of the Outbox list. Outbox folder can store up to 16
recently sent messages. When the folder is full, the next sent message will automatically
replace earlier massages in this folder.
3837

Note: Pressing [ ] button at any time can return to the previous screen. Note: In addition to pressing [ ], [ or ] key, if you press PTT or side key, it will
return to exit. When you press [PTT] button to initiate a single call or group call, or respond
View sent text messages
Use menu :
1. Press [ ] button to enter menu mode.
2. Press [ or ] key to enter message, and then press [ ] button to select.
3. Press [ or ] key to Outbox, and then press [ ] button to select.
4. Press [ or ] key to the desired message, and then press [ ] button to select.
The icon in the upper right corner of the screen indicates the status of the message.
Send a sent message
When viewing a text message, you can choose from the following options:
• Resend
• Forward
• Edit
• Delete
1. While viewing message, press [ ] button again.
2. Press [ or ] key to resend, and then press [ ] button to select.
3. The screen display sent to: <user / group alias or ID>, confirming that the same message
is being sent to same target radio.
4. If the message is sent successfully, a beep will sound and screen shows message is sent.
Or if message is not sent, a loud tone beeps, and the screen displays failed to send message.
If message is not sent, radio returns to the resend screen. Press [ ] to resend message
to the same user / group name or ID.
to group call, radio will exit resend selection screen. If you receive a text message or remote
sensing telemetry information, emergency call or alarm, or receive a call prompt, radio will
also exit resend selection screen. If you press [PTT] key to respond to a single call (except
when radio is displaying a missed call screen), or when all call ends, screen display returns
to resend selection screen. Press [ or ] key to enter the Forward, Edit, or Delete
selection screen.
• Select Forward to send selected messages to other groups / user aliases or IDs.
• Select Edit to edit the selected message before sending it.
• Select Delete to delete the selected message.
Use menu function:
1. Press [ ] button to enter menu mode.
2. Press [ or ] key to enter message, and then press [ ] button to select.
3. Press [ or ] key to Outbox, and then press [ ] button to select.
4. Press [ or ] key to delete all, and then press [ ] button to select.
5. Press [ ] button to delete message. Select "Yes" to display sent messages is cleared.
When message is deleted, press [ or ] to No, and press [ ] to return to previous
screen. When you select "Outbox" but there is no text message, screen will show the list is
empty, at this time if keyboard tone is open, it will sound a low tone .
Receive text messages
When your radio receives a text message, the tone sounds, screen displays short message icon.
4039

View message
1. Press [ ] button to enter menu mode, press [ or ] key to message, press [ ]
button to select Inbox, and press [ ] key to select Inbox list.
2. The selected message in the Inbox opens.
3. Press [ ] button to return to Inbox.
Or press [ ] to reply, forward or delete message.
Press [ or ] to reply or forward or delete selection screen:
• Select Reply to reply messages and select Forward to forward messages.
• Select Delete to delete received messages.
Manage received messages
Use Inbox to manage messages. Inbox can store up to 16 text messages.
Radio support the following message options:
• Reply
• Forward
• Delete
• Delete all
Store the messages in your inbox in the order you received recently.
Note: Pressing [ ] button at any time can return to the previous screen.
Check messages in your inbox
1. Press [ ] button to enter menu mode.
2. Press [ or ] key to enter message, and then press [ ] button to select.
3. Press [ or ] key to the Inbox, and then press [ ] button to select.
4. Press [ or ] key to view message. If message comes from an e-mail program,
a subject line will appear.
5. Press [ ] button to select current message, and then press [ ] button again to
reply, delete or forward the message.
Unread messages ;Already read message .
Reply messages in your Inbox
Use menu function:
1. Press [ ] button to enter menu mode.
2. Press [ or ] key to message, and then press [ ] button to select.
3. Press [ or ] key to Inbox, and then press [ ] button to select.
4. Press [ or ] key to desired message, and then press [ ] button to select.
5. Press [ ] button again to enter the submenu.
6. Press [ or ] key to reply, and then press [ ] button to select.
7. Press [ or ] key to write message, then press [ ] button to select, the flashing
cursor appears, and use your keyboard to edit your message.
Or press [ or ] to enter quick text, and then press [ ] button to select. Select
desired message and press [ ] button, flashing cursor appears. If necessary, use your
keyboard to edit your message.
8. After writing message, press [ ] button.
9. The screen displays message: <user / group name or ID> to confirm that the message is
being sent.
4241

10. If message is sent successfully, a beep will sound and screen shows message is sent.
Or if you can not send text messages, the screen displays failed to send message. If the
message is not sent, radio returns to resend selection screen.
Delete messages in the Inbox
Use menu function:
1. Press [ ] button to enter menu mode.
2. Press [ or ] key to message, and then press [ ] button to select.
3. Press [ or ] key to Inbox, and then press [ ] button to select.
4. Press [ or ] key to desired message, and then press [ ] button to select.
5. Press [ ] button again to enter the submenu.
6. Press [ or ] key to delete, and then press [ ] button to select.
7. When radio shows delete massage, press [ or ] key to "YES", and then press
[ ] button to select.
8. Screen shows message is delete.
9. The screen returns to Inbox.
Delete all messages in your inbox
Use menu function:
1. Press [ ] key to enter the menu mode.
2. Press [ or ] to message, and then press [ ] button to select.
3. Press [ or ] key to Inbox, and then press [ ] button to select.
4. Press [ or ] key to delete all, and then press [ ] button to select.
5. When radio shows delete all, press [ or ] key to YES, and then press [ ]
button to select.
6. The screen display Inbox has been cleared.
When you select "Inbox" but there is no text message, the screen will show that list is empty.
Encryption
If this function is enabled, it is helpful to prevent other users on the channel from eavesdropping
by unauthorized use of software encryption. The transmitted signaling and user identification
sections are not encrypted. Your radio must enable encryption on the channel to send encrypted
transmissions, even if it is not necessary to receive this.
Basic Encryption
Digital channels, radio can only be assigned one of the above encryption type. To decrypt
an encrypted call or a data transmission, preprogrammed radio and launch radio must have
same "encryption key" (suitable for basic encryption).
If your radio receives an encrypted call with a different encryption key or a different key value
and key ID, you will hear a messy sound (basic encryption).
Press the preprogrammed encryption key to turn encryption on or off.
DTMF
Analog channels, Dual Tone Multi-Frequency function allows operate radio in a radio system
with interference.
To initiate a DTMF call
4443

1. Press and hold [PTT] button.
2. Enter the desired number.
Secrecy
You can activate or kill any radio in the system. For example, you might want to disable
a stolen radio, prevent thieves from using it, and enable it when you get it back.
Note: The implementation of radio kill or activation is limited to radio that have open (software
preset) this function.
Radio Disable(Digital mode)
Move
Move
move
Move
Radio Enable(Digital mode)
Move
Move
move
Move
4645

Scan list
Note: Scanning function should be used when double wait is closed!
Create a scan list and assign it to a single channel / group, and your radio can support up to
16 scan lists, up to 16 members per list.
Each scan list supports mixing of analog and digital channels. You can add / remove channels
or set priorities for channel by editing scan list.
View members in scan list
1. Press [ or ] to select a channel with a preprogrammed scan list;
2. Press [ ] button to enter menu mode;
3. Press [ or ] key to scan, and then press [ ] button to select;
4. Press [ or ] key to view / edit list, and then press [ ] button to select;
5. Use [ or ] key to view members in the list.
If priority is set, scan icon distinction display, priority 1 or priority 2 , no priority when
scan is on
Two scanning methods:
• Manual scan: Start scanning according to preprogrammed scan on / off key or menu function,
radio will detect all channels / groups in preset scan list when scanning is initiated.
• Auto Scan: When you select a channel / group that has activated Auto Scan, radio starts
scanning from the channel that activated auto scan.
Start and stop scanning
Press preprogrammed scan on / off key or enter scan menu function
1. Press [ or ] to select a channel with a preprogrammed scan list;
2. Press [ ] button to enter menu mode;
3. Press [ or ] key to scan, and then press [ ] button to select;
4. If scan is disabled, screen displays on or if scan is activated, screen displays off;
5. Press [ ] button to select.
6. When scan is activated, LED flashes red and scan icon is displayed; or when scan is
disabled,LED is off and scan icon is not displayed.
Scan instructions and methods
When you start scanning, your radio through cycling of pre-programmed scan list to see
whether there is voice activity in the current channel. The LED flashes orange and scan icon
appears on the screen.
During a dual mode scan, if you are on a digital channel and your radio locks an analog
channel, it will automatically switch from digital mode to analog mode throughout the duration
of the call. vice versa.
Scan reply
Scanning when radio detects an active channel / talk group, radio remains in the channel
/ group, which is called "scan hang time" of preprogrammed time limit.
Process:
1. Hold radio in a vertical position and keep it at a distance of 1 to 2 inches (2.5 to 5.0 cm)
from the mouth. If "channel free indication tone" function is enabled, the receiver will hear
a short beep when [PTT] button is released by the launch radio, indicating that the channel
4847

is idle and waiting for a reply.
2. Press [PTT] key during hang time, and LED indicator will be on red.
3. Release [PTT] key to receive.
4. If you do not respond within hang time, radio continues to scan down.
• Passwd Lock(Programmable in software)
• Mode(Programmable in software)
• Screen(Programmable in software)
• Language
Set
Set include the following:
Radio Set
• CTCSS/DCS(Analog channel)
• Squelch
• TX Power(Programmable in software)
• Talkaround(Programmable in software)
• Band(Analog channel)
• Busy Lock
• TOT
• VOX
• Double Wait(Programmable in software)
• Encrypt(Digital channel)(Programmable in software)
• Power Save
• Beep(Programmable in software)
• Backlight(Programmable in software)
•Keypad Lock(Programmable in software)
• Indocator(Programmable in software)
49
Radio Info
• Radio ID
• Dev. Info
Radio Cfg
• RX Freq
• Tx Freq
• Ch Name
• Color Code
• Slot
Radio Set
CTCSS/DCS
In analog channels,in order to prevent interference,only match carrier and CTCSS/DCS can
open the speaker.Provide 50 groups standard CTCSS, while supporting non-standard CTCSS
(range 60Hz ~ 280Hz); provide 104 groups standard DCS, while supporting non-standard
non-standard(Range 000 ~ 777Hz) a total of 1024 groups. CTCSS/DCS can be set in receiving
CTCSS / DCS or transmitting CTCSS/DCS of analog channel in software, or CTCSS/DCS
menu in radio.
50

67.0 69.3
85.4
82.5
103.5
100.0
127.3
123.0
156.7
151.4
173.8
171.3
192.8
189.9
210.7
218.1
250.3
254.1
CTCSS
71.9
88.5
107.2
131.8
159.8
177.3
196.6
225.7
74.4
91.5
110.9
136.5
162.2
179.9
199.5
229.1
77.0
94.8
114.8
141.3
165.5
183.5
203.5
233.6
79.7
97.4
118.8
146.2
167.9
186.2
206.5
241.8
023
054
125
165
245
274
356
445
506
627
732
025
065
131
172
246
306
364
446
516
631
734
026
071
132
174
251
311
365
452
523
632
743
031
072
134
205
252
315
371
454
526
654
754
D C S
032
073
143
212
255
325
411
455
532
662
036
074
145
223
261
331
412
462
546
664
043
114
152
225
263
332
413
464
565
703
047
115
155
226
265
343
423
465
606
712
051
116
156
243
266
346
431
466
612
723
053
122
162
244
271
351
432
503
624
731
Use menu function:
1. Press [ ] button to enter menu mode.
2. Press [ or ] key to "Set", and then press [ ] button to select Radio Set.
3. Press [ or ] key to "CTCSS/DCS", then press [ ] button to select "C CDC/DCS"
and press [ ] button to select. Press [ or ] key to select standard CTCSS/DCS,
press [*] key to switch CTCSS and DCS.Press [#] key to switch positive and negative DCS
in DCS, N is positive, I is negative. Press [ ] button to select, but also through keyboard
number keys to enter Non-standard CTCSS/DCS, press [ ] button to confirm. Press
[ ] button to cancel and return previous menu.
If in special circumstances your encoding and decoding requirements are different,you can
set separately "R CDC/DCS" and "T CDC/DCS", same way as above.
4. Press continuously [ ] to return to the main interface.
Contents set will be saved permanently, contents after turn off radio is not lost.
Set Squelch level
You can adjust radio squelch level, filter useless calls with low signal , or channels with
background noise higher than normal values. Settings: Normal is default, strict filtering (useless)
calls or background noise. However, calls from remote locations may also be filtered out.
Press preprogrammed strict / normal squelch key to switch between normal and strict squelch
level.
Use menu function:
1. Press [ ] button to enter menu mode.
2. Press [ or ] key to set, then press [ ] button to select radio set.
3. Press [ or ]key to squelch, and then press [ ] button to select.
4. Press [ or ] key to select Strict or Normal, and then press [ ] button to select.
5. Press continuously [ ] to return to main screen.
Set Power Level
You can set radio power level for each channel high or low.
Set: high power to achieve relatively far away from radio communication. Low power to achieve
communication with nearest radio.
Press preprogrammed high / low power select key to switch transmit power level between
high and low.
Use menu function:
1. Press [ ] button to enter menu mode.
5251

2. Press [ or ] key to set, then press [ ] button to select radio set.
3. Press [ or ]key to Power Level, and then press [ ] button to select.
4. Follow screen instructions to change current settings.
5. Press [ ] button to select new power level.
6. Press continuously [ ] to return to the main screen, screen displays power level icon.
Talkaround
You can continue to communicate when repeater does not work or when radio is outside
range of repeater but is within range of other radios. This is so-called "talkaround".
Press preprogrammed repeater / talkaround key to switch between two modes.
Use menu function:
1. Press [ ] button to enter menu mode.
2. Press [ or ] key to set, then press [ ] button to select.
3. Press [ or ]key to Radio Set, and then press [ ] button to select.
4. Press [ or ]key to Talkaround, and then press [ ] button to select.
5. Press continuously [ ] button to return to main interface.Screen displays " " to
show talkaround is on.
Even after shutdown, radio still maintain talkaround setting.
1. Press [ ] button to enter menu mode.
2. Press [ or ] key to set, then press [ ] button to select.
3. Press [ or ]key to Band, and then press [ ] button to select.
4. Press [ or ]key to Narrow or Wide band, and then press [ ] button to select.
5. Press continuously [ ] button to return to main interface.
Even after shutdown, radio still maintain Wide/Narrow band setting.
Busy Lock
Settings: "Off" / "Carry" / "QT / CC"
Select "Carry" when carry is matched and reach to open squelch threshold ,press PTT to
prohibit and send busy tone;
Select "QT / CC", when carry is matched and reach to open squelch threshold and does not
match QT / CC, press PTT to prohibit and send busy tone.
1. Press [ ] button to enter menu mode.
2. Press [ or ] key to set, then press [ ] button to select.
3. Press [ or ]key to Busy Lock, and then press [ ] button to select.
4. Press [ or ]key to Off or Carry or QT / CC, and then press [ ] button to select.
5. Press continuously [ ] button to return to main interface.
Even after shutdown, radio still maintain Busy Lock setting.
Wide and narrow band
In analog mode, channel bandwidth set to narrow band (12.5kHz) and wide band (25kHz)
for transmit and receive frequencies.
Use menu function in analog channels
TOT
1. Press [ ] button to enter menu mode.
2. Press [ or ] key to set, then press [ ] button to select.
3. Press [ or ]key to TOT, and then press [ ] button to select.
4. The screen shows OFF, 15S, 30S ... 495S and other options (with the increasing amplitude
5453

of 15s).Press [ or ] key to corresponding option, and then press [ ] button to
select. If "OFF" is selected, TOT is closed. If you select other options, screen displays ..
S has been selected.
VOX
This feature allows you to initiate hands-free voice calls on a preprogrammed channel. When
microphone on the accessory with VOX function detects the voice, radio automatically launches
signal during the preprogrammed time period.
During operation of radio, pressing [PTT] key disables VOX function. To re enable VOX function,
do one of following actions:
• turn off and return on radio, or
• change channels via channel knobs, or
• Perform the following procedure:
Note: Enabling or disabling this feature is limited to the radio that activates these features.
Press pre-programmed VOX on/off key to turn this function on or off.
Use menu
1. Press [ ] button to enter menu mode.
2. Press [ or ] key to set, then press [ ] button to select.
3. Press [ or ]key to VOX, and then press [ ] button to select.
4. The screen shows on and off.If you select Off, press [ ] button to disable VOX function.
If you select On, enable VOX function.Press continuously [ ] to return to main interface.
Microphone icon in icon bar indicates that Vox is turned on
Double Wait
Double wait can be set through radio menu, you can also set in "menu option" in software.
Use menu
1. Press [ ] button to enter menu mode.
2. Press [ or ] key to set, then press [ ] button to select.
3. Press [ or ]key to Double Wait, and then press [ ] button to select.
4. Screen shows Off/Double Wait/Single Wait.When choose off,radios works under single band
mode.When single wait is selected, radio operates on the main channel, and sub-channel
does not receive the signal. When double wait is selected, main channel and sub-channel
receiving scan one by one.
When scanning effective reception of the signal, radio locked and work.If channel locked is
not main channel, points to the temporary working channel, then press PTT, temporary
Channel transmit.Timing time is up, icon disappears. No temporary icon, press PTT ,
point to the main channel transmission.Press continuously [ ] to return to main
interface and display the corresponding status.
Encrypt
In digital mode, communication voice secret switch. When encryption is on, only two-party
radios matching encryption key can communicate.
Use menu
1. Press [ ] button to enter menu mode.
2. Press [ or ] key to set, then press [ ] button to select.
3. Press [ or ]key to Encrypt, and then press [ ] button to select on/off.
4. Press [ ] to confirm and press continuously [ ] to return to main interface.
5655

Power Save
Power saving, the default ratio is 1: 4. Radio will open power saving function after 10 seconds
be in stansby mode.
1. Press [ ] button to enter menu mode.
2. Press [ or ] key to set, then press [ ] button to select.
3. Press [ or ]key to Power Save, and then press [ ] button to select on/off.
4. Press [ ] to confirm and press continuously [ ] to return to main interface.
Beep
including following
• All Tone
• Call Permit
• Key Beep
All tone
If desired, you can enable or disable all radio tones and prompts (except for incoming
emergency tones).
Press preprogrammed beeps on / off key to turn on or off all tones of radio.
Use Menu
1. Press [ ] button to enter menu mode.
2. Press [ or ] key to set, then press [ ] button to select.
3. Press [ or ]key to Beep, and then press [ ] button to select.
3. Press [ or ]key to All Tone, and then press [ ] button to select.
5. Press [ ] button to select On to enable all tones and hints, and screen shows that all
tones are on.
Or press [ ] button to select Off, all tones and prompts are turned off and screen shows
all tones off. Press continuously [ ] to return to main interface.
Turn on/off Key Beep
Use Menu
1. Press [ ] button to enter menu mode.
2. Press [ or ] key to set, then press [ ] button to select.
3. Press [ or ]key to Beep, and then press [ ] button to select.
3. Press [ or ]key to Key Beep, and then press [ ] button to select.
5. Press [ ] button to select On to enable key beep.Or press [ ] button to select Off,
key beep are turned off. Press continuously [ ] to return to main interface.
Backlight
You can turn on or off screen backlight as needed. This setting also affects menu key and
keyboard backlight.
Press preprogrammed backlight key to switch backlight setting.
Use Menu
1. Press [ ] button to enter menu mode.
2. Press [ or ] key to set, then press [ ] button to select radio set.
3. Press [ or ]key to Backlight, and then press [ ] button to select.
4. The screen displays Always On, 5 sec, 10 sec, 15 sec option. Press [ ] button to select
Always On, screen backlight will always be lit and will not turn off. Or if you choose 5 sec,
10 sec, 15 sec, screen will be off in the corresponding time after users no operation. Press
continuously [ ] to return to main interface.
5857

Keypad Lock
You can lock radio keyboard to prevent accidental key input. Ways Includes manual keyboard
lock and automatic keyboard lock, Automatic keyboard lock includes 5 sec, 10 sec, 15 sec
three time options.
Use Menu
1. Press [ ] button to enter menu mode.
2. Press [ or ] key to set, then press [ ] button to select.
3. Press [ or ]key to Keypad Lock, and then press [ ] button to select.
4. Press [ or ] key to Manual,then press [ ] button to select.Screen display Select
Manual, you need to long press [*] key to lock the keypad.
5. Press [ or ] to select 5 sec, 10 sec, 15 sec, screen displays to select the corresponding
time.The within the corresponding time,if users have notany keyboard operation, the screen
display lock, return to main screen.
7. To unlock keypad, press [ ] button, and then press [*] key. Press continuously [ ]
to return to main interface.
Indicator
If needed, you can turn on/off LED indicator.
1. Press [ ] button to enter menu mode.
2. Press [ or ] key to set, then press [ ] button to select radio set.
3. Press [ or ]key to indicator, and then press [ ] button to select.
4. Screen displays on, press [ ] button to enable LDE indicator, screen shows indicator on.
Or Screen displays off, press [ ] button to turn off LED indicator, screen shows indicator
off. Press continuously [ ] to return to main interface.
Passwd Lock
1. Press [ ] button to enter menu mode.
2. Press [ or ] key to set, then press [ ] button to select radio set.
3. Press [ or ] key to Passwd Lock, and then press [ ] button to select.
4. Use keypad to enter correct 6-digit password (also cen be preset in software), then press
[ ] button.
5. If password is incorrect, screen displays Password Error. If password is correct, selection
option is displayed.
6. If the first line shows "On", press [ ] button to turn on password lock, next time you
need to enter correct password to turn on radio. If the first line shows "off", press [ ]
button to turn off password lock, next time you turn on the radio directly.
7. Press [ or ] key to change Pwd, and then press [ ] button to select.
8. Enter new password below 6 digits and press [ ] button to select.
9. Screen shows set Succeed. Press continuously [ ] to return to main interface.
Mode
Mode settings are divided into:
• CH. No.: Displays channel number
• CH Name: Displays channel name
• CH Frequency: Displays channel frequency
1. Press [ ] button to enter menu mode.
6059

2. Press [ or ] key to set, then press [ ] button to select radio set.
3. Press [ or ] key to Mode, and then press [ ] button to select.
4. Press [ or ] key to select CH. No.or CH Name or CH Frequency, and then press
[ ] button to select the corresponding display mode. Display show corresponding
mode is selected.
5. The main interface will display CH. No.or CH Name or CH Frequency(reception frequency,
PTT display transmission frequency) according to the selected mode. Press continuously
[ ] to return to main interface.
Screen
If necessary, you can enable and disable screen display.
1. Press [ ] button to enter menu mode.
2. Press [ or ] key to set, then press [ ] button to select radio set.
3. Press [ or ] key to Screen, and then press [ ] button to select.
4. Press [ ] button to select Picture or Character. When Picture is selected, the picture
will be displayed when turn on radio. When the preset characters is selected, two lines of
characters preset in software are displayed. Press continuously [ ] to return to main
interface.
Language
Radios supports the following languages:
• English
• Chinese
1. Press [ ] button to enter menu mode.
2. Press [ or ] key to set, then press [ ] button to select radio set.
3. Press [ or ] key to Language, and then press [ ] button to select.
4. Press [ or ] key to corresponding Language,, and then press [ ] button to select.
5. The screen switches and displays the corresponding language.Press continuously [ ]
to return to main interface.
Radio Info
• Radio ID
• Dev. Info
Note: Pressing [ ] button at any time can return to previous screen.
Radio Info
1. Press [ ] button to enter menu mode.
2. Press [ or ] key to Radio Info, then press [ ] button to select.
3. Press [ or ] key to Radio ID, and then press [ ] button to select.
4. The screen displays radio ID and name, which can only be checked and cannot set.
Dev. Info
including following contents:
• Model information: radio model No.
• Serial number: radio identity code
• CPS version: software version
• Hardware version: Hardware version number
6261

• Firmware version: CPU software version
• DSP version: Digital chip baseband version number
• Programming time: the last writing time
1. Press [ ] button to enter menu mode.
2. Press [ or ] key to Radio Info, then press [ ] button to select.
3. Press [ or ] key to Dev. Info, and then press [ ] button to select.
4. Press [ or ] key to view model information, serial number, CPS version, hardware
version, firmware version, DSP version, and programming time. Press continuously [ ]
to return to main interface.
Radio Cfg
Radio configuration is mainly to edit the channel content
Editable channel content includes:
• Rx Freq
• Tx Ferq
• Ch Name
• Color code
• Slot
• Dual time slot for point to point
Rx Freq
1. Press [ ] button to enter menu mode.
2. Press [ or ] key to Radio Cfg, then press [ ] button to select.
3. Press [ or ] key to Rx Freq, and then press [ ] button to select.
4. The screen displays the current channel reception frequency, and then press [ ] button
to select.
5. Press [ ] button to delete, press [ ] key to move one digit left, press [ ] to move
one digit right, press [*] to delete all, delete all and press [ ] to return to the previous
menu. Press number keys to enter the corresponding number.
6. After the change is complete, press [ ] button, the screen displays "Rx Freq success".
Note: When editing frequency, the frequency will be changed according to the frequency range
preset on software. If exceed the frequency range preset on software, show "illegal modification
value is invalid" and return.
Tx freq
1. Press [ ] button to enter menu mode.
2. Press [ or ] key to Radio Cfg, then press [ ] button to select.
3. Press [ or ] key to Tx Freq, and then press [ ] button to select.
4. The screen displays the current channel transmit frequency, and then press [ ] button
to select.
5. Press [ ] button to delete, press [ ] key to move one digit left, press [ ] to move
one digit right, press [*] to delete all, delete all and press [ ] to return to the previous
menu. Press number keys to enter the corresponding number.
6. After the change is complete, press [ ] button, the screen displays "Tx Freq success".
Note: When editing frequency, the frequency will be changed according to the frequency
range preset on software. If exceed the frequency range preset on software, show "illegal
modification value is invalid" and return.
6463

Ch Name
1. Press [ ] button to enter menu mode.
2. Press [ or ] key to Radio Cfg, then press [ ] button to select.
3. Press [ or ] key to Ch Name, and then press [ ] button to select,screen displays
the current channel name.
4. Press [ ] button to delete, press [ ] key to move one digit left, press [ ] to move
one digit right, press [*] to delete all, delete all and press [ ] to return to the previous
menu. Press number keys to enter the corresponding number.
5. After the change is complete, press [ ] button, the screen displays "Ch Name success".
Color Code
Color code can only be set in digital channels.
1. Press [ ] button to enter menu mode.
2. Press [ or ] key to Radio Cfg, then press [ ] button to select.
3. Press [ or ] key to Color Code, and then press [ ] button to select.
4. Press [ or ] key to select color code value to be set, and then press [ ] button
to select. Screen display color code X (selected color code value) has been selected.
Note:Double wait and the main channel to open dual capacity direct mode, the main channel
locked after the first 4.5 minutes will send synchronization code, and in the channel stay about
3S-5S to determine whether the other party received the synchronization code.
1.After no receiving any signal, after 3S-5S the launch of the synchronization code ,radio
re-enter double wait switch
2.Only after 5S current channel has received a signal or actively transmit , radio re-enter
the double wait switch
3.If the radio sending synchronization code and the call radio are not the same frequency
band,It takes 8-10S.
Slot
1. Press [ ] button to enter menu mode.
2. Press [ or ] key to Radio Cfg, then press [ ] button to select.
3. Press [ or ] key to Slot, and then press [ ] button to select.
4. Press [ or ] key to select slot value to be set, and then press [ ] button to select.
Screen display slot X (selected slot value) has been selected.
Note: Dual Capacity Direct Mode(dual time slot for point to point) can be set on or off in digital
channel of software. This mode supports parallel direct mode transmission of two groups of
radio users, both in the 12.5 kHz channel bandwidth. Same group radios must use same time
slot, the group using slot 1 will not interfere with the group using slot 2.
Special function
Online update
1. Turn off radio, insert programming cable;
2. Hold down side key 1 and side key 2 at the same time to turn on radio, the indicator light
green, indicating that radio has entered the upgrade mode;
3. Start upgrade software "Update.exe"; select the corresponding serial port;
4. Click "Browse" to select the file to be upgraded (provided by the manufacturer), for
example: XX_V2.2.1.sgl;
6665

5. Click "Download" until the download is successful, remember that when updating,prohibit
power off, or radio single machine scrapped;
6. Unplug programming cable, turn off radio or reboot radio
Factory Reset Defaults
Turn off radio and press and hold side key 1 and number key [1] at the same time to turn on
radio.Radio displays "Memory Reset?" Press [ ] key to enter the initialization, radio displays
"Memory Reset ..." After 10 seconds, initialization is successful and normal boot; press other
keys to exit initialization interface and normal boot.When initialization,prohibit power off, or
otherwise it will cause initialization to fail.
Specification
General
Frequency range
Channel
Frequency stability
Operating temperature
Voltage
Receiver
Analog sensibility
Digital sensibility
Adjacent channel selectivity
Co-channel rejection
Spurious response
Audio response
Rated audio distortion
Audio power
Modulation noise
136-174/400-470MHz
1024
±1ppm
-30℃ ~ + 60℃
7.4V DC
0.2μV @ 12dB SINAD
0.25uV(BER:5%)
≤-60dB@12.5KHz
≥65dB
≥70dB
+1~-3dB
<5%
1W
≥45dB@25KHz /≥40dB @12.5KHz
6867

Transmitter
Power
Transmit current
Standby current
FM modulation mode
4FSK digital mode
Modulation distortion
Hum and noise
Adjacent channel power
Audio response
Antenna port spurious
Digital protocol
High:5W Low:1W
Analog≤1.6A Digital≤0.9A
0.15A
11K0F3E @
16K0F3E @ 25KHz
12.5KHz Data only:7K60FXD
12.5kHz Data and voice:7K60FXW
<5%
≥45dB@25KHz /≥40dB@12.5KHz
≤-60dB@12.5KHz
+1~-3dB
9KHz-1GHz: ≤-36dBm
1GHz-12.75GHz: ≤-30dBm
ETSI-TS102 361-1,-2,-3
12.5KHz 14K0F3E @ 20KHz
69
 Loading...