

Page 1
FreeLinc™
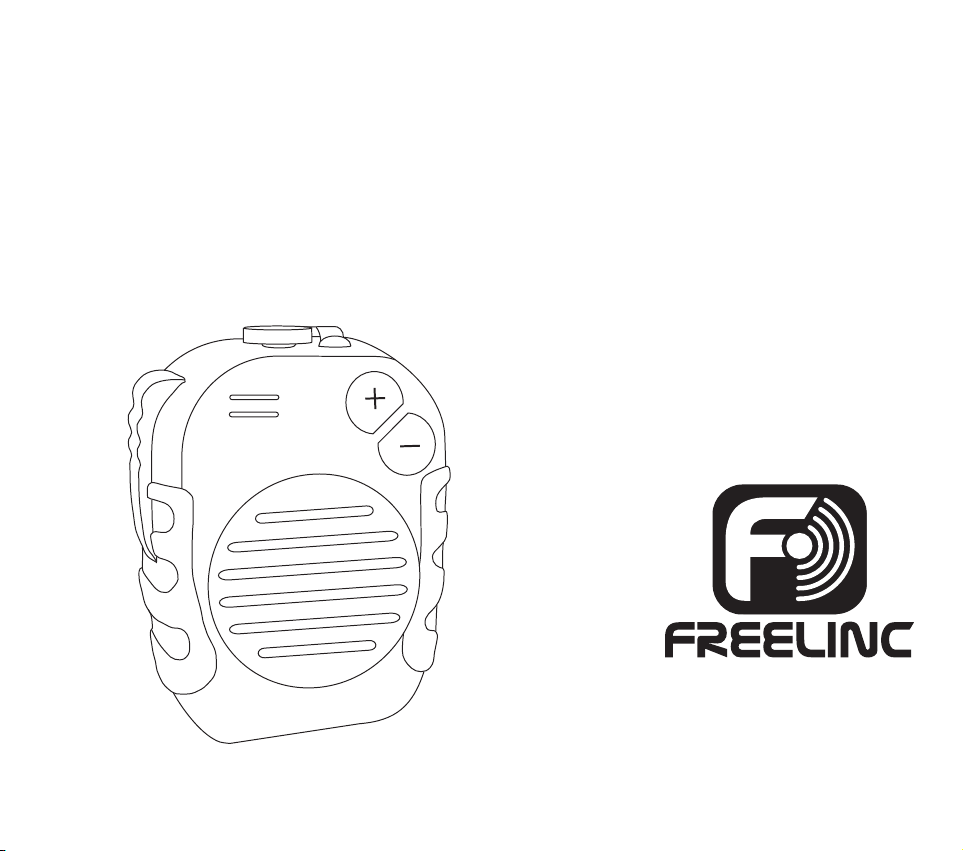
FreeMic™ 200
Product User Guide
™
Page 2

Warranty and FCC Compliance
Warranty
I. What this warranty covers and for how long:
a. Radeum, Inc., doing business as FreeLinc (“FreeLinc”), war-
rants to Purchaser that its FreeLinc manufactured products
(“Product”) will substantially conform to FreeLinc’s published
specifications, as of the date of the Purchaser’s purchase of
the Product, and for one (1) year from the date of purchase
(the “Warranty Period”).
b. Rechargeable batteries will be replaced during the warranty
period if
c. FreeLinc, at its option, will at no charge either repair, replace,
d. This express limited warranty is extended by FreeLinc to the
e. FreeLinc is not responsible in any way for any ancillary equip
the battery develops leakage.
or refund the purchase price for warranted Product during
the warranty period provided it is returned in accordance
with the terms of this warranty to the place of purchase.
Repair, at FreeLinc’s option, may include the replacement of
parts or boards with functionally equivalent reconditioned
or new parts or boards. Replaced parts or boards are war
ranted only for the balance of the original Warranty Period.
All replaced parts or Product shall become the property of
FreeLinc.
original end user purchaser only and is not assignable or
transferable to any other party. This is the complete warranty
for Product manufactured by FreeLinc. FreeLinc assumes no
obligations or liability for additions or modifications to this
warranty unless made in writing and signed by an officer of
FreeLinc. Unless made in a separate written agreement be
tween FreeLinc and the original end user purchaser, FreeLinc
does not warrant the installation, maintenance or service of
warranted Product.
ment not furnished by FreeLinc which is attached to or used
in connection with Product, or for operation of the Product
with any ancillary equipment and all such equipment is
expressly excluded from this warranty. Because each system
which may use the Product is unique, FreeLinc disclaims
liability for range, coverage, or operation of the system as a
whole under this warranty.
II. What this warranty does not cover:
a. Defects or damage resulting from use of the Product in other
than its normal and customary manner.
b. Defects or damage from misuse, accident, water or neglect.
c. Defects or damage from improper testing, operation, mainte
nance, installation, alteration, modification, or adjustment.
d. A Product subjected to unauthorized Product modifications,
disassemblies, or repairs.
e. Product which has had the serial number removed or made
-
-
-
illegible.
f. Rechargeable batteries if the damage or defect is caused by
charging or using the battery in equipment or service other
than the Product for which it is specified.
g. Freight costs related to Product returned for warranty claims.
h. A product which, due to illegal or unauthorized alteration of
the software/firmware in the Product, does not function in
accordance with FreeLinc’s published specifications or the
FCC type acceptance labeling in effect for the Product at the
time the Product was purchased.
III. How to get warranty service:
a. Purchaser shall notify FreeLinc of any nonconformance
during the warranty period, and obtain a written return
material authorization (“RMA”) and an RMA number for the
-
Page 3

nonconforming Product from FreeLinc.
b. Purchaser shall return the nonconforming Product to the
place of purchase freight prepaid.
IV. Limitation of Liability:
a. This warranty sets forth the full extent of FreeLinc’s responsi
bilities regarding the Product. Repair, replacement, or refund
of the purchase price, at FreeLinc’s option, is the exclusive
remedy.
b. THE FOREGOING WARRANTIES ARE THE SOLE WARRANTIES,
EXPRESS OR IMPLIED, GIVEN BY FREELINC IN CONNECTION
WITH THE PRODUCT, AND FREELINC DISCLAIMS ALL OTHER
WARRANTIES EXPRESS OR IMPLIED, INCLUDING WARRANTIES
OF MERCHANTIBILITY, FITNESS FOR A PARTICULAR PURPOSE,
AND NONINFRINGEMENT OF THIRD-PARTY RIGHTS.
c. FREELINC SHALL NOT BE LIABLE FOR ANY SPECIAL, INCIDEN
TAL, OR CONSEQUENTIAL DAMAGES IN CONNECTION WITH
THE PRODUCT, EVEN IF FREELINC HAS BEEN ADVISED OF THE
POSSIBILITY OF SUCH DAMAGES.
d. EXCEPT FOR CLAIMS FOR BODILY INJURY (including death)
AND CLAIMS FOR DAMAGE TO REAL PROPERTY AND
TANGIBLE PERSONAL PROPERTY, FREELINC’S LIABILITY FOR
ALL OTHER CLAIMS SHALL NOT EXCEED THE AMOUNT PAID
TO FREELINC FOR THE PRODUCT GIVING RISE TO FREELINC’S
LIABILITY. THIS LIMIT OF LIABILITY ALSO APPLIES TO OUR
MANUFACTURERS AND DISTRIBUTORS. IT IS THE MAXIMUM
AMOUNT FOR WHICH WE ARE COLLECTIVELY RESPONSIBLE.
FCC Compliance
instructions, may cause interference harmful to radio
communications.
This device complies with part 15 of the FCC Rules. Op
-
eration is subject to the following two conditions: (1) This
device may not cause harmful interference, and (2) this
device must accept any interference received, including
interference that may cause undesired operation.
There is no guarantee however, that interference will
not occur in a particular installation. If this equipment
does cause harmful interference to radio or television
reception, which can be determined by comparing the
-
equipment off and on, the user is encouraged to try to
correct the interference by one or more of the following
measures:
• Reorient or relocate the receiving antenna.
• Increase the separation between the equip
ment and receiver.
• Connect the equipment into an outlet on a
circuit different from that to which the receiver
is connected.
• Consult your supplier or an experienced radio/
TV technician for assistance.
-
WARRANTY & FCC COMPLIANCE
-
This equipment has been tested and found to comply
with the limits for a class B digital device, pursuant to
Part 15 of the FCC rules. These limits are designed to pro
vide reasonable protection against harmful interference
in a residential installation. This equipment generates,
uses and can radiate radio frequency energy and, if not
installed and used in accordance with the manufacturer’s
Warning: Changes or modifications to this unit not
expressly approved by the party responsible for compli
ance could void the user’s authority to operate this
-
equipment.
-
3
Page 4

Safety Information
Caution: To reduce the risk of fire or injury to persons, read and follow these instructions.
Do not dispose of product in a fire. The battery cells may explode. Check with local
codes for possible battery disposal instructions.
Use only the supplied charging unit to charge the product from an AC voltage or
wall outlet.
If the product becomes hot during charging, disconnect the AC adapter from the
wall and contact qualified support personnel.
Do not disassemble the AC adapter of this product as it may expose you to dangerous voltages or other risks. Incorrect reassembly can cause electric shock when the
product is subsequently used.
Do not use the charger outdoors or in damp areas.
Only charge the product battery in accordance with the instructions of this manual.
Page 5

Never submerge your product in water or other liquids.
Protect your product from spills, excessive rain, and wet locations.
Do not use liquid cleaners or aerosol cleaners as they may damage the product or
finish of the product. Use a dry cloth to clean the external portions of the product.
Do not stick anything inside the product as this may damage internal components.
This product conforms to the following safety standards:
ANSI/UL 60950-1 1st Ed.
CAN/CSA C22.2 No. 60950-1-03
EN 60950-1 1st Ed.
IEC 60950-1 1st Ed.
SAFETY INFORMATION
5
Page 6

Table of Contents
SAFETY AND WARRANTY INFORMATION 2-5
Warranty 2
FCC Compliance 3
Safety Information 4-5
TABLE OF CONTENTS 6-7
INTRODUCTION AND GENERAL INFORMATION 8
CONTENTS IN PACKAGES 9
PARTS OF THE PRODUCT 10-13
Diagram/Terms 10-11
Product 10-11
Product Charge Indicator Light 12
Product Indicator Tones 12
Product Volume Adjustment Tones 13
GENERAL OPERATION 14-19
Operating Concepts and Terms 14
Personal Communication Bubble 14
Pairing 14
Seek Mode 14
Linking 14
Sleep Mode 15
Charging the Battery 15
Using Your Product for the First Time 16
Step One: Charge FreeMic Battery 16
Step Two: Attach Adapter 16
Page 7

Step Three: Turn On Adapter 16
Step Four: Exit Sleep Mode 16
Step Five: Pair Product to Adapter 16
Step Six: Establish Link (Automatic) 17
Step Seven: Adjust Product Volume 17
Step Eight: Ending Use 17
VOX Operation 18
Entering VOX Mode 18
Operating in VOX Mode 18
Adjusting VOX Sensitivity 18
Exiting VOX Mode 18
Pairing Your Product with Other Adapters 19
Manually Initiating the Pairing Process 1
ACCESSORIES 20
TIPS AND SUGGESTIONS 20
Specifications: 20
TROUBLESHOOTING 20
SAFETY & WARRANTY
TABLE OF CONTENTS
9
A detachable QuickStart Guide is included with this manual.
7
Page 8

Introduction and General Information
Congratulations, and thank you for choosing
the FreeLinc FreeMic 200 wireless product to
enhance your two-way radio communications.
The FreeMic 200 uses cutting-edge Near-Field
Magnetic Induction communication (NFMI)
wireless technology. NFMI supports mobility,
freedom-of-motion, exceptional battery life,
audio integrity, ease-of-use, durability, secure
communications, and comfort. This is the first
technology of its kind to be implemented into
practical voice and audio solutions for two-way
radios.
The FreeMic 200 operates in a “bubble” that
envelops one to three meters of each user’s
personal space, and is – by the laws of physics
– fully private and secure. The result is the ability
to eliminate the restrictive and hazardous cable,
without sacrificing reliable and secure commu
nications. Additionally, with NFMI, signals are
-
designed to propagate only within a two-me
ter range, enabling a huge power and battery
advantage (up to six times) over standard RF
technology.
We are confident that you will immediately
experience the benefit of using innovative
FreeLinc products for your two-way radio trans
missions. As the pioneer in wireless push-to-talk
communications, we thank you for choosing
FreeLinc.
Anthony J. Sutera
President & CEO
-
-
Page 9

PACKAGE CONTENTS
FreeMic 200 (FMC-200):
• One Wireless Speaker-Microphone
• One AC Power Adapter
• One User Guide
• One Quick Start Guide
• One Tether Cord
INTRODUCTION
9
Page 10

Parts of the Product - Diagrams
FreeMic 200 (FMC-200) Product
Accessory/ Headphone
Jack
Charge Indicator
LED Light
Push-to-Talk
Button
Microphone
Rugged AllWeather Design
Volume/ VOX Sensitivity
Adjustment Buttons
Powerful Speaker
Page 11

Spring-Loaded
Rotating Clip
DIAGRAMS
SAFETY & WARRANTY
Accessory/ Headphone
Jack
Charge Indicator
LED Light
Wall Charger Connection
11
Page 12

Parts of the Product
Charge Indicator Light
The charge indicator light on your FreeMic 200 speaker-microphone indicates battery charge status
when plugged into the charger:
LED BEHAVIOR INDICATION
Red, Solid Charging
Green, Solid Charging Complete
The FreeMic LED will not illuminate when it is unplugged from the charger.
Indicator Tones
During operation, you will hear the following tones from your FreeMic 200 speaker-microphone:
INDICATION TONE
Low Battery Double short chirp, repeating when
Seek
ing Single short chirp, repeating
Pairing Achieved Long single tone
VOX Activated/Deactivated Double short tone
recieving and transmitting
Page 13

Volume Adjustment Tones
When clicking the Volume Up or Volume Down buttons to adjust FreeMic volume, you will hear the
following tones
:
INDICATION TONE
Volume Up/Volume Down Buttons
Clicked
Maximum Volume Reached Double short tone, high pitched
Minimum Volume Reached No tone, speaker muted
Single short tone
LIGHTS & TONES
SAFETY & WARRANTY
13
Page 14

General Operation
Operating Concepts and Terms
Personal Communication Bubble
The FreeMic 200 works within a small field, or
“bubble” of communication surrounding the
user. The size of the bubble is determined by the
distance between the FreeMic and the adapter.
If the FreeMic and adapter are close together,
the bubble shrinks to approximately three feet
(0.91 meters) in diameter – just large enough to
accommodate the range of communication be-
tween adapter and FreeMic. As you increase the
distance between the FreeMic and adapter, the
size of the bubble expands accordingly, up to
approximately four or five feet (1.2-1.5 meters) in
diameter.
Pairing
Before your FreeMic can communicate with an
adapter, it must establish a link. In order to es-
tablish a link, the FreeMic and the adapter must
exchange a randomly generated software ID
code, which is stored on each device. This pro-
cess is called “pairing.” The FreeMic and adapter
remain paired until you initiate the manual pair-
ing sequence (see page 18) to pair your FreeMic
with a different adapter.
Seek Mode
When your FreeMic is searching for an adapter
with which to establish a link, it will initially en-
ter “Seek Mode”. If it does not detect the adapter
with which it has been paired, the FreeMic will
remain in Seek Mode for two minutes before
entering Sleep Mode (see page 15).
Linking
After entering Seek Mode and finding the adapt-
er with which it is paired, the FreeMic will estab-
lish a link, after which communication can occur.
This link will remain active until you switch off
the adapter or radio, at which point the FreeMic
returns to Seek Mode.
Page 15

Sleep Mode
When your FreeMic has remained in Seek Mode
for two minutes without finding a link, it will
go into Sleep Mode. While in Sleep Mode, the
FreeMic uses no power. To awaken your FreeMic
from Sleep Mode, depress the Push-To-Talk (PTT )
button and hold for one second, which activates
Seek Mode.
six hours before first use. Subsequent charges
take just three hours (approximate). The charge
indicator light will turn green when the FreeMic
battery is fully charged.
Important: Do not attempt to charge the
FreeMic battery using a USB cable other than
the USB cable provided by FreeLinc. Failure to
comply may result in decreased battery capacity.
SAFETY & WARRANTY
Charging the Battery
Charging the Battery
To charge the battery on your FreeMic, con-
nect the included AC power adapter into your
AC power outlet, and then to the charging jack
located on the bottom of the FreeMic. (see dia-
gram on page 9) In a few seconds, the charge
indicator light on the FreeMic will illuminate red,
indicating that charging is in progress.
Note: Please do not use or wear the FreeMic
while charging.
Important: Charge the FreeMic battery at least
TERMS & BATTERY CHARGING
15
Page 16

General Operation
Using Your FreeMic for the First
Time
Step One: Charge FreeMic Battery
Plug the FreeMic into an electrical socket using
the included wall charger. Please refer to the
diagram on page 11 for the location of the wall
charger connection on the FreeMic.
Step Two: Attach Adapter
Fit adapter to the accessory interface of the
portable radio (see your portable radio’s user
manual if you need assistance locating the ac-
cessory interface). If your adapter has a mount-
ing clip on top, this will fit into a corresponding
notch on top of your portable radio. If your
adapter does not have a mounting clip, use the
set screw (see diagram) to secure it to your radio.
When properly attached, the spring-loaded pins
should align with the contacts on the accessory
interface of your portable radio and adapter
should fit securely.
Step Three: Turn On Adapter
Turn on your portable radio and set toggle
switch on your FreeLinc adapter to “On” position.
(see diagram) Note that this will automatically
silence the speaker on your portable radio and
route all communications to the FreeMic.
Step Four: Exit Sleep Mode
Your FreeMic will be in Sleep Mode when you
unplug it from the charger. To awaken your
FreeMic from Sleep Mode, depress the PTT but-
ton once and hold it for one second. Once you
have awakened your FreeMic from Sleep Mode,
it automatically enters Seek Mode (see defini-
tion above).
Step Five: Pair FreeMic to Adapter
When you take your FreeMic out of the box for
the first time, you will need to pair it with an
adapter manually. To initiate manual pairing,
hold the FreeMic close to the adapter and simul-
Page 17

taneously depress the Volume Up and Volume
Down buttons on the FreeMic. When you have
successfully paired your FreeMic to the adapter,
the adapter LED will turn solid green and then
begin flashing green, indicating a link has been
established.
Step Six: Establish Link (Automatic)
Once you have paired your FreeMic to an adapt-
er, the two devices can establish a communica-
tion link. This occurs automatically immediately
after pairing, and the link persists as long as the
FreeMic remains within the Personal Commu-
nication Bubble (see definition; page 14). When
your FreeMic moves outside of the bubble, the
link is lost, and the unit returns to Seek Mode.
While in Seek Mode, the FreeMic is attempting
to locate the adapter to which it is paired (see
above definition). The adapter LED will flash red
and you will hear a repeating short single tone
from the FreeMic speaker. This will persist until
the unit exits Seek Mode by either:
• Re-establishing the link with the adapter
with which it is paired - when this occurs the
adapter LED will resume flashing green, or
• Entering Sleep Mode - this occurs when no
link is established for two (2) minutes.
Step Seven: Adjust FreeMic Volume
The FreeMic has eight different volume levels.
Use the Volume Up and Volume Down keys on
your FreeMic to increase or decrease the volume
level. Depress Volume Up or Volume Down once
for each level you want the volume to increase
or decrease. Setting the FreeMic volume to
the lowest possible level causes all audio to be
disabled.
CAUTION
If the volume buttons are held down continu-
ously to increase or decrease the volume levels,
after six seconds, the unit will switch into VOX
mode.
Step Eight: Ending Use
There is no On/Off switch on the FreeMic. To
turn off the FreeMic, you can either switch the
adapter toggle switch to the OFF position (see
USING YOUR FREEMIC FOR THE FIRST TIME
17
Page 18

General Operation
diagram) or turn the portable radio off. Once
you have powered off the adapter, the link will
be broken and the FreeMic will move into Seek
Mode. When the link has been broken for two (2)
minutes, the FreeMic will move into Sleep Mode,
and will thus power off.
Adjusting VOX Sensitivity
Depending on background audio conditions,
you may need to adjust the microphone sen-
sitivity. Use the Volume Up and Volume Down
buttons on your FreeMic to increase or decrease
sensitivity while in VOX mode.
VOX Operation
Entering VOX Mode
To enter VOX mode, depress the Volume Down
button on FreeMic for six seconds. The adapter
LED will change from flashing green to flashing
orange.
Operating in VOX Mode
To initiate a transmission in VOX mode, you sim-
ply speak into the microphone on the FreeMic.
The sound of your voice activates the transmis-
sion in the same way depressing the PTT button
does in normal mode.
Exiting VOX Mode
To exit VOX mode, depress the Volume Down
button on the FreeMic for six seconds. The
adapter LED will change from flashing orange to
flashing green.
CAUTION
While in VOX mode, any communication may be
transmitted over the airway.
Page 19

Pairing Your FreeMic with Other
Adapters
Manually Initiating the Pairing Process
To initiate pairing, hold the FreeMic close to the
adapter and simultaneously depress the Volume
Down and Volume Up buttons on the FreeMic.
Hold the Volume Up and Volume Down buttons
on the FreeMic simultaneously for two seconds.
The adapter LED will flash solid green indicating
a successful pairing. You can repeat this process
at any time to break the existing pairing and
establish a new pairing with any other adapter.
Keep in mind that the FreeMic can only be
paired with one adapter at a time.
VOX OPERATION, PAIRING
19
Page 20

Accessories
FreeLinc continually releases new accessories for FreeMic products. Please refer to the FreeLinc
website at www.freelinc.com to see the latest offerings.
Tips and Suggestions
To learn more about Near-Field Magnetic Induction Technology, please visit the technology
area of the FreeLinc website at http://www.freelinc.com.
Specifications
Wireless Technology Near-Field Magnetic Induction
Battery Type Lithium Polymer Rechargeable
Talk Time up to 20 hours continuous talk
Charger Type Wall wart with USB connector
Range up to 5 feet ( .1.52 meters)
Dimensions 0.5 x 3.4 x 3.6 inches (1.3 x 8.6 x 9.1 cm)
Weight 1.2 oz (34 g)
Operating Temperature -30 C to +60 C
Humidity 95% @ 8 hours (non-condensing)
Troubleshooting
For up-to-date troubleshooting information, to get help with a specific problem, or to contact
a customer service representative, please visit www.freelinc.com, and click the “support” link or
call 1-866-467-1199.
Page 21

Notes:
HELP
21
Page 22

Notes:
Page 23

Notes:
NOTES
23
Page 24

© 2005 Radeum Inc., DBA FreeLinc. All Rights Reserved. U.S. Patents Pending.
The FreeLinc FreeMic 200 may not be authorized for use in some countries.
™
 Loading...