

From Scanning Mode (continued from previous page)
1. Press the CAR key (13) and e nter the desired car numb er, then press the CAR or Ente r key to
lock the sca nner on the desired channel.
2. Push and ho ld the Function key (16) and a numbe r key (1,2,or 3) for 3 secon ds to designate
the channel as a Favor ite and assign it to that FAV sho rtcut key.
PROGRAMMING
You can add, remove o r edit race series and d river infromation f rom the PROGRAM men u.
Users have t wo methods available f or programming thie r scanner.
Over The Air
Racing Ele ctronics locat ions at the track are equi pped with transmit ters that match the “Ove r
The Air” r eceiving frequency that is p rogrammed into your s canner. Before the scan ner can
perfo rm this function, i t needs to be located within 100 fee t of one of these transmi tters. This is
the fastes t and easiest metho d of updating the scann er with the latest trac k/driver frequen cies,
names, cod es and channel number s. Instruction s for completing this op eration are in the
“QUICK START” section o n the rst page of this gu ide.
Keypad Entry
1. Press the MENU key (12) to re turn to the main menu. Se lect PROGRAM (9), then select
“Keypad Entry”
2. You will be pr ompted to enter the foll owing information.
•
Car Number: This will be th e channel number assi gned for this record. I f you enter a
number th at is already in use, the pr evious information w ill be overwrit ten.
•
Frequency: Enter the fre quency (450-4 69.9875) by using the Four-Way key s (9, 10, 11, 12).
•
CTCSS/DC S Code: This code is essent ial for monitoring tr ack/driver channels. CTCSS and
DCS Code s are sub-audio signa ling formats design ed to prevent interfe rence from other
broadc asting stations sha ring the same frequ ency. When using CTCSS o r DCS codes the
scanne r will only respond to tr ansmissions carr ying the tone so that you on ly hear the
race team’s tra nsmissions. Use the Four-Way key s to set CTCSS/DCS code. The Lef t (11)
and Right (12) keys t urn the CTCSS Code o and o n. The Up (9) and Down (10) keys
change the number.
•
Alpha Label: Used to name t he channel. You can use both l etters and number s. Use the
Alphanumeric Keypad (15) to enter the label. Th e Up (9) and Down (10) keys will switch
between ABC, a bc, or 123. The Lef t (11) a nd Right keys (12) will move the cursor. DONE (7)
will del ete the entry, and NEX T (8) will jump to next channel to continue programming.
Other Programming Functions
•
Race Series: Select “ Race Series” to view th e series names. Sel ect a series and use t he
Four-Way keys (9, 10, 11, 12) and Alphanumeric Keypad (15) to edit it .
•
Reset Scanner: This function w ill restore the scann er’s default setti ngs and clear any
recordin g stored in the Replay me mory.
NOTE: There a re two items in the progr am menu for the use of qua lied radio technic ians.
“Write - Sc anner,” and “Read - Scann er” have no end user fun ction.
SETTING PREFERENCES
Some scan ner settings are lo cated in the “My Prefere nces” section of th e Options menu.
Backlight
: This set ting determines whe n the LCD’s backlight will be i lluminated.
•
On When Re ceive: Display is lit for 10 seco nds when receiving .
•
On When Key press: Display is lit for 2 s econds after any key is pr essed.
•
O: No Display lig hting.
•
Always On : Display will be lit continu ously (this option can sh orten batter y life).
Squelch: Squelch l ters out unwanted noise. Squelch o perates as a gate to reduce no isy
transmissi ons. If the transmission is strong , the gate will open and th e transmission will be
heard. If th e transmission is weak or m ostly static, the gate will remain c losed and the
transmissi on will not be heard. You can se t Squelch level to Low, Mid, or S ensitive.
Favorite Scan: Switches the Favorite Channel S can feature on or o.
•
On: Favorite channels w ill be scanned more f requently in scanni ng mode. If you are not
scanning , then the channel you are listening to w ill be interrupted wh enever there is trac
on a Favorite Channe l.
•
O: Favorite Channel s will not be given prior ity other other chan nels.
Replay: Switches th e Replay feature on or o.
• On:
The scann er will record the last conve rsation. The Lef t Soft Key (7) becomes the "PLAY"
button as i ndicated in the lower le ft corner of the disp lay
•
Press the “PL AY” button (7) to r eplay the last record ed audio segment.
•
You can stop playb ack at any time by pressing th e CAR (13) or SC AN (14) keys.
• Th e scanner will ignore the radio tr ac and won’t record new au dio while the Replay fe ature
is in playba ck mode (indicated by a sp eaker icon in the upper ri ght corner of the display).
When play back ends the Replay fea ture will resume record ing radio trac (indic ated by a
tape icon in t he upper right corner of the display).
LIMITED WARRANTY
Please take a f ew minutes to register you r RE3000 scanner. Comp leting product re gistration
allows us to ver ify your warrant y eligibility.
http://www.racingelectronics.com/registration
Get the latest news about RE products and promotions, follow us online at:
@RERAD IOZFACEBOOK.COM/RACINGELECTRONICS
RACING ELECTRONICS | 840 DERITA ROAD | CONCORD, NC | 28027 | 1.800.272.7111 | www.racingelectronics.com
QUICK START
GET UPDATED FREQUENCIES “OVER-THE-AIR”
1. Stand within app roximately 100 feet of a
Racing Electronics location.
2. Turn on the scanner by rotating the o n/o volume knob
on the top of th e scanner.
3. Choose the “PROGRAM ” option by pressing the up key
4. Choose “Over T he Air” by pressing the l eft soft key
5. Answer “Yes” by press ing the left sof t key again.
6. Your scanner is now being progr ammed. Please wait
until the sc anner reads “PROGR AMMING COMPLETE”.
Your scanner has been pre-programmed for you.
If you purcha sed this scanner at one o f our trackside
locatio ns you can skip the progr amming instructi ons
above for this race.
SELECT A RACE SERIES TO SCAN
1. “SELECT” ra ce series.
2. Using the arrow keys , select the appro priate
series (ie : CUP, N ATIONWIDE, T RUCK).
The scanner will the n go into scanning mode.
TO LOCK ON A SPECIFIC DRIVER
1. Press the “CAR” b utton.
2. Enter the car numb er.
3. Press the “CAR” b utton again.
LISTENING TO RACE BROADCAST
(MRN-PRN)
1. Press the “CAR” b utton.
2. Enter the number “69.”
3. Press the “CAR” b utton again.
Press the “SC AN” button to resum e scanning.
Adjust the SQ UELCH by holding the “SQ” b utton
on the side of t he scanner and turnin g the
volume knob.
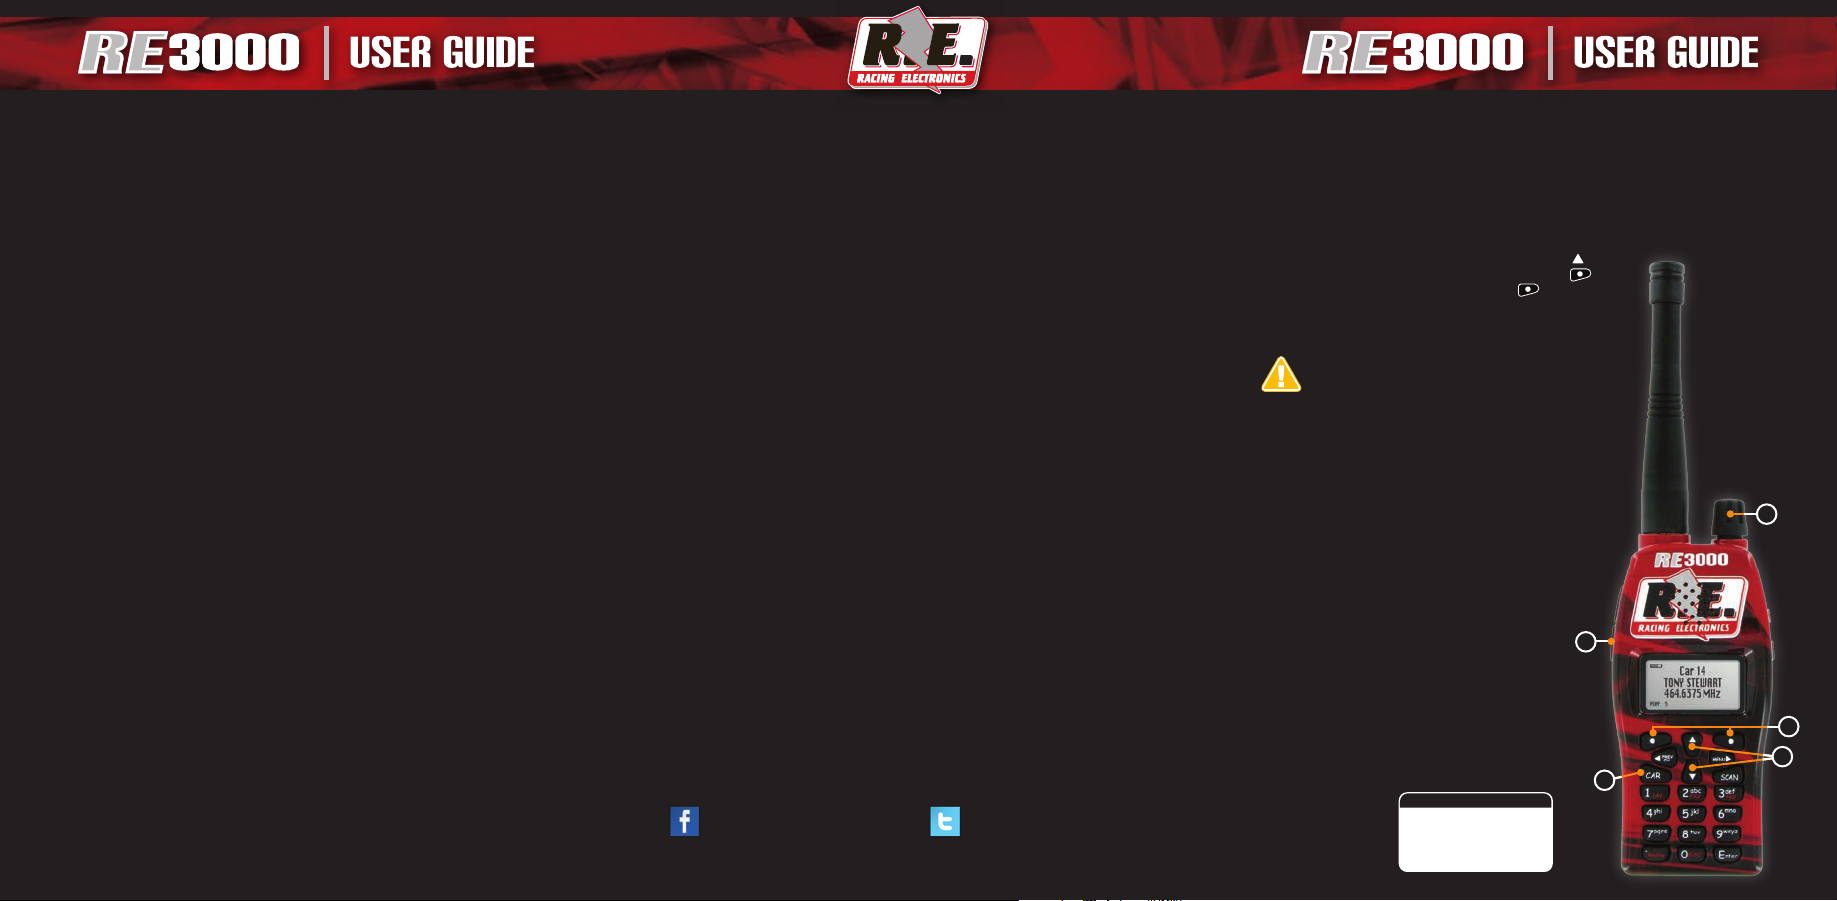
KEY
1. On/O-Volume Control
2. Soft Key s
3. CAR Butt on
4. Squelch Button
5. Arrow Keys
4
1
2
5
3
3000
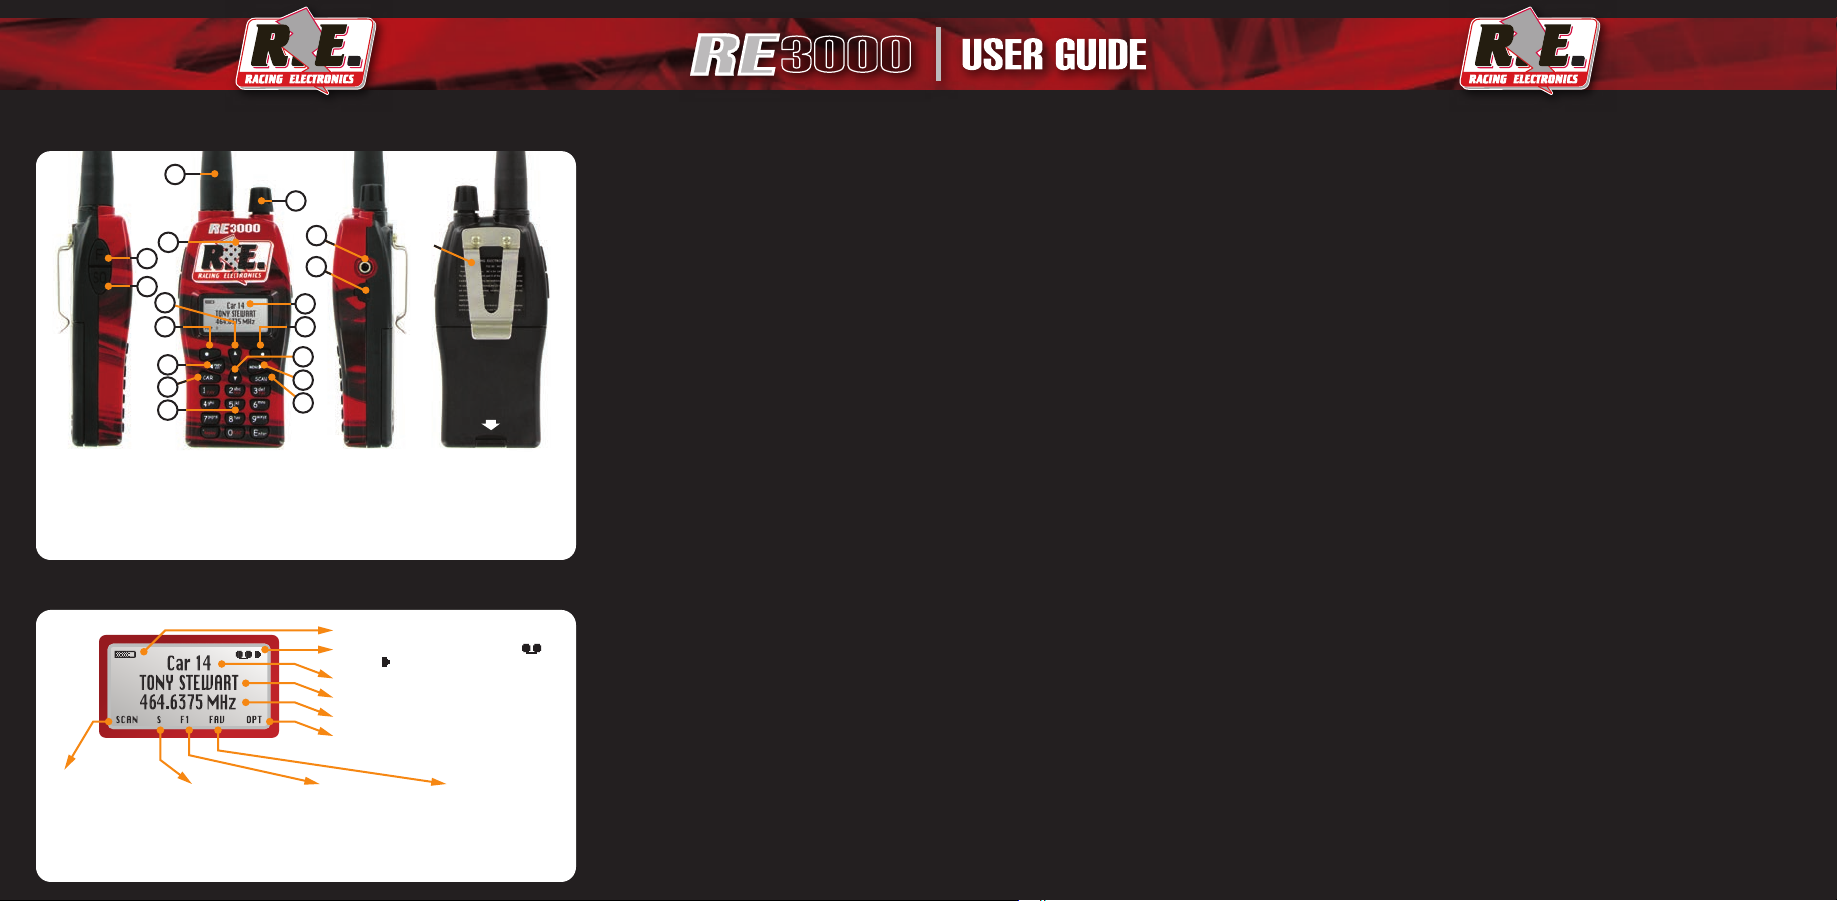
GETTING TO KNOW YOUR SCANNER
2
1
16
17
9
11
13
15
1. Sp eaker
2. BNC Ante nna
3. On/O & Volum e Control
4. Headset Jack
5. USB Connector
6. LCD Disp lay
Left So ft Key Action:
displays t he action
currently associated
with the button below
it (SERIES, S CAN,
SELECT/DESELECT,
or PLAY )
Scan List I ndicator:
displaye d when the
current channel is
also in the s can list
3
4
5
6
87
10
12
14
7. Left Soft Key
8. Right S oft Key
9. Up Arrow Key
10.Down Arr ow Key
11. Left /PREV CH Key
12. Right/ME NU Key
13. CAR Key
14. SCAN Key
15. Alphanumeric Keypad
16. Function Key (F )
17. Squelch
LCD DISPLAY FEATURES
Battery Capacity Indicator
REPLAY Indic ator:
speaker s ymbol when “rep lay” is active
Car Number
Driver’s Name
Driver’s Frequency
Right Sof t Key Action: displays t he action
currentl y associated wi th the button be low it
(MANUAL, DO NE, or STOP)
Favorite Channel
Indicator: displayed
when the cu rrent
channel i s saved
as a “favorite”
Belt
Clip
Battery
Battery
Cover Loc k
displays a t ape or
Favorite Channel
Scan Indicator:
displaye d when the
“favorite” channel
scanning feature is
active
Cover
(numbers re fer to the diagram on prev ious page)
Command Keys
MENU Key (12 ) Displays the sc anner’s main start m enu.
Left So ft Key (7) Selects the left display command/prompt.
Right Sof t Key (8) Selects the right display command/prompt.
PREV CH (11) Switches to the previously tuned channel.
CAR Key (13) Stops scanning and allow s user to manually enter a channel’s numb er.
SCAN Key (14) Begins scanning the selected series channel list.
Two-Step Key (Shortcuts)
The keys wit h red letters have othe r functions when us ed with the Function ke y (16)
F + FAV The channe l that the scanner is cur rently locked on will b e memorized to a
Favorite Channel when the Func tion key is pressed and h eld rst, then one of the
FAV keys (1, 2, or 3) are held for t hree seconds.
Scanner w ill go directly to a Favorite Ch annel when the Functi on key and one of
the FAV keys are both press ed.
F + Replay Switches the Replay feat ure on or o when the Function and Replay keys are bo th
pressed.
F + F.S C Switches the Favor ite Channel Scan featur e on or o when the Functi on and F.SC
keys are both p ressed.
Four-Way Directional Keys (9, 10, 11, 12)
Controls the c ursor and highlighte d items in the display menus . Pressing these arrow key s will
move the cursor within the selected menu.
CONTROLS
MENUS
Startup Menus
There are th ree menus available wh en you turn on the scann er. They appe ar across the bottom
of the display a nd are selected by pr essing the Left and R ight Soft Keys ( 7, 8) o r the Up key (9).
SERIES: (7) The s canner can be progr ammed to hold up to four ra cing series. Use this me nu to
switch between them.
PROGRAM: (9) T here are six choices avai lable from this menu re lated to programming t he
scanner.
• Over The Ai r: Track programming broadcasts are radio transmissions that are available at
the track . They contain race ser ies driver channel inf ormation. When the s canner is set to
Over The Air, programming transmissions c an be automatically downloade d into the
scanner. Thi s is the fastest and easie st method of updatin g the scanner with the l atest
track/driver frequencies, names, codes and channel numbers.
• Keypad Entr y: Use this to enter trac k/driver frequen cies, codes and driver n ames manually.
• Write - Scann er: Not an end-us er feature.
• Read - Scan ner: Not an end-u ser feature.
• Race Series: Used to edit the four b anks where each ra ce series is stored.
• Reset Scanner: Will delete al l data and return the sca nner to its default se tting.
OPT : (8) There are ve choices available from this menu related to customizing the scanner’s
options and settings.
• Scan List: Use this to add an d remove channels from t he Scan List.
• Favorite Channel: Use this to designate up to thr ee channels as Favorites.
• My Preferences: The four sub -menus here allow you t o customize your scann er.
Backlight: Available o ptions include, “On Wh en Receive,” “On When Key Pressed,” “Always
On,” or “O”.
Squelch: Used to set th e squelch level to “Low ”, “Mid”, or “Sensitive”.
Favorite Scan: Switches the Favorite Chann el Scan feature on or o. Whe n it is set to “On,”
Favorite Channe ls will be given priori ty over the others.
Replay: Switches the R eplay feature on or o. Whe n it set to “On,” the last conver sation the
scanner r eceived will be recor ded and can be played ba ck.
OPERATING INSTRUCTIONS
Getting started and selecting a Series
1. Turn the power switch on b y rotating the On/O Volum e knob (3).
2. Press and hold th e “SQ” button (15) to adju st the volume to a safe and co mfortable leve l
before connecting the headset.
3. Press the Lef t Soft Key (7) to select Race Serie s.
Note: Series chann els must be programm ed and should be upda ted for each race.
4. Use the Four-Way keys (9, 10, 11, 12) to scroll through seri es options, selec t a series and star t
scanning all of the programmed/selected channels within that series.
To Edit Scan List
1. Within a particular series, pres s the MENU key (12) to return to th e main menu. Selec t
OPT (8) then sele ct “Scan List.” The ch annels for the selec ted series will be d isplayed.
2. Scroll through the channe ls and press the Left S oft Key (7) to SELECT/DESELECT them.
An arrow mark beside the n ame indicates that the ch annel is in the Scan List .
3. When inside the S can List menu, press M ENU key (12) to ente r a secondary pop -up menu.
4. Scroll up and dow n to highlight desired ac tion, then press the M ENU key (12) to se lect it.
This is a quick w ay to move all of the stored fr equencies for a seri es in or out of the scan lis t.
5. Press DONE (8) to ret urn to the Options menu .
NOTE: Do not add radi o or television broa dcast channels to the Sc an List.
To Edit Favorite Channel
You can designate up t o three channels per se ries as Favorites. You can use shor tcut keys to
access Favorite Chan nels and they get prio rity over other chann els when the Favorite Channel
Scan featu re is on. There are two ways to edit your Favor ite Channels, from the O ptions Menu
or while the s canner is in scanning m ode.
From the O ptions Menu
1. Within a particular series, pres s the MENU key (12) to return to th e main menu. Selec t
OPT (8) then select “Favorite Channel.”
2. Scroll through driver chan nels and press SELECT (7) to d esignate it as a Favorite Channel .
3. Pressing the Lef t Soft Key (7) repeate dly will allow you to choo se which of the FAV keys th e
channel wi ll be assigned to.
4. Press DONE (8) to ret urn to the Options menu .
NOTE: Do not selec t a radio or televisio n broadcast channe l as a Favorite.
 Loading...