

Racing Electronics 2-WAY EQUIPMENT User Manual

YOUR #1 SOURCE FOR PROFESSIONAL
RACE COMMUNICATIONS... WORLDWIDE
2-WAY EQUIPMENT
INSTALLATION,
OPERATION &
MAINTENANCE
Congratulations! You have just purchased the finest in race
communications equipment from the Leader in Professional
Race Communications. Please store this manual in a safe
place. It contains important information about the use of your
equipment.
YOUR FREQUENCIES ARE:
WWW.RACINGELECTRONICS.COM
RACING ELECTRONICS | 840 DERITA ROAD | CONCORD, NC | 28027 | 1.800.272.7111
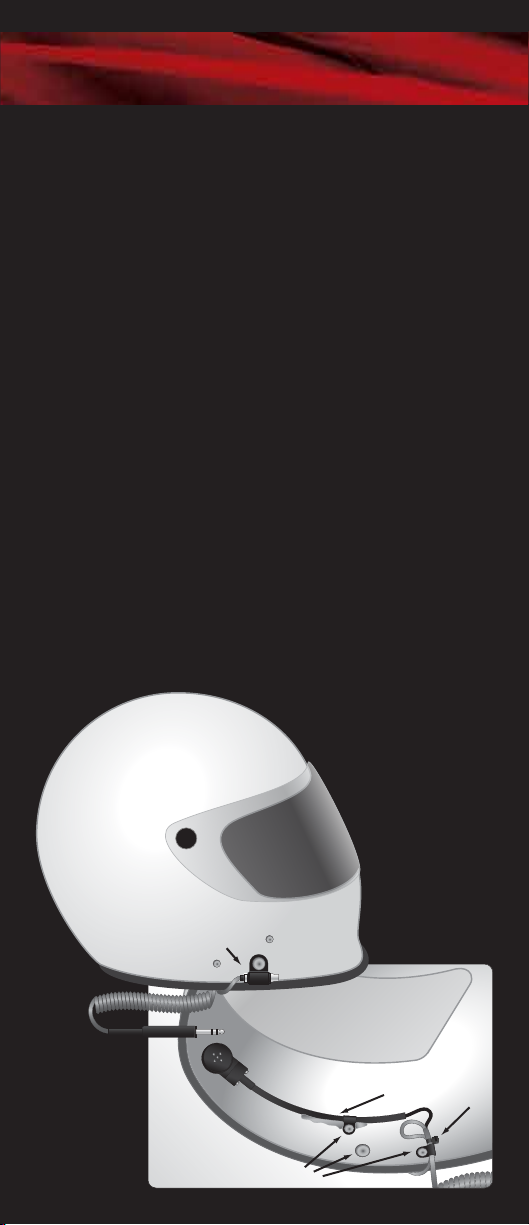
FULL FACE HELMET
Hot Glue
Zip Tie
3-1/8” Holes
INSTALLATION:
1) Remove the helmet’s inside padding on the right side.
2) Position the Mic-Boom so that the vents in the Mic will touch
your lips, but swing away and towards the front snout of the
helmet when putting it on and taking it off.
3) Mount RT605, RT615, RT705 and RT715 Helmet Kits by
attaching the cable clamp around the middle section of the flex
boom. Use a rivet to secure the clamp.
NOTE: The microphone is designed to speak into the side that
has either two set screws or a mic picture.
4) Attach the audio connector using the large cable clamp and
rivet with a star washer between the helmet and the clamp.
5) Tuck the lead wire from audio connector inside the helmet
alongside the cable that goes to the harness. Use a cable clamp
to attach both of these cables to the helmet with a rivet.
6) Secure the loose cables by adding a zip tie above their clamp.
This will keep them from slipping when the cable is pulled from
the outside.
7) Hot glue the flex boom arm to the fiberglass shell for extra
support.
8) Use hot glue to reinstall the inside padding.
Audio Connector
 Loading...