

Page 1

INSTRUCTIONS FOR Replacing a
AF
10/18/2012 r3 Replacing The Frame Press Top Instructions.cdr
Remove the old top by pulling it off the aluminum
frame. Clean the frame with acetone or PVC pipe
cleaner that does not leave a film.
NOTE: If you are just re-sticking the existing top
to the frame clean the old top with acetone/PVC
pipe cleaner being careful not to use an access,
as acetone and PVC pipe cleaner etches the poly
top. If an excess is used and puddles, it will soften
the poly .
Apply the High Tack thin Adhesive Tape to the
frame. This is a very aggressive tape. Hold the roll
in one hand after sticking it down at one end and
unroll the tape while guiding it in place along the
frame. Use your thumb on one side of the frame
and forefinger on the other to guide the tape.
Leave the paper on the top side for now. At the
end of a side, cut the tape flush with the end.
Frame Press Top
The top will fit inside the frame. The 2 1/2“ flange
from the T op should sit on the frame without any
bunching or ripples along the frame. The top is
slightly smaller than the frame to eliminate the
possibilities of wrinkle or bunching of the
material. Hold each corner with a spring clamp
and make sure the top is centered.
Remove about 12“ of the paper backing material
from the tape from the center of one end only.
Press the flange in place as you continue
removing the backing form the tape. DO NOT
PRESS THE FLANGE IN WITH MUCH FORCE AT
THIS TIME. You may have to pull up the flange if
you did not center correctly. Do the same for the
other end. The sides should be ripple free,
remove the backing material and press the sides
in place. Again st art at the center working toward
the end.
Start the next side by butting the tape at the
corner where you just finished the first strip. And
continue around until all four sides have been
taped. Now tape the outside of the frame as you
did the bottom. At this point you need to roll the
tape with a dowel or rounded piece of stock so
that it is firmly adhered to the frame and most of
the air bubbles have been removed. Air bubbles
can be removed by pushing them aside.
If you are applying a replacement top, it’s a good
idea to etch the flange with PVC pipe cleaner
(area that will stick to the frame). It was etched the
day it left the factory and should be etched again
if over 5 day has elapsed from shipping date. An
etched surface provides a better surface for the
adhesive to grab.
T o assemble the Gusset top to the frame, elevate
the frame off the table with blocks from the
bottom side (tape) up. This allows you to drop the
Top inside the frame. Hold the top in place with
several spring clamps.
Once the top is stuck in place, take a dowel or
hard roller and roll around the frame to press the
top in place. If you make a mistake in a short
length, you can pull the top and reset it.
Applying the Foam Gasket T ape:
Apply the foam gasket tape around the outside
edge of the bottom of the frame . Drawing B.
Remove about 12 - 18" of backing and start in the
center of the front side and work your way around
the frame. Make a smooth curve at the corners
as in Drawing B. When you come around to the
beginning, run the tape to the inside of the
Foam Gasket tape just applied, thus making the
two rows parallel and tight to each other. This
will give you a long joint that will be vacuum tight.
Note: The second row of tape should go to the
inside corner, thus, place the first row
appropriately.
CALL 1-800-547-5484 TODAY!
Or visit our site at www.qualityvak.com
Quality VAKuum Products, Inc.
OVER
74 Apsley St. - Hudson, MA 01749
Tel: 978-562-4680 - Fax: 978-562-4681
Page 2
INSTRUCTIONS FOR ASSEMBLING
THE VAKUUM FRAME PRESS
Formica Top: It is very important that the Formica
finish be a smooth and not a matte finish.
If you made a table with a matte finish, wax the outer 3“
(around the baseboard) of our table top. This will do
two things, give a smother finish plus a better vacuum
seal and the wax makes it easier to remove glue squeeze
out from the table top.
A frame press (FP) has a very large area to
seal (up to 35') and it tends to cause the
pump to cycle on and off more often than a
bag. Under normal conditions a FP will
cycle every 3 to 5 minutes. Some have
achieved up to a 60 minute cycle by paying
close attention to details and adding a
vacuum tank.
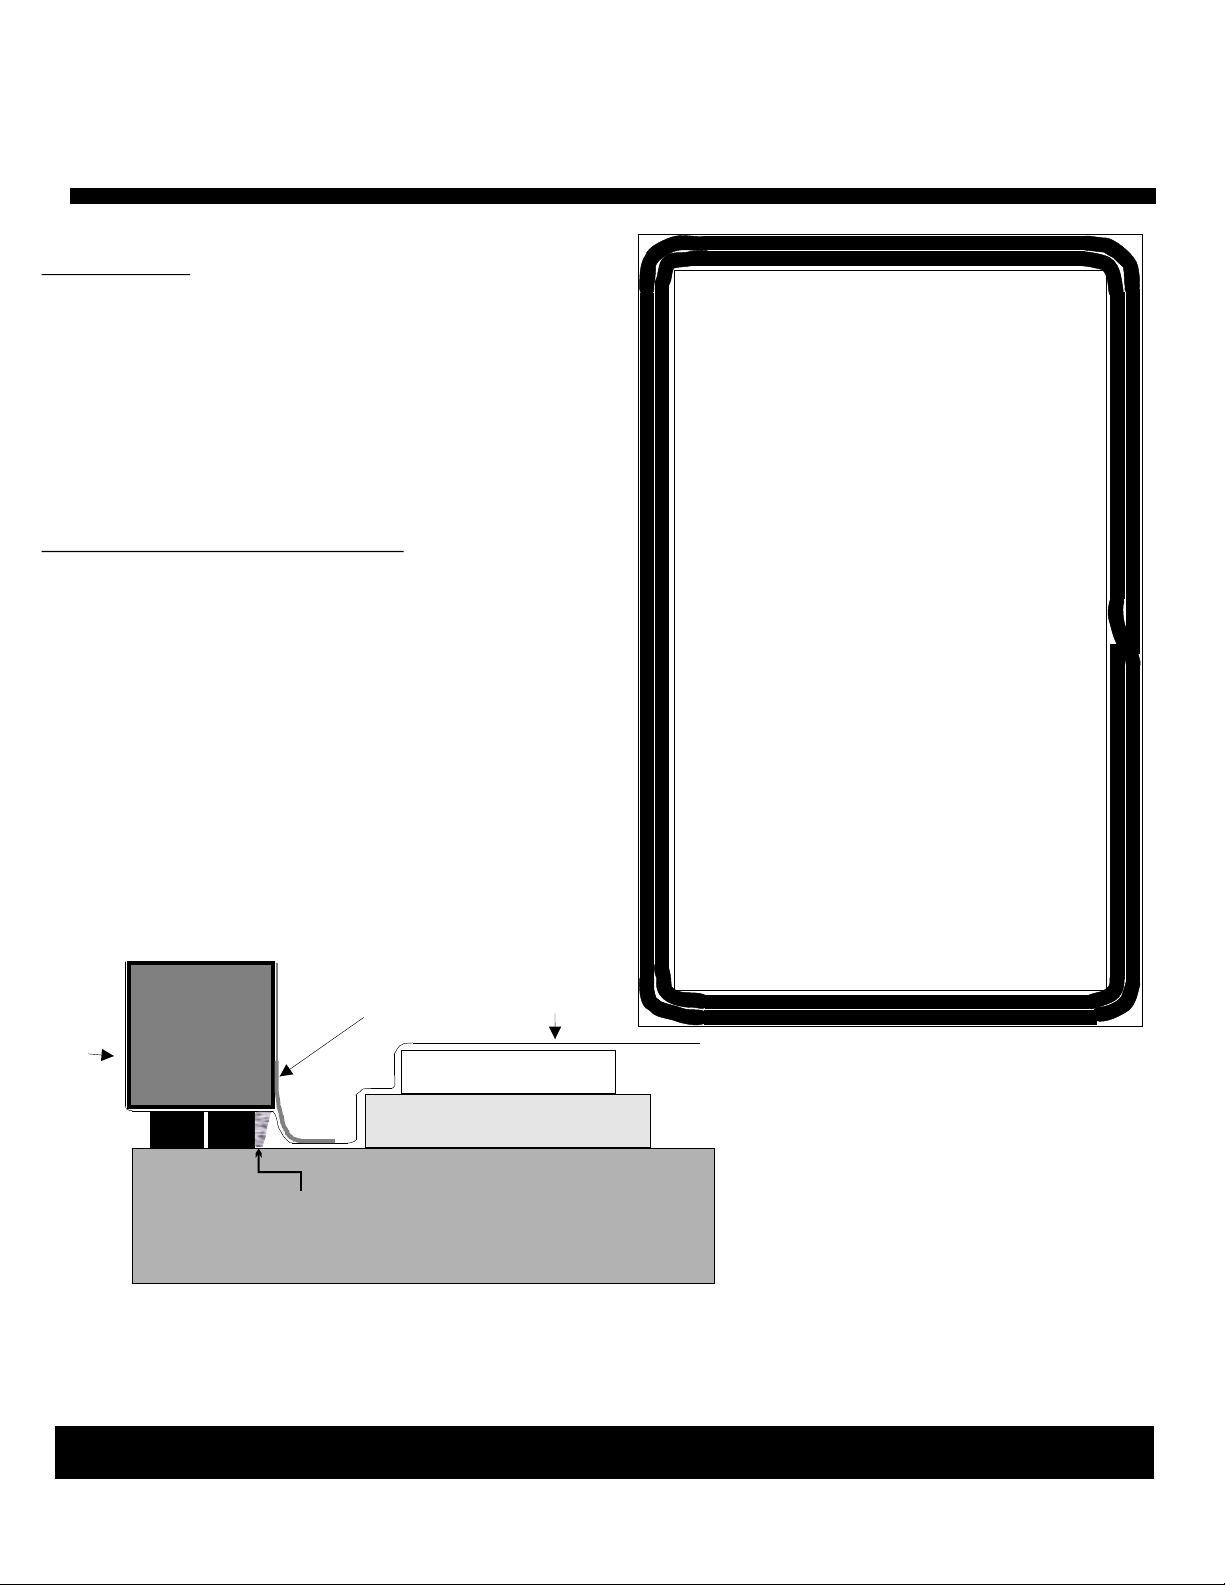
Tips from an experienced user: To increase the
holding force of the high tack adhesive tape that holds
the top to the bottom of the frame, apply duct tape
around the inside of the frame and down on to the top.
This not only provides additional holding force but
most importantly also keeps sawdust from getting on to
the high tack tape. If the duct tape is not added, the high
tack adhesive tape will loose it’s adhesive quality and
will need to be replaced periodically depending on the
frequency of use and dust level in the shop.
Duct
Poly Top
Tape
Poly Top
You can improve the seal by applying a
small bead of Silicone II around the inside
edge of the gasket material. The key is not
to have it wider than 1/8” where it touches
your table top. If it's too wide, it can prevent
the gasket from compressing because the
silicone is much denser than the gasket
material. If this happens, the frame doesn't
compress evenly and you could be worse
off. Better to apply a smaller amount and
add more latter than to apply too much.
Also when applying the tape make sure to
butt the 2nd row against the 1st row. (The
gap in this drawing is only to show 2 rows.)
Drawing B
Gasket
BASE BOARD
Silicone II
TABLE TOP
CALL 1-800-547-5484 TODAY!
Or visit our site at www.qualityvak.com
Quality VAKuum Products, Inc.
Make sure you pat the poly top to the
table top between the frame and the
baseboard before pulling vacuum.
This is important to keep the top from
bending the frame in or pulling the top
off the frame when under vacuum.
You have 400 to 500 lbs of force per
linear foot pressing the poly top to the
table, thus, keeping it from pulling on
the aluminum frame.
74 Apsley St. - Hudson, MA 01749
Tel: 978-562-4680 - Fax: 978-562-4681
 Loading...