

Page 1
6 CORPORATE PARKWAY
GOOSE CREEK SC 29445
www quoizel com
..
ASSEMBLY
INSTRUCTIONS
,.
BEFORE BEGINNING ASSEMBLY/SHADE INSTALLATION, CAREFULLY UNPACK
ALL PARTS AND REFER TO THE ILLUSTRATIONS FOR PARTS IDENTIFICATION.
THIS INSTRUCTION SHEET COVERS A VARIETY OF LAMPS AND SHADE
APPLICATIONS. DO NOT PLUG IN YOUR LAMP TO A POWER SOURCE UNTIL
ALL ASSEMBLY AND BULB INSTALLATION IS COMPLETE.
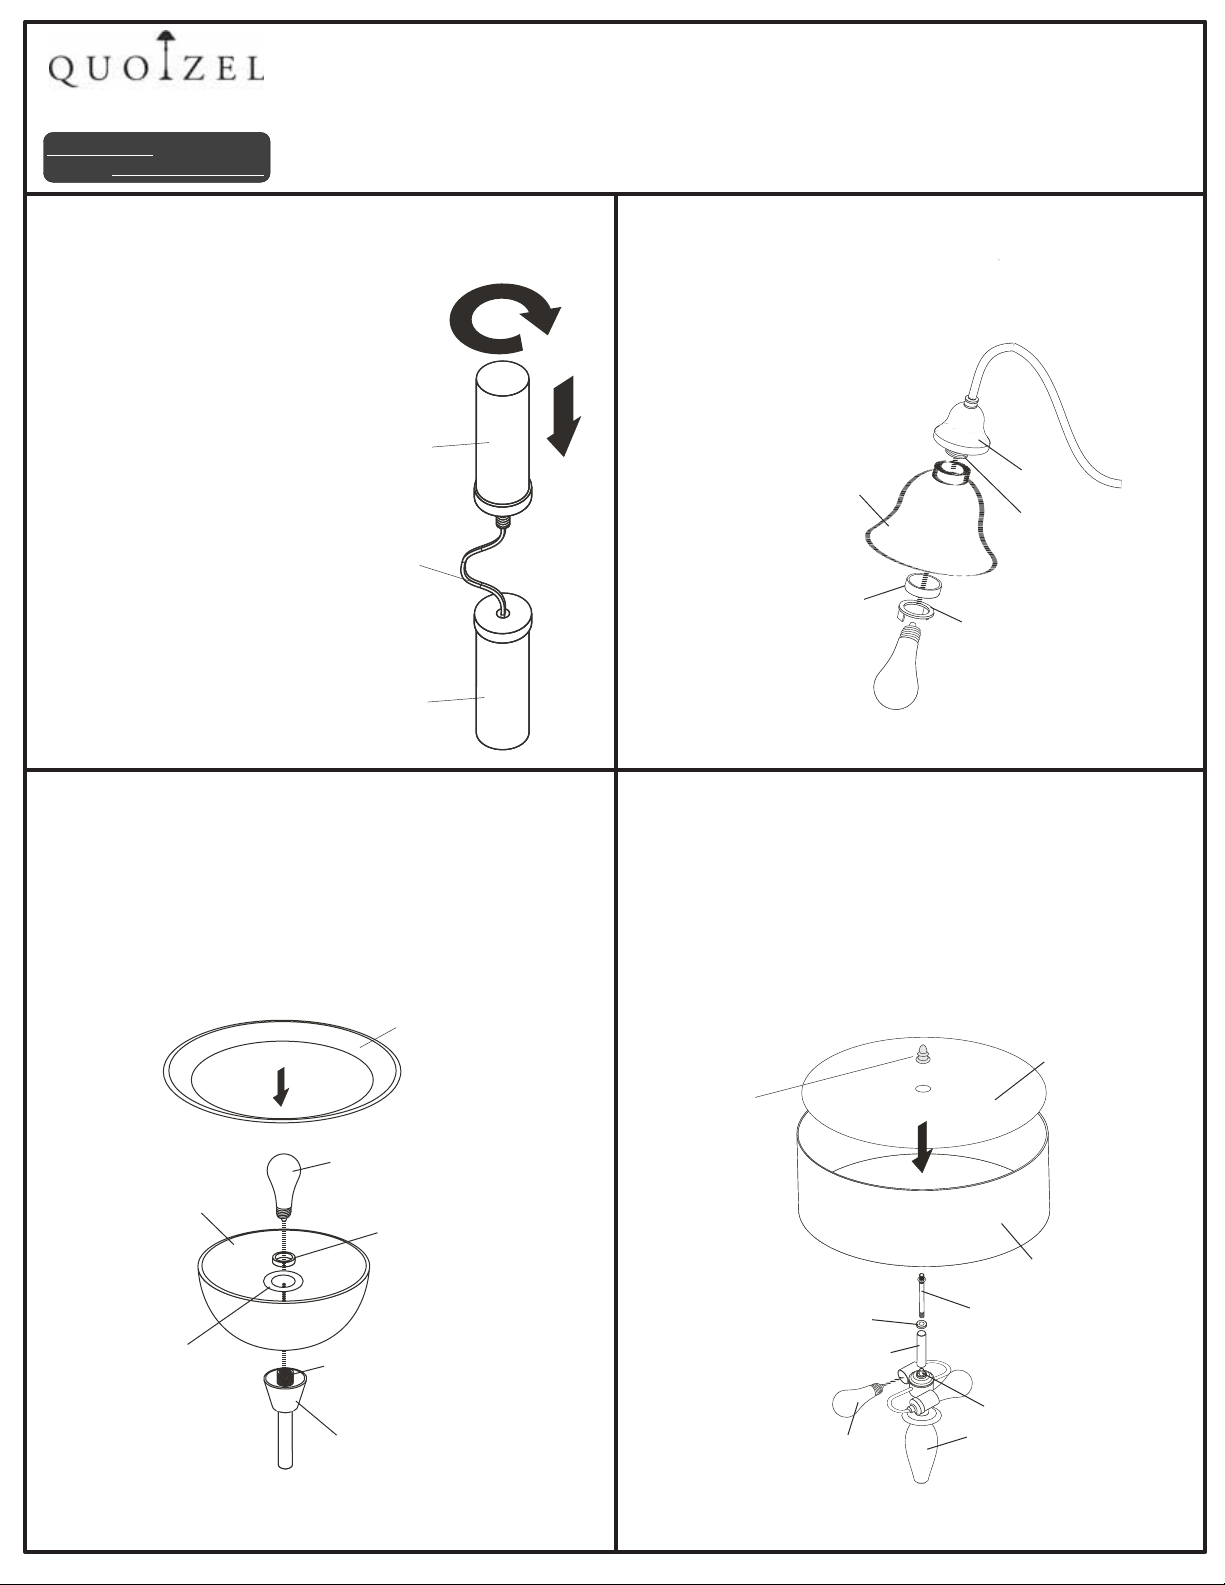
TORCHIERE & FLOOR LAMP
TUBE SECTIONS
Place lamp base onto a flat
surface. Thread UPPER
SECTION and LOWER
SECTION together and
hand tighten until snug.
Note: depend on style
purchased, lamps may be
divided into more than
UPPER
SECTION
(2)sections and may or
may not have lamp base
joined to end of LOWER
SECTION. Join all
sections together.
ELECTRICAL
CORD
NOTE: PLEASE TAKE SPECIAL
CARE NOT TO PINCH OR CUT
THE ELECTRICAL CORD WHEN
JOINING THE SECTIONS.
LOWER
SECTION
TORCHIERE GLASS
Position the SHADE/GLASS and the 3“ MOUNTING
DISK(*) over the SOCKET. Thread the SOCKET
COLLAR onto the SOCKET and hand tighten until snug
to secure them. Install the bulb(s) referring to the fixture
markings and/or labels for maximum wattage.
Position the DECORATIVE RING/TRIM(*) onto the
outside edge of the SHADE/GLASS.
DECORATIVE RING
OR TRIM
*
TASK L A M P S
Locate the hole in the SHADE over the SOCKET so it sets
onto the SHADE HOLDER. Thread the STEEL COLLAR (*)
and SOCKET COLLAR onto the socket. Hand tighten until
snug. Install the bulb(s) referring to the fixture markings
and/or labels for maximum wattage.
This instruction can also be
applied to table top torchieres
where the shade is
inverted and faces
upward.
SHADE
STEEL COLLAR
NOTE: A PART DESCRIPTION FOLLOWED BY AN ASTERISK (*)
MAY OR MAY NOT BE INCLUDED IN YOUR STYLE OF LUMINAIRE.
*
SHADE
HOLDER
SOCKET
SOCKET COLLAR
HARDBACK SHADE W/ TOP DIFFUSER
Remove the KNURLED NUT from the STEM and then
thread end of STEM into COUPLING on the top center of
socket body. Hand tighten until snug. Position SPACER
and CHECK RING downwards over top end of STEM and
thread KNURLED NUT until snug to secure them. Locate
SHADE and DIFFUSER over top end of STEM. Secure
them by threading FINIAL onto the top end of STEM.
Hand tighten until snug. Install bulb(s) referring to
fixture markings and/or labels for maximum wattage.
DIFFUSER
BULB
SHADE
SOCKET COLLAR
3 MOUNTING DISC"
NOTE: A PART DESCRIPTION FOLLOWED BY AN ASTERISK (*)
MAY OR MAY NOT BE INCLUDED IN YOUR STYLE OF LUMINAIRE.
*
SOCKET
SHADE HOLDER
FINIAL
SHADE
CHECK RING
SPACER
BULB not supplied()
NOTE: A PART DESCRIPTION FOLLOWED BY AN ASTERISK (*)
MAY OR MAY NOT BE INCLUDED IN YOUR STYLE OF LUMINAIRE.
STEM WITH
KNURLED NUT
COUPLING
BASE
Page 2
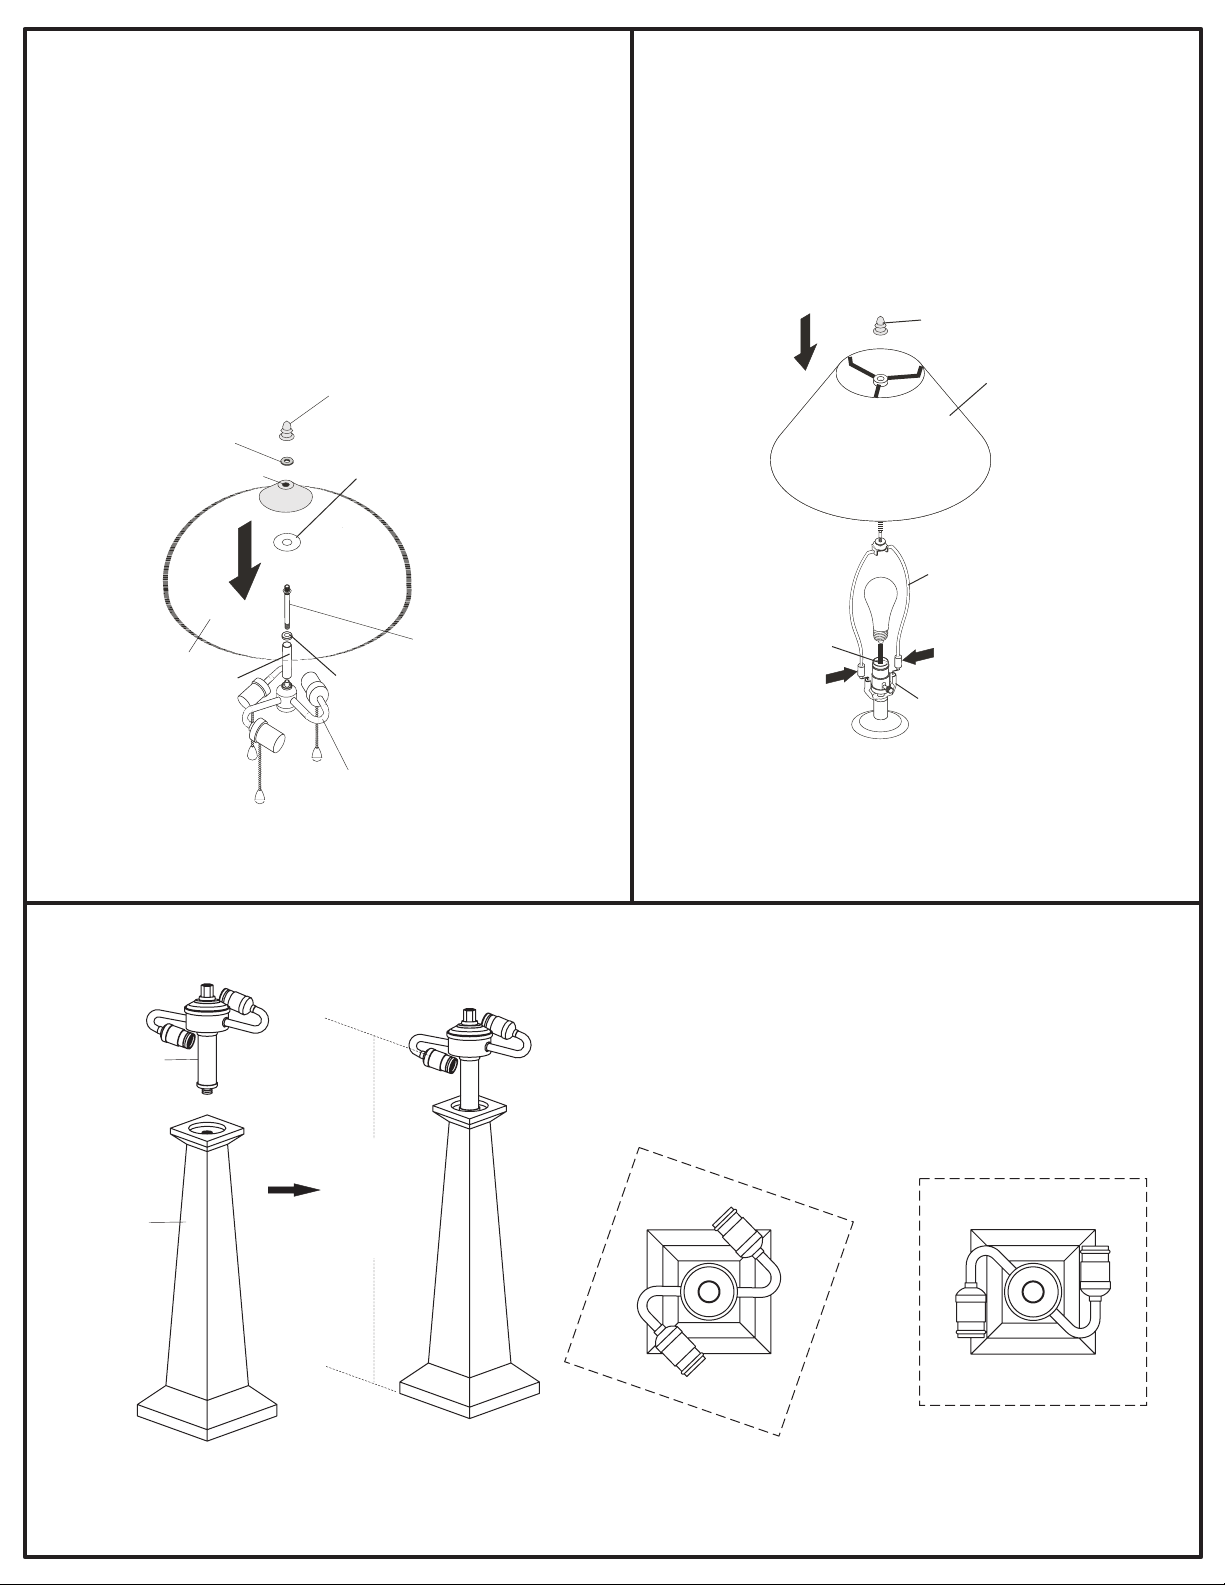
ROUND TIFFANY STYLE SHADES
BASIC STYLE SHADES
Remove the KNURLED NUT from the STEM and
thread the end of STEM into COUPLING on the top
center of the socket body. Hand tighten until snug.
Position SPACER and CHECK RING downwards over
the top end of the STEM and thread the KNURLED NUT
until snug to secure them. Locate WASHER (*) and
SHADE over top end of STEM. Secure them by threading
the KNURLED NUT (*) onto the top end of STEM. Hand
tighten until snug. Proceed to thread FINIAL onto top
end of the STEM and tighten until snug. Install bulb(s)
referring to fixture markings and/or labels for maximum
wattage.
FINIAL
KNURL NUT
SHADE CENTER
HOLE
SHADE
SPACER
*
WASHER
CHECK RING
*
STEM with
KNURLED NUT
Locate the HARP and squeeze the ends of it into the
HARP SADDLE. Slide the small cups over the harp ends
and saddle, securing it in place. Next, install the bulb(s)
referring to the fixture markings and /or labels for
maximum wattage. Place the SHADE over the top of the
HARP. Locate and thread the finial onto the top end of
the HARP. Tighten the FINIAL until it is snug to secure
the SHADE.
FINIAL
SHADE
SHADE
HARP
SOCKET
HARP CLIP
BULB CLUSTER
BODY bulb qty
(.
depends on style
NOTE: A PART DESCRIPTION FOLLOWED BY AN ASTERISK (*)
MAY OR MAY NOT BE INCLUDED IN YOUR STYLE OF LUMINAIRE.
)
SQUARE TIFFANY SHADE AND BASE WITH 2 LIGHT “S” CLUSTER
SOCKET BODY
ASSEMBLY
MAKE SURE
SOCKETS
ARE
PARALLEL
BASE
WITH
BASE.
NOTE: A PART DESCRIPTION FOLLOWED BY AN ASTERISK (*)
MAY OR MAY NOT BE INCLUDED IN YOUR STYLE OF LUMINAIRE.
Thread the end of the SOCKET BODY ASSEMBLY into
the mounting hole on the top of the BASE. Tighten them
together and make sure the direction of SOCKETS are
in-line with the edge of the BASE.
Next, follow the instructions else where on this
instruction sheet describing how to install your tiffany
style shade.
base/ socket/ shade Orientation
NOTE: A PART DESCRIPTION FOLLOWED BY AN ASTERISK (*)
MAY OR MAY NOT BE INCLUDED IN YOUR STYLE OF LUMINAIRE.
Correct
Incorrect
base/ socket/ shade Orientation
RETAIN THIS SHEET FOR FUTURE REFERENCE
Revised 2006-8-29
IS-687
 Loading...