

Page 1
6 CORPORATE PARKWAY
GOOSE CREEK SC 29445
www quoizel com
..
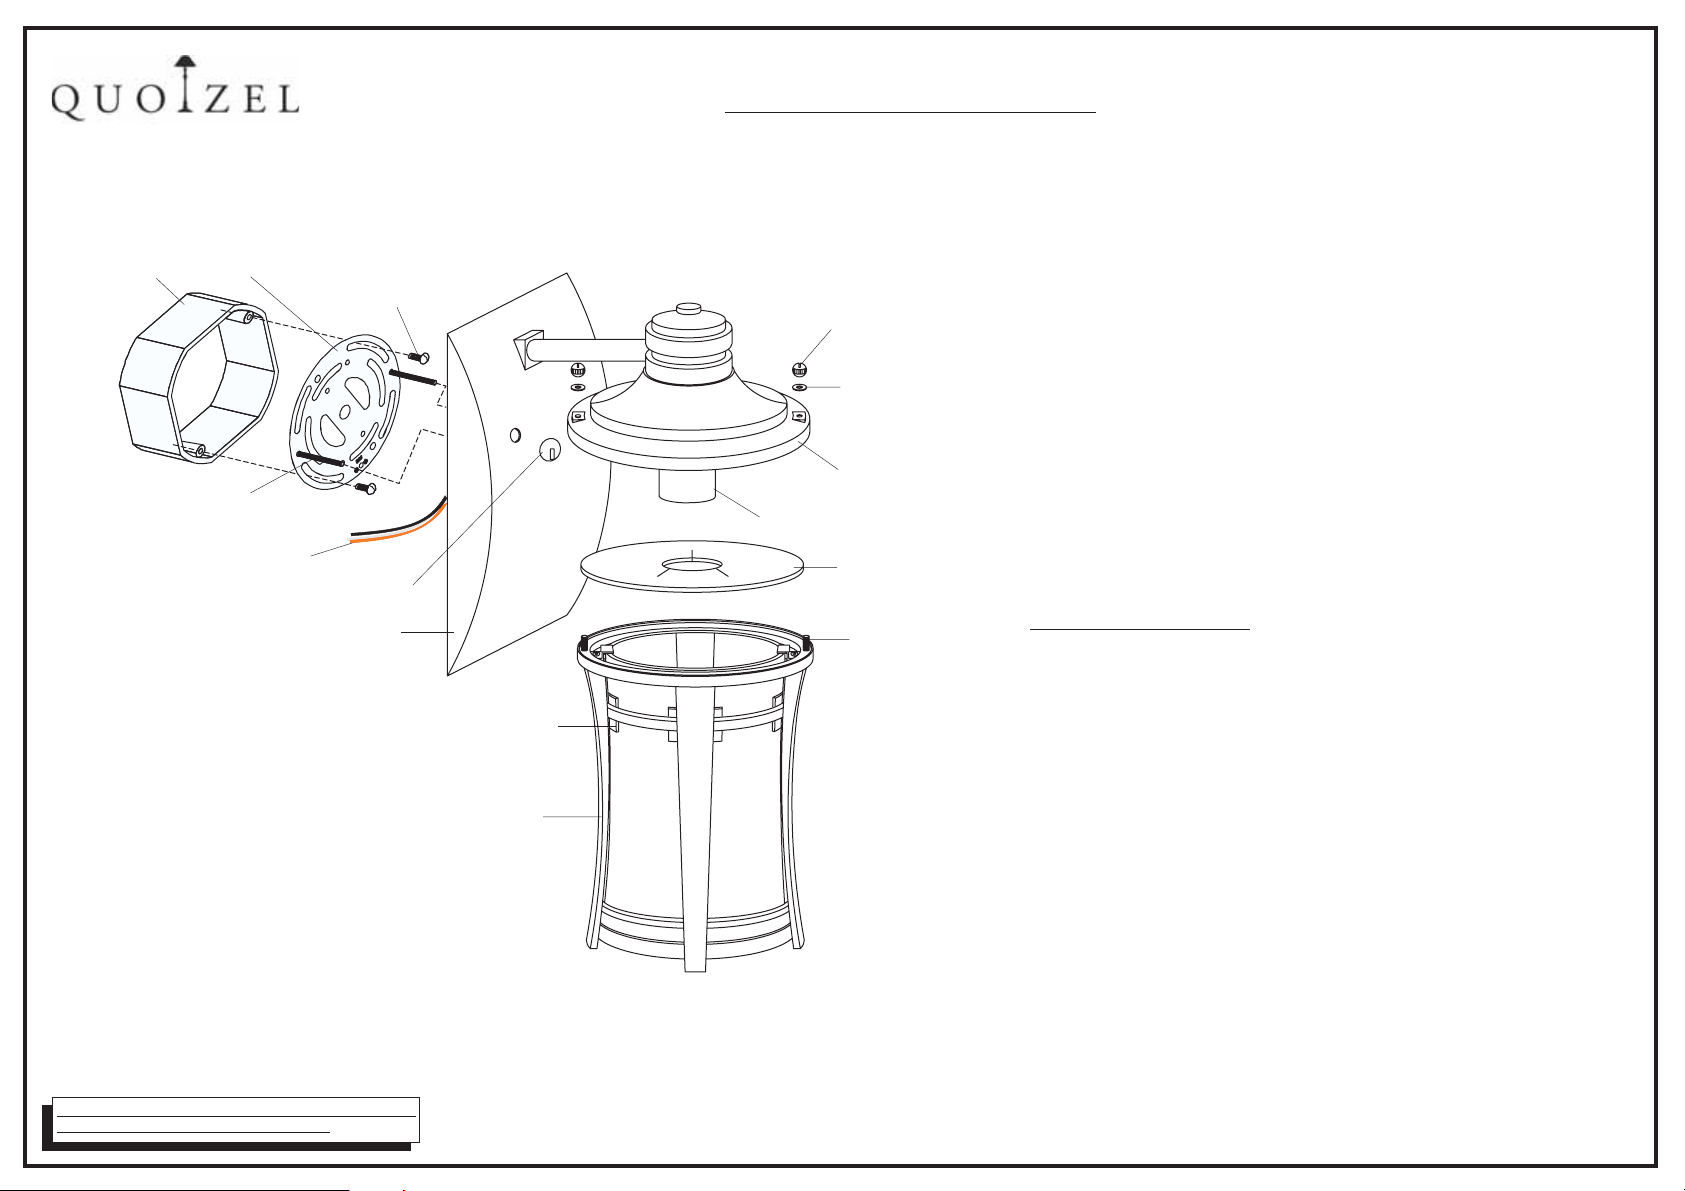
OUTLET BOX
,.
CROSSBAR
(2) OUTLET BOX SCREWS
(not supplied)
INSTALLATION INSTRUCTIONS
1. Before beginning installation, carefully unpack and identify all parts
referring to the illustration.
2. Turnpower to installation point OFF at thecircuit breaker.
3.
Install the correct bulb referring to the fixture markings and/or labels
LOCK BALL
WASHER
fox maximum wattage.
4.
Remove the PAPER CARD from the top of theFIXTURE FRAME
and discardit. Lift theFIXTURE FRAME and SHADEupward,
aligning the STUDS through the holes on theFIXTURE HOOD
Secure them together by threading the LOCK BALLS onto the
STUDS and hand tighten bothuntil snug
.
.
(2) MOUNTING SCREWS
FIXTURE SUPPLYWIRE
and GROUND WIRE
()2 MOUNTING BALLS
BACKPLATE
()
remove duringassembly
PAPER CARD
FIXTURE FRAME
with SHADE
FIXTURE HOOD
SOCKET
PAPER CARD
(
remove during
assembly
STUD
5.
Place the CROSSBAR on the BACKPLATE and align the holes in
the BACKPLATEwith a set of threaded holes in the CROSSBAR.
Install the (2) MOUNTING SCREWS in the aligned threaded holes on
the CROSSBAR. Next, mount the CROSSBAR to the outlet box with
(2)OUTLET BOX SCREWS (not provided).
)
6.
Make the connections:
Use wire connectors(not supplied) and connect the HOUSE
GROUND to the FIXTURE GROUND WIRE attach the HOUSE
;
WHITE WIREto the FIXTURE WHITE (or RIBBED SIDE) SUPPLY
WIRE; connect the HOUSE BLACK (or RED) WIRE to the FIXTURE
BLACK (or SMOOTH SIDE) WIRE. Wrap each connection with
approved electrical tape.
7. Carefully tuck all wires into the OUTLET BOX. Align the HOLES in
the BACKPLATEwith the 2 MOUNTING SCREWS attached to
the CROSSBAR. Passthe fixture over the 2 MOUNTING
()
()
SCREWS and secure against the surface by threading
2 MOUNTING BALLS onto end of the screws. Tighten until snug.
()
8. Refer to Page 2 for fixture caulking instructions.
9. Restore power to the installation point ON. Retain this sheet for
future reference.
IF IN DOUBT ABOUT ELECTRICAL INSTALLATION,
CONSULT A LICENSED ELECTRICIAN!
IS-HY8407
Page1of2
2007-03-03
Page 2
6 CORPORATE PARKWAY
GOOSE CREEK SC 29445
www quoizel com
..
,.
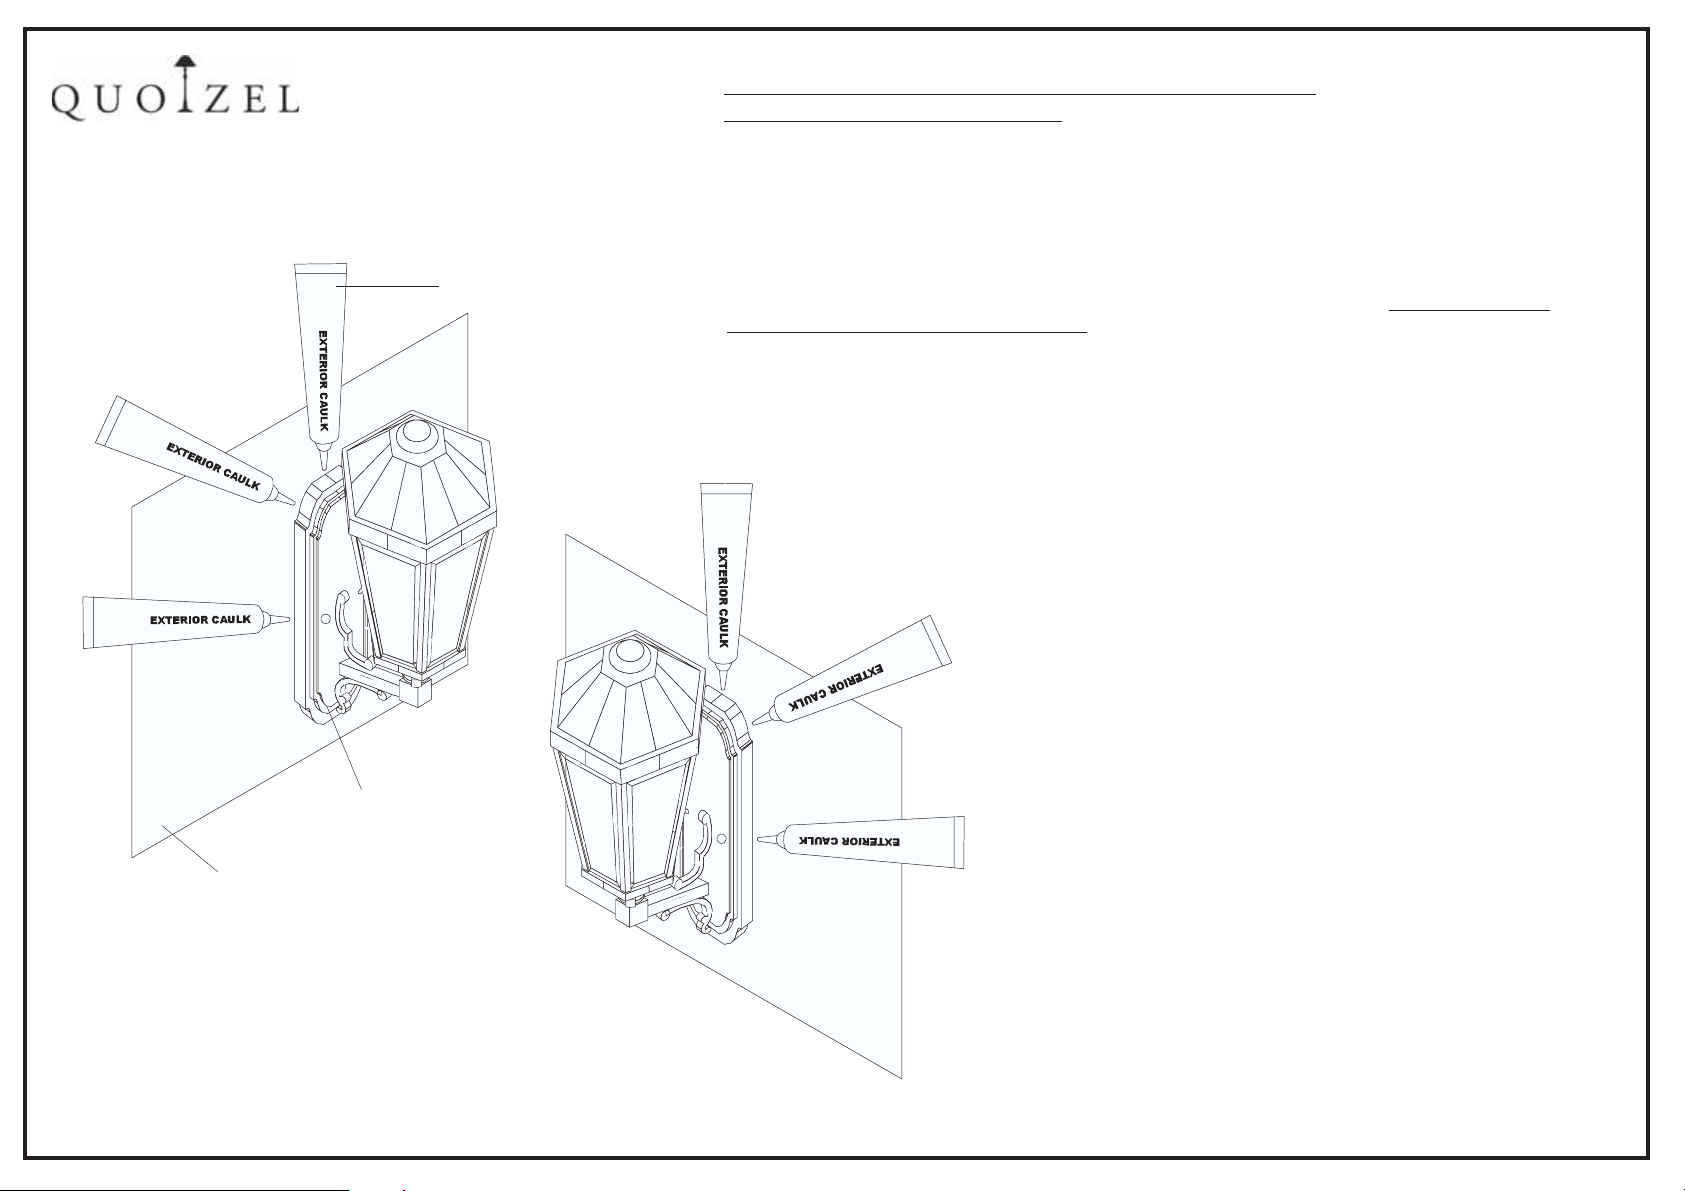
EXTERIOR GRADE
CAULK
WALL SURFACE MOUNTED OUTDOOR FIXTURE
CAULKING INSTRUCTIONS
With the OUTDOOR FIXTURE properly installed in accordance with supplied
With the OUTDOOR FIXTURE properly installed in accordance with supplied
assembly/installation instructions, proceed with caulking instructions below.
assembly/installation instructions, proceed with caulking instructions below.
Note: Be sure EXTERIOR WALL SURFACE and FIXTURE BACKPLATE are free to dirt to
Note: Be sure EXTERIOR WALL SURFACE and FIXTURE BACKPLATE are free to dirt to
caulking. Using EXTERIOR GRADE CAULK, start on one side of FIXTURE BACKPLATE and
caulking. Using EXTERIOR GRADE CAULK, start on one side of FIXTURE BACKPLATE and
follow contour, were the FIXTURE BACKPLATE meets the EXTERIOR WALL SURFACE
follow contour, were the FIXTURE BACKPLATE meets the EXTERIOR WALL SURFACE
upward. Proceed to caulk over top of backplate and down other side.
upward. Proceed to caulk over top of backplate and down other side.
BOTTOM OF FIXTURE BACKPLATE
BOTTOM OF FIXTURE BACKPLATE
to ensure proper moisture drainage.
to ensure proper moisture drainage.
DO NOT CAULK
DO NOT CAULK
OUTDOOR
FIXTURE BACKPLATE
EXTERIOR WALL SURFACE
IS HY8407
-
Page2of2
2007-03-03
 Loading...