

Page 1
6CORPORATEPARKWAY
GOOSECREEKSC29445
wwwquoizelcom
..
,.
INSTRUCTIONSHEETIS-DW5005
STYLENUMBER:DW5005C
ISSUED03-2011 REVISED2014-06-18PACKAGECONTENTS
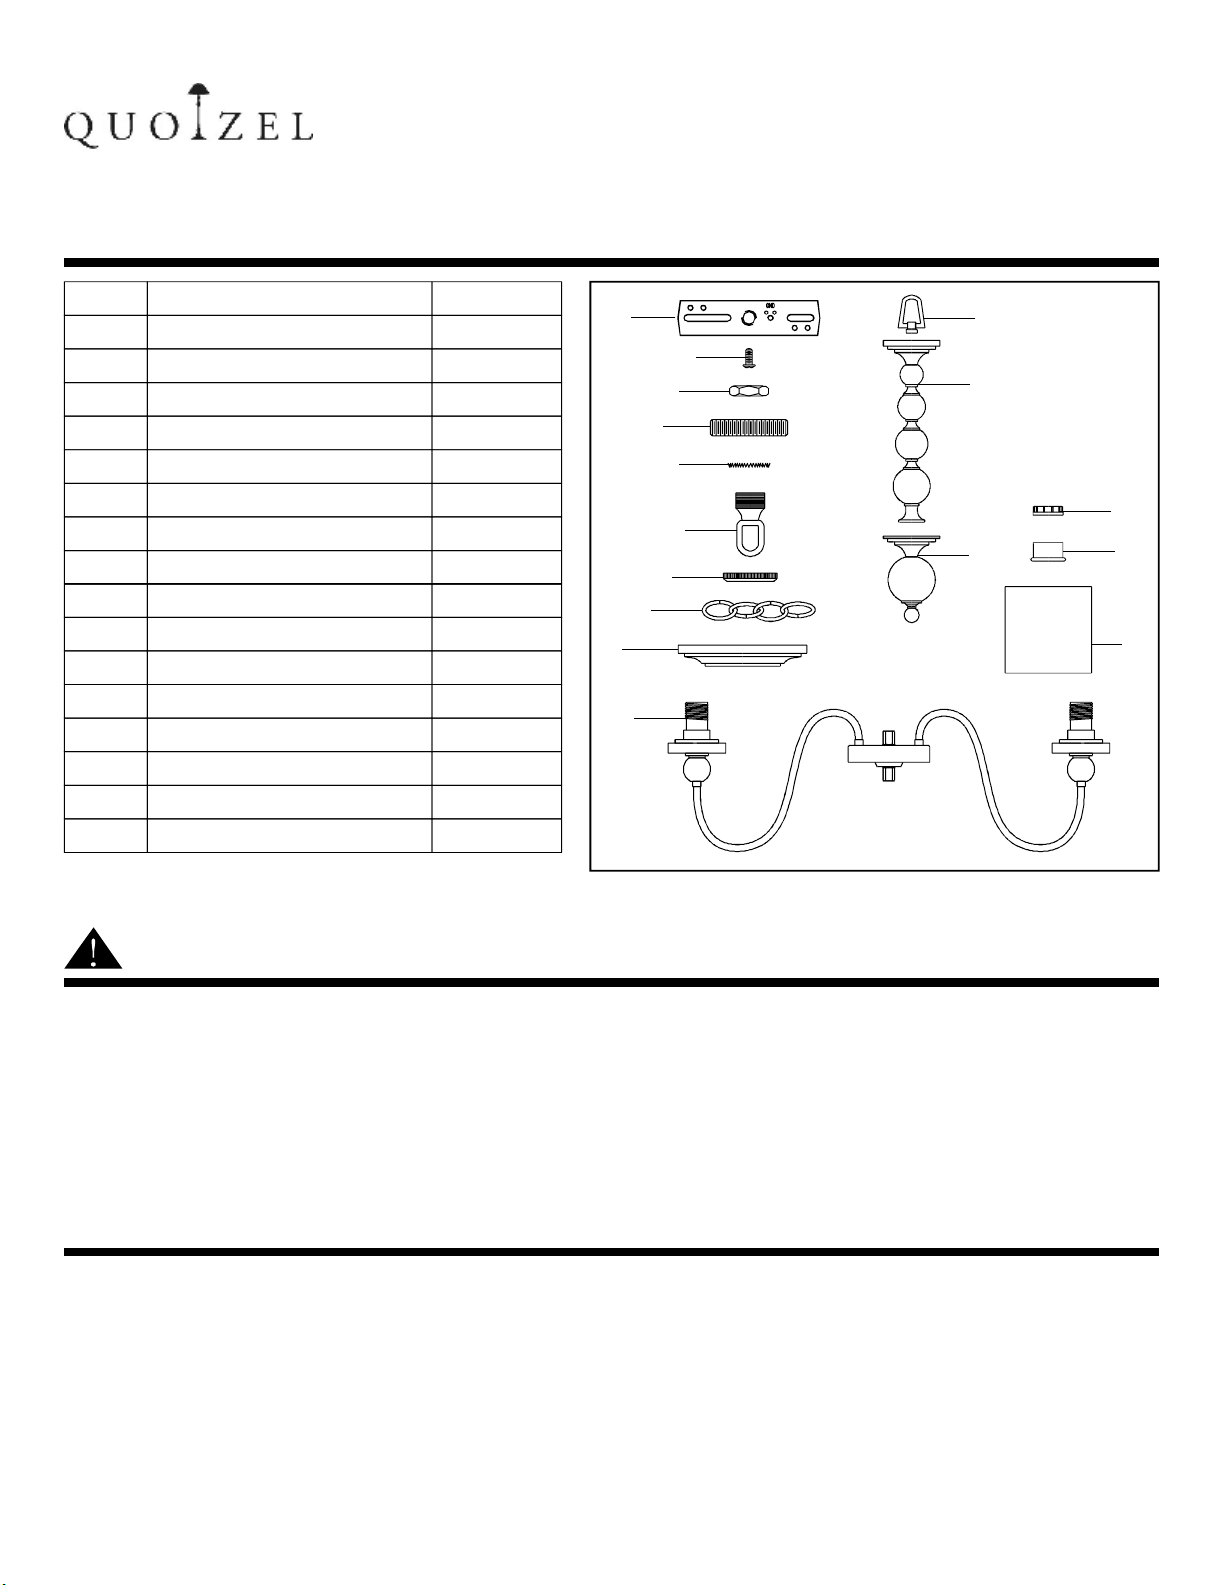
PART DESCRIPTION
A Crossbar
B
C
D
E
F
G
H
I
J
K
L
M
N
O
P
GreenGroundScrew
HexNut
Nipple
LockWasher
CanopyChainLoop
CanopyLockRing
FixtureChain
CeilingCanopy
FixtureAssembly
FixtureLoop
UpperAssembly
BottomAssembly
SocketCollar
SteelCollar
Shade
QUANTITY
1pc
1pc
2pcs
1pc
2pcs
1pc
1pc
1pc
1pc
1pc
1pc
1pc
1pc
5pcs
5pcs
5pcs
A
D
H
I
J
B
C
E
F
G
K
L
N
M
O
P
WARNINGSANDCAUTIONS
WARNING:
● Beforebeginningtheinstallation,turnoffelectricityatthecircuitbreakerboxorthemainfuseboxbyswitching
offthecircuitbreakerorremovingthefuse.
CAUTION:
● Theseinstructionsareprovidedforyoursafety.Itisveryimportantthattheyarereadcompletelybeforethe
installationofyourfixture.Westronglyrecommendthataprofessionalelectricianinstallthefixture.
● Disconnectfixturefromthepowersourcebeforereplacingthebulb(s),makingsurethatbulb(s)hadsufficient
timetocooldown.DONOTsubjectthelamptoanyshockwhilelitasshatteringoflampmayresult.
PREPARATION
● Beforebeginninginstallationofproduct,makesureallpartsarepresent.Comparepartswithpackagecontents
listanddiagramabove.Ifanypartismissingordamaged,donotattempttoassemble,installoroperatethe
product.Contactcustomerserviceforreplacementpart.
● EstimatedAssemblyTime:30-45minutes
● ToolRequiredforAssembly(notincluded):Flatheadscrewdriver,Phillipsscrewdriver,Pliers,Electricaltape,
Wirecutter,Safetyglassesand(5)100WType-Amediumbasebulbs
● HelpfulTools(notincluded):Wirestrippers.
1OF7
.
Page 2
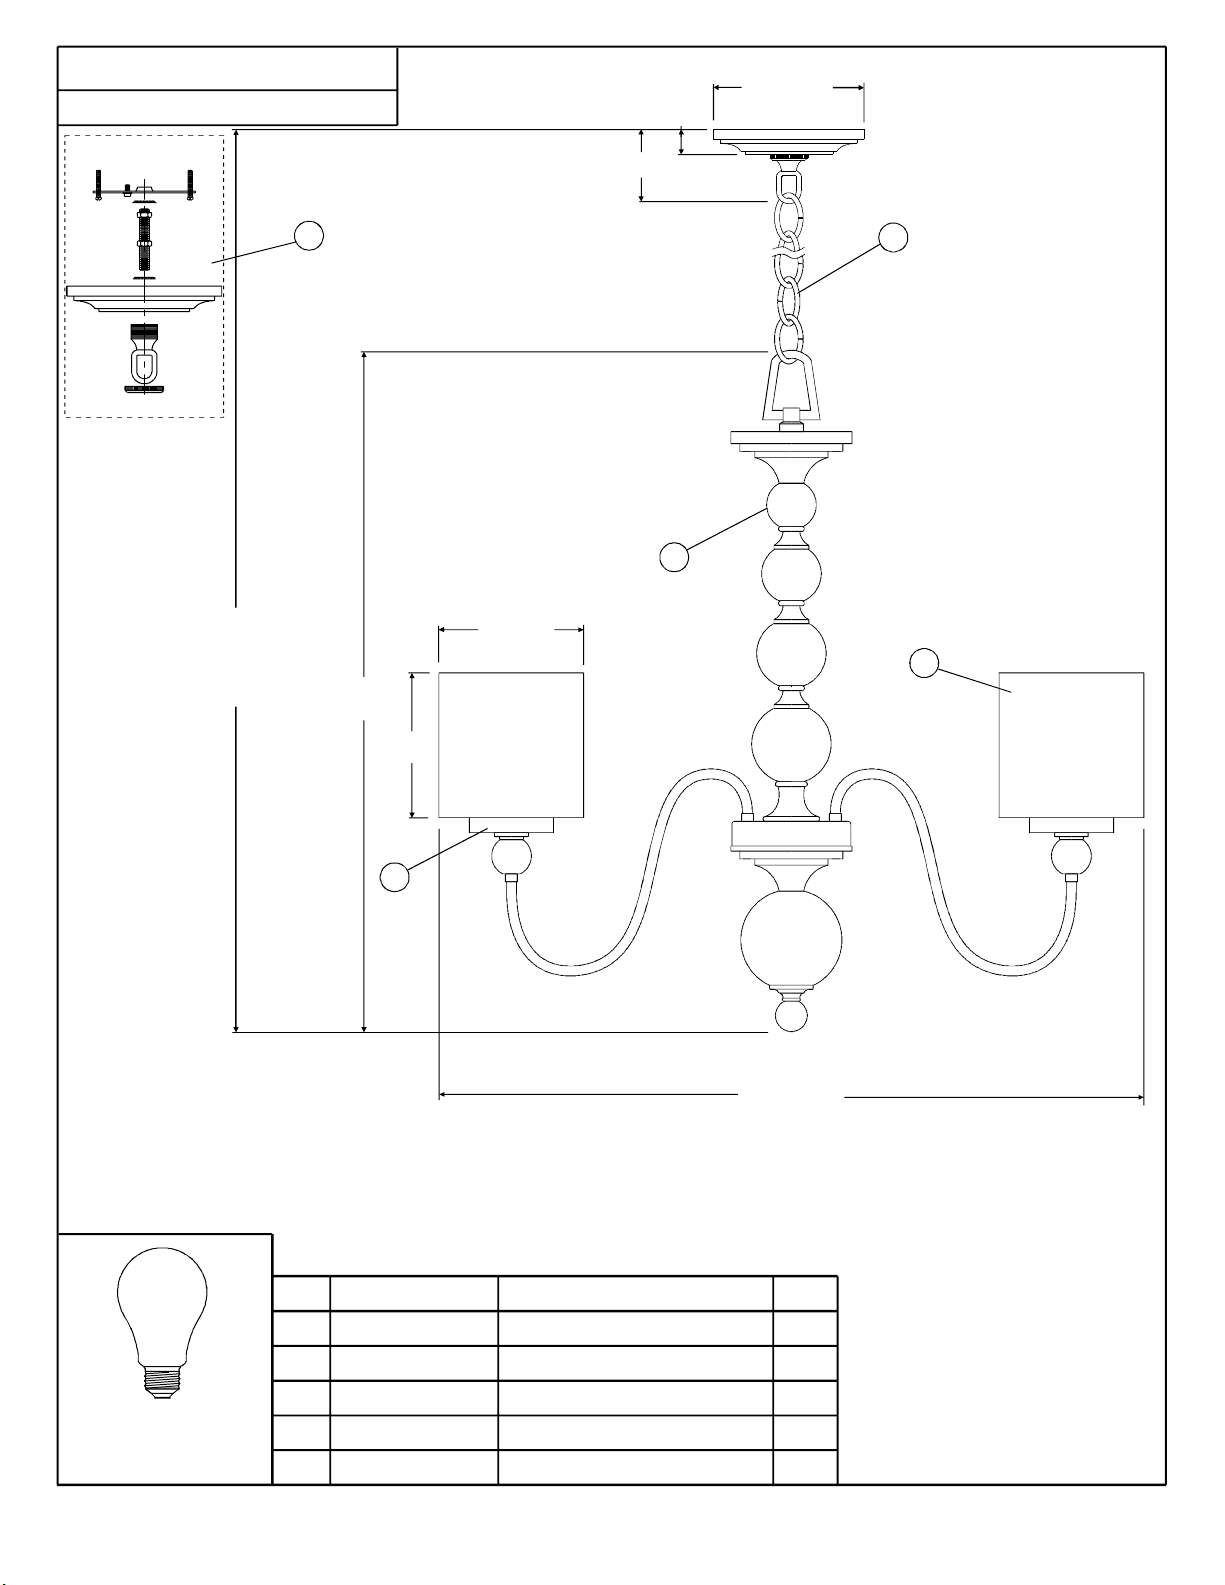
DW5005C
FINISH:POLISHEDCHROME
6” Dia.
1”
3”
4
77”
MAXIMUMHEIGHT
INCLUDES4’(48”)
SUPPLIEDCHAIN
2
1
6” Dia.
5
26”
5 ”½
(5)100WA19
MedBase
(NotSupplied)
3
NOTE:ALLDIMENSIONSAREROUNDEDUP
TOTHENEAREST1/2"
PARTNUMBER
15005CDW
1
M1355CHC
2
3
4
5
G2563CR
9081KIT
G595WL
REPLACEMENTPART REQ.NO.
BASE
CHAIN
CRYSTALDISC
MOUNTINGHARDWARE
SHADE
28” Dia.
1
1
1
1
5
2OF7
Page 3
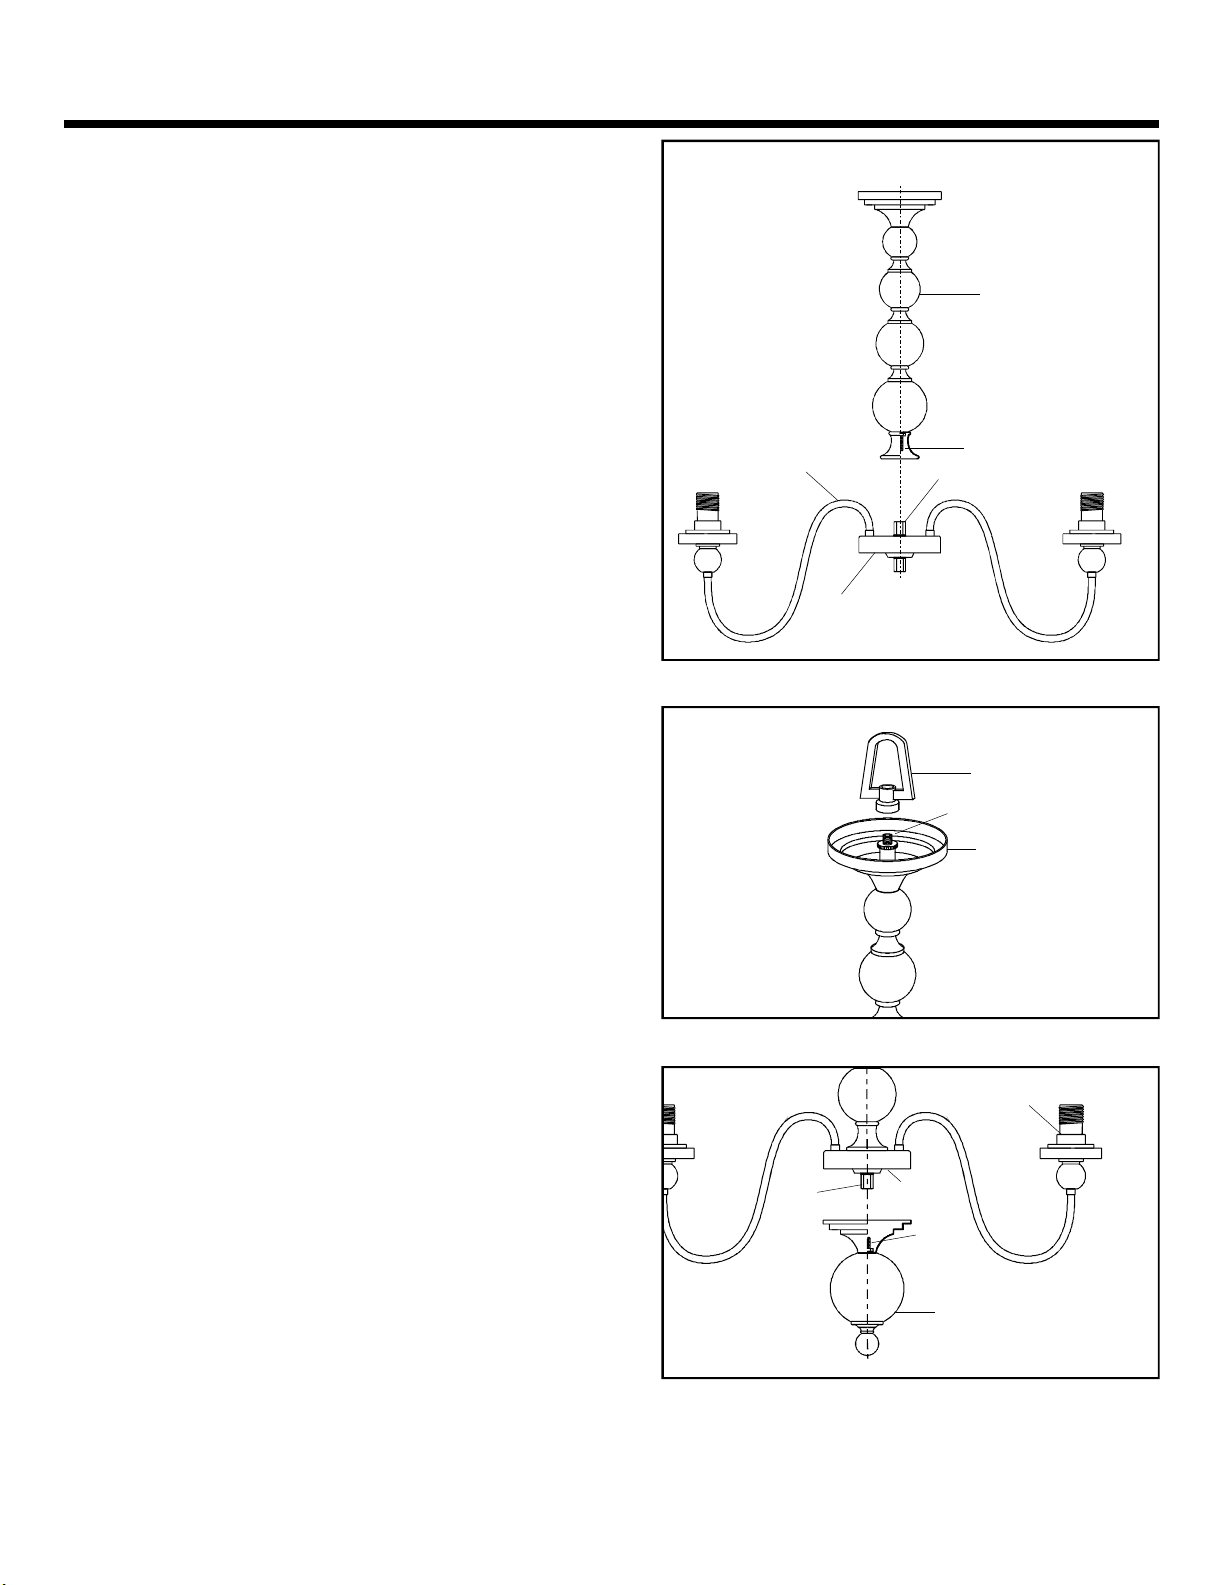
INSTALLATIONINSTRUCTIONS
STEP1:
a.ThreadtheUpperAssemblyontotheHexCouplingon
thetopcenteroftheJunctionBox.Handtightenuntil
snug.
STYLENUMBER:DW5005C
UpperAssembly
STEP2:
a.ThreadtheFixtureLoopontothenippleonthetop
centeroftheFixtureCanopy.Handtightenuntilsnug.
FixtureAssembly
JunctionBox
Nipple
HexCouplings
FixtureLoop
Nipple
FixtureCanopy
STEP3:
a.ThreadtheLowerAssemblyontotheHexCouplingson
thebottomcenteroftheJunctionBox.Handtighten
untilsnug.
3OF7
Hex
Couplings
FixtureAssembly
Junction
Box
Nipple
BottomAssembly
Page 4

INSTALLATIONINSTRUCTIONS
STEP4:
a.SecuretheCrossbarontotheOutletBoxwithOutlet
BoxScrews.Tightenuntilsnug.
STEP5:
a.ThreadoneHexNutontotopendoftheNipple.
b.PlaceoneLockWasheroverthetopendoftheNipple
andthenthreadtheNippleintothecenterlockholeof
theCrossbar.
c.Usingpliers,threadtheHexNutagainsttheCrossbar
andhand-tightenuntilsnug.
Crossbar
STYLENUMBER:DW5005C
OutletBox
Crossbar
OutletBox
Screw
LockWasher
HexNut
Nipple
STEP6:
a.ThreadanotherHexNutontotheendoftheNipple.
b.PlacetheLockWasherovertheendoftheNippleand
thenthreadtheCanopyChainLoopontotheendofthe
Nipple.
c.Usingpliers,threadtheHexNutagainsttheCanopy
ChainLoopandhand-tightenuntilsnug.
Nipple
HexNut
LockWasher
CanopyChainLoop
4OF7
Page 5

INSTALLATIONINSTRUCTIONS
STEP7:
a.PushtheCeilingCanopyupwardovertheOutletBox.
ThreadtheCanopyLockRingontotheCanopyChain
LoopandtightenuntilsnugtosecuretheCeiling
Canopy.
STEP8:
a.AdjusttheFixtureChaintoyourdesiredlengthby
removingthelinksifneeded.Youmayneedtouse
plierstoopenthechainlinks.Ifso,putaclothoverthe
chaintoprotectthefinishfromthepliers.
b.AttachoneendoftheFixtureChainontotheCanopy
ChainLoopandthenattachtheotherendoftheFixture
ChainontotheFixtureLooponthetopofthefixture.
STYLENUMBER:DW5005C
OutletBox
CanopyChainLoop
CeilingCanopy
CanopyLockRing
CanopyChainLoop
FixtureChain
STEP9:
a.PulltheSupplyWiresupthroughtheFixtureChain
alternatinglinks.PushthewiresupthroughtheCanopy
ChainLoopintotheoutletbox.
SupplyWires
FixtureLoop
CanopyChainLoop
FixtureChain
SupplyWires
5OF7
Page 6

INSTALLATIONINSTRUCTIONS
STEP10:
a.Un-threadtheCanopyLockRingandslideCanopy
LockRingandCeilingCanopydowntheFixtureChain.
b.PushallslackfixturewirethroughCanopyChainLoop
intoOutletBox.Trimexcessfixturewireleavinga
minimumof6in.HangingoutoftheOutletBox.
c.RefertoSTEP11toconnectthewires.
d.Re-attachtheCeilingCanopyasshowninSTEP7.
STYLENUMBER:DW5005C
OutletBox
CanopyChainLoop
FixtureChain
CeilingCanopy
CanopyLockRing
STEP11:
UseWireConnectorstoconnectthewires.
a.ConnecttheHouseGroundWiretotheFixtureGround
Wire.
b.ConnecttheHouseWhite(orRibbed)Wiretothe
FixtureSupplyWire(WhiteorRibbedSide).
c.ConnecttheHouseBlack(orRed)WiretotheFixture
SupplyWire(BlackorSmoothSide).
d.Wrapeachconnectionwithapprovedelectricaltape
andcarefullystuffalloftheconnectedwiresintothe
OutletBox.
6OF7
WHITEORRIBBED
FROMHOUSE
BLACK(ORRED)WIRE
FROMHOUSE
GROUNDWIRE
FROMHOUSE
WHITEORRIBBED
FROMFIXTURE
BLACKORSMOOTH
FROMFIXTURE
GROUNDWIRE
FROMFIXTURE
Page 7

INSTALLATIONINSTRUCTIONS
STEP12:
a.PlacetheShadeandtheSteelCollarovertheSocket
asshown.SecurebythreadingtheSocketCollaronto
theSocket.Handtightenuntilsnug.
STEP12:
a.InstallcorrectBulbsreferringtofixturemarkingsand/orlabelsformaximumwattage.
STYLENUMBER:DW5005C
SocketCollar
SteelCollar
Shade
Socket
Yourinstallationiscompletednow.Restoreelectricity.Retainthissheetforfuturereference.
7OF7
 Loading...