

QuietCool QC36D1, QC36B1, QC36DVS, QC36B1X, QC36B3 Owner's Manual
...
1
This Manual covers all of the following QuietCool Portable Evaporative Coolers.
QC36D1 – QuietCool 36” Direct Drive 1 Speed
QC36DVS – QuietCool 36” Direct Drive Variable Speed (shown above)
QC36B1 – QuietCool 36” Belt Drive 1 Speed ½ HP
QC36B1X – QuietCool 36” Belt Drive 1 Speed ¾ HP
QC36B3 – QuietCool 36” Belt Drive 3 Speed
QC36B1XHL – QuietCool 36” Belt Drive 1 Speed ¾ HP – Explosion Proof
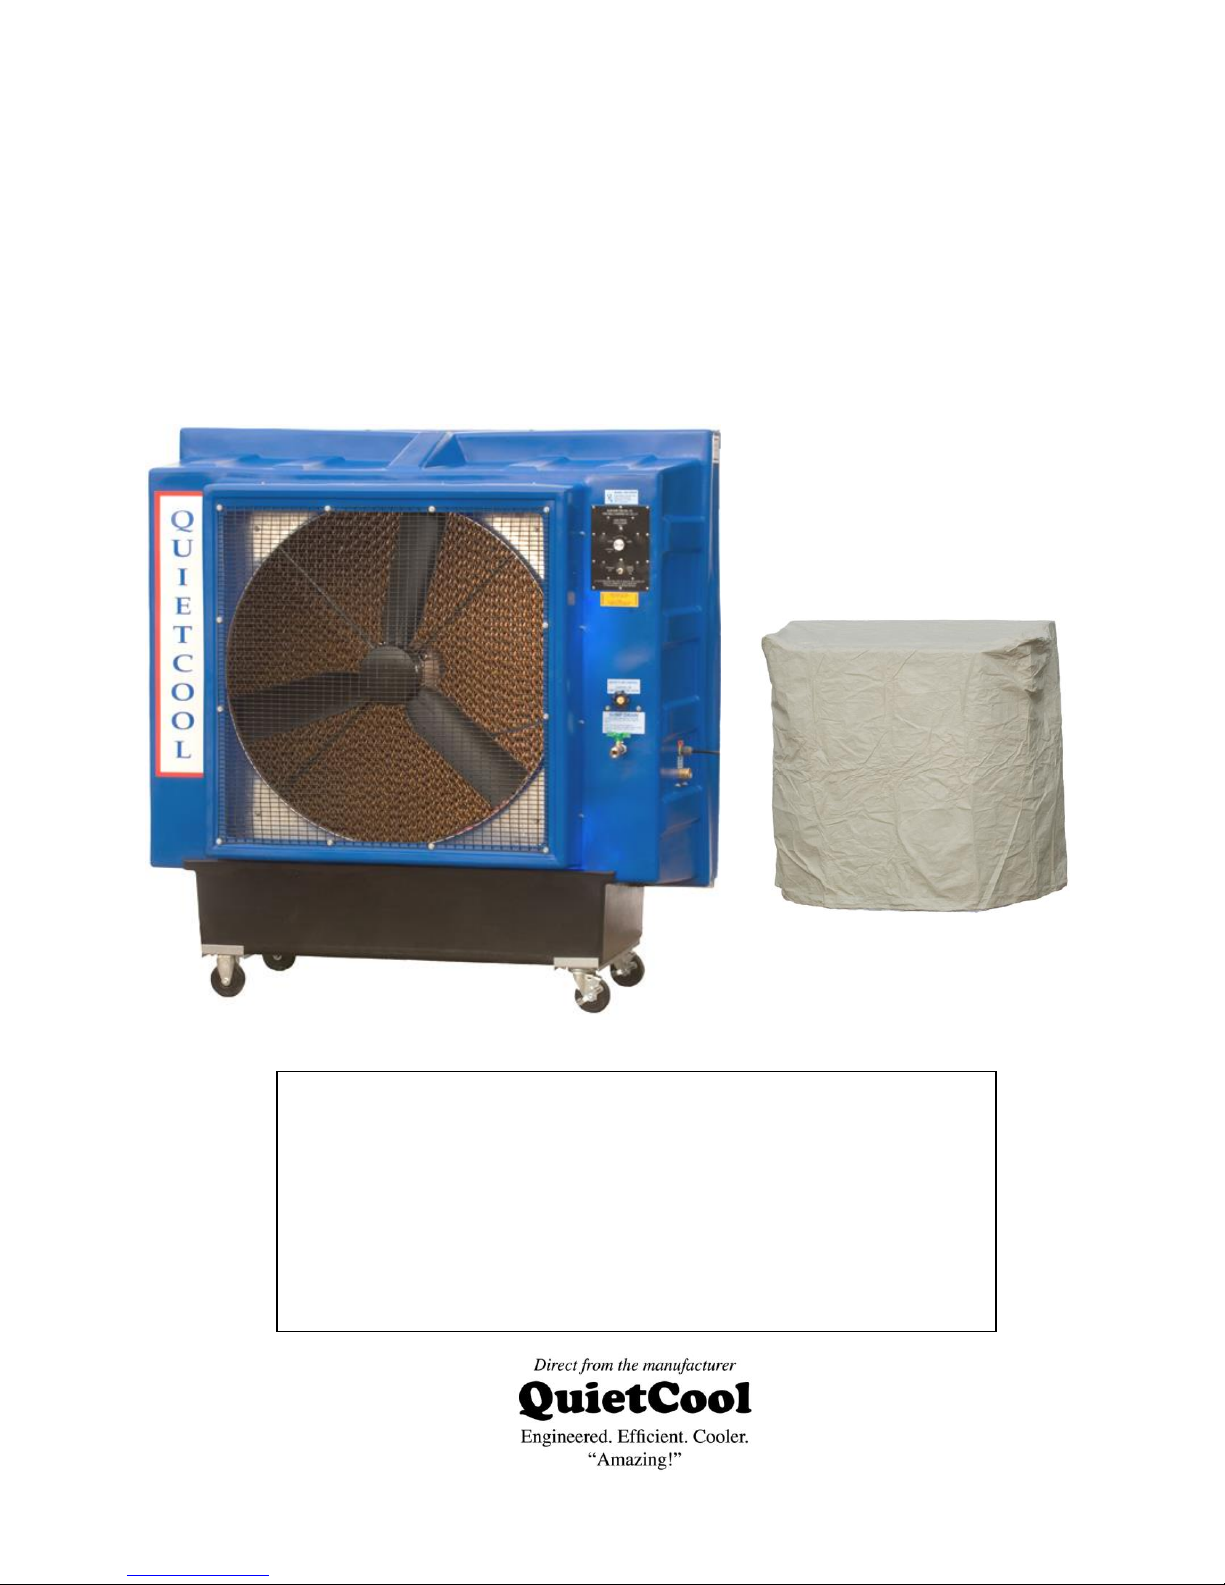
Optional Cover for storage protection.
See section 9.0 for details and a
convenient Fax Back Order form.
36” QuietCool
Portable Evaporative Cooler
Owner’s Manual

2
File this owner’s manual in a safe place for future reference. It contains operating procedures – maintenance procedures –
trouble shooting guide – replacement parts guide – order form – and contact information. You will need this!
Warnings and Cautions
Read before operating QuietCool Portable Evaporative Cooler
ELECTRICAL
WARNING Do not use a 3 prong to 2 prong adapter on the electrical power cord. Use 12 gauge extension cord only.
WARNING Do not remove the grounding lug from the electrical power cord plug.
Use only 3 prong, grounded receptacles.
WARNING Disconnect the QuietCool Portable Evaporative Cooler from your electrical power source before performing
any service action.
WARNING Your QuietCool unit must be plugged into a fused or circuit breaker protected 20 Amp, 120 Volt, 60 Hz circuit
– unless specifically manufactured for another voltage / frequency configuration. See manufacturer’s label on
cooler. A ground fault circuit interrupter protected circuit is strongly recommended.
WARNING Check your units electric power cord for insulation breaks, cracks or fraying. If any of these conditions are
found DO NOT USE. See your distributor for immediate service replacement parts.
WARNING Some electric motors require periodic oiling. Check your model for oil fill holes. A couple drops of light oil
per year normally will be sufficient. Heavy usage may require additional oil.
WARNING To reduce the risk of fire or electrical shock, DO NOT USE with any solid-state speed control device.
WARNING To reduce the risk of electrical shock or injury to persons, DO NOT USE cooler in a window.
WATER
WARNING Do not connect your QuietCool Portable Evaporative Cooler to any water source where water pressure exceeds
60 p.s.i. If your water source is above 60 p.s.i. you must use a pressure regulator (which can be found
at your local hardware store).

3
QuietCool Portable Evaporative Cooler
Table of Contents
1.0 Introduction
1.1 Quick Start
1.2 Operate unit for 2 weeks before adding Evap-O-Matic Tablets
2.0 How Evaporative Cooling Works
3.0 Unpacking your new QuietCool unit
4.0 Set-up your QuietCool unit
4.1 Connecting the electrical supply
4.2 Connecting the water supply
5.0 Operating procedures
5.1 Filling the units reservoir with water
5.2 Turn-on pump
5.3 Adjust water flow
5.4 Turn-on Fan
6.0 Daily Operating procedures
6.1 Turn-on pump
6.2 Adjust water flow
6.3 Turn-on fan
6.4 Turn-off unit
7.0 Maintenance
7.1 Access inside of unit
7.2 Removing the cooling media
7.3 Daily maintenance
7.4 Periodic maintenance
7.5 QuietCool Trouble Shooting Guide
8.0 Storage
9.0 Accessories
10.0 Replacement Parts and – Order form
11.0 Wiring Diagrams for all 36” units
12.0 Warranty
File this owner’s manual in a safe place for future reference. It contains operating procedures – maintenance procedures –
trouble shooting guide – replacement parts guide – order form – and contact information. You will need this!
4
Electrical cord for 120V, 20Amp connection.
Note: Standard ¾” water connection for
utility water source under 60 p.s.i.
QuietCool Portable Evaporative Cooler
1.0 Introduction
Your QuietCool was engineered to be the most efficient portable evaporative cooler manufactured. It was
manufactured and assembled at our plant in Houston, Texas.
Your QuietCool was tested 3 ways. Your unit was tested for 1. Maximum air flow at operating static pressure.
Only QuietCool is tested in operating conditions with 2. Water and 3. Electricity before it is shipped.
QuietCool is easy to operate – needs only tap water and electricity to operate.
QuietCool is easy to move – roll your QuietCool to the area you
want to cool. QuietCool comes standard with straight and swivel
/ lock casters which make moving your QuietCool a breeze.
1.1 Quick Start – Your Quick Start Information is located inside the
information packet shipped with your unit.
Look on the front of your QuietCool in a plastic sleeve.
1.2 Evap-O-Matic – Chemical Water Treatment. Operate your unit 2
weeks – flush out old water – add clean water – then add Chemical Water
Treatment tablet. Note; Tablet makes water foam which can cause unit to
spit droplets of water temporarily. Foam subsides in 1 – 2 working days.
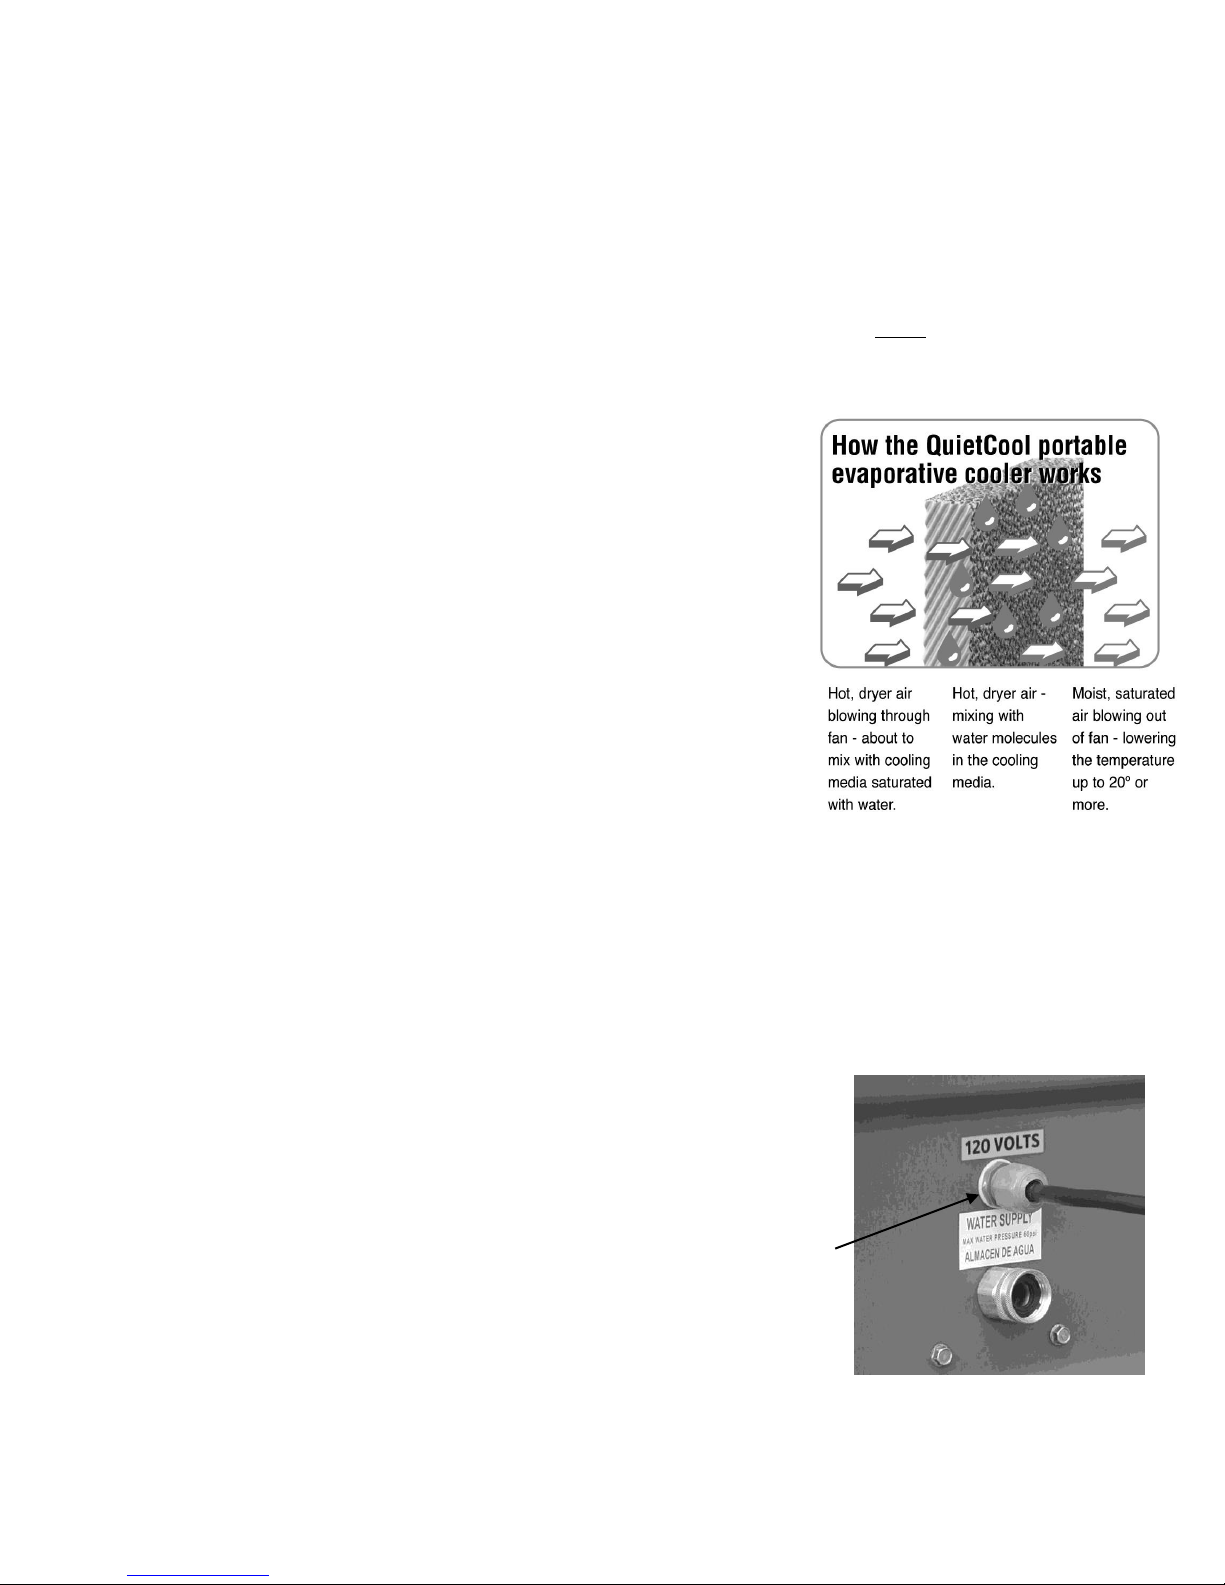
2.0 How Evaporative Cooling Works
Keeping in mind that regular fans only circulate same temperature air same humidity – your QuietCool portable evaporative cooler takes that same existing air, combines it with evaporating
water (which dramatically lowers the temperature) immediately relieving hot, dry areas, similar to the conditions when a
natural rain storm approaches, the temperature drops noticeably cooler, because the air is saturated with water. Because your
air is now saturated with water it becomes noticeably cooler. In high humidity areas the temperature will not be as cool –
however, the QuietCool was engineered efficient to evaporate perspiration and sweat from employees to keep them cooler.
3.0 Unpacking your new QuietCool unit
Note: Carefully examine your QuietCool shipping carton for damage before
opening. If your carton is damaged – notify the shipper immediately!
Your QC36” unit was shipped on a wooden skid covered with a cardboard cover
and lid – strapped. First remove the straps then you may lift the whole cardboard
box off the unit and skid. Your QuietCool must now be lifted off the wooden skid.
4.0 Set-up your QuietCool unit.
Roll your QuietCool unit to a level surface and lock the swivel casters to prevent
accidental movement.
5
Top: Water control valve – controls water to
units water reservoir. Open 1 ¼ turns.
Bottom: Water hook-up for cleaning and
flushing water reservoir.
4.1 Connecting the electrical supply
All QuietCool models require regular 3 prongs, ground with 120 volt power supply. Plug electrical cord into receptacle. If
using an extension cord be sure it is rated for at least 20 amps for the distance your cord is running. To be safe – make sure
no other equipment is plugged into the same circuit. The QuietCool should run smoothly on 20 amp, 120 volt, and 60 Hz
circuit.
4.2 Connecting the water supply
Connect standard water hose to female fitting on the right side of your QuietCool (looking at the fan blade side). If your
water pressure is above 60 pounds per square inch (p.s.i). you must use a pressure regulator (which can be found at your
local hardware store). If you have purchased our optional QR60 gallon reservoir tank – simply attach the garden hose from
the tank to the cooler. Note: Do not connect to water source exceeding 60 p.s.i. – this can cause damage to your QuietCool.
5.0 Operating procedures
Back your QuietCool unit up to a fresh air source
such as an open door or window so the unit can pull
in fresh air from the outside. Next, make sure you
have a natural exhaust at the opposite end of the
room, bay or building such as a window, door or bay
door. This will ensure maximum efficiency from
your unit. Finally make sure there are no obstructions
between your QuietCool and the people / area you
need to cool.
5.1 Filling the units reservoir with water
Once your water hose is connected – open the water
flow valve (located on the front of your unit) only
one and half (1 1/4) turns. This water flow valve adjusts the amount of water to the unit. Next, turn water on and fill the
reservoir with water. Listen carefully. You can hear water filling the reservoir. Check your water connection – make sure
there is no dripping. Once the reservoir is filled with water the float valve will automatically shut off the water source. When
you no longer hear the water running – you know that the float valve is fully operational
(the water turns off automatically) and you are now ready to turn on the water pump.
Warning! Do not run water pump without water in the reservoir.
5.2 Turn-on pump
To turn-on the water pump - flip the toggle switch for the water pump to on. Switch is
located on front side of unit. Warning! Do not run water pump without water in the
reservoir. The water pump will now begin pumping water to the top of the unit so that
gravity will allow the water to run down the backside of unit inside and on the cooling
pads. (If the water is dripping off of the pads on to the floor – turn your fan on low –
close the flow valve a little to slow the water flow. After the pads are wet – you can
 Loading...