

Page 1
OWNER’S GUIDE
OPTIONAL CURB FLASHING
for AFR SMT and AFR PRO
FLA-CRB-2222
Page 2
1. PRODUCT OVERVIEW
1.1 INTRODUCTION
Introducing the QuietCool AFR Roof Mount Attic Fan Curb Mount Adapter –
the perfect solution for seamless installation on at or low-pitch roofs! The
QuietCool AFR Roof Mount Attic Fan Curb Mount Adapter simplies the
process of mounting your AFR fan on a curb mount for at or low-pitch roofs.
NOTE: This adapter is designed for at or low pitch roofs - 3:12 pitch and below.
Do NOT attempt to install this adapter on roofs with a higher pitch than 3:12. If
installed incorrectly, the warranty of the fan will be voided.
NOTE: This supplementary Owner’s Guide is to help you install the ashing on
the AFR fan unit. Please follow the instructions in your AFR Owner’s Guide
regarding installation on your roof. The Warranty for this ashing is covered by
the warranty of your fan. For more details, please read your AFR Owner’s Guide.
2. INSTALLATION
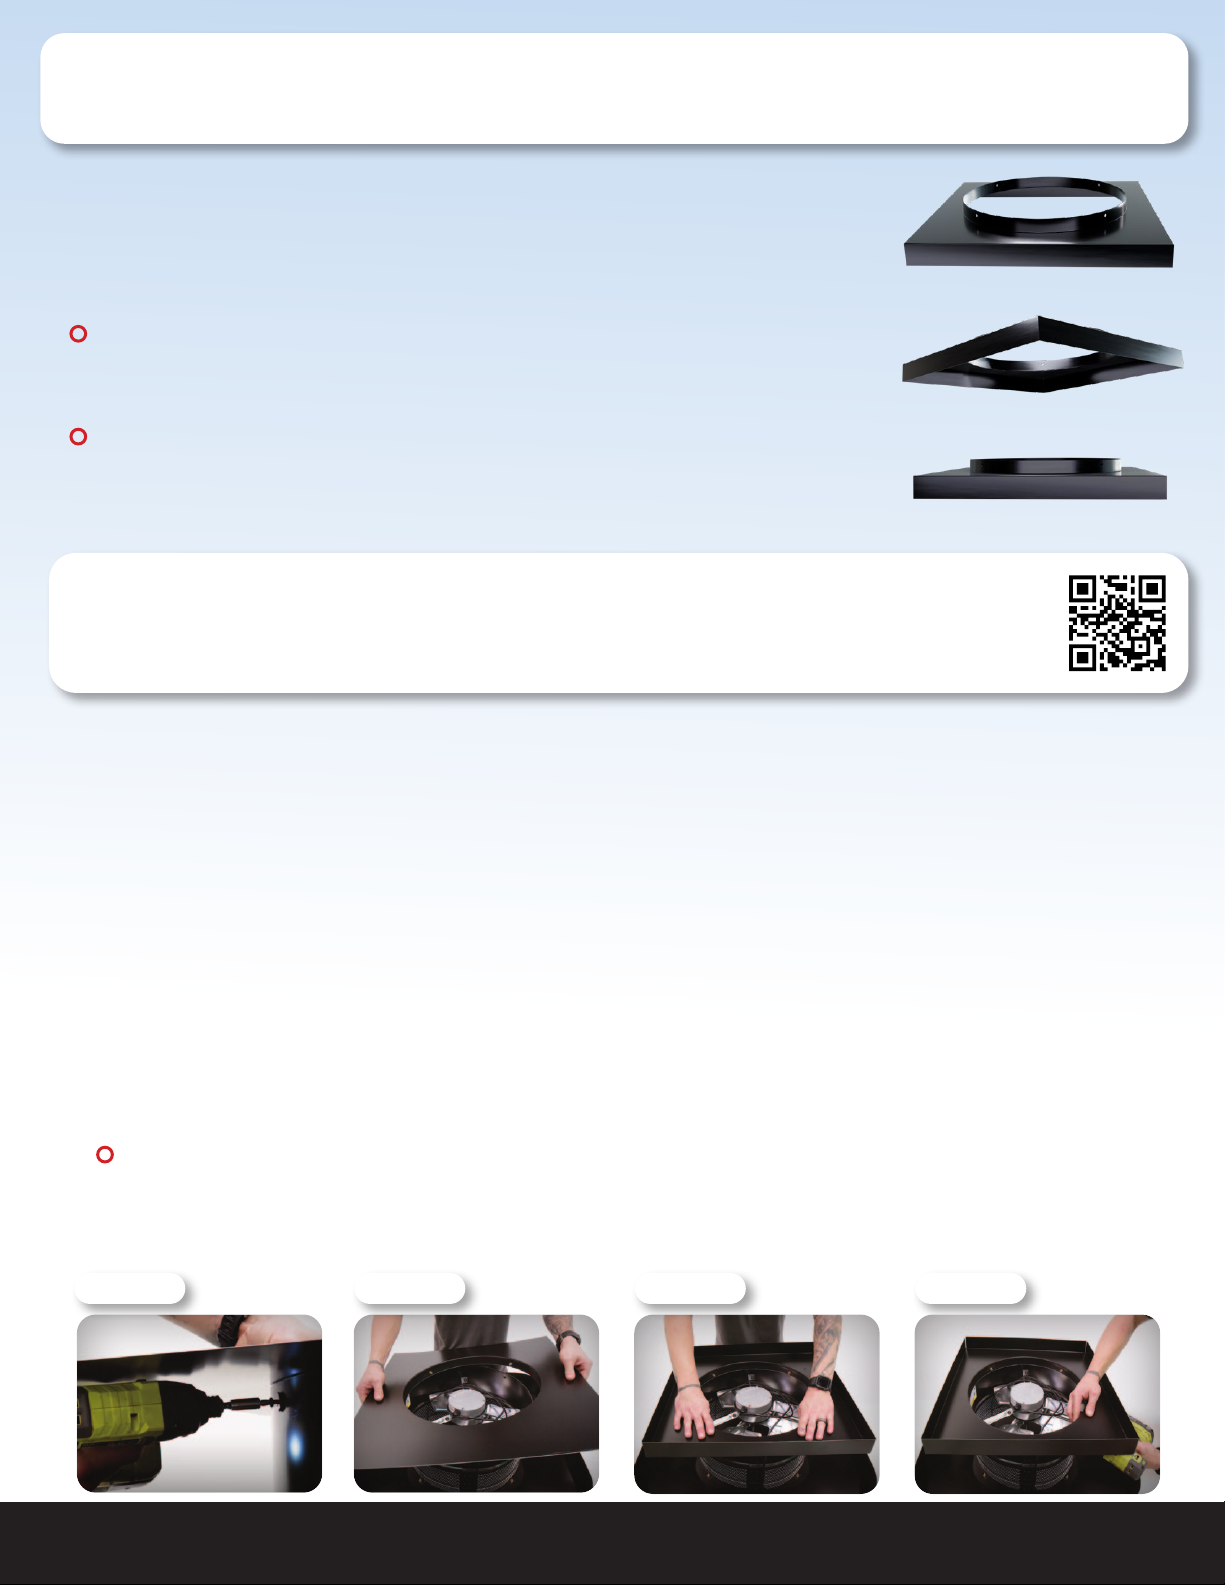
2.1 INSTALLING CURB FLASHING
1. Find a at work surface and turn your AFR fan unit upside down.
2. Remove the four screws and rubber bonded washers that fasten the primary ashing to the housing.
(see Figure 2.1A)
3. Once all screws are removed, remove the primary ashing. (see Figure 2.1B)
4. Align the screw holes and attach the curb ashing to the housing. (see Figure 2.1C)
5. Once all four screw holes are lined up, re-install the four rubber bonded washers and screws to fasten
the curb ashing to the housing. (see Figure 2.1D)
6. Your fan is now ready to be installed on your roof.
NOTE: The seam between the housing and the ashing exists to allow the use of interchangeable
ashings. If this seam is not sealed, water may leak in between the fan housing and the ashing.
Be sure to use a generous amount of weatherproof sealant to create a watertight seal when you
install the fan on your roof.
Watch the video by scanning the QR
www.QuietCoolSystems.com/support
Installation Video:
code or visit
Figure 2.1A Figure 2.1B Figure 2.1C Figure 2.1D
QUIETCOOLSYSTEMS.COM
Rev. 4/8/24
1-888-QUIETCOOL
 Loading...