

Page 1
O P E R A T I N G I N S T R U C T I O N S
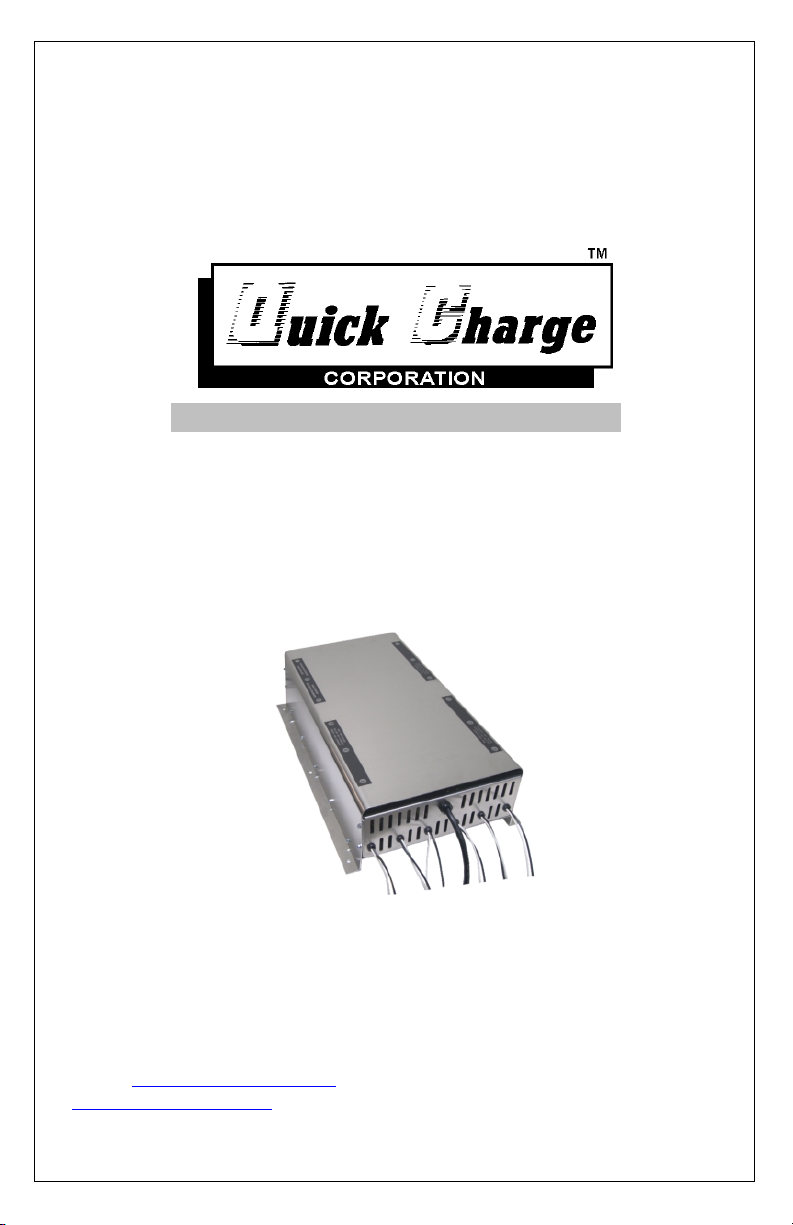
MB Multi Bank Battery Chargers
Models: MB1210X2, MB1210X3, MB1210X4, MB1210X6, MB1210X10, MB1210X12
For Industrial Use: Designed for gel, wet cell, AGM, and Lithium Ion Batteries
(Lithium ion applications must be factory programmed)
Quick Charge Corp.
800 658-2841
e-mail [email protected]
www.quickcharge.com
Made in the U.S.A
101712
Page 2
QUICK START INSTRUCTIONS:
Check that the temporary paper label on the charger marked with
the profile setting matches your battery type. If not, see the
reprogramming section.
If your charger has an ON/OFF switch move it to the OFF
position.
Connect the red charge leads to battery positive, black’s to
negative. But before, make sure the battery is of the same voltage
rating of the charger. If you are unsure, count the number of cells
on each battery and multiply by two. This figure should be the
same as the DC voltage rating of the charger. (see ratings label on
charger)
Charging a battery with a lower voltage rating than the
charger will cause damage to batteries, charger, and can create an
explosive atmosphere.
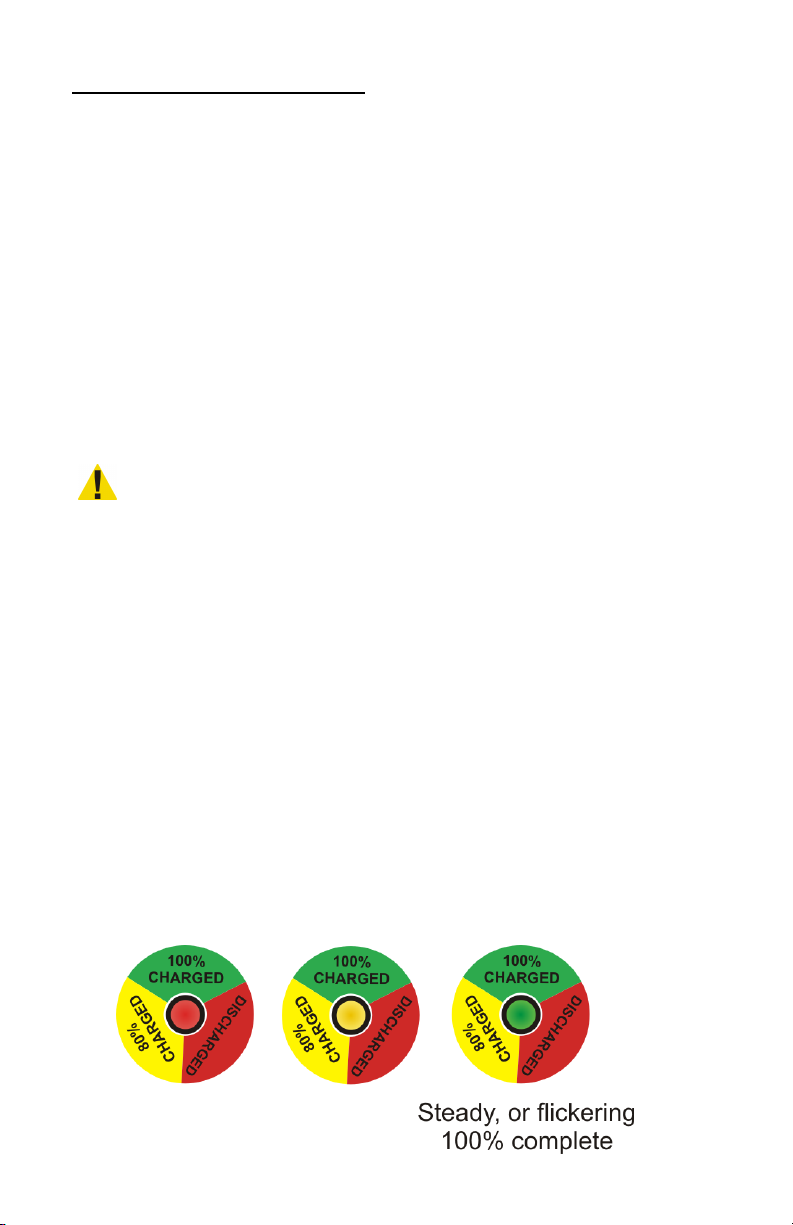
Plug the charger into AC power and if so equipped, switch the
power switch to the ON position. the LED will flash red for a few
seconds, then turn steady red. When the cycle is 80% complete it
will turn yellow, and finally green when cycle is complete.
If the profile is set to maintain the battery(s), the LED will flicker
green. If the profile is set to shut off, the cycle will end with a
steady green. The LED may also flicker when it is at the high limit
of the charge cycle.
To discontinue charging, move the power switch OFF if equipped,
or unplug AC power.
Page 3

Look to the Trouble shooting section for any deviations from this.
Since these chargers are independent from each other, you can set
each circuit differently. For example, you may want to set some
circuits to an AGM profile, and others to a wet cell profile, just
remember to mark or label how they are set on the outside so as
not to get them mixed up, charging a battery with the wrong profile
can damage it.
You can also charge a battery faster than the individual 10 amp
rate by connecting more than one set of leads to a single battery.
For example, you can connect two sets of leads to a single battery
and charge it at 20 amps instead of 10, but the increase is
diminished with each additional set, so it will be something less
than a 10 amp incremental increase.
Please read complete instructions before proceeding.
SAFETY INFORMATION AC WIRING:
Before making AC connections, refer to the requirements on the
charger ID label. If your charger is not equipped with an AC plug,
for example, a 230 volt charger, have a qualified electrician install
one.
To reduce the risk of fire, use this charger only on branch circuits
that are protected by a circuit breaker or fuse, and that are adequate
to carry the power drawn by the charger. All wiring should be in
accordance with the National Electric Code, ANSI/NFPA 70, and
all local codes and ordinances.
This battery charger must be grounded to reduce the risk of electric
shock. 117 volt chargers are equipped with a grounding type plug,
230 volt chargers are shipped without a plug. Have a qualified
electrician install a properly grounded 3 wire plug.
Page 4
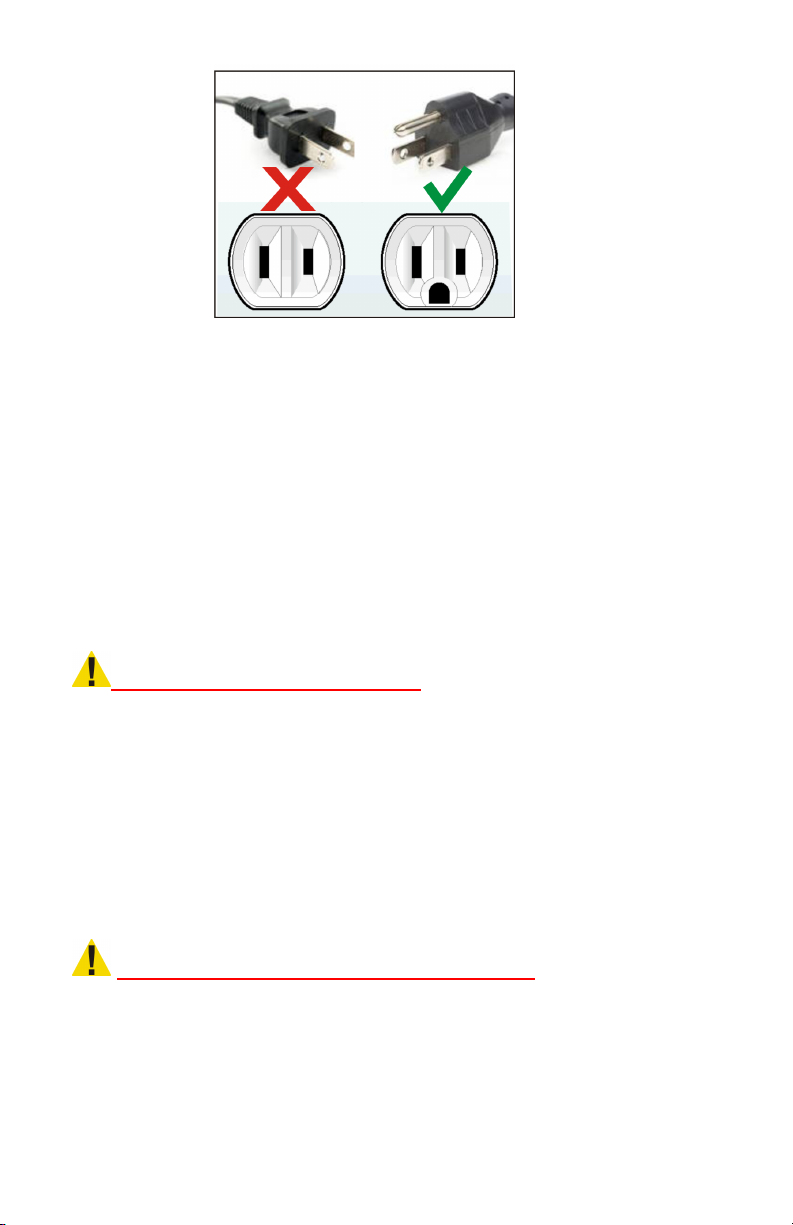
DO NOT USE THIS CHARGER ON A TWO POLE
UNGROUNDED OUTLET OR ATTEMPT TO BREAK OFF
THE GROUND PRONG FOR USE ON A RECEPTACLE OR
EXTENSION CORD NOT HAVING A GROUND.
If an extension cord must be used, make sure it is in good
condition. Use a three conductor cord no smaller than the size
being used on the charger, and keep it as short as possible. The use
of an improper extension cord could result in a risk of a fire or
electric shock. Locate all cords so that they will not be stepped on,
tripped over, or otherwise subjected to damage or stress.
OTHER SAFETY INFORMATION
Do not use charger if it shows signs of physical stress, or if DC
output leads or connector feel hot when used.
Do not disconnect the DC output clamps, or connector from the
batteries when the charger is on. The resulting arcing could cause
the batteries to explode.
Do not expose charger to rain.
BATTERY SAFETY & CARE INFORMATION
Always wear protective eye shields and clothing when working
with batteries. Batteries contain acids which can cause bodily
harm. Do not put wrenches or other metal objects across the
battery terminal or battery top. Arcing or explosion of the battery
can result. Do not wear jewelry when working around batteries.
Arcing can cause severe burns.
Page 5

The tops of the batteries and battery hold downs must be kept clean
and dry at all times to prevent excessive self discharge and flow of
current between the battery post and frame.
With wet cell batteries, maintain the proper electrolyte level by
adding water when necessary. Never allow the electrolyte level to
fall below the top of the battery plates. Electrolyte levels fall
during discharge and rise during charging. Therefore, to prevent
the overflow of electrolyte when charging, add water only after
the batteries have been fully charged, or just enough to cover
the plates if discharged. Old batteries require more frequent
additions of water than do new batteries.
Do not over discharge batteries. Excessive discharge can cause
polarity reversal of individual cells resulting in complete battery
failure. Re-charge batteries as soon as possible after a deep
discharge, but not if they are warm, allow a cooling down period.
Provide adequate ventilation when charging batteries. Chargers can
ignite flammable materials and vapors. Do not use near fuels,
grain, dust, solvents, or other flammables.
Do not charge batteries in excessively hot temperatures; wait till
the cool of the evening.
PRE CHARGE INFORMATION:
Mount the charger in the desired location. Allow space for the
charger to dissipate heat, it will get hot while in use. Do not seal
the charger in an air tight compartment. Do not cover the charger
with any material.
Make sure the AC cord, DC output leads, terminals,
connectors, or clamps are all in good working condition. Do not
use the charger if there are any signs of stress or damage, or if
wires are cut or have damaged insulation. Using this charger with
any of these symptoms could result in a fire, property damage, or
personal injury. Have a qualified service person make the
necessary repairs. Repairs should not be made by people who are
not qualified.
Page 6
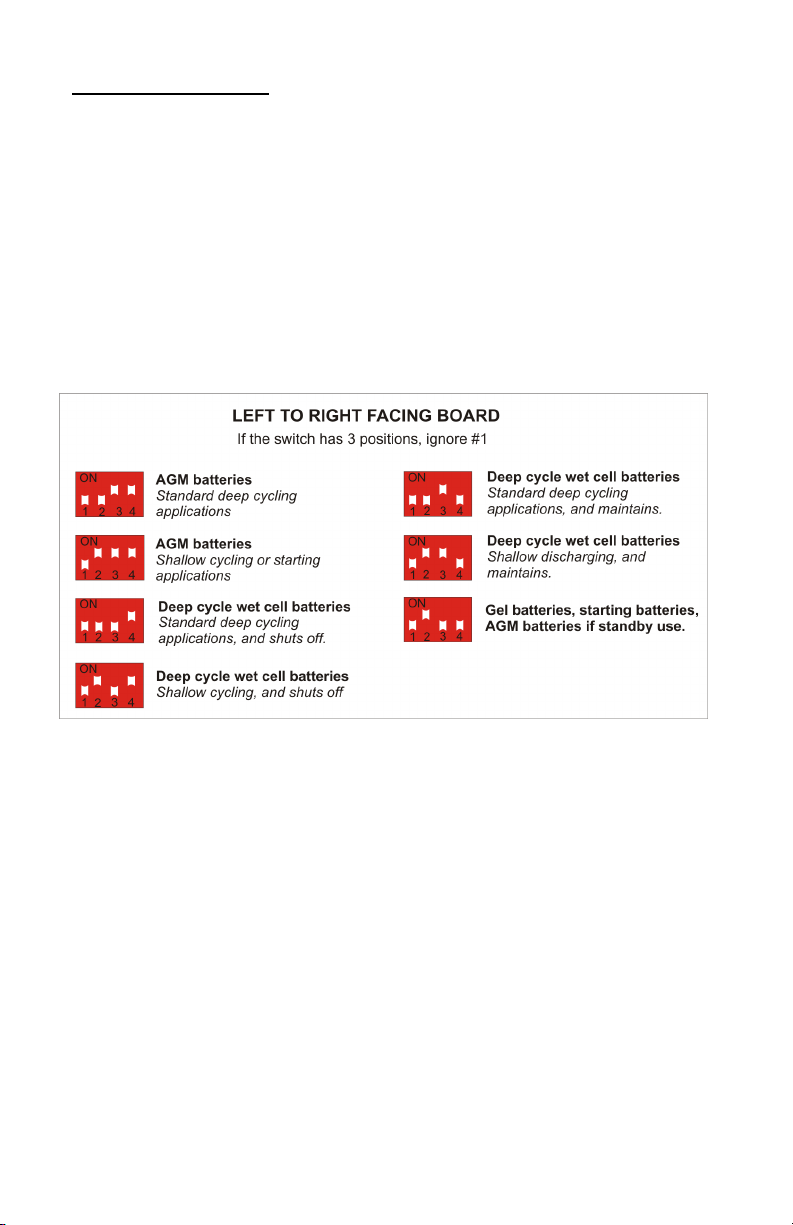
REPROGRAMMING:
Disconnect the charger from the batteries, and unplug the power
cord. Remove the sheet metal screws holding the cover on.
Select the switch configuration that most closely matches your
application. Whether choosing maintenance mode, or shut off is a
personal preference, however the maintenance mode assures
batteries will remain charged and won’t self discharge.
IMPORTANT: Use switch numbers as a guide, as some boards
may be upside down, and reversed.
NOTE: The #1 position is designated for batteries requiring long
finish rates. If your performance is poor, it could be the batteries
are being undercharged. Verify with specific gravity readings on
wet cells. US Battery, and Full River are two brands that benefit
from longer charge cycles.
Page 7

When plugged into AC
Connected reverse to
Correct polarity, or
When plugged into AC
No AC power.
Check circuit.
When I put a volt meter
The charger must be
The batteries don’t
The charger is too small
Check that the charger’s
When switched
on, the
Charger and battery
Connect the charger to a
TROUBLESHOOTING
Symptom Cause Corrective Action
power the LED flashes
red/green.
power the LED does not
come on.
across the output of the
charger there is no
power coming out when
I plug it in.
receive a full charge. On
wet cells, the specific
gravity will not rise to a
full reading after the
charge has completed.
battery, or not connected
to battery.
Break in DC cord, or
connector.
Battery too dead to
charge.
connected to a battery to
turn on.
for the battery.
The charge profile is not
set correctly.
The cycle needs more
time.
The battery is defective.
connect to battery.
Have a qualified person
make repair.
Replace.
Check extension cord
for breaks or damage.
output is about 10% of
the amp hour rating of
the battery.
Recheck the dip switch
setting. If in doubt,
contact us.
If you have a 4 position
switch, switch #1
position ON.
Replace.
LED flashes red/yellow.
voltage mismatch.
battery(s) with the same
voltage rating.
Page 8

When powered up the
LED is solid red with a
The battery is very low,
Leave connected, it may
The charger blows it’s
Charger is shorted.
Contact factory.
The charger blows the
The branch circuit is too
Relocate charger to a
Batteries use water, get
One or more dead cells.
Replace batteries. If
After a full charge, the
The batteries are
Sometimes batteries can
yellow flash.
fuse, or branch circuit
fuse/circuit breaker as
soon as it’s switched on.
and the charger is in a
slow charge phase until
the voltage rises to a safe
level before full turn on.
.
take hours, but if the
voltage rises even a little
bit, it should recover,
and turn the charger full
on. (Do not allow your
batteries to deep
discharge, it is the
number one cause of
premature battery
failure.)
branch circuit
fuse/circuit breaker a
short while after being
switched on.
hot, or smell.
batteries die quickly
small.
Dip switch not set
correctly.
sulfated.
branch circuit with a
heavier rating, or
remove other loads on
the circuit.
charging in a series
string, it is best to
replace all the batteries
rather than mix new with
old.
If shallow discharging,
check that the dip switch
is not set to standard, or
extended cycle.
be recovered. Leave the
charger on for some
hours, if the voltage falls
and the current begins to
rise, it is a good sign
they can recover under
normal charging.
Page 9

After a full charge the
LED is green with a
The batteries did not
The charger is too small
yellow flash
reach 80% charge in 12
hours, or did not reach
minimum voltage, and
the charger timed out.
for the batteries.
Batteries are beginning
to age.
Sometimes running a
second cycle will
achieve full charge, but
battery replacement, or a
larger charger may be
needed.
QUICK CHARGE MB Battery Chargers
“LIMITED WARRANTY”
Quick Charge Corporation warrants the MB line of chargers for three (3) years from the date of
purchase. After the warranty period, chargers returned to the factory for repair will be charged a
minimum rate of $25.00. Charger will be returned, freight and repair charges, C.O.D. unless other
arrangements have been made. This warranty covers all defects in manufacture and
performance, provided the unit is operated in compliance with manufacture’s operating
instructions.
For repairs to be made at the Quick Charge factory, a charger and/or component(s) should be
sent, freight prepaid to Quick Charge at:
Quick Charge Corp.
1032 S.W. 22nd St.
Oklahoma City, OK. 73109
Quick Charge, will at it’s option, repair or replace the charger or component in question. The
repaired item will then be returned, freight prepaid by Quick Charge. This warranty is void if the
charger or component have been altered, changed, or repaired by anyone not authorized by
Quick Charge, or if the charger or component, have been subjected to misuse, negligence, or
harsh environmental conditions. (Except those chargers designed for such conditions)
If returning the charger to the factory is not practical, replacement parts may be shipped to the
customer for field repair at no charge. On parts such as circuit boards, the customer will be
required to return the board suspected to be defective to Quick Charge, freight prepaid. If such
defective parts are not returned, the customer will be invoiced for the repair parts. Field repairs
are made at the user’s own risk. “Authorization” by Quick Charge to repair refers to maintaining
the warranty only. Quick Charge assumes no responsibility or liability for field servicing, and shall
not be responsible for incurred travel or labor charges.
Quick Charge corporation shall not in any event be liable for the cost of any special, indirect or
consequential damages to anyone, product or thing. This warranty is in lieu of all other warranties
expressed or implied. Quick Charge neither assumes nor authorizes any representative or other
person to assume for us any liability in connection with the sale of this product.
 Loading...