

Page 1

Usermanual QU3
REV 12072001\01
Page 2

2
© Urban Mobility Europe
This manual or parts thereof may not be reproduced, stored in a retrieval system, or transmitted, in any form or by any means,
electronic, mechanical, photocopying, recording, nor otherwise, without the prior written permission of Urban Mobility Europe.
This manual could contain technical inaccuracies or typographical errors.
Urban Mobility Europe reserves the right to revise this manual from time to time in the contents thereof without the obligation
of Urban Mobility Europe to notify any person of such revision or change. Details and values given in this manual are average
values and have been compiled with care. They are not binding, however, and Urban Mobility Europe disclaims any liability for
damage or detriments suffered as a result of reliance on the information given herein or the use of vehicles, processes or equipment to which this manual refers. no warranty is made that the use of the information or of the vehicles, processes or equipment
to which this manual refers will not infridge any third party’s patents or rights. The information given does not release the user
from making their own experiments and tests.
Page 3

3
Table of contents
1 About this manual.........................................................................................................5
1.1 How to work with the manual .......................................................................................... 5
1.2 Warranty ......................................................................................................................... 5
2 Safety.............................................................................................................................7
2.1 Intended use ................................................................................................................... 7
2.2 Not intended use ............................................................................................................ 7
2.3 Liability ............................................................................................................................ 7
2.4 Safety precautions .......................................................................................................... 7
2.4.1 General.................................................................................................................7
2.4.2 Clothing................................................................................................................7
2.4.3 Driving..................................................................................................................8
2.5 CE certification ............................................................................................................... 8
2.6 Safety symbols on the vehicle ........................................................................................ 8
2.7 Safety symbols in the manual ......................................................................................... 9
2.8 Disposal of the vehicle .................................................................................................... 9
3 Installation...................................................................................................................11
3.1 Content ......................................................................................................................... 11
3.2 Make the vehicle ready for use ..................................................................................... 12
3.2.1 Charge the battery for the first time....................................................................12
3.2.2 Installation of the handle bar..............................................................................12
3.2.3 Installation of the mirror......................................................................................13
3.2.4 Installation of the mirror......................................................................................13
3.2.5 Place the saddle.................................................................................................13
3.2.6 Remove the saddle ............................................................................................14
3.2.7 Place the number plate on the vehicle...............................................................14
3.2.8 Place the number plate on the vehicle...............................................................14
3.2.9 Place the number plate on the vehicle...............................................................15
3.2.10 Place the luggage holder(option) .......................................................................15
3.2.11 Tyre pressure.....................................................................................................15
3.2.12 Dispose of the packaging material.....................................................................16
3.3 Charge the battery ........................................................................................................ 17
3.3.1 Safety.................................................................................................................17
3.3.2 To charge the battery..........................................................................................17
4 Operator manual.........................................................................................................21
4.1 Description .................................................................................................................... 21
4.1.1 Overview of the vehicle......................................................................................21
4.1.2 Overview of the dashboard. ...............................................................................22
4.1.3 Type plate: details...............................................................................................23
4.2 Driving the vehicle ........................................................................................................ 23
Page 4

4
4.2.1 Safety.................................................................................................................23
4.2.2 Checks before use. ............................................................................................23
4.3 Step up the vehicle ....................................................................................................... 24
4.4 Cornering ...................................................................................................................... 25
4.4.1 Left corner..........................................................................................................25
4.4.2 Right corner........................................................................................................26
4.4.3 Sharp corners.....................................................................................................26
4.5 To brake with the vehicle .............................................................................................. 27
4.6 To park the vehicle ....................................................................................................... 28
4.7 Cruise control ............................................................................................................... 29
4.7.1 To use the cruise control ....................................................................................29
4.8 Switch from km/h to M/h ............................................................................................... 30
5 Maintenance................................................................................................................31
5.1 Cleaning ....................................................................................................................... 31
5.2 Maintenance ................................................................................................................. 31
5.2.1 Rearbrake...........................................................................................................31
5.2.2 Frontbrake..........................................................................................................32
5.2.3 Adjust the handle bar levers...............................................................................32
6 Troubleshooting..........................................................................................................33
6.1 General troubleshooting procedure .............................................................................. 33
6.2 Contact service ............................................................................................................. 33
6.3 Troubleshooting guide .................................................................................................. 33
7 Technical data.............................................................................................................35
7.1 General specifications .................................................................................................. 35
Page 5

5
About this manual
1 About this manual
The manual shows the information necessary to:
-install
- operate
- perform basic maintenance
- correct small problems
The Qugo and all its versions are referred to in the manual as the ’vehicle’. This manual
describes both types A (25 km/h) and type B (33 km/h) of the vehicle.
This manual contains the original instructions. The original language of the manual is
English.
1.1 How to work with the manual
1. Familiarize yourself with the structure and content.
2. Read the safety chapter in detail and make sure you understand all the
instructions. See
§ 2.
3. Carry out the actions completely and in the given sequence.
1.2 Warranty
Nog aan te leveren text
Page 6

6
About this manual
Page 7

7
Safety
2 Safety
2.1 Intended use
The vehicle is designed to transport a single person. Any other use of the vehicle is strictly
forbidden.
2.2 Not intended use
Do not use the vehicle for mountain riding, speed riding, downhill riding and stunt riding.
2.3 Liability
Urban Mobility Europe is not liable is you do not follow the rules below:
- Do not use a damaged vehicle. When you have doubts, contact your supplier or the
service department of Urban Mobility Europe See www.Qugo.nl.
- Install and connect the vehicle according to the instructions in this manual.
- Observe all local safety regulations.
- Obey the local regulations concerning traffic laws and personal protection equipment..
- Connect the vehicle to an earthed wall socket.
- Keep the vehicle in good condition. Make sure that defective parts are immediately
replaced.
- Replace parts only with original Urban Mobility Europe spare parts.
All maintenance beyond the scope of this manual must be carried out by a local Qugo dealer
that Urban Mobility Europe has trained and certified.
2.4 Safety precautions
2.4.1 General
- Practice in a safe area before you use the vehicle in traffic.
- Make sure that you know the structure and the contents of the manual.
- Do the procedures of the manual fully and in the given sequence.
- Keep body parts away from the spinning wheels.
- Guarantee will void when the procedures in the manual are not done fully.
2.4.2 Clothing
- Wear a helmet when you use the vehicle.
- Keep clothing away from the spinning wheels.
- Wear proper shoes when you use the vehicle.
WARNING
Read the manual before you install or use the vehicle. Failure to do so can result
in personal injury, death or property damage.
Page 8

8
Safety
- Wear visible clothing when you use the vehicle
- Do not wear loose clothes that can come into moving parts.
2.4.3 Driving
- Drive carefully when the road is wet.
- Drive carefully when the road is covered with loose dirt or gravel.
- Do the procedures of the manual fully and in the given sequence.
2.5 CE certification
The vehicle is CE certified and approved according to european regulations (R WE 2002/24/
EC. It means that the vehicle complies with the essential requirements concerning safety.
The directives that have been taken into consideration in the design are available on
www.Qugo.nl
2.6 Safety symbols on the vehicle
/i
www.qugo.nl
Refer to the manual before use
High Voltage
www.qugo.nl
Page 9

Safety
9
2.7 Safety symbols in the manual
/i
2.8 Disposal of the vehicle
1. Sort the vehicle, the accessories and the
packaging for environmentally friendly recycling.
2. Do not dispose of the vehicle into domestic waste.
Dispose of the vehicle according to local
regulations.
WARNING
Can cause personal injury.
Note
Shows further information.
CAUTION
Can cause damage to the
vehicle
.
Page 10

10
Safety
Page 11

Installation
11
3 Installation
3.1 Content
A: Qugo
B: Quick reference guide
C: Battery charger
D: Saddle
E: Number plate holder
F: Mirror (Left or right)
G: Luggage holder
www.qugo.nl
Optional
A
E
D
B
C
F
G
Page 12

12
Installation
3.2 Make the vehicle ready for use
3.2.1 Charge the battery for the first time
1. Connect the battery charger (A) to charging point
(B). See § 3.3.2.
2. Charge the battery for 24 hours.
3.2.2 Installation of the handle bar
1. Lift up the handle bar (A).
2. Tighten the levers (B) of the handle bar.
24hr
A
B
CAUTION
Avoid contact with water when you
charge the vehicle
.
B
A
WARNING
Make sure the levers are fixed tight on to
the vehicle
.
Page 13
Installation
13
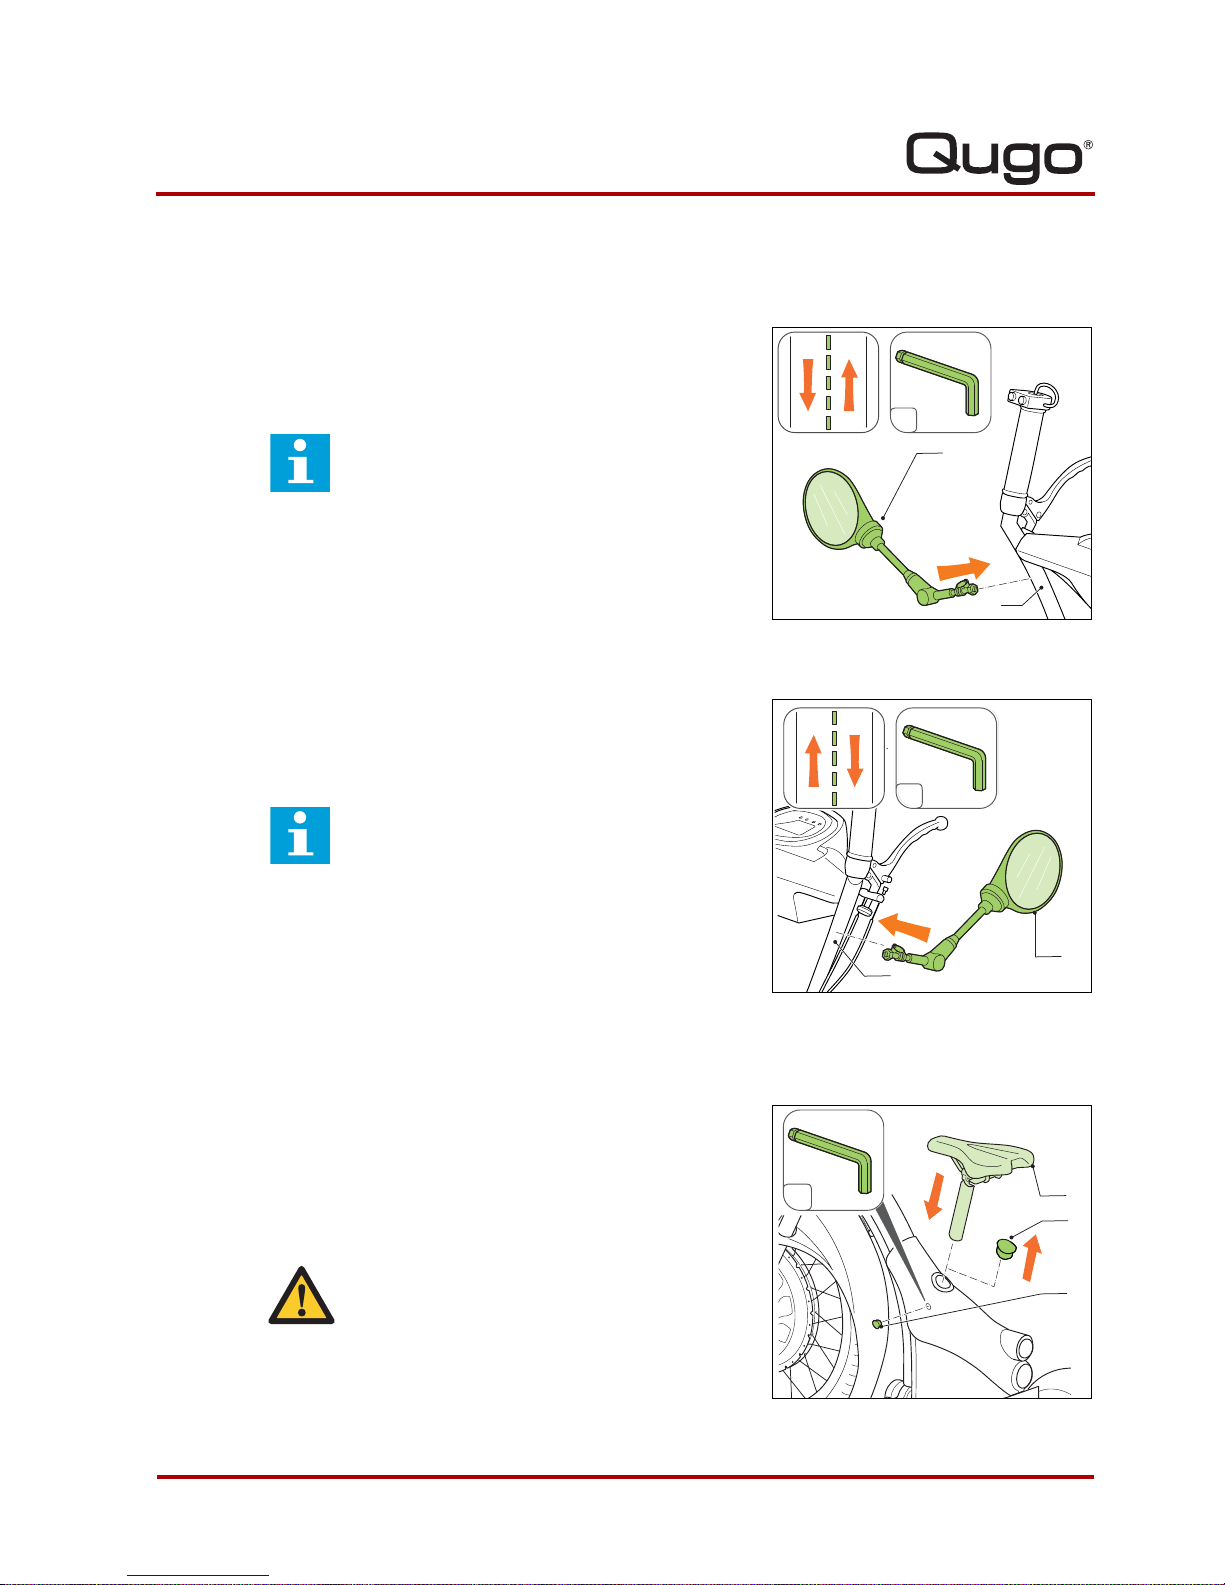
3.2.3 Installation of the mirror
1. Place the mirror (A) with a clamp ring on the left
hand side of the handle bar (B) and fix it with a
bolt.
3.2.4 Installation of the mirror
1. Place the mirror (A) with a clamp ring on the right
hand side of the handle bar (B) and fix it with a
bolt.
3.2.5 Place the saddle
1. Remove cap (B).
2. Place the saddle (A).
3. Remove cap (C).
4. Tighten the saddle adjustment with an allen key.
5. Place back cap (C).
4
B
A
Note
For countries driving at the right hand side
of the road
4
A
B
Note
For countries driving at the left hand side of
the road
4
4
B
C
A
WARNING
Make sure the saddle if fixed firmly on to
the vehicle.
Page 14

14
Installation
3.2.6 Remove the saddle
1. Remove cap (C).
2. Loosen the saddle adjustment with an allen key.
3. Remove saddle (A).
4. Place the cap (B).
5. Place back cap (C).
3.2.7 Place the number plate on the vehicle
1. Clean the spot where you want to fo place the
nuber plate holder with alcohol.
2. Remove the protection foil (A) from the the double
sided tape.
3. Fix the number plate holder (B) onto the left hand
side fender.
4. Fix the number plate (C) with the screws onto the
number plate holder.
3.2.8 Place the number plate on the vehicle
1. Clean the spot where you want to fo place the
nuber plate holder with alcohol.
2. Remove the protection foil (A) from the the double
sided tape.
3. Fix the number plate holder (B) onto the left hand
side fender.
4. Fix the number plate (C) with the screws onto the
number plate holder.
B
C
A
4
C
B
A
Note
For countries driving at the right hand side
of the road
C
B
A
Note
For countries driving at the left hand side of
the road
Page 15

15
Installation
3.2.9 Place the number plate on the vehicle
1. PLace the number plate (A) at the back of the
vehicle with screws (B).
3.2.10 Place the luggage holder(option)
1. Fix the luggage holder (A) onto the handle bar with
screw (B).
3.2.11 Tyre pressure
1. Make sure the tyre pressure ot the tyres is correct.
B
A
3
B
A
WARNING
maximum load weight is 5 Kg.
015
bar
3,5 bar
50 psi
015
bar
2,5 bar
36 psi
CAUTION
Check the tyre pressure of the rear
tyre on a regular basis.
Page 16

16
Installation
3.2.12 Dispose of the packaging material
1. Dispose of the packaging material in an
environmentally friendly way, according to local
regulations.
CAUTION
Do not exceed the tyre pressure given
in the drawing.
Page 17

17
Installation
3.3 Charge the battery
3.3.1 Safety
- Keep your battery charged.
- Do not drop the battery.
- Do not short circuit the battery.
- Charge the battery in a dry and open well ventilated aera.
- Charge the battery at least once a month.
- Only adults must charge the battery
- Do not expose the battery to heat or direct sunlight.
3.3.2 To charge the battery
To charge
1. Turn the parking brake (A) up.
2. Make sure the brake (B) is in.
3. Remove key (A) from contact (B).
B A
B
A
Page 18

18
Installation
4. Connect the battery charger (A) to the charging
point (B) of the vehicle.
5. Connect the battery charger (B) to the wall socket
(A).
6. Stop charge the battery if the indicator indicates
the battery is full.
A
B
Note
First connect the battery charger to
the vehicle.
A
B
Note
Make sure your battery is always
charged
.
Page 19

19
Installation
7. Disconnect the battery charger from the vehicle
8. Disconnect the battery charger from the wall
socket
9. Place back the plug (A) in to the charge point (B)
of the vehicle.
A
B
CAUTION
The caps prevent corrosion on the
charge point.
Page 20

20
Installation
Page 21
Operator manual
21
4 Operator manual
4.1 Description
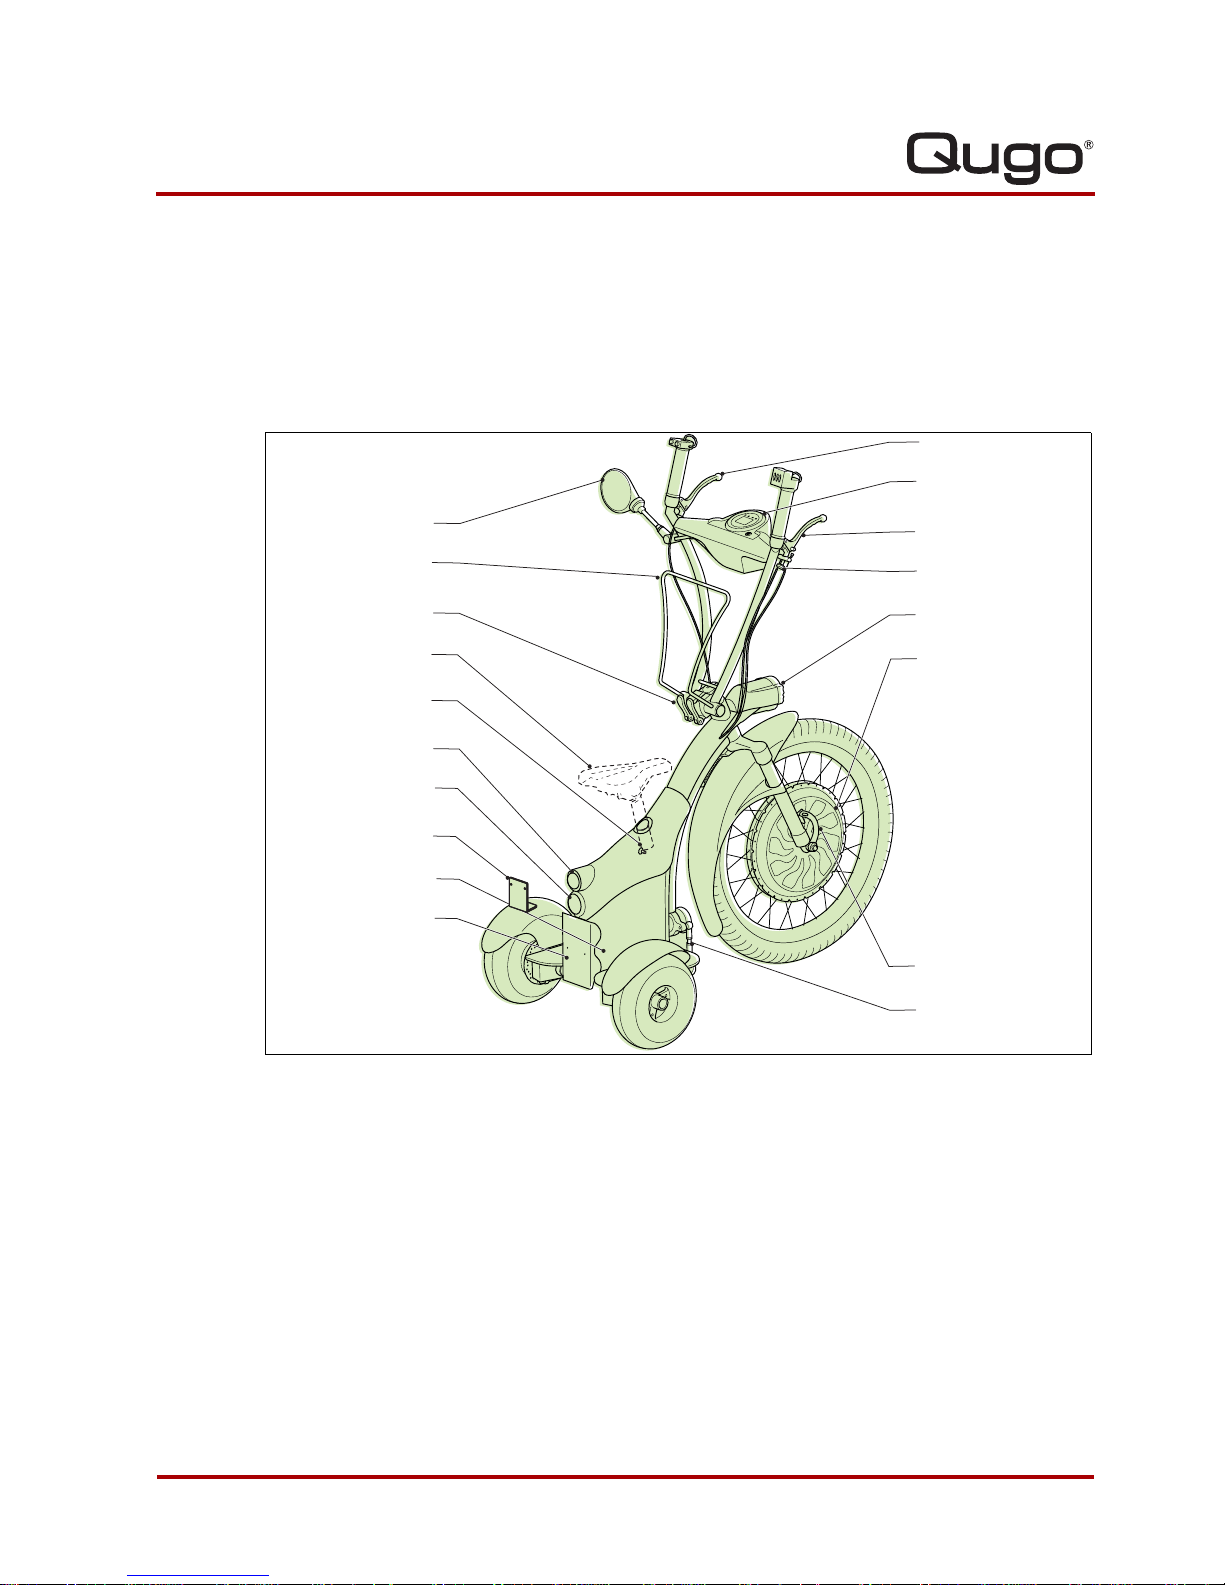
4.1.1 Overview of the vehicle
A: Mirror (Left or right)
B: Luggage holder (Option)
C: Handle bar levers
D: Saddle
E: Chargepoint
F: Rear light
G: Reflector
H: Number plate holder
I: Batteryholder
J: Number plate holder
K: Front brake
L: Dashboard
M: Rear brake
N: Parking brake
O: Headlight
P: Motor
Q: Torque reaction arm
R: Rotation coupling device
P
O
L
K
N
M
G
F
J
I
B
A
E
C
D
H
R
Q
Page 22

22
Operator manual
4.1.2 Overview of the dashboard.
A: Cruise control (Switch from Km/h to M/h)
B: Horn
C: Left indicator (not connected)
D: Light indicator
E: ON indicator
F: Right indicator (not connected)
G: Contactswitch
H: Light switch
I: Throttle control
J: Front brake
K: Rear brake
Stop
Stop
Go
DCBA
HGFE
J
I
K
Page 23

23
Operator manual
4.1.3 Type plate: details
A Compagny name
B Ce Markking
C VIN (Vehicle Industrial name)
D Sationary sound level
4.2 Driving the vehicle
4.2.1 Safety
- Obey the local regulations concerning traffic
laws and personal protection equipment.
- Do not ride trough heavy rain.
- Do not ride trough deep puddles.
- Do not ride on steep hills
- Do not lift the vehicle at the front end.
4.2.2 Checks before use.
- Make sure that the battery is charged
completely
- Make sure the saddle adjusting mechanism is
thightened.
- Make sure you do a check on the vehicle on
mechanical or electrical parts.
B
A
C
D
Note
At the bottom of the frame the chassisnumer is
found.
Page 24

24
Operator manual
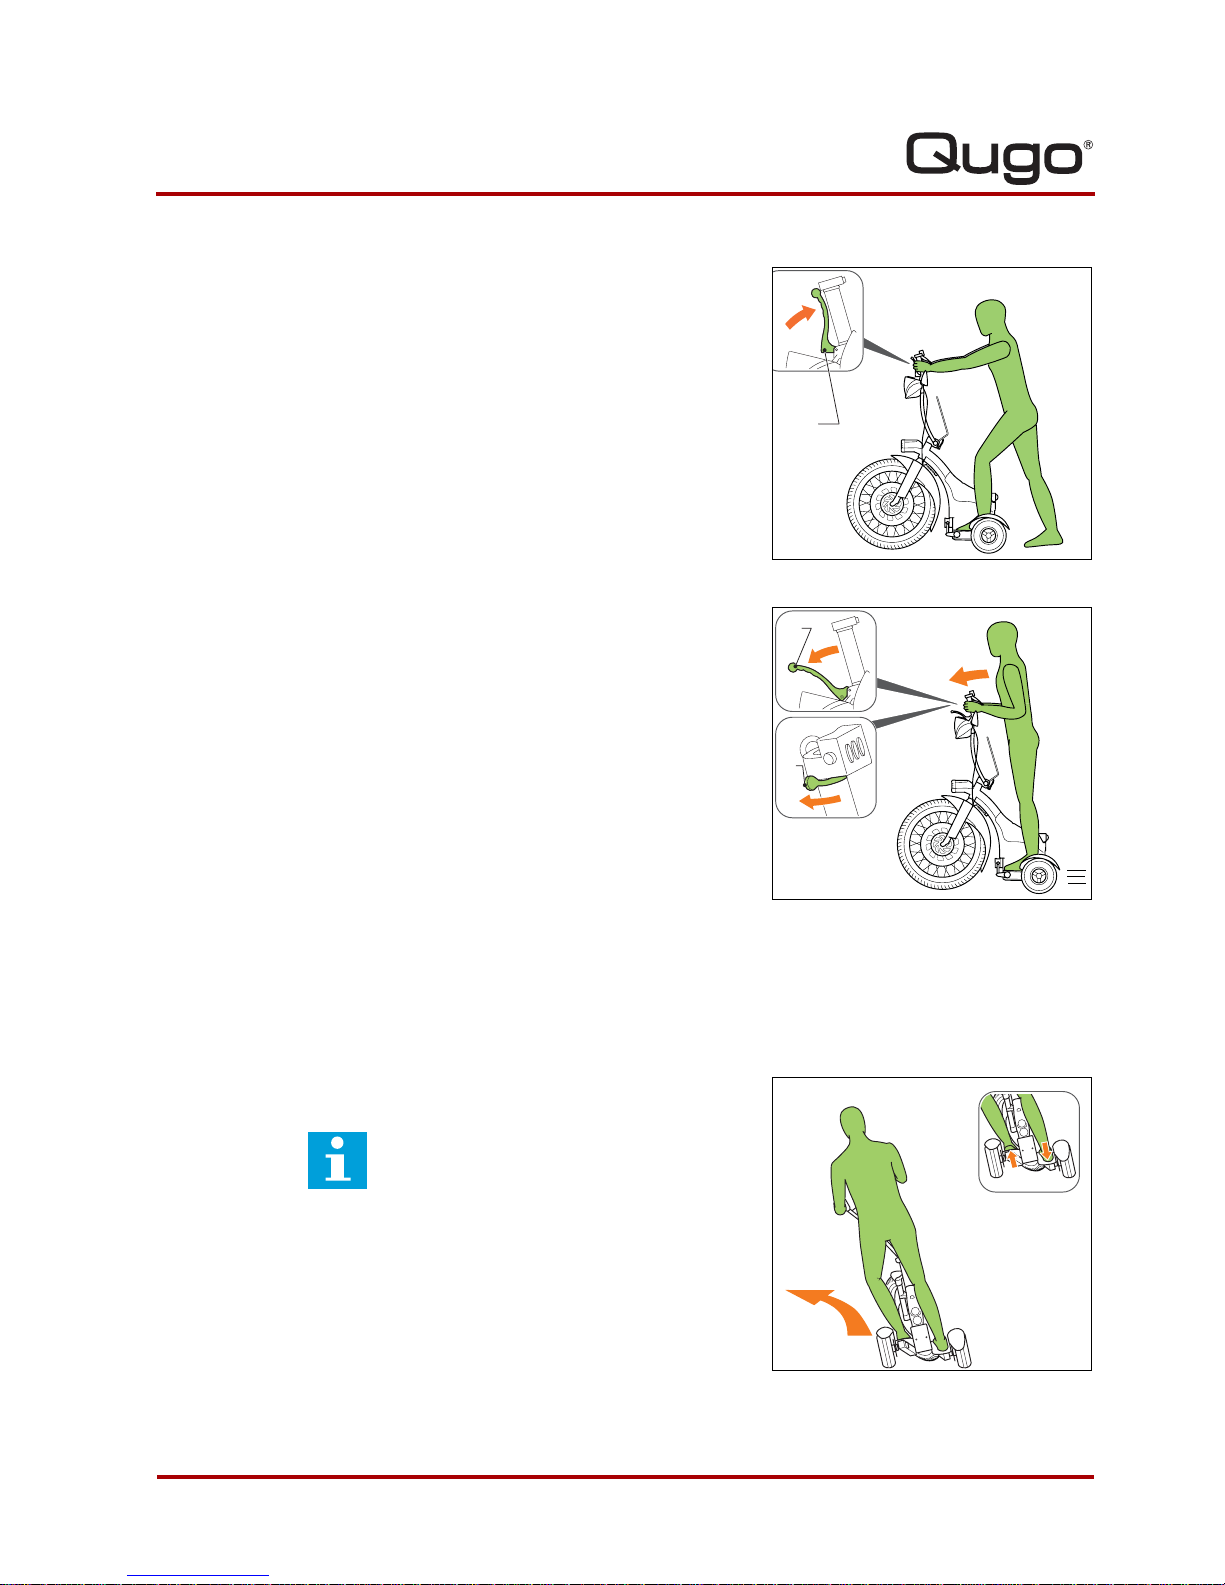
4.3 Step up the vehicle
1. Make sure the tyre pressure is ok
2. Turn the parking brake (A) down.
3. Make sure the front and rear brake (B) is out.
4. Put the key (A) into the contact (B).
015
bar
3,5 bar
50 psi
015
bar
2,5 bar
36 psi
CAUTION
Check the tyre pressure of the rear
ttyres on a regular basis.
B
A
CAUTION
Do not drive with the parking brake. it
causes damage to your vehicle.
B
A
Page 25
Operator manual
25
5. Pull the handle bar (A) and step up the vehicle.
6. Release the brakes (A)
7. Lean slighly towards the handle bar.
8. Push the lever (B) forward to accelerate.
4.4 Cornering
4.4.1 Left corner
1. Push your right heel down to make a left corner.
A
B
A
Note
Stretch the right leg ease the inner
foot and bend left knee
Page 26

26
Operator manual
4.4.2 Right corner
1. Push your left heel down to make a right corner.
4.4.3 Sharp corners
1. Make sure that the lowest point of the vehicle do not touch the
road when you make a sharp corner.
Note
Stretch the lef t leg ease the inner foot
and bend right knee
Page 27

27
Operator manual
4.5 To brake with the vehicle
1. Release the Throttle control (A).
2. Control the brake(B) with care.
3. Make sure that you control the brakes too firmly to
prevent the vehicle to tip over.
B
A
Note
Use both brake for adequate stopping
power
WARNING
Avoid to brake hard and sudden.
Page 28
28
Operator manual
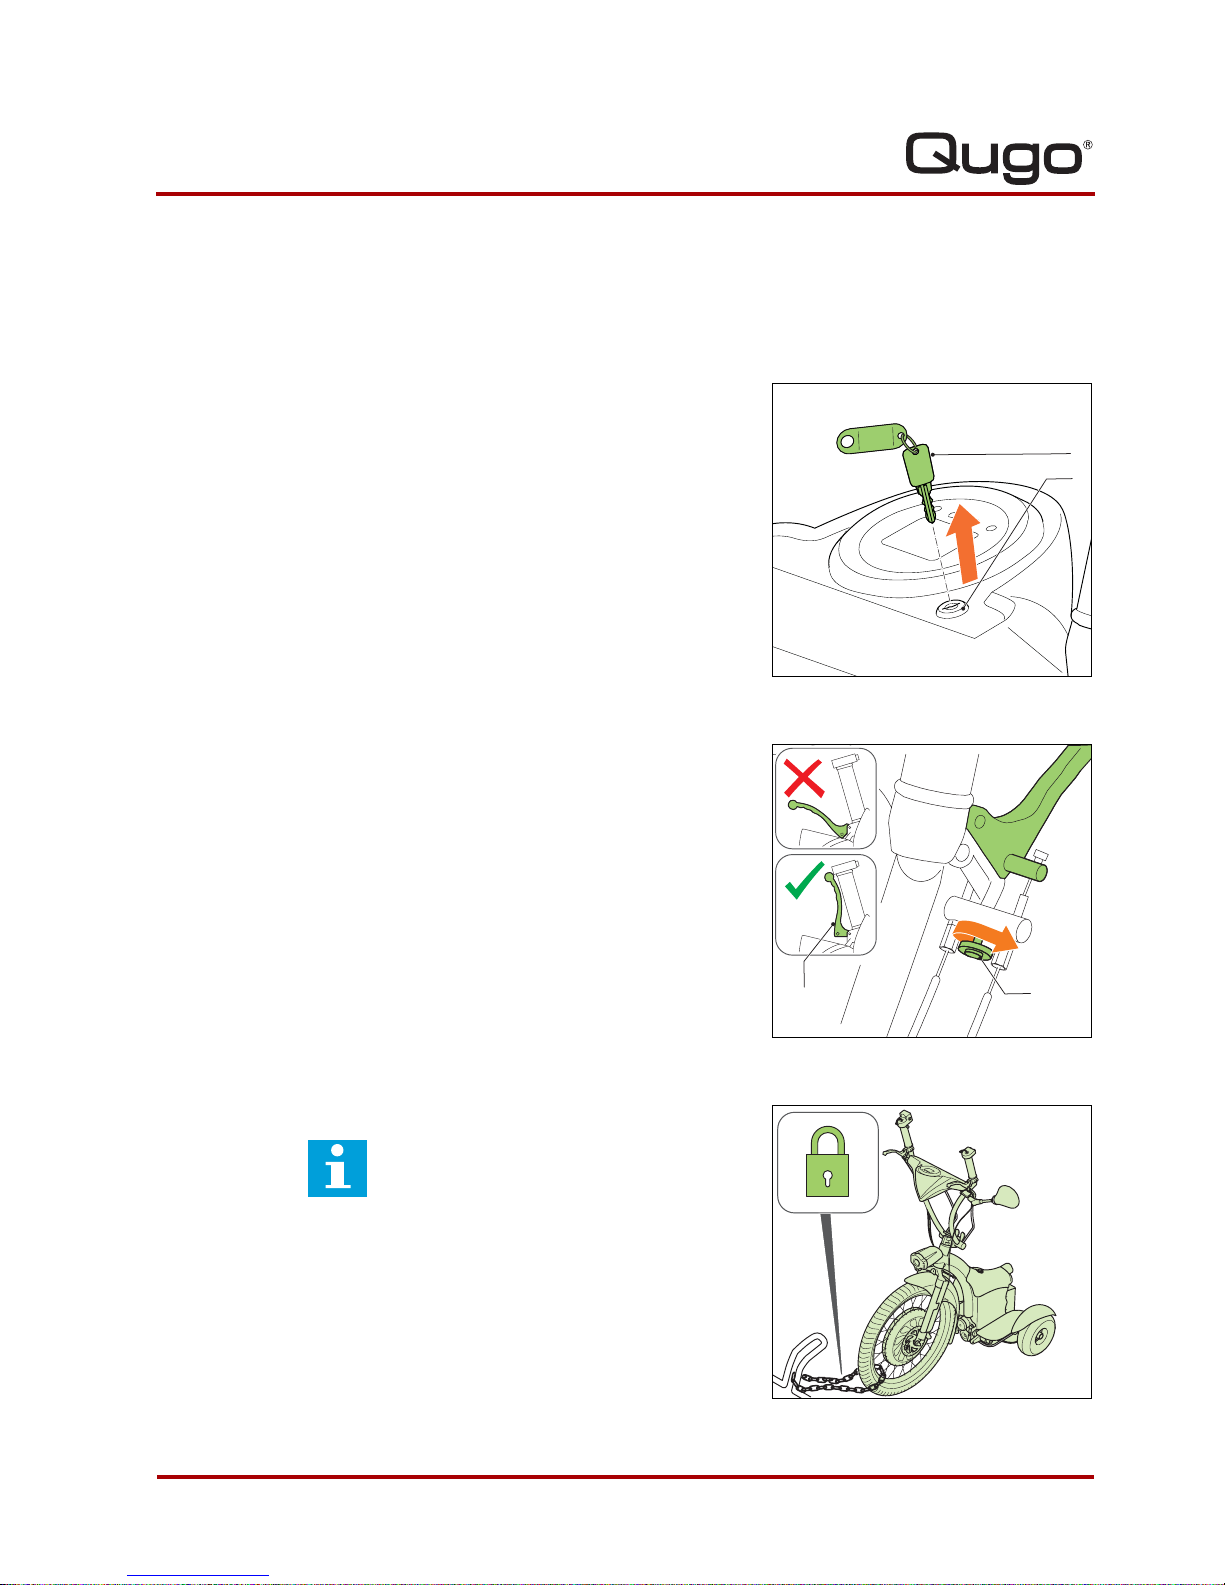
4.6 To park the vehicle
1. Remove key (A) from contact (B).
2. Turn the parking brake (A) up.
3. Make sure the brake (B) is in.
4. Fix the vehicle to a fixed poin with a chainlock.
B
A
B A
Note
Place the chain so, that the chainlock
can not damage the vehicle
.
Page 29

29
Operator manual
5. Place Cap (A), (B) and (C).
4.7 Cruise control
4.7.1 To use the cruise control
1. Push the cruise control button (A) to activate the
cruise control.
2. Push the cruise control button (A) again to de
activate the cruise control
B
C
A
Note
The caps prevent the water enters the
frame
.
CAUTION
Water causes serious damage to the
electrical system of the vehicle
.
A
Note
The Cruise control is de-activated
automatically when you activate the brake.
Page 30
30
Operator manual
4.8 Switch from km/h to M/h
1. Keep the cruise control button for 10 sec to switch
from Kilometers to Miles.
A
Page 31

Maintenance
31
5 Maintenance
5.1 Cleaning
1. Clean the vehicle with a sponge and luke warm
water.
5.2 Maintenance
5.2.1 Rearbrake
1. Loosen lock nut (B).
2. Turn knob (A) tighter to adjust te brake.
3. Tighten locknut (B).
CAUTION
Do not use a high pressure hose .
CAUTION
Avoid that water comes into contact
with the electical system trough
openings in the frame . Water causes
serious damage to the electrical
system of the vehicle.
A
B
Page 32

Maintenance
32
5.2.2 Frontbrake
1. Loosen lock nut (B).
2. Turn knob (A) tighter to adjust te brake.
3. Tighten locknut (B).
5.2.3 Adjust the handle bar levers
1. Tip over lever (A) and lever (B).
2. Turn the lever clockwise or anticlockwise to adjust
the lever.
3. Move back lever ( and lever (B)
4. Start with step 1 if the lever (A) or( B) can not move
completely to the handle bar or when the handle
bar is not firmly tightened.
A
B
A
B
Note
Do not screw in the lever (A) or (B) too far
in.
Page 33

Troubleshooting
33
6 Troubleshooting
6.1 General troubleshooting procedure
1. Try to solve the problem with the information in this manual.
See § 6.3.
2. If it is not possible to solve the problem with the information in
this manual, contact service. See § 6.2.
6.2 Contact service
1. Contact your supplier or manufacturer. See www.qugo.nl
6.3 Troubleshooting guide
Problem Possible cause Possible solution
Battery level indicator
indicates one block
vehicle is used too long Recharge the battery
battery is not charged fuly Contact service. See § 6.2.
Overload protection Turn of the power with the contact
key.
vehicle does not drive
smoothly
Battery level too low Charge your battery
Rear brake does not
function properly
Brake adjustment not
correct.
See § 5.2.1
Front brake does not
function properly
Brake adjustment not
correct
See § 5.2.2
Handle bar too loose handle bar levers
adjustment not correct
See § 5.2.3
Front light is broken Contact your local dealer
Rear light is broken Contact your local dealer
Page 34

34
Troubleshooting
Page 35

Technical data
35
7 Technical data
7.1 General specifications
/i
Parameter Specification
Maximum load weight [kg] 40
Dimensions, height x width x depth [cm] 108x86x75
Packed dimensions, height x width x depth
[cm]
126x97x80
Net mass [kg] 171
Packed mass [kg] 200.5
Temperature [°C] +5 to +40
Altitude above sea level [m], out of
operation
-10 to 12000
Page 36

Technical data
36
 Loading...