

Page 1
Getting
Started
Guide
Page 2
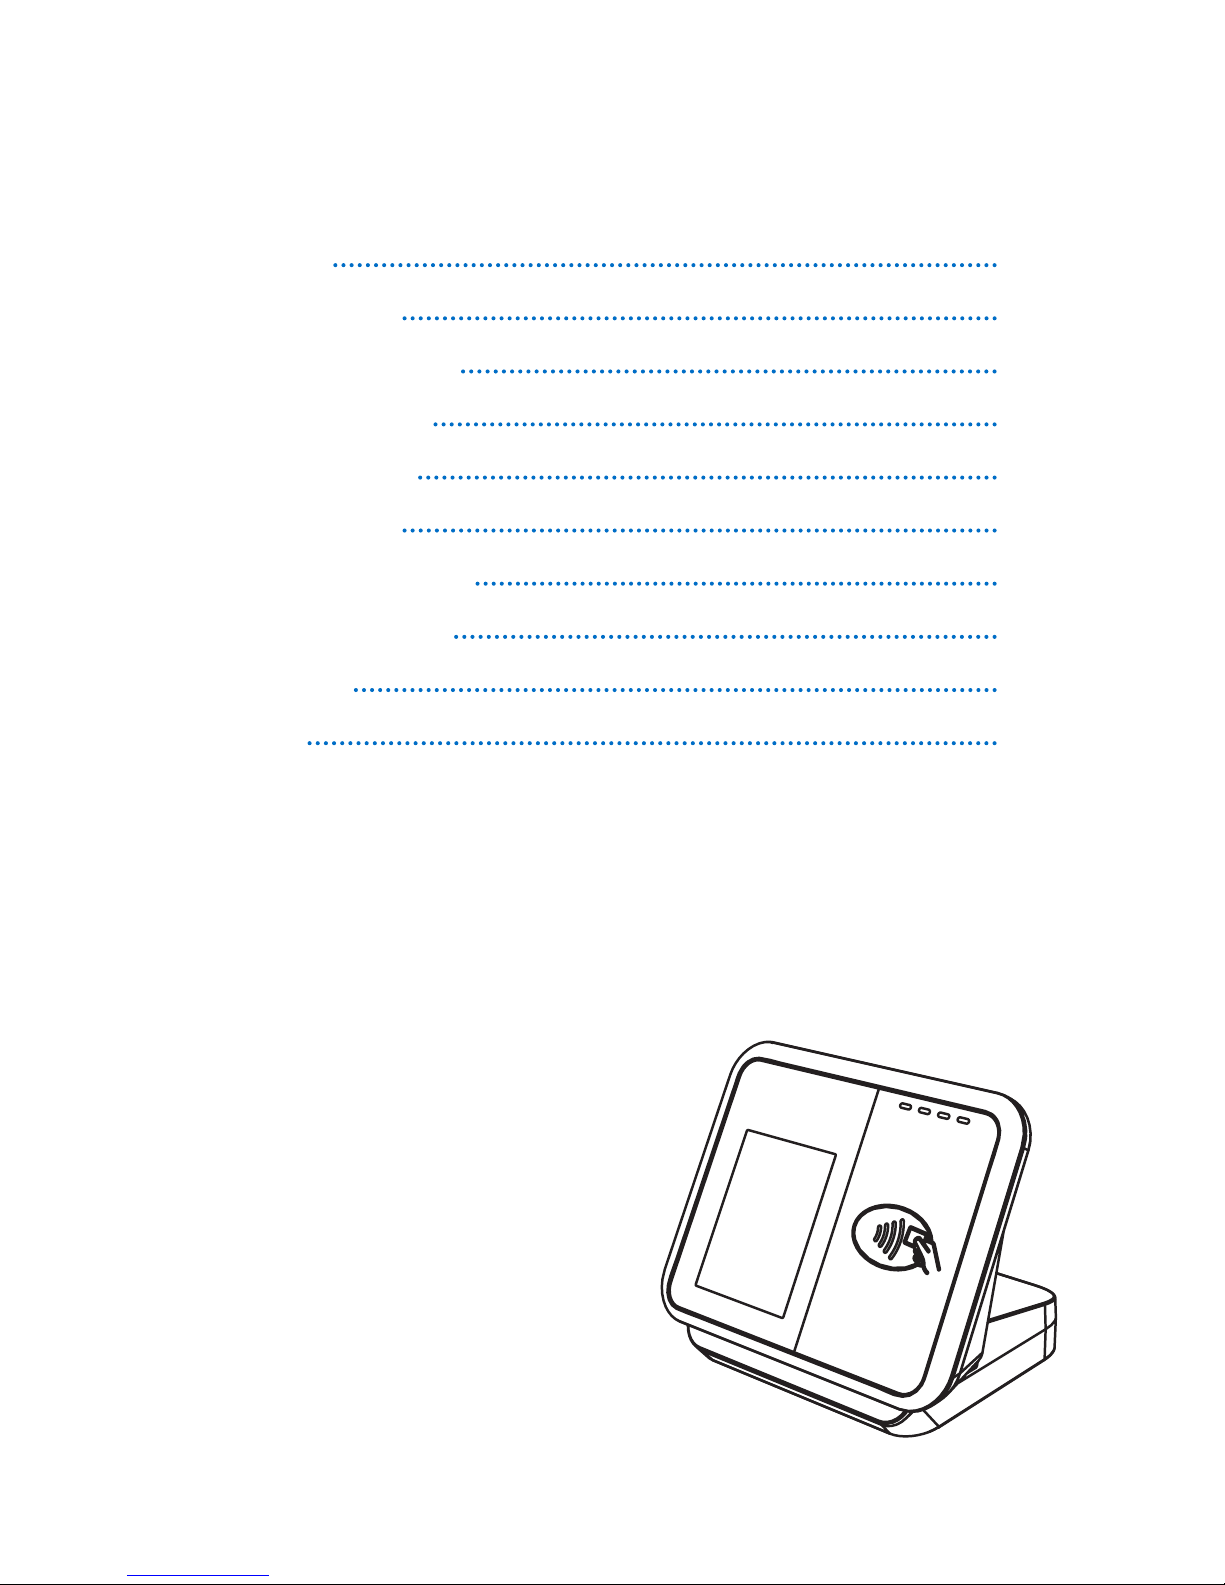
Donation Point Tap is an aordable contactless
counter-top device that enables charities to
quickly accept low value card donations.
Compact and cost-eective, Donation Point
Tap is portable and small in footprint. The
pre-set donation amount can be changed at
any time through the online Quest Cloud
EFTPOS website.
Donation Point Tap processes a ‘set’
donation amount such as $2. Donors
simply tap their card to make a
donation. Donation Point Tap can be
placed on your counter or in store
with your charity partners such as
supermarkets or cafés and is the
perfect way to accept ‘spur of the
moment’ donations at charity
events.
Contents
Overview
Overview 2
Items in the box 3
Setting up the Device 4
Making a Donation 5
Online Reporting 6
Caring for your Device 9
Lost or Stolen Device 9
Troubleshooting 7
Accessories 10
Returns 10
2
Page 3
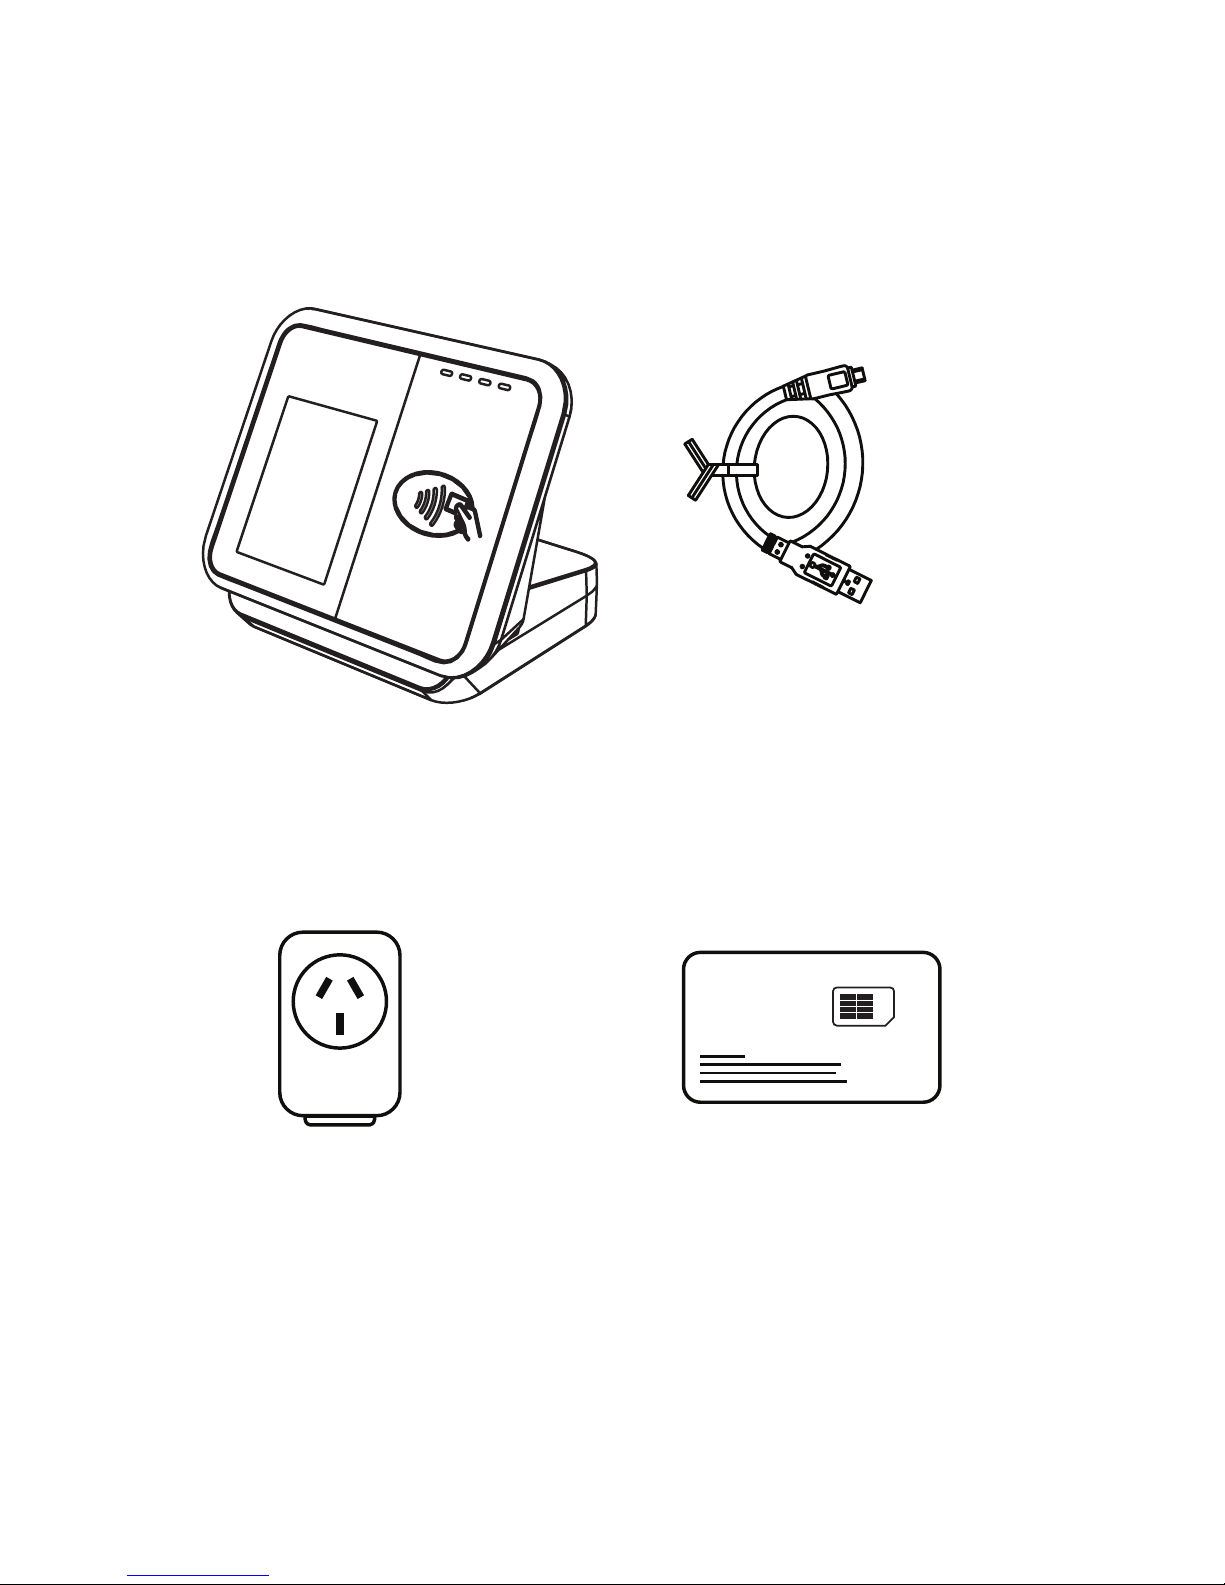
Donation Point Tap MicroUSB Cable
Power Adapter SIM card (size: micro)
(not always included)
(may be pre-installed in Donation Point device)
(5V 2A)
SIM
items in the box!
3
Page 4
16/02/2017 11:31AM
16/02/2017 11:31AM
16/02/2017 11:31AM
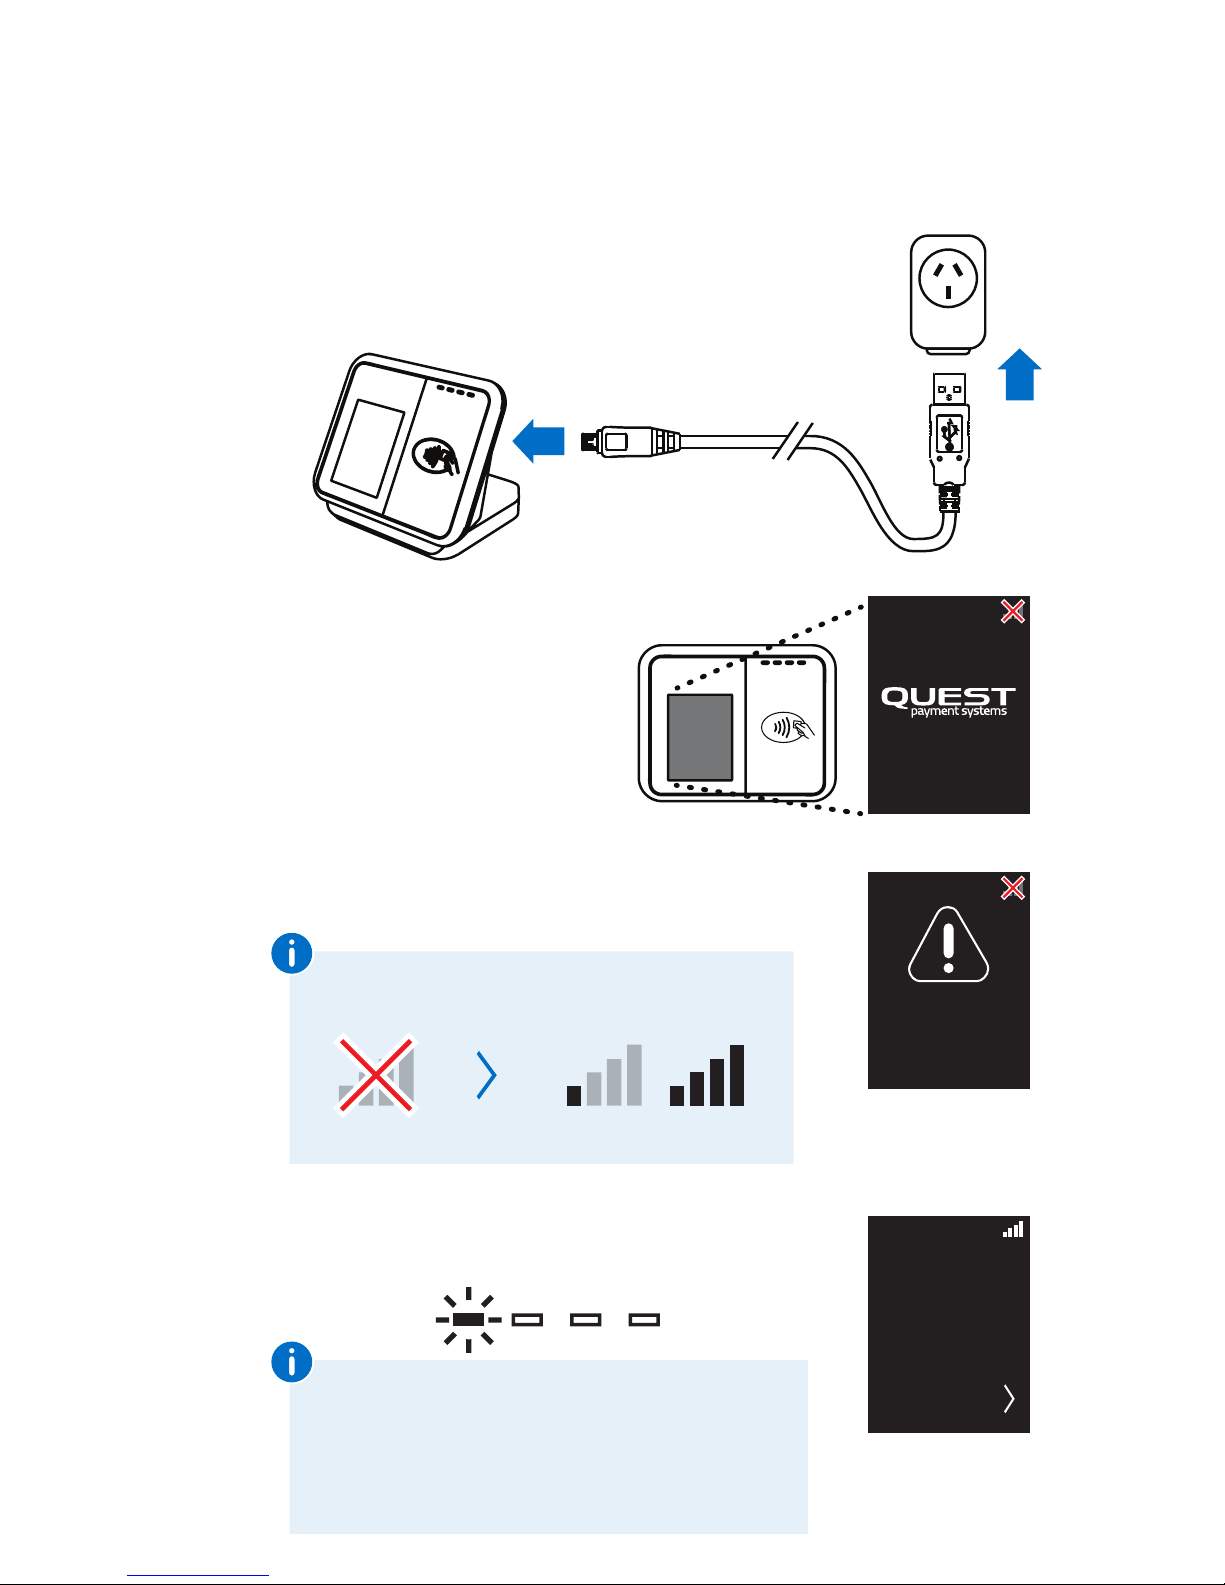
When power is applied, the
device will automatically turn
on. The following image will be
displayed.
Whilst the device is logging onto the 3G network
it will display the following image.
Logging onto to the 3G network may take between
30 seconds, to 1 minute.
The device is ready to accept donations when the
Home screen is displayed and the first green light
is flashing.
No 3G
connection
Weak 3G
connection
Good 3G
connection
2.
3.
4.
QUESTPS.COM.AU
Donation
Unavailable
TAP CARD
$
2
You can display your charity’s logo on the device.
This logo will be displayed after the home screen
and cycle through with the other prompts.
You can alter the fixed donation amount on the
online portal.
Home screen
4
Contactless
lights
Connect the microUSB end of the cable to the
Donation Point device. Plug the larger end of the cable
into the Power adapter. Connect the Power adapter to
a power source, and turn on.
Setting up the Device
1.
Page 5
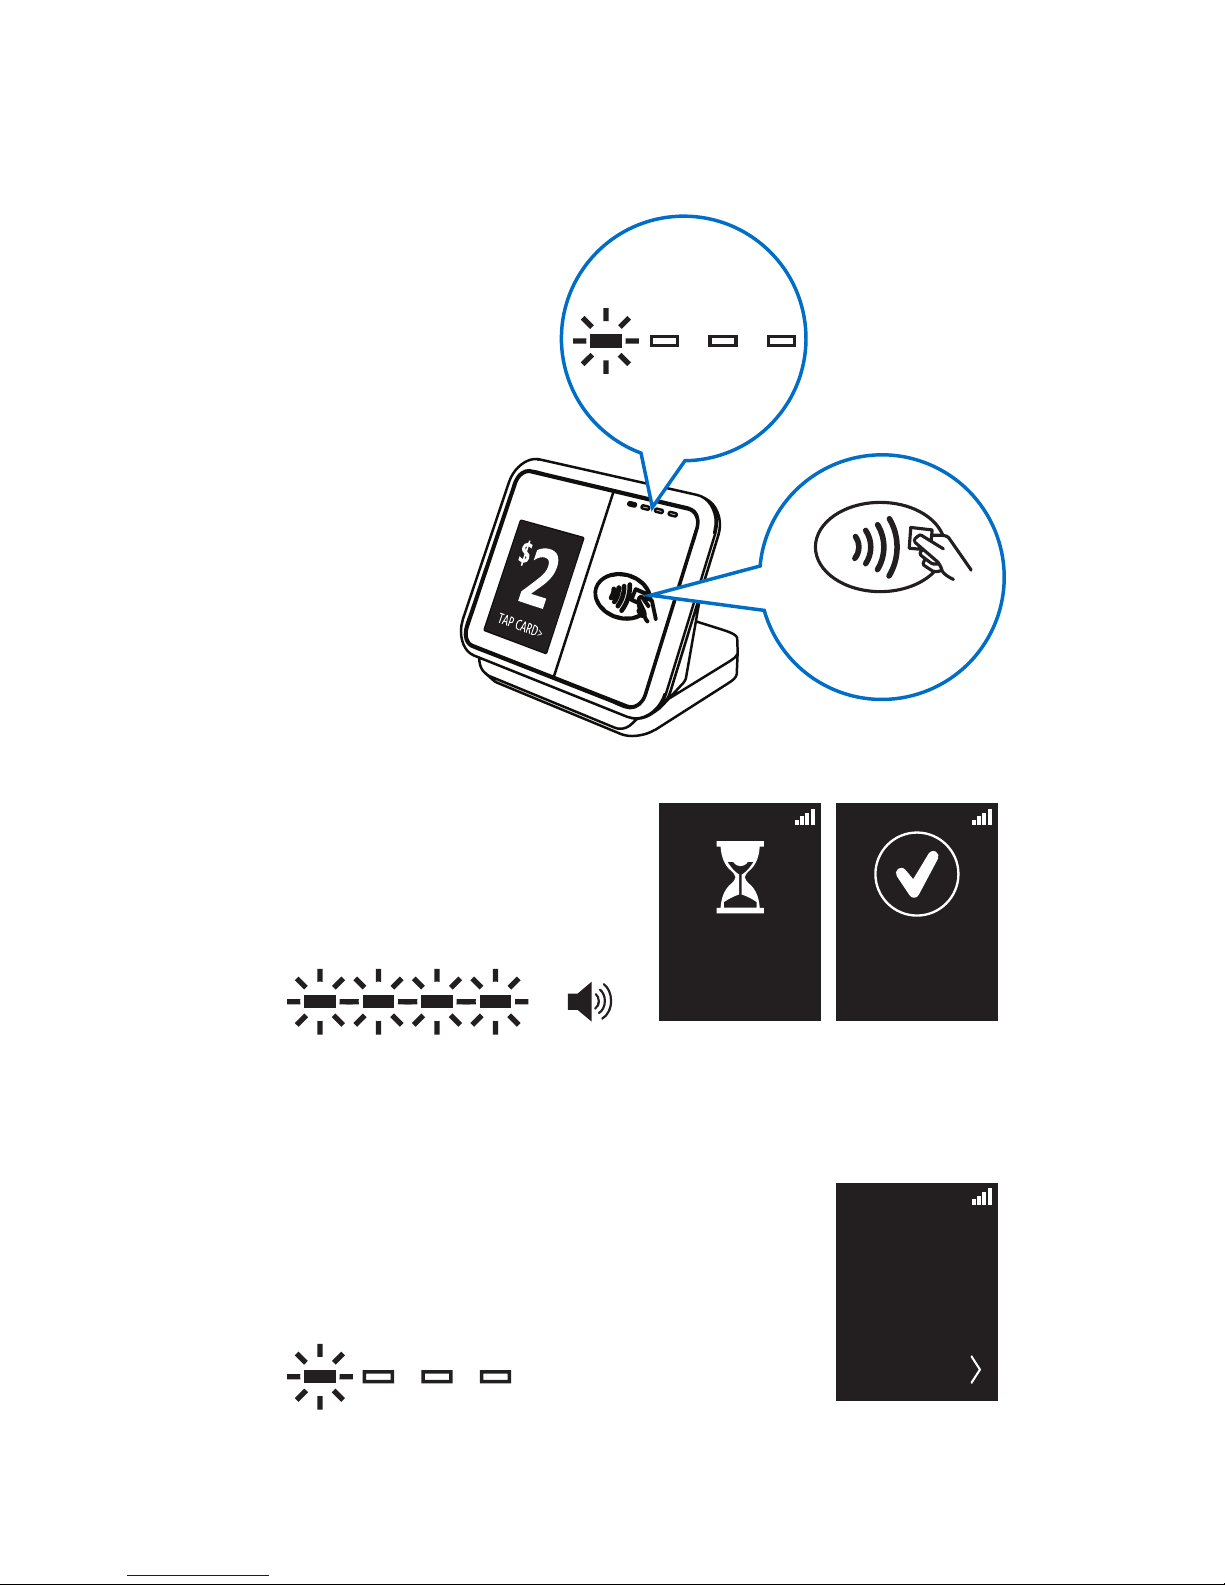
Making a Donation
1.
Donors simply tap their
contactless enabled
card on the device
nearest the Contactless
logo.
16/02/2017 11:31AM
2.
3.
When the donor taps their card,
all 4 lights on the device will
illuminate and emit a single beep.
The following notifications will be
displayed.
In a few seconds the transaction will be
processed and the device will return to the
home screen. The device is now ready for a
new tap!
Home screen
Thank you
for Donating
16/02/2017 11:31AM
Processing
Donation
16/02/2017 11:31AM
$
2
5
Contactless
logo
TAP CARD
All lights illuminate
One light illuminated
Beep
Contactless
lights
Page 6
Online Reporting
Information on the donations received
by your Donation Point device/s are
available to you via the online portal.
In your web browser, go to: mel.cloudeftpos.com
‘Log on’ by entering the User name & Password supplied to
you.
On the Reporting page, click the ‘Transactions’ button.
At this point, you’ll be presented with a summary page of the
transactions processed within a given period.
Use a date range to filter your results.
The following reports are available by clicking on the ‘Report
type’ drop down box:
• Transaction Overview Report
• Detailed Transaction Report
• Detailed Card Report
• Card Summary Report
Step 1.
2.
3.
6
REVIEWING TRANSACTION HISTORY
Page 7
Q: My device does not show signs of turning on, what
should I do?
A: Check the power is turned on at the wall. Check fitment
of cable in the device and USB adapter. If the device still
will not power on, call your nominated help desk.
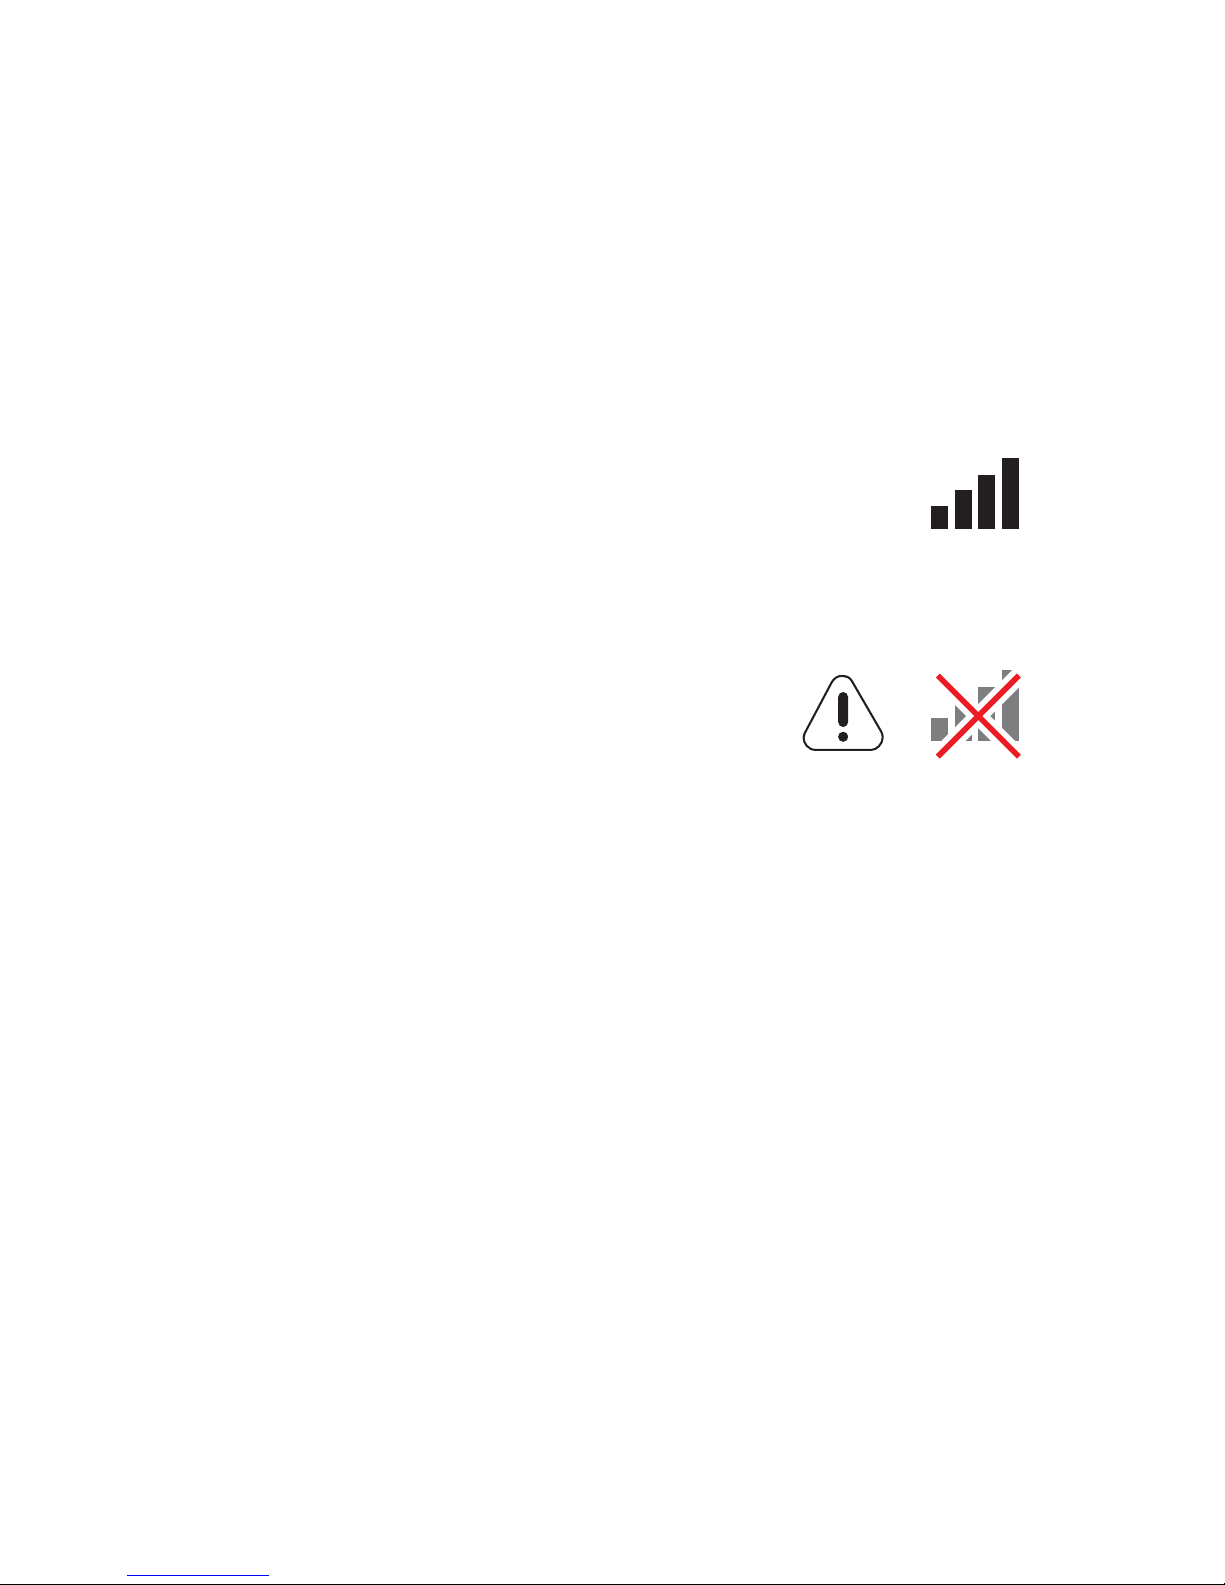
Q: How do I know that my device has connected to a 3G
network?
A: Like a mobile phone, refer to the top right corner of the
device for the network signal strength. 4 bars is best.
Q: My device shows this icon, what does it mean?
A: This icon indicates no connection to a 3G
network. To retry a connection, switch the
device o, wait one minute, turn the power back
on. If the device still cannot connect to a 3G
network then move the device to a dierent
location that may present a stronger signal
strength.
Q: My device is displaying ‘Please try again’, what can I do?
A: You may receive this screen for a number of reasons, for
example the bank or mobile data network is not available or
the card is not working. Try the transaction again when the
error message goes away. If the problem persists, contact
your nominated help desk.
Q: My device is restarting unexpectedly?
A: Please ensure you are using the cable and power supply
that was supplied with your device. Do not use other brand
cables and power supplies.
Q: My device is not registering a card tap, what should i do?
A: Turn o and unplug the device. Wait at least 10 seconds
and reconnect the power. If the problem persists, contact
your nominated help desk.
Troubleshooting
7
Donation
Unavailable
Page 8
16/02/2017 11:31AM
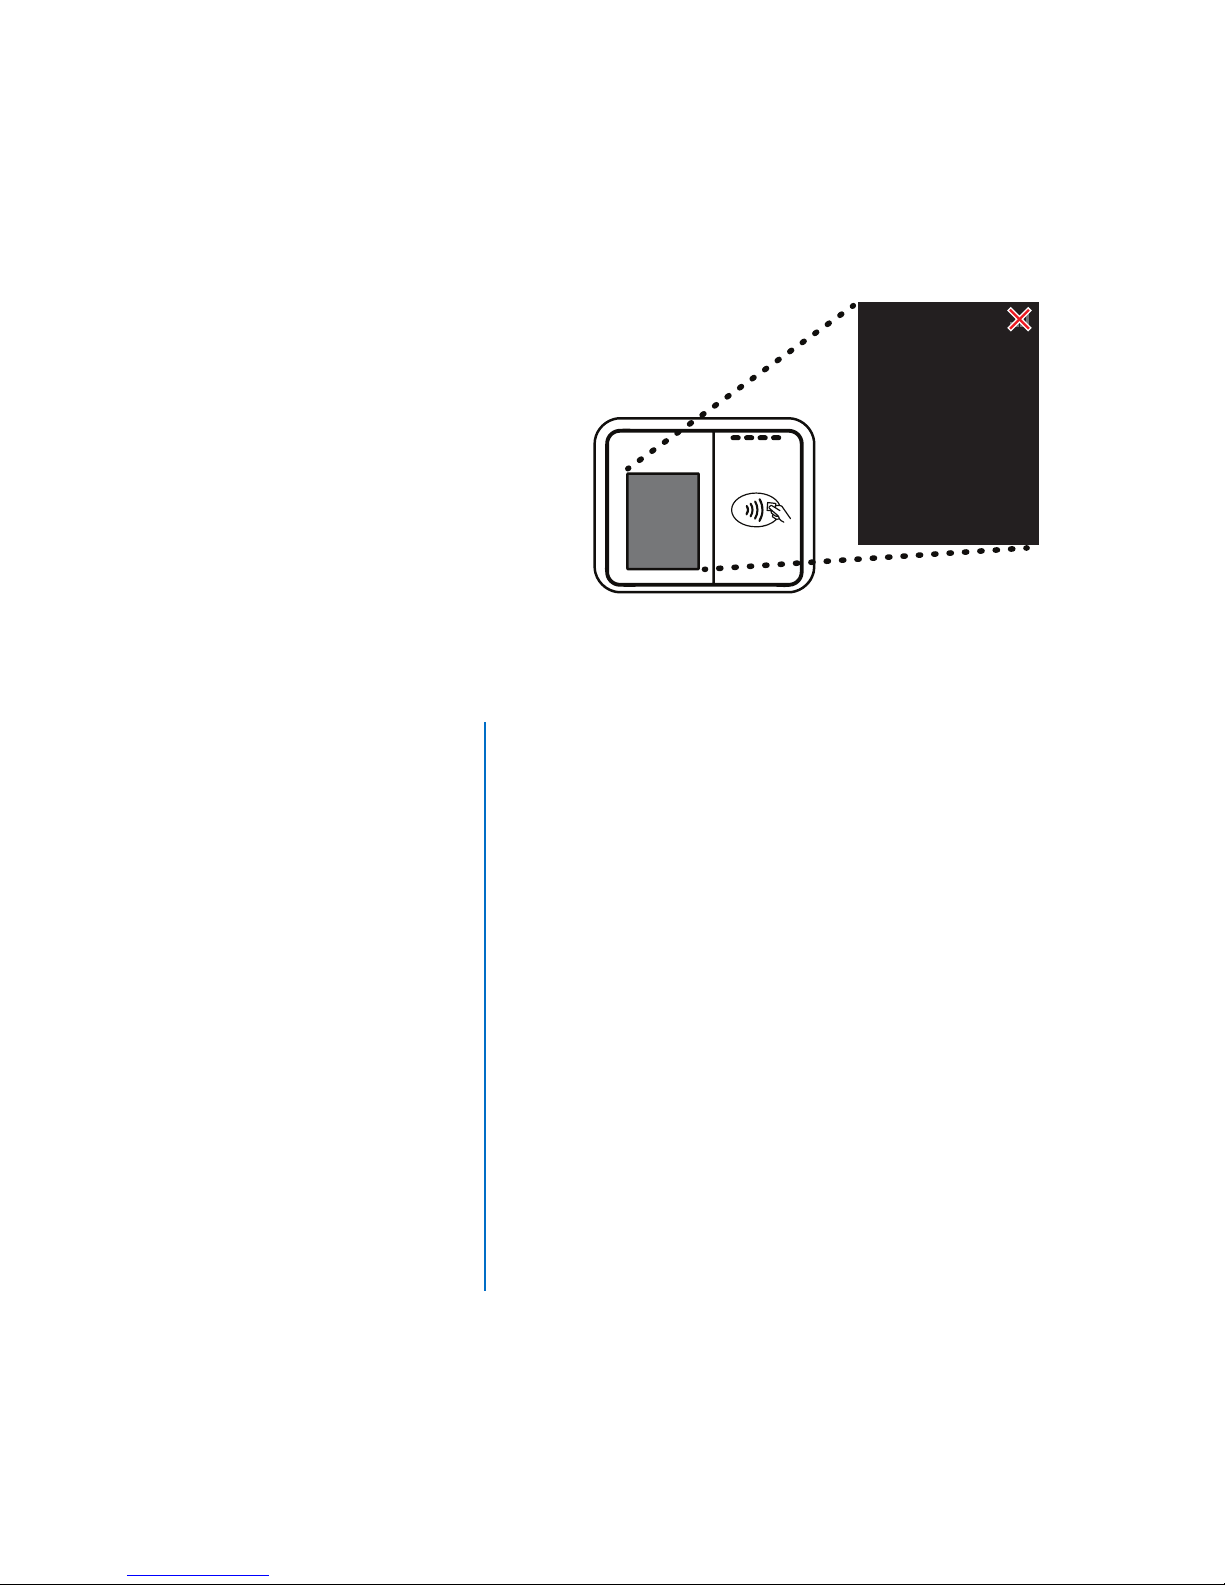
If the device displays an error code
listed below, please address the cause
or take the appropriate action.
CA
No response
The transaction has been rejected by the issuing
Bank due to insucient funds. Refer the card
holder to the card issuer. Ask the customer for an
alternative method of payment.
The cardholder’s Bank (issuer) has not allowed the
transaction. Contact Merchant Help Desk.
The cardholder’s Bank is unable to be contacted to
authorize the transaction. Ask for an alternative
method of payment.
Unplug the device, wait 10 seconds, reconnect the
cable to try again. If the problem persists, call your
nominated help desk.
If you are supplying the SIM card, please insert it
into the device (call the Quest support team for
instructions). If Quest was to supply the SIM card,
please notify the Quest support team to resolve.
51 – Cannot Pay
59 – Transaction Cancelled
91 – Issuer Not Available
‘C’ Error
No SIM card
CODE CAUSE / ACTION
Error codes
Troubleshooting continued
8
Example Error code
displayed on device
Page 9

• Do not use this device in an extreme environment where high
temperature or high humidity exists.
• Do not leave this equipment in a vehicle or window in direct full sun.
• Do not drop or shake Donation Point Tap. Rough handling could break
internal circuit boards and mechanics.
• Do not expose this equipment to rain or spilled beverages.
• Avoid contact with metal objects to avoid unsightly scratches.
• Storage - Store Donation Point Tap in a cool dry place. If in long term
storage, the internal memory battery must be fully charged before
storage and the battery level must be periodically recharged every 6
months to avoid damage to the device or its battery. (To fully recharge
the internal memory battery, connect the device to power for at least 4
hours).
• Do not disassemble Donation Point Tap or its accessories. If service or
repair is required, contact Quest to organise for the device to be returned.
If the device is disassembled this will void the warranty and will render the
device inoperable.
If your device gets stolen, please contact Quest for deactivation. Acting
promptly will help to reduce any potential for fraud.
03 8807 4444
Caring for your Device
Lost or Stolen Devices
9
Page 10
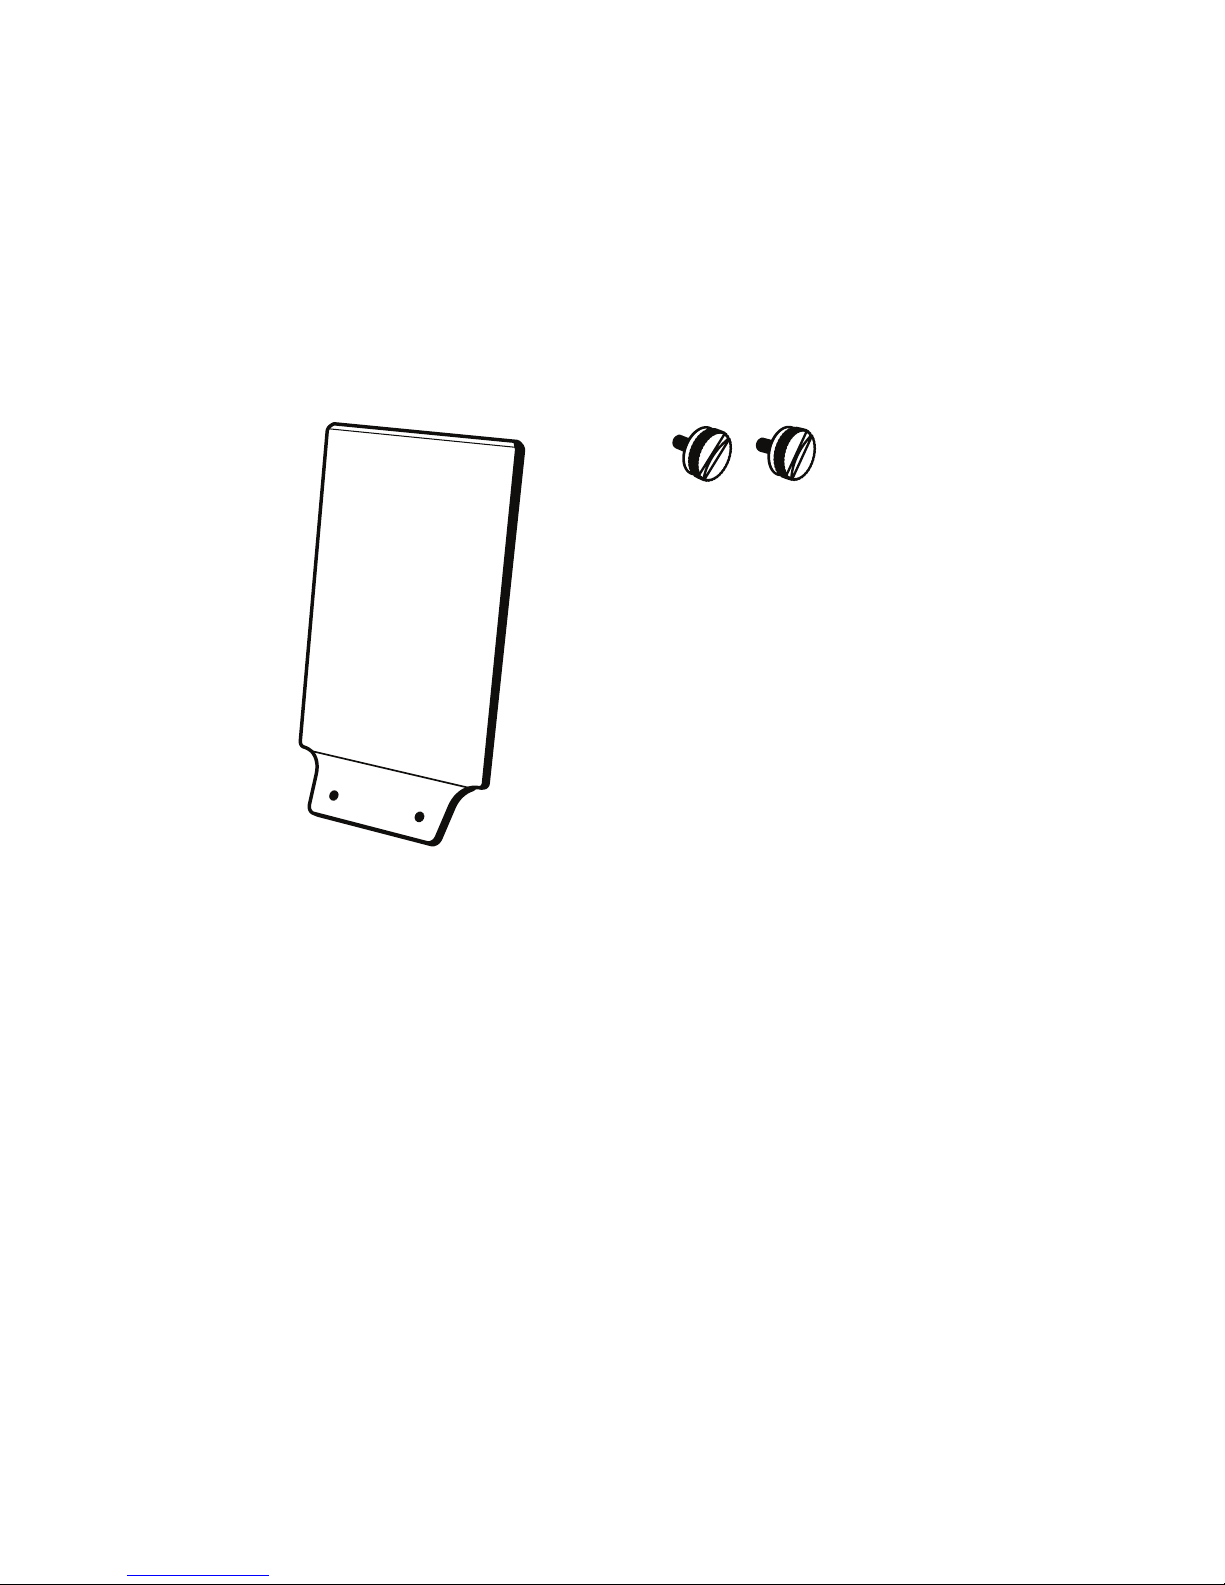
The following accessories are available for separate purchase.
Call the Quest sales team on 03 8807 4400 to purchase.
Acrylic Banner Holder
Accessories
Banner Thumb Screws
10
If you are renting a Donation Point Tap for a short period, please return the
equipment in reasonable working order. The equipment must be returned in
its original packaging to our Service Centre address below. Once received at
Quest, the equipment will be assessed for reasonable wear and tear. Any
unreasonable damage may incur a repair fee. Lost accessories will also incur a
fee for their replacement.
227 Burwood Road, Hawthorn, Victoria 3122
Quest Payment Systems - Returns
RETURNS
Page 11
@2017 Quest Payment Systems. All Rights Reserved
Doc v1
Best of luck
with your
Fundraising!
Need help with Donation Point Tap?
Please contact our support team.
1800 008 595
9am - 9pm, 7 days a week (Australian EST)
 Loading...