

Quer KOM0774 Owner's Manual
KOM0774
Car DVR
Instrukcja obsługi
PL
Owner’s manual
EN

3
Owner’s manual
EN
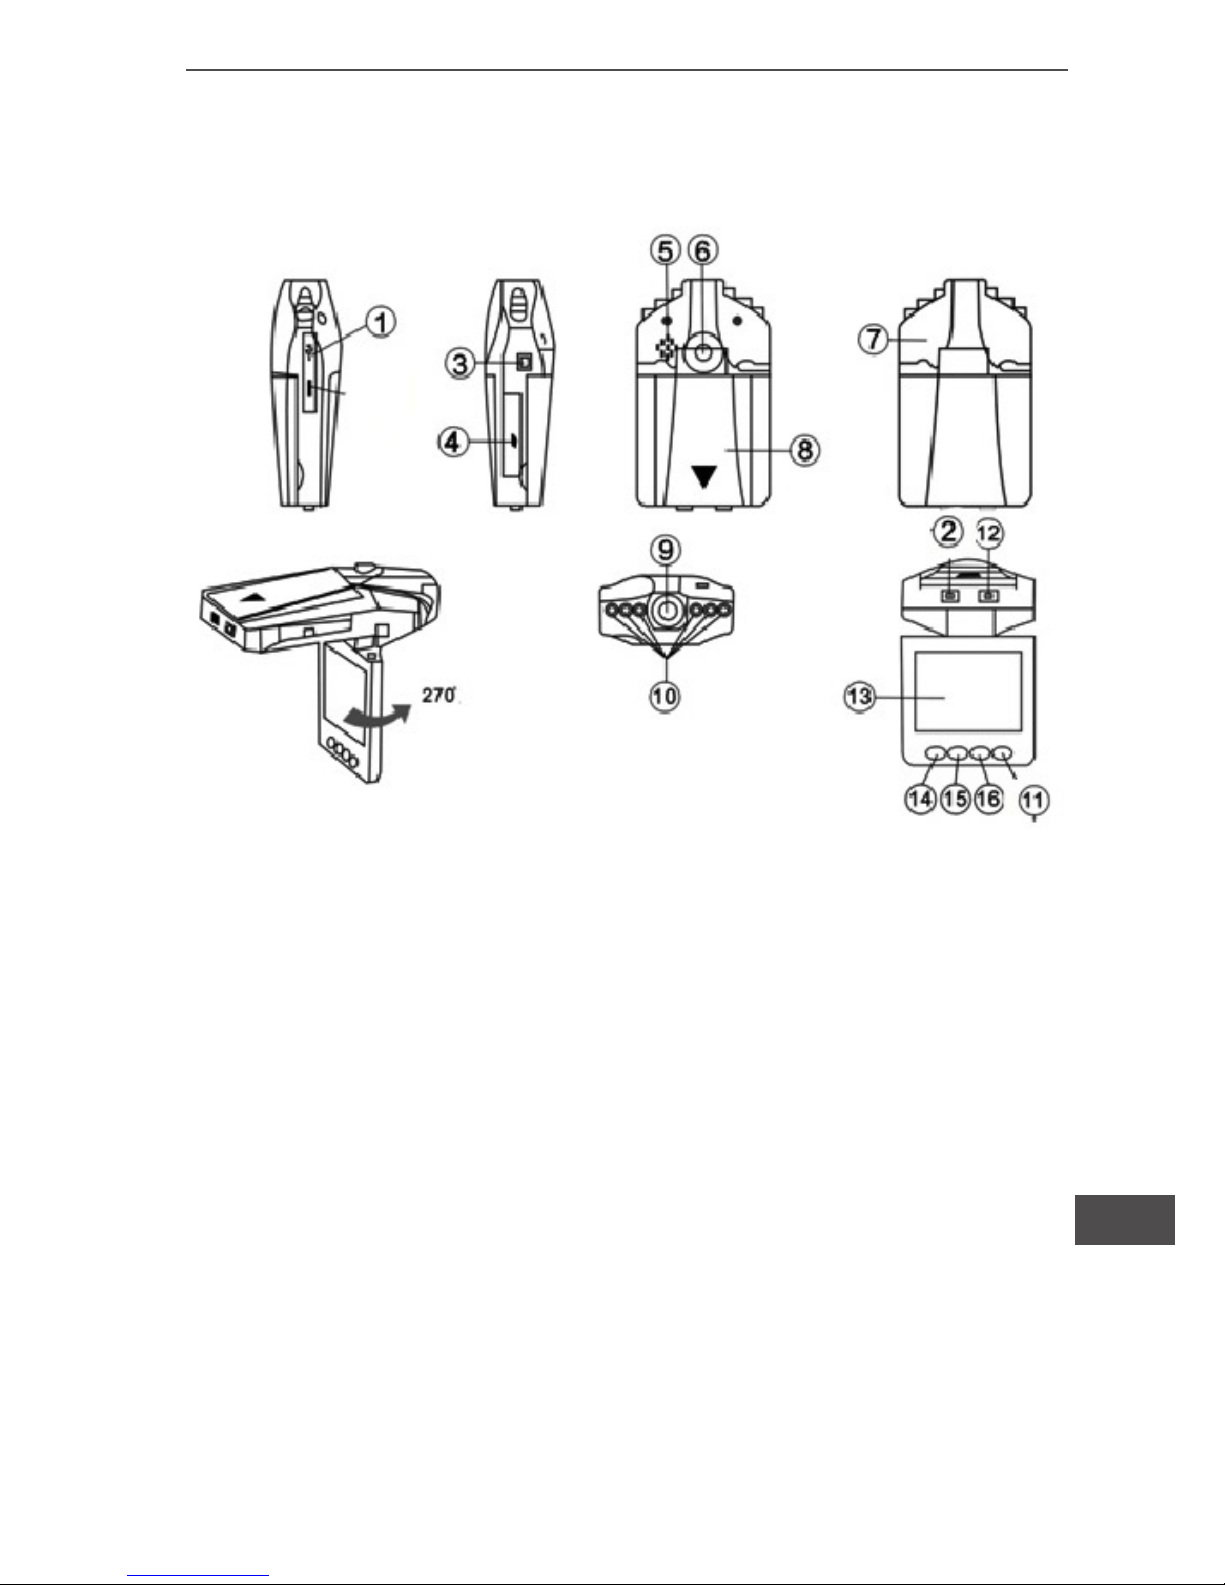
Instruction to keys function
1 USB Interface
2 On/Off key
3 .5V power input jack
4 SD/MMC card slot
5 Speaker
6 Bracket hole
7 MIC
8 Battery cover
9 Lens
10 Infrared lamp
11 Mode (Record/Photo/
Preview)
12 Record/Photo working (blue) indicator,
charge (red) indicator
13 2.5-inch color display
14 Menu
15, 16 Down/Up key

Owner’s manual
4
EN
Accessories
● Operation Manual ● Bracket ● USB cable
● Car charger (with 24V/12V to 5V output voltage
converter inside)
Instruction of the car video recorder
Power supply (two modes):
A) Using built-in rechargeable lithium battery
Charge mode: 1) connect to car charger; 2) Connect
to computer by USB interface
The red indicator is on during charging. It will turn off
after the DVR is charged full.
Note: When supplying power with lithium battery, it is
required to press On/Off key 2 to start or stop DVR
recording.
B) Connecting 12V/24V car charger
After vehicle started, DVR starts recording automatically. It saves the le and turn off automatically 5 seconds later after vehicle is shut down.
Note: Only car charge source with 5V output can be
used.
Function Description
DVR has record/photo/preview functions. You can
switch between these modes at your discretion.
A) Record mode
Press down the On/Off key 2 or connect to car charger, the DVR goes into record mode and starts

5
Owner’s manual
EN
recording automatically. (Note: please insert SD/
MMC card before using.). Now the blue indicator ashes.
The recorded video les are stored in SD/MMC card.
Press Record key 12 to stop recording. Now the
blue indicator illuminate solid.
B) Photo mode
Turn the unit on and press the Mode key 11 to enter the photo mode. Press the Photo key 12 to take
photo.
C) Preview mode
Turn the unit on and press the Mode key 11 twice to
enter the preview mode.
Press the Up/Down key to select the desired le for
browsing. Press Record key 12 to “Play/Pause”.
D) Delete Function
In preview mode, press the Menu key 14 to enter deletion screen. Press the Record key 12 to enter the screen to select deleting “Single/All/Selected”
(with Up/Down). Finally, press the Record key 12 to
conrm. You can also select “Thumbnails” and “Preview Playback Volume” and press the Record key
12 to conrm.
Menu Settings
Turn the unit on and press Menu key 14 to enter the
settings screen. Press Up/Down key to cycle through the items listed.
 Loading...