

KOM0480
Wireless
keyboard
Bedienungsanleitung
Owner’s manual
Instrukcja obsługi
Manual de utilizare
DE
EN
PL
RO


Bedienungsanleitung
I. Beschreibung der Fernbedienungsfunktionen
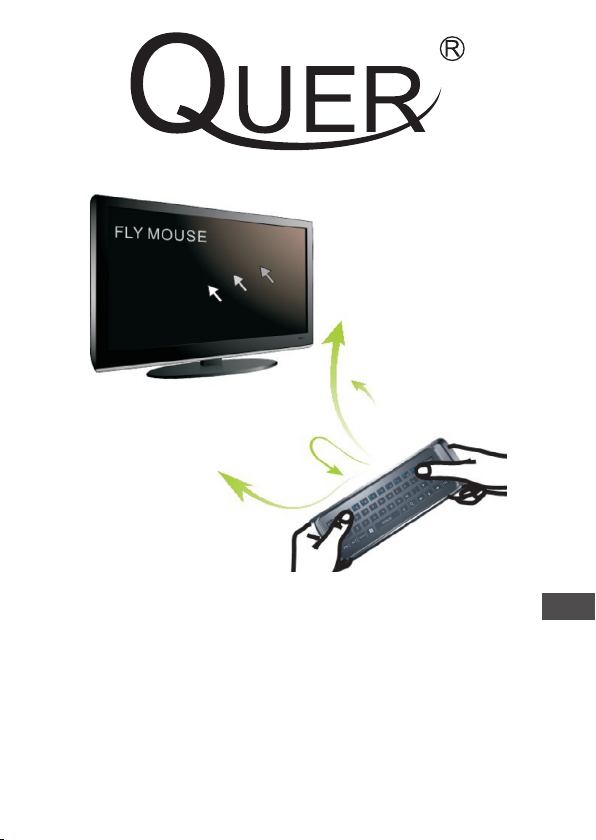
Luftmaus Fernbedienungsfunktion
Luftmaus Fernbedienung Luftmaus Funktion mit 6-Achs-Technik
3-Achsen-Gyro und 3-Achsen-Beschleunigungssensor Technologie), nämlich die Verwendung der eingebauten 3-Achsen-Beschleunigungs-Sensor und 3-Achsen-Gyro, um die Mausbewegung in der Luft zu messen: nach oben und unten, links und rechts.
Und verwendet selbst entwickelte 3-Achsen-Gyro- und 3-AchsenBeschleunigungs-Sensoralgorithmus präzise umgerechnet auf die
Bewegung der Maus auf dem Bildschirm. Die fortschrittliche Luft-Maus hilft, Ihre Set-Top-Box oder Computer frei vom Desktop zu
bedienen. Drücken Sie auf die Taste „Menü” um diese Funktion zu
aktivieren / deaktivieren. Drücken Sie die anderen Funktionstasten
um die entsprechenden Funktionen zu erreichen.
Bewegungsgefühl SpielesteuerEinstellungsfunktion
Diese Fernbedienung unterstützt die 6-Achsen-Spielsteuerung
(3-Achsen-Gyro und 3-Achsen Beschleunigungssensor Spielsteuerung). Gehen Sie in den Bewegungs-Spielmodus und Sie können
die Bewegungs-Spielfunktion gemäß den Spielanleitungen einstellen. Kompatible Spiele: Angry Birds, Fruit Ninja, Tischtennis, Tennis, Golf, Skifahren, Need for Speed, usw.
Schlafmodus
Wenn keine Taste für mehr als 20 Sekunden gedrückt wird, geht
die Fernbedienung in den Schlafmodus. Zum aufwachen drücken
Sie eine beliebige Taste.
DE
3

Bedienungsanleitung
II. Bedienungsanleitung
1. Anschluss der Fernbedienung an Empfänger
(Kopplung)
Die Fernbedienung und Empfänger sind standardmäßig im Werk
gepaart. Nur den Empfänger in den USB-Anschluss der Set-TopBox (Computer) einstecken, der Empfänger und die Fernbedienung werden automatisch verbunden. Unregelmäßige Verbindung
und Kommunikation zwischen Fernbedienung und Empfänger, als
Folge von Betriebsfehler bei Verwendung der Fernbedienung oder
anderen Gründen, können durch die folgenden Methoden wieder
hergestellt werden:
Drücken Sie die Tasten [OK] und [BACK] für etwa 3~5 Sekunden.
Der LED Betriebsanzeige beginnt zu blinken. Es zeigt die Fernbedienung gelangt in den Kopplungsmodus. Lassen Sie beide Tasten los und stecken Sie den USB-Empfänger in die USB-Buchse des TV oder Computer innerhalb von 20 Sekunden. Die Fernbedienung und Gerät startet Auto-Code-Kopplung. Wenn die LED
erlischt, bedeutet dies, der Code wurde erfolgreich abgestimmt.
2. Air-Maus Bewegungsgeschwindigkeit (Sensibilität) Einstellungsfunktion (Option)
Die Air-Maus-Empndlichkeit wird in 4 Stufen unterteilt. Je größer
der Wert ist, desto größer die Geschwindigkeit (höhere Empn-
dlichkeit) der Luft Maus. Der Standard-Wert ist Stufe 3.
• Erhöhung der Luft Mausgeschwindigkeit: Drücken Sie [OK] + [V+]
für ca. 3 Sekunden. LED Anzeige blinkt zweimal. DPI 1 Stufe von
DE
der aktuellen Geschwindigkeit erhöhen.
• Verlangsamen die Luft Mausgeschwindigkeit: Drücken Sie [OK] +
[V-] für ca. 3 Sekunden. LED Anzeige- blinkt zweimal. . DPI 1 Stufe von der aktuellen Geschwindigkeit verringern.
Hinweis: Wenn die Geschwindigkeit die höchste Stufe erreicht hat
(Stufe 4) kann die Fernbedienung nicht länger beschleunigen, sondern nur die Geschwindigkeit verringern.
4

Bedienungsanleitung
3. Lithium-Batterie auaden (Luftmaus Fernbedienung)
Wenn die Batterie schwach ist, laden Sie bitte so bald wie möglich.
Diese Fernbedienung ist mit wiederauadbarer Lithium-Batterie
ausgestattet. Wenn die Batterie im Niederspannungsbereich ist,
können Sie die Batterie vom Computer auaden über USB-Buchse oder, von 5V USB Stromversorgung über USB-Kabel. Während
des Ladevorgangs leuchtet die rote Anzeige. Nachdem die Batterie voll aufgeladen ist, erlischt die Anzeige.
III. Technische Daten und Produkt Parameters
Trägerfrequenz: 2,4GHz ISM Frequenzbereich,
Automatischer Frequenzsprung
Protokoll: HID,USB 2.0
Effektive Entfernung: 8m
Batterie: 3.7V Lithium Batterie ,320mAh
Betriebsspannung: 3.7V ~ 4.2V
Betriebsstrom: <40mA
Temperaturbereich: -5ºC ~ +50ºC
Dongle: Mini USB Dongle
System: Unterstützt Windows, Android,
Linux usw. Einstellbar gemäß
Benutzersystem.
Die Spezikationen können ohne Ankündigung geändert werden.
„Hiermit erklär die Firma Lechpol dass sich das Gerät KOM0480
im Einklang mit den grundlegenden Anforderungen und anderen
relevanten Bestimmungen der Richtlinie 1999/5/EG bendet. Konformitätserklärung zum Download auf www.lechpol.eu”
DE
5

Bedienungsanleitung
DE
6

Owner’s manual
I. Remote Function Description
Air Mouse Remote Function
Air-mouse Remote air mouse function using 6-axis technology (3axis gyro and 3-axis accelerometer sensor technology), namely
the use of remote control built-in 3-axis accelerometer sensor and
3-axis gyro to measure mouse moves around the air up and down,
left and right. And use self-developed 3-axis gyro and 3-axis accelerometer sensor algorithm to its precise converted to the displacement of the mouse on the screen. The advanced air mouse helps
to manipulate your set-top box or computer freely away from the
desktop. Press „Menu” key to enable/disable this function.
Press the other function keys to achieve the corresponding functions.
Motion felling game controller features
This remote control supports the 6-axis game intervention (3-axis
gyro and 3-axis accelerometer sensor game intervention). Enter
the matched interface for motion game, you can activate the motion game function according to the game interface instruction. The
games includes: Angry birds, Fruit ninja, Table tennis, Tennis, Golf,
Skiing, Need for Speed etc.
Sleep mode
If no button is pressed for over 20 seconds, the remote will enter sleep mode. Press any button can wake up the remote control.
EN
7

Owner’s manual
II. Operating instructions
1. Remote control and receiver connection (Pairing)
The remote control and receiver is default paired in factory. Just
need to plug the receiver into USB socket of the set-top box (computer), the receiver can automatically connect to the remote control. Irregular connection and communication between the remote and receiver, that caused by any operation error during using of
the remote, or other reasons, can be reconnected through the following methods:
Press [OK] and [BACK] keys for about 3 to 5 seconds. The ope-
ration indicating LED starts ashing. It indicates the remote enters
Code Matching Mode. Release both keys, and plug the USB receiver to the USB socket of TV or Computer within 20 seconds. The
remote and device starts auto code matching. If LED turns off, it
means the code is successfully matched.
2. Air mouse travelling speed (sensitivity) adjustment function (option)
The Air mouse sensitivity is divided into 4 gears. The greater the
value of air mouse is, the faster the speed (the higher sensitivity)
of air mouse will be. The default gear is gear 3.
• Speed up the air mouse speed: Press [OK] + [V+] for about 3 seconds. Indicating light ashes twice. The CPI increase 1 gear on
the basis of current speed.
• Slow down the air mouse speed: Press [OK] + [V-] for about 3 seconds. Indicating light ashes twice. The CPI decrease 1 gear on
EN
the basis of current speed.
Note: When the speed reaches the highest gear (gear 4), remote
control can no longer speed up. It can
only implement “slow down” operation.
8

Owner’s manual
3. Lithium battery charging (air mouse remote)
When battery is lack of power, please recharge it as soon as possible. This remote is using rechargeable Lithium battery. When battery is in low voltage, you can recharge the battery by computer via
USB socket, or recharged by 5V USB power supply via USB cable.
While charging, the red indicating light turns on. After fully charged,
red indicating light turns off.
III. Product Spec and Parameters
Carrier frequency: 2.4GHz ISM frequency range, Auto
Frequency hopping
Protocol: HID,USB 2.0
Effective distance: 8m
Battery: 3.7V Lithium battery ,320mAh
Operation voltage: 3.7V ~ 4.2V
Operation current: <40mA
Temperature scope: -5ºC ~ +50ºC
Dongle: Mini USB Dongle
System: Support Windows, Android, Linux
etc. And it is adjustable according to
user’s system.
Specications are subject to change without notice.
„The Lechpol company declares that product KOM0480 is consistent with the essential requirements and other relevant provisions
of directive 1999/5/EC. The proper declaration for download from
www.lechpol.eu”
EN
9

Owner’s manual
EN
10

Instrukcja obsługi
I. Funkcje
Funkcja myszki bezprzewodowej
Urządzenie wykorzystuje 6-osiową technologię kontroli położenia kursora (3-osiowy żyroskop i 3-osiowe czujnik przyspieszenia).
Zapewnia to wygodne i precyzyjne poruszanie myszką po ekranie (w lewo, prawo, górę i dół). Za pomocą funkcji bezprzewodowej myszki, można swobodnie korzystać z komputera, dekodera
lub innego urządzenia będąc z dala od niego. Po najechaniu na
wybrany element, należy nacisnąć żądany przycisk (aby wywołać
przypisaną do niego funkcję - np. prawy lub lewy przycisk myszki).
Uwaga: aby włączyć / wyłączyć sterowanie kursorem, należy nacisnąć przycisk „Menu”.
Gry
6-osiowa technologia kontroli położenia idealnie nadaje się do zastosowania jako kontroler gier. Sterowanie grą za pomocą bezprzewodowego kontrolera może dostarczyć dodatkowej porcji wrażeń. Sposób sterowania zależy od konkretnej gry.
Tryb uśpienia
Jeśli żaden przycisk nie zostanie naciśnięty przez 20 sekund, pilot
przejdzie w tryb uśpienia. Naciśnięcie dowolnego przycisku, spo-
woduje powrót do normalnego trybu pracy.
11
PL

Instrukcja obsługi
II. Obsługa
1. Połączenie pilota z odbiornikiem USB (parowanie)
Pilot i odbiornik USB są domyślnie sparowane w fabryce. Wystarczy podłączyć odbiornik do gniazda USB w urządzeniu (komputerze, dekoderze itp.). Nieprawidłowa komunikacja pomiędzy pilotem a odbiornikiem, spowodowana przez jakikolwiek błąd operacji,
może być naprawiona poprzez ponowne sparowanie:
- należy jednocześnie nacisnąć przyciski [OK] i [BACK] przez około 3~5 sekund (zacznie migać dioda LED). Następnie należy zwolnić oba przyciski i w ciągu 20 sekund podłączyć odbiornik USB do
dekodera, komputera itp. Jeżeli dioda LED zgaśnie, oznacza to, że
odbiornik z pilotem zostały pomyślne sparowane.
2. Ustawienie czułości myszki
Czułość myszki można ustawić na jeden z 4 poziomów. Im większa wartość tym większa szybkość poruszania (wyższa czułość).
Domyślnie ustawiona jest wartość 3.
• Zwiększenie czułości: Aby zwiększyć czułość myszki, należy jednocześnie nacisnąć i przytrzymać przyciski [OK] i [V+] przez około 3 sekundy. Dioda informacyjna mignie 2 razy. Po wykonaniu tej
operacji czułość zostanie zwiększona o jeden poziom.
• Zmniejszenie czułości: Aby zmniejszyć czułość myszki, należy
jednocześnie nacisnąć i przytrzymać przyciski [OK] i [V-] przez
około 3 sekundy. Dioda informacyjna mignie 2 razy. Po wykonaniu
tej operacji czułość zostanie zmniejszona o jeden poziom.
Uwaga: Po osiągnięciu 4 poziomu, nie będzie możliwości kolejnego zwiększenia czułości (poziom 4 reprezentuje najwyższą czułość).
PL
12

Instrukcja obsługi
3. Ładowanie baterii
Jeżeli bateria się rozładuje, należy ją jak najszybciej naładować.
Pilot może być ładowany za pomocą ładowarki 5V lub bezpośrednio z gniazda USB komputera. Czerwona dioda oznacza ładowanie baterii. Po zgaśnięciu czerwonej diody, pilot jest w pełni naładowany i można go odłączyć od źródła zasilania.
III. Specykacja
Częstotliwość: Zakres częstotliwości 2.4GHz ISM,
automatyczny przeskok
częstotliwości
Protokół: HID,USB 2.0
Efektywny zasięg: 8m
Bateria: Bateria litowa 3.7V, 320mAh
Napięcie: 3.7V ~ 4.2V
Natężenie: <40mA
Temperatura pracy: -5ºC ~ +50ºC
Dongle: USB Dongle
System: Wsparcie dla Windows, Android,
Linux itp.
Specykacja urządzenia może ulec zmianie bez powiadomienia.
„Niniejszym rma Lechpol oświadcza, że urządzenie KOM0480
jest zgodne z zasadniczymi wymaganiami oraz innymi stosownymi postanowieniami dyrektywy 1999/5/WE. Właściwa deklaracja
do pobrania na stronie www.lechpol.eu”
13
PL

Instrukcja obsługi
PL
14

Manual de utilizare
I. Descrierea functiilor de control la distanta
Functia remote a mouse-ului
Functia remote a mouse-ului cu tehnologia pe 6 axe (giroscop pe
3-axe si cu senzor accelerometru pe 3-axe), pentru a masura miscarea mouse-ului in aer: in sus si in jos, la stanga si la dreapta.
Utilizarea giroscoapelor pe 3-axe si a senzorilor de acceleratie pe
3-axe permit miscarea mouse-ului pe ecran. Acest tip avansat de
mouse-ul va ajuta pentru a controla un set-top box sau calculatorul
care se aa departe de dvs.. Apasati tasta „Meniu” pentru a activa
sau dezactiva aceasta functie. Apasati celelalte taste pentru functiile corespunzatoare.
Caracteristici pentru control jocuri
Aceasta telecomanda suporta jocurile cu dinamica pe 6-axe (giroscoape pe 3-axe si senzori de acceleratie pe 3-axe). Accesati interfata jocului si puteti activati functiile jocului. Compatibil cu: Angry Birds, Fruit Ninja, Tenis de masa, tenis, golf, schi, Need for
Speed, etc.
Modul Sleep (Hibernare)
Daca nu este apasat niciun buton mai mult de 20 de secunde, aparatul va intra pe modul sleep (hibernare). Pentru a-l activa, apasati orice tasta.
RO
15

Manual de utilizare
II. Instructiuni de functionare
1. Conexiunea cu receptorul (Cuplare)
The remote control and receiver is default paired in factory. Just
Telecomanda si receptorul sunt imperecheate din fabrica. Trebuie doar sa conectati receptorul la mufa USB a set-top box (sau calculator) si acesta se va conecta automat la telecomanda. In cazul
in care apar erori in functionare sau erori de receptie reconectarea
se poate face prin urmatoarele metode:
Apasati tastele [OK] si [BACK] pentru aproximativ 3~5 secunde.
Indicatorul luminos LED incepe sa palpaie. Acesta indica faptul ca
telecomanda intra pe modul asociere (imperechere). Eliberati ambele butoane si conectati receptorul USB in portul USB al calculatorului sau al televizorului in 20 de secunde. Telecomanda si unitatea incep transmiterea automata a codurilor. Daca LED-ul este
stins, inseamna ca a fost gasit codul potrivit.
2. Functia de setare (optiune) a vitezei de miscare
a mouse-ului (sensibilitate)
Sensibilitatea mouse-ului este impartita in 4 etape. Cu cat valoarea
este mai mare, cu atat este mai mare viteza (sensibilitate mare)
mouse-ului.Valoarea implicita este de nivelul 3.
• Marirea vitezei mouse-ului: Apasati tasta [OK] + [V+] timp de
aproximativ 3 secunde. LED-ul palpaie de doua ori. CPI va creste
cu 1 nivel fata de viteza actuala.
• Incetinirea vitezei mouse-ului: Apasati tasta [OK] + [V-] timp de
aproximativ 3 secunde. Indicatorul LED palpaie de două ori. CPI 1
va scadea cu un 1 nivel fata de viteza actuala.
Nota: In cazul in care viteza a atins cel mai inalt nivel (nivel 4), telecomanda nu accelereaza mai mult, dar reduce doar viteza.
RO
16

Manual de utilizare
3. Incarcare baterie litiu (telecomanda air mouse)
Daca bateria este descarcata, va rugam sa incarcati cat mai curand posibil. Aceasta telecomanda este echipata cu un acumulator cu litiu. Atunci cand bateria are tensiunea scazuta, puteti incarca acumulatorul cu ajutorul calculatorului prin intermediul portului
USB sau cu o sursa de alimentare USB 5V prin cablul USB. In timpul incarcarii, LED-ul rosu se aprinde. Dupa ce acumulatorul este
complet incarcat, indicatorul se stinge.
III. Specicatii produs si parametrii
Frecventa purtatoare: 2,4GHz gama de frecvente ISM,
salt automat frecventa
Protocol: HID,USB 2.0
Distanta efectiva: 8m
Baterie: 3.7V Baterie litiu ,320mAh
Tensiunea de functionare: 3.7V ~ 4.2V
Curentul de functionare: <40mA
Interval temperatura: -5ºC ~ +50ºC
Dongle: Mini USB Dongle
Sistem: Suporta Windows, Android, Linux,
etc. in conformitate cu sistemul
folosit de utilizator.
Specicatiile sunt supuse schimbarilor fara noticare prealabila.
„Compania Lechpol declară că produsul KOM0480 este în conformitate cu cerinţele esenţiale şi alte prevederi relevante ale Directivei 1999/5/CE. Declaraţia pentru descărcare este postata pe site-ul www.lechpol.eu”
RO
17

Manual de utilizare
RO
18


www.quer.pl
 Loading...