

Page 1
GL200 Quick Start V1.01
Page 1 : Basic Operation
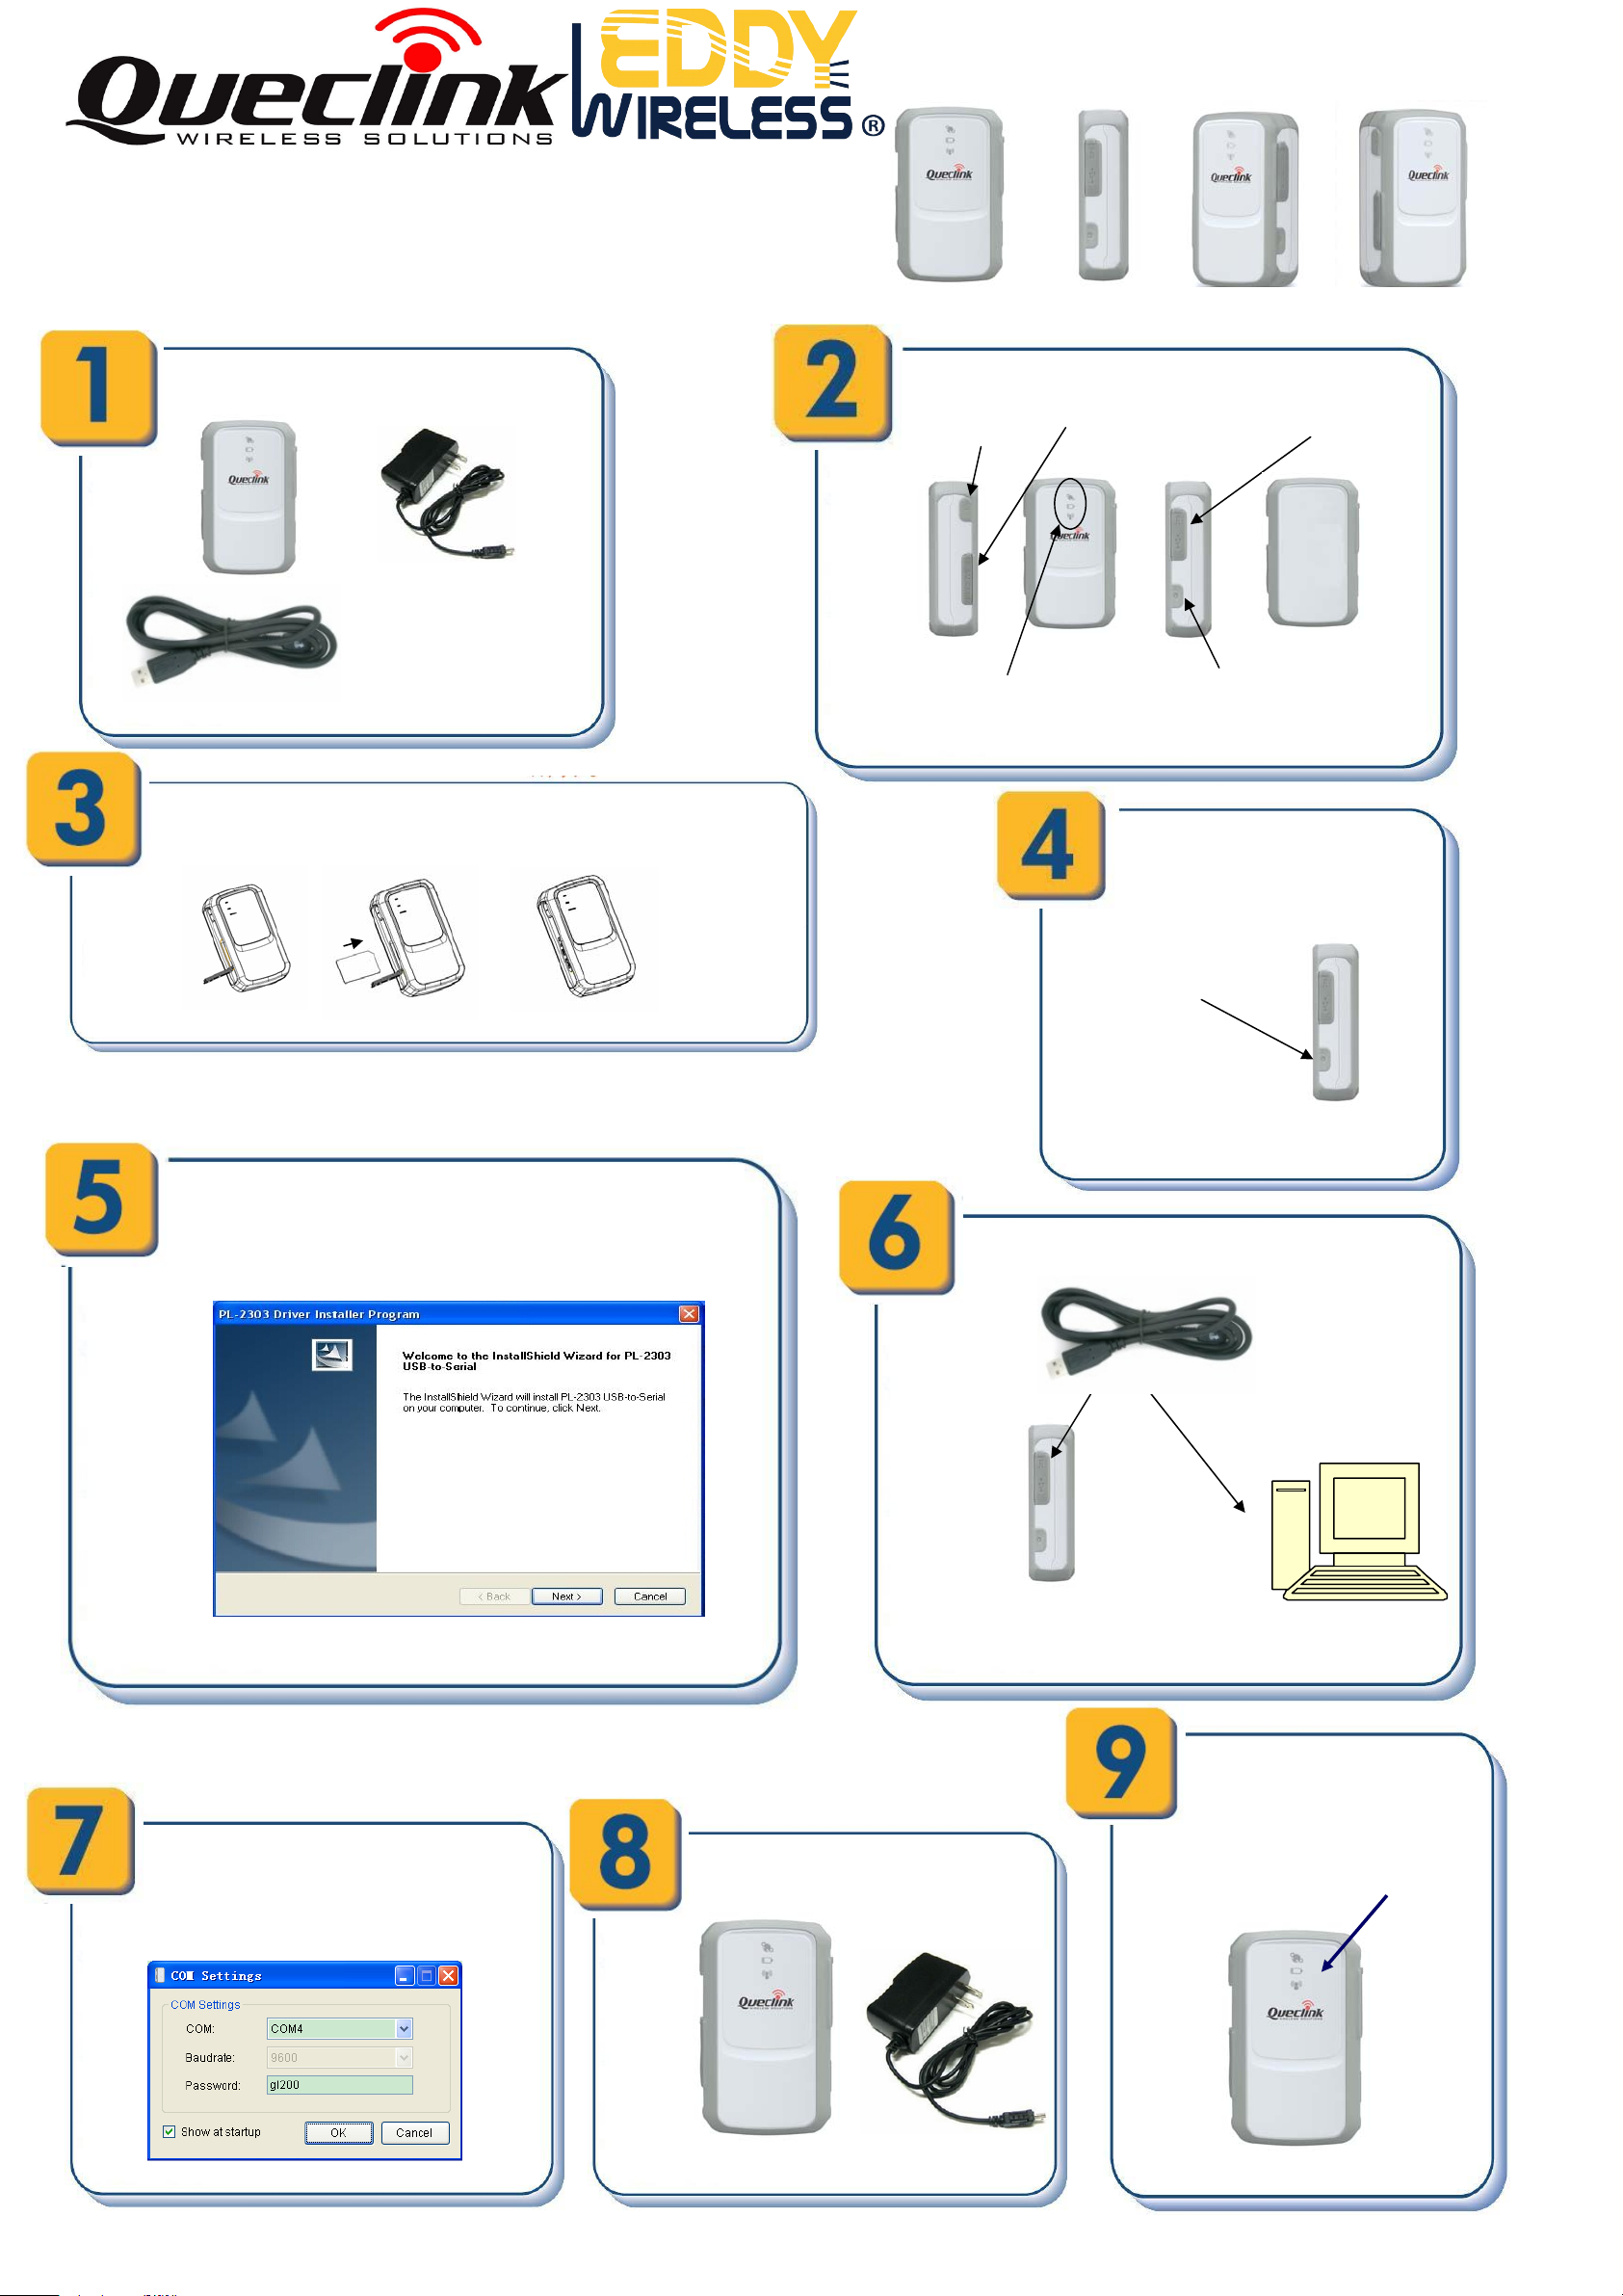
The USB Data_Cable_M is
not in the delivery list.
Please contact your vendor
for it.
Check The AppearanceCheck Parts List
Function Key
SIM Card Interface
Mini USB And External
GPS Antenna Interface
Install SIM Card
Find “PL2303_Prolific_DriverInstaller_v10518.zip”
in develop suit and install the drive for PL2303. If
you have already installed it please go to Step 6.
Three Indicator LED
Connect GL200 to computer by USB
Data_Cable_M.
Power Key
Turn On GL200
Power Key
Find “Queclink GL200 Manager Tool
Vx.xx.exe” in develop suit and run it to
configure the running parameters of
GL200.
Please refer to Page 2 for detail.
Before the first time using GL200,
please full charge the battery
To mini
USB
To computer
Better place the GL200
under the open sky, and let
the surface which has
indication Led to the sky.
Here is GPS Antenna
Page 2
Page 2 : PC Manager Tool Quick Start
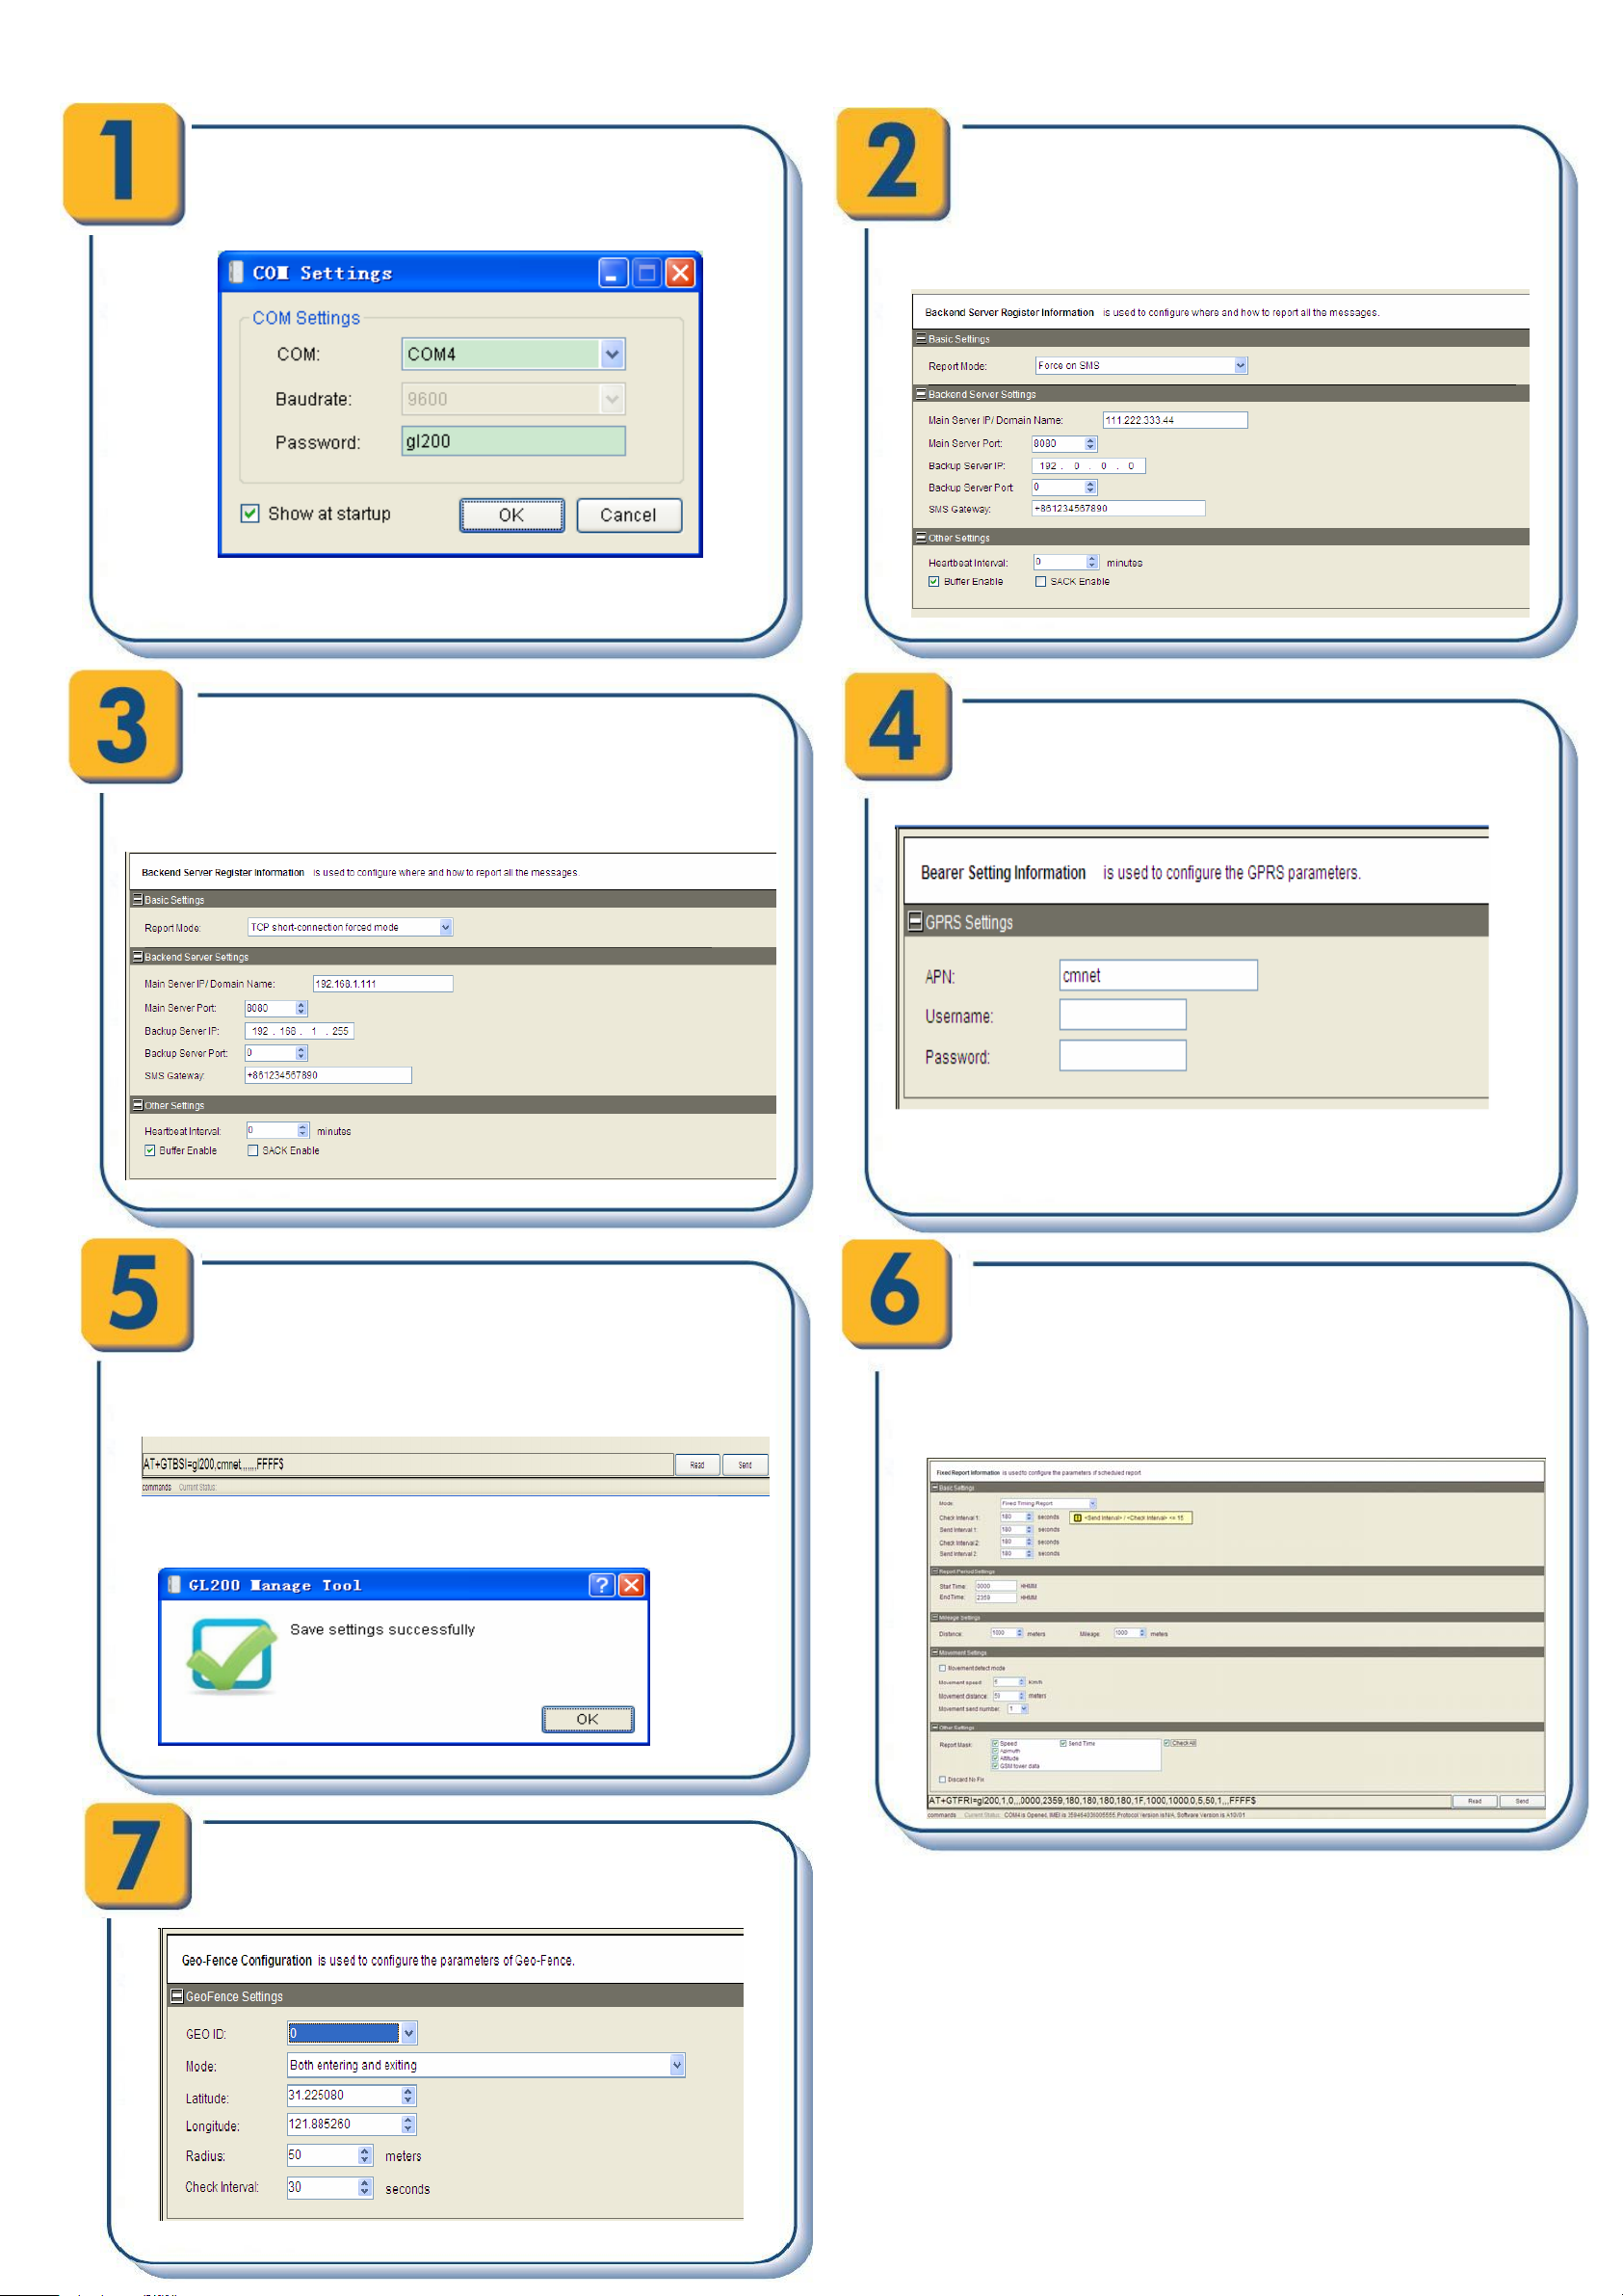
Run manager tool. Select correct Com port and
input default password “gl200”. Then press OK.
If you want to test the GL200 by SMS then set “Report
Mode” to “SMS” and input the phone number which
you want to receive the SMS from GL200. After that
you can go to Step 6.
Otherwise please go to Step 3
Set “Report Mode” to “TCP Short Connection”. input
the IP address and port number of the backend
server. Please make sure the IP address can be
accessed by internet and the data sends to this
address can be received.
Press the “Send” button and update the
parameters of GL200. Then the GL200 can
report information to your backend server or
SMS receiver.
Note: These commands can also be sent to
GL200 by SMS.
Please contact your SIM card provider and get the
APN information for GPRS. Input it in GTBSI
setting.
Set the parameters of scheduled fixed timing
report so that the GL200 will report it’s position
to backend server period periodically. Press
“Send” button to update the parameters.
Follow screen shot shows how to configure the
GL200 to report it’s position every 3 minutes.
Command has been accepted when you see the
success window.
The following screen shot shows how to create a
Geo-Fence rule. Press “Send” button to update the
parameters.
After these steps. GL200 will have some
basic tracking functions like scheduled
timing report and Geo-Fence. For other
advanced functions of GL200 please
refer to “GL200 @Tracker Air Interface
Protocol” or visit our website.
 Loading...