

Page 1

GoVault™ for Windows
Contents 0
Quick Start Guide
The Quantum internal GoVault for Windows, model QR 1201, and external
GoVault Tabletop for Windows, model QR 1202, are cost-effective, highperformance data protection solutions. Quantum’s removable disk
technology, the Ruggedized Disk Cartridge (RDC), referred to in this
document as the cartridge, together with the GoVault dock, serve as a twocomponent data storage system.
Each GoVault dock allows the cartridge to be hot plugged and available to
the host Windows operating system and includes an LED indicator for
power and activity status.
The Internal GoVault Dock:
• Attaches to the computer through a Serial ATA interface and is SATA II
compliant at SATA 1.5 Gbytes/sec. speeds.
• Is compatible with SATA-equipped motherboards and SATA PCI host
bus adapters. See the Quantum web page www.quantum.com
latest list of SATA PCI adapters that are compatible with the Quantum
GoVault.
for the
This document is provided in the
following languages:
•English
•French
•German
• Japanese
•Korean
• Simplified Chinese
•Spanish
• Traditional Chinese
Each language has the following
sections:
• Installing GoVault For Windows
• Installing the Internal GoVault Dock
• Installing the External GoVault
Tabletop Dock
• Installing the GoVault System
Application Software
• Installing the Backup Application
Software
• Registering GoVault
• Inserting and Ejecting Cartridges
• Safety Compliance
• Electromagnetic Compatibility
(EMC) Compliance
The External GoVault Tabletop Dock:
• Attaches to the computer through a Universal Serial Bus (USB) 2.0
interface.
• Has a Serial ATA (SATA) I/O port for interfacing with the removable
disk cartridge.
The Cartridge:
• Is a durable, removable disk that can withstand a one-meter drop to a
hard surface and has an interconnection with the carrier that is rated at
5,000 insertions.
• Capacity varies from 40, 80, 120, and 160 Gbytes.
• Provides long-term safe data storage for up to 10 years.
• Has a write-protect switch to guard against accidental data overwrite.
Additionally:
• Each external GoVault Table top system includes the following:
• Power adapter/converter
• USB interface cable
• GoVault Resource CD
• Backup application software CD
Page 2
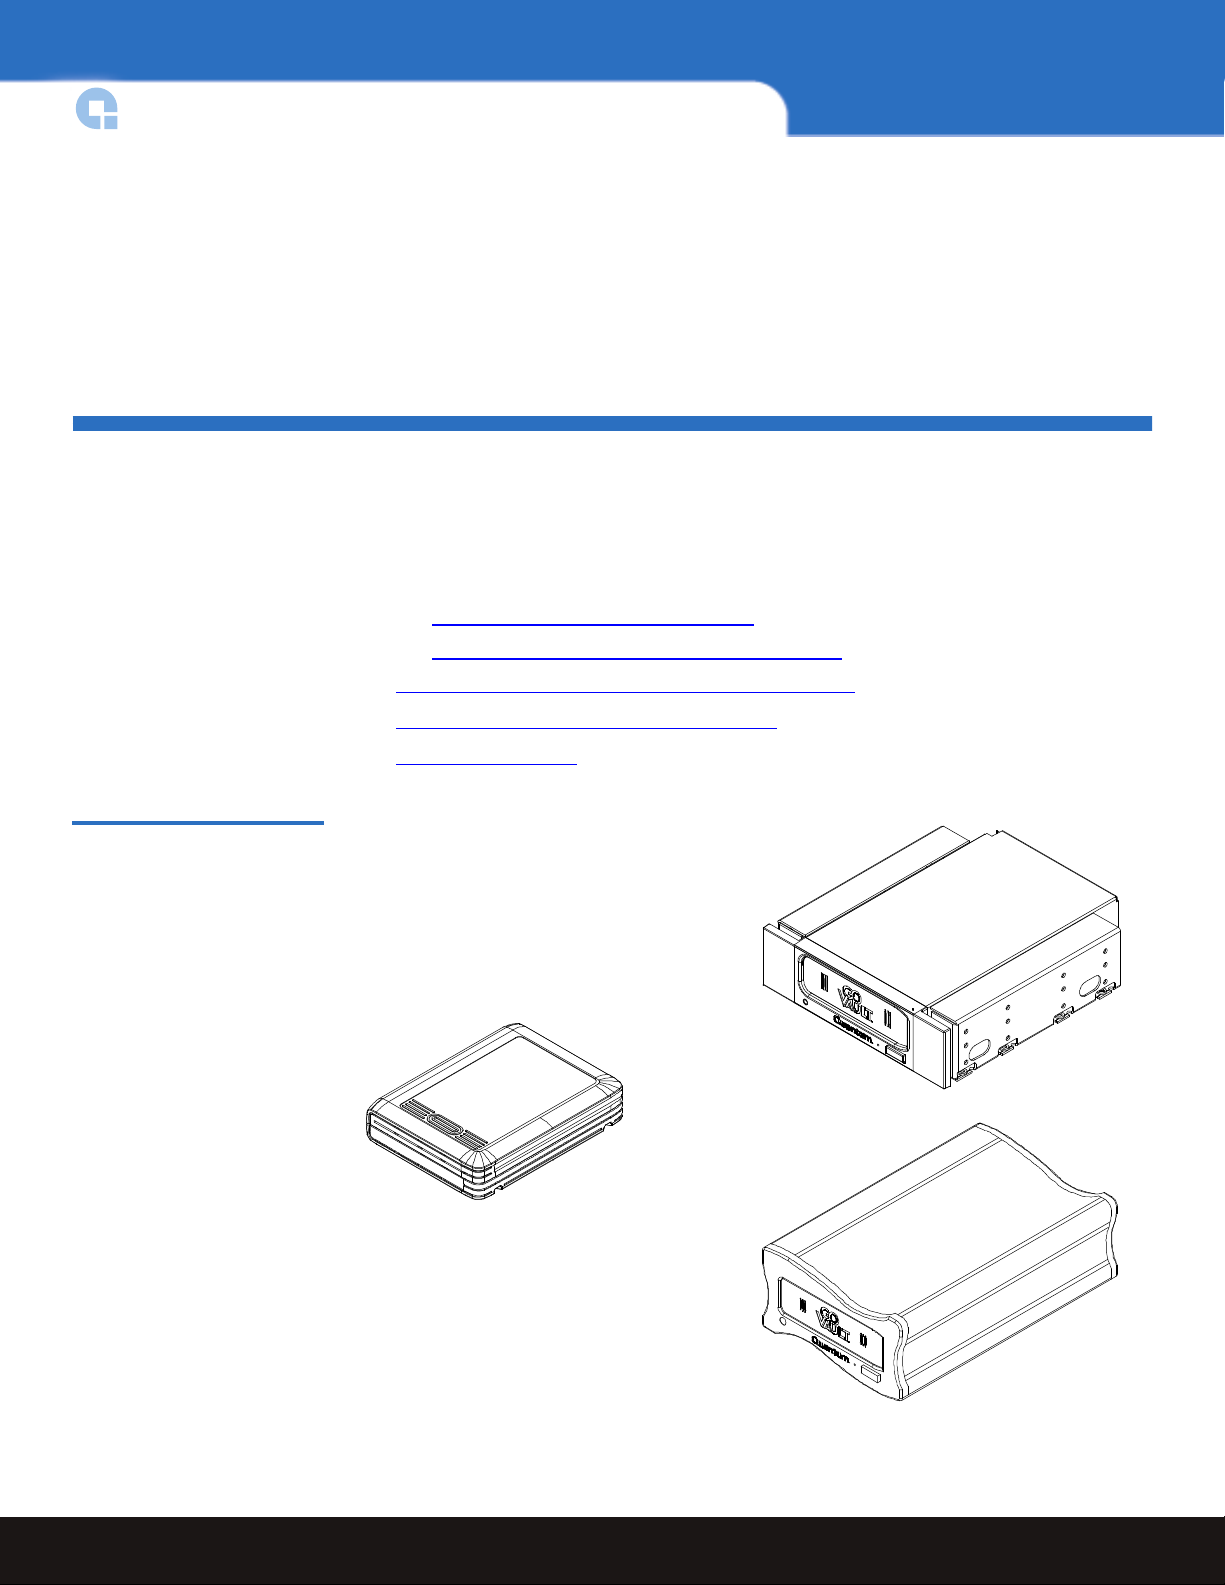
Quick Start Guide
Internal dock with 5 1/4-inch
bezel and side rails attached
External tabletop dock
Cartridge
• Each internal GoVault system includes the following:
• SATA data cable
• SATA power supply conversion adapter cable
• Dock/rail installation screws
• 3.5-inch bezel
• GoVault Resource CD
• Backup application software CD
Installing GoVault For Windows
Installing GoVault for Windows is quick and easy. Be sure to follow these procedures in
the order presented:
1 Install the GoVault dock by either:
• Installing the Internal GoVault Dock
• Installing the External GoVault Tabletop Dock
2 Installing the GoVault System Application Software
Figure 1 GoVault Components
3 Installing the Backup Application Software
4 Registering GoVault
2 Installing GoVault For Windows
Page 3
GoVault™ for Windows
Before Installing GoVault 0
Installation of GoVault for Windows requires the following computer hardware,
software, and tools:
• Hardware
•CPU, either:
• Intel Pentium 4 or above
• AMD K6 or above
• CD-ROM drive
• 2 Mbytes of hard disk storage
• For the internal GoVault dock:
• One empty 3.5-inch or 5.25-inch drive bay
• One empty PCI card slot (if SATA host bus adapter is needed)
• SATA II compliant interface
• For the external GoVault Tabletop dock, one available USB port
• Software
• Windows 2000, Windows 2003, Windows XP, or Windows Vista
• Tools, for the internal GoVault dock:
• Phillips screwdriver
Note: The standard configuration of the internal GoVault dock includes side brackets
and a 5.25-inch bezel for installation in a 5.25-inch drive bay. If you need to
install the dock in a 3.5-inch drive bay, use the procedure in appendix A of the
GoVault for Windows User’s Guide to remove the side brackets and change the
bezel before installing the GoVault dock.
Installing the Internal GoVault Dock
To install the internal GoVault dock and cartridge disk drive, complete the following
procedures in the order presented:
1 Installing the SATA Card
2 Installing the Internal GoVault Dock
Installing the SATA Card 0
If your workstation or server system does not already have either a SATA-equipped
motherboard or a SATA-compliant host bus adapter PCI card, you should follow the
procedures provided by the manufacturer of the SATA card and your computer reference
manual.
, if required
Installing the Internal GoVault Dock 3
Page 4
Quick Start Guide
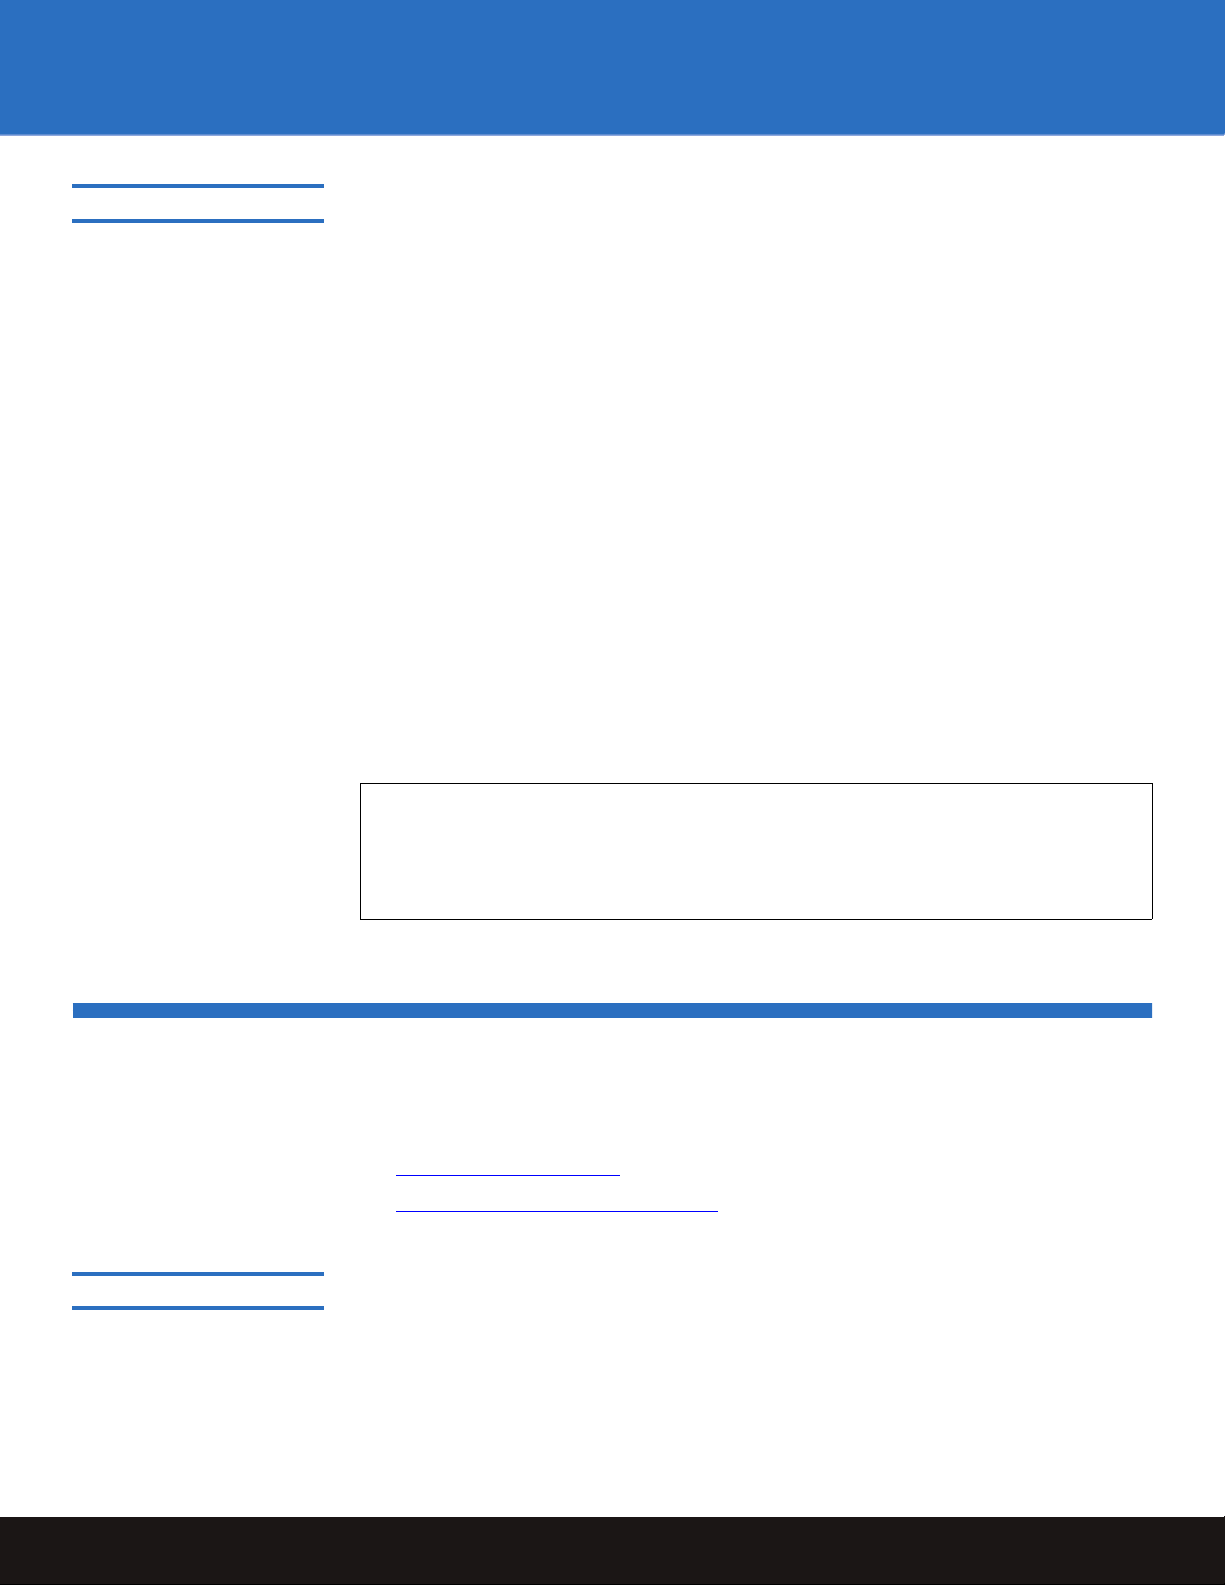
SATA card
PCI slot
If the procedures presented in this subsection do not appear to be appropriate for your
workstation or server system, stop the installation attempt and seek assistance from the
appropriate hardware manufacturer.
Note: This procedure is only necessary if your workstation or server system does not
already have a SATA-equipped motherboard or a SATA-compliant host bus
adapter PCI card installed.
Figure 2 Installing the SATA
Card
Procedure
1 As required:
a Save and close your open files and terminate all running applications.
b Shut down the workstation or server system.
c Disconnect the AC power cord from the facility AC power receptacle.
2 Remove the cover from the workstation or server system.
Note: See your computer manufacturer’s instructions for the proper procedures
to remove the cover.
3 Install the SATA card in an empty PCI slot and fasten the card to the computer using
one screw (see figure 2
).
0
Installing the Internal
GoVault Dock 0
After you have installed the SATA card, or if your computer workstation or server system
already has either a SATA-equipped motherboard or a SATA-compliant host bus adapter
PCI card, use the following procedure to install the internal GoVault dock.
Procedure
1 If you have just installed a SATA card, then you already have shut down the
computer and removed the cover. In this case, skip to step 4 of this procedure.
If your computer workstation or server system already had either a SATA-equipped
motherboard or a SATA-compliant host bus adapter PCI card, then proceed to step 2
of this procedure.
4 Installing the Internal GoVault Dock
Page 5
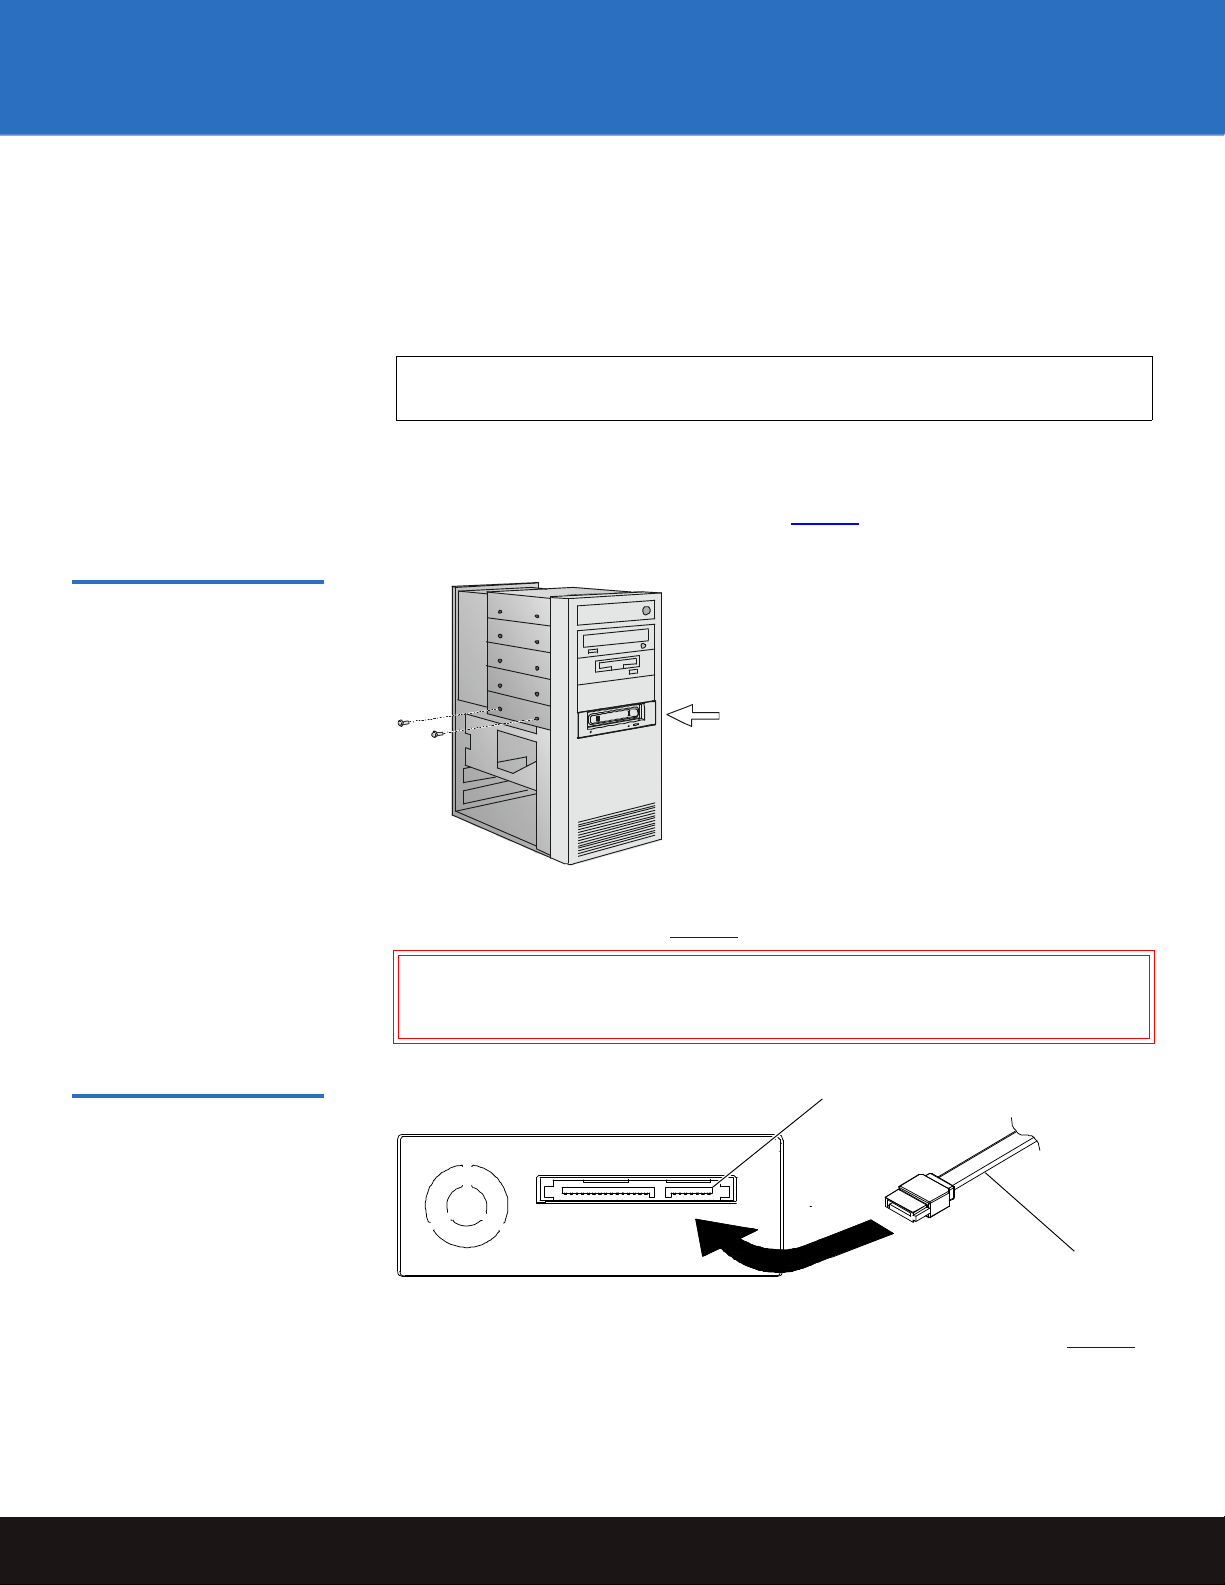
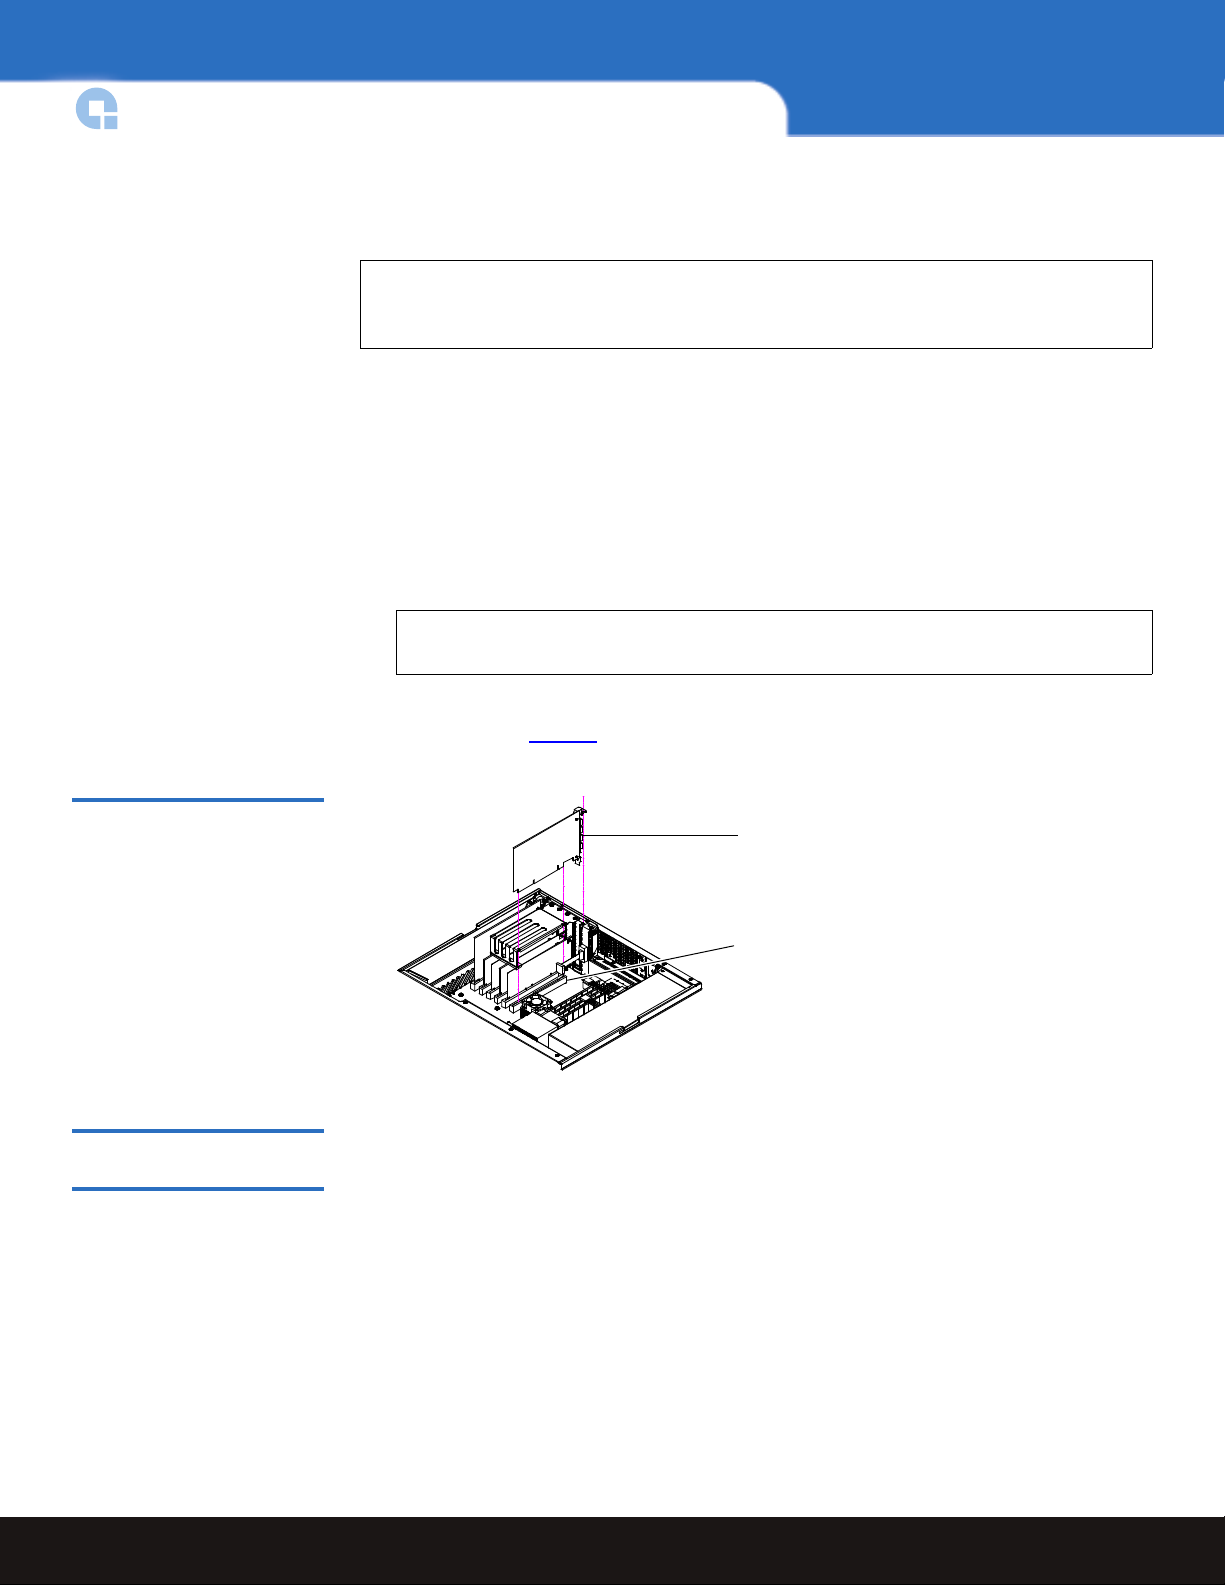
Figure 3 Installing and
Internal GoVault dock
SATA data connector
SATA data cable
Securing the GoVault Dock
GoVault™ for Windows
2 As required:
a Save and close your open files and terminate all running applications.
b Shut down the workstation or server system.
c Disconnect the AC power cord from the facility AC power receptacle.
3 Remove the cover from the workstation or server system.
Note: See your computer manufacturer’s instructions for the proper procedures
to remove the cover.
4 Select an available internal drive bay and, if required, remove the bay cover.
5 Slide the internal GoVault dock into the bay and secure it to the computer chassis
with two mounting screws on each side (see figure 3
).
Figure 4 Connecting the SATA
Data Cable to the Dock
6 Connect one end of the SATA data cable to the SATA data connector on the back of
the internal GoVault dock (see figure 4
).
Caution: Do not force SATA connections. SATA connectors are designed to fit
one way only. If you encounter any difficulty in making the SATA
cable connection, rotate the cable and try again.
7 Carefully route the SATA data cable from the internal GoVault dock and connect the
other end to either the SATA-equipped motherboard or the SATA card (see figure 5
Installing the Internal GoVault Dock 5
).
Page 6

Quick Start Guide
SATA data cable
SATA data connector
SATA card (top view)
SATA DC power connector
SATA power supply conversion
adapter cable
SATA power supply
conversion adapter cable
Computer power harness connector
Figure 5 Connecting the SATA
Data Cable to the SATA Card
Figure 6 Connecting the SATA
Power Cable to the Dock
8 Connect the drive end of the SATA power supply conversion adapter cable to the
SATA power connector on the back of the internal GoVault dock (see figure 6
).
Figure 7 Connecting the SATA
Power Cable to the PC
9 Connect the power supply end of the of the SATA power supply conversion adapter
cable to the computer power harness connector (see figure 7
).
10 Reinstall the system cover and reconnect the AC power cord to the facility AC power
receptacle.
11 Restart the workstation or server system.
12 Verify that the LED on the front panel of the GoVault dock illuminates when the
system restarts.
13 Insert a GoVault cartridge into the dock and verify that the front panel activity LED
indicator signifies a successful cartridge load operation (see Inserting Cartridges
page 11).
on
6 Installing the Internal GoVault Dock
Page 7

Figure 8 Successful
GoVault
Configuration Display
GoVault™ for Windows
14 Use Windows My Computer to verify successful GoVault installation and
configuration (see figure 8
15 Perform a number of file copy operations to and from the GoVault cartridge to verify
the disk read/write functions.
16 If you are going to install both the GoVault system application software and the
backup application software, then proceed to Installing the GoVault System
Application Software on page 9.
If you are not going to install the GoVault system application software, then skip to
Installing the Backup Application Software
Note: If you do not install the GoVault system application software, the
Windows operating system might assign the low-speed Programmed I/O
(PIO) mode for GoVault data transfer operations. Use the procedures in
appendix B of the GoVault for Windows User’s Guide to determine if this is
the case and, if necessary, configure the operating system to use the highspeed Direct Memory Access (DMA) mode for GoVault data transfer
operations.
).
on page 10.
Installing the External GoVault Tabletop Dock
Install the external GoVault Tabletop dock and cartridge as follows:
1 Connect the drive-end (Mini-B) connector of the USB interface cable to the Mini-B
USB port on the rear panel of the GoVault Tabletop dock (see figure 9
2 Connect the DC power output plug of the power adapter/converter to the DC power
jack on the rear panel of the dock.
3 Carefully position the dock in a secure location that provides adequate circulation for
the rear panel air vents (see figure 9
Installing the External GoVault Tabletop Dock 7
).
).
Page 8

Quick Start Guide
Air vents Mini-B USB port DC power jack
Figure 9 GoVault Tabletop
Rear Panel
4 Plug the power adapter/converter into a 115/230 VAC facility power receptacle and
verify that the LED on the front panel of the GoVault Tabletop dock illuminates.
5 Connect the system-end (standard) connector of the USB interface cable to an
available USB port on your workstation or server system and verify that the system
launches the
Found New Hardware wizard that finds and configures the device driver,
assigns a drive letter, and enables read/write access.
6 Use Windows
figure 8
).
My Computer to verify successful GoVault Tabletop configuration (see
7 Insert a GoVault cartridge into the dock and verify that the front panel activity LED
indicator signifies a successful cartridge load operation (see Inserting Cartridges
on
page 11).
8 Perform a number of file copy operations to and from the GoVault cartridge to verify
the disk read/write functions.
9 If you are going to install both the GoVault system application software and the
backup application software, then proceed to Installing the GoVault System
Application Software in the next subsection.
If you are not going to install the GoVault system application software, then skip to
Installing the Backup Application Software
.
Note: If you do not install the GoVault system application software, the
Windows operating system might assign the low-speed Programmed I/O
(PIO) mode for GoVault data transfer operations. Use the procedures in
appendix B of the GoVault for Windows User’s Guide to determine if this is
the case and, if necessary, configure the operating system to use the highspeed Direct Memory Access (DMA) mode for GoVault data transfer
operations.
8 Installing the External GoVault Tabletop Dock
Page 9

Installing the GoVault System Application Software
Use one of three system application applets on the GoVault Resource CD to install the
GoVault system application software.
Each applet provides an installation package that corresponds to one of the three types of
supported operating systems:
•
x64
• x86
• IA64
To install the internal GoVault system application software, complete the following
procedures in the order presented:
1 Determining Which System Application Applet to Use
2 Installing the GoVault System Application Software
GoVault™ for Windows
Determining Which
System Application
Applet to Use 0
Installing the GoVault
System Application
Software 0
To find out which system application applet you need to use:
1 From the
2 Select Properties.
3 On the
IF... THEN use the... system application applet
you see
you do not see
the system is a 64-bit Itanium, IA64
After determining which system application applet you need to use, install the GoVault
system application software on your workstation or server system as follows:
1 Insert the GoVault Resource CD into the CD-ROM drive.
2 Browse the CD contents to find the
application applet.
3 Double-click the
4 Follow the screen prompts to complete the GoVault system application software
installation.
Start menu on your PC, right click My Computer.
General tab, under the System heading, look for the words x64 Edition.
x64 Edition,x64
x64 Edition,x86
SetupGoVault.msi file for the appropriate system
SetupGoVault.msi file to launch the GoVault Setup Wizard.
5 As prompted, when the installation completes, click
dialog to exit the GoVault Setup Wizard.
6 Remove the GoVault Resource CD from the CD-ROM drive.
Installing the GoVault System Application Software 9
Close on the Installation Complete
Page 10

Quick Start Guide
7 Verify successful installation of the GoVault system application software by right-
clicking the GoVault drive letter and seeing the
options on the menu display
8 If you are going to install the included backup application, or another backup
application, proceed to Installing the Backup Application Software
subsection.
Set Password and GoVault Help
in the following
If you are not going to install a backup application, skip to Registering GoVault
Installing the Backup Application Software
GoVault for Windows includes a robust backup application. After you have installed the
GoVault dock and cartridge hardware and the GoVault system application software:
IF you want to install...
the included backup application software, on the included backup CD.
some other backup application software, by the other backup application software
Before installing any other backup application software, check the Compatibility Guide
on the Quantum website to verify that it is compatible with GoVault:
www.quantum.com/ServiceandSupport/CompatibilityGuides/Index.aspx
After installing the backup application software, proceed to Registering GoVault in the
following subsection.
.
THEN refer to the installation
instructions provided...
supplier.
Registering GoVault
After installing GoVault, register it via the Quantum website at:
www.quantum.com/registration
Registering GoVault ensures that you will receive the latest technical information about
the drive, as well as other product, service, and support information.
10 Installing the Backup Application Software
Page 11

Inserting and Ejecting Cartridges
Alignment slot
You can insert and eject GoVault cartridges without shutting down the workstation or
server system.
GoVault™ for Windows
Inserting Cartridges 0
To insert a cartridge into the GoVault dock:
1 Verify that the activity LED indicator is on continuously, and not flashing, to signify
that the GoVault dock is functioning correctly.
Caution: Do not insert a cartridge when the activity LED indicator is either off
or flashing. Doing so might require a manual eject procedure to
remove the cartridge.
2 Carefully slide the cartridge into the GoVault dock until you feel a slight resistance as
the cartridge engages the internal mechanical load/eject mechanism.
Note: The GoVault dock has an internal alignment tab that engages a matching
alignment slot on the upper-right side of the cartridge. This design feature
makes it impossible to insert the cartridge either upside-down or
backwards (see figure 10
If you feel any mechanical resistance as you slide the cartridge into the dock, stop and
make sure the cartridge is oriented properly, with the connector to the rear and the
alignment slot to the upper-right.
3 Firmly push the cartridge the rest of the way into the dock.
4 Verify that the front panel activity LED flashes on and off as the operating system
accesses the cartridge.
).
Figure 10 Inserting a Cartridge
Inserting and Ejecting Cartridges 11
Page 12

Quick Start Guide
Ejecting Cartridges 0
You can eject a cartridge from the GoVault dock by either:
• Pressing the front panel cartridge eject button (see Power Cartridge Eject Procedure
• Using the Windows software eject function (see Software Cartridge Eject Procedure
or your backup application software
If neither of those procedures ejects the cartridge, and you must remove the cartridge
from the dock, you could also:
• Force an emergency cartridge eject by pressing and holding the front panel cartridge
eject button (see Emergency Cartridge Eject Procedure
• Use the front panel manual cartridge eject hole (see Manual Cartridge Eject
Procedure)
Power Cartridge Eject Procedure
1 Verify that the font panel activity LED indicator is not flashing, which would signify
that the cartridge is being accessed.
Caution: Ejecting the cartridge while it is being accessed can result in a loss of
data.
2 Press and hold the front panel cartridge eject button for a second or longer, and watch
the activity LED to confirm that the cartridge eject operation is underway:
)
)
)
0
This LED indication . . . Signifies . . .
continuous fast flashing a normal cartridge eject operation, which can take up
to ten seconds to complete.
five flashes and then stop that either the operating system or your backup appli-
cation software inhibited the cartridge eject operation.
In this case, see Software Cartridge Eject Procedure
the following subsection, or refer to the documentation
for your backup application software.
3 Remove the cartridge from the dock after the eject operation completes and store it in
its protective case.
Software Cartridge Eject Procedure
Use Windows to perform the cartridge eject function as follows:
1 Verify that the font panel activity LED indicator is not flashing, which would signify
that the cartridge is being accessed.
Caution: Ejecting the cartridge while it is being accessed can result in a loss of
data.
in
0
2 Right-click the
to display the GoVault menu.
12 Inserting and Ejecting Cartridges
GoVault icon in either Windows Explorer or the My Computer window
Page 13

GoVault™ for Windows
3 Click Eject to eject the cartridge.
4 Remove the cartridge from the dock after the eject operation completes and store it in
its protective case.
Emergency Cartridge Eject Procedure
Caution: Avoid using this procedure. Ejecting a cartridge in this manner can result
in a loss of data and directory corruption.
If neither the power nor software cartridge eject procedure is successful, and you
absolutely must have the cartridge ejected from the dock:
1 Verify that the font panel activity LED indicator is not flashing, which would signify
that the cartridge is being accessed.
Caution: Ejecting the cartridge while it is being accessed can result in a loss of
data.
2 Press and hold the front panel cartridge eject button until the cartridge ejects. This
could take from fifteen to thirty seconds or more.
Disregard any displayed error messages.
Note: If the cartridge still does not eject, remove power from the GoVault by
either shutting down your workstation or server system (internal GoVault
dock), or unplugging the power adapter/converter from the DC power
jack on the rear panel of the external GoVault Tabletop dock and use the
manual cartridge eject procedure (see Manual Cartridge Eject Procedure
0
).
3 Remove the cartridge from the dock after the eject operation completes.
4 Restart your workstation or server system to reset the GoVault dock firmware.
5 Before using the cartridge again, verify the integrity of its directory and file system as
follows:
a Insert the cartridge into the GoVault dock.
b Use the Windows chkdsk
cartridge file system.
c If the integrity check fails, reformat the cartridge before using it again (see
Reformatting Cartridges in the GoVault for Windows User’s Guide).
Manual Cartridge Eject Procedure
In case of a power loss or other unusual situation that prevents a normal power or
software cartridge eject operation, you can manually eject the cartridge from the GoVault
dock by straightening a large paper clip and inserting it into the front panel manual
cartridge eject hole (see figure 11
Inserting and Ejecting Cartridges 13
command or a third-party utility to check the
).
0
Page 14

Quick Start Guide
Manual cartridge eject hole
Figure 11 Manual Cartridge
Eject Hole
Do not use a pencil or other breakable items.
Caution: Do not use the manual cartridge eject procedure while power is applied to
the GoVault dock. Data can be lost or corrupted if you eject the cartridge
while power is applied to the dock.
Safety Compliance
GoVault drives are safety compliant with the following regulatory organizations and
codes in the countries indicated.
Country Regulatory Organization Compliant to:
Canada Canadian Standards Association (CSA) UL/CSA 60950-1
EU member nations Comité Europèen de Normalisation Electrotechnique
– the European Committee for Electrotechnical Standardization (CENELEC)
Germany Bauart EN 60950-1, 2001
IECEE* member
nations
Taiwan BSMI BSMI certification, CNS 14336
IECEE* International Electrotechnical Commission on
Electrical Equipment (IECEE) for Mutual Recognition
of Test Certificates for Electrical Equipment “CB
Scheme”
EN 60950-1, 1st edition
CB Scheme per IEC 60950-1 with
details and exceptions for each member country
14 Safety Compliance
Page 15

GoVault™ for Windows
Country Regulatory Organization Compliant to:
United States Nationally Recognized Testing Laboratory (NRTL) UL/CSA 60950-1
*
ICEE member nations include: Argentina, Austria, Australia, Belgium, Brazil, Canada, China (PR), Czech Republic, Denmark, Finland, France, Germany, Hungary, India, Ireland, Israel, Italy, Japan, (South) Korea, Montenegro, Netherlands,
Norway, Poland, Russian Federation, Serbia, Singapore, Slovakia, Slovenia, South Africa, Spain, Switzerland, Turkey,
United Kingdom, and USA.
Electromagnetic Compatibility (EMC) Compliance
GoVault drives are EMC compliant with the following regulatory organizations and
codes in the countries indicated.
Country Regulatory Organization Compliant to:
Australia Australian Communications and Media Authority
(ACMA)
Canada Industry Canada Digital Apparatus - Interference-
Causing Equipment Standard (ICES-003)
EU member nations CE Emissions per CISPR 22, EN55022
Japan Voluntary Control Council for Interface (VCCI) VCCI
New Zealand Australian Communications and Media Authority
(ACMA)
South Korea MIC CISPR 22 and CISPR 24
Taiwan Bureau of Commodity Inspection and Quarantine
(BSMI)
United States Federal Communications Commission (FCC) Title 47: Code of Federal Regulations,
Note: Use internal GoVault drives only in equipment where the combination has
been determined to be suitable by an appropriate certification organization (for
example, Underwriters Laboratories Inc. or the Canadian Standards
Association in North America).
AS/NZS 3548 (same as CISPR 22)
ICES-003 Digital Apparatus
and Immunity per CISPR 24, EN55024
AS/NZS 3548 (same as CISPR 22)
BSMI EMC certification, CNS 14338
Part 15, Subpart B (47CFR15B),
Electromagnetic Compatibility (EMC) Compliance 15
Page 16

Quick Start Guide
You should also consider the following safety points:
• Install the drive in an enclosure that limits the user’s access to live parts, gives
adequate system stability and provides the necessary grounding for the drive.
• Provide the correct voltages (+5 VDC and +12 VDC) based on the regulation
applied—Extra Low Voltage (SEC) for UL and CSA, and Safety Extra Low Voltage for
BSI and VDE (if applicable).
For assistance contact Quantum Technical Assistance center:
North America +1-800-284-5101
UK, France, and Germany 00800 4 QUANTUM
EMEA +44 1256 848 766
For worldwide support: www.quantum.com/contactsupport
Backup. Recovery. Archive. It’s What We Do.
©2007 Quantum Corporation. All rights reserved. Quantum, the Quantum logo, and all other
logos are registered trademarks of Quantum Corporation or their respective owners.
Quantum Corp. (NYSE: QTM) is the leading global storage company
specializing in backup, recovery and archive. Combining focused
expertise, customer-driven innovation, and platform independence,
Quantum provides a comprehensive range of disk, tape, media, and
software solutions supported by a world-class sales and service
organization. As a long-standing and trusted partner, the company works
closely with a broad network of resellers, OEMs, and other suppliers to
meet customer’s evolving data protection needs.
20013265-001 June 2007
 Loading...