

Page 1

Quantum|ATL 7100 Series
Library Unpacking Instructions
Introduction 3
Optional Cable Cover...................................................................................3
Selecting an Installation Locat ion 4
Floor Space .......................................................................... ...........................4
Floor Clearance.... ......... .................................................................................4
Floor Strength, Inclination, and Characteristics .......................................5
Power and Grounding..................................................................................5
Environmental Conditions...........................................................................5
Preparing for the Installation 6
Providing the Necessary Tools and Equipment.......................................6
Taking ESD Precautions...............................................................................6
Unpacking the Library 7
Receiving the Library....................................................................................7
Unpack the Library.......................................................................................7
Checking the Packing List..........................................................................11
Positioning the Library...............................................................................11
Installation Procedures 13
Removing the Internal Packing Materials ...............................................13
Storing the Shipping Materials..................................................................15
Leveling the Library....................................................................................16
Document 6241100-03, Ver. 3, Rel. 1, August 2001 1
Page 2

Quantum|ATL 7100 Series Library Unpacking Instructions
Document 6241100-03, Ver. 3, Rel. 1
August 2001
2 6207947-05fN 8
Page 3
Quantum|ATL 7100 Series Library Unpacking Instruc tions
Document 6241100-03, Ver. 3, Rel. 1
August 2001
Introduction 0
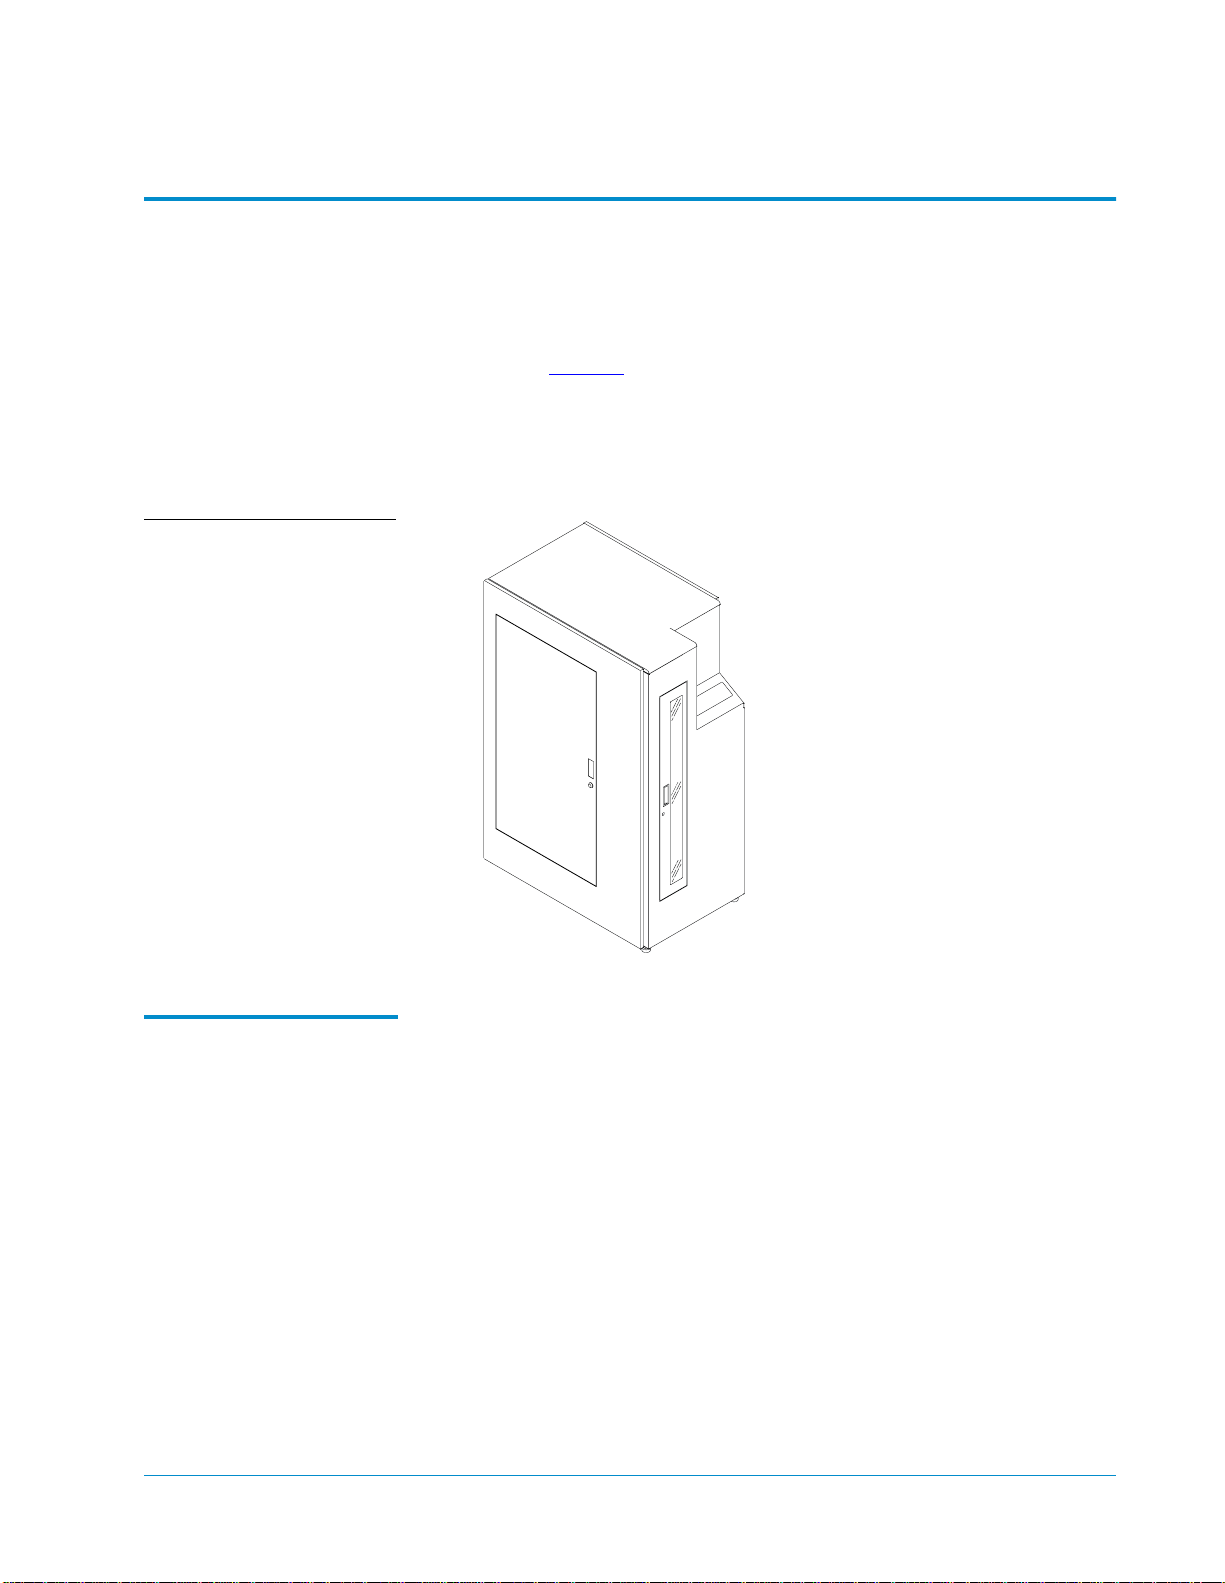
This document explains how to unpack the crate containing the
Quantum|ATL 7100 Series library, an automated storage and retrieval
system (see figure 1
After completing the instructions in this booklet, perform the set up
procedure using the instructions in the Quantum|A TL 71 00 Series Lib rary
Facilities Planning and Installation Guide.
Figure 1 Quantum|ATL
7100 Series Library
).
Optional Cable Cover0
The Quantum|Quantum|ATL 7100 Series library may include an
optional cable cover. The cable cover ships in a separate box strapped
on top of the Quantum|ATL 7100 Series crate. For informati o n on thi s
optional item, refer to the Quantum|ATL 7100 Series Cable Cover
Installation Instructions in the cable cover shipping box.
Introduction 3
Page 4
Quantum|ATL 7100 Series Library Unpacking Instructions
Document 6241100-03, Ver. 3, Rel. 1
August 2001
Selecting an Installation Location 0
When choosing an installation site for the library, consider the
following requirements:
• Floor space
• Floor clearance
• Floor strength and inclination
• Power and grounding
• Environmental conditions
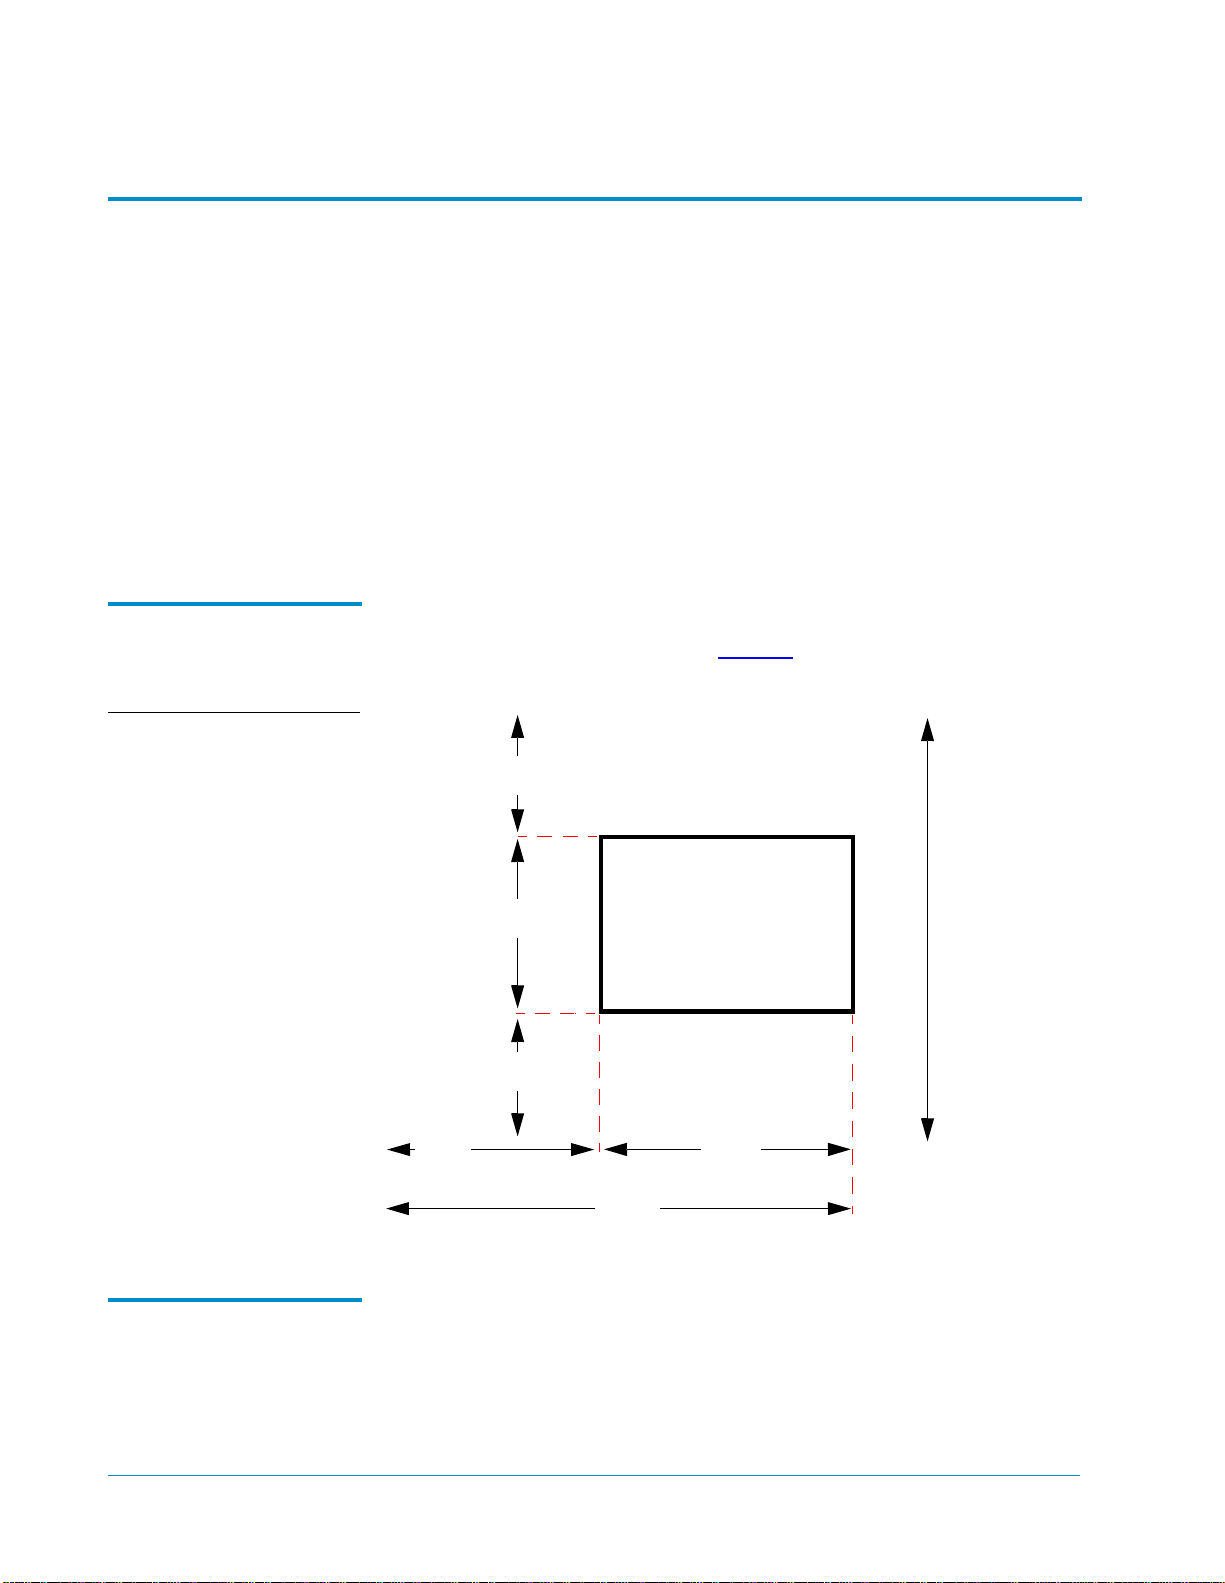
Floor Space 0
Figure 2 Floor Space
Requirements
The Quantum|ATL 7100 series library requires over 2 ft. of open floor
space around the entire unit (see figure 2
25 in (64 cm)
Rear
24 in (61 cm)
25 in (64 cm)
25 in
(64 cm)
Library
37 in
(94 cm)
).
Front
74 in
(188 cm)
62 in
(157 cm)
Floor Clearance 0
4 Selecting an Installati on Location
The library has a floor clearance of 0.75 inch (19 mm).
Page 5
Quantum|ATL 7100 Series Library Unpacking Instruc tions
Document 6241100-03, Ver. 3, Rel. 1
August 2001
Floor Strength, Inclination, and Characteristics
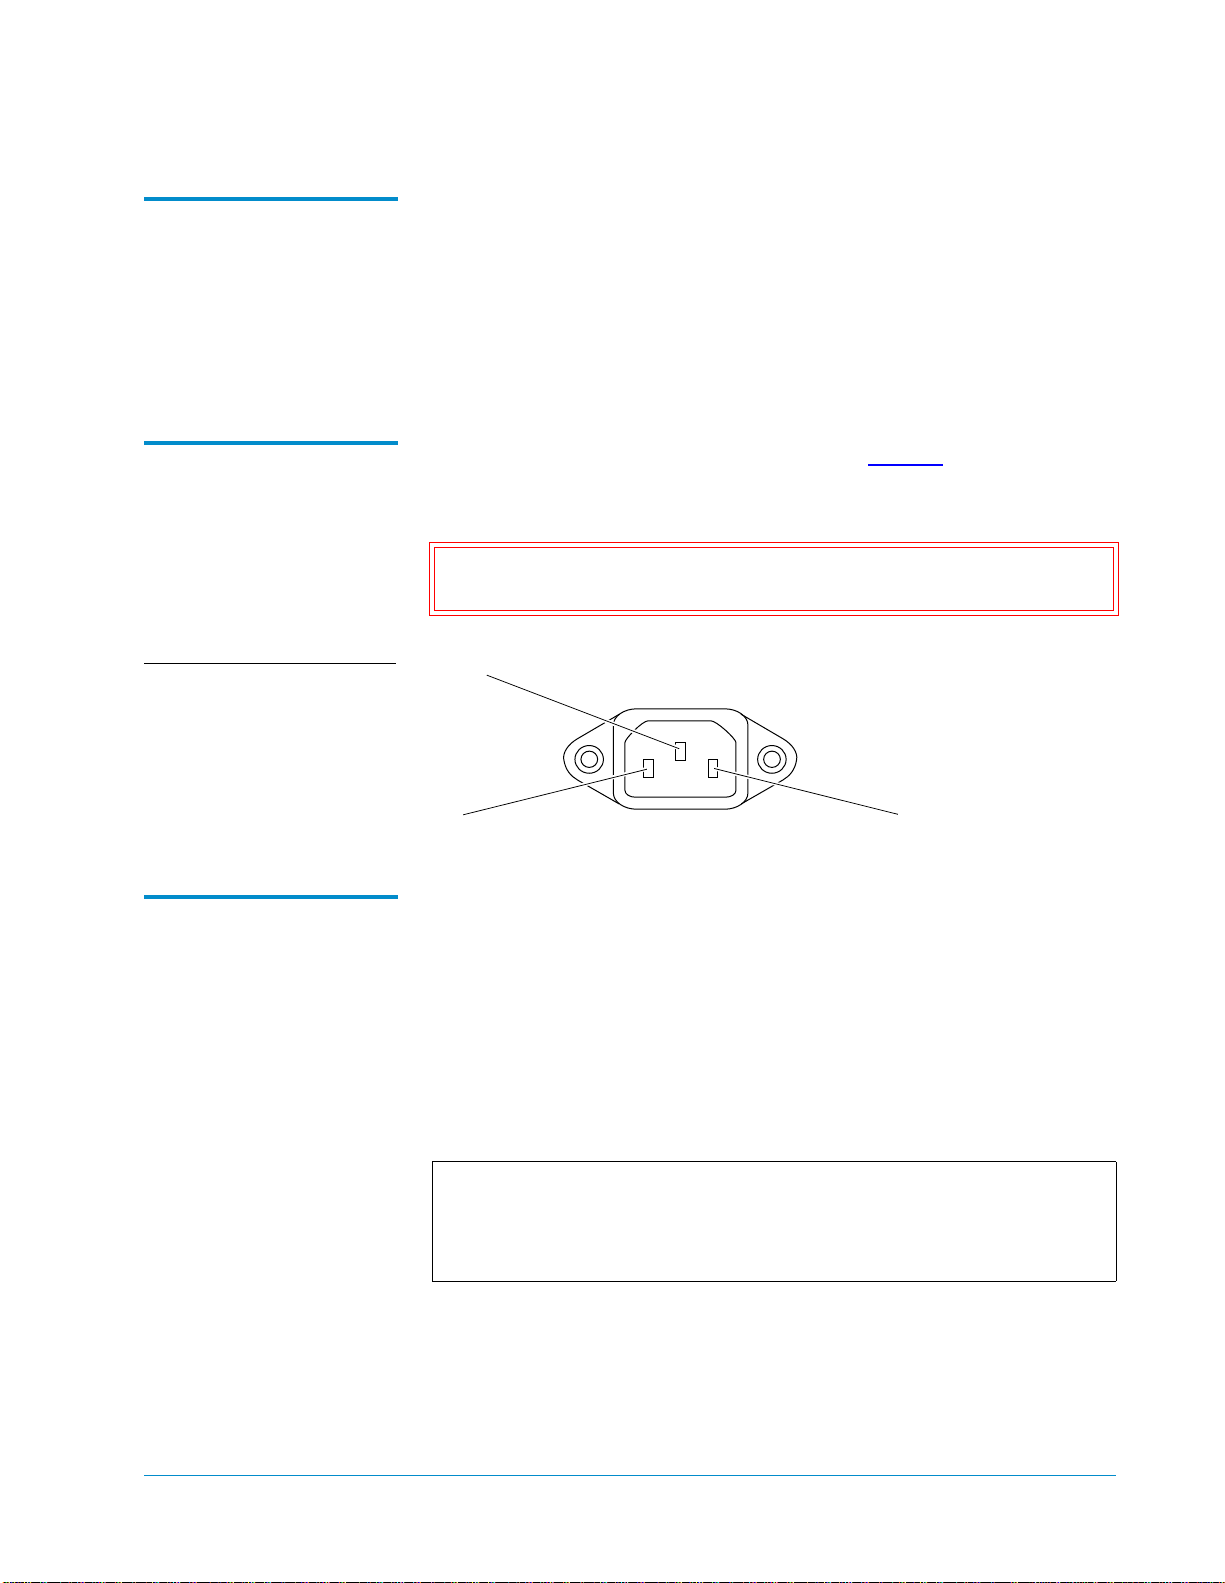
Power and Grounding0
Figure 3 Library Power
Receptacle
The floor at the installation site must be rated at 250 lb/ft
2
m
). This is sufficient to support a fully loaded Quantum|ATL 7100
0
Series library.
2
(1221 kg/
The floor must be level to within 0.25 inch (6.4 mm) over a 6-foot-by-6foot (1.83-meter-by-1.83-meter) area.
The floor at the installation site must be uncarpeted and free of defec ts.
The power inlet is an IEC-320 connector (see figure 3). Outside N orth
America, replace the power cord with a harmonized 3 x 2 mm
2
power
cord that is approved by the country where used.
Caution: To prevent equipment damage, connect the library to a
grounded electrical outlet.
Ground
IEC-320 Type
~100-120V/~200 - 240V
3.5A/7A 50/60 Hz
4A/2A
Environmental Conditions
Line
Neutral
The installation site must have the following environmental
0
conditions:
• Humidity: 10% to 90%
• Temperature: 15° C to 32° C (59° F to 90° F)
• Altitude: sea level to 13,200 feet (4.023 km)
These environmental conditions only apply when the library is in
operation.
Note: For additional library specifications (including
environmental requirements during shipping and storage),
refer to the Quantum|A TL 7100 Seri es Library Facilit ies Planning
and Instal lation Guide.
Selecting an Installation Location 5
Page 6

Quantum|ATL 7100 Series Library Unpacking Instructions
Document 6241100-03, Ver. 3, Rel. 1
August 2001
Preparing for the Installation 0
Use the following steps to prepare for the installation:
• Providing necessary tools and equipment
• Taking ESD precautions
Providing the Necessary Tools and Equipment
Taking ESD Precautions
Provide the following tools for leveling the library:
0
• 3/4-inch open-end wrench
• Level
Some components within the Quantum|ATL 7100 Series library
0
contain static-sensitive parts. To avoid damaging these parts while
performing installation procedures, always observe the following
precautions:
• Do not switch on the library during installation procedures.
• Keep the library power cord connected to a grounded power outlet
except when working with AC electrical components.
• Avoid contact with power supplies, EMI filters, and AC electrical
components while the library is connected to a power outlet.
• Use an antistatic wrist strap.
• Keep static-sensitive parts in their original shipping containers
until ready for installation.
• Do not place static-sensitive parts on a metal surface. Place them
inside their protective shipping bag or on a grounded antistatic
mat.
• Avoid touching connectors and other static-sensitive components.
• Keep library doors and access panels closed whenever possible.
Note: Dry climates and cold-weather heating environments
have lower relative humidity and are more likely to
produce static electricity.
6 Preparing for the Installation
Page 7

Quantum|ATL 7100 Series Library Unpacking Instruc tions
Document 6241100-03, Ver. 3, Rel. 1
August 2001
Unpacking the Library 0
This section expla ins how to unpack the library and move it to its
installation location. The following are the major steps in this section:
• Receiving the library
• Unboxing the library
• Checking the packing list
• Positioning the library
Note: Before fo llowing the instructi ons in this s ection, verify
the installation site meets the requirements found in
“Selecting an Installation Location” on page 4 of this
document.
Receiving the Library0
Unpack the Library 0
Inspect the shipping pallet and carton for damage that may have
occurred during shipment. Report any damage to the shipper.
Warning: The library weighs approximately 500 pounds (227 kg).
Use at least two people to unpack, move, and install the
library.
To unpack the library:
1 Verify the minimum floor space requirements (see figure 4).
Note: Unpacking the crate requires a minimum of 8 feet (2.44
meters) in front of the library, and adequate space at the
sides and back for two people to maneuver.
Unpacking the Library 7
Page 8

Quantum|ATL 7100 Series Library Unpacking Instructions
Document 6241100-03, Ver. 3, Rel. 1
August 2001
Figure 4 Minimum Floor
Space Requirements—
Unpacking Site
Ramp
extension
Library
Pallet
Figure 5 Removing the
Steel Bands
Unloading area
(minimum)
40 in (1.02 m)
24 in
(61 cm)
37 in (94 cm)
2 Cut the two steel bands that secure the library and packing
material to the pallet (see figure 5
).
Caution: The steel bands are under tension and will snap away
when cut.
Optional
cable
cover
10 ft (3.05 m)
Without
optional
cable
cover
Steel bands
8 Unpacking the Library
RAMP SIDE
RAMP SIDE
With optional
cable cover
Page 9

Figure 6 Removing the
Cardboard Box
Quantum|ATL 7100 Series Library Unpacking Instruc tions
Document 6241100-03, Ver. 3, Rel. 1
August 2001
3 If the optional cable cover is included:
• Remove the cable cover box from the top of the library.
• Set the cable cover box aside.
• Refer to the Quantum|ATL 7100 Series Cable Cover
Installation Instructions to install the cable cover.
4 Cut the two steel bands that secure the cardboard box to the pallet.
5 Lift the box top straight up and off the cardboard box (see
figure 6
6 Open the four retaining clips on the rear of the cardboard box.
7 Unwrap and remove the cardboard box from the library.
).
Box top
Retaining clip
Cardboard box
Pallet
8 Lift the accessories tray up and off the library (see figure 7).
9 Lift the foam cap up and off the library (see figure 7).
10 Remove the two screws that secure the stop block. The stop block
is located under the library in front of the casters.
Unpacking the Library 9
Page 10

Quantum|ATL 7100 Series Library Unpacking Instructions
Document 6241100-03, Ver. 3, Rel. 1
August 2001
11 Remove the stop block.
Figure 7 Removing the
Accessories Tray and Stop
Block
Accessories tray
Foam cap
Stop block
12 Pull the two ramp extensions out from under the library (see
figure 8
).
13 Secure the ramp extensions to the pallet using the Velcro straps.
14 Carefully cut the shipping bag along the heat-seal seam (see
figure 8
.
10 Unpacking the Library
Page 11

Figure 8 Ramp Extens ion s
Quantum|ATL 7100 Series Library Unpacking Instruc tions
Document 6241100-03, Ver. 3, Rel. 1
August 2001
Heat seal seam
Ramp extensions
Checking the Packing List
Positioning the Library
After you finish unpacking the library, check the packing list to verify
0
that you have received all library components and accessories. If any
part is missing or damaged, contact your authorized reseller.
To position the library:
0
Warning: The library weighs approximately 500 pounds (227 kg).
Use at least two people to unpack, move, and install the
library.
1 Map out a route to the installation site.
2 Verify the floor clearance, strength, and inclination information
(see figure 2
3 Verify that the library’s leveling feet are raised. If not, raise each
).
foot as needed as by turning the le veling foot u ntil it is fully
retracted (see figure 9
).
Unpacking the Library 11
Page 12

Quantum|ATL 7100 Series Library Unpacking Instructions
Document 6241100-03, Ver. 3, Rel. 1
August 2001
Figure 9 Leveling Feet
4 Using two people, carefully wheel the library out of the shipping
bag and down the ramp.
Figure 10
Nonstructural Features
Caution: When maneuvering the library, do not push on
nonstructural features (see figure 10
Storage array door
Storage array
door handle
).
5 Roll the library to the final installation area.
Drive access door
and handle
Control panel
Front door
Front door handle
12 Unpacking the Library
Page 13

Quantum|ATL 7100 Series Library Unpacking Instruc tions
Document 6241100-03, Ver. 3, Rel. 1
August 2001
Installation Procedures 0
This section explains how to unpack the library’s internal packing
materials and prepare it for installation. The following are the major
steps in this procedure:
• Removing the internal packing materials
• Storing the shipping materials
• Leveling the library
Removing the Internal Packing Materials
To remove the internal packing material from the library:
0
1 Remove the packing material from the load port door (see
figure 11
a Open the load port door.
b Remove the foam sheet.
c Close the load port door.
2 Remove the packing material from the drive access door (see
figure 11
a If necessary, unlock the drive access door.
b Open the drive access door.
c Remove the foam sheet.
d Close the drive access door.
3 Remove the packing material from the front door by using the
):
):
procedure in step 2.
4 Remove the packing material from the storage array door:
a If necessary, unlock the storage array door.
b Open the storage array door.
c Remove the foam sheet.
Installation Procedures 13
Page 14

Quantum|ATL 7100 Series Library Unpacking Instructions
Document 6241100-03, Ver. 3, Rel. 1
August 2001
Figure 11 Access Doors
Storage array door
5 Remove the tie wraps from the robotics area (see figure 12):
Front door
Load port door
Drive access door
Figure 12 Tie Wraps
a Remove the tie wrap that secures the gripper.
b Remove the tie wrap that secures the horizontal carriage
assembly to the library frame.
Note: Do not cut the tie wraps.
Gipper tie wrap
Horizontal carriage tie wrap
14 Installation Procedures
Page 15

Figure 13 Internal Packing
Material
Quantum|ATL 7100 Series Library Unpacking Instruc tions
Document 6241100-03, Ver. 3, Rel. 1
August 2001
6 Remove the internal packing material (see figure 13):
a Remove the horizontal carriage tie wrap.
b Gently raise the extension axis assembly.
c Remove the vertical axis packing block.
d Gently push the carriage assembly toward the front of the
library.
e Remove the horizontal axis packing block.
f Lower the extension axis to the floor of the library.
Horizontal carriage
tie wrap
Storing the Shipping Materials
Horizontal packing
block
Vertical axis
packing block
To store the shipping and packaging materials for future use:
0
1 Replace the ramp extensions:
a Remove the Velcro straps securing the ramp extensions to the
pallet in the unload ing positi on.
b Slide the two ramp extensions into their shipping position on
top of the pallet.
c Secure the ramp extensions with the Velcro straps.
2 Place the molded top, shipping bag, and all packagi ng materials on
top of the pallet.
3 Collapse the cardboard box.
4 Place the box on top of the packaging materials on the pallet.
5 Secure the pallet, packaging materials, and cardboard box for
future use.
Installation Procedures 15
Page 16

Quantum|ATL 7100 Series Library Unpacking Instructions
Document 6241100-03, Ver. 3, Rel. 1
August 2001
Leveling the Library 0
To level the library:
1 Lower each foot of the library until it makes contact with the floor
(see figure 9
2 Apply a 1/4 turn clockwise with the open-end wrench to tighten
).
each foot against the floor.
3 Center a carpenter’s level on the top front edge of the library.
4 Check the gauge on the level. If the front of the library is level, go
to the next step. If it is not level:
a Determine the tilt of the library.
b Lower the foot on the low side by applying a 1/4 turn with the
open-end wrench.
c Repeat until the front is level.
5 Repeat the previous step for all edges of the library.
6 Recheck the level on all top edges.
To continue installation procedures, refer to the Quantum|ATL 7100
Series Facilities Planning and Install ation Guide.
16 Installation Procedures
 Loading...