

Page 1

Installation Guide Installation Guide Installation GuideInstallation Guide
StorNext® 3.1.3
StorNext
6-00360-15
Page 2

StorNext 3.1.3 Installation Guide, 6-00360-15 Rev B, September 2009, Made in USA.
Quantum Corporation provides this publication “as is” without warranty of any kind, either express or implied,
including but not limited to the implied warranties of merchantability or fitness for a particular purpose. Quantum
Corporation may revise this publication from time to time without notice.
COPYRIGHT STATEMENT
© Copyright 2000 - 2009 Quantum Corporation. All rights reserved.
US Patent No: 5,990,810 applies. Other Patents pending in the US and/or other countries.
StorNext is either a trademark or registered trademark of Quantum Corporation in the US and/or other countries.
Your right to copy this manual is limited by copyright law. Making copies or adaptations without prior written
authorization of Quantum Corporation is prohibited by law and constitutes a punishable violation of the law.
TRADEMARK STATEMENT
ADIC, Quantum, DLT, DLTtape, the Quantum logo, and the DLTtape logo are all registered trademarks of Quantum
Corporation. SDLT and Super DLTtape are trademarks of Quantum Corporation.
Other trademarks may be mentioned herein which belong to other companies.
Page 3
Contents
Chapter 1 Installing StorNext File System and Storage Manager 1
Storage Manager System Requirements.........................................................2
Operating System Requirements.............................................................. 2
Hardware Requirements ...........................................................................2
LAN Requirements..................................................................................... 4
Getting Ready to Install ....................................................................................5
Configuring Storage Devices .................................................................... 5
Planning for LUNs Larger than 1 TB....................................................... 5
Installing the Linux Kernel Source Code ................................................ 7
Verifying Hostname Length......................................................................7
Pre-Installation Script........................................................................................ 8
Before You Begin.........................................................................................8
Running snPreInstall.................................................................................. 9
Interpreting snPreInstall Output............................................................ 10
StorNext Installation Script ............................................................................ 12
Launching the StorNext Installation Script........................................... 12
Changing Installation Configuration Options......................................14
Performing an Installation Operation.................................................... 17
Chapter 2 Installing StorNext File System 18
File System Requirements............................................................................... 19
Operating System Requirements............................................................ 19
StorNext 3.1.3 Installation Guide iii
Page 4

Contents
Hardware Requirements .........................................................................20
LAN Requirements................................................................................... 20
Getting Ready to Install ..................................................................................21
Configuring Storage Devices .................................................................. 21
Planning for LUNs Larger than 1 TB..................................................... 22
Installing the Linux Kernel Source Code .............................................. 23
Installing StorNext File System on Linux or Unix ...................................... 24
Launching the SNFS Installation Script................................................. 24
Changing Installation Configuration Options......................................25
Performing an Installation Operation.................................................... 26
Installing StorNext File System on Windows.............................................. 27
Removing a Previous Version of StorNext ........................................... 28
Running the Setup Wizard...................................................................... 29
Restoring a Previous Client Configuration........................................... 33
Chapter 3 Installing the StorNext Client 36
Client System Requirements .......................................................................... 37
Operating System Requirements............................................................ 37
Hardware Requirements .........................................................................38
Downloading the StorNext Client Software ................................................ 39
Installing the StorNext Client on Linux or Unix .........................................42
Installing the StorNext Client on Linux................................................. 42
Installing the StorNext Client on Sun Solaris ....................................... 44
Installing the StorNext Client on HP-UX .............................................. 46
Installing the StorNext Client on IBM AIX ........................................... 47
Installing the StorNext Client on SGI IRIX ........................................... 49
Installing the StorNext Client on Windows................................................. 51
Removing a Previous Version of StorNext ........................................... 51
Running the Setup Wizard...................................................................... 52
Restoring a Previous Client Configuration........................................... 56
Chapter 4 Configuring StorNext 59
StorNext GUI .................................................................................................... 60
Accessing the StorNext GUI.................................................................... 60
Configuration Wizard ..................................................................................... 62
Displaying the Configuration Wizard................................................... 63
Using the Configuration Wizard............................................................ 63
Configuring a Distributed LAN Client Server ............................................67
StorNext 3.1.3 Installation Guide iv
Page 5

Contents
Configuring a Distributed LAN Client on Linux................................. 68
Configuring a Distributed LAN Server on Linux................................ 68
Windows Configuration Utilities .................................................................. 72
Client Configuration................................................................................. 73
Disk Device Labeler.................................................................................. 83
License Identifier....................................................................................... 86
Simple File System Configuration.......................................................... 86
Start File System Services ........................................................................ 88
Stop and Remove File System Services ................................................. 88
Stop File System Services.........................................................................88
Version Information ................................................................................. 88
Check (Read-Only) a File System ........................................................... 89
File System Startup List ........................................................................... 89
Re-initialize a File System........................................................................ 91
Repair a File System ................................................................................. 91
Server Administration.............................................................................. 91
Server Configuration................................................................................ 97
Appendix A Uninstalling StorNext 108
Uninstalling StorNext on Unix and Linux .................................................108
Uninstalling SNSM and SNFS .............................................................. 109
Uninstalling the StorNext Client Software ......................................... 110
Uninstalling StorNext on Windows............................................................ 111
Appendix B StorNext Administration Tasks 112
Sharing a Library Between Applications....................................................112
Manually Modifying Storage Manager Configuration ............................ 114
fs_sysparm_override Configuration File............................................. 114
filesize.config Configuration File ......................................................... 115
log_params Configuration File............................................................. 115
Connecting to a StorNext Network Using Xsan 1.4.2............................... 116
Mounting SNFS on the OSx Computer ............................................... 116
Creating the automount.plist File ........................................................ 118
Connecting to a StorNext Network Using Xsan 2..................................... 119
Mounting SNFS on the Mac OS X Computer..................................... 119
Viewing a Fibre Channel Device ................................................................. 122
StorNext Log Rolling Administration......................................................... 123
Changing Log Rolling Times ................................................................ 123
StorNext 3.1.3 Installation Guide v
Page 6

Contents
Log Rolling Options ............................................................................... 123
Avoiding Poor System Performance........................................................... 124
Appendix C StorNext Files 125
The example.cfg File......................................................................................125
Commonly Used SNFS Files ........................................................................ 132
Appendix D Quality of Service Guide 135
Overview.........................................................................................................136
Active vs. Passive.................................................................................... 136
Supported Platforms .............................................................................. 136
Configuration ................................................................................................. 137
Unit of I/O............................................................................................... 137
Converting MB/sec to I/O/sec............................................................ 137
Real-time I/O..................................................................................................142
SetRtio.......................................................................................................143
Oversubscription ....................................................................................143
Handles .................................................................................................... 143
Ungated files............................................................................................ 144
Calculating Available RTIO ..................................................................145
Callbacks ......................................................................................................... 145
Callback Failures.....................................................................................147
Tokens ...................................................................................................... 148
Failure Semantics....................................................................................149
FSM Failures............................................................................................150
Client Failures ......................................................................................... 150
Client Token Releases ............................................................................ 151
Monitoring ...................................................................................................... 151
Sharing Disk Resources................................................................................. 152
StorNext 3.1.3 Installation Guide vi
Page 7

Figures
Figure 1 Pre-Installation Script ................................................................ 10
Figure 2 StorNext Installation Script....................................................... 13
Figure 3 Configuration Menu .................................................................. 15
Figure 4 StorNext Installation Status ...................................................... 17
Figure 5 SNFS Installation Script............................................................. 25
Figure 6 Configuration Menu .................................................................. 26
Figure 7 StorNext Installation Status ...................................................... 27
Figure 8 StorNext Installation Window: Remove StorNext ................28
Figure 9 StorNext Installation Window: Install StorNext.................... 29
Figure 10 SNFS Setup: Welcome ............................................................... 30
Figure 11 SNFS Setup: End-User License Agreement............................30
Figure 12 SNFS Setup: Customer Information ........................................ 31
Figure 13 SNFS Setup: Choose Setup Type..............................................31
Figure 14 SNFS Setup: Ready to Install .................................................... 32
Figure 15 SNFS Setup: Finish ..................................................................... 32
Figure 16 StorNext Installation Window: Configure StorNext.............33
Figure 17 StorNext Configuration Window............................................. 34
StorNext 3.1.3 Installation Guide vii
Page 8

Figures
Figure 18 Import/Export Client Configuration Window...................... 35
Figure 19 Select Platform Window............................................................40
Figure 20 Download Client Software Window ....................................... 41
Figure 21 StorNext Installation Window: Remove StorNext ................52
Figure 22 StorNext Installation Window: Install StorNext.................... 53
Figure 23 SNFS Setup: Welcome ............................................................... 53
Figure 24 SNFS Setup: End-User License Agreement............................54
Figure 25 SNFS Setup: Customer Information ........................................ 54
Figure 26 SNFS Setup: Choose Setup Type..............................................55
Figure 27 SNFS Setup: Ready to Install .................................................... 55
Figure 28 SNFS Setup: Finish ..................................................................... 56
Figure 29 StorNext Installation Window: Configure StorNext.............57
Figure 30 StorNext Configuration Window............................................. 57
Figure 31 Import/Export Client Configuration Window...................... 58
Figure 32 StorNext Home Page: File System and Storage Manager .... 61
Figure 33 StorNext Home Page: File System Only ................................. 61
Figure 34 StorNext Configuration Wizard: Storage Manager............... 62
Figure 35 StorNext Configuration Wizard: File System Only............... 63
Figure 36 sndpscfg Configuration Utility ................................................ 69
Figure 37 Client Configuration: Drive Mappings................................... 74
Figure 38 Client Configuration: FS Name Servers.................................. 76
Figure 39 Client Configuration: Authentication ..................................... 77
Figure 40 Client Configuration: Mount Options..................................... 79
Figure 41 Client Configuration: Syslog Level.......................................... 80
Figure 42 Client Configuration: Cache Parameters ................................81
Figure 43 Client Configuration: Distributed LAN.................................. 82
Figure 44 Disk Device Labeler ................................................................... 84
Figure 45 Disk Labeler Dialog Box............................................................ 85
Figure 46 Simple File System Configuration ...........................................87
StorNext 3.1.3 Installation Guide viii
Page 9

Figures
Figure 47 File System Startup List............................................................. 90
Figure 48 Server Administration ............................................................... 92
Figure 49 Server Administration: File System Properties...................... 93
Figure 50 Server Administration: Stripe Group Properties...................94
Figure 51 Server Administration: Quota Properties............................... 96
Figure 52 Configuration Administrator ...................................................98
Figure 53 Server Configuration: Global Settings..................................... 99
Figure 54 Server Configuration: Disk Types..........................................102
Figure 55 Server Configuration: Enter New Disk Type ....................... 103
Figure 56 Server Configuration: Disk Definitions................................. 104
Figure 57 Server Configuration: Stripe Groups..................................... 105
Figure 58 StorNext Remove Main Menu................................................110
Figure 59 Sharing Access to Files.............................................................144
Figure 60 Callback Flow for Initial RTIO Request................................ 146
Figure 61 Callback Retraction Example..................................................147
Figure 62 Non-Real-time Token Adjustments....................................... 149
StorNext 3.1.3 Installation Guide ix
Page 10
Tables
Table 1 Storage Manager Supported Platforms.................................... 2
Table 2 Storage Manager Hardware Requirements.............................. 3
Table 3 Required Disk LUN Labels ......................................................... 6
Table 4 StorNext Support Directories ..................................................... 8
Table 5 Pre-Installation Script Recommendation Types .................... 11
Table 6 StorNext Installation Main Menu Options ............................. 14
Table 7 File System Supported Platforms............................................19
Table 8 File System Hardware Requirements...................................... 20
Table 9 Required Disk LUN Labels ....................................................... 22
Table 10 SNFS Installation Main Menu Options................................... 25
Table 11 StorNext Client Supported Platforms .................................... 37
Table 12 Distributed LAN Server Parameters ....................................... 70
Table 13 Distributed LAN Client and Server Commands ................... 71
Table 14 Client Configuration: Drive Mappings................................... 74
Table 15 Client Configuration: FS Name Servers.................................. 76
Table 16 Client Configuration: Authentication .....................................77
Table 17 Client Configuration: Distributed LAN.................................. 82
StorNext 3.1.3 Installation Guide x
Page 11

Tables
Table 18 Disk Labeler Dialog Box............................................................ 85
Table 19 Simple File System Configuration ........................................... 87
Table 20 File System Startup List............................................................. 90
Table 21 Server Administration: File System Properties...................... 93
Table 22 Server Administration: Stripe Group Properties................... 95
Table 23 Server Administration: Quota Properties............................... 96
Table 24 Server Configuration: Global Settings..................................... 99
Table 25 Server Configuration: Enter New Disk Type.......................103
Table 26 Server Configuration: Disk Definitions................................. 104
Table 27 Server Configuration: Stripe Groups..................................... 106
Table 28 QOS Configuration Keywords...............................................138
StorNext 3.1.3 Installation Guide xi
Page 12

Preface
StorNext provides high performance data sharing and intelligent
archiving that is compatible with an industry-leading range of operating
systems, server platforms, and storage devices.
StorNext includes two main components:
• StorNext File System (SNFS) is high performance data sharing
software that lets applications on multiple operating systems access a
single data set.
• StorNext Storage Manger (SNSM) is an intelligent, policy-based data
mover that automatically moves and locates data across multiple
storage tiers.
You can choose to install both StorNext File System and Storage Manager,
or install StorNext File System only. In addition, StorNext includes client
software that allows client systems to mount and work with StorNext file
systems.
StorNext 3.1.3 Installation Guide xii
Page 13

Audience
Purpose
Preface
Audience
This document is intended for service professionals and system
administrators who install StorNext software. The installer should have
strong familiarity with the operating system on which StorNext is
installed.
Only service professionals, experienced StorNext users, or individuals
who have successfully completed StorNext training should configure
StorNext. Attempting to configure StorNext without proper experience or
training can affect system performance and may result in data loss.
This document provides information about installing and configuring
StorNext. The following topics are covered:
• System requirements
• Pre-installation tasks
• Installation
• Configuration
• Uninstalling StorNext
StorNext 3.1.3 Installation Guide xiii
Page 14

Document Organization
This document contains the following chapters:
• Chapter 1, “Installing StorNext File System and Storage Manager,”
provides system requirements, pre-installation information, and
instructions for installing StorNext File System and Storage Manger
on a metadata controller (MDC).
• Chapter 2, “Installing StorNext File System,” provides system
requirements, pre-installation information, and instructions for
installing StorNext File System (without Storage Manager) on a
metadata controller (MDC).
• Chapter 3, “Installing the StorNext Client,” provides system
requirements, pre-installation information, and instructions for
installing the StorNext client software.
• Chapter 4, “Configuring StorNext,” describes how to use the
StorNext configuration wizard and the Windows configuration
utilities to create a basic StorNext configuration, and how to
configure a distributed LAN client or server.
Preface
Document Organization
• Appendix A, “Uninstalling StorNext,” describes how to remove
StorNext software from a server or client system.
StorNext 3.1.3 Installation Guide xiv
Page 15

Notational Conventions
This manual uses the following conventions:
Convention Example
Preface
Notational Conventions
User input is shown in Arial regular
./install.stornext
font.
User input variables are enclosed in
mkdir -p <mount point>
angle brackets and are shown in
Arial italic font.
For UNIX and Linux commands, the
command prompt is implied.
File and directory names, menu
./install.stornext
is the same as
# ./install.stornext
/stornext/snfs1
commands, button names, and
window names are shown in Arial
bold font.
Menu names separated by arrows
indicate a sequence of menus to be
Admin > Download Client
Software
navigated.
The following formats indicate important information:
Note: Notes emphasize important information related to the main
topic.
Tech Tip: Tech Tips provide technical information which may be
helpful in performing the procedure.
Caution: Cautions indicate potential hazards to equipment and are
included to prevent damage to equipment.
StorNext 3.1.3 Installation Guide xv
Page 16
Related Documents
Documents related to StorNext are shown below:
Quantum StorNext Documentation 0
Preface
Related Documents
Warning: Warnings indicate potential hazards to personal safety and
are included to prevent injury.
Document No. Document Title Document Description
6-01658-06 StorNext User’s Guide Provides in-depth
information about using
StorNext to create and
manage StorNext File
Systems.
6-01376-10 StorNext File System
Tuning Guide
6-01620-09 StorNext Upgrade
Guide
6-01688-06 StorNext CLI Reference
Guide
StorNext 3.1.3 Installation Guide xvi
Provides information for
maximizing file system
performance.
Provides procedures for
upgrading from earlier
versions of StorNext.
Provides procedures for
performing common tasks
using the command line
interface.
Page 17

Preface
Contacting Quantum
Document No. Document Title Document Description
6-01564-02 AMASS Conversion
6-00431-23 StorNext 3.1.3 Release
Contacting Quantum
More information about this product is available on the Quantum Service
and Support website at
Quantum Service and Support website contains a collection of
information, including answers to frequently asked questions (FAQs).
You can also access software, firmware, and drivers through this site.
To request a software upgrade, visit www.quantum.com/
ServiceandSupport/Upgrade/Index.aspx. For further assistance, or if
training is desired, contact Quantum Global Services:
Provides information about
Guide
Notes
www.quantum.com/ServiceandSupport. The
migrating systems running
AMASS to StorNext.
Includes the latest product
information, fixes, and
issues.
North America
EMEA
Online Service and
Support
World Wide Web
(Local numbers for specific countries are listed on the Quantum Service
and Support Website.)
StorNext 3.1.3 Installation Guide xvii
+1 800-284-5101 Option 5
00800 9999 3822
www.quantum.com/OSR
www.quantum.com/ServiceandSupport
Page 18

Chapter 1
1Installing StorNext File System
and Storage Manager
This chapter describes how to install StorNext File System (SNFS) and
StorNext Storage Manager (SNSM) on a metadata controller (MDC).
Install both SNFS and SNSM for storage systems that require policybased data movement (for example, systems that include tape drives or
libraries).
To ensure successful operation, do the following tasks before installing
StorNext:
• Make sure the MDC meets all operating system and hardware
requirements (see
• Make sure all storage devices are correctly configured and are visible
to the MDC (see
Storage Manager System Requirements).
Getting Ready to Install on page 5)
• (Optional) Run the pre-installation script to check for available disk
space and view recommended locations for support directories (see
Pre-Installation Script on page 8).
When you are ready to install StorNext File System and Storage Manager
on the MDC, run the installation script (see
on page 12).
Note: To install only StorNext File System (without Storage
Manager), see
install the StorNext client software, see Chapter 3, “Installing
the StorNext Client.”
StorNext 3.1.3 Installation Guide 1
Chapter 2, “Installing StorNext File System.” To
StorNext Installation Script
Page 19

Chapter 1 Installing StorNext File System and Storage Manager
Storage Manager System Requirements
Storage Manager System Requirements
To run StorNext File System and Storage Manager, the metadata
controller must meet all operating system, hardware, and LAN
requirements.
Operating System Requirements 1
Table 1 Storage Manager
Supported Platforms
The operating systems, kernel versions, and hardware platforms
supported by StorNext SNFS and SNSM are presented in
sure the MDC uses a supported operating system and platform, and if
necessary update to a supported kernel version before installing
StorNext.
Operating System Kernel Platform
Red Hat Enterprise
Linux 4
Red Hat Enterprise
Linux 5
SUSE Linux Enterprise
Server 10
Sun Solaris 10 Generic 120011-14 SPARC 64-bit
2.6.9-55.EL (Update 5)
2.6.9-67.EL (Update 6)
2.6.9-78.EL (Update 7)
2.6.18-53.EL (Update 1)
2.6.18-92.EL (Update 2)
2.6.16.21-0.8
2.6.16-46-0.12 (SP1)
2.6.16-60-0.27 (SP2)
Table 1. Make
x86 32-bit
x86 64-bit
Itanium 64-bit
x86 64-bit
x86 32-bit
x86 64-bit
Itanium 64-bit
Hardware Requirements1
StorNext 3.1.3 Installation Guide 2
The minimum amount of RAM and available hard disk space required to
run StorNext SNFS and SNSM are presented in
files (such as database and journal files) are stored on the MDC, the
amount of local disk space that is required increases with the number of
data files stored on StorNext file systems.
If necessary, upgrade the RAM and local disk storage in the MDC to meet
the minimum requirements before installing StorNext.
Table 2. Because support
Page 20
Chapter 1 Installing StorNext File System and Storage Manager
Storage Manager System Requirements
Note: The RAM requirements in Table 2 are for running StorNext
File System and Storage Manager only. Running additional
software (including the StorNext client software) requires
additional RAM.
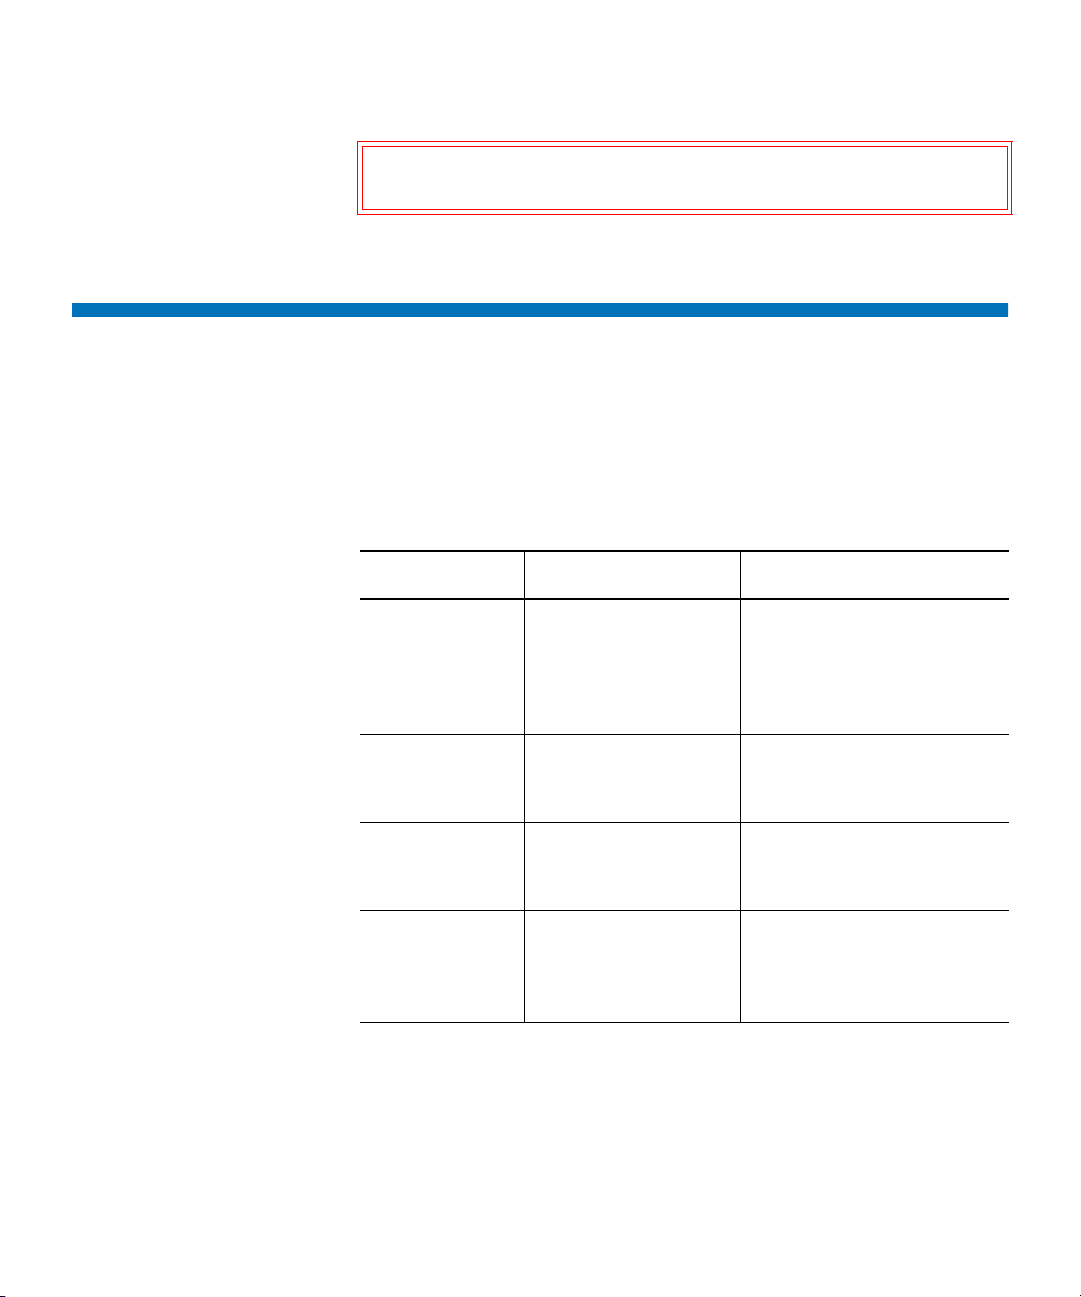
Table 2 Storage Manager
Hardware Requirements
File Systems RAM Disk Space
1–4* 2 GB • For application binaries, log files,
5–8** 4 GB
and documentation: up to 30GB
(depending on system activity)
• For support directories: 3 GB per
million files stored
• For metadata: 25GB minimum
* Two CPUs recommended for best performance.
** Two CPUs required for best performance.
Note: If a file system uses deduplicated storage disks (DDisks), note
the following additional requirements:
• Requires 2 GB RAM per DDisk in addition to the base RAM
noted in
Table 2.
• Requires an additional 5GB of disk space for application
binaries and log files.
• Deduplication is supported only for file systems running on
a Linux operating system (x86 32-bit or x86 64-bit).
• An Intel Pentium 4 or later processor (or an equivalent
AMD processor) is required. For best performance,
Quantum recommends an extra CPU per blockpool.
StorNext 3.1.3 Installation Guide 3
Page 21
Chapter 1 Installing StorNext File System and Storage Manager
Storage Manager System Requirements
Partitioning Local Hard Disks 1
StorNext can be installed on any local file system (including the root file
system) on the MDC. However, for optimal performance, as well as to aid
disaster recovery, follow these recommendations:
• Avoid installing StorNext on the root file system.
• Partition local hard disks so that the MDC has four available local file
systems (other than the root file system) located on four separate
hard drives.
Note: You can run the pre-installation script to help determine the
estimated size of and optimal location for StorNext support
directories. For more information, see
Pre-Installation Script
on page 8.
LAN Requirements 1
The following LAN requirements must be met before installing StorNext
on the MDC:
• In cases where gigabit networking hardware is used and maximum
StorNext performance is required, a separate, dedicated switched
Ethernet LAN is recommended for the StorNext metadata network. If
maximum StorNext performance is not required, shared gigabit
networking is acceptable.
• A separate, dedicated switched Ethernet LAN is mandatory for the
metadata network if 100 Mbit/s or slower networking hardware is
used.
• The MDC and all clients must have static IP addresses.
Verify network connectivity with pings, and also verify entries in the
/etc/hosts file.
• If using Gigabit Ethernet, disable jumbo frames and TOE (TCP
offload engine).
Note: StorNext does not support file system metadata on the same
network as iSCSI, NFS, CIFS, or VLAN data when 100 Mbit/s
or slower networking hardware is used.
StorNext 3.1.3 Installation Guide 4
Page 22
Getting Ready to Install
Before installing StorNext SNFS and SNSM, complete the following tasks
to ensure successful installation:
• Correctly configure all storage devices (see Configuring Storage
Devices).
• If using LUNs larger than 1 TB, decide on a label type and install any
necessary operating system patches (see
than 1 TB).
• (Linux only) Install the kernel source code (see Installing the Linux
Kernel Source Code on page 7).
Chapter 1 Installing StorNext File System and Storage Manager
Getting Ready to Install
Planning for LUNs Larger
Configuring Storage Devices 1
Planning for LUNs Larger than 1 TB 1
Before installing StorNext SNFS and SNSM, make sure that all LUNs are
visible to the MDC. (A LUN, or logical unit number, is a logical device
that corresponds to one or more disks, drives, or storage devices.)
If there are any connection issues, resolve them before installing
StorNext. For assistance in configuring storage devices, refer to the
documentation that came with the storage device, or contact the
manufacturer.
Note: LUNs that you plan to use in the same stripe group must be
the same size. Consider this when configuring storage devices.
(For more information about stripe groups, see the StorNext
3.1.3 User’s Guide.)
Caution: StorNext does not support the connection of multiple
devices through fibre channel hubs. Multiple devices must
be connected using fibre channel switches.
StorNext supports LUNs greater than 1 TB in size if they are allowed by
the operating system. To enable support for 1 TB or larger LUNs, all
StorNext LUNs must be correctly labeled according to the requirements
StorNext 3.1.3 Installation Guide 5
Page 23

Chapter 1 Installing StorNext File System and Storage Manager
Getting Ready to Install
of the operating system running on the MDC as well as the operating
system running on all connected clients. Disk LUNs can have one of three
labels: VTOC, EFI, or sVTOC (short VTOC).
Required disk LUN label settings based on operating system and LUN
size are presented in
Table 3. Before installing StorNext, decide what
label type will be used, and then install any required operating system
patches or updates (for both MDC and client) as indicated in the notes for
Table 3.
Note: After labeling a disk LUN, you must reboot systems running
Solaris before they can access the disk LUN.
Table 3 Required Disk LUN
Labels
Operating
System
Windows XP
Windows 2003
Label for
LUNs < 1 TB
a
VTOC, EFI VTOC, EFI EFI, sVTOC
Label for
LUNs 1–2 TB
VTOC, EFI VTOC, EFI EFI, sVTOC
Label for
LUNs > 2 TB
Server
Linux 2.6
VTOC, EFI VTOC, EFI EFI, sVTOC
Kernel
Linux 2.4
VTOC, EFI VTOC, EFI Not supported
Kernel
Solaris 9
Solaris 10
HP-UX
IBM AIX
b
c
a
d
VTOC, EFI EFI Not supported
VTOC, EFI EFI EFI
VTOC, EFI VTOC, EFI EFI, sVTOC
VTOC, EFI VTOC, EFI EFI, sVTOC
SGI IRIX VTOC VTOC Not supported
Apple Xsan 1.3
VTOC, EFI VTOC, EFI EFI, sVTOC
(MacOS X 10.4
Tiger)
Apple Xsan 1.3
(MacOS X 10.3
Panther)
StorNext 3.1.3 Installation Guide 6
a
VTOC, EFI VTOC, EFI EFI, sVTOC
Page 24
Chapter 1 Installing StorNext File System and Storage Manager
Getting Ready to Install
Installing the Linux Kernel Source Code 1
Operating
System
Apple Xsan
a
1.2
a. Supports only the first 2 TB of LUNs larger than 2 TB.
b. Support for EFI labels requires the Multiterabyte Disk Support patch.
c. Support for 2 TB or larger LUNs requires Solaris 10 Update 2 (06/06).
d. Supports only LUNs of 2.2 TB or less.
Label for
LUNs < 1 TB
Label for
LUNs 1–2 TB
Label for
LUNs > 2 TB
VTOC VTOC sVTOC
Note: For best results, Quantum recommends using persistent
binding for disk LUNs. For more information, contact the
vendor of your HBA (host bus adapter).
For management servers running Red Hat Enterprise Linux version 4 or
5, before installing SNFS and SNSM you must first install the kernel
header files (shipped as the kernel-devel or kernel-devel-smp RPM,
depending on your Linux distribution).
For servers running SUSE Linux Enterprise Server, you must install the
first kernel source code (shipped as the kernel-source RPM). StorNext
will not operate correctly if these packages are not installed. You can
install the kernel header files or kernel source RPMs by using the
installation disks for your operating system.
Verifying Hostname Length 1
The maximum hostname length for a StorNext server is limited to 25
characters. Before you begin the installation, verify that the destination
hostname is not longer than 25 characters. (The hostname is read during
the installation process, and if the hostname is longer than 25 characters
the installation process could fail.)
StorNext 3.1.3 Installation Guide 7
Page 25

Pre-Installation Script
The StorNext pre-installation script (snPreInstall) is included on the
StorNext installation CD. When you run
for information about your system. The pre-installation script uses this
information to estimate the amount of local disk space required for SNFS
and SNSM support directories. In addition, the script recommends the
optimal locations for support directories.
StorNext uses five directories to store application support information.
These directories are stored locally on the metadata controller, except for
the
Backup directory, which is stored on the managed file system.
The StorNext support directories are described in Table 4.
Chapter 1 Installing StorNext File System and Storage Manager
Pre-Installation Script
snPreInstall, you are prompted
Table 4 StorNext Support
Directories
Before You Begin 1
Support Directory Description
Database
/adic/database
Journal
/adic/database_jnl
Mapping
/adic/mapping_dir
Metadata
/adic/database_meta
Backup
/backup
Records information about where and how
data files are stored.
Records changes made to the database.
Contains index information that enables quick
searches on the file system.
Stores metadata dumps (backups of file
metadata).
Contains configuration files and support data
required for disaster recovery.
Before running the pre-installation script, be prepared to answer the
following questions:
• Is this an upgrade installation?
• What local file systems can be used to store support information?
• Which version of StorNext will be installed?
StorNext 3.1.3 Installation Guide 8
Page 26
Chapter 1 Installing StorNext File System and Storage Manager
Pre-Installation Script
• What is the maximum number of directories expected (in millions)?
• What is the maximum number of files expected (in millions)?
• How many copies will be stored for each file?
• How many versions will be retained for each file?
Note: Keep in mind that storage needs typically grow rapidly.
Consider increasing the maximum number of expected
directories and files by a factor of 2.5x to ensure room for
future growth.
Note: The pre-installation script ignores unmounted file systems.
Before running
snPreInstall, be sure to mount all local file
systems that will hold StorNext support information.
Running snPreInstall 1
To run the pre-installation script, use the StorNext installation CD.
1 Log on to the MDC as root.
2 Mount the StorNext installation CD and change to the CD root
directory.
3 List the installation directories on the CD. At the command prompt,
type:
ls -l
4 Identify the correct installation directory for your operating system
and hardware platform, and then change to that directory.
For example, for Red Hat Linux 4 running on an x86 64-bit platform,
change to the
RedHat40AS_26x86_64 directory.
5 Run the script. At the command prompt, type:
./snPreInstall
The pre-installation script runs (figure 1).
StorNext 3.1.3 Installation Guide 9
Page 27
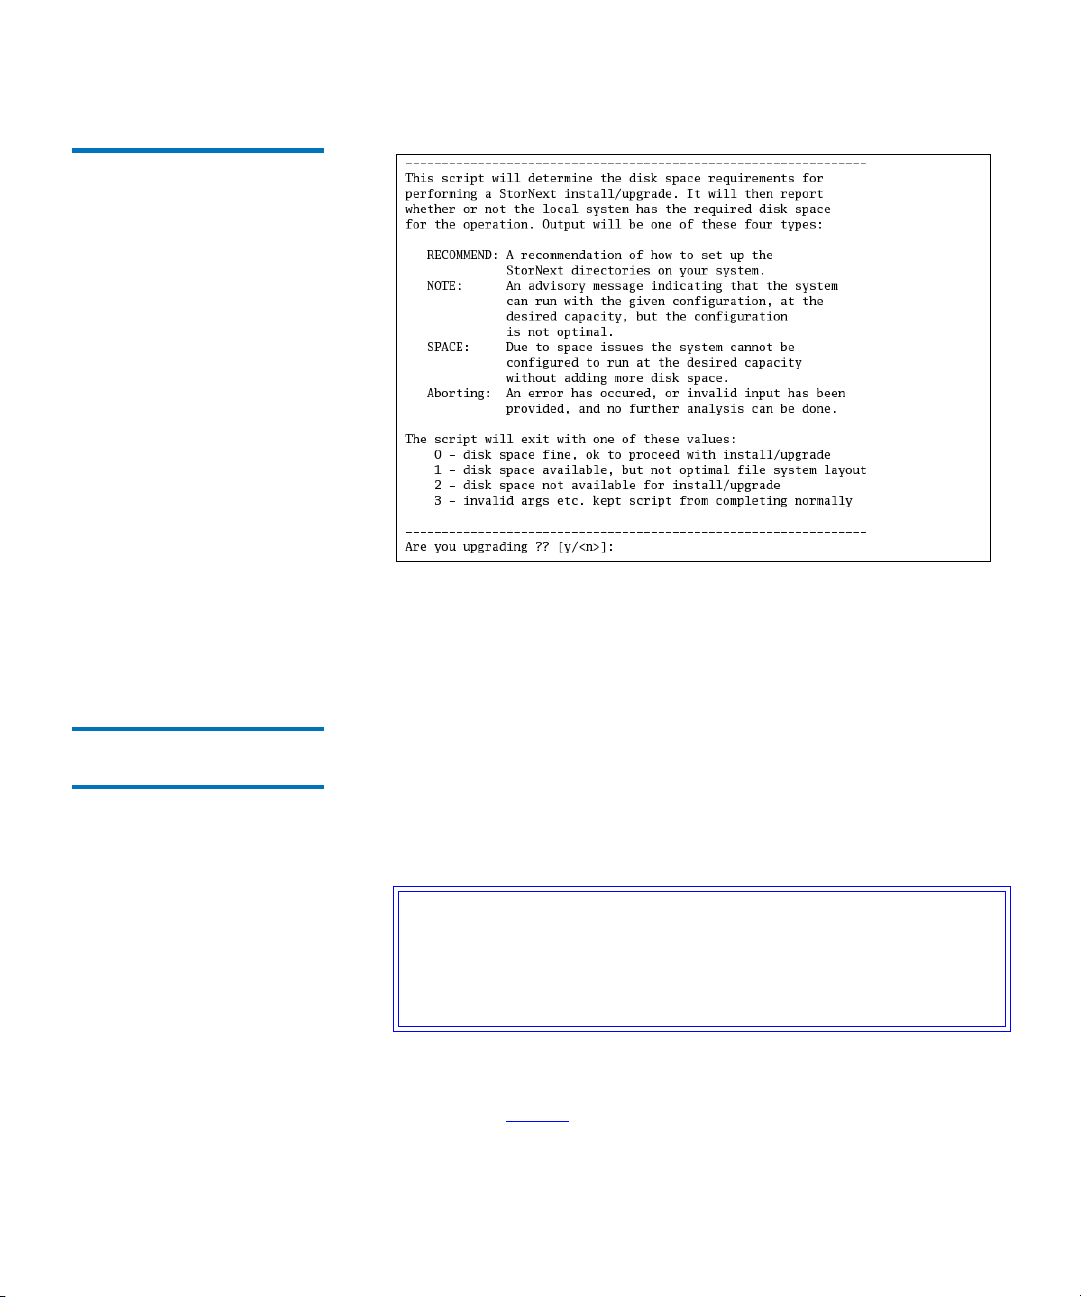
Figure 1 Pre-Installation Script
Chapter 1 Installing StorNext File System and Storage Manager
Pre-Installation Script
6 Follow the onscreen instructions, and answer each question when
prompted.
The script outputs results based on the information you entered.
Interpreting snPreInstall Output 1
After you enter all requested information, the pre-installation script
outputs the following results:
• Estimated disk space required for each support directory.
• Recommended file system location for each support directory.
Tech Tip: For optimal performance, each support directory
(other than the
Backup directory) should be located on
its own local file system, and each local file system
should reside on a separate physical hard disk in the
MDC.
There are three types of directory recommendations, as indicated by the
text preceding the recommendation. The three types of recommendations
are described in
StorNext 3.1.3 Installation Guide 10
Table 5.
Page 28
Chapter 1 Installing StorNext File System and Storage Manager
Pre-Installation Script
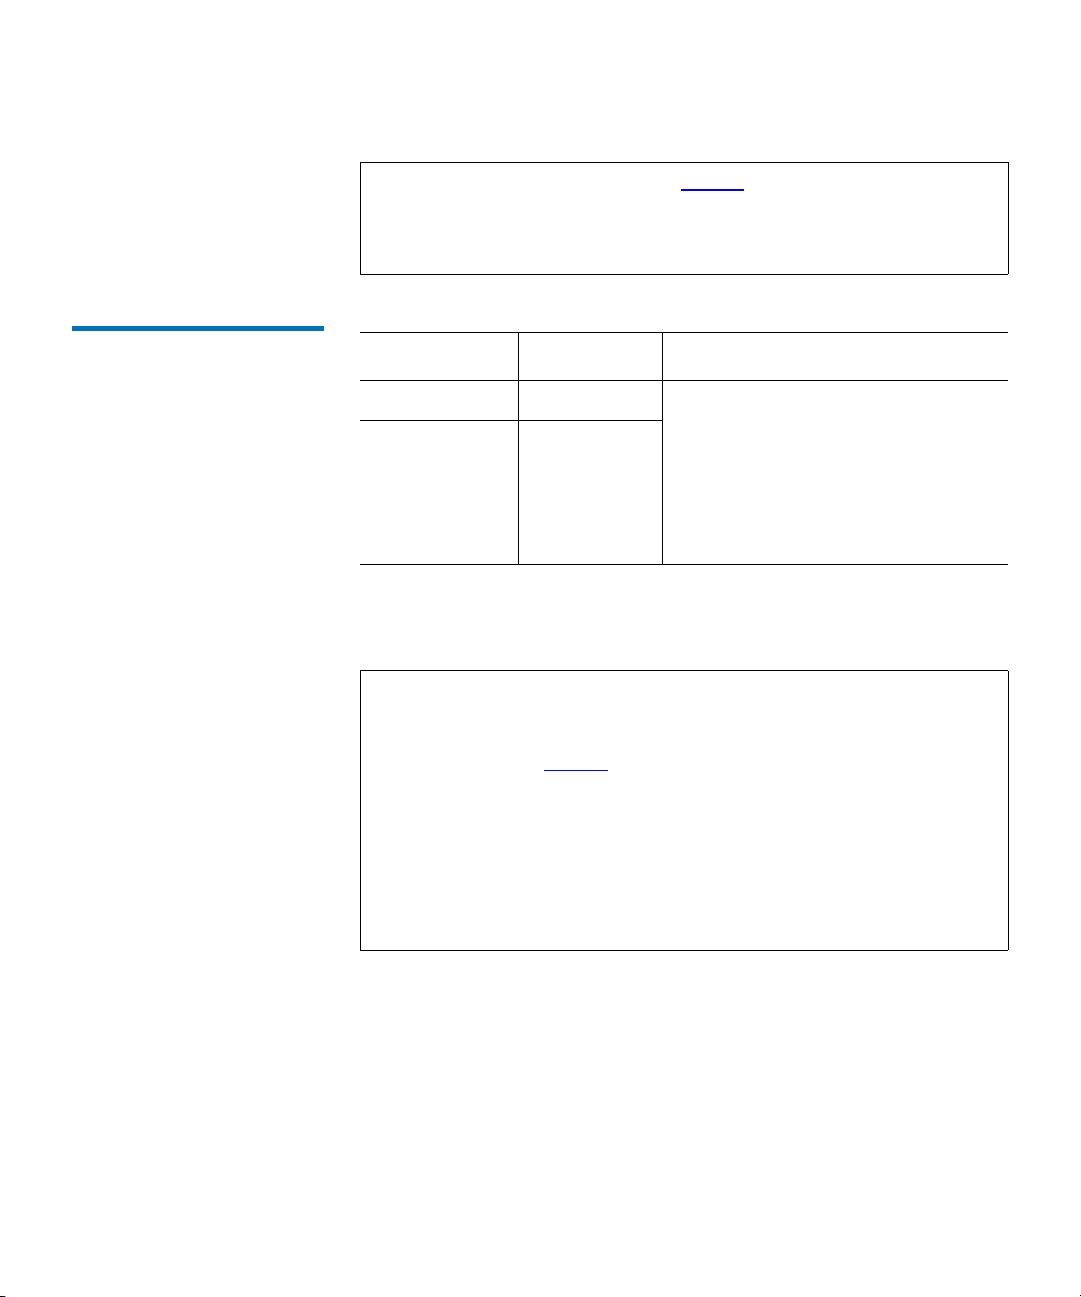
Table 5 Pre-Installation Script
Recommendation Types
Type Description
RECOMMEND The suggested directory locations will result in
optimal system performance.
NOTE The suggested directory locations are valid but
system performance will not be optimal.
SPACE Additional hard disk space is required to store
the required support directories.
The pre-installation script bases directory location recommendations on
the following criteria:
• To aid disaster recovery, the Database and Journal directories should
be located on different file systems.
• For optimal performance, the Metadata directory should not be
located on the same file system as (in order of priority) the
Database, or Mapping directory.
Journal,
Note: Do not change the location of support directories manually.
Instead, use the installation script to specify the location for
support directories. For more information, see
StorNext
Installation Script.
StorNext 3.1.3 Installation Guide 11
Page 29

StorNext Installation Script
When you are ready to install StorNext, use the StorNext installation
script to install StorNext File System and Storage Manager on the
metadata controller. The installation script also installs the client software
on the MDC.
Chapter 1 Installing StorNext File System and Storage Manager
StorNext Installation Script
Launching the StorNext Installation Script 1
The StorNext installation script lets you choose installation configuration
options and install StorNext. To launch the script, use the correct
StorNext installation CD for your operating system.
1 Log on to the MDC as root.
2 Mount the StorNext installation CD and change to the CD root
directory.
Note: When you mount a CD in a Red hat 4 or 5 system, CDs are
mounted by default with a noexec (non-executable) option
which prevents you from proceeding with the installation.
For Red Hat users only, before proceeding you must
remount the CD by typing mount -o remount, exec ...
3 List the installation directories on the CD. At the command prompt,
type:
ls -l
4 Identify the correct installation directory for your operating system
and hardware platform, and then change to that directory.
For example, for Red Hat Linux 4 running on an x86 64-bit platform,
change to the
RedHat40AS_26x86_64 directory.
5 Run the script. At the command prompt, type:
./install.stornext
The installation script runs (figure 2).
StorNext 3.1.3 Installation Guide 12
Page 30
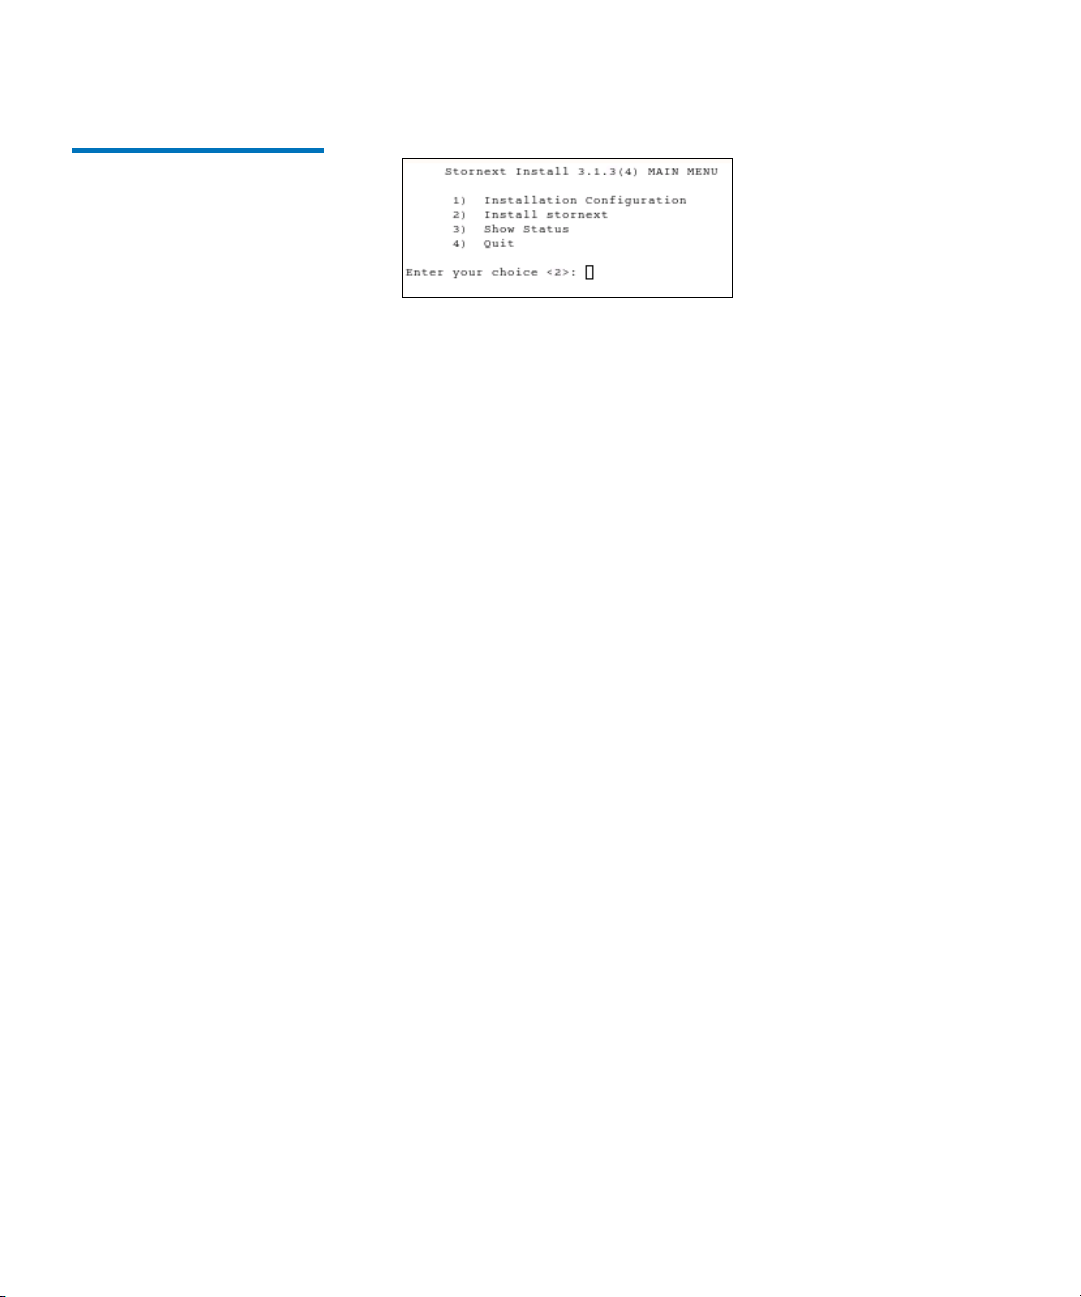
Figure 2 StorNext Installation
Script
Chapter 1 Installing StorNext File System and Storage Manager
StorNext Installation Script
StorNext 3.1.3 Installation Guide 13
Page 31

Chapter 1 Installing StorNext File System and Storage Manager
StorNext Installation Script
6 Type the number corresponding to a menu option and press <Enter>.
Installation menu options are described in
Table 6.
Table 6 StorNext Installation
Main Menu Options
Changing Installation Configuration Options 1
Menu Option Description
1 Change installation options, including the
location of application directories and the
default media type (see
Changing Installation
Configuration Options).
2 Install StorNext using the installation options
specified on the Configuration Menu (see
Performing an Installation Operation on page
17).
3 View the status of an installation operation that
is currently in progress.
4 Exit the StorNext installation script.
Use the Configuration Menu to change StorNext installation options. You
can specify the location of application and support directories and change
the default media type for storage devices.
On the Main Menu, type 1 and press <Enter>. The Configuration Menu
appears (
figure 3).
StorNext 3.1.3 Installation Guide 14
Page 32

Figure 3 Configuration Menu
Chapter 1 Installing StorNext File System and Storage Manager
StorNext Installation Script
Changing Application Directory Locations 1
When you first enter the Configuration Menu, it displays recommended
locations for StorNext application directories based on the available file
systems detected by the installation script. To accept the recommended
directory locations and return to the Main Menu, press
<Enter>.
Alternately, customize the installation by specifying the file systems
where application and support files are stored.
1 On the Configuration Menu, type the number that corresponds to the
directory location you want to customize (
<Enter>.
1–14), and then press
A list of available local file systems is shown.
2 To change the file system where the directory is located, type the
name of the file system and press
StorNext 3.1.3 Installation Guide 15
<Enter>.
Page 33

Chapter 1 Installing StorNext File System and Storage Manager
StorNext Installation Script
3 To confirm the change, type yes and press <Enter>.
To customize additional directory locations, repeat steps 1–3.
4 When you are done customizing the installation, press <Enter> to
return to the Main Menu.
Note: To help determine the optimal location for StorNext support
directories, use the StorNext pre-installation script. For more
information, see
Pre-Installation Script on page 8.
Changing the Default Media Type 1
If you do not specify a different media type, the StorNext installation
script selects LTO as the default media type for storage devices. If storage
devices in your system use a different media type, change the default
media type before installing StorNext.
1 On the Configuration Menu, type 15 and press <Enter>.
A list of valid default media types is shown. The valid media types
are: DDISK, SDISK, LTO, LTOW, 3590, 3592, 9840, 9940, AITW, AIT,
DLT4, and T10K.
Note: The DDISK option is available only for MDCs running
x86 (32-bit or 64-bit) versions of Linux.
2 Type the correct default media type for storage devices in your
system and press
<Enter>.
3 To confirm the change, type yes and press <Enter>.
4 When you are done customizing the installation, press <Enter> to
return to the Main Menu.
Note: For multiple libraries or systems with mixed media types,
specify the media type used in the primary backup.
StorNext 3.1.3 Installation Guide 16
Page 34

Chapter 1 Installing StorNext File System and Storage Manager
StorNext Installation Script
Performing an Installation Operation 1
Figure 4 StorNext Installation
Status
To install StorNext using the options specified on the Configuration
Menu, perform an installation operation.
1 On the Main Menu, type 2 and press <Enter>.
The StorNext installation script runs (figure 4). The script displays
the current progress of the installation.
2 When the installation is complete, press <Enter> to return to the Main
Menu.
3 To exit the installation script, type 4 and press <Enter>.
Note: The script displays the URL at which the MDC can be
accessed. Make a note of this information.
You can now access StorNext File System and Storage Manager, and run
the configuration wizard. For more information, see
Chapter 4,
“Configuring StorNext.”
StorNext 3.1.3 Installation Guide 17
Page 35

Chapter 2
2Installing StorNext File System
This chapter describes how to install StorNext File System (SNFS) on a
metadata controller (MDC). Install SNFS to create data sets that can be
shared by clients and applications running on multiple operating
systems.
To ensure successful operation, do the following tasks before installing
StorNext:
• Make sure the MDC meets all operating system and hardware
requirements (see
• Make sure all storage devices are correctly configured and are visible
to the MDC (see
When you are ready, install StorNext File System on the MDC using the
appropriate method for your operating system (see
File System on Linux or Unix on page 24 or Installing StorNext File
System on Windows on page 27).
File System Requirements).
Getting Ready to Install on page 21).
Installing StorNext
Note: To install both StorNext File System and StorNext Storage
Manager, see
Storage Manager.” To install the StorNext client software, see
Chapter 3, “Installing the StorNext Client.”
StorNext 3.1.3 Installation Guide 18
Chapter 1, “Installing StorNext File System and
Page 36

File System Requirements
To run StorNext File System, the metadata controller must meet all
operating system and hardware requirements.
Chapter 2 Installing StorNext File System
File System Requirements
Operating System Requirements 2
Table 7 File System
Supported Platforms
The operating systems, releases and kernels, and hardware platforms
supported by StorNext SNFS are presented in
MDC uses a supported operating system and platform, and if necessary
update to a supported release or kernel version before installing
StorNext.
Operating System Release or Kernel Platform
Windows 2003 Server SP2 x86 32-bit
Windows 2008 Server SP1 x86 32-bit
Red Hat Enterprise
Linux 4
Red Hat Enterprise
Linux 5
SUSE Linux Enterprise
Server 10
2.6.9-55.EL (Update 5)
2.6.9-67.EL (Update 6)
2.6.9-78.EL (Update 7)
2.6.18-53.EL (Update 1)
2.6.18-92.EL (Update 2)
2.6.16.21-0.8
2.6.16.46-0.12 (SP1)
2.6.16-60-0.27 (SP2)
Table 7. Make sure the
x86 64-bit
x86 64-bit
x86 32-bit
x86 64-bit
Itanium 64-bit
x86 64-bit
x86 32-bit
x86 64-bit
Itanium 64-bit
Sun Solaris 10 Generic 120011-14 SPARC 64-bit
StorNext 3.1.3 Installation Guide 19
Page 37

Chapter 2 Installing StorNext File System
File System Requirements
Hardware Requirements2
Table 8 File System Hardware
Requirements
The minimum amount of RAM and available hard disk space required to
run StorNext SNFS are presented in
Table 8.
If necessary, upgrade the RAM and local disk storage in the MDC to meet
the minimum requirements before installing StorNext.
Note: The RAM requirements in Table 8 are for running StorNext
File System only. Running additional software (including the
StorNext client software) requires additional RAM.
File Systems RAM Disk Space
1–4* 2 GB 2 GB
5–8** 4 GB 4 GB
* Two CPUs recommended for best performance.
** Two CPUs required for best performance.
Note: On 32-bit versions of Windows, for best performance, run
SNFS on a dedicated system. Do not run other applications on
the MDC.
LAN Requirements 2
The following LAN requirements must be met before installing StorNext
on the MDC:
• In cases where gigabit networking hardware is used and maximum
StorNext performance is required, a separate, dedicated switched
Ethernet LAN is recommended for the StorNext metadata network. If
maximum StorNext performance is not required, shared gigabit
networking is acceptable.
• A separate, dedicated switched Ethernet LAN is mandatory for the
metadata network if 100 Mbit/s or slower networking hardware is
used.
• The MDC and all clients must have static IP addresses.
Verify network connectivity with pings, and also verify entries in the
/etc/hosts file.
StorNext 3.1.3 Installation Guide 20
Page 38

• If using Gigabit Ethernet, disable jumbo frames and TOE (TCP
offload engine).
Note: StorNext does not support file system metadata on the same
Getting Ready to Install
Before installing StorNext SNFS, complete the following tasks to ensure
successful installation:
• Correctly configure all storage devices (see Configuring Storage
Devices on page 21).
• If using LUNs larger than 1 TB, decide on a label type and install any
necessary operating system patches (see
than 1 TB on page 22).
Chapter 2 Installing StorNext File System
Getting Ready to Install
network as iSCSI, NFS, CIFS, or VLAN data when 100 Mbit/s
or slower networking hardware is used.
Planning for LUNs Larger
• (Linux only) Install the kernel source code (see Installing the Linux
Kernel Source Code on page 23).
Configuring Storage Devices 2
StorNext 3.1.3 Installation Guide 21
Before installing StorNext SNFS, make sure that all LUNs are visible to
the MDC. (A LUN, or logical unit number, is a logical device that
corresponds to one or more disks, drives, or storage devices.)
If there are any connection issues, resolve them before installing
StorNext. For assistance in configuring storage devices, refer to the
documentation that came with the storage device, or contact the
manufacturer.
Note: LUNs that you plan to use in the same stripe group must be
the same size. Consider this when configuring storage devices.
(For more information about stripe groups, see the StorNext
3.1.3 User’s Guide.)
Page 39

Chapter 2 Installing StorNext File System
Getting Ready to Install
Caution: StorNext does not support the connection of multiple
devices through fibre channel hubs. Multiple devices must
be connected using fibre channel switches.
Planning for LUNs Larger than 1 TB 2
Table 9 Required Disk LUN
Labels
StorNext supports LUNs greater than 1 TB in size if they are allowed by
the operating system. To enable support for 1 TB or larger LUNs, all
StorNext LUNs must be correctly labeled according to the requirements
of the operating system running on the MDC as well as the operating
system running on all connected clients. Disk LUNs can have one of three
labels: VTOC, EFI, or sVTOC (short VTOC).
Required disk LUN label settings based on operating system and LUN
size are presented in
Table 9. Before installing StorNext, decide what
label type will be used, and then install any required operating system
patches or updates (for both MDC and client) as indicated in the notes for
Table 9.
Note: After labeling a disk LUN, you must reboot systems running
Solaris before they can access the disk LUN.
Operating
System
Windows XP
Windows 2003
Label for
LUNs < 1 TB
a
VTOC, EFI VTOC, EFI EFI, sVTOC
Label for
LUNs 1–2 TB
VTOC, EFI VTOC, EFI EFI, sVTOC
Label for
LUNs > 2 TB
Server
Linux 2.6
VTOC, EFI VTOC, EFI EFI, sVTOC
Kernel
Linux 2.4
VTOC, EFI VTOC, EFI Not supported
Kernel
Solaris 9
Solaris 10
HP-UX
StorNext 3.1.3 Installation Guide 22
b
c
a
VTOC, EFI EFI Not supported
VTOC, EFI EFI EFI
VTOC, EFI VTOC, EFI EFI, sVTOC
Page 40

Chapter 2 Installing StorNext File System
Getting Ready to Install
Operating
System
IBM AIX
d
Label for
LUNs < 1 TB
Label for
LUNs 1–2 TB
Label for
LUNs > 2 TB
VTOC, EFI VTOC, EFI EFI, sVTOC
SGI IRIX VTOC VTOC Not supported
Apple Xsan 1.3
VTOC, EFI VTOC, EFI EFI, sVTOC
(MacOS X 10.4
Tiger)
Apple Xsan 1.3
(MacOS X 10.3
Panther)
a
Apple Xsan
a
1.2
a. Supports only the first 2 TB of LUNs larger than 2 TB.
b. Support for EFI labels requires the Multiterabyte Disk Support patch.
c. Support for 2 TB or larger LUNs requires Solaris 10 Update 2 (06/06).
d. Supports only LUNs of 2.2 TB or less.
VTOC, EFI VTOC, EFI EFI, sVTOC
VTOC VTOC sVTOC
Note: For best results, Quantum recommends using persistent
binding for disk LUNs. For more information, contact the
vendor of your HBA (host bus adapter).
Installing the Linux Kernel Source Code 2
For MDCs running Red Hat Linux or SUSE Linux Enterprise Server you
must install the kernel source code as well as all tools required to compile
the kernel before installing SNFS. StorNext will not operate correctly if
the kernel source code is not installed.
The kernel source code can be installed using the installation disks for
your operating system.
StorNext 3.1.3 Installation Guide 23
Page 41

Chapter 2 Installing StorNext File System
Installing StorNext File System on Linux or Unix
Installing StorNext File System on Linux or Unix
When you are ready to install StorNext, use the SNFS installation script to
install StorNext File System on a metadata controller running Linux or
Unix. The installation script also installs the client software on the MDC.
StorNext can be installed on any local file system (including the root file
system) on the MDC. However, for optimal performance, avoid installing
StorNext on the root file system.
Launching the SNFS Installation Script 2
The SNFS installation script lets you choose installation configuration
options and install StorNext. To launch the script, use the correct
StorNext installation CD for your operating system.
1 Log on to the MDC as root.
2 Mount the StorNext installation CD and change to the CD root
directory.
Note: When you mount a CD in a Red hat 4 or 5 system, CDs are
mounted by default with a noexec (non-executable) option
which prevents you from proceeding with the installation.
For Red Hat users only, before proceeding you must
remount the CD by typing mount -o remount, exec ...
3 List the installation directories on the CD. At the command prompt,
type:
ls -l
4 Identify the correct installation directory for your operating system
and hardware platform, and then change to that directory.
For example, for Red Hat Linux 4 running on an x86 64-bit platform,
change to the
RedHat40AS_26x86_64 directory.
5 Run the script. At the command prompt, type:
./install.snfs
The installation script runs (figure 5).
StorNext 3.1.3 Installation Guide 24
Page 42

Figure 5 SNFS Installation
Script
Chapter 2 Installing StorNext File System
Installing StorNext File System on Linux or Unix
6 Type the number corresponding to a menu option and press <Enter>.
Installation menu options are described in
Table 10.
Table 10 SNFS Installation
Main Menu Options
Changing Installation Configuration Options 2
Menu Option Description
1 Change installation options for the location of
application directories (see
Changing
Installation Configuration Options on page 25).
2 Install StorNext using the installation options
specified on the Configuration Menu (see
Performing an Installation Operation on page
26).
3 View the status of an installation operation that
is currently in progress.
4 Exit the SNFS installation script.
Use the Configuration Menu to change the location of application
directories.
On the Main Menu, type 1 and press <Enter>. The Configuration Menu
appears (
figure 6).
StorNext 3.1.3 Installation Guide 25
Page 43

Figure 6 Configuration Menu
Chapter 2 Installing StorNext File System
Installing StorNext File System on Linux or Unix
When you first enter the Configuration Menu, it displays recommended
locations for StorNext application directories based on the available file
systems detected by the installation script. To accept the recommended
directory locations and return to the Main Menu, press
<Enter>.
Alternately, customize the installation by specifying the file systems
where application and support files are stored.
1 On the Configuration Menu, type the number that corresponds to the
directory location you want to customize (
<Enter>.
1–6), and then press
A list of available local file systems is shown.
2 To change the file system where the directory is located, type the
name of the file system and press
<Enter>.
3 To confirm the change, type yes and press <Enter>.
To customize additional directory locations, repeat steps 1–3.
4 When you are done customizing the installation, press <Enter> to
return to the Main Menu.
Performing an Installation Operation 2
To install StorNext using the options specified on the Configuration
Menu, perform an installation operation.
1 On the Main Menu, type 2 and press <Enter>.
The installation script runs (figure 7). The script displays the current
progress of the installation.
StorNext 3.1.3 Installation Guide 26
Page 44

Figure 7 StorNext Installation
Status
Chapter 2 Installing StorNext File System
Installing StorNext File System on Windows
2 When the installation is complete, press <Enter> to return to the Main
Menu.
3 To exit the installation script, type 4 and press <Enter>.
Note: The script displays the URL at which the MDC can be
accessed. Make a note of this information.
You can now access StorNext File System and run the configuration
wizard. For more information, see
Chapter 4, “Configuring StorNext.”
Installing StorNext File System on Windows
The StorNext setup wizard guides you through the process of installing
StorNext File System on a metadata controller running Windows 2003
Server. (The installation wizard also installs the client software on the
MDC.)
Before installing StorNext, remove any previously installed versions (see
Removing a Previous Version of StorNext on page 28).
When you are ready, use the setup wizard to install StorNext (see
Running the Setup Wizard on page 29).
(Optional) After installation, restore the previous client configuration (see
Restoring a Previous Client Configuration on page 33).
StorNext 3.1.3 Installation Guide 27
Page 45

Chapter 2 Installing StorNext File System
Installing StorNext File System on Windows
Note: You must log on as an Administrator to install StorNext.
Removing a Previous Version of StorNext 2
Figure 8 StorNext Installation
Window: Remove StorNext
If a previous version of StorNext exists on the system, you must remove it
before installing the new version.
1 Insert the StorNext installation CD.
2 Browse to the root directory of the installation CD and double-click
the file
SnfsSetup32.exe (32-bit systems) or SnfsSetup64.exe (64-bit
systems).
The StorNext Installation window appears (figure 8).
3 Click Remove StorNext.
A dialog box appears informing you that the current client
configuration has been saved.
4 Note the name and location of the saved configuration file, and then
click
OK.
5 If prompted, click Yes to continue, and then click OK to finish the
removal.
6 When the removal is complete, click Yes to reboot the system.
StorNext 3.1.3 Installation Guide 28
Page 46

Chapter 2 Installing StorNext File System
Installing StorNext File System on Windows
Note: After installing the new version of StorNext, you can restore
the saved client configuration (see
Restoring a Previous Client
Configuration on page 33).
Running the Setup Wizard 2
Figure 9 StorNext Installation
Window: Install StorNext
To launch the setup wizard, use the correct StorNext installation CD for
your operating system.
1 Insert the StorNext installation CD.
2 Browse to the root directory of the installation CD and double-click
the file
SnfsSetup32.exe (32-bit systems) or SnfsSetup64.exe (64-bit
systems).
The StorNext Installation window appears (figure 9).
3 Click Install StorNext to begin installation.
The StorNext setup wizard appears (figure 10).
StorNext 3.1.3 Installation Guide 29
Page 47

Figure 10 SNFS Setup:
Welcome
Chapter 2 Installing StorNext File System
Installing StorNext File System on Windows
4 Click Next to continue.
The License Agreement window appears (figure 11).
Figure 11 SNFS Setup: EndUser License Agreement
5 Click the option to accept the license agreement, and then click Next
to continue.
The Customer Information window appears (figure 12).
StorNext 3.1.3 Installation Guide 30
Page 48

Figure 12 SNFS Setup:
Customer Information
Chapter 2 Installing StorNext File System
Installing StorNext File System on Windows
6 Type your name and the name of your company or organization in
the boxes, and then click
Next to continue.
The Choose Setup Type window appears (figure 13).
Figure 13 SNFS Setup:
Choose Setup Type
7 Click an installation option:
• Typical: (Recommended) Installs StorNext File System, client
software, and help files in the default location (
Files\StorNext
StorNext 3.1.3 Installation Guide 31
).
C:\Program
Page 49

Figure 14 SNFS Setup: Ready
to Install
Chapter 2 Installing StorNext File System
Installing StorNext File System on Windows
• Custom: Lets you choose which components to install and specify
an installation location. When ready, click
Next.
• Complete: Same as a typical installation.
The Ready to Install window appears (figure 14).
8 Click Install to continue.
Wait while the setup wizard installs StorNext. When installation is
complete, the
Figure 15 SNFS Setup: Finish
StorNext 3.1.3 Installation Guide 32
Finish window appears (figure 15).
Page 50

Chapter 2 Installing StorNext File System
Installing StorNext File System on Windows
9 Click Finish to close the setup wizard.
10 On the StorNext Installation window, click Exit.
You are prompted to reboot the system.
11 Click Yes to reboot.
You can now configure StorNext File System. For more information, see
Chapter 4, “Configuring StorNext.” Or, to restore a previous client
configuration, see the next section.
Restoring a Previous Client Configuration 2
Figure 16 StorNext Installation
Window: Configure StorNext
If you saved a client configuration file (for example, when removing a
previous version of StorNext), you can import it after installing StorNext.
This configures StorNext using the same settings as the previous
installation.
1 Insert the StorNext installation CD.
2 Browse to the root directory of the installation CD and double-click
the file
SnfsSetup32.exe (32-bit systems) or SnfsSetup64.exe (64-bit
systems).
The StorNext Installation window appears (figure 16).
3 Click Configure StorNext.
The StorNext Configuration window appears (figure 17).
StorNext 3.1.3 Installation Guide 33
Page 51

Figure 17 StorNext
Configuration Window
Chapter 2 Installing StorNext File System
Installing StorNext File System on Windows
4 Click Import/Export Client Settings.
The Import/Export Client Configuration window appears (figure 18).
StorNext 3.1.3 Installation Guide 34
Page 52

Figure 18 Import/Export Client
Configuration Window
Chapter 2 Installing StorNext File System
Installing StorNext File System on Windows
5 Under Import, click Browse. Locate the client configuration (*.reg) file
to import, and then click
Open.
Client configuration files saved during removal of a previous version
of StorNext are located in one the following directories:
• C:\SNFS\config\
• C:\Program Files\StorNext\confi g\
6 Click an option for handling current configuration settings:
• Merge with current configuration: The imported configuration is
merged with the current configuration settings.
• Replace current configuration: The imported configuration
overwrites the current configuration settings.
7 Click Import, and then click Yes to confirm.
A message appears informing you the configuration settings were
successfully added to the registry.
8 Click OK, and then click Quit to close the Import/Export Client
Configuration
StorNext 3.1.3 Installation Guide 35
window.
Page 53

Chapter 3
3Installing the StorNext Client
This chapter describes how to install the StorNext client software. The
StorNext client software lets you mount and work with StorNext file
systems.
To ensure successful operation, make sure the client system meets all
operating system and hardware requirements (see
Requirements).
To install the StorNext client software, first download the client software
from the metadata controller (MDC) (see
Client Software on page 39).
After downloading the client software, install and configure it using the
appropriate method for your operating system (see
StorNext Client on Linux or Unix on page 42 or Installing the StorNext
Client on Windows on page 51).
Downloading the StorNext
Client System
Installing the
Note: Before installing the StorNext client software, you must install
and configure StorNext on an MDC. For more information, see
Chapter 1, “Installing StorNext File System and Storage
Manager” or Chapter 2, “Installing StorNext File System.”
StorNext 3.1.3 Installation Guide 36
Page 54

Client System Requirements
To run the StorNext client software, the client system must meet all
operating system and hardware requirements.
Chapter 3 Installing the StorNext Client
Client System Requirements
Operating System Requirements 3
Table 11 StorNext Client
Supported Platforms
The operating systems, releases and kernels, and hardware platforms
supported by the StorNext client software are presented in
Make sure the client system uses a supported operating system and
platform, and if necessary update to a supported release or kernel version
before installing StorNext.
Operating System Release or Kernel Platform
Windows XP SP2
SP3
Windows 2003 Server SP2 x86 32-bit
Windows Vista SP1 x86 32-bit
Red Hat Enterprise
Linux 4
Red Hat Enterprise
Linux 5
2.6.9-55.EL (Update 5)
2.6.9-67.EL (Update 6)
2.6.9-78.EL (Update 7)
2.6.18-53.EL (Update 1)
2.6.18-92.EL (Update 2)
Table 11.
x86 32-bit
x86 64-bit
x86 64-bit
x86 64-bit
x86 32-bit
x86 64-bit
Itanium 64-bit
x86 64-bit
SUSE Linux Enterprise
Server 10
Sun Solaris 9 — SPARC 64-bit
StorNext 3.1.3 Installation Guide 37
2.6.16.21-0.8
2.6.16-46-0.12 (SP1)
2.6.16-60-0.27 (SP2)
x86 32-bit
x86 64-bit
Itanium 64-bit
Page 55

Chapter 3 Installing the StorNext Client
Client System Requirements
Operating System Release or Kernel Platform
Hardware Requirements3
Sun Solaris 10 Generic 120011-14
Generic 127128-11
SPARC 64-bit
Opteron and
Intel x86 64-bit
HP-UX 11i v2 Itanium 64-bit
IBM AIX 5.3 64-bit Power
Architecture
SGI-IRIX 6.5.30 64-bit MIPS
Apple MacOS X 10.5 With Xsan 1.4.2 or Xsan
x86 32-bit
2.1.1
To install and run the StorNext client software, the client system must
meet the following minimum hardware requirements.
For SAN (FC-attached) clients or for distributed LAN clients:
•1 GB RAM
• 500 MB available hard disk space
For SAN clients acting as a distributed LAN server:
•2 GB RAM
• 500 MB available hard disk space
Note: Distributed LAN servers may require additional RAM
depending on the number of file systems, distributed LAN
clients, and NICs used. See the StorNext 3.1.3 Release Notes for
distributed LAN server memory tuning guidelines.
StorNext 3.1.3 Installation Guide 38
Page 56

Chapter 3 Installing the StorNext Client
Downloading the StorNext Client Software
Downloading the StorNext Client Software
The StorNext client software can be downloaded from a metadata
controller. (To download the client software, the client system must have
network access to the MDC.)
Note: You can download the client software only from MDCs
running Linux or Unix.
1 On the client system, point a web browser to the URL (host name and
port number) of the MDC. For example,
Use one of the following web browsers to access the MDC (make sure
pop-up blockers are turned off):
• Internet Explorer 6.0 or later (including 7.0)
• Mozilla Firefox 1.5 or later (including 2.0 or later)
http://servername:81
2 When prompted, type the username and password for the MDC, and
then click
admin.)
The StorNext home page appears.
3 Do one of the following:
• For a MDC running SNFS and SNSM: On the Admin menu, click
• For a MDC running SNFS only: On the home page, click
The Select Platform window appears (figure 19).
OK. (The default value for both username and password is
Download Client Software.
Download Client Software.
StorNext 3.1.3 Installation Guide 39
Page 57

Figure 19 Select Platform
Window
Chapter 3 Installing the StorNext Client
Downloading the StorNext Client Software
4 In the list, click the operating system running on the client system,
and then click
Next.
The Download Client Software window appears (figure 20).
StorNext 3.1.3 Installation Guide 40
Page 58

Figure 20 Download Client
Software Window
Chapter 3 Installing the StorNext Client
Downloading the StorNext Client Software
5 Click the download link that corresponds to your operating system
version and hardware platform. (Depending on the operating
system, you may have only one choice.)
For example, for Red Hat Linux 4 running on an x86 64-bit platform,
click
Linux Redhat AS 4.0 (Intel 64bit).
6 When prompted, click Save or OK to download the file to the client
system.
Make sure to note the file name and the location where you save the
file.
7 After the download is complete, click Cancel to close the Download
Client Software
window.
Do not follow the onscreen installation instructions. Instead, continue
with the correct procedure for your operating system:
• Installing the StorNext Client on Linux or Unix on page 42
• Installing the StorNext Client on Windows on page 51.
StorNext 3.1.3 Installation Guide 41
Page 59

Chapter 3 Installing the StorNext Client
Installing the StorNext Client on Linux or Unix
Installing the StorNext Client on Linux or Unix
After downloading the StorNext client software from the metadata
controller, install it on the client system using the correct procedure for
your operating system:
• Installing the StorNext Client on Linux on page 42
• Installing the StorNext Client on Sun Solaris on page 44
• Installing the StorNext Client on HP-UX on page 46
• Installing the StorNext Client on IBM AIX on page 47
• Installing the StorNext Client on SGI IRIX on page 49
Installing the StorNext
Client on Linux 3
To run the StorNext client software on Red Hat Linux or SUSE Linux
Enterprise, first install the client software package, and then configure the
client.
Caution: Before installing the StorNext client software, you must
install the kernel source code. You can install the kernel
source code by using the installation disks for your
operating system.
1 Log on to the client system as root.
2 Change to the directory where the client software archive file you
downloaded from the MDC is located.
3 Extract the software archive file. At the command prompt, type:
tar xf <archive name>
where <archive name> is the name of the software archive file you
downloaded from the MDC.
4 List the packages extracted from the software archive file. At the
command prompt, type:
ls -l
Identify the correct package to install. The correct package begins
with
snfs-client and ends with the .rpm file name extension.
StorNext 3.1.3 Installation Guide 42
Page 60

Chapter 3 Installing the StorNext Client
Installing the StorNext Client on Linux or Unix
Note: The file that ends with .rpm.md5sum is a checksum file, not
the client software package.
5 Install the client software package. At the command prompt, type:
rpm -ivh <package name>
where <package name> is the name of the client software package you
identified in
step 4.
6 Configure the boot order for system services. Do one of the following:
• For Red Hat Linux, at the command prompt, type:
chkconfig --level 3456 cvfs on
• For SUSE Linux Enterprise, at the command prompt, type:
chkconfig -s raw 235
chkconfig -s cvfs 345
7 Edit the /usr/cvfs/config/fsnameservers text file to contain the IP
address of the MDC the client will connect to.
The fsnameservers file on the client must be exactly the same as on
the MDC. If the
fsnameservers file does not exist, use a text editor to
create it.
Note: The fsnameservers file only needs to contain the name of
the MDC. For example, if the MDC is named
the
fsnameservers file should contain a single line with a
single word:
snserver
snserver, then
8 Create a mount point for the file system. At the command prompt,
type:
mkdir -p <mount point>
chmod 777 <mount point>
where <mount point> is the directory path where you want the file
system to be mounted. For example:
/stornext/snfs1
StorNext 3.1.3 Installation Guide 43
Page 61

Chapter 3 Installing the StorNext Client
Installing the StorNext Client on Linux or Unix
9 Configure the file system to automatically mount after reboot. To do
this, edit the
<file system> <mount point> cvfs verbose=yes 0 0
/etc/fstab file so that it contains the following line:
where <file system> is the name of the StorNext file system and <mount
point>
is the directory path created in step 8.
10 Reboot the client system.
After reboot, the StorNext file system is mounted at the mount point
you specified.
Note: To manually mount a file system, at the command prompt,
type:
mount -t cvfs <file system> <mount point>
where <file system> is the name of the StorNext file system and
<mount point> is the directory path where you want the file
system to be mounted.
Installing the StorNext Client on Sun Solaris 3
To run the StorNext client software on Sun Solaris, first install the client
software package, and then configure the client.
1 Log on to the client system as root.
2 Change to the directory where the client software archive file you
downloaded from the MDC is located.
3 Extract the software archive file. At the command prompt, type:
tar xf <archive name>
where <archive name> is the name of the software archive file you
downloaded from the MDC.
4 Install the client software package. At the command prompt, type:
pkgadd -d .
5 Type 1 to select the ADICsnfs package.
6 Type y to confirm installation of the ADICsnfs package. When
installation is complete, type
StorNext 3.1.3 Installation Guide 44
q to quit the installation program.
Page 62

Chapter 3 Installing the StorNext Client
Installing the StorNext Client on Linux or Unix
7 Edit the /usr/cvfs/config/fsnameservers text file to contain the IP
address of the MDC the client will connect to.
The fsnameservers file on the client must be exactly the same as on
the MDC. If the
fsnameservers file does not exist, use a text editor to
create it.
Note: The fsnameservers file only needs to contain the name of
the MDC. For example, if the MDC is named
the
fsnameservers file should contain a single line with a
single word:
snserver
snserver, then
8 Create a mount point for the file system. At the command prompt,
type:
mkdir -p <mount point>
chmod 777 <mount point>
where <mount point> is the directory path where you want the file
system to be mounted. For example:
/stornext/snfs1
9 Configure the file system to automatically mount after reboot. To do
this, edit the
/etc/vfstab file so that it contains the following line:
<file system> - <mount point> cvfs 0 auto rw
where <file system> is the name of the StorNext file system and <mount
point>
is the directory path created in step 8.
10 Reboot the client system.
After reboot, the StorNext file system is mounted at the mount point
you specified.
Note: To manually mount a file system, at the command prompt
type:
mount -F cvfs <file system> <mount point>
where <file system> is the name of the StorNext file system and
<mount point> is the directory path where you want the file
system to be mounted.
StorNext 3.1.3 Installation Guide 45
Page 63

Chapter 3 Installing the StorNext Client
Installing the StorNext Client on Linux or Unix
Installing the StorNext Client on HP-UX 3
To run the StorNext client software on HP-UX, first install the client
software package, and then configure the client.
1 Log on to the client system as root.
2 Change to the directory where the client software archive file you
downloaded from the MDC is located.
3 Extract the software archive file. At the command prompt, type:
tar xf <archive name>
where <archive name> is the name of the software archive file you
downloaded from the MDC.
4 List the packages extracted from the software archive file. At the
command prompt, type:
ls -l
Identify the correct package to install. The correct package begins
with
snfs-client and ends with the .depot file name extension.
5 Install the client software package. At the command prompt, type:
swinstall -s <package path and name> -x mount_all_filesystems=false \*
where <package path and name> is the full path and name of the client
software package you identified in
step 4.
6 Edit the /usr/cvfs/config/fsnameservers text file to contain the IP
address of the MDC the client will connect to.
The fsnameservers file on the client must be exactly the same as on
the MDC. If the
fsnameservers file does not exist, use a text editor to
create it.
Note: The fsnameservers file only needs to contain the name of
the MDC. For example, if the MDC is named
the
fsnameservers file should contain a single line with a
single word:
StorNext 3.1.3 Installation Guide 46
snserver
snserver, then
Page 64

Chapter 3 Installing the StorNext Client
Installing the StorNext Client on Linux or Unix
7 Create a mount point for the file system. At the command prompt,
type:
mkdir -p <mount point>
chmod 777 <mount point>
where <mount point> is the directory path where you want the file
system to be mounted. For example:
/stornext/snfs1
8 Configure the file system to automatically mount after reboot. To do
this, edit the
<mount point> <mount point> cvfs rw,fsname=<file system> 0 0
/etc/fstab file so that it contains the following line:
where <mount point> is the directory path created in step 7 and <file
system> is the name of the StorNext file system.
9 Reboot the client system.
After reboot, the StorNext file system is mounted at the mount point
you specified.
Note: To manually mount a file system, at the command prompt,
type:
mount -F cvfs <mount point> <mount point>
where <mount point> is the directory path where you want the
file system to be mounted.
Installing the StorNext Client on IBM AIX 3
To run the StorNext client software on IBM AIX, first install the client
software package, and then configure the client.
1 Log on to the client system as root.
2 Change to the directory where the client software archive file you
downloaded from the MDC is located.
3 Extract the software archive file. At the command prompt, type:
tar xf <archive name>
where <archive name> is the name of the software archive file you
downloaded from the MDC.
StorNext 3.1.3 Installation Guide 47
Page 65

Chapter 3 Installing the StorNext Client
Installing the StorNext Client on Linux or Unix
4 List the packages extracted from the software archive file. At the
command prompt, type:
ls -l
Identify the correct package to install. The correct package begins
with
snfs and ends with the .bff file name extension.
5 Install the client software package. At the command prompt, type:
installp -ac -d <package name> all .
where <package name> is the name of the client software package you
identified in
step 4.
6 Edit the /usr/cvfs/config/fsnameservers text file to contain the IP
address of the MDC the client will connect to.
The fsnameservers file on the client must be exactly the same as on
the MDC. If the
fsnameservers file does not exist, use a text editor to
create it.
Note: The fsnameservers file only needs to contain the name of
the MDC. For example, if the MDC is named
the
fsnameservers file should contain a single line with a
single word:
snserver
snserver, then
7 Create a mount point for the file system. At the command prompt,
type:
mkdir -p <mount point>
chmod 777 <mount point>
where <mount point> is the directory path where you want the file
system to be mounted. For example:
/stornext/snfs1
8 Configure the file system to automatically mount. At the command
prompt, type:
crfs -v cvfs -d <file system> -a verbose=yes -a type=cvfs -A yes -m <mount
point>
where <file system> is the name of the StorNext file system and <mount
point>
is the directory path created in step 7.
The StorNext file system is mounted at the mount point you
specified.
StorNext 3.1.3 Installation Guide 48
Page 66

Chapter 3 Installing the StorNext Client
Installing the StorNext Client on Linux or Unix
Note: To manually mount a file system, at the command prompt,
type:
mount <mount point>
where <mount point> is the directory path where you want the
file system to be mounted.
Installing the StorNext Client on SGI IRIX 3
To run the StorNext client software on SGI IRIX, first install the client
software package, and then configure the client.
1 Log on to the client system as root.
2 Change to the directory where the client software archive file you
downloaded from the MDC is located.
3 Extract the software archive file. At the command prompt, type:
tar xf <archive name>
where <archive name> is the name of the software archive file you
downloaded from the MDC.
4 Install the client software package. At the command prompt, type:
inst -f .
5 Type go to confirm installation. When installation is complete, type
quit to quit the installation program.
6 Configure the boot order for system services. At the command
prompt, type:
chkconfig cvfs on
chkconfig verbose on
7 Edit the /usr/cvfs/config/fsnameservers text file to contain the IP
address of the MDC the client will connect to.
The fsnameservers file on the client must be exactly the same as on
the MDC. If the
fsnameservers file does not exist, use a text editor to
create it.
StorNext 3.1.3 Installation Guide 49
Page 67

Chapter 3 Installing the StorNext Client
Installing the StorNext Client on Linux or Unix
Note: The fsnameservers file only needs to contain the name of
the MDC. For example, if the MDC is named
the
fsnameservers file should contain a single line with a
single word:
snserver
snserver, then
8 Create a mount point for the file system. At the command prompt,
type:
mkdir -p <mount point>
chmod 777 <mount point>
where <mount point> is the directory path where you want the file
system to be mounted. For example:
/stornext/snfs1
9 Configure the file system to automatically mount after reboot. To do
this, edit the
<file system> <mount point> cvfs verbose=yes 0 0
/etc/fstab file so that it contains the following line:
where <file system> is the name of the StorNext file system and <mount
point>
is the directory path created in step 8.
10 Reboot the client system.
After reboot, the StorNext file system is mounted at the mount point
you specified.
Note: To manually mount a file system, at the command prompt,
type:
mount -t cvfs <file system> <mount point>
where <file system> is the name of the StorNext file system and
<mount point> is the directory path where you want the file
system to be mounted.
StorNext 3.1.3 Installation Guide 50
Page 68

Chapter 3 Installing the StorNext Client
Installing the StorNext Client on Windows
Installing the StorNext Client on Windows
The StorNext setup wizard guides you through the process of installing
the StorNext client software on Windows XP, Windows 2003 Server, or
Windows Vista.
Before installing StorNext, remove any previously installed versions (see
Removing a Previous Version of StorNext on page 51).
When you are ready, use the setup wizard to install StorNext (see
Running the Setup Wizard on page 52).
(Optional) After installation, restore the previous client configuration (see
Restoring a Previous Client Configuration on page 56).
Note: You must log on as an Administrator to install StorNext.
If you are installing on Windows Vista, answer Yes to any
messages asking if you want to run the installation process
with administrative privileges.
Removing a Previous
Version of StorNext 3
StorNext 3.1.3 Installation Guide 51
If a previous version of StorNext exists on the system, you must remove it
before installing the new version.
1 Unzip the client software archive file you downloaded from the
MDC.
2 Open the unzipped folder and double-click the client software
installer file. This file is named
SnfsSetup64.exe (64-bit systems).
The StorNext Installation window appears (figure 21).
SnfsSetup32.exe (32-bit systems) or
Page 69

Figure 21 StorNext Installation
Window: Remove StorNext
Chapter 3 Installing the StorNext Client
Installing the StorNext Client on Windows
3 Click Remove StorNext.
A dialog box appears informing you that the current client
configuration has been saved.
4 Note the name and location of the saved configuration file, and then
click
OK.
5 If prompted, click Yes to continue, and then click OK to finish the
removal.
6 When the removal is complete, click Yes to reboot the system.
Note: After installing the new version of StorNext, you can restore
the saved client configuration (see
Restoring a Previous Client
Configuration on page 56).
Running the Setup Wizard 3
To launch the setup wizard, use the correct StorNext installation CD for
your operating system, or use the client software installer you
downloaded from the MDC.
1 If necessary, unzip the client software archive file you downloaded
from the MDC.
2 Open the unzipped folder and double-click the client software
installer file. This file is named
SnfsSetup64.exe (64-bit systems).
SnfsSetup32.exe (32-bit systems) or
The StorNext Installation window appears (figure 22).
StorNext 3.1.3 Installation Guide 52
Page 70

Figure 22 StorNext Installation
Window: Install StorNext
Figure 23 SNFS Setup:
Welcome
Chapter 3 Installing the StorNext Client
Installing the StorNext Client on Windows
3 Click Install StorNext to begin installation.
The StorNext setup wizard appears (figure 23).
4 Click Next to continue.
The License Agreement window appears (figure 24).
StorNext 3.1.3 Installation Guide 53
Page 71

Figure 24 SNFS Setup: EndUser License Agreement
Chapter 3 Installing the StorNext Client
Installing the StorNext Client on Windows
5 Click the option to accept the license agreement, and then click Next
to continue.
The Customer Information window appears (figure 25).
Figure 25 SNFS Setup:
Customer Information
6 Type your name and the name of your company or organization in
the boxes, and then click
Next to continue.
The Choose Setup Type window appears, (figure 26).
StorNext 3.1.3 Installation Guide 54
Page 72

Figure 26 SNFS Setup:
Choose Setup Type
Chapter 3 Installing the StorNext Client
Installing the StorNext Client on Windows
7 Click an installation option:
• Typical: (Recommended) Installs the StorNext client software and
help files in the default location (
C:\Program Files\StorNext).
• Custom: Lets you choose which components to install and specify
an installation location. When ready, click
Next.
• Complete: Same as a typical installation.
The Ready to Install window appears (figure 27).
Figure 27 SNFS Setup: Ready
to Install
StorNext 3.1.3 Installation Guide 55
Page 73

Figure 28 SNFS Setup: Finish
Chapter 3 Installing the StorNext Client
Installing the StorNext Client on Windows
8 Click Install to continue.
Wait while the setup wizard installs StorNext. When installation is
complete, the
Finish window appears (figure 28).
9 Click Finish to close the setup wizard.
10 On the StorNext Installation window, click Exit.
You are prompted to reboot the system.
11 Click Yes to reboot.
You can now configure StorNext File System. For more information, see
Chapter 4, “Configuring StorNext.”
Restoring a Previous Client Configuration 3
If you saved a client configuration file (for example, when removing a
previous version of StorNext), you can import it after installing StorNext.
This configures StorNext using the same settings as the previous
installation.
1 If necessary, unzip the client software archive file you downloaded
from the MDC.
2 Open the unzipped folder and double-click the client software
installer file. This file is named
SnfsSetup64.exe (64-bit systems).
SnfsSetup32.exe (32-bit systems) or
The StorNext Installation window appears (figure 29).
StorNext 3.1.3 Installation Guide 56
Page 74

Figure 29 StorNext Installation
Window: Configure StorNext
Figure 30 StorNext
Configuration Window
Chapter 3 Installing the StorNext Client
Installing the StorNext Client on Windows
3 Click Configure StorNext.
The StorNext Configuration window appears (figure 30).
4 Click Import/Export Client Settings.
The Import/Export Client Configuration window appears (figure 31).
StorNext 3.1.3 Installation Guide 57
Page 75

Figure 31 Import/Export Client
Configuration Window
Chapter 3 Installing the StorNext Client
Installing the StorNext Client on Windows
5 Under Import, click Browse. Locate the client configuration (*.reg) file
to import, and then click
Open.
Client configuration files saved during removal of a previous version
of StorNext are located in one the following directories:
• C:\SNFS\config\
• C:\Program Files\StorNext\confi g\
6 Click an option for handling current configuration settings:
• Merge with current configuration: The imported configuration is
merged with the current configuration settings.
• Replace current configuration: The imported configuration
overwrites the current configuration settings.
7 Click Import, and then click Yes to confirm.
A message appears informing you the configuration settings were
successfully added to the registry.
8 Click OK, and then click Quit to close the Import/Export Client
Configuration
StorNext 3.1.3 Installation Guide 58
window.
Page 76

Chapter 4
4Configuring StorNext
This chapter describes how to configure StorNext after installation. To
configure StorNext, enter license information and create one or more file
systems. In addition, on metadata controllers (MDCs) running StorNext
Storage Manager, you can add storage devices and media, create storage
policies, and set up e-mail notifications. In addition, Linux or Windows
SAN clients can be configured as a distributed LAN client or a distributed
LAN server.
For system running Unix or Linux, use the web-based GUI (graphical
user interface) to access StorNext running on an MDC (see
GUI).
The first time you log on to StorNext, the Configuration Wizard appears.
The wizard guides you through the process of setting up StorNext (see
Configuration Wizard on page 62).
StorNext
To configure a StorNext client as a distributed LAN client or server, edit
the distributed LAN configuration file (see
LAN Client Server on page 67).
For systems running Windows, use the Windows-based configuration
utilities to set up server and client features (see
Utilities on page 72).
StorNext 3.1.3 Installation Guide 59
Configuring a Distributed
Windows Configuration
Page 77

StorNext GUI
Chapter 4 Configuring StorNext
StorNext GUI
The StorNext GUI provides access to StorNext features and displays
system status information. Use the StorNext GUI to create and work with
file systems. In addition, on metadata controllers running Storage
Manager, you can use the StorNext GUI to configure storage devices and
media, and to set up storage policies.
Note: The StorNext GUI is available only for MDCs running on Unix
or Linux. For MDCs running on Windows, use the
configuration utilities to configure StorNext (see
Configuration Utilities on page 72).
Windows
Accessing the StorNext GUI 4
To log on to the StorNext GUI, use a web browser running on the MDC,
or on any system that has network access to the MDC.
1 Point a web browser to the URL of the MDC.
The URL consists of the host name or IP address of the MDC
followed by the port number at which StorNext can be reached. (The
default port number is
Use one of the following web browsers to access the MDC (make sure
pop-up blockers are turned off):
• Internet Explorer 6.0 or later (including 7.0)
• Mozilla Firefox 1.5 or later (including 2.0 or later)
2 When prompted, type the user name and password for the MDC, and
click
OK. (The default value for both user name and password is
admin.)
The StorNext home page appears. The appearance of the home page
differs depending on if both Storage Manager and File System are
installed on the MDC, or if File System only is installed.
The StorNext home page for an MDC running File System and
Storage Manager is shown in
an MDC running File System only is shown in figure 33.
81.) For example: http://servername:81
figure 32. The StorNext home page for
StorNext 3.1.3 Installation Guide 60
Page 78

Figure 32 StorNext Home
Page: File System and Storage
Manager
Figure 33 StorNext Home
Page: File System Only
Chapter 4 Configuring StorNext
StorNext GUI
StorNext 3.1.3 Installation Guide 61
Page 79

Configuration Wizard
The first time you log onto the StorNext GUI, the Configuration Wizard
appears. The wizard guides you step-by-step through the process of
configuring StorNext.
The appearance of the wizard differs depending on if both Storage
Manager and File System are installed on the MDC, or if File System only
is installed.
The Configuration Wizard for an MDC running File System and Storage
Manager is shown in
running File System only is shown in figure 35.
Figure 34 StorNext
Configuration Wizard: Storage
Manager
Chapter 4 Configuring StorNext
Configuration Wizard
figure 34. The Configuration Wizard for an MDC
StorNext 3.1.3 Installation Guide 62
Page 80

Figure 35 StorNext
Configuration Wizard: File
System Only
Chapter 4 Configuring StorNext
Configuration Wizard
Displaying the Configuration Wizard 4
The Configuration Wizard appears each time you log on to StorNext until
all steps of the wizard are completed. You can also control the wizard
manually:
• To set the Configuration Wizard to not appear the next time you log
in, select the
Don’t Show CW Again check box.
• To display the Configuration Wizard at any time, on the Config
Using the Configuration Wizard 4
menu, click
The Configuration Wizard consists of eight steps. (If Storage Manager is
not installed on the MDC, only the first two steps appear.) The wizard
Configuration Wizard.
lets you navigate between steps and tracks your progress as you
complete each step.
• To go to the next step, click Next.
• To return to a previous step, click the step in the list.
• To start the wizard over from the beginning, click Reset.
• To exit the wizard, click Done.
StorNext 3.1.3 Installation Guide 63
Page 81

Chapter 4 Configuring StorNext
Configuration Wizard
The following sections describe each step of the Configuration Wizard.
Each step consists of a separate wizard that guides you through a task. To
complete a task, follow the onscreen instructions. To see more detailed
instructions for completing a task, refer to the indicated section in the
StorNext User’s Guide.
Note: Using the Configuration Wizard to configure StorNext is
optional. All configuration tasks can be accessed at any time
using the StorNext main menu, as described in the following
sections.
Step 1: Enter License 4
The Enter License Wizard guides you through the steps of entering a
license string. A license string must be entered before you can configure
or use StorNext.
You can generate a temporary license that is valid for 30 days. To obtain a
permanent license, contact the Quantum Technical Assistance center at
licenses@quantum.com and provide the following information:
• The product serial number from the StorNext box or CD.
• The number of client machines connecting to the MDC.
• The StorNext Server ID number. (This number can be found on the
Enter License String window of the Enter License Wizard.)
To display the Enter License Wizard at any time, on the Config menu,
click
Enter License. For more information about entering a license, see
Chapter 4, “Common StorNext Tasks,” in the StorNext User’s Guide.
Step 2: Add File System 4
The Add New File System Wizard guides you through the steps of
creating and configuring a new file system. The wizard also lets you
establish a mount point for the file system, specify disk block size, and
customize stripe groups.
A file system is a shared data pool that can be accessed by client systems
and applications. Each file system contains one or more stripe groups. (A
stripe group is a logical volume that consists of one or more disks.)
StorNext 3.1.3 Installation Guide 64
Page 82

Chapter 4 Configuring StorNext
Configuration Wizard
To display the Add New File System Wizard at any time, on the Config
menu, click
Add File System. For more information about adding file
systems, see Chapter 6, “Managing the File System,” in the StorNext
User’s Guide.
Step 3: Add Library 4
The Add Library wizard guides you through the steps of adding and
configuring a tape library or vault. The wizard lets you specify the type of
library (SCSI, ACSLS, DAS, or vault) and set the appropriate parameters
for that library type.
To display the Add Library Wizard at any time, on the Config menu, click
Add Library. For more information about adding libraries, see Chapter 7,
“Managing Libraries,” in the StorNext User’s Guide.
Step 4: Add Tape Drive 4
The Add Drive Wizard guides you through the steps of adding and
configuring tape drives. The wizard lets you associate hardware devices
with libraries and, if necessary, map them to slots.
To display the Add Drive Wizard at any time, on the Config menu, click
Add Tape Drive. For more information about adding tape drives, see
Chapter 8, “Managing Drives and Disks,” in the StorNext User’s Guide.
Step 5: Add Media 4
The Add Media Wizard guides you through the steps of adding media to
a configured library. The wizard lets you specify a media type and, for
vaults, specify media IDs. (Before adding media, make sure no tape
drives contain media.)
To display the Add Media Wizard at any time, on the Config menu, click
Add Media. For more information about adding media, see Chapter 9,
“Managing Media,” in the StorNext User’s Guide.
StorNext 3.1.3 Installation Guide 65
Page 83

Chapter 4 Configuring StorNext
Configuration Wizard
Step 6: Add Storage Disks 4
The Add Storage Disk wizard guides you through the steps of adding
external storage disks to a managed system. The wizard lets you specify
which file systems to define as storage disks. Once defined, storage disks
can be used as a target media type when creating storage policies.
To display the Add Storage Disk Wizard at any time, on the Config menu,
click
Add Storage Disk. For more information about adding storage disks,
see Chapter 10, “Managing Storage Disks,” in the StorNext User’s Guide.
Step 7: Add Storage Policy 4
The Add New Storage Policy Wizard guides you through the steps of
adding disk-to-disk policy classes to a managed system. Storage policies
allow data to be intelligently moved between disks (stripe groups)
without affecting the file name space.
To display the Add New Storage Policy Wizard at any time, on the Config
menu, click
Add Storage Policy. For more information about adding
storage policies, see Chapter 11, “Data Migration Management,” in the
StorNext User’s Guide.
Step 8: E-Mail Notification 4
The E-mail Notification Wizard guides you through the steps of setting
up e-mail notifications on the MDC. The wizard lets you specify the
SMTP server to use for outgoing e-mail, and the addresses to which
system alerts and notifications are sent. (Make sure the SMTP server is
configured before setting up e-mail notifications.)
To display the E-mail Notification Wizard at any time, on the Config
menu, click
E-Mail Notification. For more information about setting up
e-mail notifications disks, see Chapter 4 “Common StorNext Tasks,” in
the StorNext User’s Guide.
StorNext 3.1.3 Installation Guide 66
Page 84

Configuring a Distributed LAN Client Server
Configuring a Distributed LAN Client Server
Traditional StorNext SAN clients access data disks using a high
throughput, low-latency fibre channel connection. In addition, using the
distributed LAN client and server feature, StorNext clients can access
data disks over a network instead of directly accessing disks.
A StorNext client running on Linux or Windows can be configured as a
distributed LAN client or a distributed LAN server. (This is a licensed
feature.)
• Distributed LAN Server: A distributed LAN server has direct access to
data disks (using fibre channel) and makes the shared storage pool
available to distributed LAN clients over a network.
• Distributed LAN Client: A distributed LAN client does not have direct
access to data disks and instead accesses the shared storage pool by
connecting to a distributed LAN server over a network. (Distributed
LAN clients have full StorNext client functionality.)
Chapter 4 Configuring StorNext
Note: A StorNext client configured as a distributed LAN server
requires a dedicated system. Do not run other applications or
services on a system configured as a distributed LAN server.
To configure a Linux client as a distributed LAN client, see Configuring a
Distributed LAN Client on Linux. To configure a Linux client as a
distributed LAN server, see Configuring a Distributed LAN Server on
Linux.
To configure a Windows client as a distributed LAN server or a
distributed LAN client, use the Windows Client Configuration utility. For
more information, see
LAN on page 81.
StorNext 3.1.3 Installation Guide 67
Client Configuration on page 73 and Distributed
Page 85

Chapter 4 Configuring StorNext
Configuring a Distributed LAN Client Server
Configuring a Distributed LAN Client on Linux 4
Configuring a Distributed LAN Server on Linux 4
To configure a StorNext client as a distributed LAN client, edit mount
options in the
/etc/fstab file.
1 Stop the StorNext client. At the command prompt, type:
/etc/init.d/cvfs stop
2 Configure the client to mount a file system as a distributed LAN
client. To do this, edit the
/etc/fstab file so that it contains the
following line:
<file system> <mount point> cvfs rw,diskproxy=client 0 0
where <file system> is the name of the StorNext file system and <mount
point>
is the directory path where the file system is mounted.
3 Start the StorNext client. At the command prompt, type:
/etc/init.d/cvfs start
To configure a StorNext client as a distributed LAN server, edit mount
options in the
/etc/fstab file, and then configure distributed LAN server
options.
1 Stop the StorNext client. At the command prompt, type:
/etc/init.d/cvfs stop
2 Configure the client to mount a file system as a distributed LAN
server. To do this, edit the
/etc/fstab file so that it contains the
following line:
<file system> <mount point> cvfs rw,diskproxy=server 0 0
where <file system> is the name of the StorNext file system and <mount
point>
is the directory path where the file system is mounted.
3 Change to the /usr/cvfs/bin/ directory.
4 Launch the StorNext distributed LAN server configuration utility. At
the command prompt, type:
./sndpscfg -e
Note: To get help for the sndpscfg utility, at the command
prompt, type:
./sndpscfig -h
The distributed LAN server configuration utility appears (figure 36).
StorNext 3.1.3 Installation Guide 68
Page 86

Figure 36 sndpscfg
Configuration Utility
Chapter 4 Configuring StorNext
Configuring a Distributed LAN Client Server
5 Edit the default distributed LAN server configuration:
• (Required) Uncomment (delete the # next to) the line that
corresponds to the network interface used by the distributed LAN
server when connecting to distributed LAN clients. (For best
performance, do not choose the network used for metadata.)
• (Optional) To change a tunable parameter from the default value,
uncomment the parameter, and then specify a new value.
Table 12
describes the tunable parameters.
Note: The distributed LAN server configuration utility uses the
default text editor. If a default text editor has not been
specified, the utility uses the
vi editor.
StorNext 3.1.3 Installation Guide 69
Page 87

Chapter 4 Configuring StorNext
Configuring a Distributed LAN Client Server
Table 12 Distributed LAN
Server Parameters
Field / Button Description
tcp_window_size_kb
The TCP window size (in KB) used by the
distributed LAN server. (Default: 64)
transfer_buffer_size_kb
The transfer buffer size (in KB) used by the
distributed LAN server. A larger buffer may
increase performance for larger files.
(Default: 256)
transfer_buffer_count
The number of transfer buffers used by the
distributed LAN server. This parameter is
used only by Windows servers and clients.
Linux servers pass the value of this
parameter to Windows clients. (Default: 16)
server_buffer_count
The number of I/O buffers allocated for
each network interface on the distributed
LAN server. This parameter is used only by
Linux servers. (Default: 8)
daemon_threads
The maximum number of daemon threads
used by the distributed LAN server.
(Default: 8)
6 When you are done making edits, type :x to save and close the
configuration file.
The configuration is saved in the file dpserver in the /user/cvfs/config/
directory.
Note: To edit this file at a later date, you can run the sndpscfg
utility again or edit the
dpserver file directly.
7 Start the StorNext client. At the command prompt, type:
/etc/init.d/cvfs start
StorNext 3.1.3 Installation Guide 70
Page 88

Chapter 4 Configuring StorNext
Configuring a Distributed LAN Client Server
Creating an Override Configuration 4
By default, the settings specified in the dpserver configuration file are
used for all file systems mounted by the distributed LAN server. To use
different settings for a file system, create an override configuration file for
that file system. At the command prompt, type:
./sndpscfg -E <file system>
where <file system> is the name of the file system to which the override
settings apply. Edit the configuration file, and then save and exit. A new
configuration file with the name
/user/cvfs/config/ directory.
dpserver.<file system> is created in the
Using Distributed LAN Client and Server Commands 4
Use the cvadmin commands described in Table 13 to see information
about distributed LAN servers and clients. (For more information about
using
cvadmin commands, see the CLI Reference Guide.)
Table 13 Distributed LAN
Client and Server Commands
Command Description
proxy
Lists all distributed LAN servers for the
currently selected file system.
proxy long
Lists all distributed LAN servers for the
currently selected file system, as well as
tunable parameters and attached disks.
proxy who <distributed LAN
client>
Lists distributed LAN servers connected
to the specified distributed LAN client, as
well as current I/O statistics.
proxy who <distributed LAN
server>
Lists distributed LAN clients connected to
the specified distributed LAN server, as
well as current I/O statistics.
StorNext 3.1.3 Installation Guide 71
Page 89

Windows Configuration Utilities
To configure StorNext File System or the StorNext client software on
Windows operating systems, use the Windows configuration utilities.
The configuration utilities let you set up a Windows-based metadata
controller, configure a StorNext client, and work with StorNext file
systems.
To run a configuration utility, on the Windows Start menu, click All
Programs > StorNext File System
The StorNext client software includes the following configuration
utilities:
• Client Configuration on page 73
• Disk Device Labeler on page 83
• License Identifier on page 86
• Simple File System Configuration on page 86
Chapter 4 Configuring StorNext
Windows Configuration Utilities
, and then click the utility.
• Start File System Services on page 88
• Stop and Remove File System Services on page 88
• Stop File System Services on page 88
• Version Information on page 88
StorNext File System server includes all the configuration utilities
installed by the client software as well as the following additional
utilities:
• Check (Read-Only) a File System on page 89
• File System Startup List on page 89
• Re-initialize a File System on page 91
• Repair a File System on page 91
• Server Administration on page 91
• Server Configuration on page 97
StorNext 3.1.3 Installation Guide 72
Page 90

Chapter 4 Configuring StorNext
Windows Configuration Utilities
Client Configuration 4
The Client Configuration utility lets you view and modify properties for
the StorNext client software. Use the utility to add name servers, map file
systems to drives, and configure a distributed LAN server or a
distributed LAN client.
To run the Client Configuration utility, on the Windows Start menu, click
All Programs > StorNext File System > Client Configuration.
The Client Configuration utility includes six tabs:
• Drive Mappings on page 73
• FS Name Servers on page 75
• Authentication on page 76
• Mount Options on page 78
• Syslog Level on page 79
• Cache Parameters on page 80
• Distributed LAN on page 81
Click a tab to view or modify StorNext client properties. After making
changes on one or more tabs, click
appears prompting you to restart the system. Click
OK to save the changes. A message
Yes. Most changes do
not take affect until the system is restarted.
Drive Mappings 4
To access a StorNext file system, it must be mapped to a local drive letter
on the client system.
Use the Drive Mappings tab (figure 37) to map file systems to local drives.
Table 14 describes the fields on the Drive Mappings tab.
Note: You must specify a file system name server on the FS Name
Servers
StorNext 3.1.3 Installation Guide 73
tab before mapping drives.
Page 91

Figure 37 Client Configuration:
Drive Mappings
Chapter 4 Configuring StorNext
Windows Configuration Utilities
Note: You must disable the Windows Recycle Bin for each local
drive that is mapped to a file system. Right click the
Bin
icon and click Properties. On the Global tab, click Configure
Drives Independently
the
Do not move files to the Recycle Bin check box, and then
click
OK.
. On the appropriate Local Disk tab, select
Recycle
Table 14 Client Configuration:
Drive Mappings
Field / Button Description
Map Drive - Drive
Select a local drive letter to associate with a
file system.
Map Drive - File
System
Map Drive - Map
Type or select the name of the file system to
associate with the selected local drive letter.
Click to associate the selected local drive letter
with the selected file system.
StorNext 3.1.3 Installation Guide 74
Page 92

Field / Button Description
Chapter 4 Configuring StorNext
Windows Configuration Utilities
Select Drive - Drive
Select the mapped drive to configure on the
other tabs of the Client Configuration utility.
Unmap Drive
Unmap
Display File System
Critical Events to
Desk Top
Select a drive to unmap.
Click to unmap the selected drive.
Select to display a notification dialog box if a
critical event occurs.
(Because the dialog box must be manually
dismissed, clear this check box for unattended
client systems.)
Disable SNFS ONC
Portmapper Process
Select to disable the SNFS portmapper service.
(Disable this service only if a product that
provides equivalent functionality is installed,
for example, the portmapper installed with
Microsoft Services for Unix).
Don’t Register with
ONC Portmapper (port
111)
Select to not register with the SNFS
portmapper service.
FS Name Servers 4
To access a file system, you must first specify the name server (StorNext
host) where the file system is located. The first host in the list is the
primary name server. Additional hosts are backups for use in the event of
a failover.
Use the FS Name Servers tab (figure 38) to specify the primary StorNext
host. Table 15 describes the fields on the FS Name Servers tab.
Note: Make sure the host list is the same for all clients on the SAN.
An incorrect or incomplete host list may prevent the client
from connecting to the file system.
StorNext 3.1.3 Installation Guide 75
Page 93

Figure 38 Client Configuration:
FS Name Servers
Chapter 4 Configuring StorNext
Windows Configuration Utilities
Table 15 Client Configuration:
FS Name Servers
Field / Button Description
Add
Click to add the name server entered in the
box.
Remove
Click to remove the name server selected in
the list.
Move Up
Click to move the selected name server up in
the list.
Move Down
Click to move the selected name server down
in the list.
Authentication 4
If a Windows client accesses file systems that are also accessed by nonWindows clients, you must specify an authentication method: Active
Directory, PCNFSD, or NIS. This method is used to map the Windows
StorNext 3.1.3 Installation Guide 76
Page 94

Figure 39 Client Configuration:
Authentication
Chapter 4 Configuring StorNext
Windows Configuration Utilities
user to a user ID and group on the SAN. (Changes are applied when you
click
Apply. You do not need to restart the client system.)
Use the Authentication tab (figure 39) to specify an authentication
method. Table 16 describes the fields on the Authentication tab.
Note: If your StorNext installation is Windows-only and you do not
plan to add non-Windows clients, you do not need to specify
an authentication method.
Table 16 Client Configuration:
Authentication
Field / Button Description
Windows User
Select the Windows user to map to a user ID
and group on the SAN.
StorNext 3.1.3 Installation Guide 77
Page 95

Field / Button Description
Chapter 4 Configuring StorNext
Windows Configuration Utilities
Use Active Directory
User Name
PCNFSD
PCNFSD - Server
NIS
NIS - Server
NIS - Domain Name
File Creation
Permissions
Apply
Click to use LDAP to obtain the Active
Directory/Services for UNIX (SFU) mapping
for the selected user. (The client system must
be part of an Active Directory domain.)
Type the user name that should be sent to the
authentication server. (PCNFSD and NIS
methods only.)
Click to use a PCNFSD server for
authentication.
Type the IP address of the PCNFSD server.
Click to use an NIS server for authentication.
Type the name of the NIS server.
Type the domain name of the NIS server.
Select the default UNIX permissions for new
files created by the selected user. (PCNFSD
and NIS methods only.)
Click to Apply changes. (You do not need to
restart the client system.)
Mount Options 4
The Mount Options tab (figure 40) displays the mount options for the
drive currently selected on the Drive Mappings tab.
Caution: Changing the values on the Mount Options tab can affect
system performance and stability. Do not change mount
options unless instructed to do so by the Quantum
Technical Assistance Center.
StorNext 3.1.3 Installation Guide 78
Page 96

Figure 40 Client Configuration:
Mount Options
Chapter 4 Configuring StorNext
Windows Configuration Utilities
Note: Selecting the Read Only check box has no effect. This feature
has been disabled.
Syslog Level 4
The system log level determines the types of messages the file system
records in the system event log.
Use the Syslog Level tab (figure 41) to specify the system log level. The
None level setting provides the least amount of logging and the Debug
level provides the most. The default level is
StorNext 3.1.3 Installation Guide 79
Info.
Page 97

Figure 41 Client Configuration:
Syslog Level
Chapter 4 Configuring StorNext
Windows Configuration Utilities
Cache Parameters 4
The Cache Parameters tab (figure 42) displays performance values that
control how many file system lookup names are kept in memory.
Caution: Changing the values on the Cache Parameters tab can
affect system performance and stability. Do not change
cache parameters unless instructed to do so by the
Quantum Technical Assistance Center.
StorNext 3.1.3 Installation Guide 80
Page 98

Figure 42 Client Configuration:
Cache Parameters
Chapter 4 Configuring StorNext
Windows Configuration Utilities
Distributed LAN 4
A StorNext client running on Windows can be configured as a distributed
LAN client or a distributed LAN server. (This is a licensed feature.)
• Distributed LAN Server: A distributed LAN server has direct access to
data disks (using fibre channel) and makes the shared storage pool
available to distributed LAN clients over a network.
• Distributed LAN Client: A distributed LAN client does not have direct
access to data disks and instead accesses the shared storage pool by
connecting to a distributed LAN server over a network. (Distributed
LAN clients have full StorNext client functionality.)
Note: A StorNext client configured as a distributed LAN server
requires a dedicated system. Do not run other applications or
services on a system configured as a distributed LAN server.
StorNext 3.1.3 Installation Guide 81
Page 99

Figure 43 Client Configuration:
Distributed LAN
Chapter 4 Configuring StorNext
Windows Configuration Utilities
Use the Distributed LAN tab (figure 43) to configure a distributed LAN
server or a distributed LAN client. Table 17 describes the fields on the
Distributed LAN tab.
Table 17 Client Configuration:
Distributed LAN
Field / Button Description
Enable Client
Select to configure the StorNext client as a
distributed LAN client. The StorNext client
will connect to all available distributed LAN
servers.
(If you select this check box, all other fields on
the tab become unavailable.)
Enable Server
Select to configure the StorNext client as a
distributed LAN server. The StorNext client
will make the disks for this file system
available to distributed LAN clients over the
specified LAN.
StorNext 3.1.3 Installation Guide 82
Page 100

Field / Button Description
Chapter 4 Configuring StorNext
Windows Configuration Utilities
Disk Device Labeler 4
Number of Transfer
Buffers
Transfer Buffer Size
(kb)
Type the number of transfer buffers used by
the distributed LAN server. (Default: 16)
Type the transfer buffer size (in KB) used by
the distributed LAN server. A larger buffer
may increase performance for larger files.
(Default: 256)
TCP Window Size (kb)
Type the TCP window size (in KB) used by
the distributed LAN server. (Default: 64)
Max Daemon Threads
Type the maximum number of daemon
threads used by the distributed LAN server.
(Default: 8)
Server Interfaces
Select the server interface (network interface
card) to use when connecting to distributed
LAN clients. If a network interface has more
than one address configured, you must select
one of the addresses to use for distributed
LAN connections. (For best performance, do
not choose the network used for metadata.)
The Disk Device Labeler utility lets you configure StorNext File System
storage area network (SAN) disks. Use the Disk Device Labeler to create a
list of disk labels, associated device names, and (optional) the sectors to
use.
Note: Run the Disk Device Labeler on a system that has visibility to
all disk devices on the SAN.
The file system uses the volume labels to determine which disk drives to
use. The label name written to a disk device must match the disk name
specified in the Server Configuration utility. For more information, see
Server Configuration on page 97.
StorNext 3.1.3 Installation Guide 83
 Loading...