


WU211
IEEE802.16E WIMAX USB DONGLE
USER GUIDE
MAY 7, 2009
Windows is a registered trademark of Microsoft Corporation in the United States and other countries.
The information presented is subject to change without notice.
Conformance statements
Industry Canada Notice:
This device complies with RSS-210 of the Industry Canada Rules. Operation is subject to the following two conditions:
(1) This device may not cause harmful interference, and
(2) this device must accept any interference received, including interference that may cause undesired operation.
IMPORTANT NOTE:
Radiation Exposure Statement:
This equipment complies with IC radiation exposure limits set forth for an uncontrolled environment. End users must follow the specific operating
instructions for satisfying RF exposure compliance. To maintain compliance with IC RF exposure compliance requirements, please follow operation
instruction as documented in this manual.
EU Compliance
This product has been tested in accordance to, and complies with the European Low Voltage Directive (73/23/EEC) and European EMC
Directive (89/336/EEC). Copies of the Declaration of Compliance and installation information in accordance with the requirements in accordance with EU
directives can be obtained from the local Alcatel-Lucent representative or by contacting the Local Alcatel-Lucent Office.
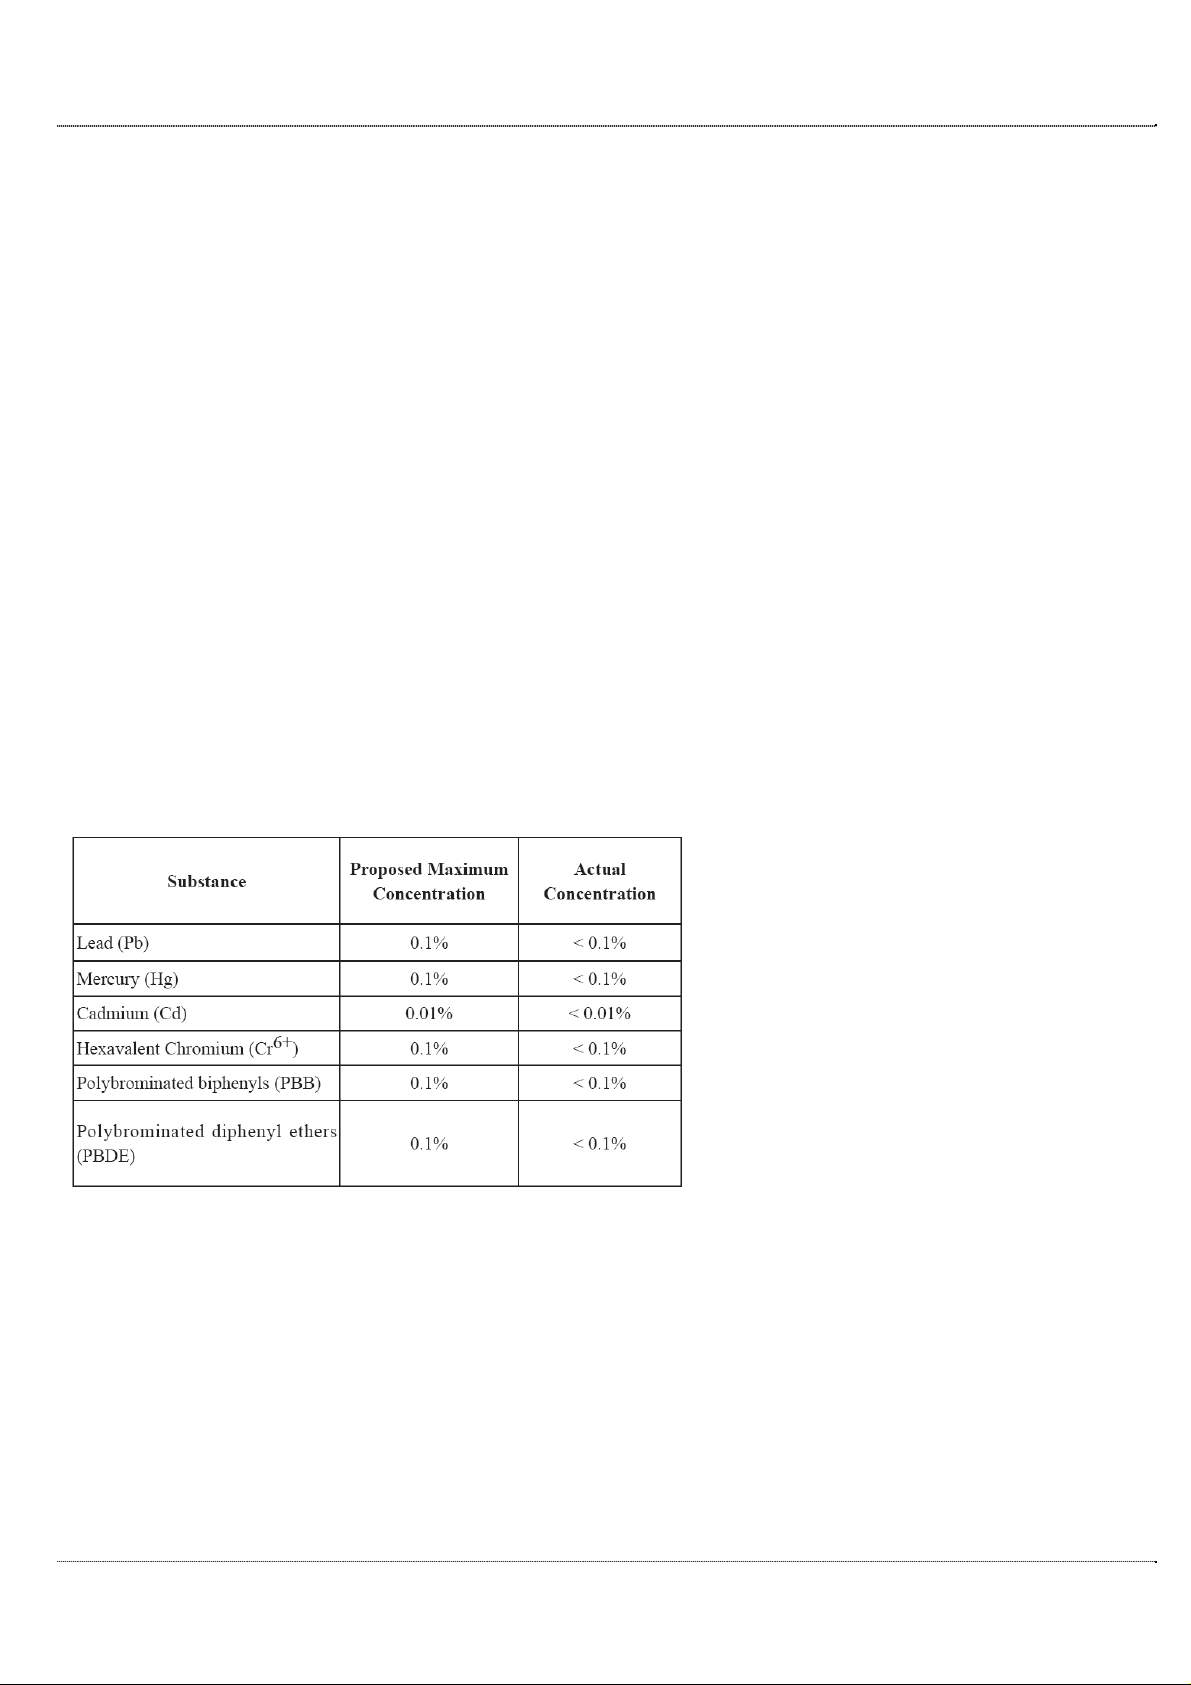
Declaration of RoHS Compliance
This product has been designed and manufactured in compliance with Directive 2002/95/EC of the European Parliament and the Council on re striction of the
use of certain hazardous substances in electrical and electronic equipment (RoHS Directive) and is deemed to comply with the maximum concentration
values issued by the European Technical Adaptation Committee (TAC) as shown below:
Certain components of products as stated above are exempted under the Annex of the RoHS Directives as noted below:
Examples of exempted components are:
(1) Mercury in compact fluorescent lamps not exceeding 5 mg per lamp and in other lamps not specifically mentioned in the Annex of RoHS
Directive.
(2) Lead in glass of cathode ray tubes, electronic components, fluorescent tubes, and electronic ceramic parts (e.g. piezoelectronic devices).
(3) Lead in high temperature type solders (i.e. lead-based alloys containing 85% by weight or more lead).
(4) Lead as an allotting element in steel containing up to 0.35% lead by weight, aluminium containing up to 0.4% lead by weight and as a cooper
alloy containing up to 4% lead by weight.
ii
E1P7 October 2008

Federal Communication Commission Interference Statement
This equipment has been tested and found to comply with the limits for a Class B digital device,
pursuant to Part 15 of the FCC Rules. These limits are designed to provide reasonable protection
against harmful interference in a residential installation. This equipment generates uses and can
radiate radio frequency energy and, if not installed and used in accordance with the instructions,
may cause harmful interference to radio communications. However, there is no guarantee that
interference will not occur in a particular installation. If this equipment does cause harmful
interference to radio or television reception, which can be determined by turning the equipment
off and on, the user is encouraged to try to correct the interference by one of the following
measures:
- Reorient or relocate the receiving antenna.
- Increase the separation between the equipment and receiver.
- Connect the equipment into an outlet on a circuit different from that to which the receiver is
connected.
- Consult the dealer or an experienced radio/TV technician for help.
FCC Caution: Any changes or modifications not expressly approved by the party responsible for
compliance could void the user's authority to operate this equipment.
This device complies with Part 15 of the FCC Rules. Operation is subject to the following two
conditions:
(1) This device may not cause harmful interference, and
(2) this device must accept any interference received, including interference that may cause
undesired operation.
IMPORTANT NOTE:
FCC Radiation Exposure Statement:
This equipment complies with FCC radiation exposure limits set forth for an uncontrolled environment.
End users must follow the specific operating instructions for satisfying RF exposure compliance. To
maintain compliance with FCC RF exposure compliance requirements, please follow operation
instruction as documented in this manual.
This transmitter must not be co-
SAR complia
be used in typical laptop computer with USB slot. Other application like handheld PC or similar device
has not been verified and may not compliance with related RF exposure rule and such use shall be
prohibited.
nce has been established in typical laptop computer(s) with USB slot, and product could
transmitting with any other antenna or transmitter.

Contents
Contents
About this document v
How to use this document..........................................................................................................................v
Safety information .....................................................................................................................................v
Conventions used.......................................................................................................................................v
Technical support.......................................................................................................................................v
1 Getting started 1
Package Contents...................................................................................................錯誤! 尚未定義書籤。
System Requirements ................................................................................................................................1
Application and utility overview ...............................................................................................................1
Device specifications.................................................................................................................................1
Hardware Overview...................................................................................................................................4
2 Installation 5
Hardware and Software installation...........................................................................................................5
Software uninstallation ..............................................................................................................................8
3 Operation and use 11
Before you begin......................................................................................................................................11
Info Mode ................................................................................................................................................13
Connecting to your WiMAX network .....................................................................................................14
Software upgrade.....................................................................................................................................16
Updating automatically............................................................................................................................17
Updating manually...................................................................................................................................18
Factory settings mode..............................................................................................................................20
4 Maintenance and troubleshooting 22
Glossary 25
iv
E1P7 October 2008
About this document
How to use this document
This User Guide describes the safety information, features, software and hardware
installation as well as the operation of WU211.
Safety information
If not used for long periods of time, disconnect your device from your computer, store in a
cool and dry environment.
Do not pour water on your device; protect it from dust and any substance potentially
harmful to electronic components.
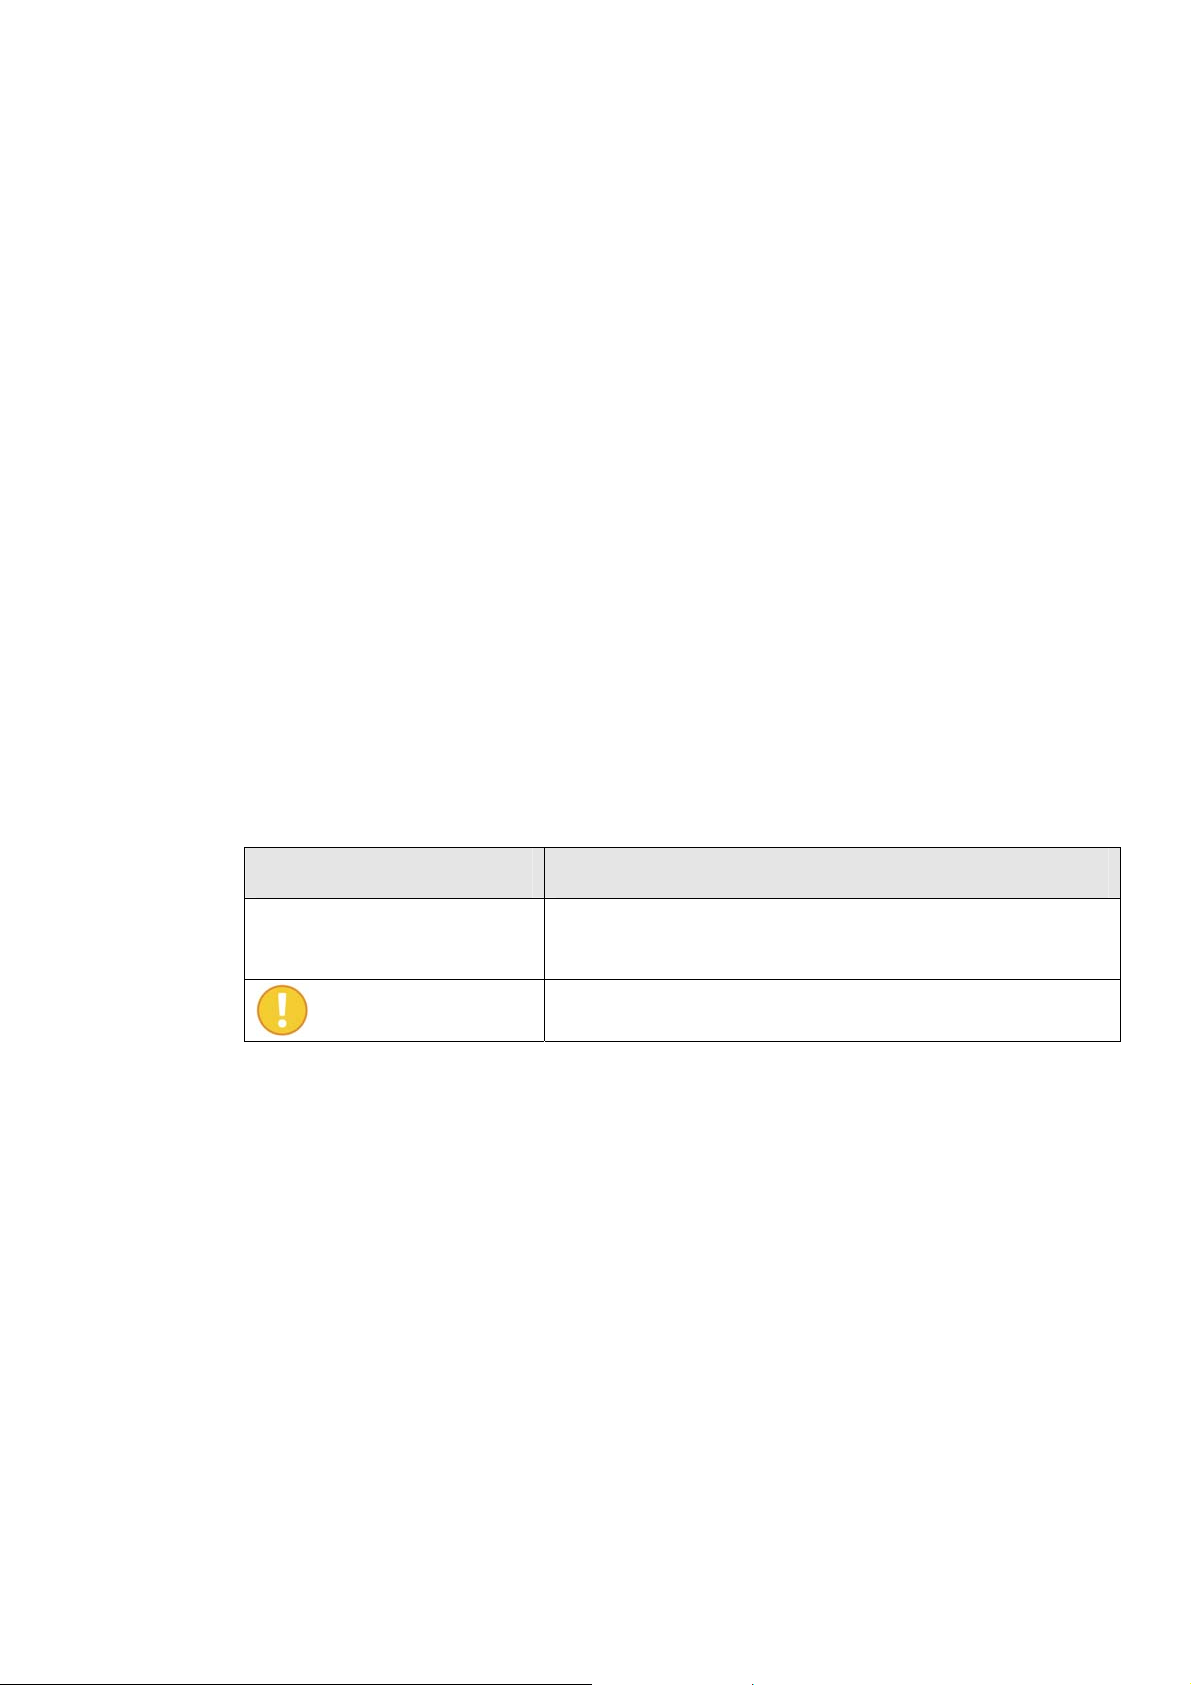
Conventions used
This guide uses the following typographical conventions:
Appearance Description
Italicized text
Technical support
Please contact your service provider customer care as indicated on the Support &
Warranty card provided with your device package.
warning
• File and directory names
• Emphasized information
Warning or important information


1 Getting started
System Requirements
• PC with available USB slot
• Microsoft
®
XP or Microsoft Windows® Vista® operating system
• CD-ROM drive
• 180 MB hard disk space
Application and utility overview
Your MIMO USB Dongle IEEE 802.16e-2005 comes equipped with state of the art
Scalable OFDMA based technology. It provides unrivaled, seamless, wireless
connectivity through a user-friendly graphical interface, Wireless Connection Manager
(WCM).
The easy-to-use Windows XP / Windows Vista based utility provides the graphic
interface for system/link status, configuration and firmware updates.
The following is an overview of the WCM included with your MIMO USB Dongle.
Device specifications
• MIMO USB Dongle
• Reference standard: IEEE 802.16e-2005
• Radio Access Method: TDD
• Frequency:
2.496-2.69 GHz
• Channel Bandwidth / FFT size: 5/10MHz
• Central frequency resolution: 200/250kHz
• Modulation: S-OFDMA, MIMO
• FEC: CC (Convolutional Coding), CTC (Convolutional Turbo Code)
• Maximum output power at antenna port: 23dBm ±0.5dB
• Antenna:
2.8dBi (2.5GHz) peak gain x 2 printed antennas
-4.5dBi average gain
Alcatel-Lucent 9799 MUD 2.5 GHz – User Guide Alcatel-Lucent 1
E1P7 October 2008

錯誤! 尚未定義樣式。
錯誤! 尚未定義樣式。
• QoS management based on classification
• Security: EAP-TTLS/CHAP-based user authentication, CMAC message authentication, CCM mode 128-bit
AES data ciphering
• Max power consumption: < 2.5W

錯誤! 尚未定義樣式。
Hardware Specifications
錯誤! 尚未定義樣式。
• USB 2.0
• 2 LEDs: Power indication and WiMAX connection status
Physical Specifications
• Dimension: 58 (W) x 10 (D) x 125 (H) mm
• Weight: 85g
Environmental Specifications
• Operation T emperatur e: 0ºC ~ 45ºC
• Operation Humidity: 10% ~ 90% (non-condensing)
• Storage Temperature: -25ºC ~ 55ºC
• Storage Humidity: 10% ~ 95% (non- condensing)
Certification
• FCC
錯誤! 尚未定義樣式。
錯誤! 尚未定義樣式。
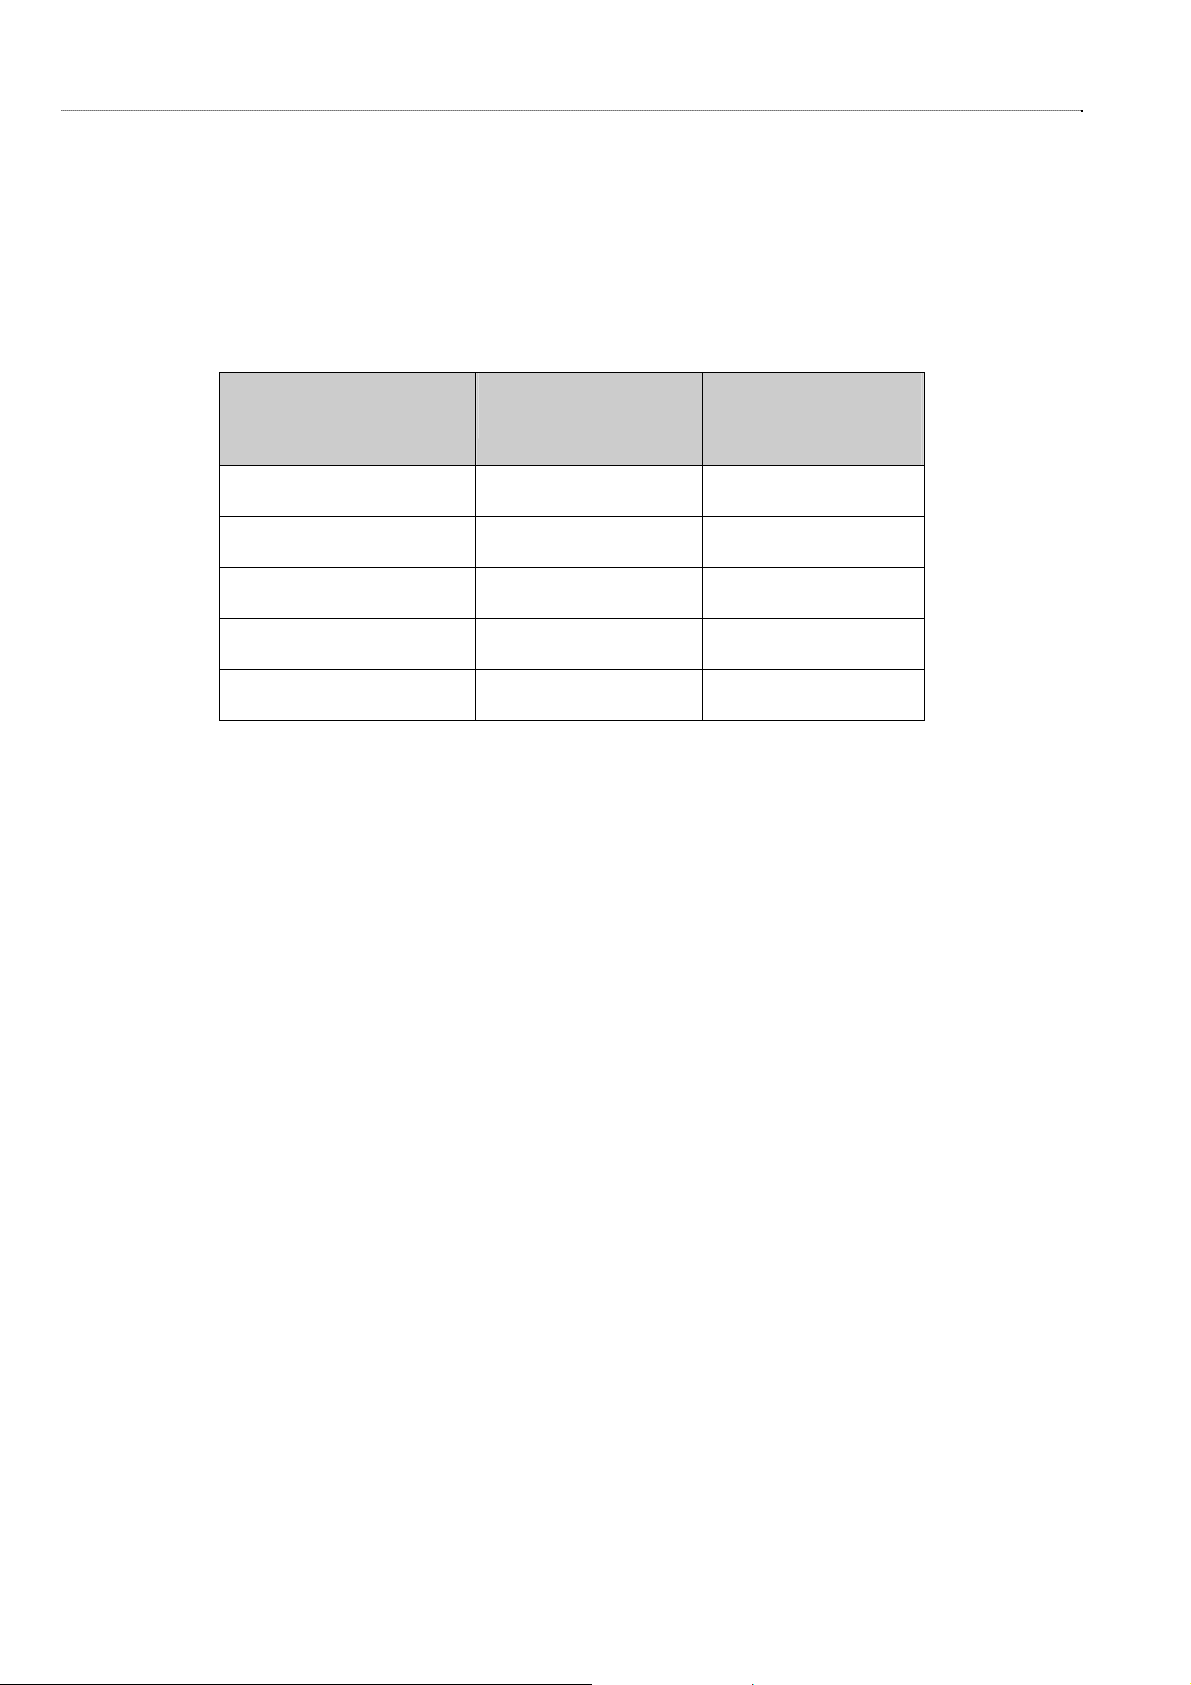
Hardware Overview
LED function:
LED Function LED 1
Driver initialized
Firmware download
Download complete
No connection
Normal Operation
RED (solid) OFF
RED (flashing) OFF
RED OFF
RED OFF
OFF Flashing
LED 2
(DL and UL Traffic)

2 Installation
Overview
Before you can use your new MIMO USB Dongle, your computer must have the proper
software drivers installed. Do not install your USB Dongle until prompted to do so during
the software installation procedure.
Before installing your USB Dongle, first install the software found in the Installation
CD.
Hardware and Software installation
Overview
The following section will guide you through the MIMO USB Dongle hardware and
software installation.
Only plug in your USB Dongle after being prompted to do so. If you have problems to
find this slot, have a look at your computer’s user manual or consult the manufacturer of
your computer. Plug in the USB Dongle carefully into the slot, making sure that the USB
Dongle is firmly seated in the slot. The MIMO USB Dongle software installs drivers on
your laptop that allows you to use the USB Dongle just like a regular modem.
The following example screens are for reference only. Software version and MAC
address are subject to change.
Related information
This document describes how to install your MIMO USB Dongle in a Windows XP or
Windows Vista operating system. Please note that the screen shots are taken using a
Windows Vista operating system and may differ slightly from a Windows XP
environment. However the functionality is the same.
Windows Vista users must install under Administrator mode for installation to be
complete.
Alcatel-Lucent 9799 MUD 2.5 GHz – User Guide Alcatel-Lucent 5
E1P7 October 2008

錯誤! 尚未定義樣式。
Before you begin
Before installation, make sure you have a computer with the following:
Procedure
1. Place the installation CD in the CD ROM drive. The installation program will automatically
run. If it does not, locate and double-click on setup.exe found in the installation CD.
2. The Choose Setup Language screen displays. Choose your desired language and click OK.
錯誤! 尚未定義樣式。
• A minimum of 180 MB available hard disk space
• A CD-ROM drive
• An available USB slot
• Windows XP or Windows Vista operating system
Do not install your USB Dongle at this time.
3. WCM setup prepares the InstallShield Wizard, which will guide you through the installation
process.
Click the Next button to continue installation.

錯誤! 尚未定義樣式。
4. The installation wizard is ready to install.
Click the Install button to begin the installation.
5. The utility and drivers are automatically installed and may take several minutes.
6. You are prompted to insert your USB Dongle.
錯誤! 尚未定義樣式。
To review or make changes at this time, click the Back button. To cancel the
installation process, click Cancel.
Windows Vista users, a security screen may prompt you to identify the WCM
program. To continue installation, click Allow.
7. With the LEDs facing up and the connectors facing the slot, slide the MIMO USB Dongle into
the slot.
The LED 1 indicator turns on if it is properly inserted.
8. The wizard automatically continues the installation process.
9. The Windows Security screen displays. Click Install this driver software anyway to continue
the installation.

錯誤! 尚未定義樣式。
錯誤! 尚未定義樣式。
10. Installation is complete. Click Finish.
11. After installing the WCM, the following icon displays in your System Tray.
12. The Connection Manager main window opens automatically.
Software uninstallation
Overview
The following section will guide you through the MIMO USB Dongle software
uninstallation procedure.
Before you begin
Before proceeding, ensure that your Wireless Connection Manager is closed to facilitate
an easy uninstallation procedure.
Procedure
Windows Vista Users:
1. Navigate to Start->All Programs->Alcatel-Lucent 9777->WCM and click Uninstall.
2. You are prompted to verify the process. Click Yes to proceed.
3. The Windows Installer removes the WCM software from your system.
Windows XP Users:
1. Navigate to Start->Programs->Alcatel-Lucent 9777->WCM and click Uninstall.
2. You are prompted to verify the process. Click Yes to proceed.
The Windows Installer removes the WCM software from your system.
A reboot will be required after uninstalling the Wireless Connection Manager.
Or:
3. Place the installation CD in the CD ROM drive.
4. You are prompted to verify the uninstallation process. Click Yes.
5. The following screen displays.
Click the OK button to continue or Cancel to stop at this time.

錯誤! 尚未定義樣式。
錯誤! 尚未定義樣式。


3 Operation and use
Overview
Your MIMO USB Dongle comes with an easy-to-use graphic user interface. The
following chapter provides information for login in and connecting to your WiMAX
account.
Menu screens are subject to change and may differ from the actual working sample.
Before you begin
Before you can connect to your network, make sure you have the following:
• WiMAX account information as supplied by your service provider.
Identifying your WCM
The following screen shows the various elements found on the WCM menu screen.
Alcatel-Lucent 9799 MUD 2.5 GHz – User Guide Alcatel-Lucent 11
E1P7 October 2008

錯誤! 尚未定義樣式。
錯誤! 尚未定義樣式。
Information Pane:
Connect:
Signal Strength
Link Quality
Advanced
Info
Account
Displays current status information related to the WiMAX connection.
Status line (first line of the information pane): indicates the
connection status
BSID: gives the identifier of the BS your device is connected to
Operator Name: name of the operator you subscribed to
IP Address: network address assigned to your device by the operator
Device status: status of your device
Click to establish connection to your WiMAX account.
See troubleshooting for further information.
WiMAX signal strength
WiMAX signal quality
Settings shall be done only by the service provider, and are accessible
only by password.
Unauthorized modification of any Advanced parameters may
cause damage to your system, software or device.
Displays driver, firmware, library, package version, MAC address,
and access to the software upgrade.
Click to set your WiMAX account login information.
Network
Your WiMAX account login information shall be entered before
trying to connect.
Displays information regarding the connected network
Network option is not available in this version.

錯誤! 尚未定義樣式。
Info Mode
The following section describes the information menu in your WCM.
Procedure
1. Locate the following icon in your System Tray.
2. Double-click on the icon to open the WCM main menu.
3. The main menu displays. Click the Info button.
錯誤! 尚未定義樣式。
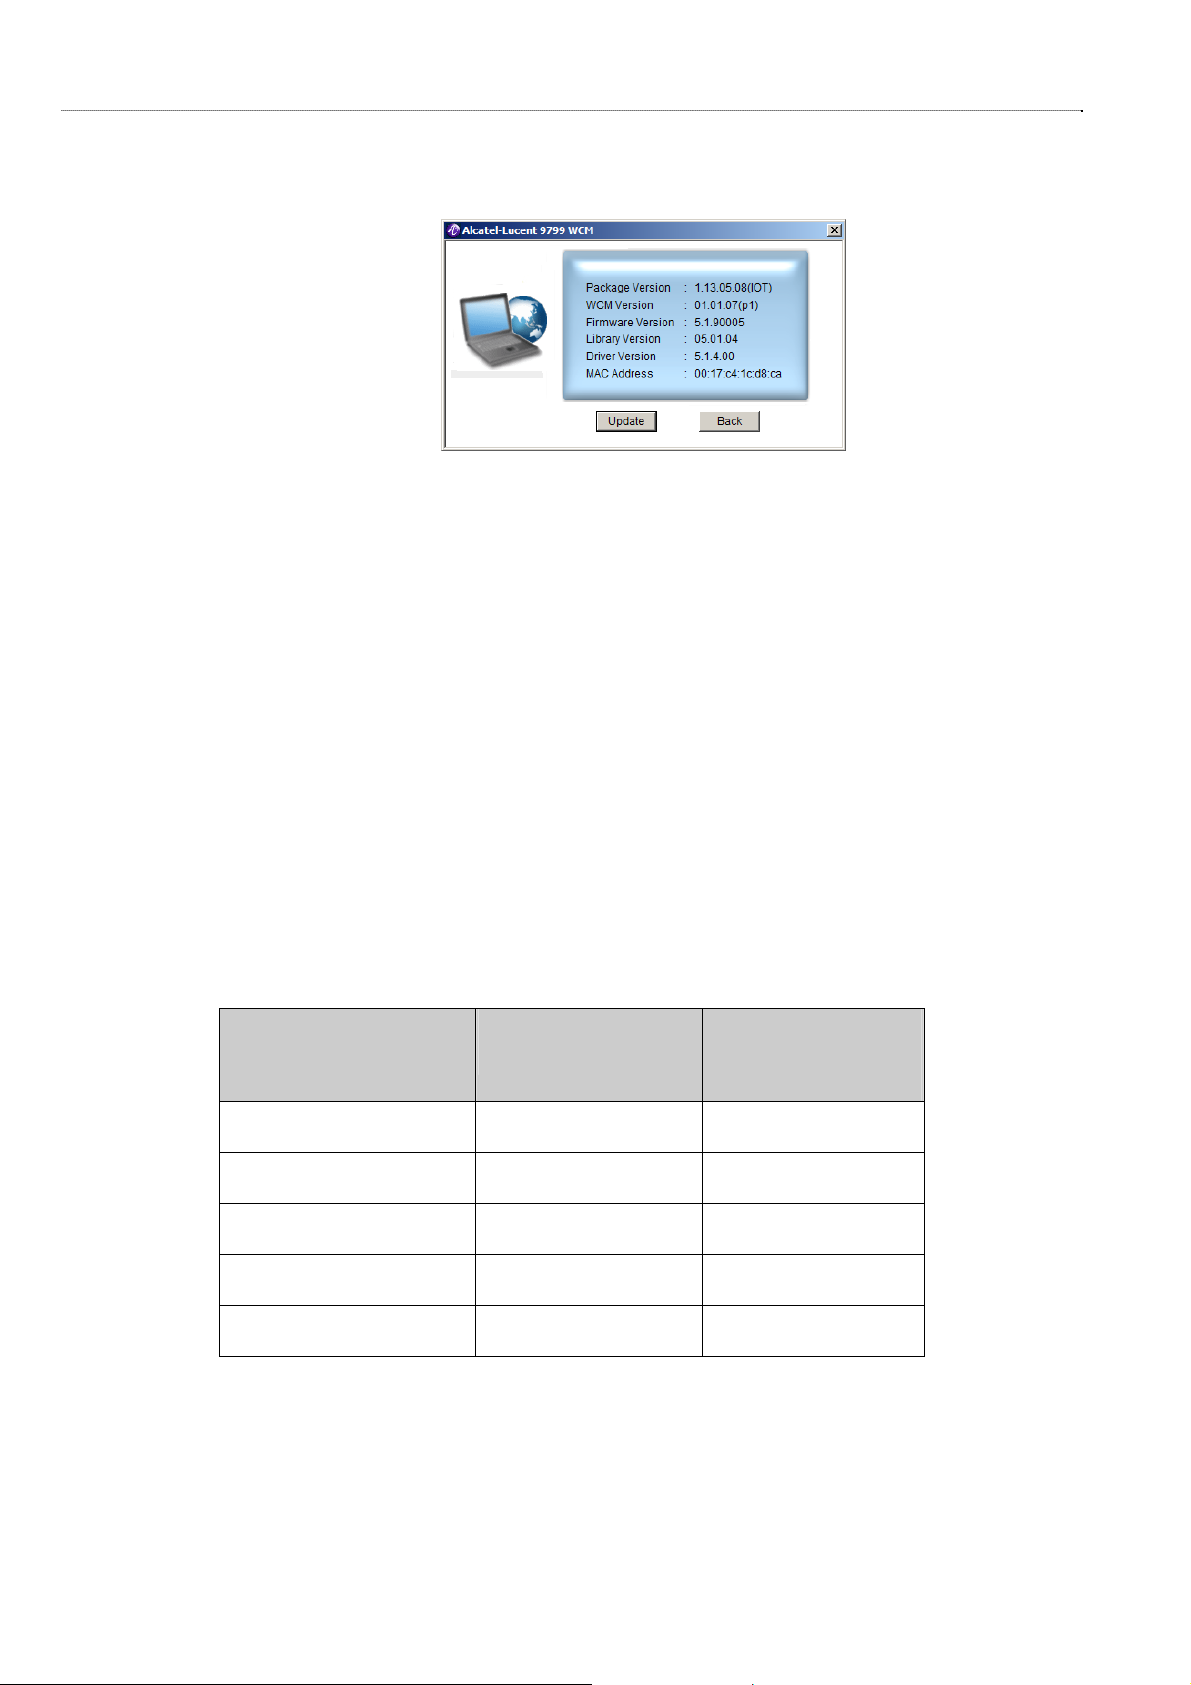
4. The Info screen displays the Package, WCM, Firmware, Library and Driver version and MAC
address of your WCM.

錯誤! 尚未定義樣式。
錯誤! 尚未定義樣式。
Connecting to your WiMAX network
Overview
The following section will guide you through the necessary steps in order to connect and
login to your WiMAX account.
Procedure
1. Locate the following icon in your System Tray.
2. Double-click on the icon to open the WCM main menu.
3. Click Account to enter the WiMAX Account screen.
4. Enter the User ID and Password as provided by your service provider.
5. Click OK to continue

錯誤! 尚未定義樣式。
6. Click the Connect button to connect to your WiMAX network
After establishing a connection, information displaying the signal strength, link quality
and network status is shown in the main menu.
錯誤! 尚未定義樣式。
In order to enhance the signal strength and link quality, you may have to shift the
laptop your device is plugged in, e.g. shift your laptop near a window.
7. Click the Disconnect button to disconnect your WiMAX network.

錯誤! 尚未定義樣式。
錯誤! 尚未定義樣式。
Software upgrade
Overview
This section will show you how to update your wireless connection manager, as well as
restore the factory default settings to your MIMO USB Dongle.
Procedure
The following section will guide you through the upgrade procedure for the software
found in your MIMO USB Dongle.
Software upgrade availability is dependent on your service provider.
Before you begin, read section 3 Operation and use before starting the SW upgrade
procedure.
1. Double-click on the icon in your system tray.
2. The main menu displays. Click the Info button.
3. Click the Update button to display the Update screen.

錯誤! 尚未定義樣式。
Updating automatically
錯誤! 尚未定義樣式。
1. In the Update screen, select Yes to enable Automatic Software Upgrade.
By selecting Yes, WCM is setup to automatically receive important software updates.
2. Click on the Periodicity drop-down box and select an update schedule
Every time at startup: Automatically checks for updates at startup.
Daily: Automatically checks for updates every day.
Weekly: Automatically checks for updates every week.
Fortnightly: Automatically checks for updates every two weeks.
Monthly: Automatically checks for updates every month.
3. Click OK to continue.
If automatic upgrade is selected and you log in to your WiMAX account, the wireless
connection manager checks for updates during the selected schedule frequency.

錯誤! 尚未定義樣式。
Updating manually
錯誤! 尚未定義樣式。
1. In the Update screen, select No to manually update your software.
2. Ensure you are connected to the Internet, and click on the Update now button.
3. Click Finish when prompted to complete the software updates.
If Internet access is not available, a Can not get the software update information at the
server screen appears.
4. Click Cancel, and try manually updating again.

錯誤! 尚未定義樣式。
5. Updating may take several minutes to complete. Click Finish when prompted.
6. Click OK to continue.
錯誤! 尚未定義樣式。

錯誤! 尚未定義樣式。
錯誤! 尚未定義樣式。
Factory settings mode
The following section describes the Factory Settings mode, which allows for the restoring
of factory default settings.
Procedure
1. Locate the following icon in your System Tray.
2. Double-click on the icon to open the WCM main menu.
3. The main menu displays. Click the Info button.
4. Click the Update button to display the Update screen.

錯誤! 尚未定義樣式。
5. In the Update screen, click the Factory Settings button.
錯誤! 尚未定義樣式。
6. At the prompt, click Yes to reset the WCM settings.
7. Click OK to restart the connection manger.

4 Maintenance and
troubleshooting
Overview
The following section provides information for hardware and software related questions or
troubleshooting issues.
Q: Are there any special requirements for laptops?
A: Yes, there are two special requirements for laptops:
• An available USB slot is required.
• Power supply support of 5V±5% is required.
Q: What’s the correct way to install the client software?
A: To install the client software perform the following steps:
• Install the client utility first, and then plug in your USB Dongle.
• The operating system detects the new hardware and guides you to install the new driver step by step.
Q: Why does it take a long time to install the client utility in Windows XP?
A: Please do NOT choose the option “search driver on networks” during installation as
your computer may do a complete driver search and cause a delay in the installation
process.
Q: I installed the client utility then plugged in the USB Dongle, however I still can’t
install the driver?
A: Perform the following:
• Take out the USB Dongle, and plug it in again.
• Your computer detects the new hardware and guides you to install the appropriate driver.
• If you still can’t install the driver successfully, check your device by installing the drivers on another computer.
Q: Can I take out the USB Dongle without removing it through the operating system?
A: Although the USB Dongle device supports hot swap, please remove it by undocking it
through your operating system first.
Alcatel-Lucent 9799 MUD 2.5 GHz – User Guide Alcatel-Lucent 22
E1P7 October 2008

錯誤! 尚未定義樣式。
Q: Do I need to install .NetFrameWork?
A: No, you do not need to install .NetFrameWork. The client utility detects
if .NetFrameWork is installed on your system. If it is not detected, the utility
installs .NetFrameWork automatically.
Q: I removed .NetFrameWork do I need it to run the client utility?
A: Yes, .NetFrameWork is necessary for the client to operate properly. You must install
the client software once again. See Hardware and Software installation.
Q: What operating system does the client utility support?
A: The client utility currently supports Windows XP and Windows Vista.
Q: Why does a Windows message displaying Cannot remove the hardware now pop up
when I run the auto-uninstall?
A: Please exit the client utility first, and restart your operating system if necessary.
錯誤! 尚未定義樣式。
If the problem still persists, a third party application may be using the USB Dongle device.
Please close the application and try again.
Q: My device failed to connect after I inserted my USB Dongle. What can I do at this
time?
A: Take out the USB Dongle at this time and reinsert it in the USB slot.
Please note when your device is not detected the following screen appears.
Q: How can I get information on my USB Dongle device?
A: Please plug in the USB Dongle device. Then, open the client utility and click the Info
button.
錯誤! 尚未定義樣式。
The following information is displayed: Software Version, Firmware Version, and Driver
Version.
Q: I have followed the procedures in the user manual, however I still can’t access the
Internet?
A: Please make sure the USB Dongle has been activated successfully. In addition, contact
your operator for detailed settings.
Q: I click connect but I cannot log in to my account?
錯誤! 尚未定義樣式。
A: Please verify your account UserID and Password and ensure they are correct. Enter the
account information and try again.
Q: My account information is correct, but I’m still not able to log in?
A: Signal reception might be a factor. Situate your computer in a location with good air
link quality, and attempt to connect again.
Q: What does the LED activity mean?
The different state information for the USB Dongle is as follows:
LED function:
LED Function LED 1
Driver initialized
Firmware download
Download complete
RED (solid) OFF
RED (flashing) OFF
RED OFF
LED 2
(DL and UL Traffic)
No connection
Normal Operation
RED OFF
OFF Flashing

Glossary
B
BSID
Base Station IDentifier
C
CD
Compact Disc
CE
Mark that demonstrates compliance with European Union (EU) laws
D
DL
DownLink
E
G
I
L
EMC
ElectroMagnetic Compatibility
GHz
GigaHertz
IEEE
Institute of Electrical and Electronic Engineers
IC
Integrated circuit
LED
Light-emitting diode

錯誤! 尚未定義樣式。
M
MAC address
Media Access Control address
MB
MegaByte
MIMO
Multiple-Input/Multiple-Output
O
OFDMA
Orthogonal Frequency-Division Multiple Access
R
RoHS
Restriction of Hazardous Substances
S
U
W
SW
Software
UL
UpLink
USB
Universal serial bus
User ID (and password)
The identifier (and password) of your WiMAX account as provided by your service provider
WCM
Wireless connection manager
WiMAX
Worldwide Interoperability for Microwave Access
 Loading...