

Page 1
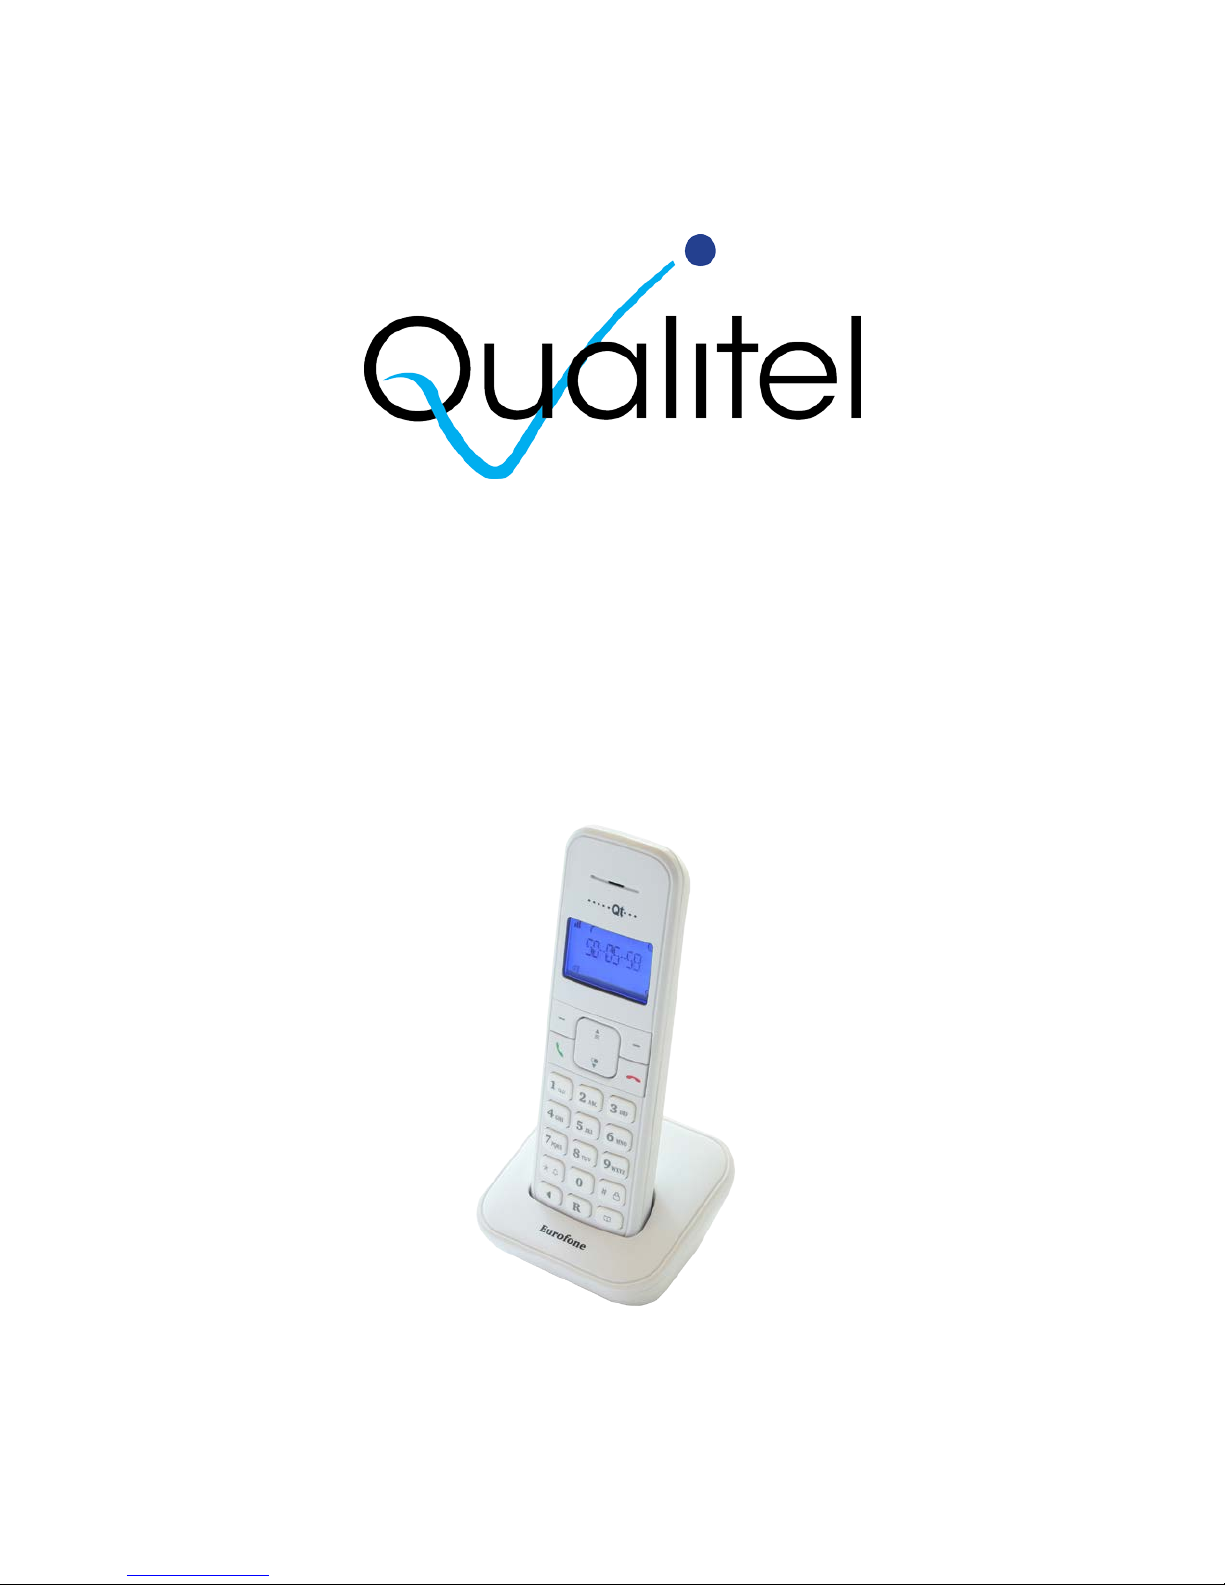
Eurofone C33H-B & C33H-W
Handset
User manual
Page 2

Contents of the package
C33
1 base station
1 connector cable
1 mains adapter 6 VDC / 300mA
1 handset
2 rechargeable batteries NiMH AAA 500 mAh
1 user manual
Location
To obtain the best possible range, we recommend positioning the telephone in a
location central to your sphere of activity. Avoid positioning the telephone in
niches, recesses and b ehind steel doors.
The maximum range between the base station and handset is approximately 50
meters indoors and 300 meters outdoors. Depending on the surrounding
conditions as well as spatial and structural factors, the range may be smaller.
Silent zones can occ ur due to t he digital trans missi on in the fr equenc y rang e used
– even within the r ang e, de pending on the struc tur al env i r onm ent . In thi s cas e th e
transmission quality may be reduced through the incidence of short breaks in
transmission. Normal call quality can be restored if you move slightly out of the
silent zone. If the range is exceeded, the call will be disconnected unless you
move back into range within five seconds.
To avoid radio signal interference from other electronic equipment, we
recommend that the base station and handset are situated at the greatest
possible distance (mi n. 1 meter) from other equipment.
Page 3

Setting up the telephone
Setting up the base station
Do not expose the base station to direct sunlight.
Protect the base station against moisture. Do not position the base station in rooms
exposed to condensation, corrosive steam or excessive dust. Condensation can be present
in basements, garages, conservatories or sheds.
The ambient temperature must be between 5 °C and 40 °C.
Avoid positioning the telephone near heat sources such as heating elements or near
obstacles such as metal doors, thick walls, niches and cupboards.
There is no mains switch on the base station. For this reason the socket to which
it is connected must be easy to access.
Listening protection
When you are on the telephone, the base station and handset are connected to
each other over a radio link. The base station handles switching between the
telephone network and the handset. To ensure that no-one can eavesdrop or
telephone at your cost, the base station and handset exchange codes. If the
codes do not match, the connection with third-party handsets cannot be set up.
Page 4
Setting up the telephone
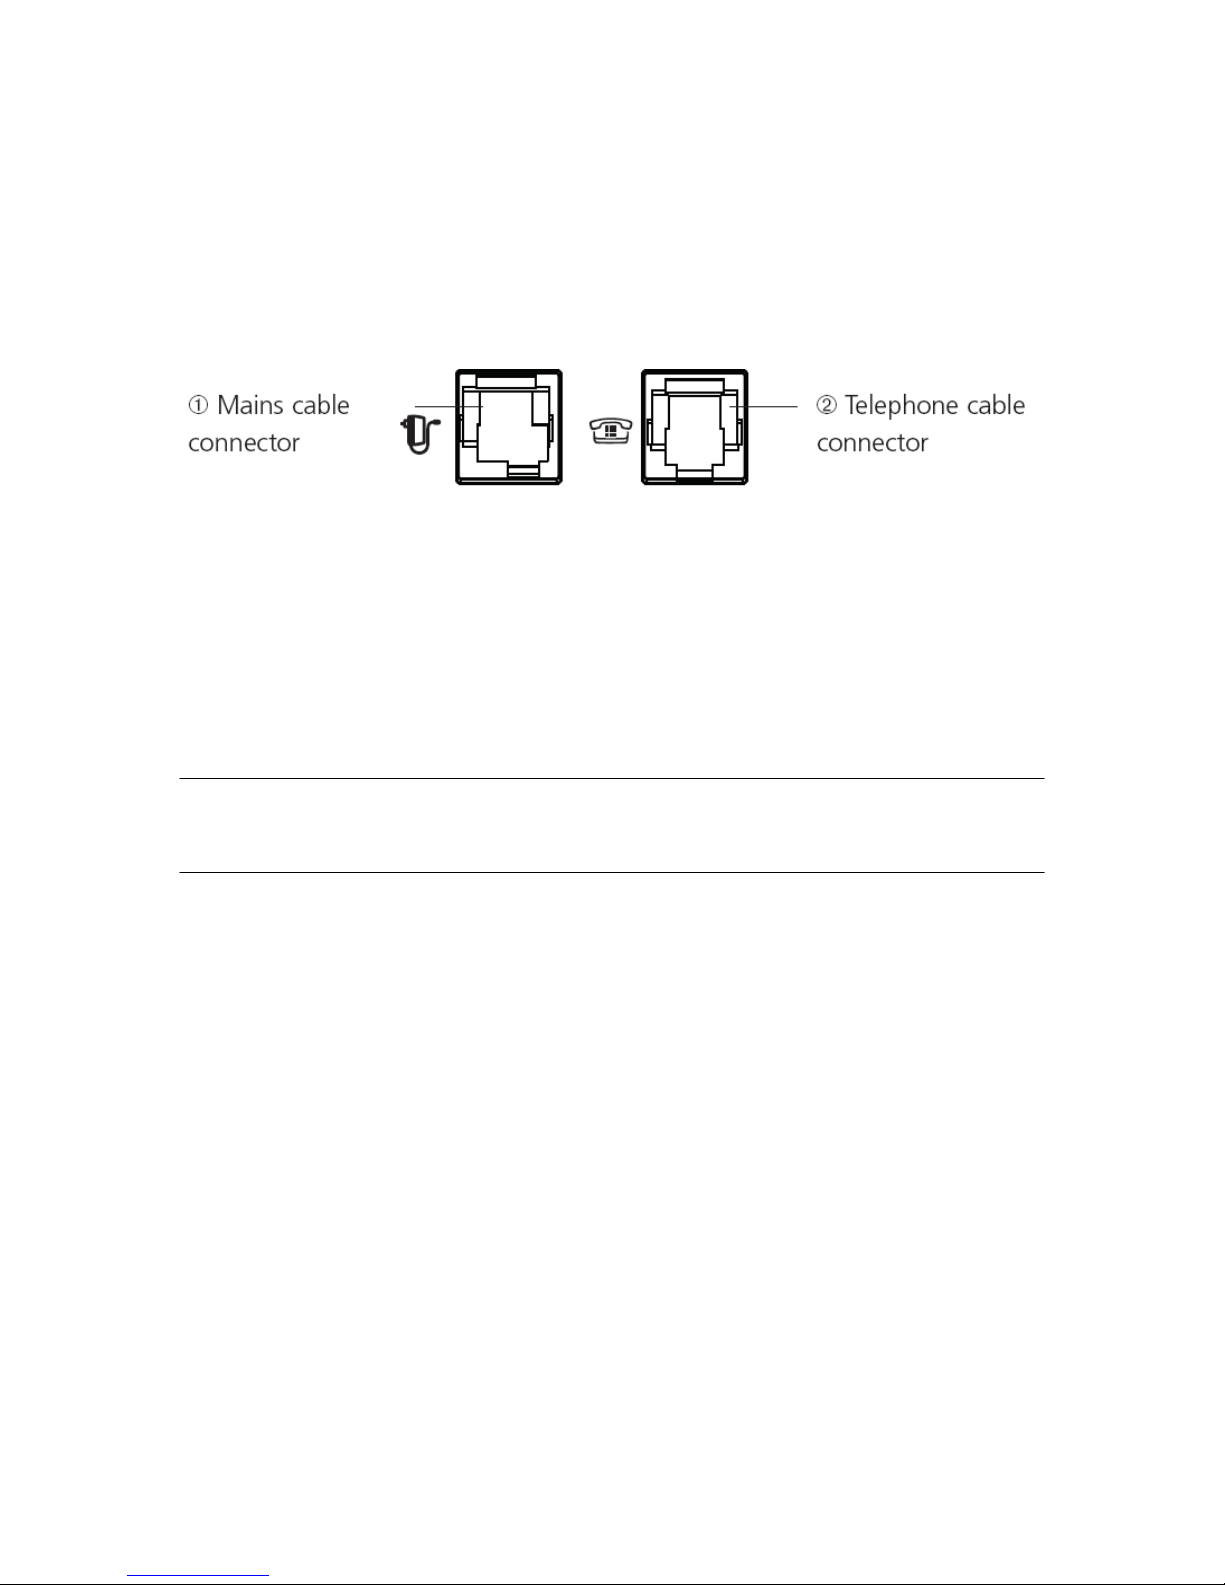
Connecting the phone
Before you can start using your telephone you must plug in the telephone
connector cable and the mains cable.
Safety note
Use only the supplied mains adapter 6 vdc / 300 mA for the base station.
① Mains cable
First, insert the mains cable in the socket marked with the mains connector
symbol on the base of the base station. Then insert the mains plug in the 230 V
socket.
Note Your telephone will not fu ncti on if the mains c on nector is not pl ug ged in or
during a power failure.
② Telephone connector cable
Insert the one end of the telephone line cord into the wall jack and the other end
into the connector marked with the telephone symbol on the base station.
Setting up the handsets
Your handsets wi ll be ready f or operati on (for making or ac cepting call s) only once
the batteries have been full y charged for the first time.
Inserting the rechargeable batteries
The bottom part of the handset contains a battery compartment for housing two
type AAA batteries (microcells).
Page 5
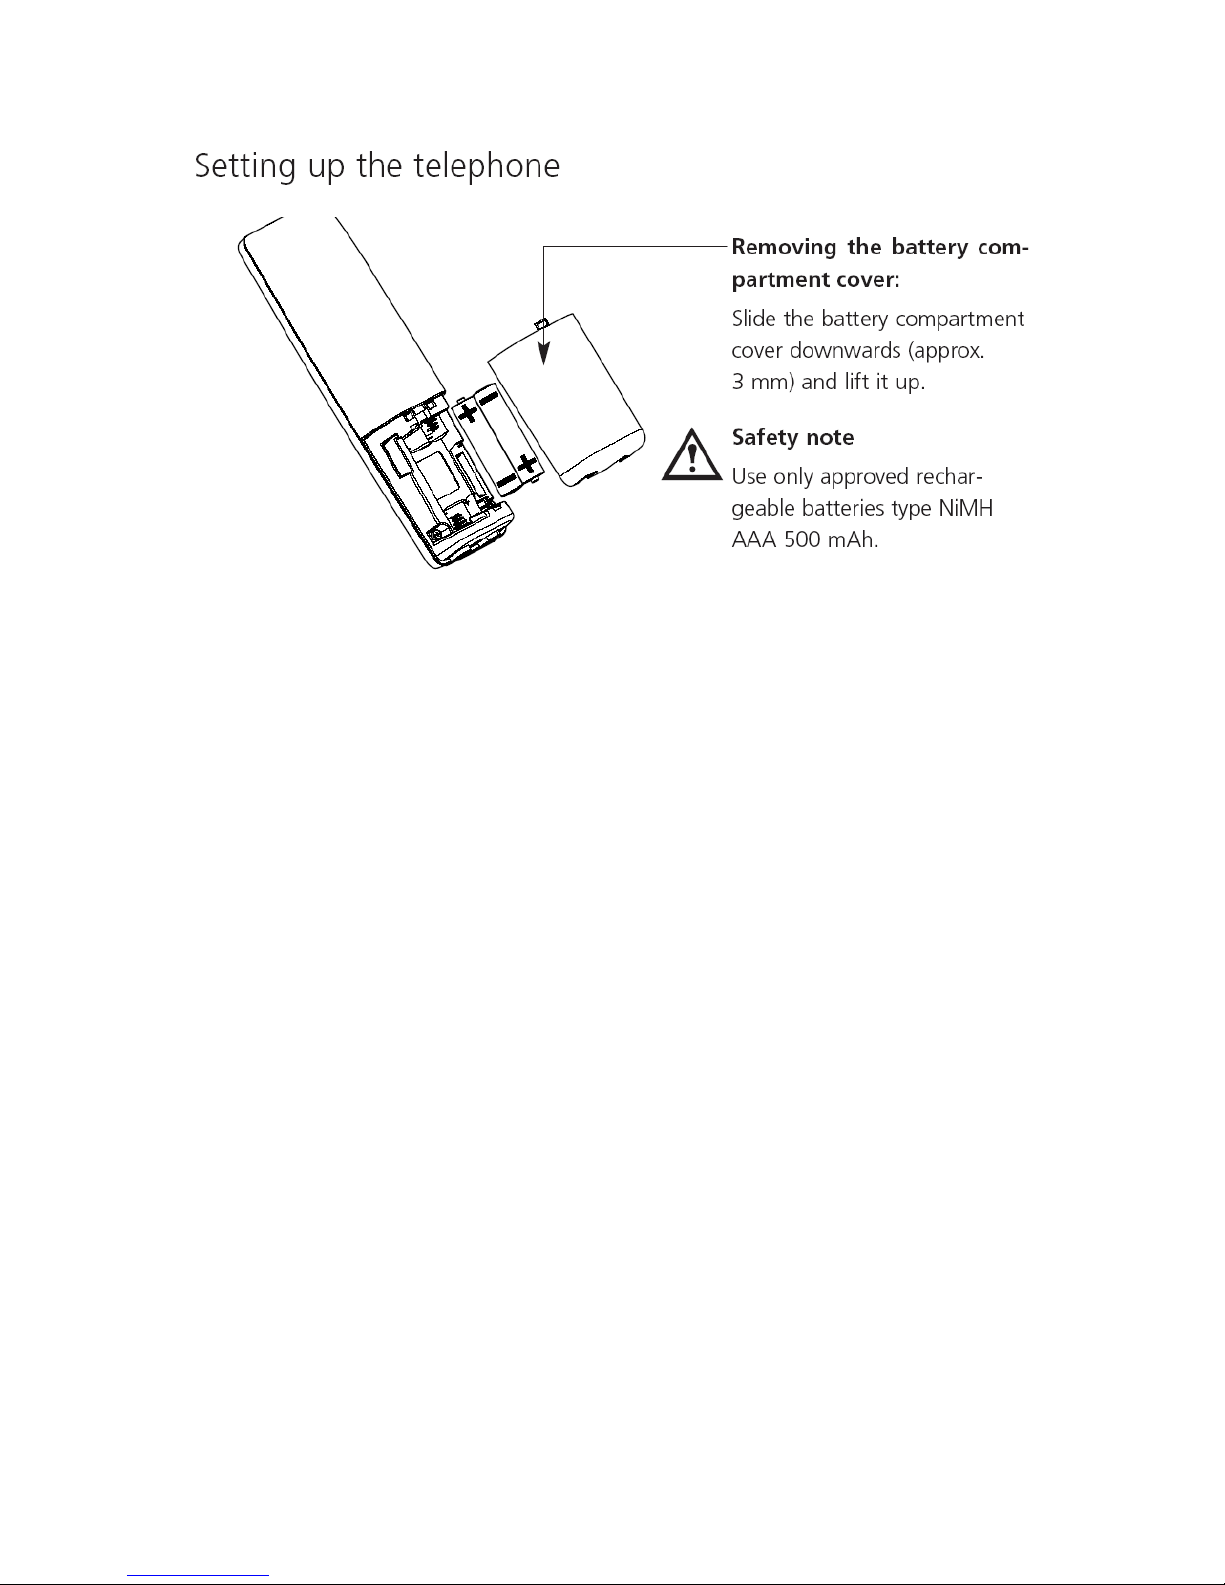
Inserting the two rechargeable batteries (note the polarity!):
Insert the batteries in the battery compartment. Make sure the polarity is correct.
Insert the bat t er i es s o that the flat end ( neg ative polarity ) of t he battery i s pr ess i ng
against the spring. The handset will not function if the batteries are incorrectly
inserted. This may result in d amage. Replace the c o mpartment cover by pl ac ing it
approximately 3 mm offset and slide it upwards until it clicks into place.
Charging the batteries
The batteries are not yet charged when you first unpack the telephone. Insert the
handset in the base station for charging. The flashing battery symbol on the
handset shows the chargi ng status. Th e batter ies w ill take aroun d 14 hours t o fully
charge (initial charge).
Do not insert the handset in the base station without batteries.
Page 6

Setting up the telephone
Once the new batteries have been inserted, the display on the handset indicates
the actual charging status only after a complete charging cycle.
Note You can replace the handset in the base station after every call. Charging is
electronically controlled to ensure optimal charging of batteries in different
charge states. Avoid removing the batteries from the ha nds e t for no g ood
reason, since this affects the optimum charging cycle.
You can telephone for up to 10 hours with fully charged batteries. The handset
has a standby time of up to 100 hours. When Full-Eco is switched on and
up to 200 hours if the function is switched off.
If the battery charge status has reached its lower limit, the battery symbol
flashes in the display and a warning signal is heard. You have 10 minutes of
talk time left.
C33
Page 7
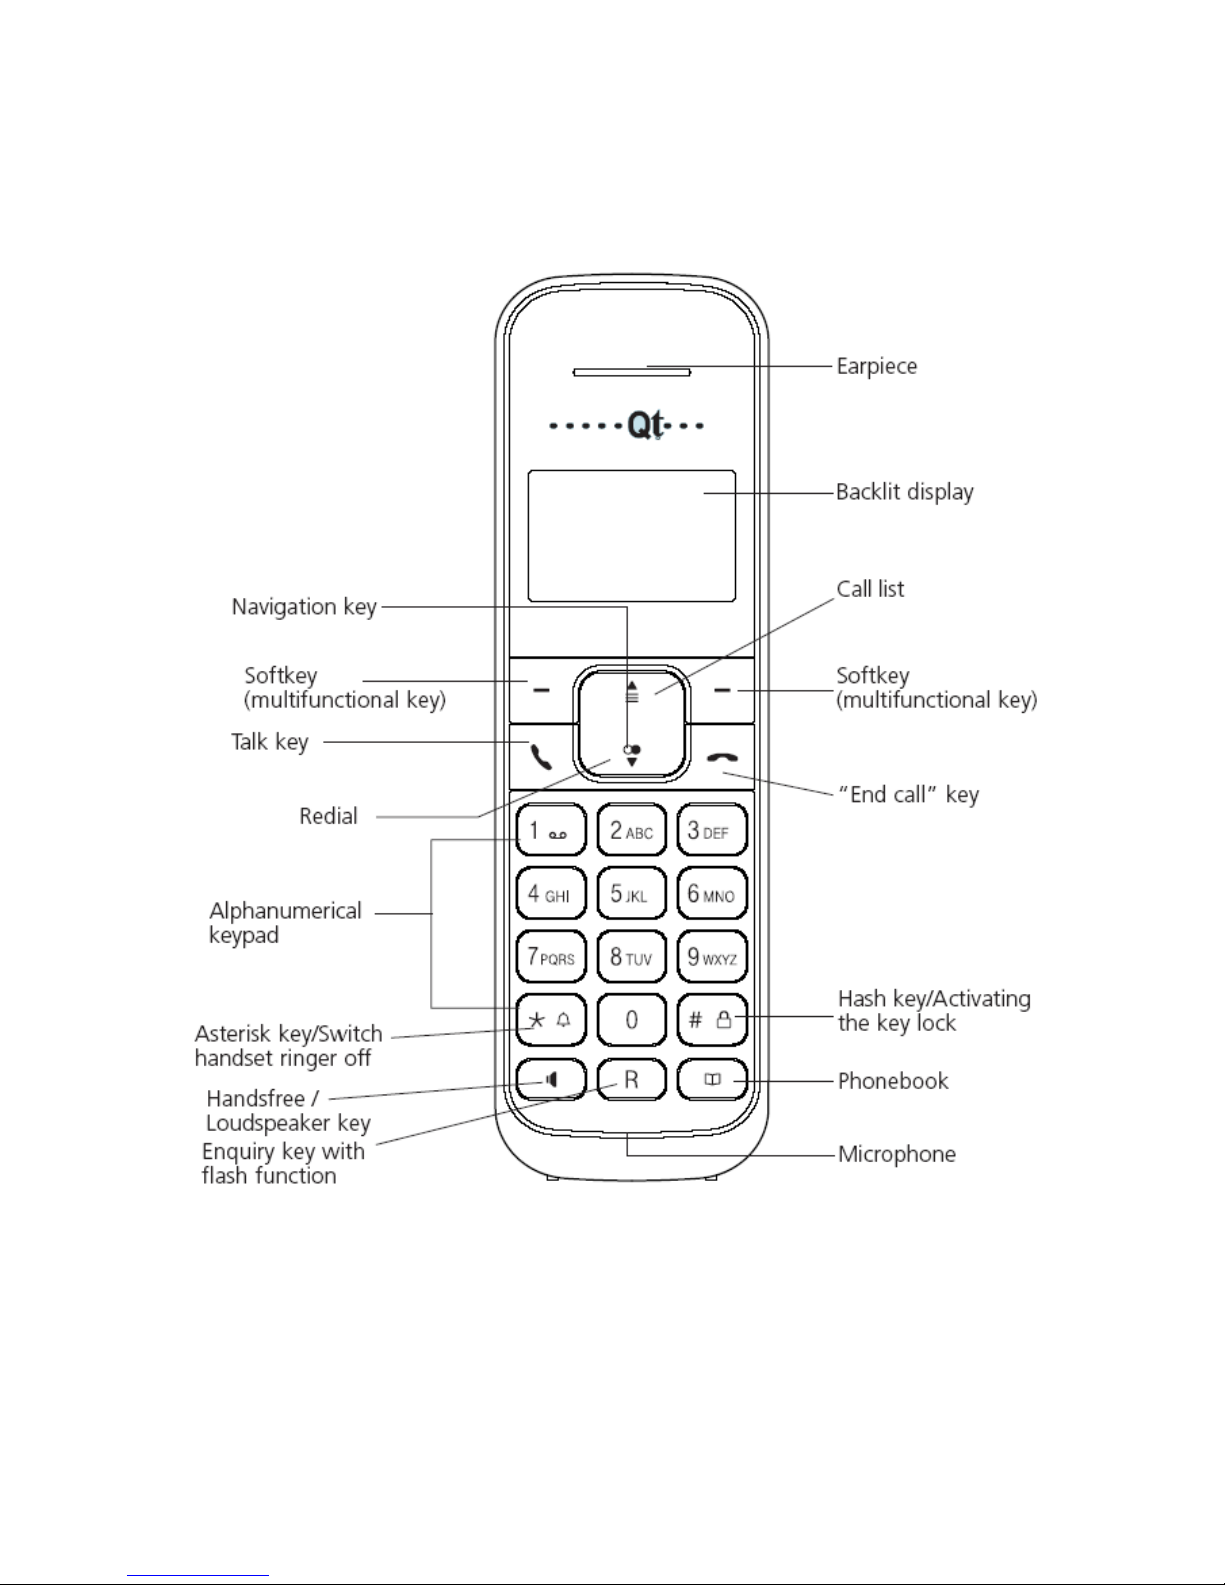
Get to know your telephone
Handset keys
Page 8

Getting to know your telephone
Page 9
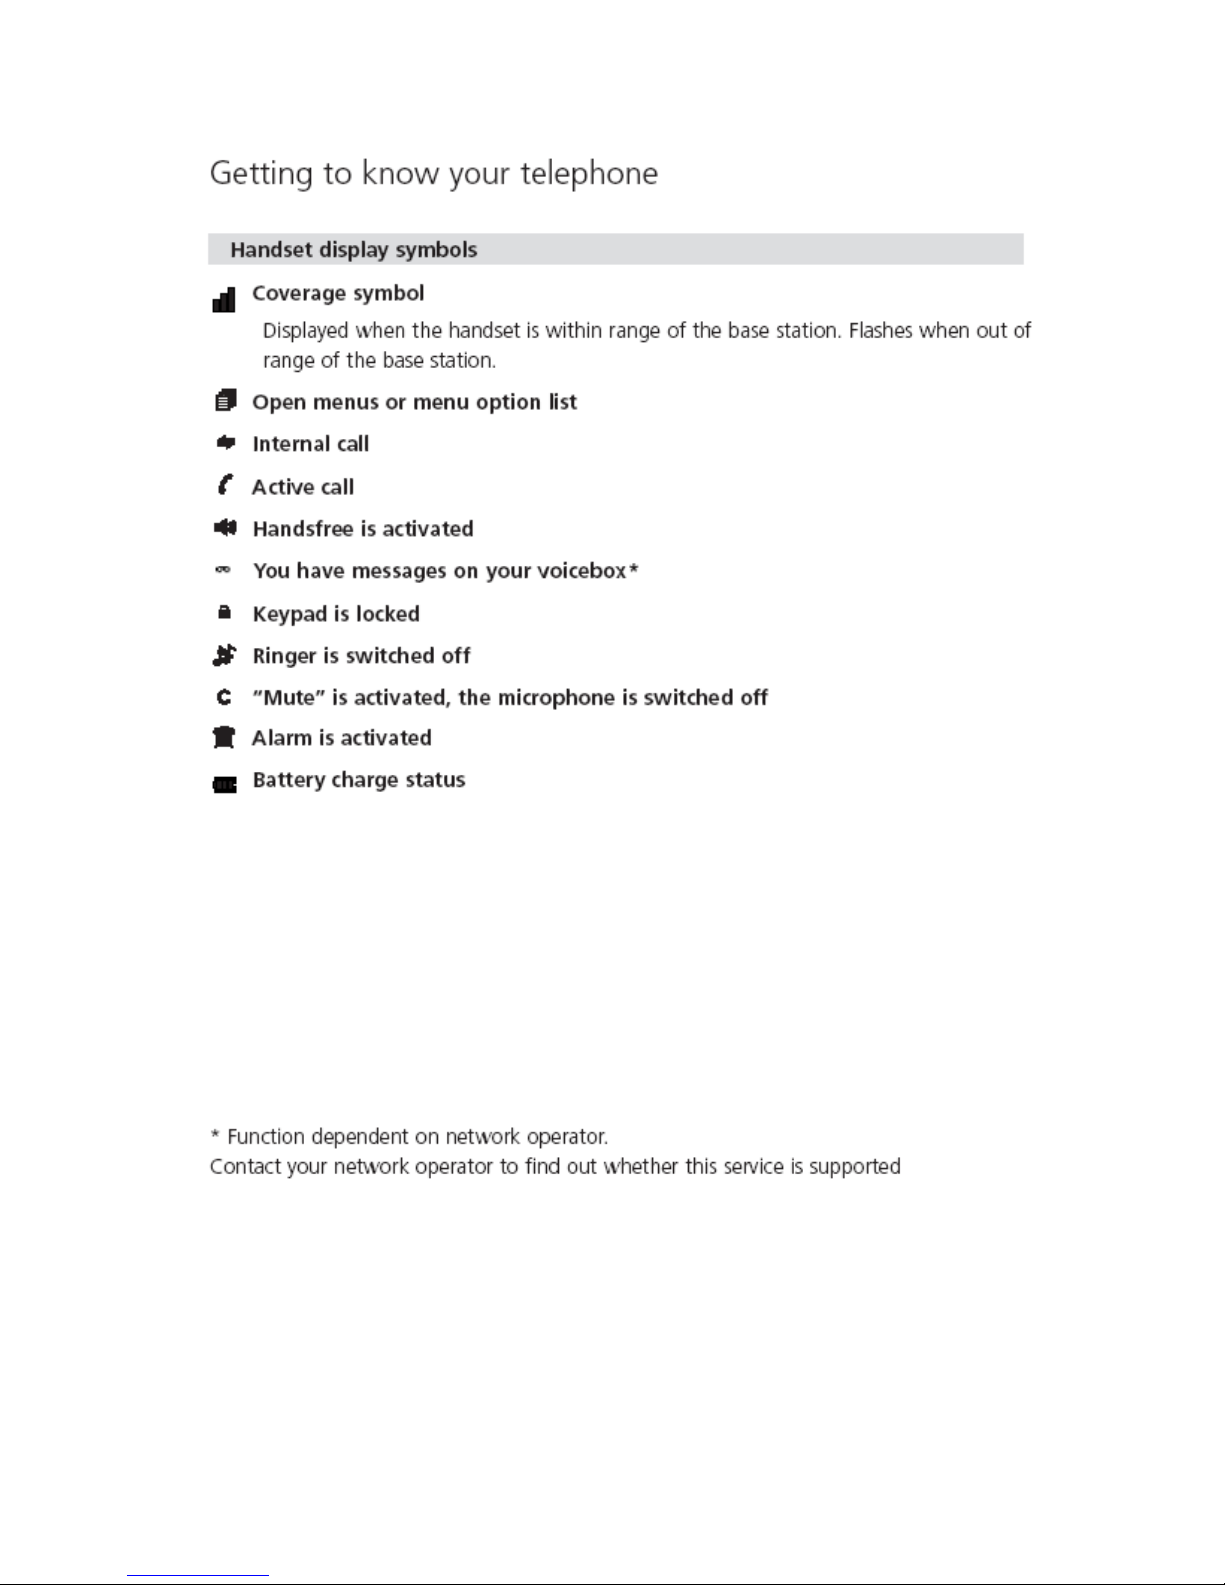
Page 10

Getting to know your telephone
Switch handset on/off
• Press and hold the End call key (approx. 5 sec).
• Press and hold the End call key to reactivate the handset.
About the menus
Menu navigation
In standby when pressing the soft key under .
Select the menus with the navigation key .
Press OK to confirm. To open the options list, use the navigation key to scroll
down the list to the preferred option, and confirm the option by pressing OK.
End menu
To exit a menu, press the End call key .
Set language
• Language default setting on delivery is English.
• To change the language:
1. Press the soft key under .
2. Press to scroll through the list, select
HS SETTINGS
and press
OK
to
confirm.
3. Press to scroll through the list, select
LANGUAGE
and press
OK
to confirm.
4. Press to scroll through the list, select the desired language and press
confirm.
OK
to
Page 11

Telephoning
Making an external call
Press , wait for the dialling tone and dial the number.
Call preparation
1. Enter the number. If you enter an incorrect number, you can:
• delete it by pressing repeatedly the right softkey.
• move the cursor to the desired character by pressing the navigation key
(left/right).
2. Press to dial the number.
Ending a call
Press or replace the handset in the base station.
Accepting a call
The caller’s number or name (i f alrea dy s aved i n the ph one book) is di splay ed only
if your network operator supports the Caller Identification Presentation (CLIP)
function and you have subscribed to this service.
Press to accept the call.
Handsfree operation
Activating handsfree before a call:
1. Press until you can hear the ringing signal and appears.
2. Enter the desired number, the number is dialed.
3. Short press deactivates handsfree speaking.
Switching to handsfree speaking during a call:
Press during a call to switch to handsfree operation.
To deactivate handsfree speaking, press again .
Page 12

Telephoning
Handset/handsfree volume
You can adjust the handset and handsfree loudspeaker volume independently in
5 steps. Press during a call to adjust the v olume. T he selec ted sett ing is saved
after the end of the call.
Handset secrecy
1. Press during a call. This switc hes the mic rophone o ff and y our c aller cann ot
hear you.
2. Press to switch the microphone on.
Redial
The 10 last-dialled numbers are saved in a redial list. If a name and number are
already stored in the phonebook, the name is shown instead of the number.
Redialing a number from the list
If the telephone is in idle mode:
Press to open the redial l i st an d pr es s to scroll through the list. Press
as soon as you have reached the number you are seeking.
Note • To open the redial list the telephone must be in idle mode.
Page 13

Telephoning
Deleting individual entries/entire redial list
Press to open the redial list. Use to scroll through the list until you reach
the entry you are seeking. Press the soft key under and delete the entry or
the entire list.
Copying numbers from the redial list to the phonebook
Press to open the redial list. Use to scroll through the list to find the entry
you are seeking. Press the soft key under , select
ADD
. Enter the name,
confirm the number, select the desired ringer melody and save the entry.
Page 14
Telephoning
Group call (paging)
You can activate a group call to locate a mislaid handset.
1. Press the paging key on the base station. You will hear an acoustic signal
on the handset(s) registered with the base station.
2. Press the paging key again to end the ringing signal or press key on the
handset.
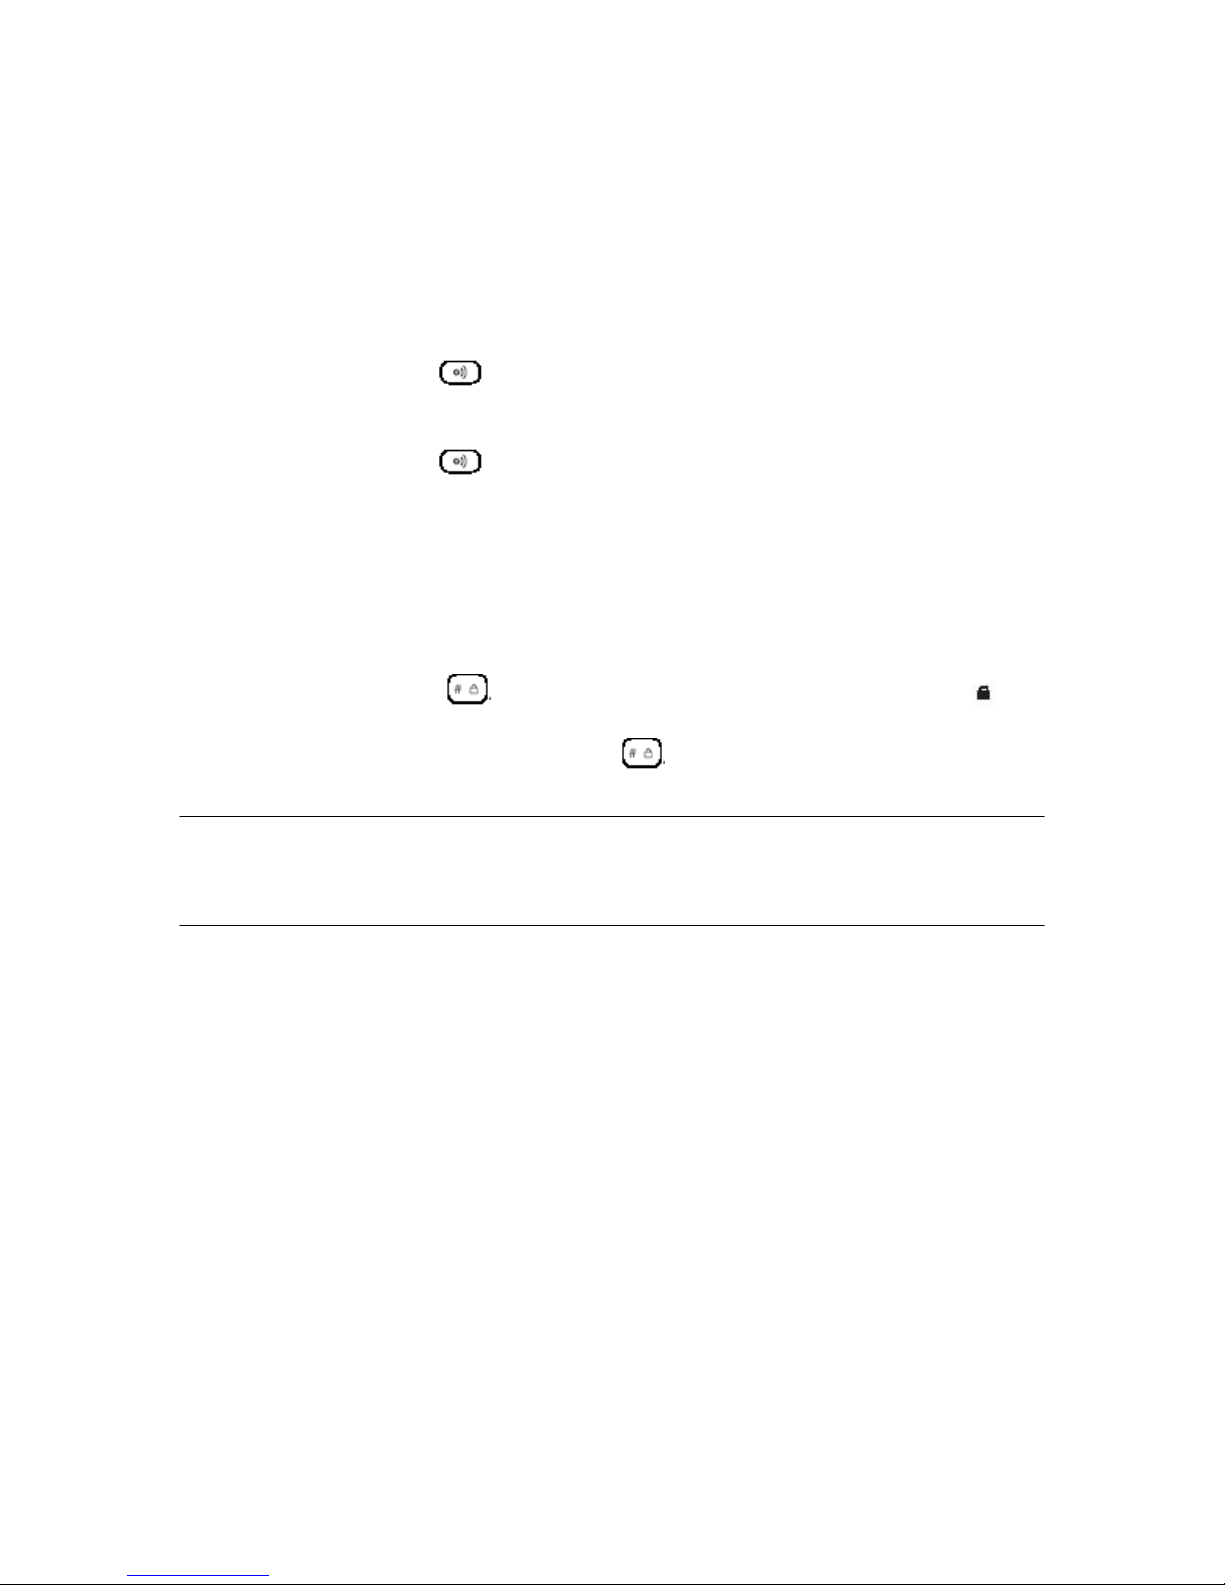
Keypad lock
If you want to carry the handset around, you can activate the key lock. This
prevents you inadvertently dialing a number.
1. Press and hold down . The keypad is locked and the display shows .
2. To unlock the keypad, press and hold again.
Note If the keypad is locked,
• Incoming calls can still be accepted.
• You cannot dial a number or access menus.
Page 15

Telephoning
Internal calls
You can call other handsets which are registered with your base station. This
allows you to make internal calls free of charge.
1. Press the soft key under , select the relevant handset number and press OK
to confirm.
Pressing automatically dials the second handset if only two handsets are
registered with the base station.
2. Press to end the call.
Internal enquiry call
You are conducting an external call and want to call an internal party without
ending the external call. If the second handset answers, you can talk to the
internal call partner without the external caller hearing you.
1. Press the soft key under .
2. Select
INTERCOM
, press OK to confirm. The external call is put on hold.
If only two handsets are registered with the base station, the second handset is
automatically dialed. If you have more than 2 handsets registered, select the
desired handset number and press OK to confirm.
3. To return to the external call, press key .
Page 16
Telephoning
Conference
You have two active calls (1 internal and 1 external), one of which is on hold.
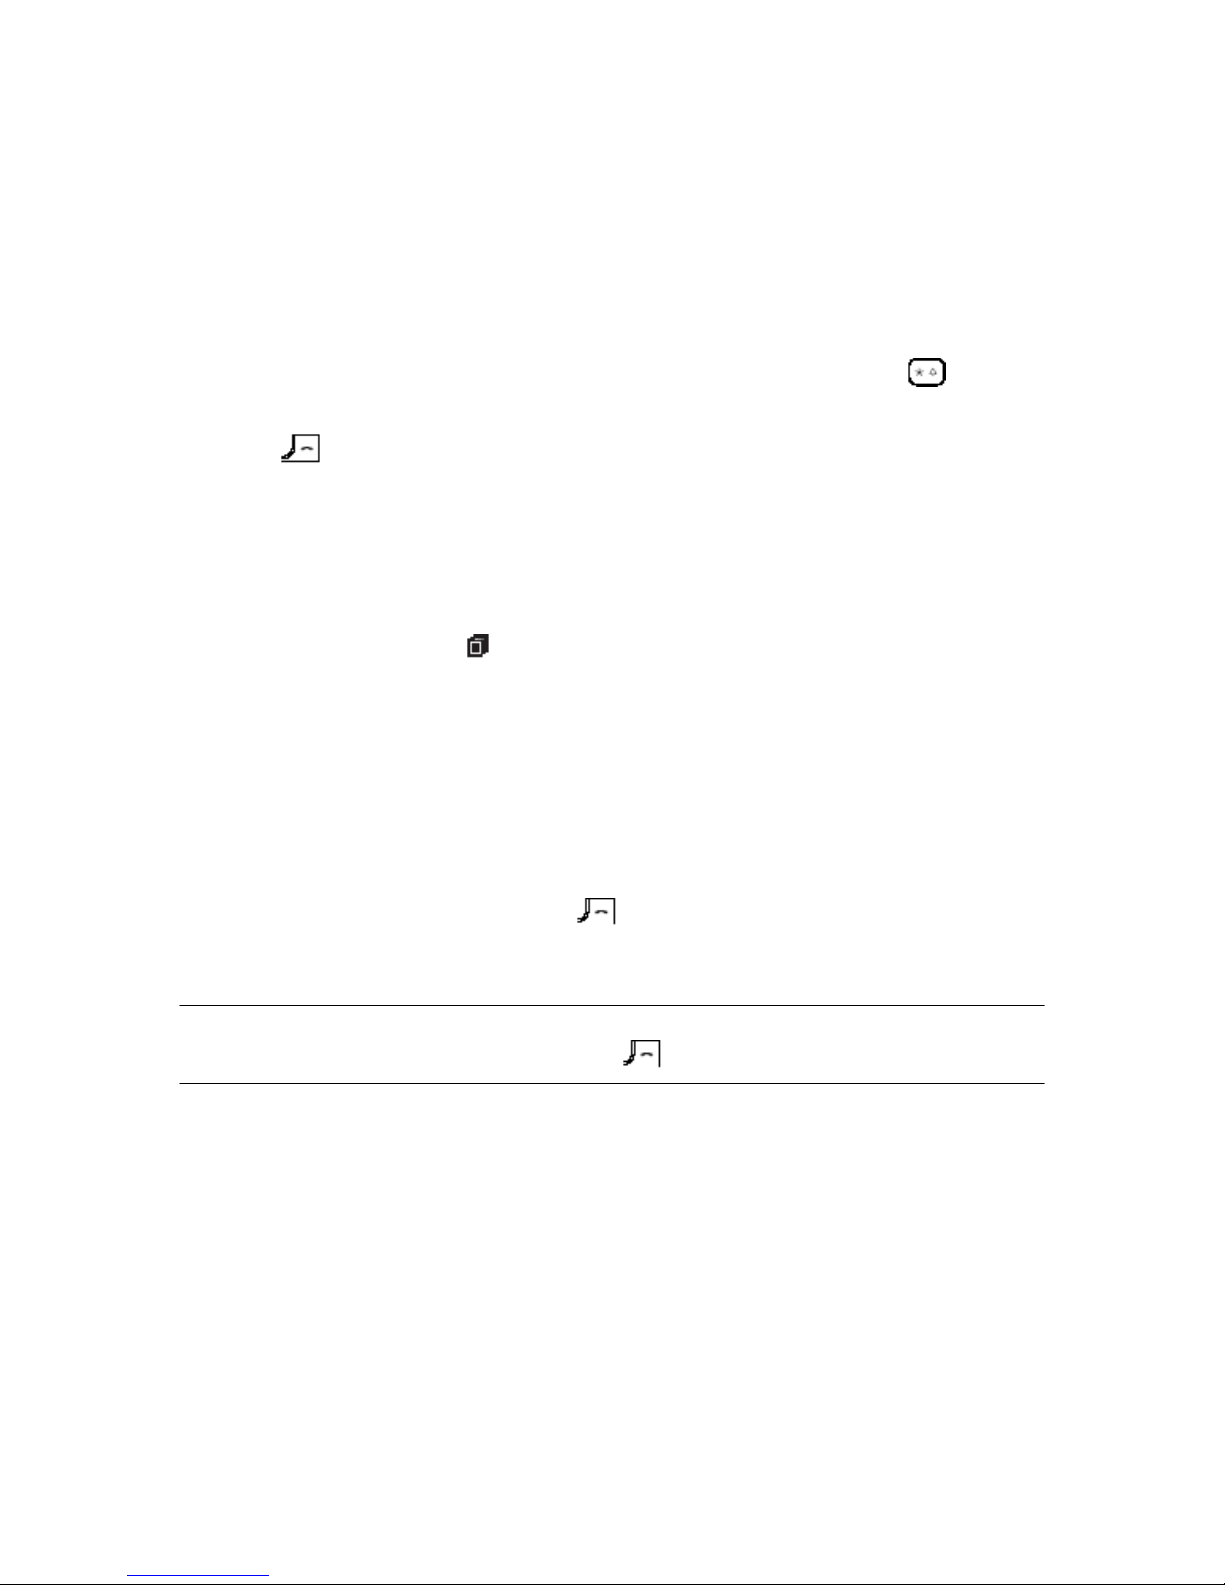
1. To connect all three call partn er s w it h each other, pr es s and hold until
CONFERENCE
appears.
2. Press to end one of the calls. The remaining call partners are
automatically connected with each other .
Call transfer to another handset
You can transfer the call you are conducting to another handset.
1. Press the soft key under .
2. Select
INTERCOM
, press OK to confirm.
If only two handsets are registered with the base station, the second handset is
automatically dialed. If you have more than 2 handsets registered, select the
handset to which you wish to transfer the call and press OK to confirm.
The external caller is put on hold.
3. If the second handset answers, you can talk to the internal call partner without
the external caller hearing you. Press to transfer the call.
Note If the second handset does not answer, you can end the ringing signal and
return to the original call by pressing key .
Page 17

Phonebook
You can store up to 50 names and numbers in the phonebook on each handset.
Every entry contains a name and telephone number. Names can be up t o 12
letters long and numbers up to 20 digits long.
Phonebook entries
Adding a new entry
If the telephone is in idle mode:
1. Press to open the phonebook.
2. Press the soft key under .
3. Select
ADD
and enter the name, the number, select the desired ringer melody
and save the entry.
Tips for entering names/numbers
• Press to insert a space, or press and hold to insert a dial pause.
• Press the soft key under repeatedly to delete digits or press and hold to
delete the entire entry.
Page 18

Phonebook
Dialling numbers from the phonebook
1. Press to open the phonebook.
2. Use to scroll through the phonebook, select the entry you are seeking and
press . The number is displayed and dialed.
You can also search by name: press the first letters of the name and press .
Editing entries
1. Press to open the phonebook. Use to scroll through the list to find the
entry you are seeking, and press the soft key under .
2. You have then the following options:
-
ADD
Add a new entry.
-
VIEW
-
EDIT
-
DELETE
-
DELETE ALL
-
PB STATUS
Show the details of a number.
Modify a name or number.
Delete the entry.
Delete the entire phone book .
Check how much space is left for storing entries.
Page 19

Call list*
If your network operator supports caller ID presentation* (CLIP), the caller’s
number (if he did not not w i thhel d hi s own number) is dis played before y ou ac cept
the call. The call list can hold up to 20 entries. If the list is full, the oldest entry is
overwritten by the most recent entry.
Dialling a number from the call list
1. Press to open the call list.
Or
Press the soft key under , select
CALL LIST
and press OK to confirm.
2. Select the desired entry and press to dial the number.
Editing entries in the call list
1. Press to open the call list.
2. Press the soft key under . You have then the following options:
-
ADD
Save numbers from the call list to the phonebook.
-
DELETE
-
DELETE ALL
-
DETAILS
-
CATEGORY
Delete a call list entry.
Delete the entire call list .
View the details of a call list entry.
Save all incoming calls in the call list or only the missed ones.
Page 20

* Function dependent on network operator.
Contact your network operator to find out whether this service is supported
Voicebox (Network answer machine)
Many network operators offer the option of setting up a network answer machine
(voicebox).
To use the network answer machine, you need to send certain codes to the
network. Ask your network operator for details.
To access new messages quickly and simply, press and hold down for
around 2 seconds to automatically dial the access number of your voicebox.
Note Please note that this service is a supplementary network service and thus
subject to availability from your network operator.
Contact your network operator for details and the appropriate codes to activate
this service.
Page 21

Handset settings
1. Press the soft key under . Select
HS SETTINGS
2. You have then the following options:
-
ALARM
Activate the alarm func ti on, enter t he desi r ed alarm time and
activate or deactivate the
-
RING SETUP
You can program different ringer melodies for internal and
external calls. Set the preferred ringer melody and the associated
volume. Select volume
-
TONES
Your telephone suppor ts v ari ous tones w hich y ou c an activ ate or
deactivate:
-
KEY TONE
Every time a key is pressed, a brief beep is heard.
-
BATTERY TONE
Sounds when the batteries are running low.
and press OK to confirm.
SNOOZE
OFF
, to switch the handset ringer off.
function.
-
OUT OF RANGE
A warning beep i s s o und e d if you exceed the ma x imum range.
Move closer to the base station.
-
LANGUAGE
Select the display text language.
-
RENAME HS
To better distinguish between handsets, you can give each
handset a name.
-
HS DISPLAY
Select the hands et di spl ay in idl e mo de (han dset name or ti me).
Page 22

-
AUTO ANSWER
you
-
DATE & TIME
-
SELECT BASE
Base settings
An incoming call can be accepted by pressing the talk key. If
activate Auto Answer, you can accept a call simply by lifting the
handset from the base station without pressing any key.
Select the desired time and date for m at and enter time and
date.
See chapter “Additi onal handsets/base stations ” .
1. Press the soft key under . Select
BS SETTINGS
2. You have then the following options:
-
BS RINGER
You can program different ringer melodies for the base.
-
RING VOLUME
Set the desired volume. Select
off.
-
DELETE HS
See chapter “Additional handsets/base stations”.
-
DIAL MODE
Select tone or pulse dialing :
analog lines.
PULSE
May be required for connecting older
telephone systems. Please refer to the relevant documentation.
-
FLASH TIME
Select the flash time (when pressing key R) for the analogue
network functionalities in your country:
SHORT
corresponds to 100 ms
OFF
TONE
and press OK to confirm.
, to switch the base ringer
Normal dialing procedure on
MEDIUM
LONG
Contact your network operator for details. On delivery, the flash
corresponds to 300 ms
corresponds to 600 ms
Page 23

time is set to the v alue for th e co untry in w hic h you hav e p urchas ed
the telephone
-
CHANGE PIN
You can change the system PIN (0000 by default).
-
ECO RANGE
See chapter “ECO Range / Fulleco".
-
FULLECO
See chapter “ECO Range / Ful l eco".
-
HS PRIORITY
When you have several handsets registered to your base: You
can set that all handsets will ring on incoming calls or that a
selected handset will ring first.
Base settings
ECO Range / Full eco
Full eco - Multi Handset Low Radiation Mode
Electromagnetic radiation is shut down between the base station and all declared
handsets.
Handsets and base station are waiting for a wake-up signal eit her in f orm of an
incoming call, when activating a handset or when the system synchronises data.
Radiation reduction in communication
65% radiation reduction on the handset is achieved when it is near the base
station. The handset’s power transmission is regulated; the power transmitted
from the handset is automatically reduced to the lower level, depending on the
distance to the base station. This feature is activated when
ON.
1. Press the soft key under . Select
BS SETTINGS
FULLECO
is set to
and press OK to confirm.
Page 24

2. You have then the following options:
-
ECO RANGE
You can reduce the range of the base (
HALF RANGE
) or set
FULL RANGE
-
FULLECO
.
Activate or deactivate the function.
Note • Default setting on delivery: Full eco mode is activated.
• Other cordless DECT products in range may interfere with the ECO
Mode.
Additional handset s/base stations
Registering additi onal handse t s
You can register up to 5 handsets wi th the b ase station. The b ase s t at ion must be
within range.
Note If you purchase additional handsets for your base station,
• the batteries must first be fully charged!
• the handsets must be registered with the base station before use!
1. Press and hold down the Paging key on the base station for around 10
seconds.
2. Release the Paging key when you hear a beep on the base station.
3. On the handset, press the soft key under . Select
REGISTRATION
and press
Page 25

OK to confirm. Select the base station, enter the base station system PIN (default
on delivery: 0000) and press OK to confirm. If the declaration is successful, the
handset is automatically assigned the next available hands et nu mb e r .
Deregistering a handset
You can deregister a handset from the base station. The base station must be
within range.
Press the soft key under . Select
BS SETTINGS
and
DELETE HS
, press OK to
confirm and deregister the desired handset from the base.
Note You can only deregister a different handset from the handset you are using
for this operation.
Selecting the base station
Press the soft key under . Select
BS SETTINGS
and
SELECT BASE
, press OK
to confirm and select the desi r ed base station.
Maintenance
Reset
You can reset the telephone to default status.
1. Press the soft key under . Select
2. Enter the system PIN (0000 on delivery).
3. Press OK to confirm the reset.
DEFAULT
and press OK to confirm.
Page 26

General information
Approval and conformity
This analogue telephone DECT complies with the basic requirements contained
in the R&TTE Directive 1999/5/EC on radio equipment and telecommunications
terminal equipment and is suitable for connection and operation in the member
state indicated on the base station and/or packaging.
The declaration of conformity may be viewed at: www.qualitel.co.za
Warranty conditions
Page 27

Your telephone is subject to a six month guarantee from the date of purchase.
As evidence of the date of purchase, pl ease keep the sales receipt. All defects
attributable to materi al and ma nu fac tur ing faults will be corrected free of charge
within the warranty period, either by repairing or replacing the defective
equipment.
The warranty does not cover damage caused by misuse or negligence or by
excessive voltage. For example, faults on the telephone or power line or
damage caused by lightning.
The warranty does not cover expendable materials (battery cells), defects which
affect the value or use of the equipment only insignificantly, and damage caused
by incorrect use, ordinary wear and tear, or manipulation by third parties.
This warranty does not cover consequential damage caused by the use, failure or
defectiveness of the product. In particular, no liability whatsoever is accepted for
damage to property and pecuniary loss.
To claim under this warranty, please contact the retailer where you purchased
your telephone.
 Loading...