

Page 1

ULTRA JACK OPTIONS AND ACCESSORIES
MODELS #2002, @2004, #2008, #2009, #2006, #2012, #2024, #2013
OPTIONS • ULTRA-JACK
Ultra-Jack System
Workbench
The use of workbenches
promote s efficie ncy and
productivity, and this versatile unit can be installed
at any time during the job
without removing the jacks
from the poles.
Model # 2004
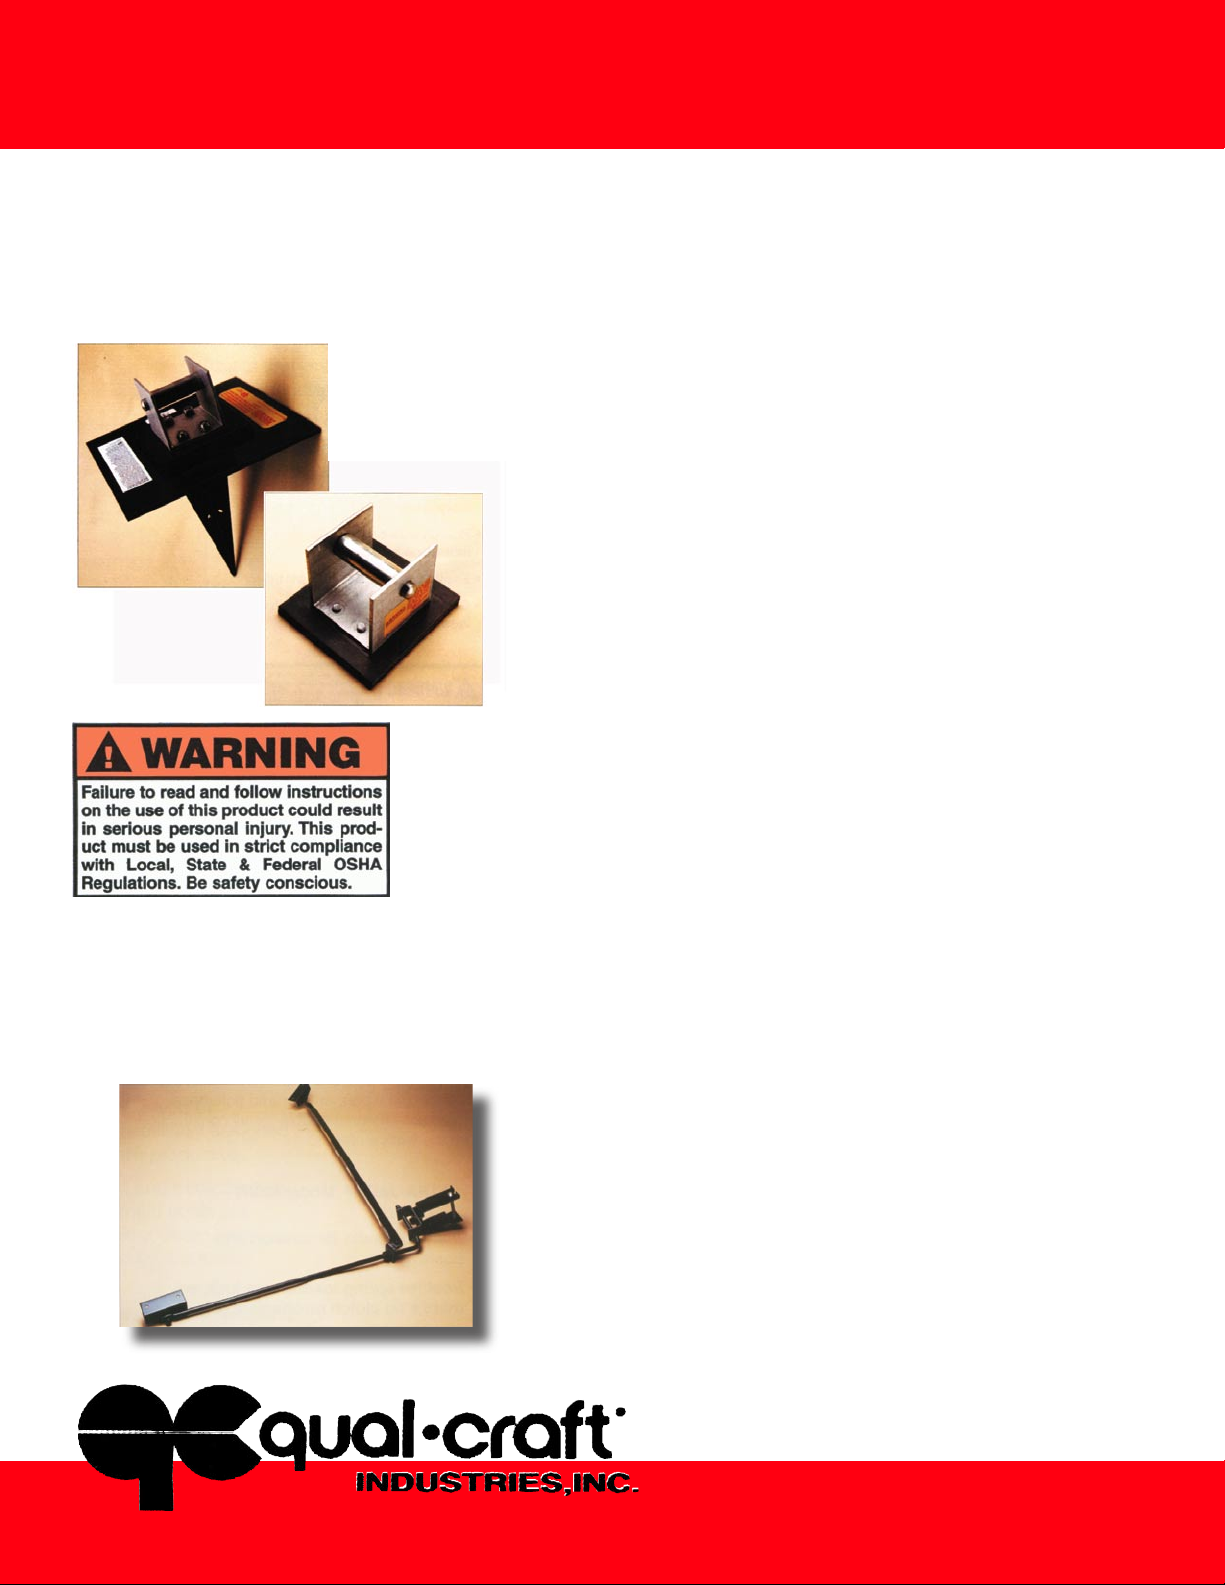
Ultra-Jack
Pole Anchor
Model # 2008
Ultra-Jack Pole
Base Model
Model # 2009
These unique self-locking
bases and anchors are
interchangeable, and provide
added stability and security
for use on all ground work
surfaces.
Ultra-Jack Aluminum
& Rubber Pole
The reinforced structural
grade aluminum/ rubber pole
has eld replaceable facing.
Continuous metal reinforcing
virtually eliminates rubber
distortion.
6 foot pole Model # 2006
12 foot pole Model # 2012
24 foot pole Model # 2024
6 foot Aluminum Pole Connector
Model # 2013
Uses spring loaded pins
made of stainless steel
Ultra-Jack System
Brace
Model # 2009
Provides rigid, tria ngula r
bracing as required by OSHA,
with full swivel head to accommodate all roof pitches.
SYSTEM
Ultra-Jack System
Model # 2000
The Ultra-Jack System is unique,
safe, durable and a dream to operate!
This versatile, state-of-the-art system
is perfect for the contractor who
wants to promote worker speed and
efciency while providing the safest
scaffolding available. The Ultra-Jack
System is ultra safe, easily transported, easy to set up and take down, and
has a greater climbing rate per stroke
for faster movement and less worker
fatigue. The easily adjusted work platform can be raised or lowered to the
perfect height, eliminating overreaching and uncomfortable positions. The
pump jack mechanism uses a springloaded cam lock for smooth operation, and there’s no clutch to wear
out. Also included are wall braces
(model #2002) with a swivel head to
accommodate all roof pitches, and
interchangeable pole anchors and
bases to accommodate all ground
surfaces. The System can be tted
with guardrails and a workbench that
can be installed at any time during the
job without removing the jacks from
the poles. For extra comfort, the foot
levers and hand cranks are padded,
and the toe straps are big enough to
accommodate large work boots.
© Copyright 2003 • Qual-Craft® Industries • 1551
Customer Support and Ordering Information
781-344-1000 • www.qualcraft.com
Page 2
ULTRA-JACK
ULTRA JACK OPTIONS AND ACCESSORIES
OPTIONS INSTRUCTIONS
Instructions for the use of the Ultra-Jack
Model #2008 Pole Anchor
Model #2009 Pole Base:
INSTRUCTIONS FOR
INSTALLATION AND USE
MODEL #2002
ULTRA-JACK BRACE
The Ultra-Jack Pole Anchor and Pole Base are designed
to provide an appropriate mudsill and should be used in
conjunction with an Ultra-Jack Pole Brace to secure the
bottom of the pole. After determining the location, care
should be taken to insure that the ground is rm and free of
small rocks or other objects. The Ultra-Jack Model #2009
Pole Base should be used when the pole is to be installed
on a paved, concrete or other hard packed surface. When
installing on hard packed surface or pavement create a
mudsill by placing one 1 ft. long 2”x 12” piece of lumber
or equivalent under the Pole Base. The Ultra-Jack Model
#2008 Pole Anchor should be used to secure the base of the
pole to soft surfaces. The Anchor should be driven into the
ground so that the 8”x 8” steel plate is resting completely
on the ground and that the spike has been fully seated.
The end of the Ultra-Jack Pole should be placed over the
connector, the buttons depressed to allow the pole to seat
rmly into the Pole Base or Anchor allowing the buttons to
expand into the corresponding holes in the bottom of the
pole. The presence of rocks or other objects or unleveled
ground conditions could prevent the anchor or base from
being fully seated onto the ground. Soft or muddy surface
areas my cause the pole to be unstable and could constitute
an unsafe condition. Always inspect the entire systems
installation prior to use to insure all components have
been installed in accordance with instructions and that the
systems installation is in compliance with Local, State and
Federal OSHA regulations.
Installation of the Ultra-Jack Pole Brace: 1) Position the
pole along the work wall. Use a Qual-Craft Pole Anchor or
Rubberized Base Plate at the bottom of the pole. Place pole
on rm level ground. Do not use on unstable base, on top
of other scaffolds or on roof surfaces. Using a Qual-Craft
Ultra-Jack Brace, secure the pole to the work wall at the
bottom and the top of the pole, and in between at 12 ft increments. Poles must be plumb. The rubber surface of the
pole should face out from the work wall. The round bar of
the brace should be fastened to the work wall at right angle
to the pole. The angle bar of the brace should then be fastened to the right or left as desired. Fasten using two 2” or
longer #12 wood screws per fastening plate. Always fasten
to structural member ie: stud, rafter or joist. The spread
MODELS #2002, @2004, #2008, #2009,
#2006, #2012, #2024, #2013
© Copyright 2003 • Qual-Craft® Industries • 1551
Customer Support and Ordering Information
781-344-1000 • www.qualcraft.com
Page 3

ULTRA JACK OPTIONS AND ACCESSORIES
MODELS #2002, @2004, #2008, #2009,
#2006, #2012, #2024, #2013
between brace arms is 32” thus enabling installation on studs 16”
on center. 2) Additional poles should be spaced based on the type
and style walk plank used. Additional poles should be installed in
the same manner as the st pole.
To pass an Ultra-Jack Brace: 1) When passing an Ultra-Jack
Brace that is already installed, an extra brace should be installed
approximately 4 feet above the one to be passed until the original
brace is re-installed. 2) After installing the temporary brace, loosen
the wing nut and allow the brace to be passed to swing clear of
the pole. Do not remove from wall. After brace has been passed
reconnect it to pole and remove the extra brace.
Care and use of the Ultra-Jack Scaffold System: 1) Prior to use
the user should inspect the installation to insure that the system is
properly set up and is ready for use. 2) An access ladder should be
used to provide safe access to the work platform. 3) Ultra-Jack Scaffolding must not be used over 48 feet off the ground. 4) There should
never be more than two people on an Ultra-Jack System between
any two poles. 5) Only one walk plank shall be supported between
any two poles. 6) Additional safet accessories such as guardrails,
mid-rails, toe-boards, fall arrest or harness systems must be used
as required by Local, State and Federal OSHA Regulations.
ULTRA-JACK
OPTIONS INSTRUCTIONS
© Copyright 2003 • Qual-Craft® Industries • 1551
Customer Support and Ordering Information
781-344-1000 • www.qualcraft.com
 Loading...