

Page 1
FRAMEPRO
PRODUCTS, LLC
Guide for Installation
Of
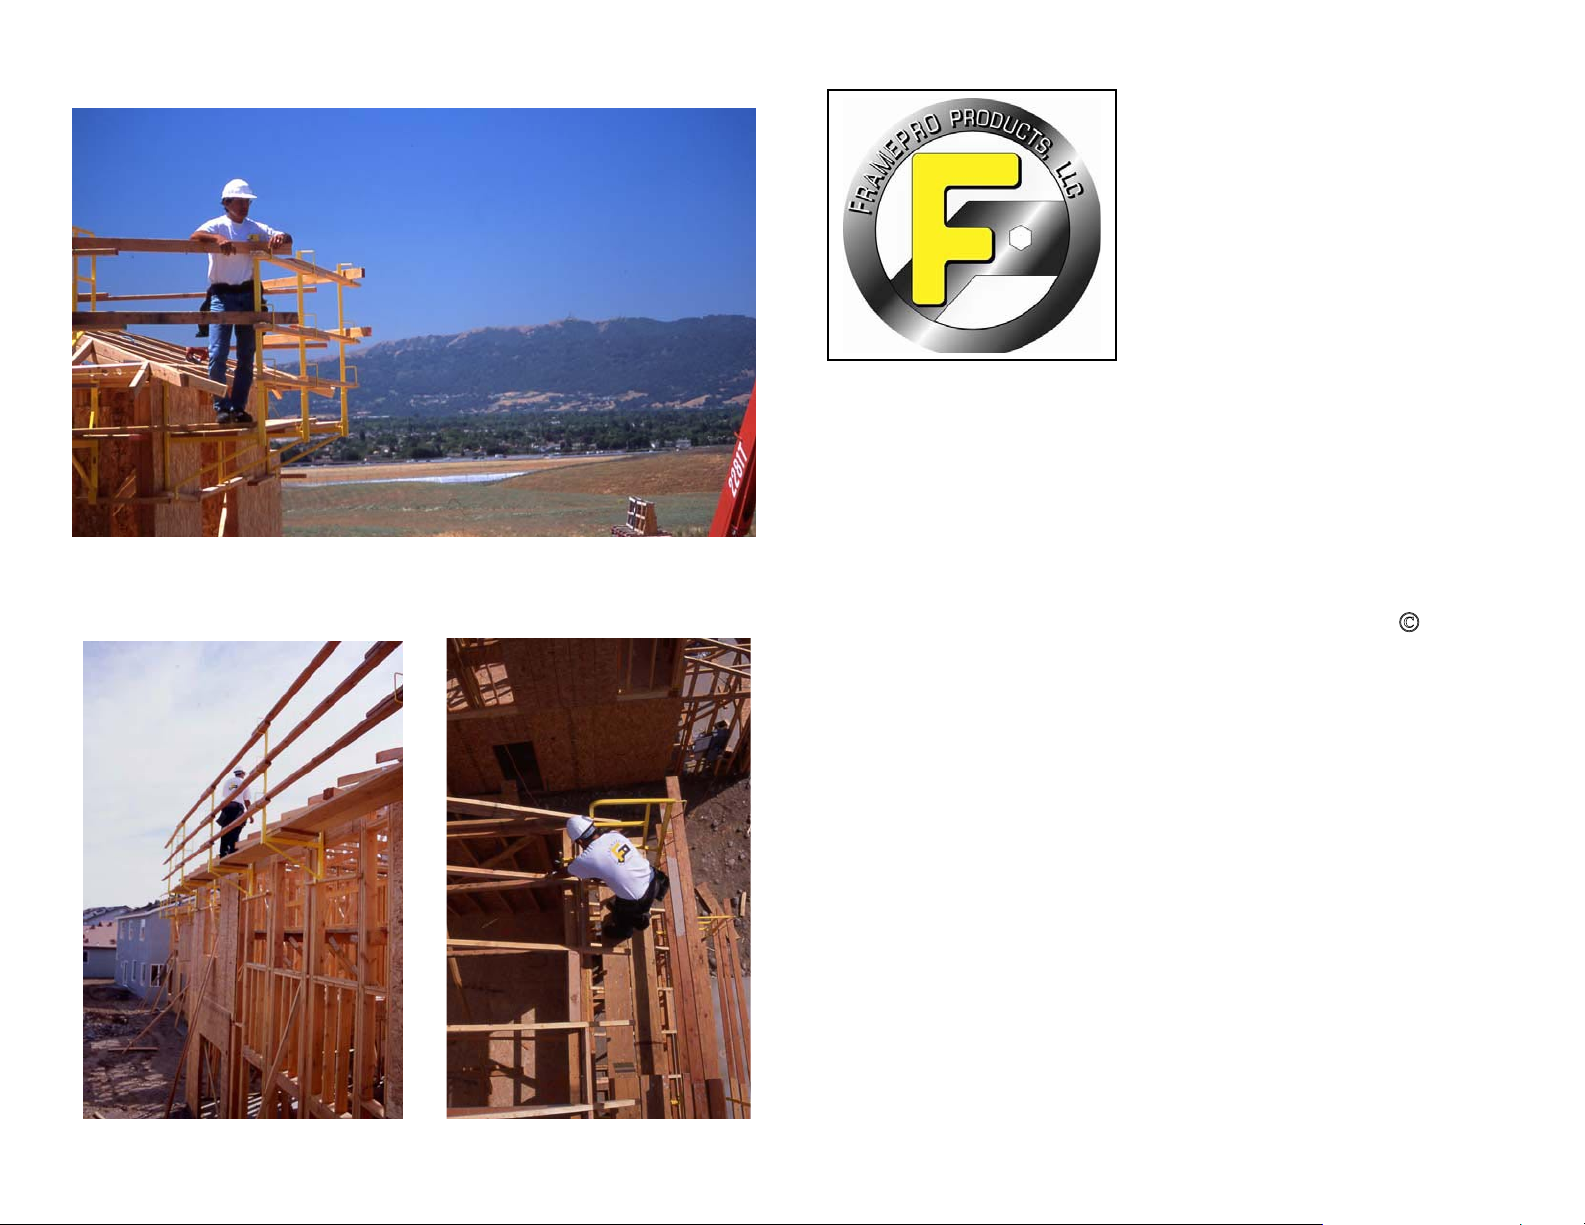
STACKER-BRACKET �
(Fall Protection System)
“It is easier to accept the responsibility of a safe
Work Attitude, than to live with the consequence
of a thoughtless procedure”
900 Business Park Drive, Suite D
Dixon, Ca. 95620
Toll Free Tel: (888) 813-8880 / Fax: (707) 678-9497
Page 2

TABLE OF CONTENTS
Introduction…………………………………………………….2
Material identification and inspection………………………….3
Installation
Stage #1: Planning…………………………………………....4
Stage #2: Lay-out…………………………………………….5
Stage #3: Installation……………………………………...5 - 8
Stage #4: Removal……………………………………………9
Special Conditions
a. Balloon Walls…………………………………………..10
b. Openings at bracket locations…………………………..10
c. Shear Walls……………………………………………..10
d. Moving an installed bracket………………………….....10
Ladder Safety……………………………………………………11
Access zones……………………………………………………..11
Safety Monitor…………………………………………………...12
Summary…………………………………………………………12
Notes……………………………………………………………..13
WARNING
Read complete instruction manual prior to installation.
Failure to follow instructions could result in serious injury
Page 1
or death!
Page 1
Page 3

INTRODUCTION
In the construction industry, falls are the leading cause of worker
fatalities. Each year, on the average, between 150 and 200 workers are
killed and more than 100,000 are injured as a result of falls at
construction sites. The standard for fall protection deals with both the
human and equipment-related issues in
protecting workers from fall
hazards. The unique feature of our product is the way it attaches and
detaches to the top plate. After the entire roof is completed, you simply
remove the safety pin and the top clamp bolt, and then let the bracket
slip away from behind the frieze block.
OBJECTIVE
The objective of this booklet is to supplement the “Hands on” training
class provided by FRAME PRO PRODUCTS, LLC. The Stacker
Bracket System
is a safety tool designed for protecting workers who
perform stacking, fascia, sheathing, nailing, and any other roof edge
operations on construction sites. The Stacker Bracket has been
designed and engineered to meet OSHA requirements for scaffolding
and fall protection.
In general the employers must ensure that:
� Safe work procedures are used.
� Workers are trained in the proper use and maintenance of
all
aspects of your protection systems.
� System is inspected daily for modifications or any unsafe
condition.
� Daily inspections are documented and corrective actions
taken.
� Those erecting, dismantling or modifying the system are
under the direct supervision of a qualified person.
Page 2
Page 4
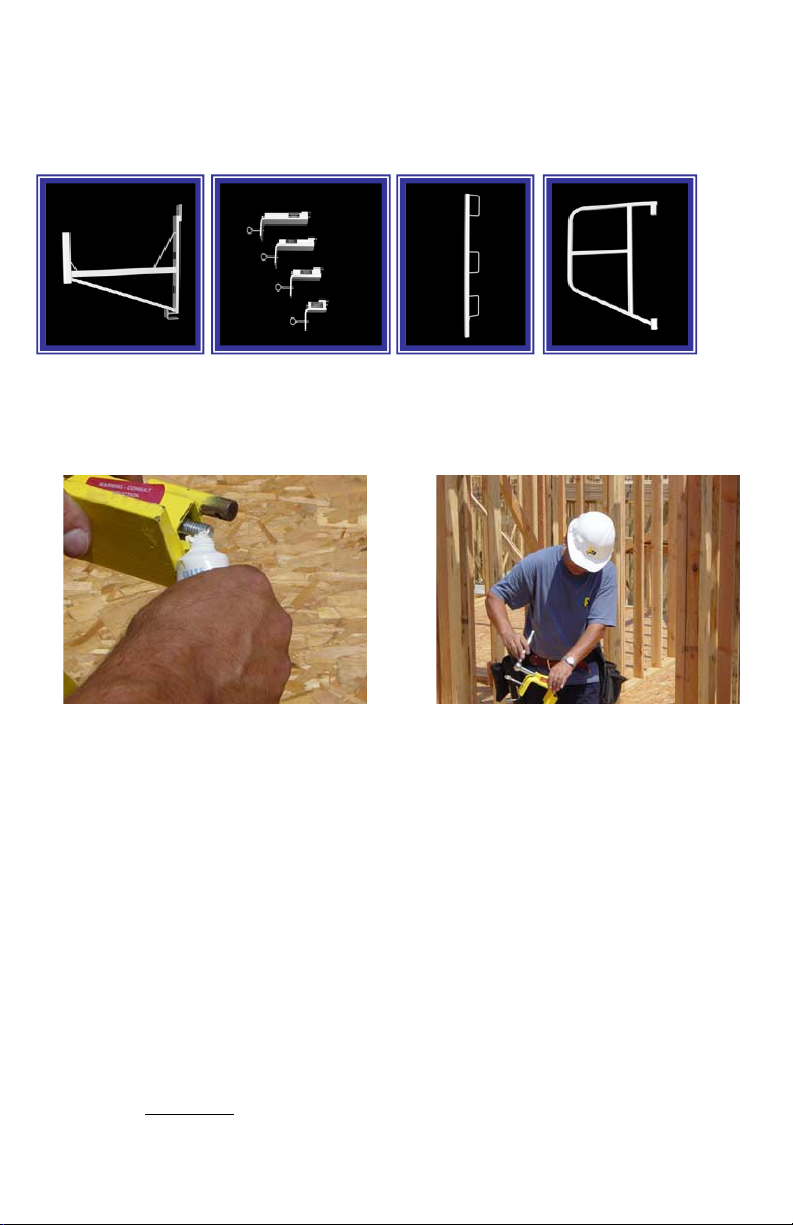
MATERIAL IDENTIFICATION AND INSPECTION
There are 4 basic parts to the Stacker-Bracket system
.
Support Bracket Top Clamp Guard Rail Post End Rail
Part #SBBF Part # SBTC4,6,8,12 Part # SBGP Part # SBER
INSPECTION
Visually inspect all parts: brackets, clamps, guard-rail posts, and end
rails, for broken welds, bent components, or stripped threads. Inspect
planks and 2 x 4 rails for cracks and splits.
PRE-INSTALLATION
In the event that the parts aren’t pre-assembled, you’ll need to attach
the Top Clamp to the support bracket. (Be sure to match correct Top
Clamp with top plate size)
Using a small amount of thread lube, attach the Top Clamp to the
Support Bracket. Start the hex bolt by hand and then use the ratchet to
finish tightening approx. ¼ turn past snug. To avoid damaging the
threads, DO NOT
use an impact wrench with this system at any time.
Page 3
Safety Monitor
The employer shall designate a competent person to monitor the safety
of other employees, and:
Summary
The most effective way to prevent job-related injuries is to implement
and maintain a proactive safety program. A proactive safety program
is one in which safety is a part of every decision made and activity
performed during the course of the workday. The skill level of
employees is such that it matches the job assignment, and appropriate
training is provided to maintain such skills. A proactive safety
program not only helps keep the workplace safe, but includes:
Since safety awareness is not instilled in all people, it must be taught.
However, all the training in the world cannot help those who cannot,
or will not, master a safe mental attitude. So be willing to learn and
enhance your safety skills in order to minimize the misery of accidents
or death.
Page 5

Stage #1: Planning
A. Manpower:
1. Minimum of two (2) people trained
on installation
Procedures
B. Tools
1. Roof layout diagram
2. Spray paint or keel (layout)
3. 9/16” deep socket with 3/8” ratchet
4. Spray lubricant or lithium grease
5. Extension ladder with hook
C. Stacker Bracket� System
1. One bracket with support brace
2. One top clamp (4” for 2x4 wall – 6” for 2x6 wall,
Etc.)
3. One guard rail post per bracket
4. End Rail at end of scaffold run
5. One lowering strap per bracket at sheer wall
locations
6.
D. Planking Material
1. Two (2) 2x10 – 10’ Scaffold Planks or
equivalent per section (OSHA approved)
2. Three (3) 2x4 – 10’ DF#1 Hand Rail per section
(OSHA approved metal rails are also acceptable)
Page 4
WARNING
This system is engineered for use with 2x4 DF #1 handrails
or approved metal rails and scaffold grade planks. Failure to
use designated materials may result in bodily injury or
death.
INFORMATIONAL NOTE
With full hip roofs, brackets are placed all the way around
the top plate with corners connected on a 45. End rails are
not necessary on hip roofs.
Page 6

Stage #2: Layout
A. Roof Plan Diagram
1. The first step is to use a roof plan and layout the bracket
location.
2. Place a mark on the floor 1’-0” from the outside corner
of the building and continue marking the rest of the wall
on 8’-0” centers at all eaves.
3. When you get to the end of the wall, place a mark
on the floor at 1 foot back from the end.
4. Continue around the house until all eave areas are
laid out and marked on the floor.
5. Distribute the proper material to each mark on the
floor.
a. One Stacker Bracket
with Top Clamp attached.
(Be sure to match clamp size with wall thickness)
b. One Guard Rail Post
c. One 36” Support Brace
d. Two 2x10x10’-0” scaffold planks
e. Three 2x4x10’-0” rails or approved metal rails.
f. End rails where necessary.
g. One optional lowering strap per sheer area.
Stage #3: Installation
1. Mark bracket location on 36” 2x4 making sure 2x4
crosses three studs, even at sheer areas
.
2. Nail 2x4 to bracket at layout mark (NOTE! The
bracket is not always in the middle of the 36” 2x4) DO
NOT drive nail flush, as it must be removed later.
Page 5
Special Conditions
A. Balloon walls
O.S.H.A, requires interior fall protection at certain working heights.
Since trigger heights vary from state to state, be sure to check local
and state requirements. Below is an example of a variable height
scaffold for use at interior locations of balloon walls. If you build or
erect this first, it makes a good platform to work from while installing
the bracket system.
b. Sole plate allows for ease
of assembly/removal
B. Openings At Bracket Locations
When a Stacker Bracket
doorway, you must install a double trimmer at that location, with three
16d nails at the top and bottom, along with the proper line brace.
C. Shear Walls
Where shear–walls occur, the optional strap should be looped through
the bracket with the free end laid over the wall for future use.
D. Moving Installed Brackets
If a bracket needs to be moved for the framer/stacker, simply loosen
the eye-bolt and move the bracket over a few inches. (Never loosen
the hex bolt until you are ready to remove the entire system.)
WARNING
Never use #1 D. F. 2 x 4’s for spans greater than 8’-0”.
SAFETY NOTE
Prior to installation of the Stacker Bracket system, you must
use a barricade to define a perimeter around the building to
prevent injury from falling objects. Be sure to consult your
local and state regulations for specific requirements.
Page 7

Working from secured ladder (See page 11 for “Ladder Safety”)
3. Hang bracket over top plate at layout location
4. Using a ratchet handle, tighten the eyebolt at least 2 full turns
past finger tight.
5. Install attached safety pin EVERY
TIME.
6. Install guard rail post, with loops to the
outside
7. Complete installing all brackets from a
ladder, adding end rails as necessary.
8. At sheer wall areas, the optional strap should be looped through
the bracket with the free end over the top of the wall for future
use.
SAFETY NOTE
Each Stacker Bracket� must have a plumb and line brace within one foot of
bracket. (Please note that perpendicular walls are acceptable as a brace.)
Page 6
Page 8

Installing Planks and Rails
1. Spread Trus Joist Scaffold Planks, 2x4 D.F #1 handrails, to
each bracket.
2. Always install first section of planks and rails, from an
extension ladder.
3. From there, complete the entire run of planks and rails from
either the scaffold or a ladder.
Page 7
CARPENTRY INSTRUCTIONS
Before removing the Stacker Bracket
carpentry, including the following.
Page 8
SAFETY NOTE
Do not use a stepladder as a lean-to ladder.
Page 9

4. Continue lapping planks in one direction for consistent overlap.
(This simplifies the removal process. )
CARPENTRY INSTRUCTIONS
Before removing the Stacker Bracket
system, complete all roof
carpentry, including the following.
� Install all roof vents and frieze blocks
� All hardware required by engineer. (L50, A35, H1, etc.)
� Complete all fascia
� Complete all roof sheeting and nailing
� All roof carpentry
� Nailing inspection approved and signed off
� Fireplace stacks, pop-outs, skylights, dormers, etc.
� Chevrons at gable ends w / OSHA approved harness.
� Holes cut for heat
� Tile kick at the eve installed
Page 8
Page 10

Stage #4: Removal
Note: Before removal, verify that caution tape is still in place around
the entire building and have a Safety Monitor present at all times.
Safety Equipment Required (Must meet OSHA regs.)
� Full body safety harness (follow mfg. Instructions)
� Self-retracting life line (follow mfg. Instructions)
� Nail on roof anchors
Removal of Bracket System
1. Remove rails, uprights, and planks while working in reverse
direction of installation.
2. Stack material on roof jacks, or lower to the ground.
Dismantling Bracket System
1. At shear wall areas, attach the previously installed lowering
strap to a rope or strap. While your assistant holds the strap,
loosen the eyebolt and remove the top clamp. Then lower the
bracket down using the strap or rope.
2. On walls without shear, remove the 36” 2x4, loosen the hex
bolt, remove the top clamp, and bring bracket in between the
studs.
3. Use a Safety Monitor to assure that lowering material does not
injure someone.
Page 9
Working from secured ladder (See page 11 for “Ladder Safety”)
3. Hang bracket over top plate at layout location
SAFETY NOTE
Each Stacker Bracket� must have a plumb and line brace within one foot of
Page 6
SAFETY NOTE
Roof jacks must be properly made and secured
.
CAUTION ! DO NOT overload jacks.
Page 11

Special Conditions
A. Balloon walls
O.S.H.A, requires interior fall protection at certain working heights.
Since trigger heights vary from state to state, be sure to check local
and state requirements. Below is an example of a variable height
scaffold for use at interior locations of balloon walls. If you build or
erect this first, it makes a good platform to work from while installing
the bracket system.
Important !
a. Notice both platforms
and their heights.
b. Sole plate allows for ease
of assembly/removal
c. Adequate bracing
d. Maximum 8’-0” spans
B. Openings At Bracket Locations
When a Stacker Bracket
falls in an opening such as a window or
doorway, you must install a double trimmer at that location, with three
16d nails at the top and bottom, along with the proper line brace.
C. Shear Walls
Where shear–walls occur, the optional strap should be looped through
the bracket with the free end laid over the wall for future use.
D. Moving Installed Brackets
If a bracket needs to be moved for the framer/stacker, simply loosen
the eye-bolt and move the bracket over a few inches. (Never loosen
the hex bolt until you are ready to remove the entire system.)
Page 10
SAFETY NOTE
Do not create a hazard at the
bal- loon wall by having a
platform at a high window
without putting hand rails thru
such openings.
Page 12

Ladder Safety
Stairways and ladders are a major source of injuries and fatalities
among construction workers. Below are some basic requirements from
O.S.H.A. regarding ladder safety. Be sure to check with your local
state for any special requirements.
� When portable ladders are used for access to an upper
landing surface, the side rails MUST extend at least 3’
above the upper landing surface.
� Ladders must be used ONLY for the purpose for which
they were designed.
� Ladders must not be used on slippery surfaces unless
secured or provided with slip-resistant feet to prevent
movement.
� When ascending or descending a ladder, the worker must
face the ladder.
� Each worker must use at least one hand to grasp the ladder
when moving up or down the ladder.
� A worker on a ladder must not carry any object or load that
could cause the worker to lose balance and fall.
Access Zones
Any employee working in a controlled area shall be under the direct
supervision of a safety monitor, and shall comply with all safety
regulations
Toe Boards
Regulations concerning toe boards include the following:
� Toe boards must be provided on all open sides and ends of
railed scaffolds at locations where persons are required to
work or pass under.
� A toe board must be securely fastened at a minimum of 4”
(nominal) in height from its top edge to the level of the
floor or platform. A toe board must have no more than 1/4
inch clearance above the floor level
Page 11
Stage #1: Planning
Page 4
Page 13

Safety Monitor
The employer shall designate a competent person to monitor the safety
of other employees, and:
� Shall be competent to recognize fall hazards
� Shall warn an employee when it appears that the employee is
unaware of a fall hazard or is acting in an unsafe manner.
� Shall be on the same walking/working surface and within
visual sighting distance of the employee being monitored.
� Shall be close enough to communicate orally with the
employee.
� Shall have NO OTHER responsibilities which could take the
monitor’s attention from the monitoring function.
Summary
The most effective way to prevent job-related injuries is to implement
and maintain a proactive safety program. A proactive safety program
is one in which safety is a part of every decision made and activity
performed during the course of the workday. The skill level of
employees is such that it matches the job assignment, and appropriate
training is provided to maintain such skills. A proactive safety
program not only helps keep the workplace safe, but includes:
� Fewer work injuries
� Lower compensation insurance
� Lower absenteeism
� Lower employee turnover
� Higher job efficiency
� Higher employee morale
� Higher quality of work
Since safety awareness is not instilled in all people, it must be taught.
However, all the training in the world cannot help those who cannot,
or will not, master a safe mental attitude. So be willing to learn and
enhance your safety skills in order to minimize the misery of accidents
or death.
Page 12
Page 14

NOTES
Page 13
INTRODUCTION
In the construction industry, falls are the leading cause of worker
fatalities. Each year, on the average, between 150 and 200 workers are
killed and more than 100,000 are injured as a result of falls at
construction sites. The standard for fall protection deals with both the
human and equipment-related issues in
hazards. The unique feature of our product is the way it attaches and
detaches to the top plate. After the entire roof is completed, you simply
remove the safety pin and the top clamp bolt, and then let the bracket
slip away from behind the frieze block.
OBJECTIVE
The objective of this booklet is to supplement the “Hands on” training
class provided by FRAME PRO PRODUCTS, LLC. The Stacker
Bracket System
perform stacking, fascia, sheathing, nailing, and any other roof edge
operations on construction sites. The Stacker Bracket has been
designed and engineered to meet OSHA requirements for scaffolding
and fall protection.
 Loading...