

Global Reach with a Local Touch
Set Top Box User Guide

Table of Contents
REMOTE SET UP
3
SET TOP BOX DIAGRAM
SET TOP BOX SETTINGS
5
TURN ON/OFF 5
TV INPUT SETTINGS 5
ADJUSTING THE VOLUME 5
RESETTING YOUR SET TOP BOX 5
PVR SET TOP BOX VERSUS STANDARD SET TOP BOX 5
THE GUIDE
6
GUIDE SCREEN 6
SCROLLING THROUGH THE GUIDE 6
CHOOSE A PROGRAM 6
PROGRAMMING FUTURE EVENTS 7
DISPLAYING CURRENT PROGRAM INFORMATION 7
ACCESSING IMPORTANT MESSAGES 8
PVR CAPABILITIES
8
RECORDING A LIVE PROGRAM
8
SCHEDULE A RECORDING
8
Option #1: Record through the guide 8
Option #2: Record through the menu 9
Option #3: Record through a search 9
PVR QUICK REFERENCE MENU
9
Getting to PVR Quick Reference Menu 9
Recordings 9
To Record 9
Storage Info 9
Schedule Priority 10
Schedule Event 10
Record History 10
Delete History 10
SCHEDULING EVENTS
10
USING SCHEDULING FOR REMINDERS OR RECORDING
10
EVENT TIMER TYPES
10
Recording 10
Autotune 11
Reminder 11
Favourites 11
EVENT TIMER FREQUENCY 11
EDITING THE SCHEDULED EVENT 11
EDITING THE SCHEDULED RECORDING 11
EVENT TIMERS TIPS & TRICKS 12
1
4

FAVOURITES 12
CREATING A FAVOURITES LIST 12
HOW TO ACCESS YOUR FAVOURITES LIST 12
Accessing Favourites in Guide 12
Accessing Favourites in Menu 12
DELETE A FAVOURITES LIST 13
DELETING OR ADDING A CHANNEL ON A FAVOURITES LIST 13
Removing and adding to Favourites in Menu 13
Removing and adding to Favourites in Guide 13
Adding or Removing Favourites while on a channel 13
PARENTAL CONTROLS 14
SET UP PARENTAL CONTROLS 14
MAKING CHANGES 14
PROGRAM RATING 14
CONTENT RATINGS 15
USING ADVANCED SETTINGS 15
GETTING TO SETTINGS 15
CHANGING PREFERENCES 15
Share Rentals 15
Require Log in 15
Enable Caller ID 15
Channel Blocking 15
Parental Control 15
PPV Action 16
Program Alarm 16
Caller ID Time out 16
Theme 16
CHANGING HARDWARE SETTINGS 16
RF Output Channel 16
Audio Language 16
HDMI Comp Resolution 16
Frame Format 16
Audio Output 16
CHANGING LANGUAGES 16
USERS 17
Add User 17
Change Password 17
Change Pin 17
User Parental Control 18
VIEW PACKAGES AND FEATURES CURRENTLY BEING USED 18
VIEW MONTHLY CHARGES 18
2

3
Set Top Box Remote Control
Power
Sends Commands to TV
Sends Commands to
Receiver
Record for PVR
Fast Forward
for PVR
Pause for PVR
Play for PVR
Stop for PVR
Displays Menu
Direction Arrows
‘Selects’ a Choice You Have Made
Displays Info Bar
Close Screen & Return to Program
Displays Guide
Volume Up or Down
Mutes Volume
Displays Last Selected Channel
Changes Channels Up/ Down
Rewind for PVR
Number Panel
Fast Foward Guide 12 hours
Rewind Guide 12 hours

4
Set Top Box
USB Connection
Record Light
Menu
Button
OK Button
Link Light HD Light
Cable Connection
To Wall
Power Outlet
USB Connection
Component
Connection
Network
Connection
Video Out Audio Out
Cable Connection
To TV
HDMI Connection
Optical Connection
S Video Connection
Power
Button
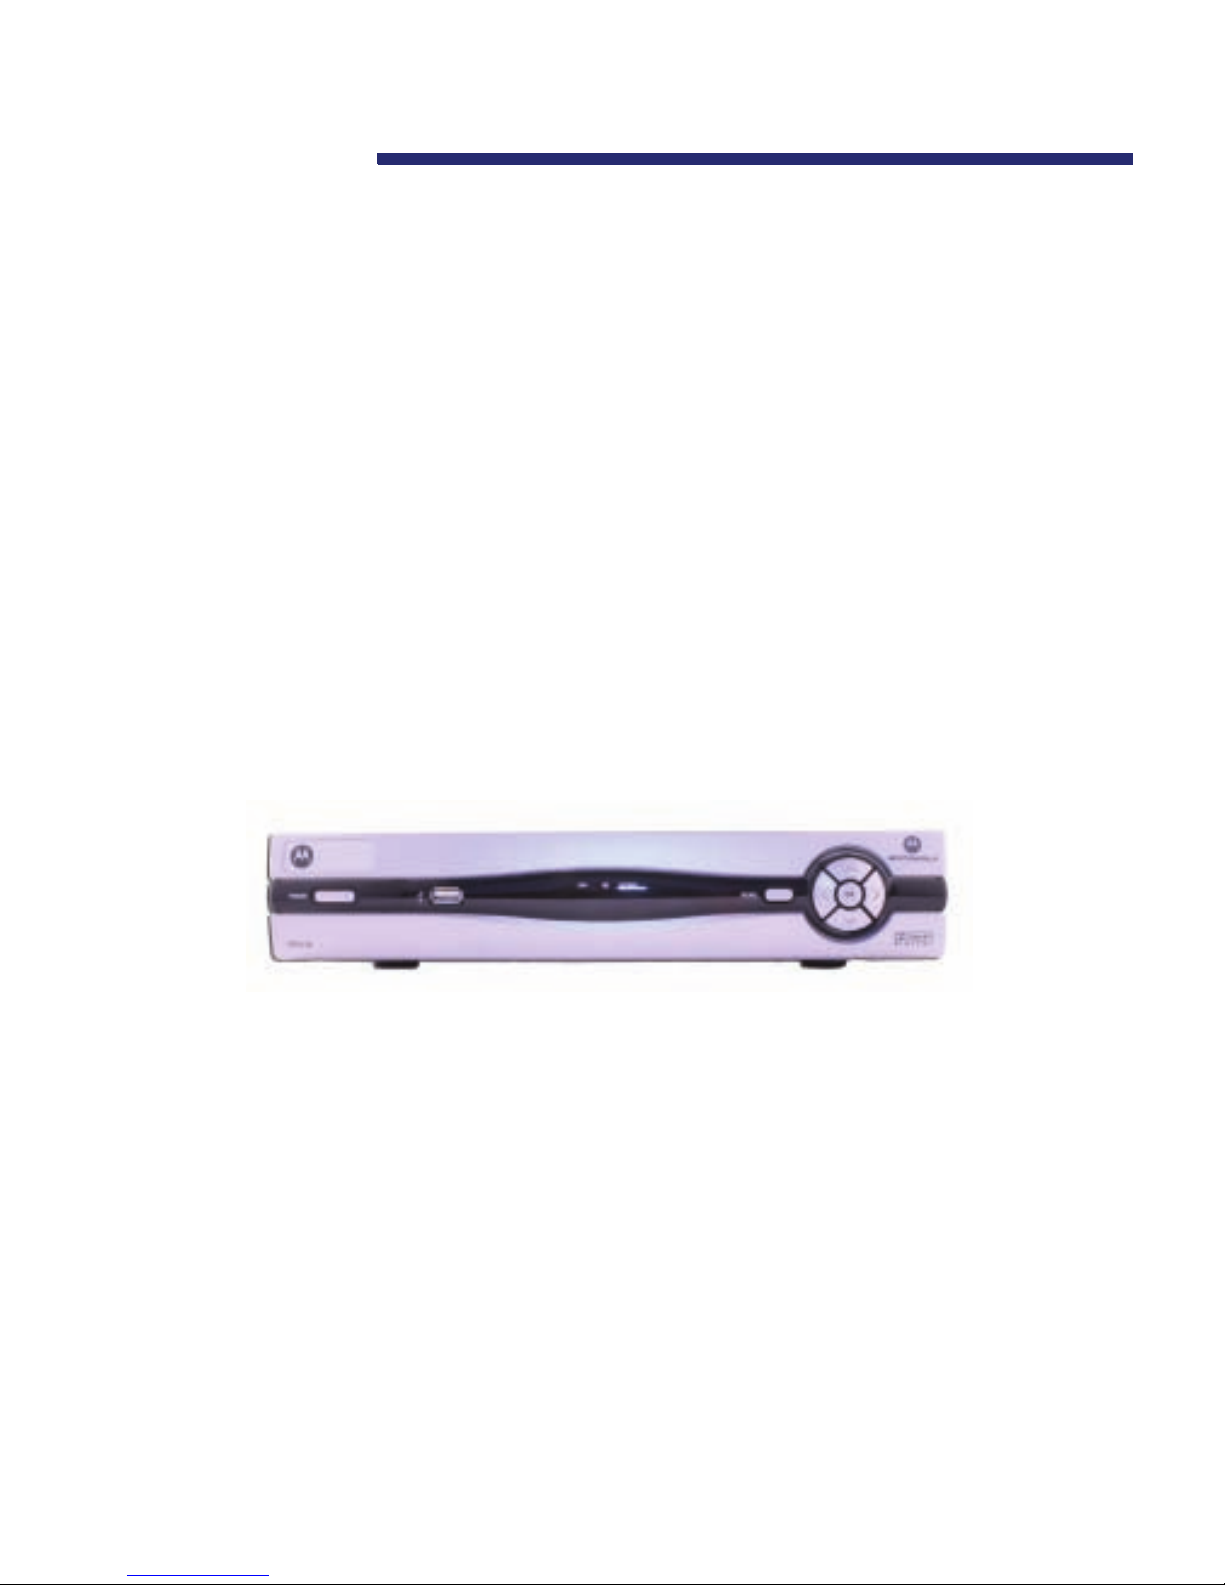
Turn on/o
P
ress Power on the remote control or on the front panel of the Set Top Box (STB) and a green light will
appear that surrounds the power button.
TV Input Settings
The television input settings must be set to the same input as what the Set Top Box is plugged into. For
example: if the Set Top Box is plugged into Video 1 input, the TV input settings must be set to Video 1.
If the STB is connected to the TV through a coax cable; the TV must be set to channel 3 (or whatever
channel is set for the RF Output Channel – this is located in the settings section of the menu in order for
the set top box to work.
Adjusting the volume
Press Volume + or – on the remote control to adjust the volume.
Press Mute to turn the sound o and on again.
Resetting your Set Top Box
Press and hold the power button, for about 10 seconds, until 3 lights (green, blue and red) in the centre of
the set top box ash. You only need to hold this button once.
The lights will return to normal, and a loading screen will appear on your TV as the system reboots itself.
Once the reboot is complete, the STB will return to the channel last selected.
The STB will automatically restart if there is a power failure or if it unplugged.
PVR Set Top Box versus Standard Set Top Box
There are two dierent Set Top Boxes available with Quadro Communications: the Motorola VIP 1200 and the
Motorola VIP 1216.
Both boxes are HD capable and can contain the same content. The dierence between the two boxes is
the PVR (Personal Video Recorder) function. The Motorola VIP 1216 is a PVR and is capable of recording what
you watch, record a program while you watch a dierent program, or record an event in the future. This
PVR set
top box can store what you record with its 160 GB memory. The Motorola VIP 1200 is the standard STB and has
no recording capabilities.
Set Top Box Settings
5

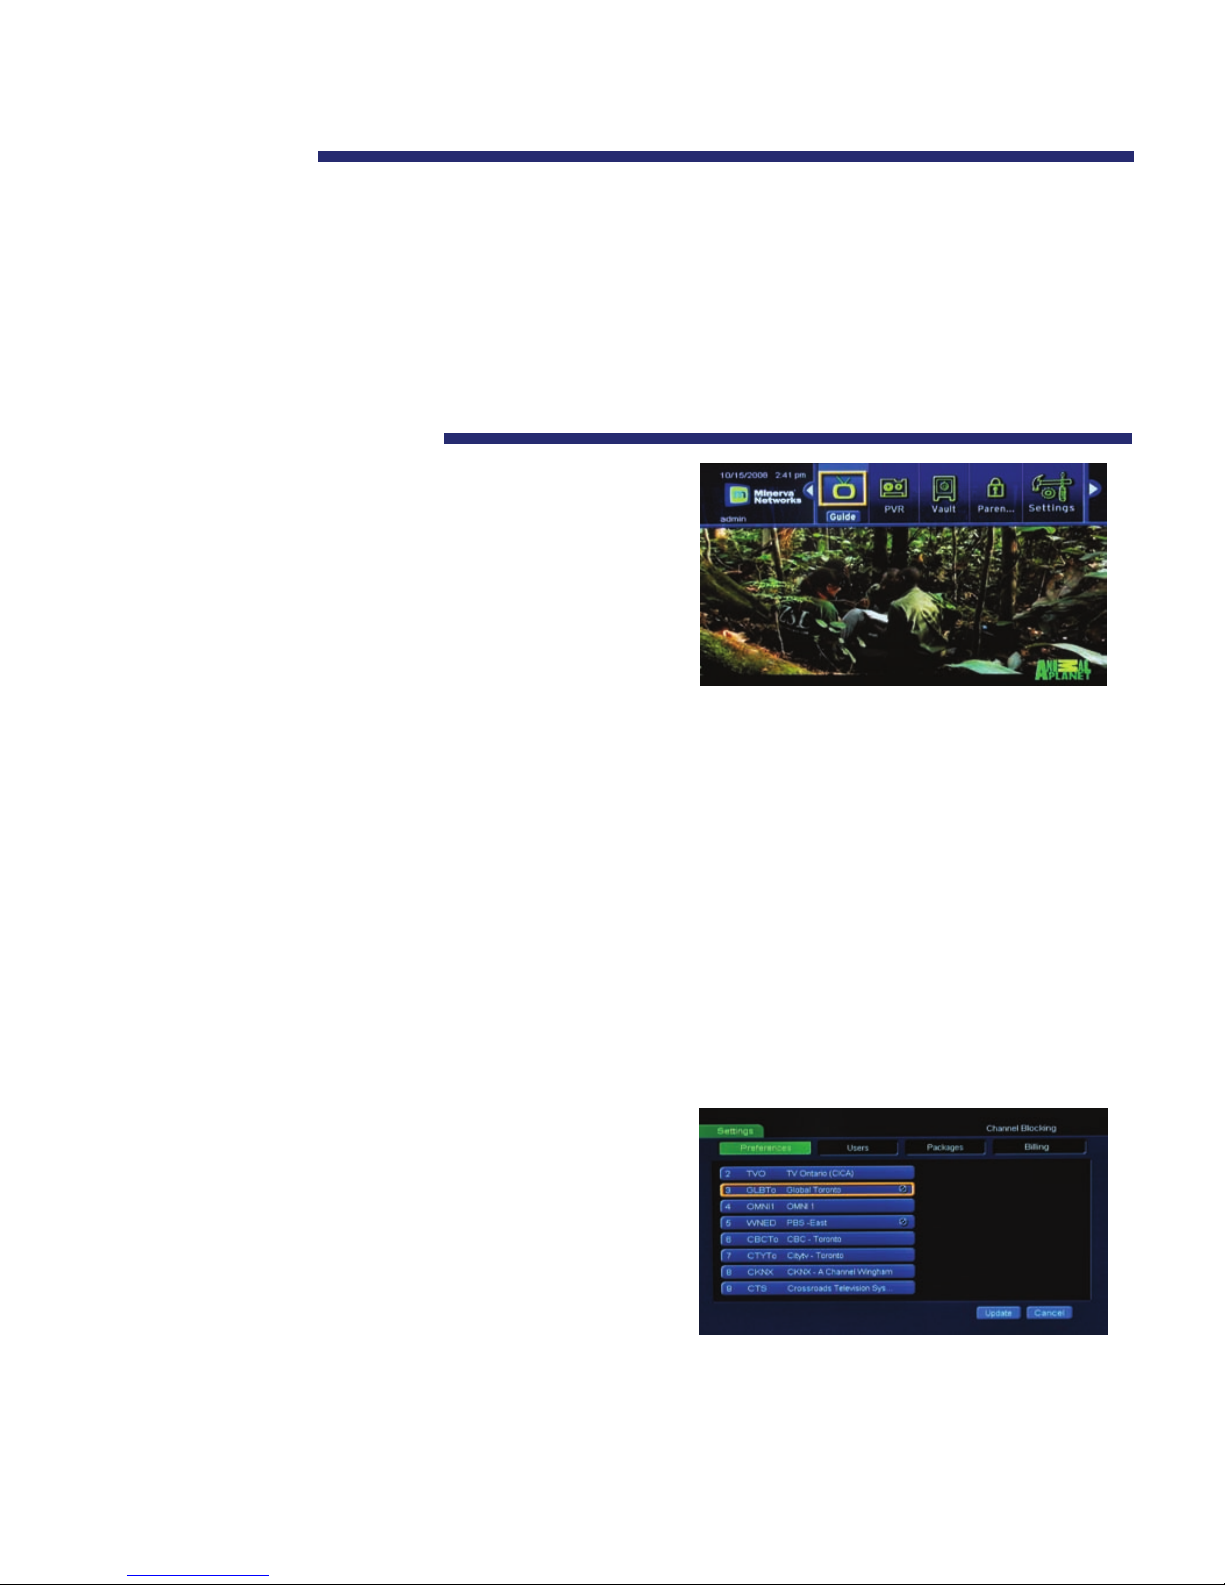
The On Screen Guide functions as the main tool to control the programs you watch. This section describes
the features and how to use the guide. On your remote press the GUIDE button to view the guide.
Preview Screen
– on the top left of the screen is a small screen version of the current program your TV is
tuned to or you have chosen to preview.
Program Description
– Information about the program showing will appear on the top right of the
preview screen. The information will change as you scroll through the channels, but the Preview screen
will remain the same.
Tab Headers
– Tab headers will show on the centre left of the screen. These tabs show channel
groupings names. Pressing the guide button repeatedly will scroll through the tabs. Once you have
gone through all the headings, you will return to your previous program.
Use the arrow keys on your remote to scroll up or down for more channels, or across for future
programming on those channels.
Purple Background
– movie being played
Blue Background
– regular programming
The Guide
6
Guide Screen
Tabs Headers include:
Subscribed
– A list of the channels which you are subscribed.
Favourites
– A list of the channels you have programmed in as your favorites. See Programming
Favorites Section on how to program a favorites list.
HD
- A list of high denition channels oered.
All
- A list of all channels that are oered by your provider. Any channels that come up as black
text under the “All” tab are channels that you have not subscribed to. If you would like these
channels, please contact your provider.
Channels
– The list of current and future programming, including channel numbers, program
name, and time of programming (for example: ABC, NBC, CBS, History, etc.) are presented down the left side.
Scrolling Through the Guide
Choose a Program
To preview a current program listed on the guide; press okay once. The top Preview Screen will change
to show what is currently playing. Press OK again for full screen viewing of that channel.
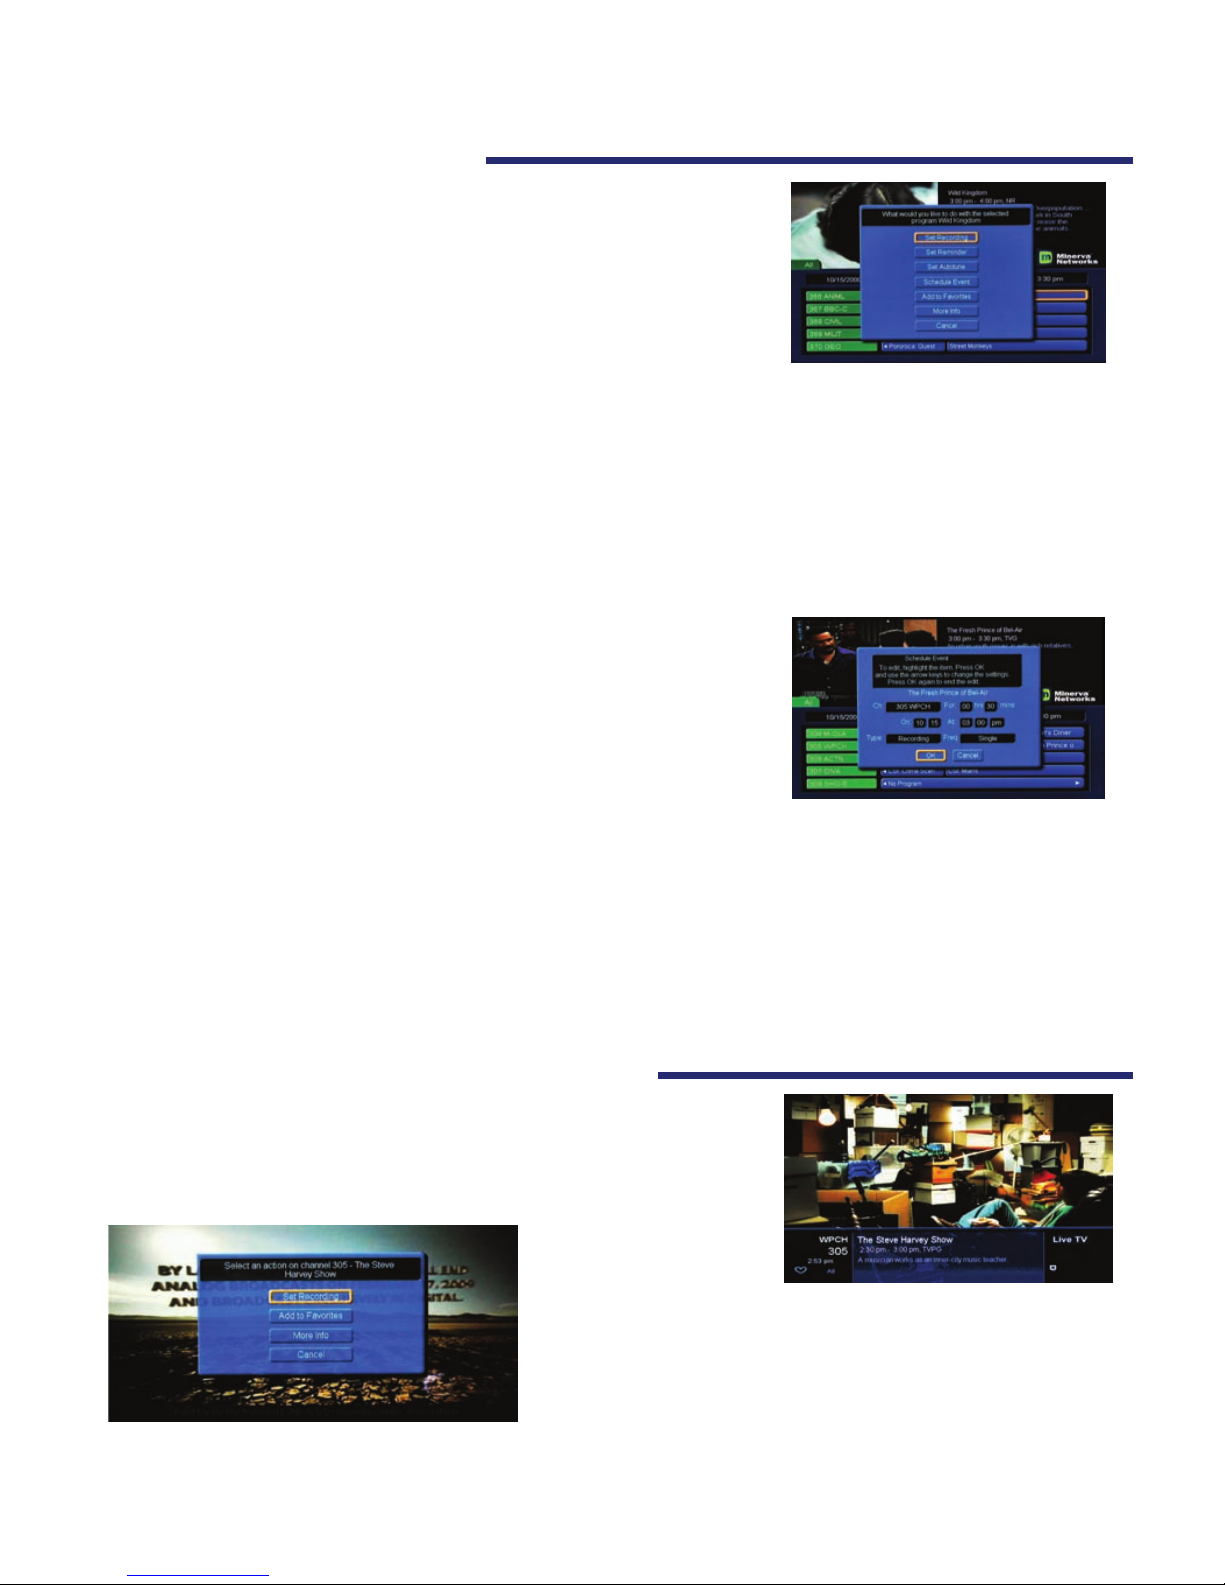
While on the guide screen and using your remote, scroll across the
selected channel with the arrow keys to a desired program. Press OK.
A menu screen will appear. Scroll to the desired function and
press okay again. To cancel, select the program again and
press OK, then select the Cancel button, and press OK.
From this screen you can:
1. Set Recording
– You can view and set recording for up to three days of programming with this function.
You must have a PVR set-top box to see or use this function (refer to the PVR section for programming
details).
2. Set Reminder
– This function will remind you that a particular show you want to watch is about to begin.
3. Autotune
– This feature will change to a channel automatically on the date and time a selected program
begins.
4. Schedule Event
– This is an in-depth option for programming for
Autotune, Reminder or Recording options from one screen. Scroll
through to access settings, and press okay to edit them. The setting
options are single, weekly, every Monday to Friday, or Every Day.
To edit or cancel an event: press okay on the channel for the event
you want to change. Scroll to desired function.
5. Favourites
– This adds the channel to your favourites list/tab (See Favourites)
6. More Info
– The description of the program as you would see on your preview screen.
7. Press Cancel to get out of that screen.
For more advanced information on programming future events, see Scheduling Events on page __.
Displaying Current Program Information
7
programming menu
scheduling events
You can also view future programming details by using the
right arrow key on the remote. Press INFO twice on your
remote and it will show additional information such as the
director, the actors and the time of the next program.
This feature will automatically time out.
Press the INFO key once on your remote while watching TV.
This will show what you are currently watching, how long the
program runs, the current time, and program information.
Programming Future Events

Your provider may need to send the subscriber messages on technical issues, events, product updates,
outages, or other pertinent information. This will be done through the message screen. Please explore
this feature on a regular basis to stay up-to-date on information coming to you.
You may also notice an information box while viewing a program. This will advise you to check the
messages.
To use other features in the Vault or Menu, please refer to the Advanced Settings section.
PVR stands for Personal Video Recorder. The PVR enables you to record a live event or a program
scheduled in the future. The PVR Quick Reference Menu (within the Menu section) allows you to organize and
watch previously recorded videos.
Recording a LIVE program (3 options)
8
Accessing Important Messages
1. If the message box appears while you are watching TV, press OK and the message will appear.
2. To retrieve messages, press the menu button, scroll to Vault and press ok.
3. Scroll down to Messages and press OK. Messages will appear. You can delete messages by
pressing OK and choosing the “delete” option.
4. Press the EXIT button on the remote to leave the message section.
PVR Capabilities
Schedule a Recording
2. Press OK on the remote while watching a program
and a Select An Action Box appears. Choose
Start Recording and recording will begin immediately.
1. While you are watching a program, press the RECORD button
on your remote. A red light will turn on in the info bar of the
set top box and recording will begin immediately.
3. Press GUIDE, highlight a program you want to record using the arrow buttons, and press RECORD .
If the program is currently on, recording will begin immediately.
1) Press GUIDE on remote
2) Arrow to the program you want to record
3) Press OK
4) Select Set Recording, press OK
5) A red record icon will appear next to the program
you are scheduled to record.
Option #1: Record through guide
Accessing Messages:

Option #2: Record through menu
1) Press MENU on remote
2) Arrow to PVR, press OK
3) Arrow to Schedule Event, press OK
4) Enter correct information (see Scheduling Events on page 9)
5) A red dot will appear beside the program indicating
it is on the list to record
6) Press EXIT on remote to return to TV
Option #3: Record through a search
1) Do a search for the program(s) you wish to record (see page 9)
2) Arrow to the program on the list, press OK
3) Arrow to Set Recording, Press OK
4) A red dot will appear beside the program indicating
it is on the list to record.
5) Press EXIT on remote to return to TV
Getting to PVR Quick Reference Menu
1) Press MENU on your remote
2) Arrow to PVR and press OK
3) Navigate around the menu by using the arrow and OK buttons
Storage Info – Displays your total disk space, how much space you have used of your disk space, and
how many items in total you have recorded.
9
Recordings – Lists programs you have already recorded.
PVR Quick Reference Menu
Press OK while Recordings is highlighted and you are given the
option to watch, lock or delete the recorded programs..
Locking a recording prevents the system from deleting a
program to make space for new ones.
Press OK while “To Record” is highlighted, and you are given
the option to cancel any future recording events.
To Record – Lists all events you have scheduled.

Schedule Priority – Lists the programs that you are scheduled to record when on a recurring basis.
Schedule Event – allows you to create a recording, reminder,
or autotune event for individual or recurring programs.
Record History – is a log of when recordings start,
complete or are cancelled.
Delete History – logs any deleted recordings.
Scheduling Events
Scheduling for Reminders or Recording
Event timers allow you to generate a reminder on your receiver to tune in and/or record a future program.
A specic timer can be created for a future program with start/stop times.
You are able to access this option several ways:
1. While viewing a show, use the arrow key (V) to display program info, use the arrow key
( >) button to select a future program, once the future program is selected, press OK.
2. After pressing OK, you are now able to view the dierent options for scheduling a
reminder, recording, event, autotune or add to favorites.
OR
1. Press the GUIDE button, use the arrow key (>) to
select a future program to view.
2. Press the MENU button, use the arrow key (>) to
select PVR and press OK.
3. Use the arrow key (V) to navigate to Scheduled
Event and press OK.
4. You are now able to view the dierent options for
scheduling a reminder, recording, event, autotune
or add to favorites.
OR
1. Access options through Event Timer.
2. Press the GUIDE button, or if currently viewing a
program, press the arrow key (V) to
display the banner guide across your screen.
3. Use the arrow key (< >) to select a future program.
Once selected, press OK.
4. Select the type of event you wish to set up and
press OK.
5. Use the arrow key (^ v) to change the eld. Use the arrow key (< >) to shift
over to the next eld.
6. Shift over to the OK at the bottom of the screen, and press OK to save and apply settings.
Event Timer Types
Recording - Tunes the receiver to the program when it begins, and starts recording the program using the
PVR capabilities.
10

11
Autotune
- Reminds you that a program is about to start, and tunes the receiver to the program when it
begins.
Reminder
- Reminds you that a program is about to start.
Favourites
- Adds a program to Favorites, see page 11 for further information.
Event Timer Frequency
Once
- A one-time event.
Monday to Friday
- An event that is scheduled for Monday – Friday on the same channel, and at
the same time each day.
Daily
- An event that is on the same day and time each day Monday – Sunday.
Weekly
- An event that is scheduled for once a week on the specied day, on the same channel,
and at the same time.
Editing a Scheduled Event
Two options:
A.
1. Press GUIDE
2. Use the arrow keys to nd the program with the reminder/ autotune event and press ‘OK’.
3. Use the arrow keys to select ‘Set Recording’, ‘ Cancel Reminder/ Autotune’, ‘ Schedule Event’,
‘Remove from Favourites’, ‘ More Info’, or ‘Cancel’.
4. Press ‘OK’
B.
1. Press ‘MENU’.
2. Use the arrow keys to select Vault and press OK.
3. Use the down arrow key (‘V’) to scroll down to Reminders and press OK.
5. Use the arrow keys to highlight the reminder to be edited, and press OK.
4. Use the up or down arrow keys (‘^ v’) to select Cancel Reminder or Cancel.
5. Press OK.
Editing a Scheduled Recording
1. Press MENU
2. Use the arrow keys (< >) to select PVR, and press OK.
3. Use the arrow keys (^ v) to scroll to ‘To Record’ and press OK.
4. Use the arrow keys to highlight the recording to be edited and press ‘OK’.
5. Use the arrow keys (^ v) to select Cancel Recording or Edit Schedule.
6. Press OK.
* If you are currently viewing your recording and want to edit it, you can access the action window by
pressing the arrow key (V), and press OK.

Event Timers Tips & Tricks
Overlapping Event Timers: If you try to create event timers for overlapping programs, the receiver will
prompt you to delete or edit one of the timers. Displaying more than one event at one time
is not programmable.
Maximum Number of Event Timers:
The receiver is only able to create a limited amount of event
timers. When this limit is reached, you must edit or delete a timer to create a new one.
Locked Program:
You must enter the receiver password before you can create an automatic event
timer for a locked program. You must enter the password to view (Default password 1-2-3-4)
Power O:
If the receiver power is o at the time of a reminder or autotune event, the receiver will not
turn on. If the receiver is o during a scheduled recording, the program will still record on the PVR.
Favourites
Creating a Favourites List
1. Press MENU and use the arrow keys to scroll to Favourites,
press OK and then select Create. This will take a moment
or two for the screen to pop up.
2. To name your favourite list, press the back key to the word
“Favourites” the press OK . A full alphabet and number pad will diplay nad you can use the arrow
keys to nd the letters. Press OK to add the letters to your text box. Click “Done” when you are
nished naming your favourties list.
3. Select channels by using the arrow keys. Press OK to add the channel to your Favourites.
A little heart will appear beside the channels you have tagged as Favourites.
4. Press update by using the arrow key (>) to submit your Favourites list
How to Access your Favourites List
Accessing Favourites in the Guide section
Press GUIDE until the green tab on the top of the channel listings
reads “Favourites1”, “ Favourites2”, etc. or whatever name you have
programmed for your Favourites list.
All the channel listings under the tab that you choose will be of your
favourite channels.
12
1. Press MENU then use the arrow keys to nd Favourites
and press OK.
2. Select Choose.
3. Use the arrow keys to choose the favourite list you are looking
for and press OK.
NOTE: You can add channels to your favourites list, and not specic shows.
Accessing Favourites in Menu

Deleting a Favourites List
1. Press MENU then use the arrow keys to nd Favourites and press OK.
2. Select Delete.
3. Use the arrow keys to choose the favourite list you wish to delete.
4. Press OK to delete.
Deleting or adding a channel on a Favourites list
Removing and adding to Favourites in Menu
1. Select MENU, use the arrow keys to scroll to Favourites then select Edit.
2. Select or deselect channels by using the arrow keys.
3. Press OK to add or delete the channel to in your Favourites. A little heart will appear beside the
channels you have tagged as Favourites.
4. Press Update.
Removing and adding to Favourites in Guide:
1. Press GUIDE, and choose a channel by using the arrow keys. (Note: you will have to choose a
program, on the channel that you are adding that is not currently airing) then press OK.
2. A window will pop up and select Add to Favourites or Remove from Favourites.
3. If you are adding a channel it will prompt you to choose the favorite list you would like to
add the channel to. Use the arrow keys to complete this request.
Adding or Removing Favourites while on a channel
1. Press the OK button while you are on the selected channel.
2. Select Add to Favourites or Remove from Favourites.
3. If you are adding a channel, it will prompt you to choose the
Favourites list you would like to add the channel to. Use the
arrow keys to complete this request.
Searching
13
1. Press the MENU button on your remote.
2. Use the arrow keys to nd Search and press OK.
3. Press OK to bring up a full alphabet and number pad.
4. Use the arrow keys to select the desired letter/s and press OK.
5. Select Done.
6. Use down arrow key for Search Guide.
7. Choose whether you would like it to do an Extended Search or Quick Search.
Extended Search will search all shows up to 3 days in the future.
Quick Search will search shows that are currently on.
8. Use the arrow keys to choose the channel you would like to watch.
2.) 3.) 7.) 8.)

Parental Controls
Parental Controls allows you to determine which shows your children can watch and which shows can be
restricted to adults only. Parental Controls also allows you to temporarily disable or enable all parental
controls.
Set up Parental Controls
1. Press Menu button on the remote.
2. Arrow to Settings and press OK.
3. Enter your password and press OK. (see page16 for instructions).
4. Arrow to Preferences tab.
5. Arrow down to Parental Controls and press OK . A check mark
will indicate that parental control has been activated.
6. Arrow right (>) to Edit. Make the appropriate changes
and press OK.
Making Changes
1. Arrow down (v) to the appropriate box and press OK. Use the left or right (< >) arrow key to
make c hanges.
Program Rating
Movie Ratings
R
Restricted - (Under 17 needs parent)
NC-17
Not recommended for kids under the age of 17
AO
Adult only
X
"
XX
"
XXX
"
G
General Audiences
PG
Parental Guidance recommended
PG-13
Parental Guidance strongly recommended
TV Ratings
TVMA
Mature Audiences
TVY
Recommended for All Children
TVY7
Recommended for Children over 7
TVG
General Audience
TVPG
Parental Guidance
TV 14
Parents Cautioned
Unlock Timeout
- Can be increased in increments of 30 minutes by pressing the right
arrow key up to 270 minutes.
Block Unrated
- Press OK to block all programs that are not rated.
Show Blocked Program Info
- Press OK to be notied by a message when you attempt to watch a
blocked program.
14
Content Ratings
1. Use the arrow key (v) to scroll down to Content Rating. By pressing OK at any of these ratings, a check
mark will appear to indicate the rating has been activated.
S
– Sexual Situations
L
- Language
D
– Suggestive Dialogue
F
– Fantasy Violence
V
– Violence
When nished making changes, press Submit and exit.
Using Advanced Settings
Getting to Settings
1) Press MENU on your remote and press OK.
2) Scroll over to Settings using the arrow keys (< >)
and press OK
3) Type in your password (Default:1-2-3-4)
Changing Preferences
This is for changing the preferences that aect users, parental controls, caller ID, log in information and the
guide layout/theme.
Share Rentals
– Check this box (by highlighting box and pressing OK) if you would like all your Pay Per
View (coming soon) rentals to be shared among all users on your Set Top Box. If the rental is too mature
for younger viewers, you might not want to share that rental with their User prole (see users on page 16).
Scroll down to the bottom right corner, highlight Submit, and press OK.
Require Log in
– Check this box if you require TV users to enter their user name and password when
they start watching TV. Scroll down to the bottom right corner, highlight Submit and press OK.
Enable Caller ID
– Check this box if you would like Caller ID to appear on your TV screen every time you
receive an incoming call. (Coming Soon) Scroll down to the bottom right corner, highlight Submit and
press OK.
Channel Blocking
1) Press MENU button
2) Scroll down (^ v) to Settings, and press OK
3) Enter Current Password (Default 1-2-3-4)
4) Scroll to Preferences tab
5) Scroll to Channel Blocking, and press OK
6) Select which channels you want blocked by putting a
check mark in the desired boxes by pressing OK
7) Arrow to Done, and press OK
15

Parental Control
– (See Parental Controls on Page 14)
PPV Action
– (Pay Per View coming soon)
Program Alarm
– Choose how long your alarms will stay on your TV. If you have your Program Alarm
set to 30 seconds and a reminder that a show is on, that reminder will stay on screen for 30 seconds.
To use this function, highlight the Program Alarm box and press OK. Scroll through your options using the
arrow keys (< >). When you nd your desired Program Alarm time, press OK. Scroll down to the bottom
right corner, highlight Submit, and press OK.
Caller ID Time out
– Choose how long you would like the Caller ID to remain on the screen for when
someone calls before it times out. Scroll to that box and press OK. Scroll through options using the arrow
keys (< >) and press OK to choose. Scroll down to the bottom right corner, highlight Submit and press OK.
Theme
– You can change the color/layout theme of your guide. Quadro only oers a standard theme but
new themes may be oered in the future. When it is oered, scroll to that box and press OK. You can then
scroll through options using the arrow keys (< >) and press OK to choose. Scroll down to the bottom right
corner, highlight Submit and press OK.
Changing Hardware Settings
In the settings menu, arrow down to the bottom left corner to the
box labeled Hardware Settings.
To change any of these Hardware Settings, scroll over to the
particular box and press OK. Use the arrow keys (< >) to nd the
option you want and press OK. Scroll down to the bottom left
corner and highlight Submit and press OK.
RF Output Channel:
If you have an analog TV that is connected to the Set Top Box through a coax
cable, you must have your television set tuned to the same channel as you named in your RF Output
Channel in settings. If your RF Output Channel is 3, then your TV must be set to channel 3 in order for your
Set Top Box to work.
HDMI Comp Resolution:
This where you can change the resolution (1080i, 720p, etc.) of the picture
coming from the Set Top Box.
Frame Format:
Change your screen aspect ratio (16:9 Full, 4:3, etc.).
Audio Output:
Scrolling between Stereo and Surround Sound audio.
Audio Language:
Scroll through dierent language options.
Changing Languages
1. Go to settings menu
2. Scroll down (v) to Hardware Settings, Press OK
3. Scroll down (v) to Audio Language, Press OK
4. Scroll through list using < > to nd your language of choice
5. Press OK
6. Scroll down (v) to Submit at bottom of page and press OK
16

Add User
– You can add Users for dierent people in your house that access your TV or any other use that
requires separate settings and channels.
To add a new user:
1. Press
Menu
, select settings, and scroll over to the Users tab.
2. Scroll down with the arrow keys (^ v) to
Add
at bottom of page; press
OK
3. Scroll down with the arrow keys (^ v) to the text boxes; press OK.
4. A full letter and number keypad will appear. Use this to enter your information.
5. Scroll down with the arrow keys to
Submit
at bottom of the screen.
6. Enter your Parental Controls information (See Parental Controls on page )
Change Password
– Passwords are set so you cannot access other peoples settings/preferences. The
following is how to set your password:
1. While in the
Settings
section of the
Menu
, scroll over
to the
Users
tab.
2. Scroll down with the arrow keys (^ v < >) to the user
for editing and press
OK
.
3. Scroll down to Edit, press
OK
4. Enter your old password in the rst box with remote. (Default is 1-2-3-4)
5. Enter your new password next and then re-enter it in the box below to conrm.
6. Scroll to the bottom left corner on the screen and select
Submit
.
Change Pin
– Your Pin Code is the number you need to enter when ordering *Pay Per View events or
*Video On Demand (VOD) Programs.
The following is how to set your Pin number:
1. While in the Settings section of the Menu, scroll over to the Users tab.
2. Scroll down to the user you would like to edit and press OK.
3. Scroll down to Edit, press OK.
4. Enter your old password in the rst box with remote. (Default is 1-2-3-4)
5. Enter your new password next and then re-enter it in the box below to conrm.
7. When you are done, scroll to the bottom left corner on the screen and select Submit.
* These services are currently not available with Quadro
** If your password or pin is not working, call Quadro Communications (519-229-8933) and your password/pin will be reset.
17
Users
Dierent users can set up to their own individual
preferences, favorites, and parental settings. Parents can be one
user accessing all channels available, while children may have
only certain channels available.

User Parental Control
– You can assign certain parental control settings to specic users. To allocate
these settings to specic users, follow these steps:
1. In the Settings section of the Menu, scroll to the Users tab.
2. Scroll down to the specic user to edit.
3. Scroll down to the bottom left corner to Parental Controls and press OK.
4. Make the appropriate changes.
View Packages and Features currently being used
1. Scroll to Settings in the Menu section.
2. Scroll left with the arrow key(<) to Packages.
3. A list appears of all packages and features you are currently subscribed to.
View monthly charges
1. Scroll to Settings in the Menu section.
2. Scroll left with the arrow key (<) to Billing.
3. A list appears of the prices of all packages that you are currently subscribed to.
18
 Loading...