

Page 1
R E V.1
C O N C O U R S E Q S E R I E S
INSTRUCTION BOOKLET
MODELS Q6A & Q8A
F O R T H E C L O S E S T A P P R O A C H T O T H E O R I G I N A L S O U N D
Page 2

TA BLE OF CONTENTS
Introduction:
Safety Instructions ....................................................................... 02
Introduction ................................................................................ 02
Warnings & Disclaimers .............................................................. 02
Rigging & Suspension ................................................................. 02
Warranty & Service .................................................................... 02
Product Descriptions:
Concourse Q6A ......................................................................... 03
Concourse Q8A ......................................................................... 03
Product Features:
Front Panel ................................................................................. 03
Back Panel ................................................................................. 04
Accessories ................................................................................ 05
Installation:
Installation Instructions ................................................................. 06
Connections:
Connections & Operations ........................................................... 08
Balanced Connections ................................................................. 08
Unbalanced Connections ............................................................. 08
CE Compliance:
Statement ................................................................................... 09
Specifications ............................................................................. 10
Contact Information:
QUAD Industrial Contact Information ............................BACK COVER
SAF ETY INST RUCTIONS
Safety First!
1. Please read this manual fully before installing and operating this
product.
2. Retain a copy of this manual for future reference.
3. Comply with all warning labels and instructions.
4. Do not attempt the installation of this equipment unless you are
qualified to do so.
5. Protect your hearing from high sound pressure levels.
Rigging and Suspension
The rigging, suspension or mounting of these products can expose the
installer and members of the public to serious health risks and even death.
UNDER NO CIRCUMSTANCES ATTEMPT TO RIG, SUSPEND
OR OTHERWISE MOUNT THIS EQUIPMENT UNLESS YOU ARE
FULLY QUALIFIED AND CERTIFIED TO DO SO BY RELEVANT
LOCAL, STATE AND NATIONAL AUTHORITIES. ALL RELEVANT
SAFETY REGULATIONS MUST BE FOLLOWED. IF YOU ARE NOT
PROPERLY QUALIFIED OR DO NOT KNOW OF PERTINENT
REGULATIONS, CONSULT QUALIFIED PERSONNEL FOR ADVICE
AND ASSISTANCE.
Limited Liability
QUAD Industrial assumes no liability whatsoever for any damage or loss,
either direct or consequential arising from the installation and use of these
products. Liability is limited to replacement of product or refund, at the
QUAD Industrial’s discretion. Your rights to compensation may vary by ter
ritory; consult with your local QUAD Industrial office or distributor.
-
Warranty & Service
These products are designed to be used as specified, and are warranted to
be free from defects in materials or workmanship. Warranty terms and con
ditions vary by territory. Please contact your local QUAD Industrial sales
office or distributor for complete details. Under no circumstances should
you attempt to repair these products. Doing so may limit or void warranty
coverage.
2
-
Page 3
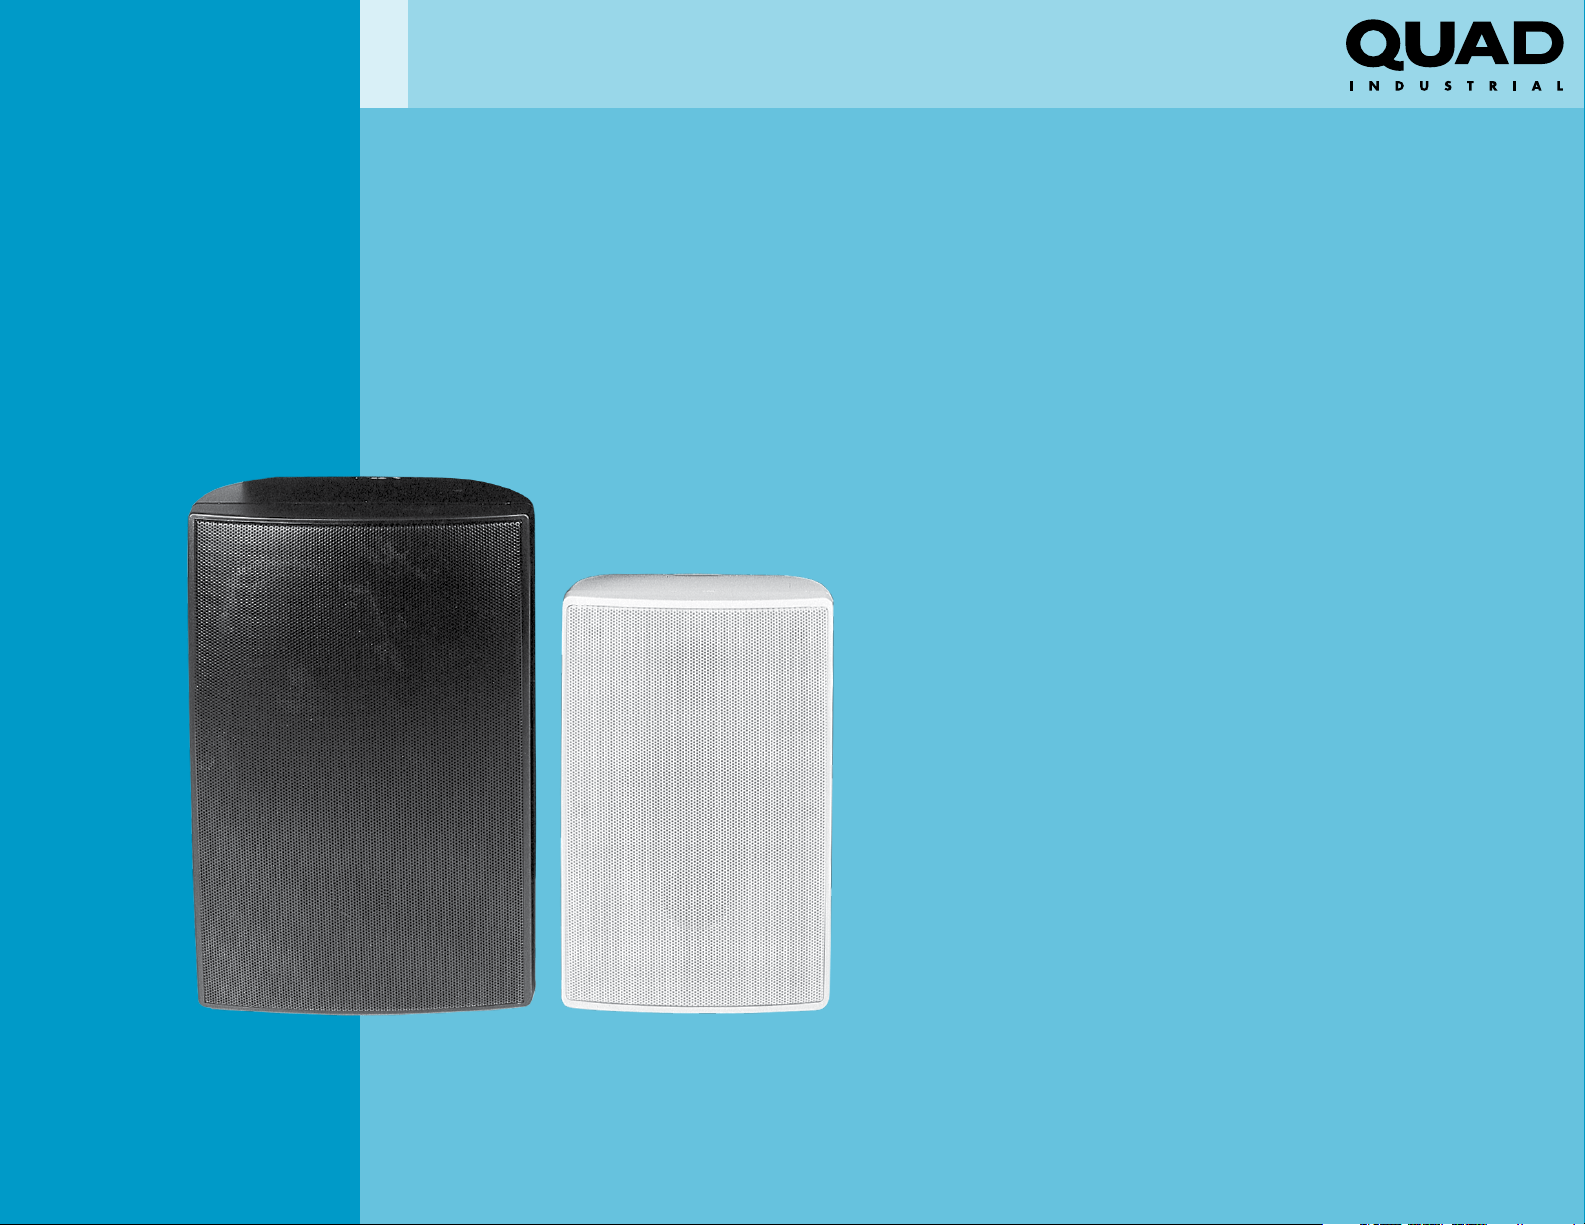
PRO DU CT D ES CR IPTION
The Concourse Q6A and Q8A are Active two-way high
performance speaker systems designed for sound reinforcement,
audio-visual and music delivery applications. They combine
quality transducers with high efficiency dedicated power amplifiers
to deliver the highest possible performance in lightweight and
durable ABS enclosures. Each model comes complete with
mounting brackets and hardware, facilitating easy installation.
Concourse Q6A
The Concourse Q6A is an active, two-way speaker system
consisting of a 6.5" low-frequency driver and a 1" dome tweeter
combined with a 50 watt, high-efficiency power amplifier. Be
aware of the position of the voltage selection switch before
connecting the power cord and be sure that the correct voltage
is selected before powering up the unit. Each unit is supplied with
a wall mounting bracket. There are two versions available:
correct voltage is selected before powering up this unit. Please
check with your QUAD Industrial sales office or local distributor to
ensure you have the correct version.
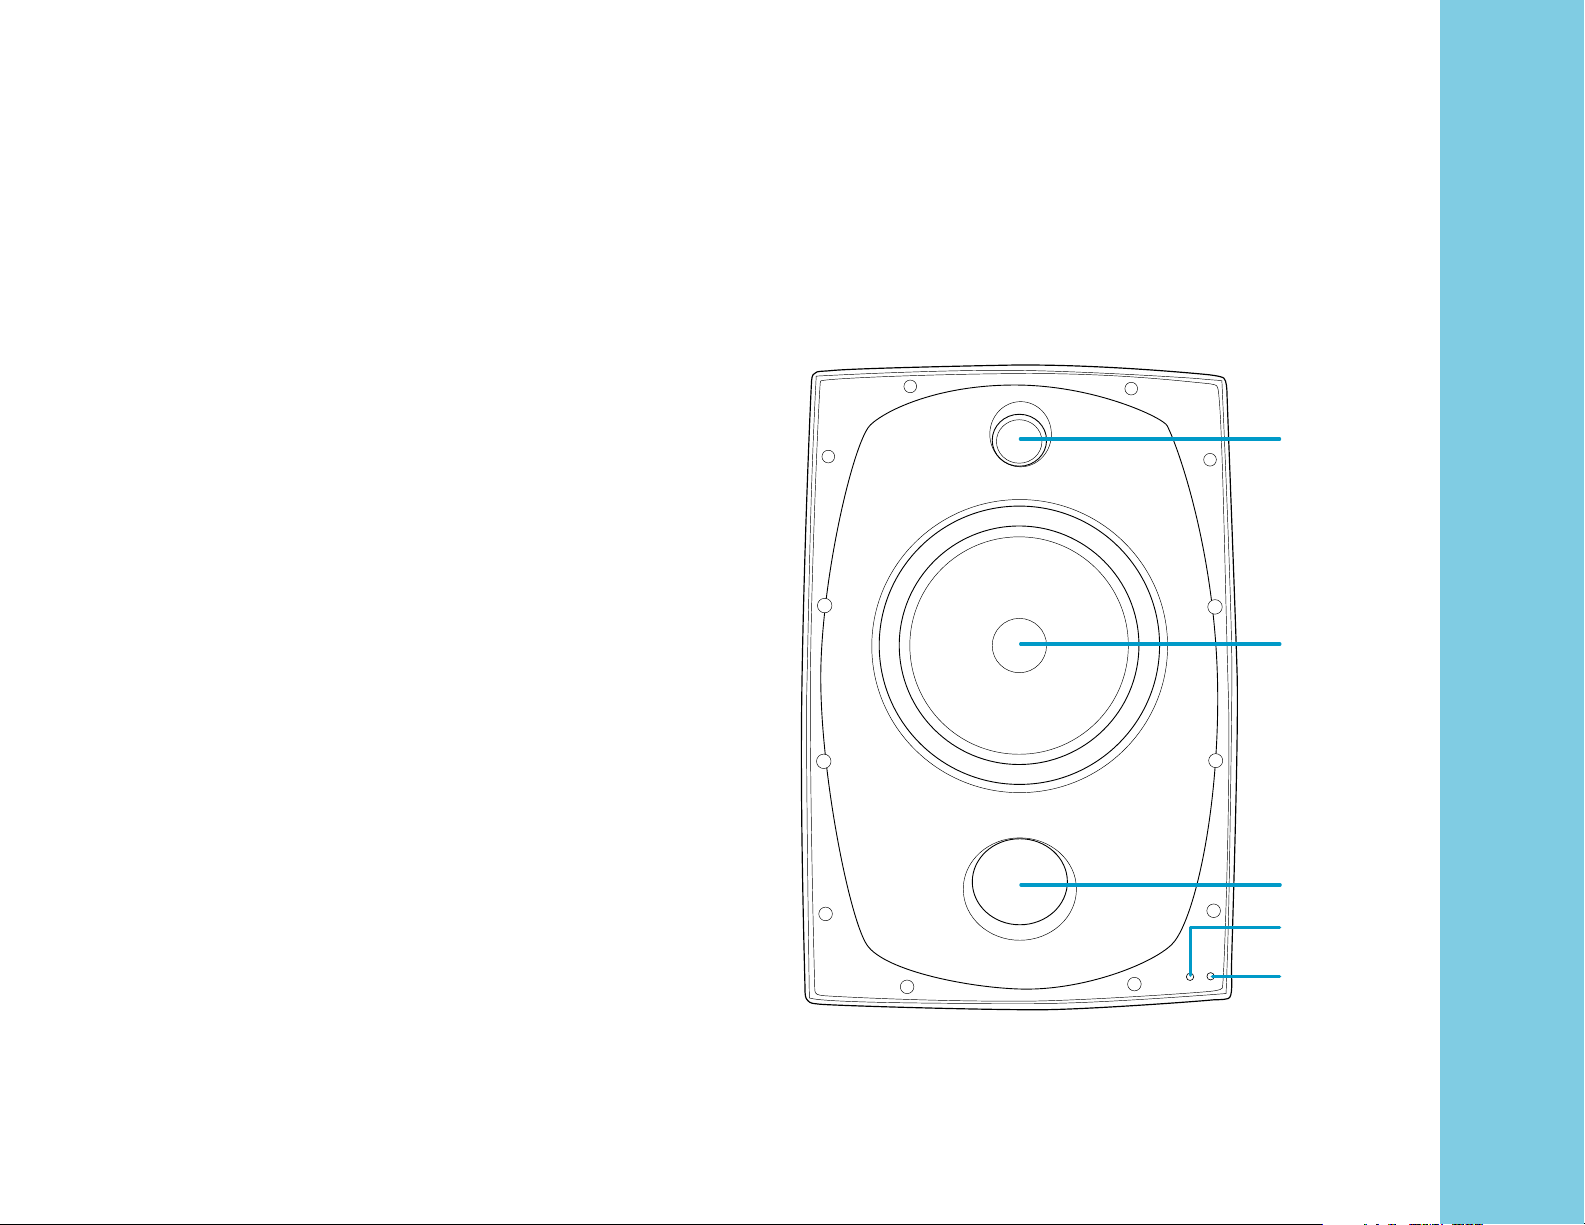
PRO DU CT F EATURES ( Q8 A sh ow n)
The Q6A and Q8A are fitted with a removable metal grille
finished with an opaque cloth backing. Two LEDs in the lower
right front of the cabinet indicate power status (Green) and
Amplifier Clip (Yellow).
Soft Dome
HF Driver
• Concourse Q6AW –
• Concourse Q6AG –
White color
Gray color
Concourse Q8A
The Concourse Q6A is an active two-way speaker system consisting of an 8" low frequency driver and a 1" dome tweeter combined with a 50 watt high-efficiency power amplifier. Each unit
is supplied with a wall mounting bracket. There are two versions
available:
• Concourse Q8AW –
• Concourse Q8AG –
NOTE: Power cords supplied with Q6A and Q8A models vary
by country of sale. Be aware of the position of the voltage selection switch before connecting the power cord and be sure that the
White color
Gray color
LF Cone
Driver
Bass Port
Yellow Clip LED
Green Power
LED
3
Page 4
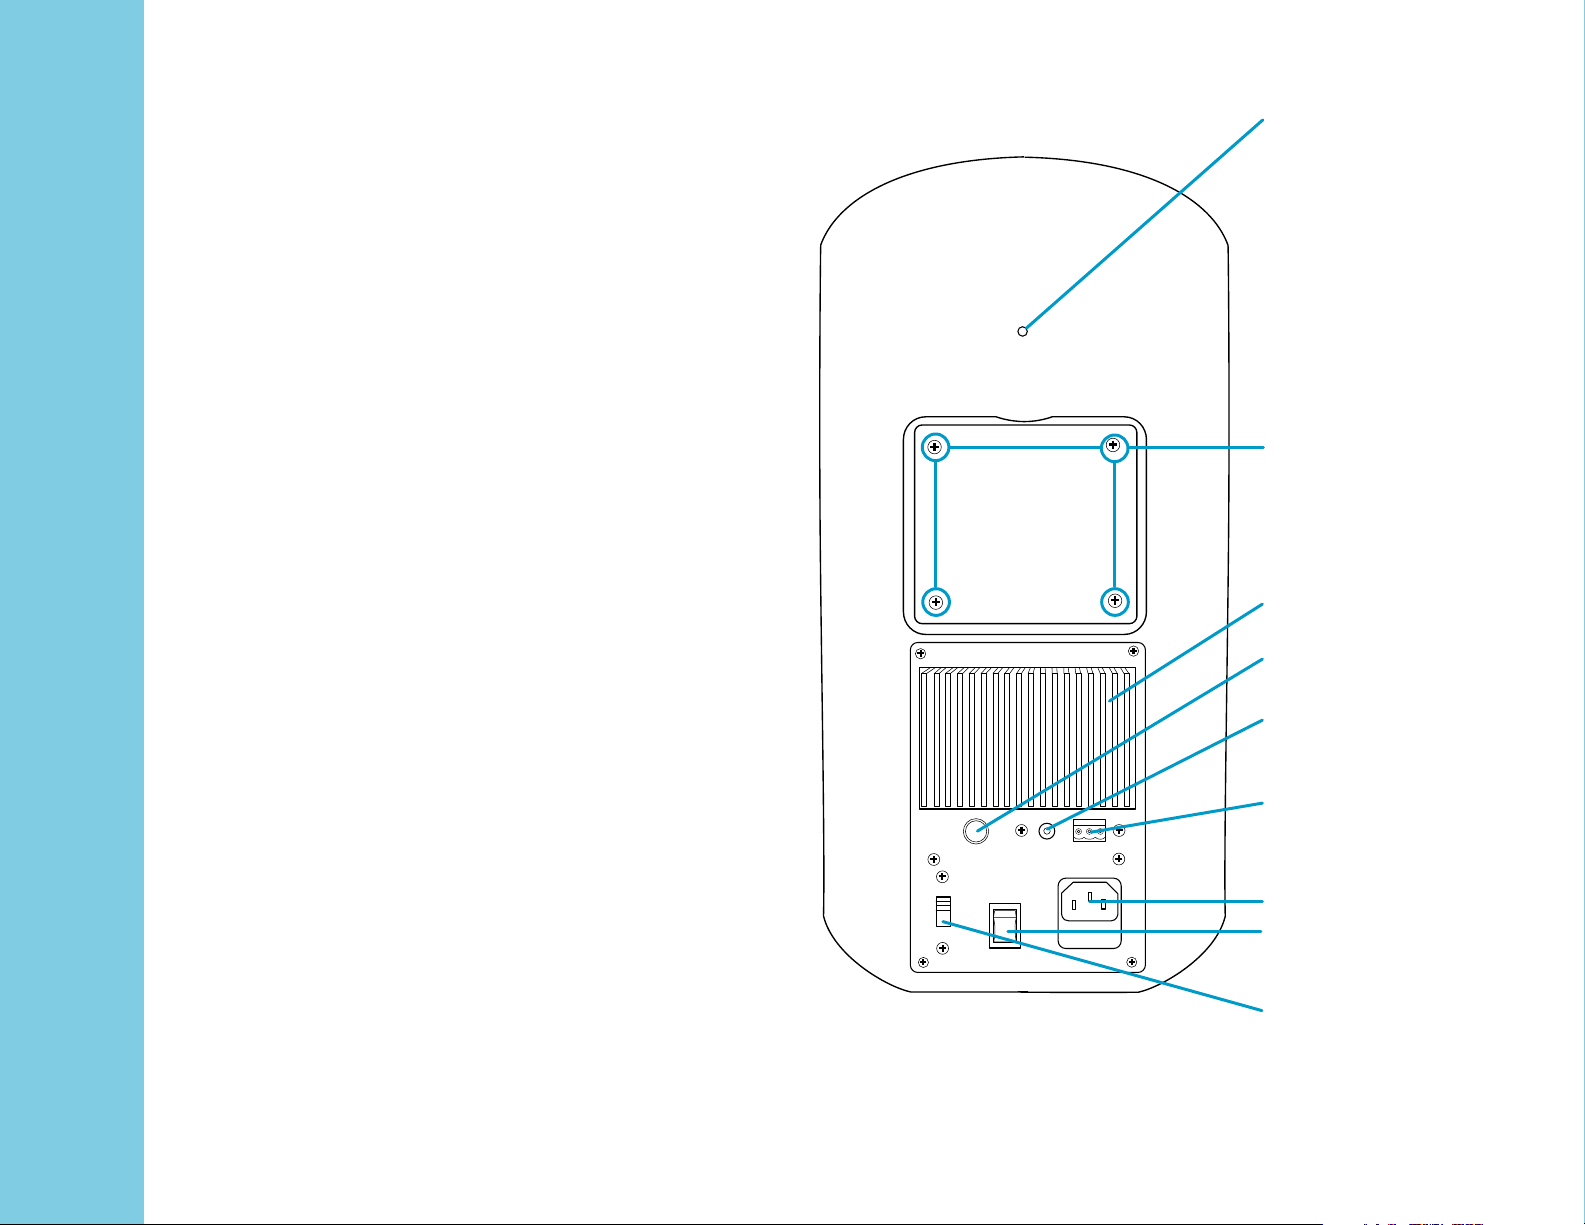
Q6A and Q8A models include a switchable voltage power supply that accepts either 110-120VAC or 220-240VAC line power.
Selection is made through the two-position Voltage Select Switch
on the rear panel. In addition there is an IEC AC Input socket and
two position rocker Power Switch.
Both models are fitted with a 50 watt high efficiency power
amplifier with external heatsink. Ensure that the heatsink is not
obstructed and that adequate airflow can circulate around it to
ensure safe and reliable operation.
The amplifier accepts either balanced or unbalanced signals,
through a detachable Phoenix-style connector or a single RCA
connector. Nominal sensitivity of the Balanced input is +4dBu
and -10dBu for the unbalanced input. A rotary Gain Control is
provided to attenuate the volume.
Both models are fitted with 4 threaded inserts on the rear for
attaching the supplied mounting bracket. Access to the mounting
points is gained by removing the four screws and the blank cover
plate. There is also a threaded insert for attachment of a seismic
restraint tether.
Seismic Restraint
Point
Bracket Mounting
Points
Amplifier Heatsink
Gain Control
Unbalanced
Line Input
Balanced Line
Input
AC Input
Power Switch
Voltage Select
Switch Switch
4
Page 5

A complete installation kit designed to work with the supplied
mounting brackets is included with each model and consists of:
1. Seismic restraint tethers (2)
2. Bracket mounting screws (8)
3. Lock washers (2)
4. Nylon locking nuts (2)
5. Friction pads (2)
6. Rubber guards (2)
Please ensure that you are familiar with all of
the parts and how they are assembled before
the installation.
1
2
6
3
5
4
5
Page 6

INS TALLAT IO N
Step 1 – Install bracket A to wall using suitable fasteners.
Step 1a – Remove four screws holding cover plate (2) on rear
of speaker.
Step 1b – Mount the bracket with the threaded bolt to the
cabinet using the four screws removed in step 1 (4).
Step 2 – Place the rubber friction washer over the bolt.
Step 3 – When the speaker is ready for installation, insert the
bolt in the wall plate bracket from below.
STEP 1b
Step 4 – Place the dome cover over the bolt.
Step 5 – Place the lock washer and hex nut on the bolt. Tighten
gently, aim the speaker as needed and tighten firmly.
Step 6 – Ensure that seismic restraint cable is firmly attached
to both the loudspeaker and an anchor point on the mounting
surface.
STEP 1
STEP 2
STEP 3
( BRACKET A )
6
Page 7

STEP 4
STEP 5
FINISH
STEP 6
7
Page 8

CON NE CT IO NS & OPERATIO N
CAUTION: Before connecting this unit to the AC power supply
please ensure that the Voltage Selector Switch is set correctly for
the voltage in your region and that you are using a suitable
power cable.
The Q6A and Q8A may be connected to either a balanced audio
system or an unbalanced source. Typically, balanced connections
are preferred. Balanced connections are less likely to respond to
radio frequency interference or cross-talk from other sources, and
allow for longer cable runs. Unbalanced connections are acceptable only where the mixer does not offer balanced outputs and
where the cable runs are less than 5m/15’.
Determine where the speakers will be placed and ensure that there
is AC power available nearby. In instances where there is no local
power outlet you may need to provide an extension cable. Ensure
that all local and national electrical codes are observed and that
the power cable used is properly rated. If in doubt consult with a
certified electrician or electrical engineer.
BAL AN CE D CO NN ECTIONS
Balanced connections require a quality, two-conductor shielded
cable. Balanced connections require one conductor for the positive
(+) signal and one conductor for the negative (-) signal, a third
conductor (shield) to create a direct connection to ground (Earth).
However this configuration will present the signal source with a
lower impedance than it would typically drive and may cause
added distortion or even damage to the source outputs. The
recommended method for connection of multiple Q6A and Q8A
active loudspeakers to one source output is through use of a
suitable active distribution amplifier or passive splitter.
UNB AL AN CE D CO NNECTIONS
For unbalanced operation connect the mixer or preamplifier
directly to the RCA input by means of a standard unbalanced
RCA cable. Unbalanced connections employ one conductor to
pass the audio signal and a second conductor to act as both audio common and shield. Unbalanced connections are susceptible
to radio frequency interference and electromagnetic interference
which may cause the speaker to hum, buzz or even rebroadcast
audio signals. For this reason, observe the following guidelines
when making unbalanced connections:
• Don’t use cables longer than 5m (15')
• Avoid running cables near electric motors, appliances,
television sets or other sources of electromagnetic
interference
• Ensure that the speakers and mixer, or preamplifier, are
all connected to the same AC power circuit to prevent
possible ground loops
Remove the detachable connector plug supplied with the speaker.
Prepare the cable by stripping each conductors’ insulation 6mm
(¼"). Insert each conductor into the appropriate position, noting
polarity and tighten the corresponding screw firmly. Once all wires
have been terminated inspect the connector plug to ensure that
there are no stray wire strands that could cause a short-circuit.
Balanced lines may be extended in parallel between speakers,
allowing several speakers to be driven from one mixer output.
8
OPE RATION
Ensure that the power switch is in the OFF position before
connecting the power cable to the AC Input socket. Connect the
cable to a nearby AC Mains outlet and the then plug in the audio
input cable. Rotate the volume control counter-clockwise to the
minimum setting before switching the power on. Start the program
source and set the preamplifier or mixer gain to a nominal level.
Page 9

Then, slowly increase the speaker’s level by turning the Volume
control counter-clockwise until the sound level is adequate for
the application.
TRO UB LE SH OO TI NG
NOTE: The Concourse Q6A and Q8A are not user-serviceable,
and no attempt should be made to repair or modify the electronics
in the field. Refer all service and repair to the nearest authorized
QUAD Industrial service center or directly to the QUAD Industrial
distributors sales office in your region.
In the event that the speaker does not power up, first check the
power outlet and the power cable. If power is present at the outlet,
REMOVE THE POWER CABLE FROM THE SPEAKER and check
the internal fuse that is mounted inside of the IEC receptacle on
the rear panel of the speaker. Use a small screwdriver to gently
remove the fuse holder and test the continuity of the fuse. Replace
the fuse with only the exact model and value printed on the rear
panel based on the voltage at which the speaker is set. Connect
the AC supply and switch on the speaker.
COM PL IA NC E
This product is in compliance with CE directives and bears the CE
mark. For detailed information on specific directives please contact
your local QUAD Industrial sales office or distributor.
9
Page 10

SPE CI FI CATIONS
Power Amplifier Q6A Q8A QSUB QSUBA
Watts RMS: 50W 50W 2x125W/2x 250W/2x500W Amp Power: 300W
AC Power: Switchable 110-120 Switchable 110-120 N/A 110-120
220-240 220-240 Two versions
Frequency Response: 50Hz−20kHz 50Hz−20kHz 35Hz−420kHz 35Hz−250kHz
(-10dB)
Frequency Response: 70Hz−17kHz 80Hz−16kHz 42Hz−350kHz 38Hz−225kHz
(+/-3dB)
Sensitivity (@2.83V): 85dB 86dB 82dB Max Power Output:
Max SPL: 102dB 103dB 106dB 105dB Measured @ 1m
(250mv)
Coverage (H x V): 150˚ x 170˚ 130˚ x 170˚ N/A N/A
Directivity (DI) (H x V): 6.3 6.54 N/A N/A
Impedance: N/A N/A Left 8Ω/Right 8Ω N/A
Regulatory Approvals: CE CE CE CE
(9UL, CE)
10
Transducers:
LF Driver Size 6.5" Cone 8" Cone 10" Long Throw 10" Long Throw
HF Driver Size 1" Soft Dome 1" Soft Dome N/A N/A
Crossover Frequency: 2.2kHz 2.0kHz 150Hz 80, 100, 150, 200
Enclosure Material: Plastic (ABS) Plastic (ABS) Wood (MDF) Wood (MDF)
Connector Type: Screw Terminal Screw Terminal 2 x Terminal Strip Parallel & Line Input
Dimensions: 245 x 216 x 370mm 270 x 234 x 405mm 585 x 372 x 316mm 585 x 372 x 316mm
(H x W x D) 9.6" x 8.5" x 14.6" 10.6" x 9.2" x 15.8" 23" x 14.6" x 12.4" 23" x 14.6" x 12.4"
Net Weight: 4.6kg 5.2kg 14.2kg 15.7kg
10.12lbs. 11.4lbs. 31.24lbs. 34.54lbs.
Page 11

11
Page 12

U S A C O N T A C T :
p h + 8 7 7 . 4 4 0 . 0 8 8 8
p h + 4 2 5 . 8 6 1 . 3 9 0 9
f x + 4 2 5 . 8 6 1 . 3 9 0 6
U K C O N T A C T :
p h + 0 8 4 5 4 5 8 0 0 1 1
p h + 4 4 ( 0 ) 1 4 8 0 4 4 7 7 0 0
f x + 4 4 ( 0 ) 1 4 8 0 4 3 1 7 6 7
O U T S I D E U S A & U K :
p h + 8 6 ( 0 7 5 5 ) 8 2 0 9 6 6 3 9
R E V.1
f x + 8 6 ( 0 7 5 5 ) 8 2 0 9 0 2 0 3
W E B :
w w w . q u a d i n d u s t r i a l . c o m
F O R T H E C L O S E S T A P P R O A C H T O T H E O R I G I N A L S O U N D
© 2006 QUA D In dus tria l. Q UAD In dust rial is a m embe r of th e In tern atio nal Aud io G roup. IAG Amer ica Inc . 84 40 1 54t h Av enue N E · Redm ond , WA 98052
 Loading...