


Technical Note TN9
9th October 2008
F80 Disassembly
This document shows the steps required to dismantle the Meridian F80 into its main component assemblies.
1. Remove the rear grille by easing it out
at the bottom corner.
2. Remove the front grille in a similar
fashion.
3. Remove these four screws from the
front half of the coloured-trim.

.
Page 2/7
4. Remove these five screws from the
rear half of the coloured-trim.
5. Working carefully from one end, ease
the two halves of the coloured-trim from
the shell.
6. Remove the internal aeriel (antenna)
from the shell.

.
Page 3/7
7. Turn the unit over and remove these
four screws.
8. Slowly ease the top and bottom
sections apart. Start on this side and
then move to the other side to release
the sections. Care should be taken not
to damage the display-loom located on
the front of unit.
9. Once the two sections have been
eased apart, release the display loom
from the main board.
.
Page 4/7
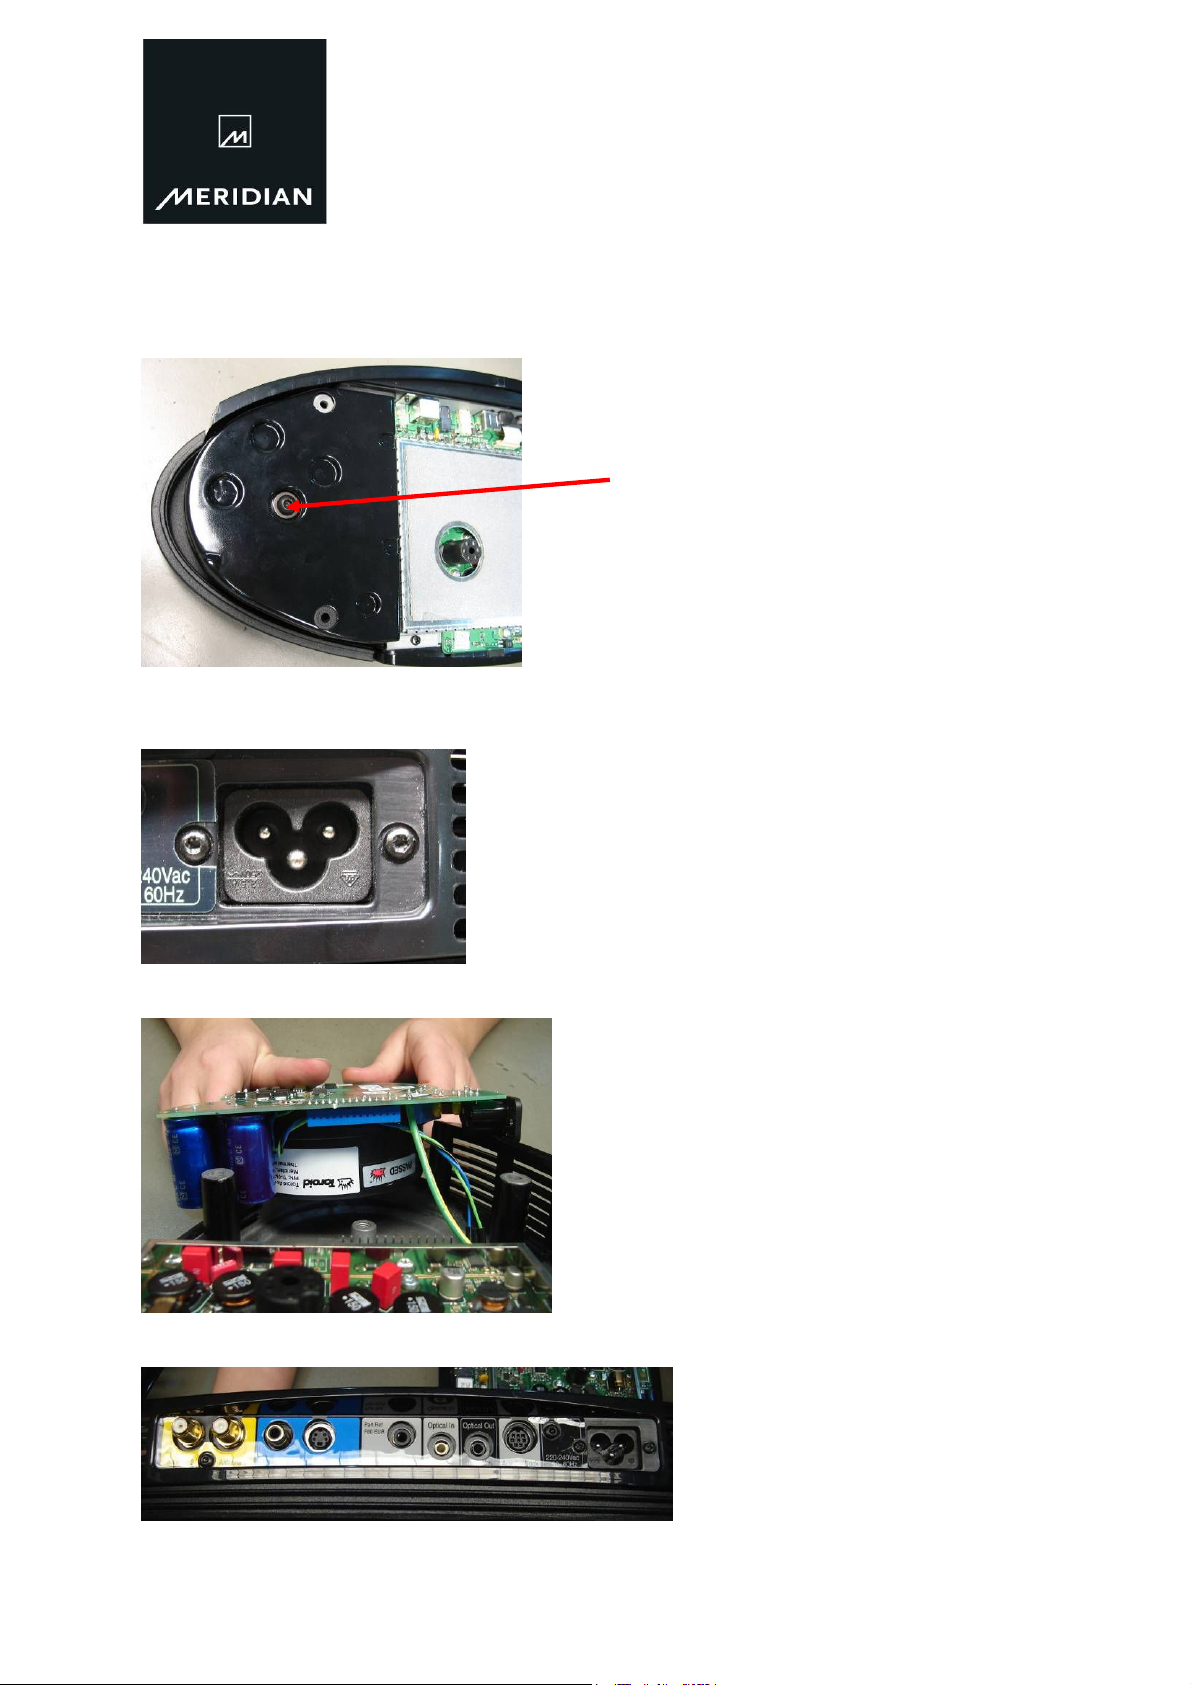
10. Remove the bolt which holds the
transformer in place.
11. Remove the two screws that hold
the mains socket into back panel.
12. Carefully ease the transformer out of
the chassis
13. Remove the other screws from the
rear trim.
.
Page 5/7
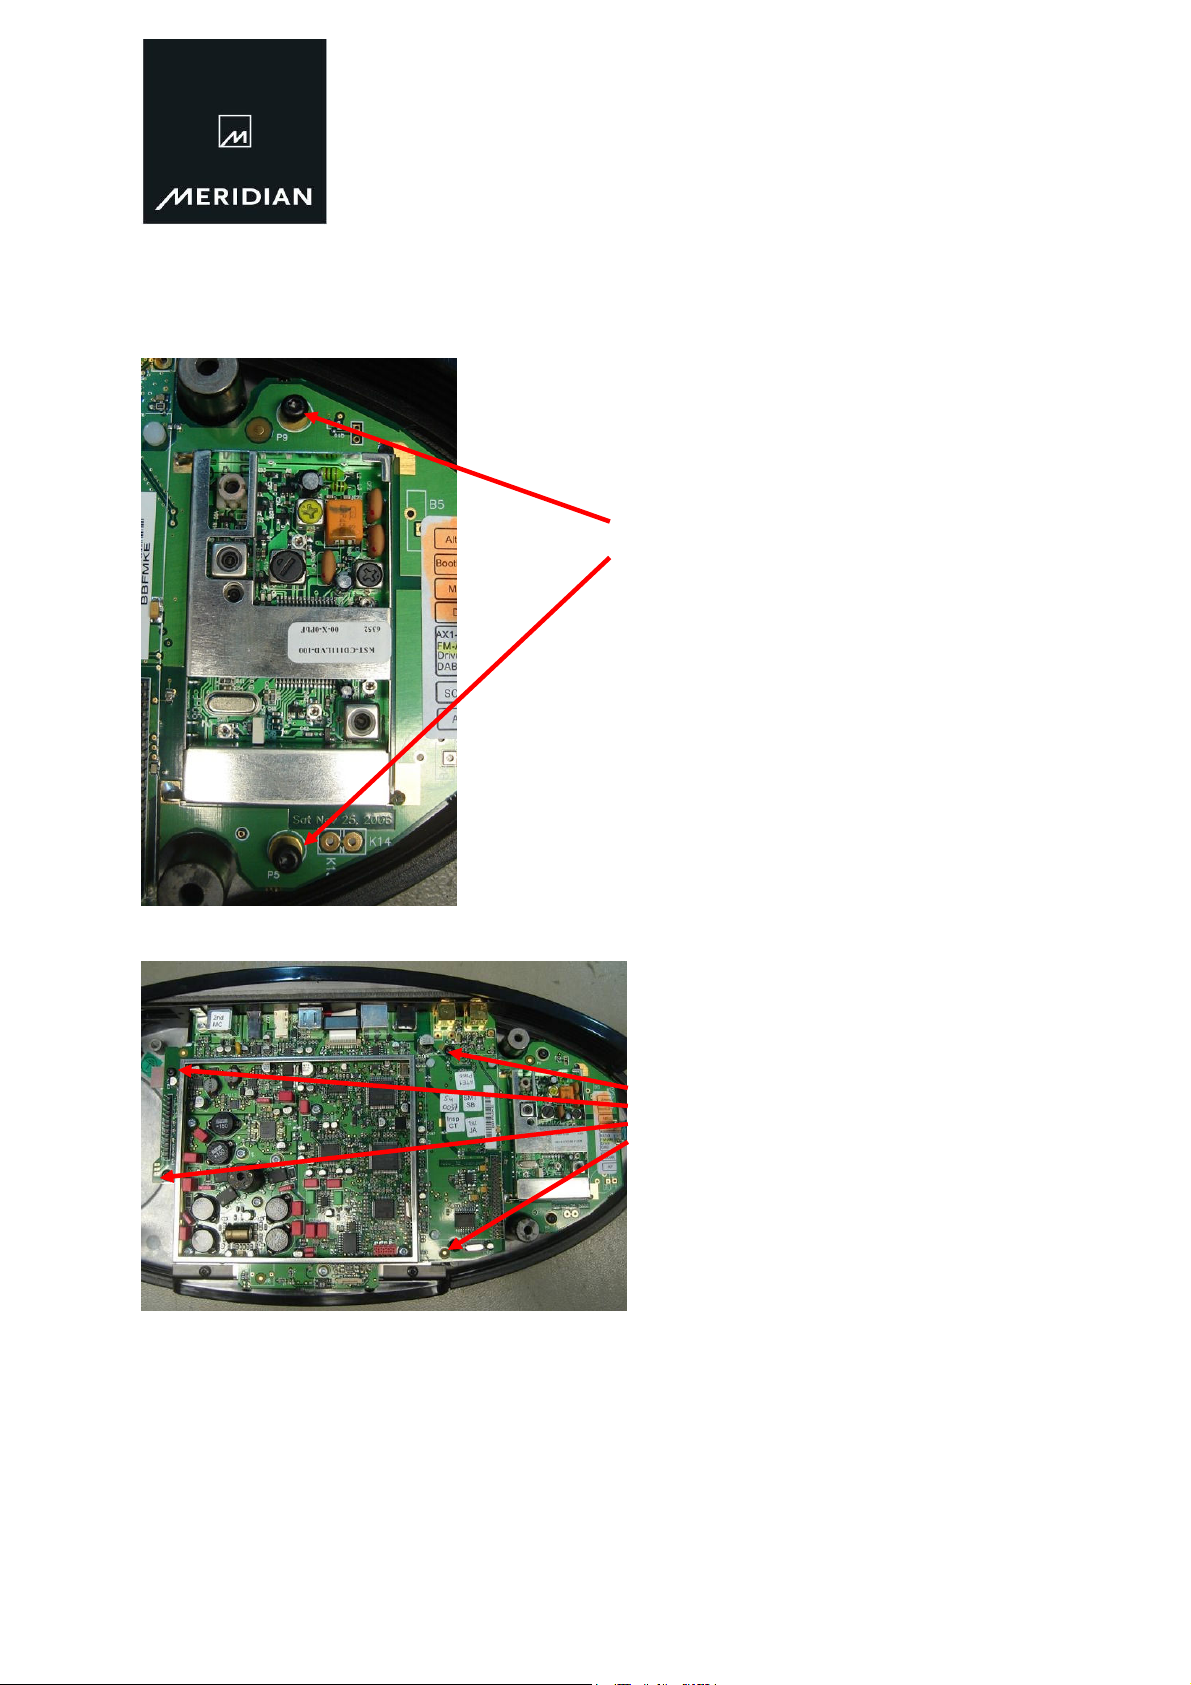
14. Remove these two screws from the
main PCB.
15. Remove these four screws from the
main PCB

.
Page 6/7
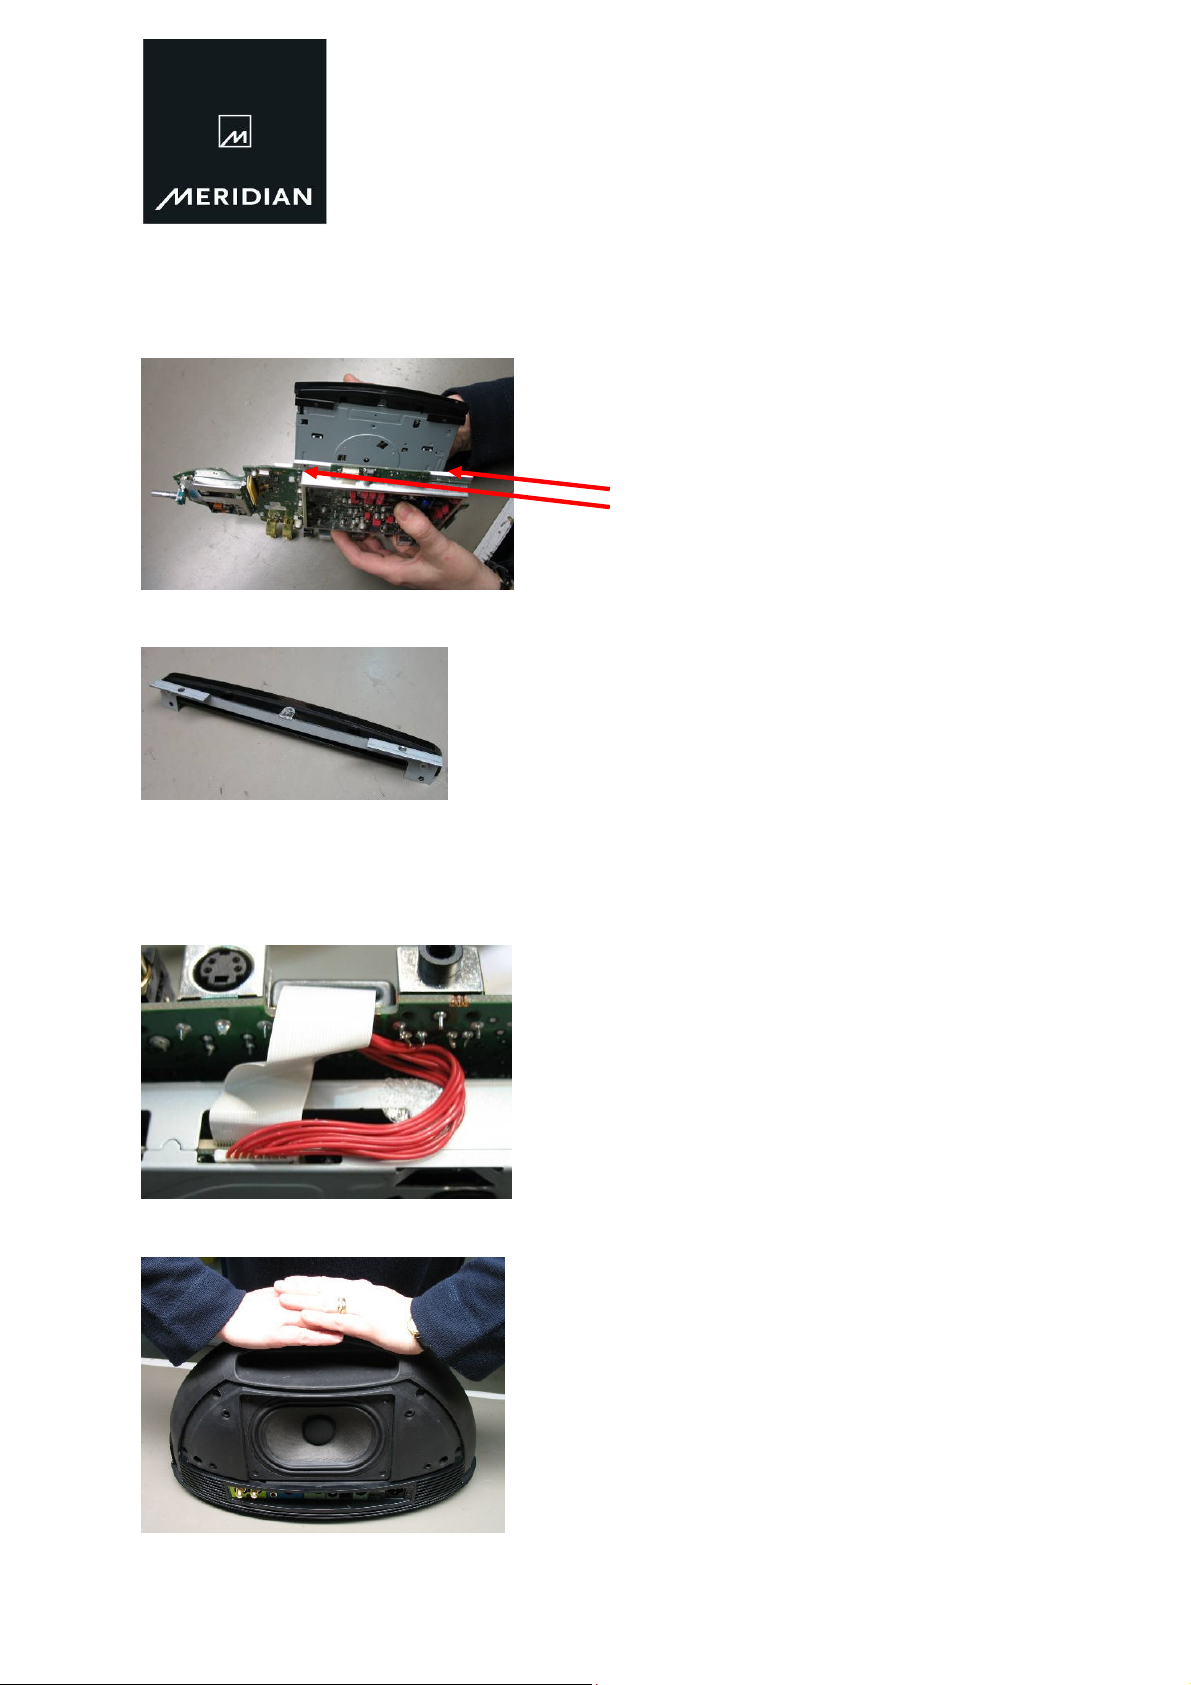
16. The whole main PCB and ROMdrive can now be lifted out of the
chassis.
Please note: The 15V regulator is still
attached to the chassis.
17. Working carefully, remove the
flexible loom from the ROM-drive.
18. Remove this red loom.
.
Page 7/7
19. Remove these two screws which
hold the ROM-drive to the electronics
assembly.
20. Remove the front trim
Reassembly tips
1. When reassembling, ensure that
these two looms are seated correctly so
that they do not foul on the chassis.
2. Align the top-cover so that it does not
foul on the front or back trims. Push topsection down to correct position.
 Loading...