

Page 1

®
A U D I O
MXa Series
▲
MX 1000a
▲
MX 1500a
▲
MX 2000a
▲
MX 3000a
Owner’s
Manual
*TD-000026-00*
Rev. B
1
Page 2
MXa Series Power Amplifier
Operation Manual
TABLE OF CONTENTS
I. WARNING NOTICES................................................. 3
Speaker Damage ....................................................... 3
Speaker Output Shock Hazard .................................. 3
Rack Mounting Precaution ......................................... 3
II. OVERALL DESCRIPTION ........................................ 4
III. INPUTS ...................................................................... 5
MX 1000a................................................................... 5
MX 1500a................................................................... 5
MX 2000a................................................................... 5
MX 3000a................................................................... 5
EXPLANATION OF
GRAPHICAL SYMBOLS
The lightning flash with arrowhead symbol, within an
equilateral triangle, is intended to alert the user to the
presence of uninsulated “dangerous voltage” within the
product’s enclosure that may be of sufficient magnitude
to constitute a risk of electric shock to humans.
The exclamation point within an equilateral triangle is
intended to alert the users to the presence of important
operating and maintenance (servicing) instructions in
the literature accompanying the product.
IV. OUTPUTS .................................................................. 6
Controls and Displays ................................................ 6
AC Power ................................................................... 6
V. OPERATIONS ........................................................... 6
Troubleshooting ......................................................... 7
Specifications ............................................................. 8
Open Input Architecture
™
Level One.......................... 9
Parallel, Stereo, or Bridged Operation ..................... 10
Instructions for Bridged Operation ........................... 10
VI. LONG-TERM OUTPUT POWER ............................. 11
AC Current Consumption ......................................... 11
Heat Emissions ........................................................ 12
Protection Circuits .................................................... 12
VII. WARRANTY AND DISCLAIMERS.......................... 13
Disclaimer ................................................................ 13
Product Warranty ..................................................... 13
VIII. TECHNICAL ASSISTANCE AND SERVICE........... 13
Technical Assistance ............................................... 13
Factory Service ........................................................ 13
Qualified Service Centers ........................................ 14
International Servicing.............................................. 14
IX. QSC ONLINE........................................................... 14
EXPLICATION DES
SYMBOLES GRAPHIQUES
Le symbole éclair avec point de flèche à l’intrérieur d’un
triangle équilatéral est utilisé pour alerter l’utilisateur
de la presence à l’intérieur du coffret de “voltage
dangereux” non isolé d’ampleur suffisante pour
constituer un risque d’elétrocution.
Le point d’exclamation à l’intérieur d’un triangle
équilatéral est employé pour alerter les utilisateurs de
la présence d’instructions importantes pour le
fonctionnement et l’entretien (service) dans le livret
d’instruction accompagnant l’appareil.
ERKLÄRUNG DER GRAPHISCHEN
SYMBOLE
Der Blitz nach unten zeigendem Pfeil in einem
gleichseitigen Dreieck weist den Benutzer auf das
Vorhandensein einer unisolierten, ”gefährlichen
Spannung“ im Gehäuse hin, die stark sein kann, einer
Person einen elektrischen Schlag zu versetzen.
Das Ausrufzeichen in einem gleichseitigen Dreieck weist
den Benutzer auf wichtige Betriebs- und Wartungsvorschriften in den beiliegenden Unterlagen des Gerätes
hin.
X. IMPORTANT ADDRESS AND TELEPHONE
INFORMATION........................................................ 15
2
Page 3
CAUTION
RISK OF ELECTRIC SHOCK
DO NOT OPEN
I. WARNING NOTICES
SPEAKER DAMAGE
CAUTION: To reduce the rish of electric shock, do not remove
the cover. No user-serviceable parts inside. Refer servicing to
qualified service personnel.
WARNING: To prevent fire or electric shock, do not expose this
equipment to rain or moisture.
AVIS
RISQUE DE CHOC
ÉLECTRIQUE
NE PAS OUVRIR
ATTENTION: Pour eviter les risques de choc électrique, ne pas
enlever le courvercle. Aucun entretien de pièces intérieures
par l’usager. Confier l’entretien au personnel qualifié.
AVIS: Pour eviter les risques d’incendie ou d’électrocution,
n’exposez pas cet article à la pluie ou a l’humidité.
VORSICHT
GEFAHR EINES
ELEKTRISCHEN SCHLAGES.
NICHT ÖFFNEN!
VORSICHT: Um das Risiko eines elektrischen Schlages zu
vermindern, Abdeckung nicht entfernen! Keine Benutzer
Wartungsteile im Innern. Wartung nur durch qualifiertes
Wartungspersonal.
WARNUNG: Zur vermeidung von Feuer oder elektrischen
Schlägen, das Gerät nicht mit Regen oder Feuchtigkeit in
Berührung bringen!
The MXa Series amplifiers are among the most powerful
professional amplifiers available and is capable of producing much more power than many loudspeakers can
handle. It is the user’s responsibility to use suitable
speakers with the amplifier and to use them in a sensible
way that will not cause damage.
QSC will not be responsible for blown speakers. Consult
the speaker manufacturer for power-handling recommendations.
Either channel of the MX 3000a amplifier has special cliplimiting protection circuitry that reduces the signal level at
the onset of heavy clipping. This not only allows the
amplifier to operate at a high average power level without
audible distortion occurring, but it also prevents the
speakers’ being destroyed by excessive clipping. However, if the amplifier is operating normally and your
speakers fail anyway, it is virtually certain that they could
not handle the high power, despite the lack of clipping.
Even if you reduce the gain using the amplifier’s front
panel attenuator controls, it is still possible to reach full
output power if the input signal level is high enough.
A single high-power crescendo can blow high-frequency
drivers almost instantaneously, while low-frequency drivers can usually withstand very high, continuous power
levels for a few seconds before they fail. Reduce power
immediately if you hear any speaker “bottoming out”—
harsh pops or cracking distortion that indicate that the
speaker voice coil or diaphragm is striking the magnet
assembly.
QSC recommends that you use amplifiers of this power
range for more headroom (cleaner sound) rather than for
increased volume.
SAFEGUARDS
Electrical energy can perform many useful functions. This unit has
been engineered and manufactured to assure your personal safety.
Improper use can result in potential electrical shock or fire hazards.
In order not to defeat the safeguards, observe the following instructions for its installation, use and servicing.
PRECAUTIONS
L’énergie électrique peut remplir de nombreuses fonctions utiles.
Cet appariel a été conçu et réalisé pour assurer une sécurité
personnelle entiére. Une utilisation impropre peut entraîner des
risques d’électrocution ou d’incendie. Dans le but de ne pas rendre
inutiles les mesures de sécurité, bien observer les instructions
suivantes pour l’installation, l’utilisation et l’entretien de l’appareil.
SPEAKER OUTPUT SHOCK HAZARD
An MXa amplifier is capable of producing hazardous
output voltages. To avoid electrical shock, do not touch
any exposed speaker wiring while the amplifier is operating.
RACK MOUNTING PRECAUTIONS
In portable racks, to avoid damage to either the amplifier
mounting ears or the mounting rails, support the amplifier
at all four corners. Contact the QSC Customer Service
Department to order rear support brackets.
3
Page 4
II. OVERALL DESCRIPTION
The MXa Series from QSC comprises four high-efficiency professional power amplifier models, each with
two independent channels. The MX 1000a, MX 1500a,
and MX 2000a, can deliver, respectively, 275, 400, and
475 watts into 8-ohm loads, and 400, 600, and 725 watts
into 4-ohm loads
Either channel of the MX 3000a is capable of delivering
850 watts into 8-ohm loads, 1300 watts into 4-ohm loads,
or more than 1600 watts into 2 ohms.
Each channel has its own transformer secondary (MX
1000a and MX 1500a) or power transformer (MX 2000a
and MX 3000a) and bipolar multi-rail power supply. The
power transformers are mounted in the front of the
amplifier chassis, as close to the front mounting rails as
possible; this keeps the unit’s center of gravity forward to
minimize the twisting force on the front mounting ears.
Still, the amplifier should be supported at all four corners,
especially if it is in a portable rack such as in touring or
mobile applications.
The MX 1000a and MX 1500a are both two rack spaces
high and weigh 19 kg (42 lb). The MX 2000a and MX
3000a occupy three rack spaces. The MX 2000a weighs
24.5 kg (54 lb), and the MX 3000a weighs 31 kg (69 lb).
The amplifiers require a rack depth of 18 inches (45.7 cm)
to clear the rear support ears. Allow some additional
clearance for input and output connectors at the rear
panel, which is 16.9 inches (42.9 cm) behind the plane of
the front mounting rails. The built-in cooling fan draws air
in at the rear of the chassis and exhausts it through vents
in the front panel. The flow-through cooling scheme
allows you to rack-mount the amplifiers one atop the
other, with no clearance necessary in between. This
mounting technique also helps support the weight of the
upper amplifiers.
The MXa Series derives much of its design from our highend EX Series amplifiers. They are engineered for stability and exceptional reliability, with protection for open or
short circuits and mismatched loads. To protect your
loudspeakers, the outputs mute during turn-on and turnoff, and also in the event of a DC fault. All protection
circuitry automatically resets to normal when conditions
assure safe operation.
The amplifiers feature thermal protection. The MX 3000a
features a variable-speed fan, which responds continuously to the cooling needs to minimize noise and dust
build-up, and a thermal limiter that reduces gain up to 15
dB if the amplifier overheats above 80˚ C. The other
models have a two-speed fan. If an MXa amplifier overheats to 85˚ C or higher, a protection circuit mutes the
output.
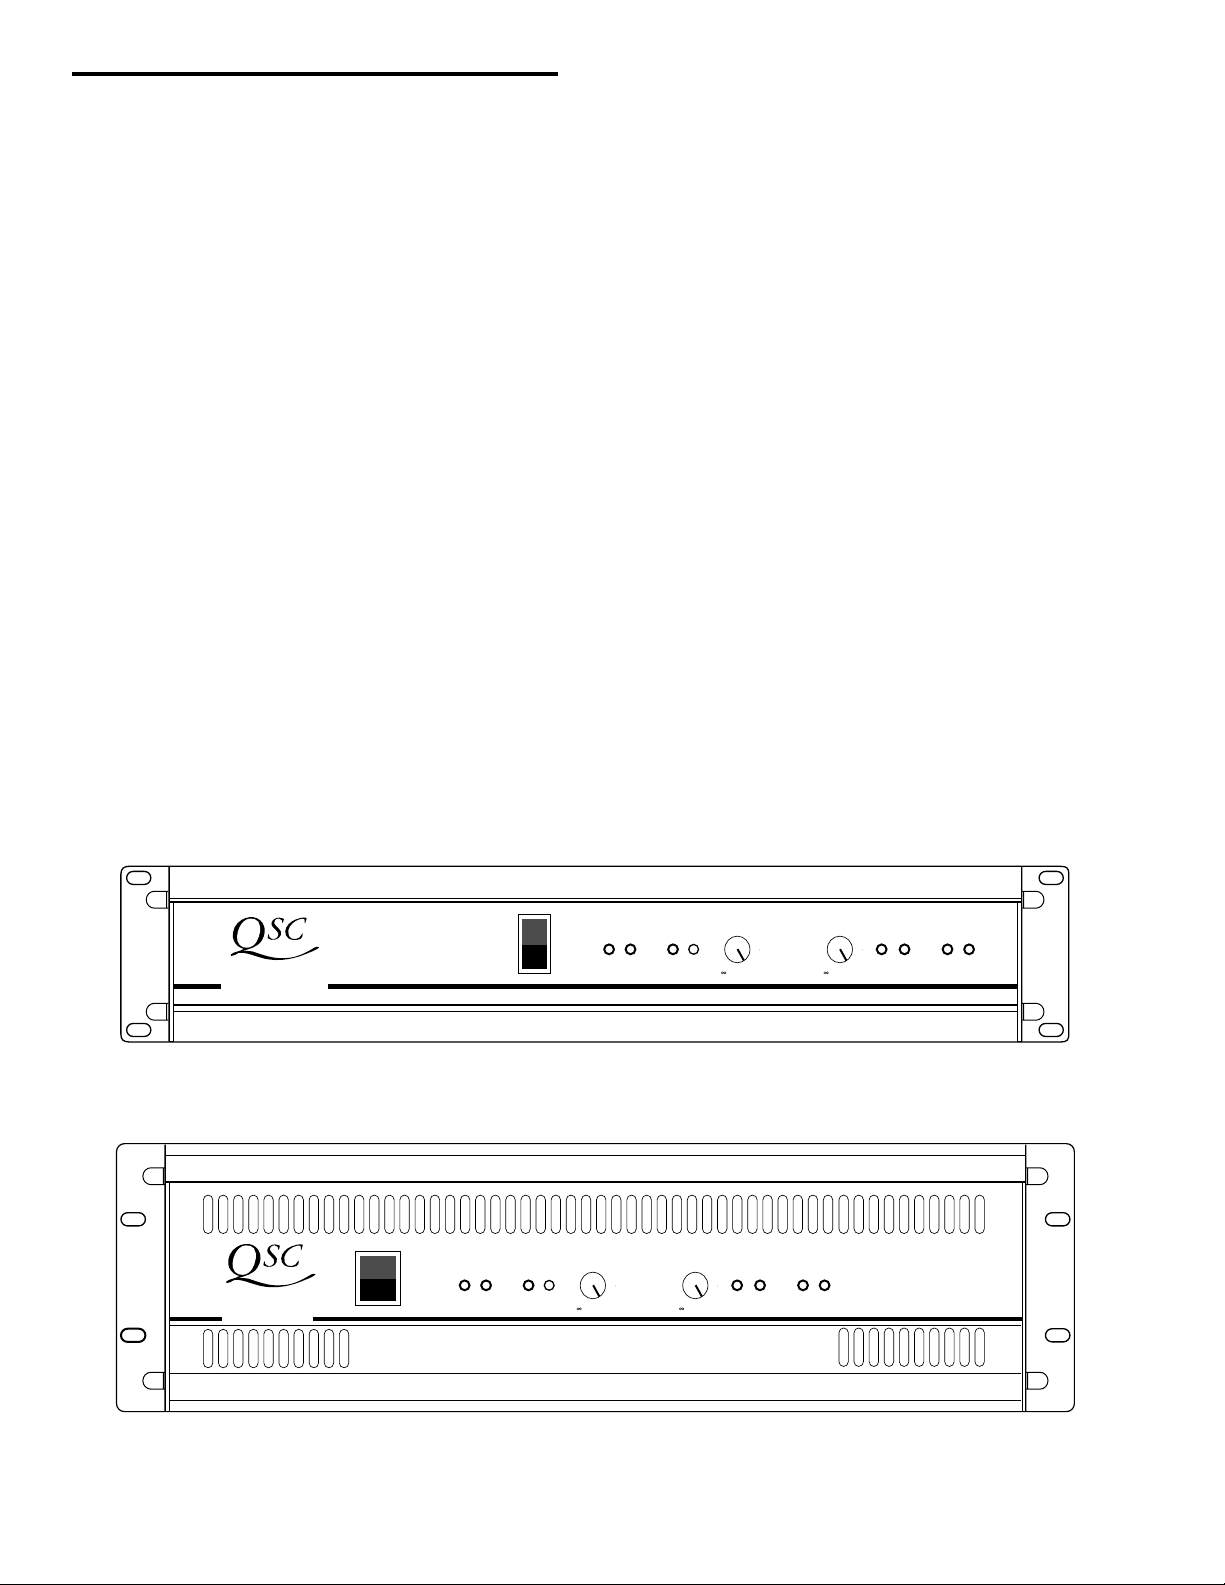
MX 1500a
Professional Stereo Amplifier
ON
OFF
CLIPPROT
Figure 1: QSC MX 1500a Front Panel (identical to the MX 1000a)
GAIN 1
12108
PWRSIG
6
14
4
18
2
24
0
- dB
MX 2000a
Dual Monaural Amplifier
ON
OFF
CLIPPROT
Figure 2: QSC MX 2000a Front Panel (identical to the MX 3000a)
14
18
24
CLIP PROT
GAIN 2
12108
- dB
PWR
6
4
2
0
CLIP PROT
SIG
GAIN 1
12108
PWRSIG
GAIN 2
12108
14
18
24
- dB
6
14
4
18
2
24
0
- dB
PWR
SIG
6
4
2
0
4
Page 5
III. INPUTS
An MXa amplifier features balanced inputs, connected
via barrier strip terminals or 1/4” (6.3 mm) tip/ring/sleeve
phone jacks. The tip of the input jack is wired for “nega-
tive’ or inverted polarity, while the ring is the non-inverting
input. Thus, if the voltage at the tip is positive with respect
to that at the ring, the amplifier channel will produce a
negative voltage at its output.
MX 1500a INPUTS
The amplifier’s input sensitivity is 1.07 volt rms; at this
signal level and any attenuators set for full gain, the
amplifier will produce full rated power—350 watts, 20Hz20kHz, 0.1% THD—into an 8-ohm load. The input impedance is 20 kilohm balanced and 10 kilohm unbalanced,
typical of QSC amplifiers.
For use with unbalanced signals, connect the unused
terminal to ground to avoid a reduction in gain caused by
a floating input; use a two-conductor (tip/sleeve) plug, or
connect a jumper between the inverting input terminals
on the barrier strip and their adjacent ground terminal.
MX 1000a INPUTS
The amplifier’s input sensitivity is 1.1 volt rms; at this
signal level and input attenuators set for full gain, the
amplifier will produce full rated power—250 watts, 20Hz20kHz, 0.1% THD—into an 8-ohm load. The input impedance is 20 kilohm balanced and 10 kilohm unbalanced,
typical of QSC amplifiers.
WARNING:
TO REDUCE THE RISK OF FIRE
OR ELECTRIC SHOCK, DO NOT EXPOSE THIS
EQUIPMENT TO RAIN OR MOSTURE.
TIP NEG RING POS
SLEEVE GND
CH 2
CH 2
GND
–
++
TIP NEG RING POS
SLEEVE GND
CH 1INPUT
–
CH 1
STEREO
PARALLEL BRIDGE
MX 2000a INPUTS
The amplifier’s input sensitivity is 1.05 volt rms; at this
signal level and any attenuators set for full gain, the
amplifier will produce full rated power—450 watts, 20Hz20kHz, 0.1% THD—into an 8-ohm load. The input impedance is 20 kilohm balanced and 10 kilohm unbalanced,
typical of QSC amplifiers.
MX 3000a INPUTS
The amplifier’s input sensitivity is 1 volt rms; at this signal
level and any attenuators set for full gain, the amplifier will
produce full rated power—800 watts, 20Hz-20kHz, 0.1%
THD—into an 8-ohm load. The input impedance is 20
kilohm balanced and 10 kilohm unbalanced, typical of
QSC amplifiers.
An MXa Series amplifier features a Level I Open Input
Architecture slot. See Section 2 for more information
about Open Input Architecture.
––
BRIDGED MONO
+
CHANNEL 2
–
STEREO 4 OHM MIN/CH.
BRIDGED MONO 8 OHM MIN.
BRIDGED MONO OPERATION: PLACE BRIDGING SWITCH ON INPUT PANEL
TO BRIDGED POSITION. CONNECT INPUT SIGNAL TO CH 1 ONLY.
CONNECT SPKR (+) TO CH 1 (+) OUTPUT. CONNECT SPEAKER (–) TO
CH 2 (+) OUTPUT. SET CH 2 GAIN FULLY CLOCKWISE AND REGULATE
LEVEL WITH CH 1 GAIN CONTROL.
CLASS 2 WIRING
+
CHANNEL 1
–
CLASS 1 WIRING MUST BE USED
AUDIO
AVIS
RISQUE DE CHOC ELECTRIQUE
NE PAS OUVRIR
CAUTION
RISK OF ELECTRIC SHOCK
DO NOT OPEN
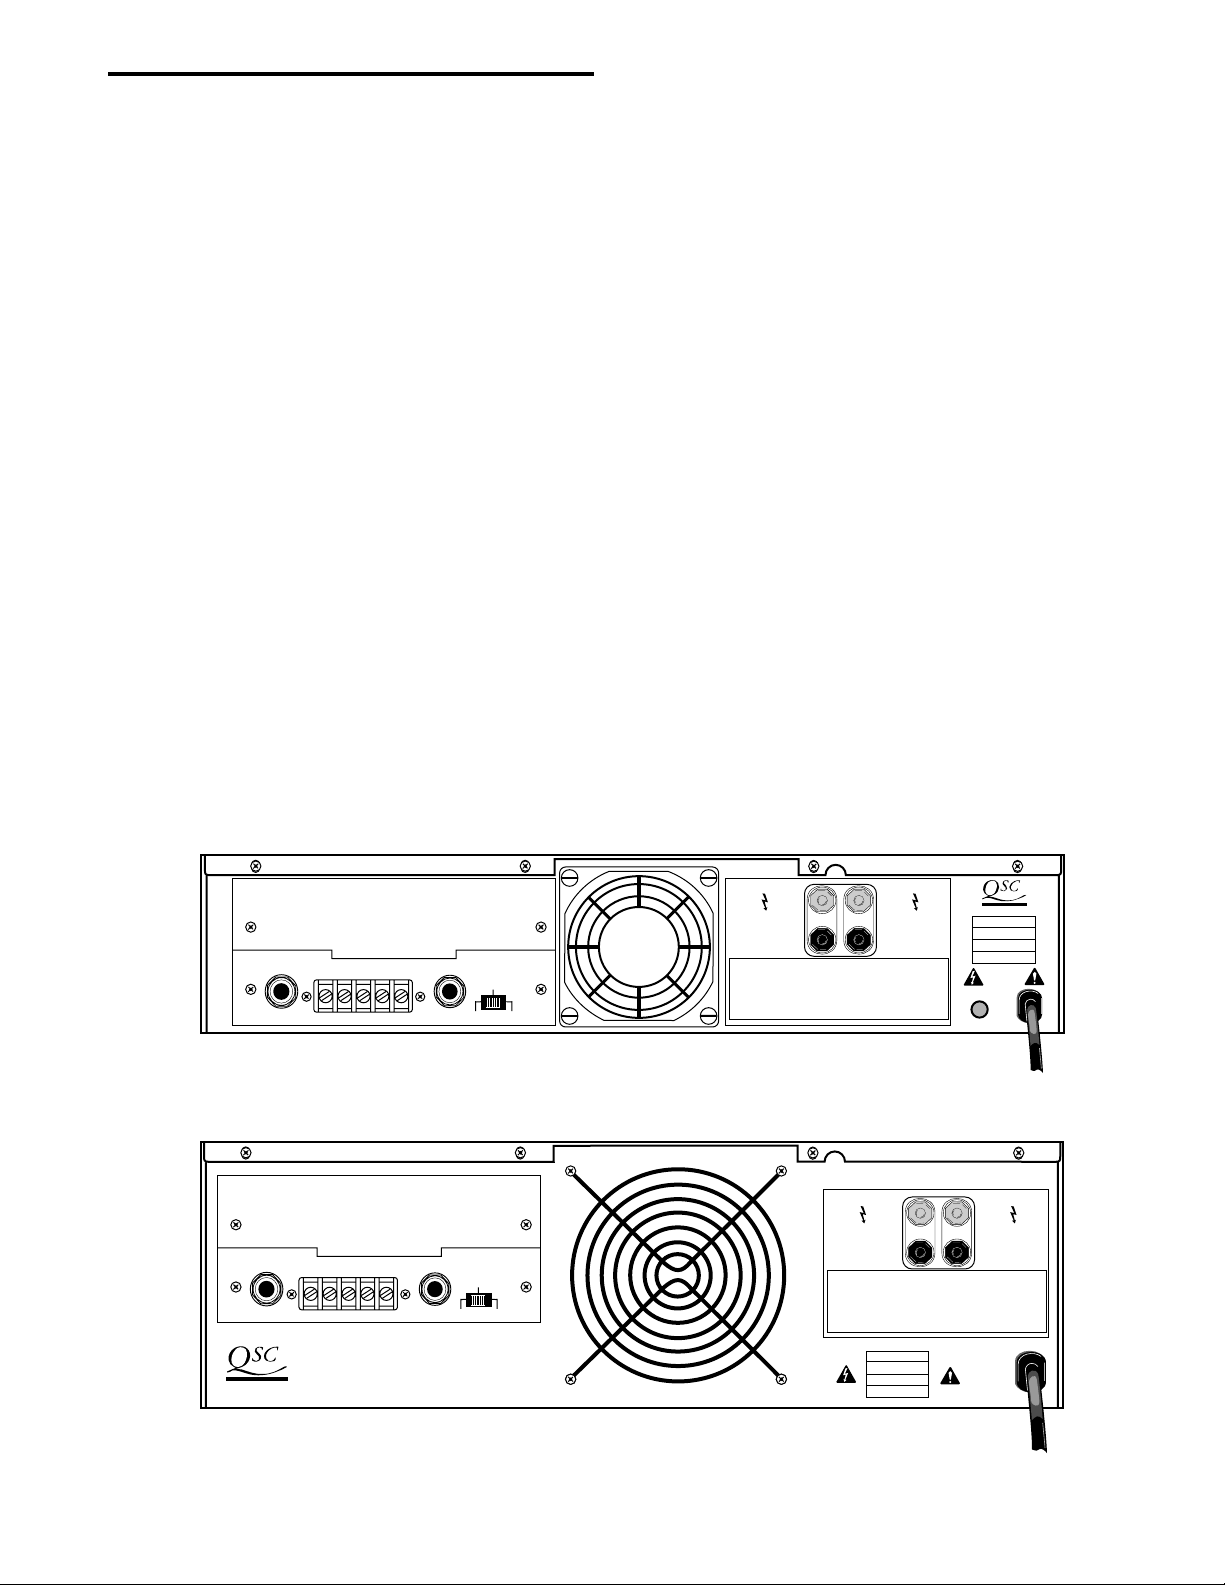
Figure 3: QSC MX 1500a Back Panel (identical to the MX 1000a)
WARNING:
TO REDUCE THE RISK OF FIRE
OR ELECTRIC SHOCK, DO NOT EXPOSE THIS
EQUIPMENT TO RAIN OR MOSTURE.
TIP NEG RING POS
SLEEVE GND
CH 2
AUDIO
CH 2
GND
–
++
TIP NEG RING POS
SLEEVE GND
CH 1INPUT
–
CH 1
STEREO
PARALLEL BRIDGE
Figure 4: QSC MX 2000a Back Panel (identical to the MX 3000a)
––
BRIDGED MONO
+
CHANNEL 2
–
AVIS
RISQUE DE CHOC ELECTRIQUE
NE PAS OUVRIR
CAUTION
RISK OF ELECTRIC SHOCK
DO NOT OPEN
CLASS 2 WIRING
STEREO 4 OHM MIN/CH.
BRIDGED MONO 8 OHM MIN.
BRIDGED MONO OPERATION: PLACE BRIDGING SWITCH ON INPUT PANEL
TO BRIDGED POSITION. CONNECT INPUT SIGNAL TO CH 1 ONLY.
CONNECT SPKR (+) TO CH 1 (+) OUTPUT. CONNECT SPEAKER (–) TO
CH 2 (+) OUTPUT. SET CH 2 GAIN FULLY CLOCKWISE AND REGULATE
LEVEL WITH CH 1 GAIN CONTROL.
+
CHANNEL 1
–
CLASS 1 WIRING MUST BE USED
5
Page 6

IV. OUTPUTS
Four “touch-proof” binding posts—one pair per channel—on the rear panel allow speaker cable connections
to the amplifier outputs. The special design allows connection of large diameter speaker cable while reducing
shock hazard due to the high output power of MXa
amplifiers. The “hot” terminal of each output pair is the red
one; the black one is signal ground.
If you are operating the amplifier in “bridged” mode,
connect the speaker load across the red terminals only;
the red terminal of Channel 1 then is “hot” or “in-phase.”
The red terminal of Channel 2 is not grounded, however,
so use the same precautions in handling and dressing
the wire that you would for the normal “hot” outputs.
CONTROLS AND DISPLAYS
The front panel-mounted attenuator controls are labeled
in dB of attenuation and are continuously adjustable from
0 dB (full gain) to ∞ (full kill).
V. OPERATIONS
When the amplifier is first turned on, the red “PROT” LED
on each channel will light for about three seconds, during
which the output relays will stay open to mute the speakers. After the turn-on muting interval, the “PROT” LEDs
turn off, the green “PWR” LEDs light, and the output
relays close to enable the speaker outputs. Even during
the muting interval, the yellow “SIG” and red “CLIP” LEDs
operate normally if there is a signal present. If the “CLIP”
LED is on while the amplifier is muted, cut the gain back
immediately to avoid a full-power blast of sound when the
output relays close. (Whenever it is practical, at turn-on
you should have the attenuators all the way down to avoid
this situation.) If a channel stays muted with “PROT” lit,
or if its “SIG” or “CLIP” indicators light up when the gain
is turned all the way down, it may be defective; see the
troubleshooting segment for more information.
The “SIG” LED indicates signal levels that are -30 dB
(referenced to full output power) or higher.
When the amplifier is shut off, the amplifier should mute
both channels virtually instantaneously, with the “PROT”
indicators lit until the power supplies are discharged.
The LED displays for each channel function as follows:
LED COLOR
PWR Green Main power supply active on this channel.
SIG Yellow Shows signal is present
CLIP Red Shows output capability is being
exceeded, with clipping distortion
PROT Red Shows when the output is muted by
protection circuitry.
Table 1: LED Display Operation
AC POWER
Any MXa Series amplifier can be wired for 100, 120, or
220–240 VAC, 50 or 60 Hz operation. Unless it is specially ordered, each amplifier is configured for the line
voltage in the market for which it is intended. For example, those intended for Japan are 100 VAC; for North
and Central America, 120 VAC; for Europe and most of
Asia, 220–240 VAC.
The power cord has a plug for connecting to a standard
AC source. For 120-volt operation, the plug is a standard
15-ampere grounded NEMA fitting; it meets safety agency
requirements for current consumption of less than 12
amperes during “normal” operation, but peak current
draw under heavy usage can be much higher.
ON/OFF MUTING
PWR SIG
NO SIGNAL
PWR SIG
NORMAL SIGNAL
PWR SIG
OCCASIONAL CLIPPING
PWR SIG
PWR SIG
STEADY CLIPPING
PWR SIG
THERMAL MUTING
PWR SIG
CLIP PROT
CLIP PROT
CLIP PROT
CLIP PROT
CLIP PROT
CLIP PROT
CLIP PROT
The “PROT” indicator lights
whenever the output is muted. At
turn-on, the amplifier mutes for a
few seconds; at turn-off, it mutes
immediately and remains muted
until the power supplies have
drained.
Only the “PWR” LED is lit. This is
normal.
The “PWR” LED is lit, and the
“SIG” LED is lit or flashing. This
is normal.
The “PWR” and “SIG” LEDs are lit,
and the “CLIP” LED flashes on
occasional peaks. This is normal.
The “PWR”, “SIG”, and “CLIP” LEDs
are lit continuously. The channel is
in hard clipping, and you should
reduce power immediately to avoid
speaker damage.
The “SIG” LED is flashing, and the
“PROT” LED is lit; this indicates
that the protection circuitry is muting the output. The condition will
reset itself when conditions allow.
Not Illuminated
Full Brightness
KEY
Flashing
Figure 5: LED displays further explained.
6
Page 7

TROUBLESHOOTING
PROBLEM: Channel will not come out of muting
• If reducing the gain control to ∞ attenuation
does not release muting, the channel is
defective or overheated (see “Overheating,”
below).
• If reducing the gain releases the muting,
raise the gain back up slowly while you
watch the “SIG” and “CLIP” indicators; the
problem may be an abnormal signal (with
excessive ultrasonic energy, for example)
that could otherwise damage your speakers.
PROBLEM: No sound
• Is the channel muted? (If the “PROT” indicator is lit, the channel is muted; see below.)
• Is the “SIG” LED lit or flashing? (If so, the
speaker is open or blown, there is an open
circuit in the speaker wiring, or there is an
open circuit in the internal output wiring of
the amplifier.)
• If the “SIG” indicator is dark, there is probably not enough signal, or even none at all.
Try turning up the front panel attenuators or
boosting the signal level at the input.
• If the “SIG” indicator shows little or no activity
but the “CLIP” LED is lit or flashing, there is
probably a short circuit in the speaker wiring.
It is also possible, but less likely, that the
channel’s output relay is defective and will
not open, thereby short-circuiting the channel output and producing the same symptoms.
PROBLEM: Hum in the audio
• Because of its grounded-collector output
transistor configuration, which maximizes
thermal efficiency, the signal ground on an
MXa amplifier cannot be lifted. The amplifier’s
balanced inputs are meant to reject hum, but
if hum remains a problem, check the tightness of the two mounting screws on the
standard input panel; if they are loose, the
panel itself might not be well grounded to the
chassis. If you have any problems with these
screws, contact the QSC Customer Service
Department. In some cases, such as when
the audio signal cables are routed near
lighting dimmers that use triacs, you may
need to use input isolation transformers because of the extremely high noise field produced by the dimmer circuitry. See the paragraphs on Open Input Architecture for further information on input transformers.
In addition, be sure to check wiring to assure
that shields are properly terminated and no
ground loops have been created.
PROBLEM: Overheating
• The thermal management system on an
MXa Series amplifier features either a twospeed fan (MX 1000a, MX 1500a, and MX
2000a) or a variable-speed fan (MX 3000a)
that modulates the cooling air flow over the
heatsinks in response to the cooling needs.
If the air flow is blocked, however, or if the
amplifier is overdriven into very low impedance loads, the amplifier could overheat
even though the fan is running at full speed.
• At approximately 55°C, the fan runs at high
speed.
PROBLEM: Channel goes into muting, with “PROT”
LED on
• If the fan is running full speed, the channel
probably suffers from severe overheating.
Unless there is a blockage in the flow of
cooling air, the channel should return to
normal within a minute or so (see “Overheat-
ing,” below).
• If the fan is not running at full speed, or the
channel does not reset to normal after a
cool-down period, the muting is probably
because of a DC fault or other amplifier
failure, especially if the “SIG” or “CLIP” indicators are lit even with the attenuator turned
all the way down.
• At approximately 80˚ C, the thermal limiter
on the MX 3000a will start to reduce gain, up
to 15 dB as needed, to reduce the amount of
heat produced.
• At approximately 85˚ C, the channel’s output
relay will mute the output. The channel will
remain muted until the temperature drops to
a safe level. Even while the channel is muted,
the “SIG” and “CLIP” indicators will function
normally. If the “CLIP” indicator is flashing or
continuously lit, reduce the gain to hasten
the cool-down and prevent repeated thermal shutdowns.
7
Page 8

SPECIFICATIONS
FTC Watts Per Channel 20Hz-20kHz, 0.1% THD EIA Watts Per Channel 1kHz, 1% THD
MODEL
8Ω Load
4Ω Load
8Ω Load
4Ω Load
2Ω Load*
MX 1000a
MX 1500a
MX 2000a
MX 3000a
250
350
450
800
350
500
650
1200
275
400
475
850
400
600
725
1300
Bridged Mono 20Hz-20kHz, 0.1% THD Bridged Mono 1kHz, 1% THD
MODEL
MX 1000a
MX 1500a
MX 2000a
MX 3000a
16Ω Load
500
700
900
1600
8Ω Load
700
1000
1300
2400
4Ω Load*
1000
1500
2000
3200
*typical
MX 1000a MX 1500a MX 2000a MX 3000a
DYNAMIC HEADROOM
8 ohms 2.0 2.0 2.0 1.9
4 ohms 2.3 2.5 2.5 2.9
500
750
1000
1600
*typical
DISTORTION
SMPTE-IM Less than 0.05%
FREQUENCY RESPONSE 20 Hz to 20 kHz, ±0.15 dB
8 Hz to 100 kHz, +0, -3 dB
DAMPING FACTOR Greater than 200
NOISE (A-weighted) 100 dB below rated output (20 Hz to 20 kHz)
VOLTAGE GAIN, dB 40 (32 dB) 50 (34 dB) 56 (35 dB) 80 (38 dB)
SENSITIVITY, V RMS 1.1 1.07 1.05 1.0
(for rated power, 8-ohms)
INPUT IMPEDANCE 10K unbalanced
20K balanced
CONTROLS Front: AC Switch, Ch. 1 and Ch. 2 Attenuator Knobs
Rear: Parallel/Stereo/Bridge Switch
INDICATORS (per channel) PWR: Green LED
SIG: Yellow LED
CLIP: Red LED
PROT: Red LED
8
Page 9

MX 1000a MX 1500a MX 2000a MX 3000a
CONNECTORS (each channel) Input: Barrier strip and 1/4” RTS phone jack
Output: “Touch-Proof” binding posts
COOLING MX 1000a, MX 1500a, MX 2000a: 2-speed fan with back-to-front air flow
MX 3000a: Continuously variable speed fan, with back-to-front air flow
AMPLIFIER PROTECTION Output Averaging™ short-circuit protection, open circuit, ultrasonic, RF, thermal
muting (thermal limiting also on MX 3000a). Stable into reactive or mismatched
loads.
LOAD PROTECTION Turn-on/turn-off muting, clip limiting (MX 3000a only), DC-fault load grounding
relay with internal fault fuses.
OUTPUT CIRCUIT TYPE MX 1000a, MX 1500a, MX 2000a: Complementary linear stage with
2-step high-efficiency circuit
MX 3000a: Complementary linear stage 3-step high-efficiency circuit
POWER REQUIREMENTS 100, 120, 220-240 VAC, 50/60 Hz
POWER CONSUMPTION
Normal operation: 1/8 power @ 4Ω per channel
Maximum: full power @ 2Ω per channel
Divide current by 2 for 220-240 VAC operation
Normal Operation @ 120 VAC 4A 5.5A 7.5A <12A
Maximum @ 120 VAC 22A 29A 38A 58A
DIMENSIONS
Faceplate Width Standard 19" (48.3 cm) Rack Mounting
Chassis Depth 17.9” (45.5 cm) deep (to support rear ears)
Faceplate Height (2 rack spaces) 3.5” (8.9 cm) 3.5” (8.9 cm)
Faceplate Height (3 rack spaces) 5.25” (13.3 cm) 5.25” (13.3 cm)
WEIGHT
Shipping, Lbs 49 lbs/22.2 kg 49 lbs/22.2 kg 62 lbs/28 kg 74 lbs/33.8 kg
Net, Lbs 42 lbs/19 kg 42 lbs/19 kg 54 lbs/24.5 kg 69 lbs/31 kg
OPEN INPUT ARCHITECTURE™ LEVEL I
On the rear of an MXa or EX amplifier are an upper and
a lower input panel; both are easily removable for future
upgrades. This is the concept of Open Input Architecture,
and the opening in which the panels mount is called the
“slot”. As installed at the factory, the lower is the MXa or
EX standard input panel and the upper one is a blank. A
ribbon cable connects the “slot” panels to the rest of the
amplifier. It carries input signals, speaker output monitor
signals, muting status, and clip activity; these are for
supporting future accessories and remote control systems. Although the physical dimensions of the MXa and
EX panels are the same, their internal cabling is different
and the MXa platform does not support all the EX
functions. The MXa Open Input Architecture slot thus is
designated as “Level I” and the EX as “Level II.”
The MX-1 Input Expander panel may be installed in the
upper panel position. It features XLR inputs and additional 1/4” RTS inputs. Installation instructions are included with the expansion kit.
Other accessories include a stereo precision attenuator
(for the lower panel position) and a cinema crossover (for
the upper panel position). More are in development.
The standard input panel shipped with each MXa Series
amplifier has balanced 1/4” (6.3 mm) RTS phone jacks
and barrier strip inputs and the Parallel-Stereo-Bridge
switch. The panel’s circuit board has solder footprints for
passive roll-off circuit components, input isolation transformers, and other special customizations.
9
Page 10

PARALLEL, STEREO, OR BRIDGED
OPERATION
INSTRUCTIONS FOR BRIDGED
OPERATION
The Parallel-Stereo-Bridge switch is located on the input
panel, next to the input jack for channel 1).
The most commonly used operating mode for a power
amplifier is “Stereo,” in which the two channels are
independent and separate all the way from input to
output. Set the switch in the center position for stereo
operation.
“Parallel” ties the two channel inputs together so that both
will be driven by the same signal, without the need for
external jumpers or wiring. After the inputs both channels
operate independently; though they carry the same signal, their gain controls affect only their respective channels, and they must use separate speakers. Never parallel the speaker outputs!
The “Bridge” position uses both channels to provide
about three times the power to a single speaker load that
a single channel does. In this position the switch feeds
channel 2 with an inverted signal from channel 1. Thus,
when one channel “pushes,” the other “pulls,” providing
twice the voltage swing of a single channel.
1. Set the switch to the “Bridge” position.
2. Connect the signal to channel 1’s input only.
Do not connect anything to the input of
channel 2.
3. Turn up the gain on channel 2 all the way.
Use channel 1’s gain control to set the level.
Both channels’ “SIG” and “CLIP” indicators
should flash identically. (If you have used
other amplifiers, this step may be different.
But it is correct; in the bridged mode, channel 2 receives its feed from a sample of
channel 1’s output. The sample is calibrated
such that channel 2, at full gain, will produce
a voltage equal in magnitude but opposite in
polarity to channel 1’s.
4. Connect the single speaker load across the
red binding posts of the amplifier outputs as
shown in Figure 2-2. The positive speaker
wire goes to channel 1, and the negative to
channel 2.
BRIDGED-MONO MODE CAUTION:
The voltage across the output terminals of a bridged MXa
amplifier may equal or exceed 100 volts rms and may be
as high as 170 volts (MX 3000a), 130 volts (MX 2000a), or
120 volts (MX 1500a). Use fully insulated CLASS ONE
wiring, and the load must be rated for up to 2400 watts (@
8 ohms) for the MX 3000a, 1300 watts (@ 8 ohms) for the
MX 2000a, 1000 watts (@ 8 ohms) for the MX 1500a, and
700 watts (@ 8 ohms) for the MX 1000a.
VORSICHT BEIM ÜBERBRÜCKTEN
MONO-MODUS:
Zwischen den überbrückten Terminals eines MXaVerstärkers besteht eine Ausgangsspannung mit einem
quadratischen Mittelwert von mehr als 100 Volt und
vielleicht von bis zu 170 Volt (MX 3000a), 130 Volt (MX
2000a), oder 120 Volt (MX1500a). Zu verwenden ist voll
isolierte Verdrahtung der US-Klasse Eins, und die
angeschlossene Belastung muß für bis zu 2400 Watt (8
Ohm) beim MX 3000a, 1300 Watt (8 Ohm) beim MX 2000a,
1000 Watt (8 Ohm) beim MX 1500a, und 700 Watt (8 Ohm)
beim MX 1000a ausgelegt sein.
TIP NEG RING POS
SLEEVE GND
STEREO
PARALLEL BRIDGE
CH 1
Figure 6: Parallel-Stereo-Bridge switch shown in the
normal (Stereo) mode position.
Switch on Input Panel
(Left side of rear panel)
––
BRIDGED MONO
+
CHANNEL 2
–
STEREO 4 OHM MIN/CH.
BRIDGED MONO 8 OHM MIN.
BRIDGED MONO OPERATION: PLACE BRIDGING SWITCH ON INPUT PANEL
TO BRIDGED POSITION. CONNECT INPUT SIGNAL TO CH 1 ONLY.
CONNECT SPKR (+) TO CH 1 (+) OUTPUT. CONNECT SPEAKER (–) TO
CH 2 (+) OUTPUT. SET CH 2 GAIN FULLY CLOCKWISE AND REGULATE
LEVEL WITH CH 1 GAIN CONTROL.
+
–
CLASS 2 WIRING
CLASS 1 WIRING MUST BE USED
CHANNEL 1
STEREO
PARALLEL BRIDGE
–
+
CONNECT ONE SPEAKER LOAD ONLY.
Figure 7: For Bridge mode, use CH 1 input only, and set
Input switch and connect load as shown.
10
Page 11

VI. LONG-TERM OUTPUT
POWER
In a properly designed sound system, you can usually
obtain the desired sound level without using the full
output power of the amplifier; if the “CLIP” indicators flash
once in a while, that is perfectly normal.
If the amplifier is operated at extremely high power levels,
it may overheat or may even damage the speakers. The
amount of stress on the amplifier depends largely on the
load and how hard the amplifier drives it. In general, the
lower the load impedance, the more stressful the load is.
8-Ohm Loads
The amplifier can operate at practically any power level
without risk of overheating. However, if it is pushed hard
enough to continually light the “CLIP” indicator, the
amplifier’s average output power can reach 250 to 800
watts (depending on the model), which is more than
many speakers can handle.
4-Ohm Loads
If the “CLIP” indicator flashes occasionally, the amplifier
is approaching its maximum long-term power capacity. If
it is lit about half the time, the amplifier channel will
probably go into thermal protection within a few minutes.
AC CURRENT CONSUMPTION
A major objective in the design of the MXa Series
amplifiers—even the highest-powered models—is to
permit their operation from readily available, standard
AC power sources. The MX 3000a can deliver 1600 watts
per channel into 2-ohm loads—a total of 3200 watts—yet
its rated current draw under “normal conditions” is less
than 12 amperes at 120 volts AC, which is 1440 watts.
How is this possible? First, “normal conditions” in power
amplifier rating means operation, using pink noise as a
source, at an average power level equal to one-eighth of
maximum power. This is recognized by most of the
world’s safety agencies as the loudest you can play
music through an amplifier and still keep the incidence of
clipping to a reasonable minimum. An amplifier’s peak
current draw at full output power into 2 ohms is several
times what the “normal” draw is, but its various protection
circuits will prevent this condition’s lasting more than a
minute or two.
When you plan the AC power hookups for your amplifiers, use Table 2 to predict the current requirements per
amplifier. You can use the one-eighth power figures to
predict the normal continuous current draw, then add a
safety margin to allow for occasional crescendos.
2-Ohm Loads
Except for an occasional flash, keep the “CLIP” indicator
dark to avoid overheating the amplifier channel.
Table 2: Current requirements, in amperes, at 120 VAC under various conditions (divide by 2 for 220–240 VAC operation):
MODEL
MX 1000a
MX 1500a
MX 2000a
MX 3000a
8+8
4+4
2+2
8+8
4+4
2+2
8+8
4+4
2+2
8+8
4+4
2+2
Output
powerLoad
275 x 2
400 x 2
500 x 2
400 x 2
600 x 2
750 x 2
475 x 2
725 x 2
1000 x 2
850 x 2
1300 x 2
1600 x 2
AC Current
@ Full power
10
15
22
14
21
29
16
25
38
25
40
58
AC Current
@ 1/3 power
5.5
7.5
10
7
11
13
9.5
15
21
16
31
42
AC Current
@ 1/8 power
3
4
5
4
5.5
6.5
5
7.5
11
9.5
15
20
AC Current
@ Idle
1
1
1
1
1
1
1
1
1
1
1
1
11
Page 12

HEAT EMISSIONS
Essentially, a power amplifier draws electrical energy
from the AC mains, converts it to DC, and then converts
it again into an analog of the input signal to send out to the
loudspeakers. Any AC power that enters the amplifier
through the power cord and does not exit through the
speaker outputs turns into heat, which the amplifier must
rid itself of by exhausting it to the outside. In indoor use
this may present a sizeable challenge to a building’s air
conditioning system. Use Table 3 to predict the heat that
will be emitted by your amplifier.
Table 3: Heat emissions of MXa amplifiers under various conditions:
Load 1/3 Power, both channels
MODEL
MX 1000a
MX 1500a
MX 2000a
MX 3000a
8Ω
4Ω
2Ω
8Ω
4Ω
2Ω
8Ω
4Ω
2Ω
8Ω
4Ω
2Ω
BTU/hr kcal/hr BTU/hr kcal/hr BTU/hr kcal/hr
1035
1430
2140
1165
1875
2770
1850
3100
4730
2980
7100
10280
265
365
545
295
475
700
470
785
1195
755
1795
2600
PROTECTION CIRCUITS
The design goal in high-efficiency, lighter-weight amplifiers such as the MXa Series is to control more power with
fewer or smaller load-bearing components, e.g., resistors, transistors, transformers, etc. However, the higher
power flow through these components makes effective,
responsive protection circuitry absolutely vital. To this
end, the design of the MXa series takes a comprehensive
approach to protection.
As in all QSC amplifiers, the inputs are resistively buffered for overload and RF protection. Chassis bypass
capacitors at inputs and outputs further improve RF
rejection.
MXa amplifiers use the proven Output Averaging™ short
circuit protection system. This circuit permits full output
current even into resistive or reactive 2-ohm loads, but
reduces the current safely by about 75% if the output is
shorted.
Turn-on/turn-off muting keeps transients—both from the
amplifier itself and from upstream equipment—from reach-
1/8 Power, both channels Idle, both channels
580
270
305
770
1010
1415
1080
1755
2760
2015
3600
5040
ing the speakers when the amplifier is turned on or off.
The turn-on delay is approximately three seconds to
allow the power supplies and circuitry to stabilize. Turnoff muting occurs almost immediately after power is shut
off. Muting occurs whether power is turned on and off
using the front panel power switch or externally at the AC
source.
An NTC (negative temperature coefficient) thermistor in
series with the power switch and transformer primary
limits inrush current. The thermistor initially has a high
resistance, which then diminishes rapidly as it warms, to
avoid power loss. Typically, the inrush current of an MXa
Series amplifier thus is equal to that of another amplifier
of about 1/3 to 1/2 its power rating.
When the DC fault protection circuitry senses a DC
voltage on the amplifier output, it activates a relay which
shorts the output and load to ground. If the DC is due to
a fault in the amplifier channel’s output circuitry, it will
probably produce enough current flow to blow the fault
fuse in series with the output. This will disable the channel
150
915
1035
195
255
360
275
445
700
510
910
1275
75
75
75
110
110
110
145
145
145
200
200
200
20
20
20
28
28
28
40
40
40
50
50
50
12
Page 13

output until it can be repaired, at which time the fuse
should be replaced also.
Temperature sensors on the channel heatsinks and the
power transformers are part of the thermal management
circuitry. On the MX 1000a, MX 1500a, and MX 2000a,
the temperature sensors govern whether the dual-speed
fan should run at low or high speed. Below 55˚ C, the fan
runs at low speed; above, it runs at high speed. At or
above 85˚ C, the channel mutes to go into thermal
protection.
On the MX 3000a, the thermal management circuitry
controls the variable-speed fan according to how much
cooling air flow is required. At and above 80˚ C, the
thermal limiting circuit reduces the audio signal by up to
15 dB. At 85˚ C, the channel mutes to go into thermal
protection.
VII. WARRANTY AND
DISCLAIMERS
VIII. TECHNICAL ASSISTANCE
& SERVICE
Servicing your unit requires a trained technician capable
of performing the type of service you need. There are no
user serviceable components inside your unit and the
danger of electric shock exists. Additionally, some of the
components in your unit has QSC specific parts that
require QSC replacements. Comprehensive service
manuals for some models are available at QSC.
TECHNICAL ASSISTANCE
If you suspect that your [product] is defective, check your
system configuration and [product] settings to determine
the origin of the problem. In many cases, incorrect audio
interfacing, poor cabling, or other system level impairments are the cause of problems in audio systems. For
technical assistance beyond the information given in this
manual, QSC Technical Services may be contacted.
DISCLAIMER
QSC Audio Products, Inc. is not liable for any damage to
speakers, amplifiers, or any other equipment that is
caused by negligence or improper installation and/or use
of the SPL-1.
PRODUCT WARRANTY
QSC Audio Products, Inc. guarantees the SPL-1 to be
free from defective material and/or workmanship for a
period of three years from date of sale, and will replace
defective parts and repair malfunctioning products under
this warranty when the defect occurs under normal
installation and use—provided the unit is returned to our
factory via prepaid transportation with proof of purchase
(sales receipt). This warranty provides that examination
of the returned product must disclose, in our judgment, a
manufacturing defect. This warranty does not extend to
any product which has been subject to misuse, neglect,
accident, improper installation, or where the date code
has been removed or defaced.
FACTORY SERVICE
In the event that your [product] does need factory service,
you may reach QSC Technical Services for return instructions. A Return Authorization (RA) number must be
obtained from QSC Technical Services. QSC may not
account for products that are returned without a Return
Authorization number.
Product Return Guidelines
1. Pack the product well for protection during shipment. QSC will provide the factory packaging free
of charge upon request.
2. Include a copy of the sales receipt, your name,
return address, phone number, and defect description with your return correspondence.
3. Call QSC Technical Services for a Return Authorization number.
4. Mark the Return Authorization number on the
outside of the packaging.
5. Ship the product prepaid to QSC Audio Products.
We recommend United Parcel Service (UPS).
QSC TECHNICAL SERVICES
1675 MacArthur Blvd
Costa Mesa, CA 92626
Telephone: (800) 772-2834
(714) 957-7150
(714) 754-6175
Fax: (714) 754-6173
Bulletin Board: (714) 668-7567
13
Page 14

QUALIFIED SERVICE CENTERS
QSC maintains a service center network for your convenience. If you choose to return your product to a local
service center, you may call QSC Technical Services for
a referral. Accessories, input modules and other peripheral QSC products must be returned to the factory for
service.
INTERNATIONAL SERVICING
For QSC products that are purchased outside of the
United States, service must be referred to the distributor
or dealer from where the product was purchased. There
are numerous service centers in many countries. The
service centers in your country may be located by your
dealer, distributor, or by contacting QSC Technical Services.
File Library
QSControl Hardware Support
QSControl Software Support
EX, MXa, VS, USA, and Series One
Slot Accessories
General Notes
File Types
Graphics
Mechanical drawings
Specifications
Application notes
Field service notes
Service bulletins
Schematics
Pin-outs
Owners manual text segments
Environment files
Computer utilities and drivers
Service manual text segments
Computer configuration tips
Block diagrams
These are primarily text, graphics, utility, and program files.
IX. QSC ONLINE
If you have a computer with a modem you can take
advantage of QSC’s convenient technical support bulletin board system,
updates, messages, or hardware application notes; upload questions, comments, and useful tips, and more.
This service is available free of charge, around the clock,
365 days a year (366 days in leap years).
As of March 18, 1994—
BBS Hours: 24 hours a day
BBS Telephone Number: (714) 668-7567
General
Automatic system maintenance hours:
System type: Open (no subscription fee)
Host location: QSC Customer Service Department
Support Areas
Bulletins
Advertisements
Ordering and Support Information
Newsletter
Conferences
Mail Messages
General Forum
Parts & Accessory Ordering
Technical Commentary
QSControl Hardware Support
QSControl Software Support
EX, MXa, VS, USA, and Series One
Slot Accessories
General Notes
QSC OnLine
1:00 a.m.–2:00 a.m. Pacific Time
(no log-ons during this hour)
Costa Mesa, California
. Download software
Security Levels
New User Cursory access, for review
Full User Customer access
QSC User Full access
Sysop Supervisory access
User Privileges and Security
New User 30 minutes per day
No uploads
No downloads
Standard messages access
Bulletin access
Full User 90 minutes per day
5 uploads per day
5 downloads per day
Standard messages access
Bulletin access
QSC User Unlimited time per day
10 uploads per day
10 downloads per day
Unlimited messages access
All menu and system access
*Uploads and messages subject to verification and editing by the sysop.
Communications Settings
14400 bps (also supports 1200, 2400, and 9600 bps)
8 bits, no parity, 1 stop bit
14
Page 15

X. IMPORTANT ADDRESS AND
TELEPHONE INFORMATION
Factory address:
QSC Audio Products, Inc.
1675 MacArthur Boulevard
Costa Mesa, California 92626-1468
USA
Factory telephone numbers:
Main Number (714) 754-6175
Sales Direct Line (714) 957-7100
Sales (800) 854-4079
(toll-free in U.S.A. only)
Sales & Marketing FAX (714) 754-6174
Customer Service (714) 957-7150
Customer Service (800) 772-2834
(toll-free in U.S.A. only)
Customer Service FAX (714) 754-6173
QSC OnLine Technical (714) 668-7567
15
Page 16

®
A U D I O
“QSC” is a registered trademark of QSC Audio Products, Inc. 1675 MacArthur Blvd. Costa Mesa, CA 92626 (714) 754-6175 FAX (714) 754-6174
16
 Loading...