

QSC ADS-82 Owners manual
Mounting
If using the loudspeaker only (no optional mount), the loudspeaker can be set on any appropriate surface. The cabinet will lean
back at a slight angle when set on a flat surface.
When operated at high output levels, the cabinet can generate sufficient vibration, causing the cabinet to move or creep if set on
a hard surface. Use anti-slip matting under the cabinet or self-adhesive rubber feet to keep the cabinet from creeping.
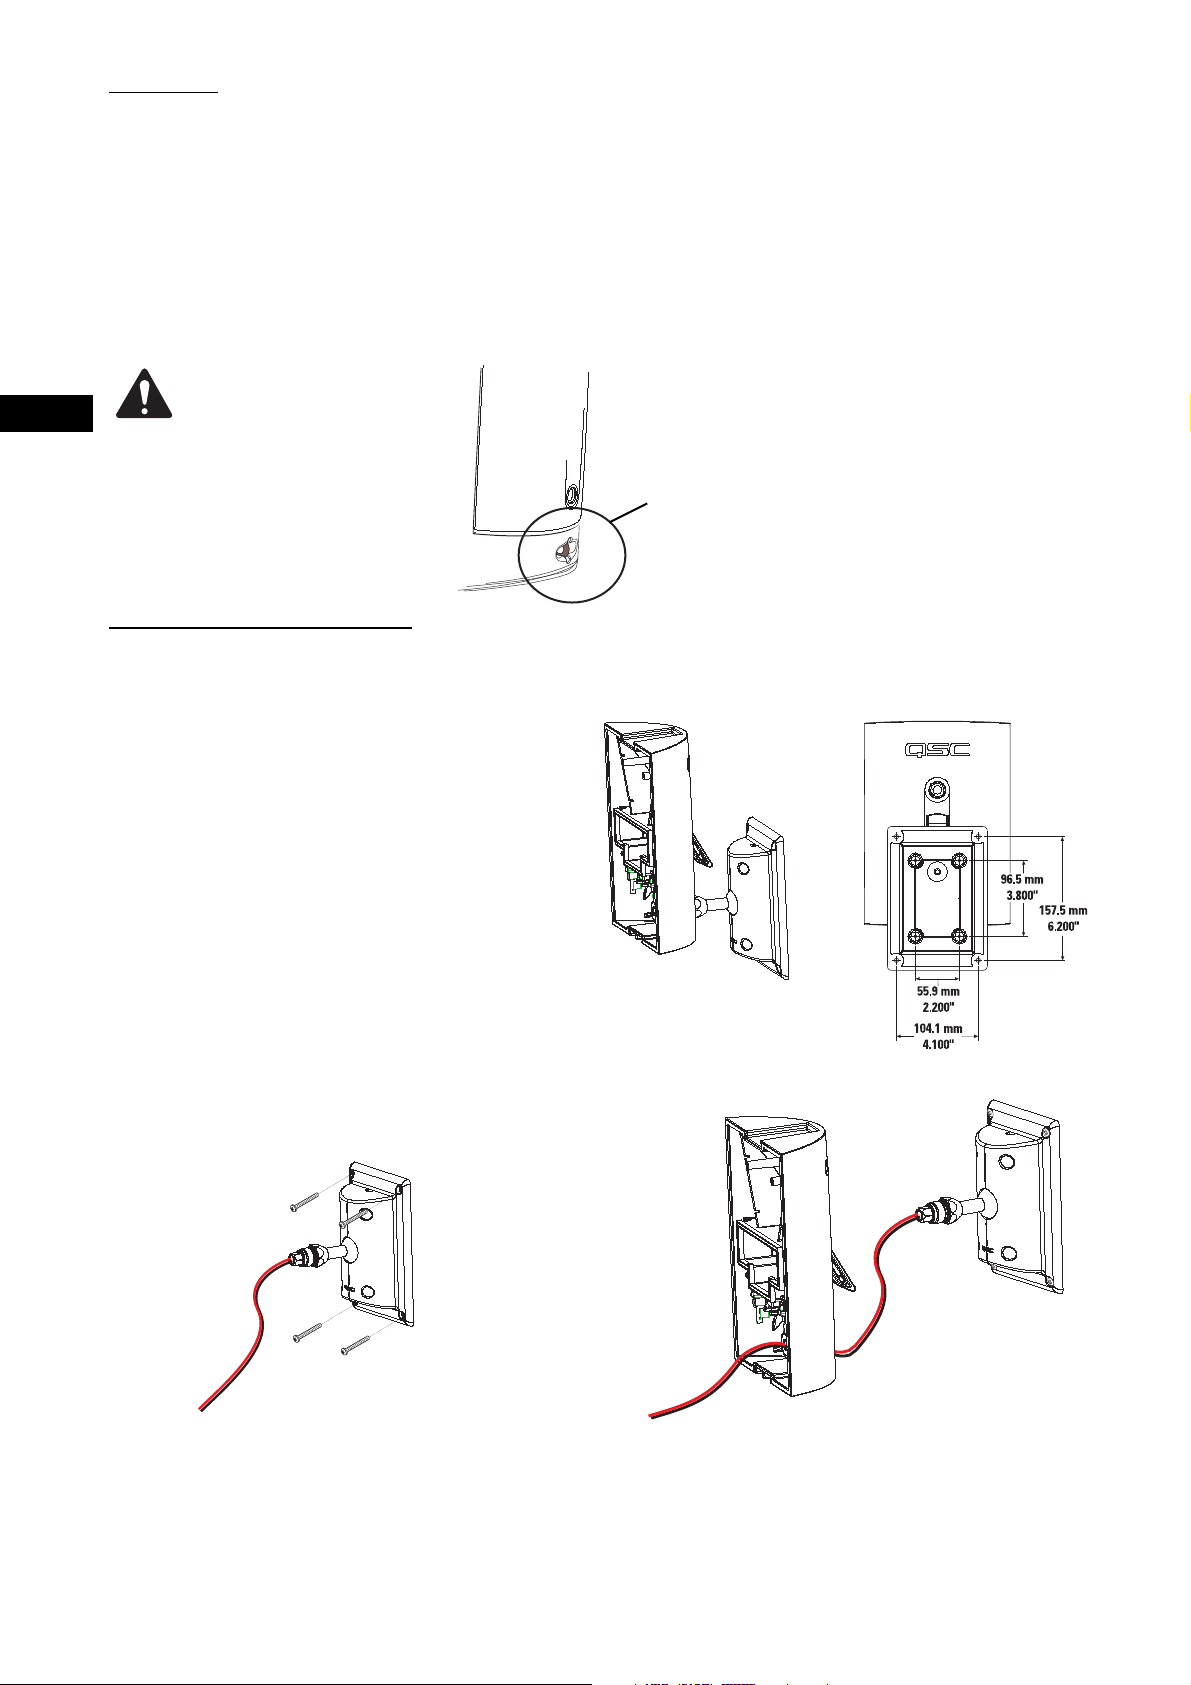
On the back of the loudspeaker, near the bottom, is a safety cable attachment point. Install a safety cable strong enough to support several times the weight of the loudspeaker assembly in the event it may fall. The cable must be secured to a secondary support point which is also strong enough to support several times the loudspeaker’s weight.
EN
IMPORTANT! ENSURE THAT THE
LOUDSPEAKER IS MOUNTED
PROPERLY AND A SAFETY
CABLE IS INSTALLED TO RETAIN THE
LOUDSPEAKER IN THE EVENT OF A
MOUNTING FAILURE.
Optional Mounts Available
ID-8 and ID-8T IntelliDock™ Mounts (YM-8 models, see p.6)
This mount features a quick-connect/disconnect latch which
provides electrical connections and a highly-adjustable balltype mount. This mount allows for all mounts and wiring to be
fully installed and the loudspeakers to be placed at the last
possible moment.
A security retaining screw for the latch in included, making
speaker removal impossible without the correct Allen (hex) bit
to remove the screw. The IntelliDock mount and its wiring
feed-through bushing provide maximum weather resistance
and maximum acoustic coverage range adjustment.
Ensure the mounting surface and supporting structure are appropriately strong enough to support the
loudspeaker assembly and any potential vibration or
seismic activity.
Attach a safety cable to the attachment point on the
bottom-back of the loudspeaker. Ensure the safety
cable, cable attachment technique, securing hardware, and attachment points are strong enough to
support several times the weight of the loudspeaker
in the event of a primary-mount failure.
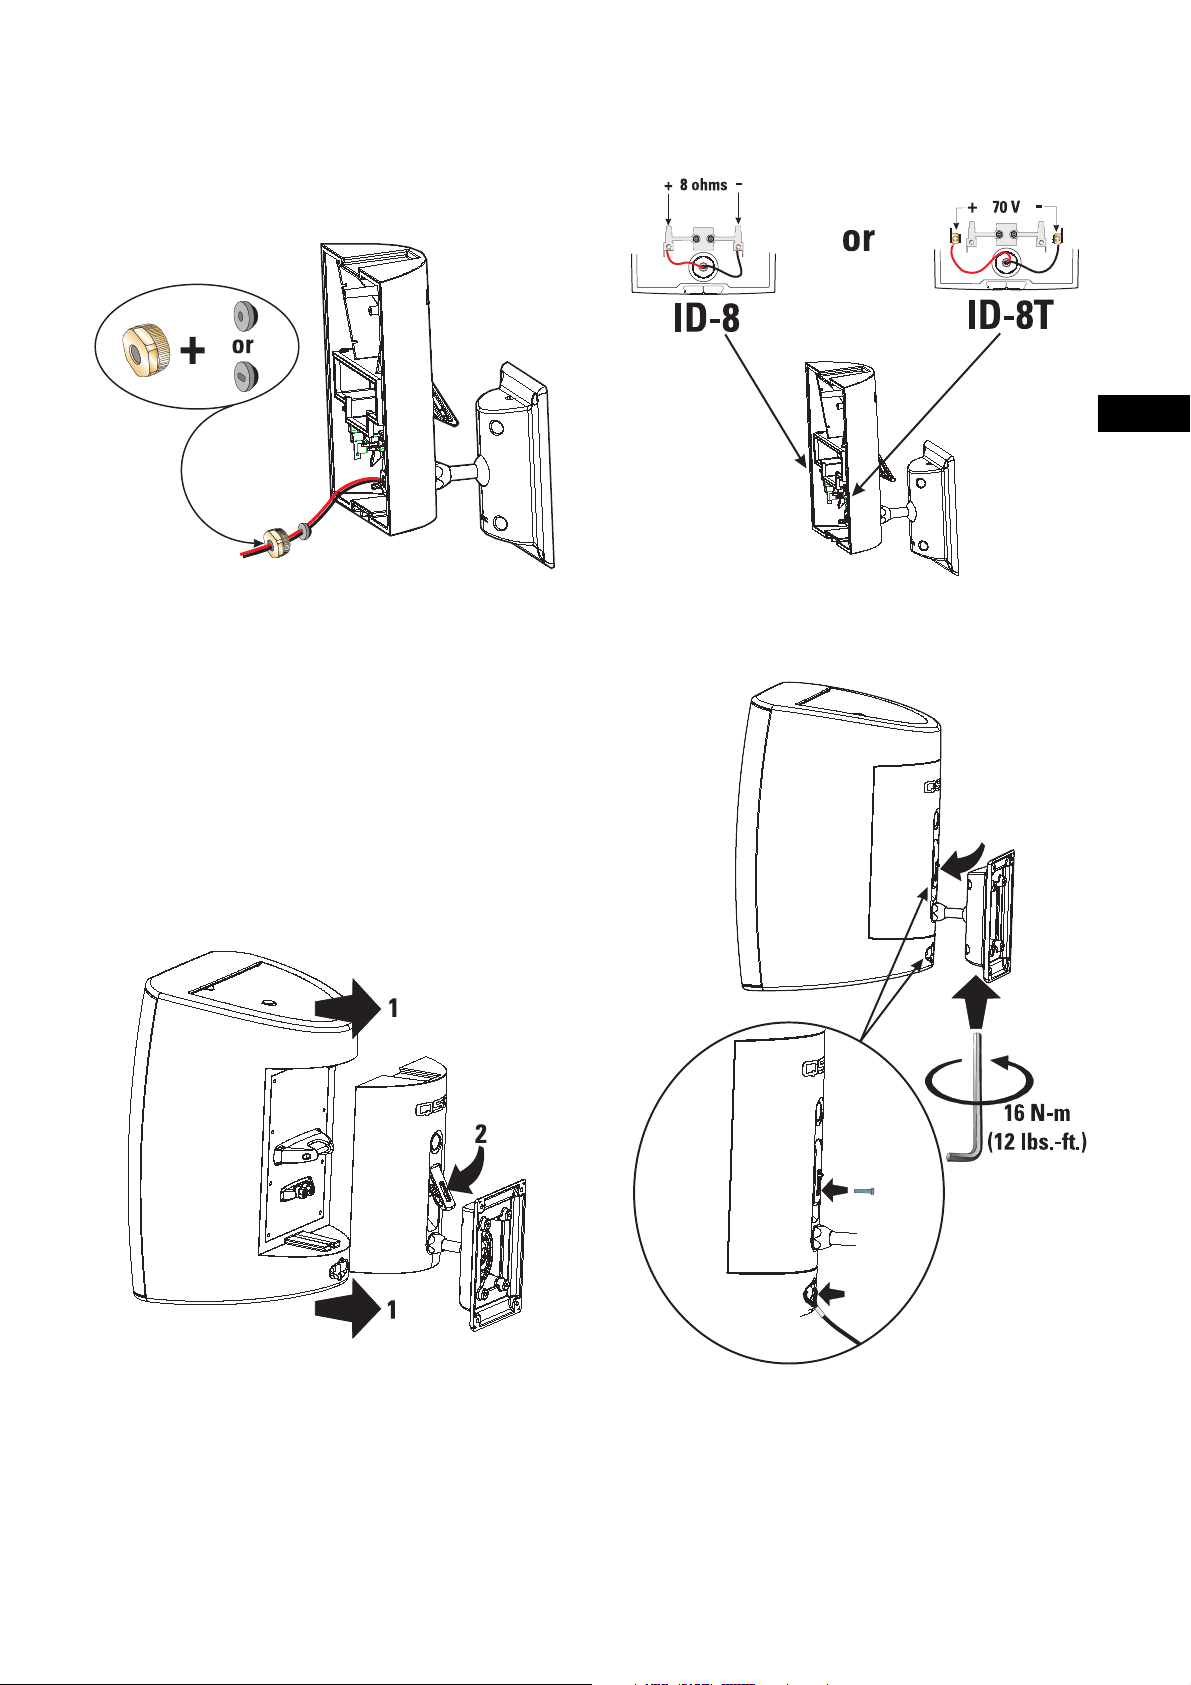
The ID-8T is identical to the ID-8, but equipped with an audio matching
transformer with 70V and 100V distributed audio input capability.
Refer to the instructions included with the mount for detailed information.
Optional ID-8 and ID-8T Mounting Procedure
1- Secure the ball mount bracket to the mounting surface.
The adapter plate can be removed if desired, however, we
recommend its use. Ensure the mounting surface and supporting structure are appropriately strong enough to support the loudspeaker assembly and any potential vibration
or seismic activity.
2- Feed the speaker wire through the cover. Secure
the cover to the ball-mount assembly.
4
Optional ID-8 and ID-8T Mounting Procedure (continued)
EN
3- Choose the appropriate rubber sealing gasket and thread
the speaker wire through it. Make sure the tapered side of
the gasket is toward the cover. Push the gasket into its seat,
and thread the nut over the speaker wire and tighten.
4- Trim the wires to the appropriate length. Strip the wires
and secure them to the terminals.
5- With the latch open, align the loudspeaker with the IntelliDock and slide the loudspeaker into place. Push the latch
down until in engages with the locking tab.
6- Aim the loudspeaker in the desired direction and tighten
the Allen (hex) retaining screw using the tool provided.
Snug the bolt then tighten exactly 5/8 of a turn (225° rotation) to positively secure the ball- mount. If a torque wrench
and appropriate hex bit are available, tighten the bolt to 16
N-m (12 lbs-ft). If extra theft deterrence is required, install
the provided security screw. Attach a safety cable to the
loudspeaker’s safety cable attachment point.
5
 Loading...