

Qomo QPC70 User Manual

- 1 -
PRECAUTIONS
Please follow these precautions:
To prevent fire or shock hazard, do not expose the unit to rain or
moisture.
To prevent electrical shock, do not open the unit. Refer to qualified
personnel for service only.
Do not use the unit continuously for more than 24 hours with camera
auto focus on. It may cause damage to the camera lens.
Be careful not to spill water or other liquids onto the unit, or allow
combustible or metallic objects to get inside the base.
Unplug the VISUALIZER from the wall outlet when it is not being
used for a long period of time.
Clean the unit with a soft cloth lightly moistened with a mild
detergent solution.
Clean the lens carefully with an air spray or soft dry cloth to avoid
scratching it.
Rotate the camera lens cap before power the unit on.

- 2 -
Contents
PRODUCT INTRODUCTION ...................................................... 3
PARTS IDENTIFICATION ........................................................... 4
MAKING ADJUSTMENTS ........................................................... 4
CONTROL PANEL ...................................................................... 5
LIGHT BOX(Optional) ................................................................. 6
REMOTE CONTROL INSTRUCTION ......................................... 7
CONNECTIONS ......................................................................... 9
INSTALLING VISUALIZER SOFTWARE .................................. 10
USB PORT ................................................................................ 10
USB IMAGE CAPTURE ............................................................ 11
CONTROLLING VISUALIZER BY COMPUTER ....................... 11
SPECIFICATION ....................................................................... 11

- 3 -
PRODUCT INTRODUCTION
Thank you for purchasing the VISUALIZER. This VISUALIZER comes
with a new design which is easy to use, portable and with a high
resolution. The VISUALIZER can be used to present 3D objects, text,
graphs, transparencies and negative films. It can be connected to
projector, PC and other multi-media equipment. The VISUALIZER is
not just designed for the corporate environment but also is an
indispensable tool to the education, medical and scientific community.
- 4 -
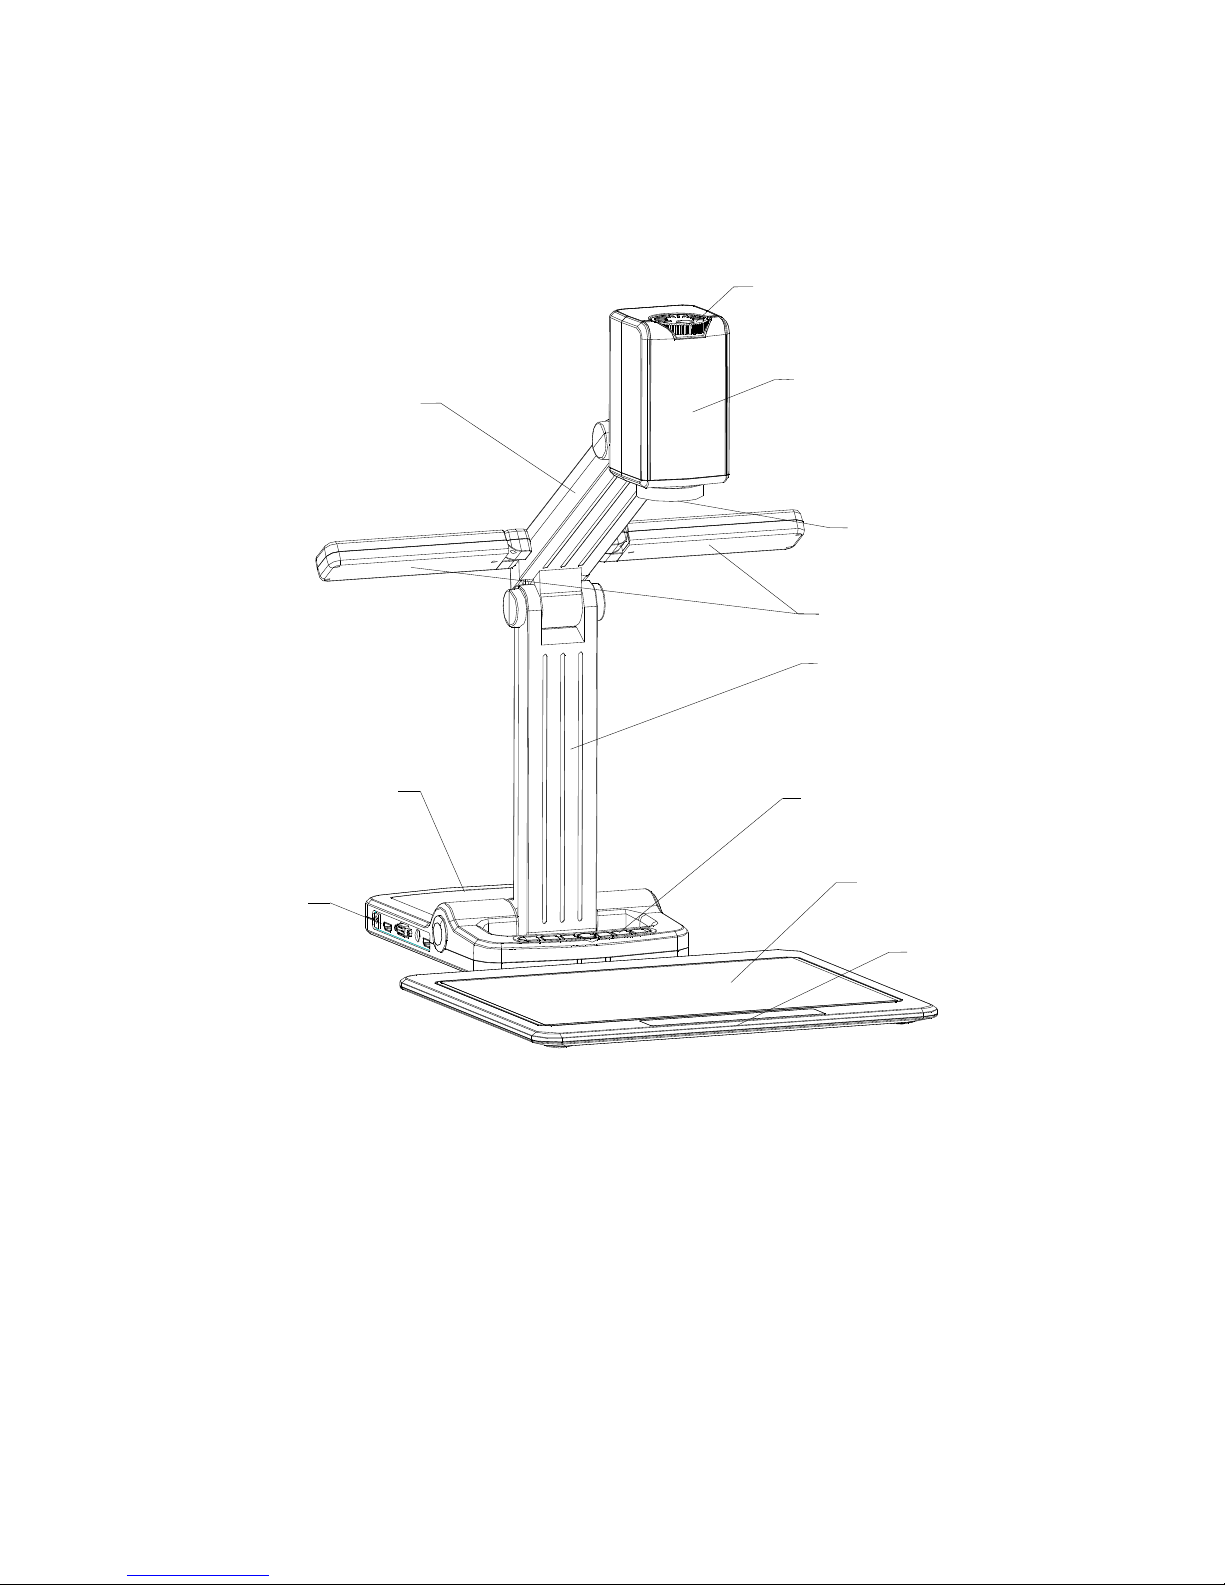
PARTS IDENTIFICATION
Connectors
Camera Lens
Camera head
Arm lights
Up camera stand
Down camera stand
Base
Control Buttons
*Light Box
Zoom In/Out knob
Control Buttons
Note: The parts marked with“*”is optional.
MAKING ADJUSTMENTS
Rotate the arm lights and the camera head until they are properly
positioned.
 Loading...