

Page 1
QOMO HITEVISION
Quick Guide
This Quick Guide is your introduction to the QIR300 audience response system.
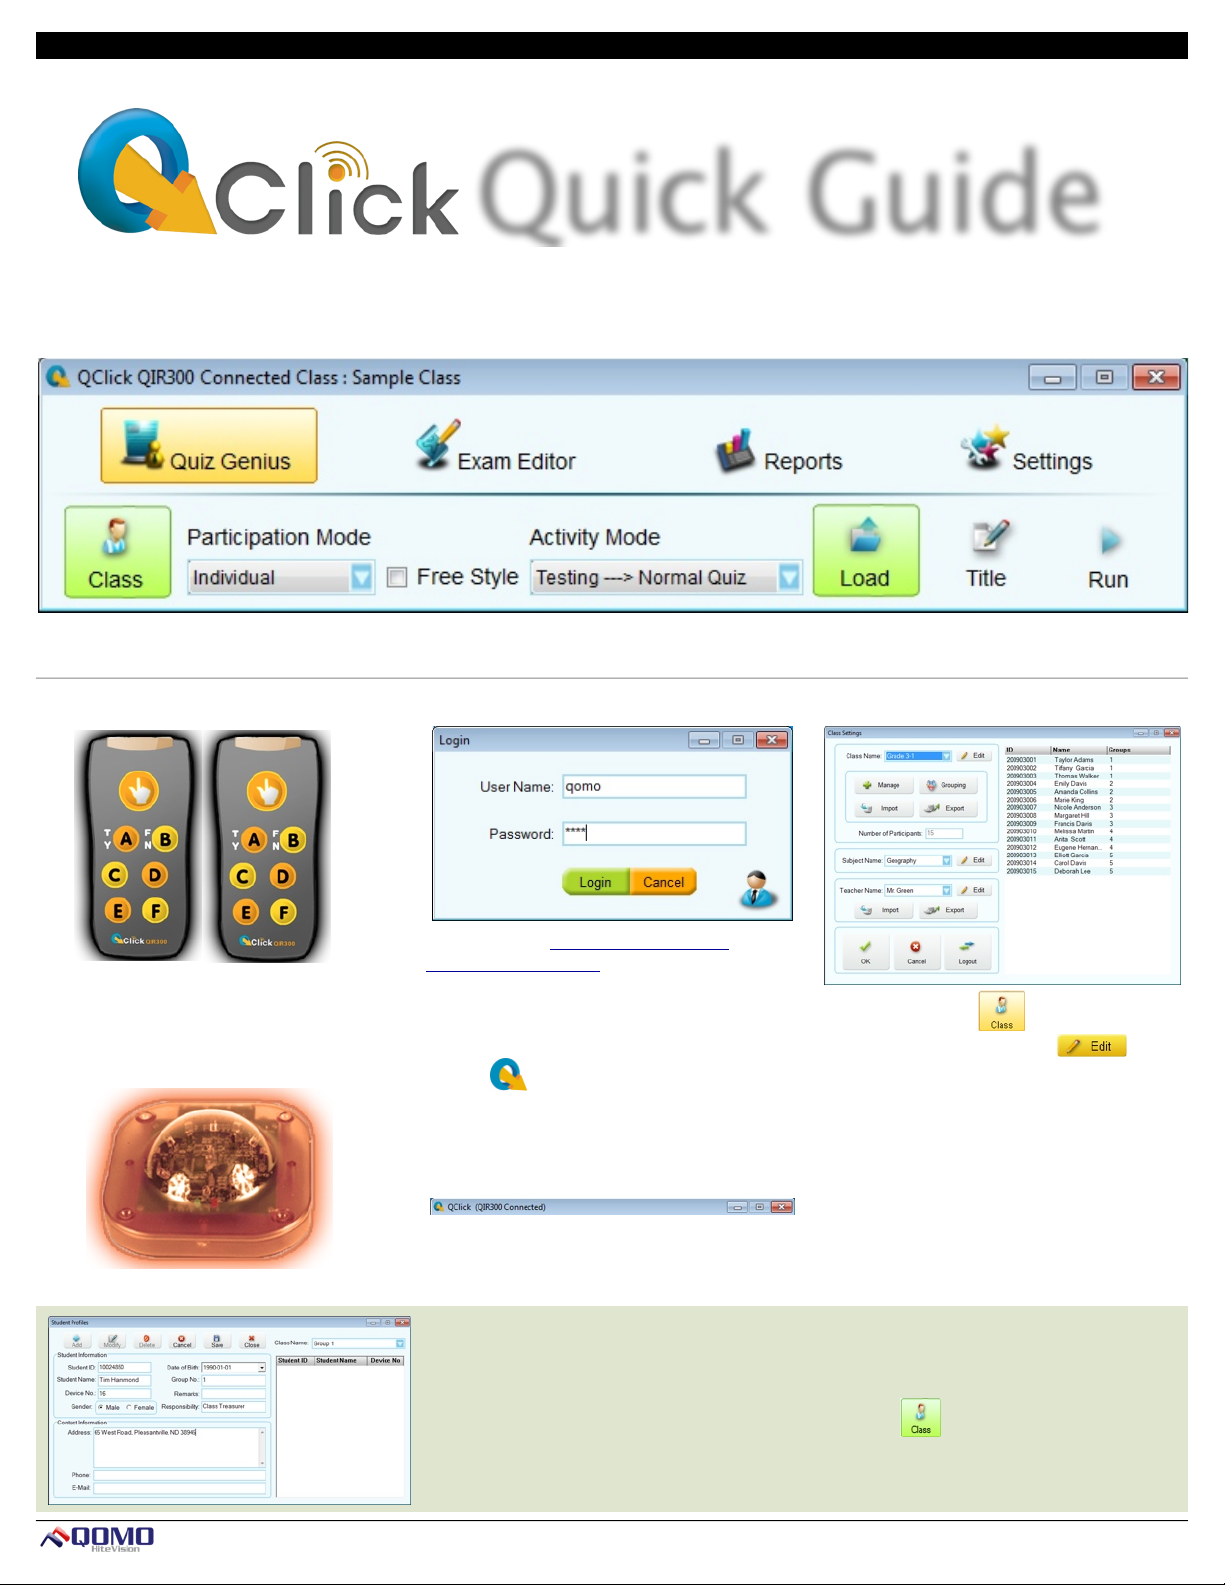
1. Remotes and Receiver
1a.
1. Load two “AAA” batteries into the (1a.) Student
and (1b.) Instructor remotes. Press any button to
illuminate the green light.
1c.
1b.
2. Start the Software
1. Use the CD or http://www.qomo.com/
FileList.aspx?FileType=1 and click the appropriate
link to extract and download the latest software
version.
2. With the (1c.) USB dongle plugged in, double-
click the icon to launch the program.
3. Enter the default username and password, both
are “qomo.” Note: Canceling this function launches
the “Read-Only” version.
4. The QClick toolbar will appear and read,
“QIR300 CONNECTED.” If the toolbar reads
“QIR300 NO HOST,” re-insert the USB dongle.
3. Setup a Class
1. Click the Class icon under the Quiz
Genius tab. Click the Edit button next to
the Class Name field. Select the Add option and
enter your class name. Click Add and the Student
Settings window will appear.
2. The Student Portfolio window will appear and
prompt you to select a method of adding
students.
Add Students
1. When adding new students, enter the Student ID, Name, and Device Number found on the back of the
remote, and any additional information. Click Save after each student’s profile has been updated.
2. Click Close to exit the class setup. The class setup, the Class icon will be green showing that the
class has been loaded. *If the icon is not green, the class is not loaded properly.
! 1
Page 2
QOMO HITEVISION
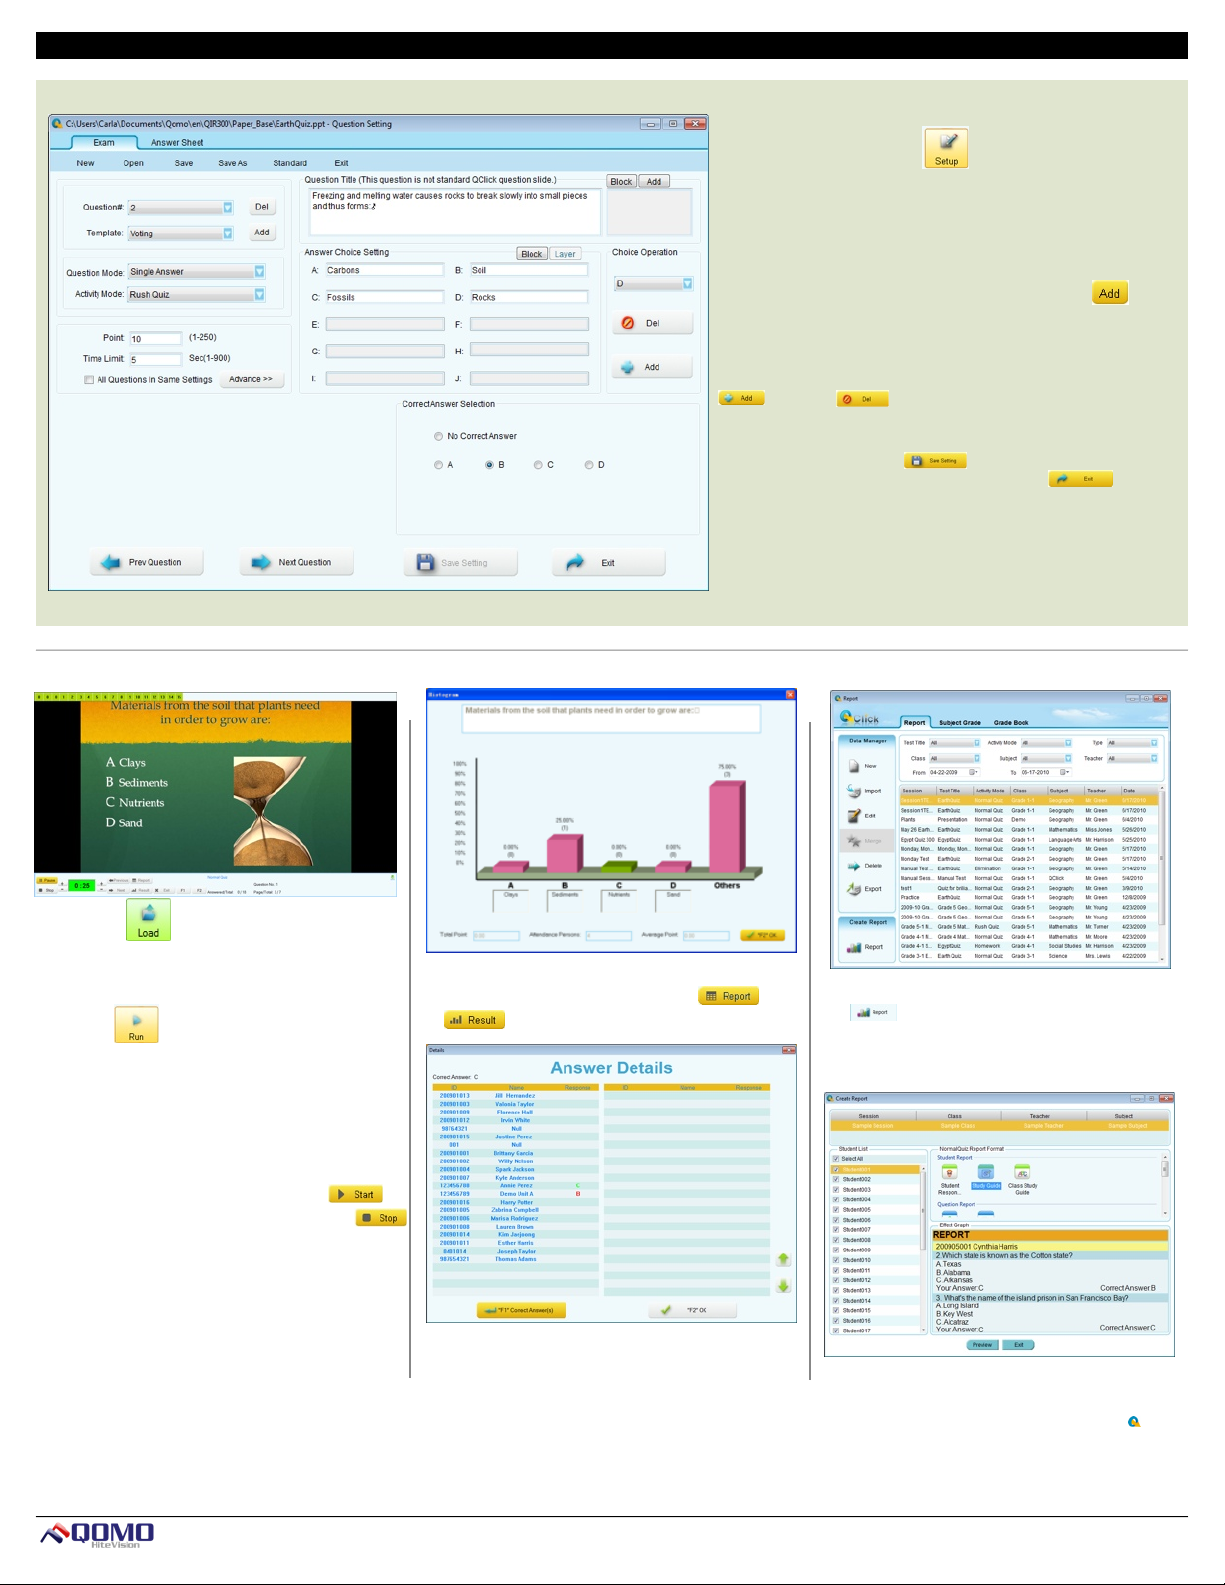
5. Create an Exam
6. Run a Quiz
1. On the QClick toolbar, click the Exam Editor icon.
2. Then click the Setup icon and select the Exam tab.
3. The (3.) Question Setup window will appear. Under the
5.
3.
6.
4.
Exam tab, fill in your questions and answer options.
4. Choose an answer under (4.) Correct Answer Selection
5. In order to add a new question, click the (5.) Add
button in the top left corner of the window in the Question #
box.
6. To add or delete the number of answer options, click Add
or Delete on the right side of the window in
the (6.) Option Operation box.
7. Click (7.) Save Setting when fields are complete,
save the exam when prompted, and click Exit .
Note: This is still a PowerPoint file, after Setup you may
enhance your design by using standard PowerPoint tools.
7.
7. View Results
7. Generate Reports
6b.
6a.
1. The Load icon must be green to run an
exam.
2. On the QClick toolbar under Quiz Genius, click
the Run icon to begin the quiz.
3. A (6a.) menu will appear along the bottom of the
screen from which you can operate your exam. At
the top of the screen a (6b.) list of student
registration numbers will appear.
4. Start any question by clicking the Play
button, ending the timer by clicking the Stop
button, and scrolling through questions with the
arrow keys.
1. During an exam, instantly view the students’
results after each question by pressing
or .
1.
1. After saving an exam session, go to the Reports
icon to open the Reports window. Select the
appropriate test or exam file and click on the Report
icon in the (1.) Create Report box.
2. In this new window, you can view and create
various reports of your students’ performance. All
reports can be printed, exported, and saved.
! 2
 Loading...