

Page 1
QCT
QConnect-1700
Quick Installation Guide
Version: 1.0
Date: Nov 13, 2017
Page 2

QConnect-1700
Quick Installation Guide
1
1. Package Contents
• QConnect-1700 Box
• USB Token
• Power Adapter (DC +5V, 2.6A)
• WiFi Antenna x 2
• Wall-Mount Kit
• Quick Installation Guide
• Warranty Card
• CE DoC
2. USB Token Contents
• MirrorOp Installer for Windows
• MirrorOp Installer for Mac
• Executable MirrorOp Application for Windows
• Executable MirrorOp Application for Mac
• SVS Driver (For Mac Extended Screen)
• SNMP MIB File
• User Manual
3. Physical Details
• Front Panel
Power LED
USB Port (Front)
LED indicator: system loading (red), ready (green)
2 USB ports for USB mouse and keyboard
QCT
Page 3
2
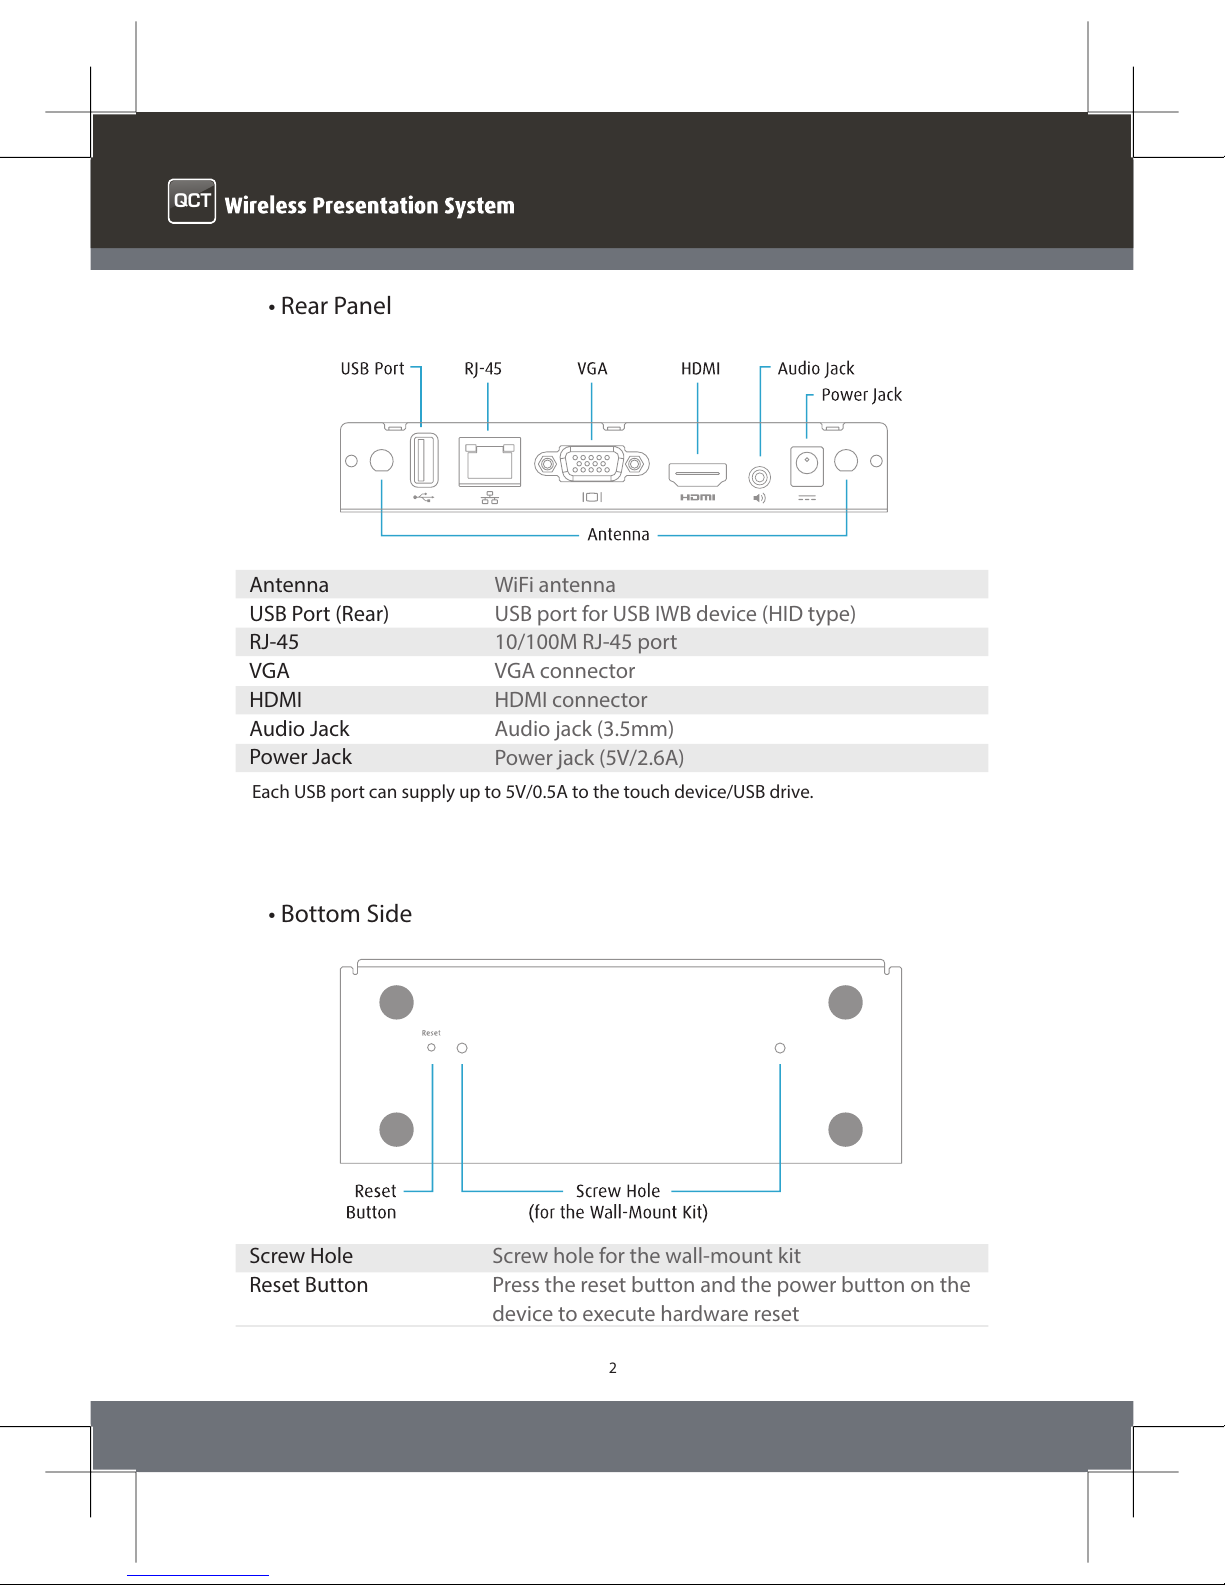
• Rear Panel
Each USB port can supply up to 5V/0.5A to the touch device/USB drive.
• Bottom Side
Antenna
USB Port (Rear)
RJ-45
VGA
HDMI
Audio Jack
Power Jack
WiFi antenna
USB port for USB IWB device (HID type)
10/100M RJ-45 port
VGA connector
HDMI connector
Audio jack (3.5mm)
Power jack (5V/2.6A)
Screw Hole
Reset Button
Screw hole for the wall-mount kit
Press the reset button and the power button on the
device to execute hardware reset
QCT
Page 4
3
4. What You Might Need
• Projector/display with VGA/HDMI interface
• Windows or Mac computer
• Apple iPhone, iPad or iPod touch
• Android phone or tablet
• Speaker (optional, for audio projection)
• USB mouse and keyboard (optional, for remote desktop)
• USB HID touch screen/IWB device (optional, for USB over IP)
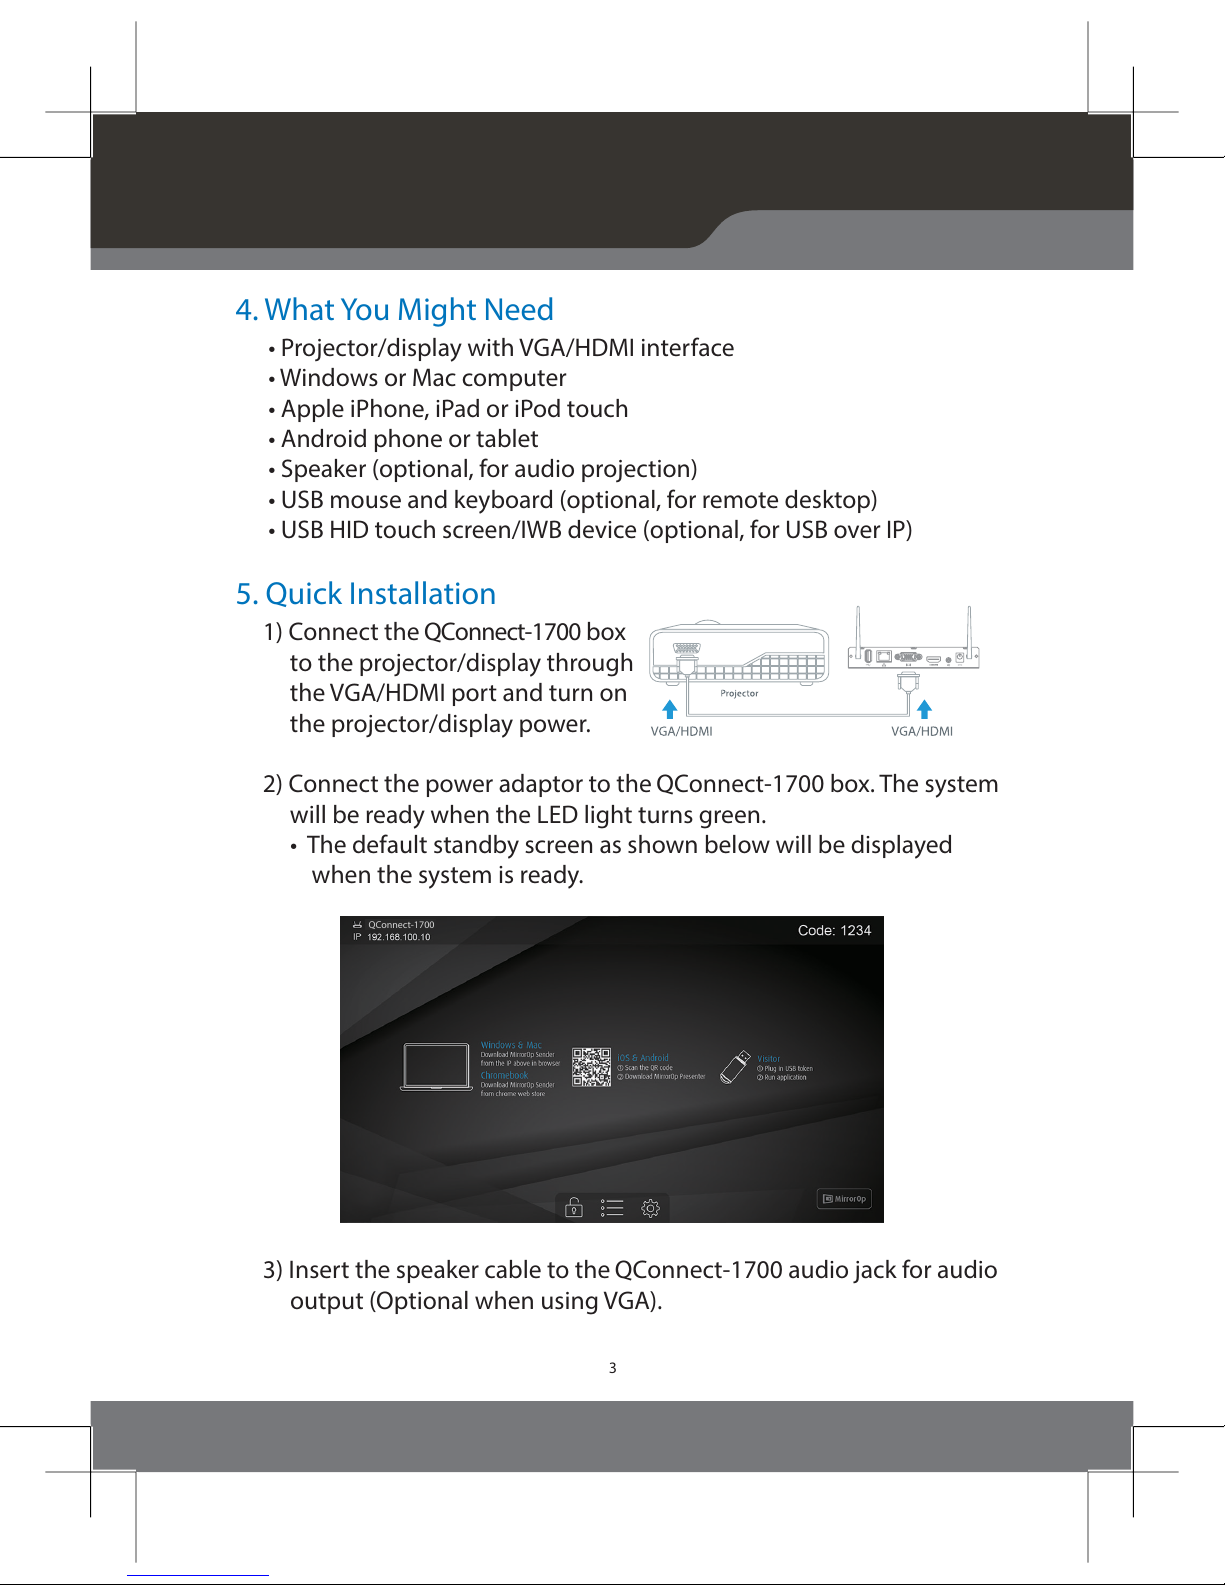
5. Quick Installation
1) Connect the QConnect-1700 box
to the projector/display through
the VGA/HDMI port and turn on
the projector/display power.
2) Connect the power adaptor to the QConnect-1700 box. The system
will be ready when the LED light turns green.
• The default standby screen as shown below will be displayed
when the system is ready.
3) Insert the speaker cable to the QConnect-1700 audio jack for audio
output (Optional when using VGA).
QConnect-1700
QConnect-1700
Quick Installation Guide
Page 5

4
6. Windows
• Do not support Windows Phone, Windows RT
• 6.1 Install the application
1) Make sure your PC is WiFi-enabled, and connect your PC to the
QConnect-1700
name (SSID) of your QConnect-1700 box on the standby screen of the
the projector/display. [Default SSID is QConnect-1700]
2) Open your browser, and enter the IP address of your QConnect-1700
address on the standby screen of the projector/display.
[Default IP address is 192.168.100.10]
QConnect-1700
QConnect-1700
QCT
Page 6

5
3) Download the software (i.e. “MirrorOp”) for “Windows 7 / 8 / 10”,
and follow the Setup Wizard to install the software. (You can
also install the “MirrorOp” software from the USB token directly.)
Make sure the software is not blocked by your
rewall.
• 6.2 Start the application
1) Click the MirrorOp icon on the desktop to execute the
application, or launch the MirrorOp application from the USB
token directly.
QConnect-1700
Quick Installation Guide
Qconnect-1700 > Download
Page 7

6
2) It will start to search for the QConnect-1700 device automatically.
3) Click on the QConnect-1700 device and enter the login code shown
on the display.
4) Click the “PLAY” button to start the screen sharing.
QConnect-1700
QConnect-1700
QConnect-1700
QCT
Page 8

7
7. Mac
• 7.1 Install the application
1) Make sure your Mac is WiFi-enabled, and connect your Mac to
the QConnect-1700 box through WiFi.
2) Open your browser, and enter the IP address of your QConnect-1700
box in the address bar of the browser. You can
nd the IP
address on the standby screen of the projector/display.
[Default IP address is 192.168.100.10]
3) Download the software for “Mac 10.9~10.11”, and you will see a
DMG
le with a MirrorOp icon .
QConnect-1700
Quick Installation Guide
QConnect-1700
Qconnect-1700 > Download
Page 9

8
4) Drag the MirrorOp icon into the Applications folder.
• 7.2 Start the application
1) Click on the MirrorOp icon from the Applications folder to
execute the application.
2) It will start to search for the QConnect-1700 device automatically.
QConnect-1700
QCT
Page 10

WGA-510P
Quick Installation Guide
9
3) Click on the QConnect-1700 device and enter the login code shown
on the display.
4) Click the “PLAY” button to start the screen sharing.
QConnect-1700
Quick Installation Guide
QConnect-1700
QConnect-1700
QConnect-1700
Page 11

 Loading...