

Page 1

Page 2

Table of Contents
Contents
Table of Contents .......................................................................................................... 1
QOMO ARS Overview ................................................................................................... 4
Part 1: Software ............................................................................................................ 5
Software Overview ........................................................................................................ 5
System Requirements ................................................................................................... 5
Installation ..................................................................................................................... 5
Using the QClick Software ........................................................................................... 6
1.1 User ................................................................ .................................................. 6
1.1.1 User Login ........................................................................................................ 6
1.1.2 User Management ............................................................................................ 6
1.2 Add a Question ................................................................................................. 8
1.2.1 Multiple Choice: ................................................................................................ 8
1.2.2 Short Answer .................................................................................................... 9
1.2.3 True/False: ....................................................................................................... 9
1.3 Question Setting ............................................................................................. 10
1.3.1 Question Setting ............................................................................................. 11
1.3.2 Question Detail ............................................................................................... 12
1.4 Tools ............................................................................................................... 14
1.4.1 Class .............................................................................................................. 14
1.4.2 Quiz ................................................................................................................ 17
Part 2. QRF900 Hardware & System Installation Illustration ................................ 51
2.1 Student Keypad .............................................................................................. 51
2.1.1 Specifications ................................................................................................. 51
2.1.2 Illustration ....................................................................................................... 51
2.2 Instructor Keypad ........................................................................................... 66
2.2.1 Specifications ................................................................................................. 66
2.2.2 Illustration ....................................................................................................... 67
2.3 Main Receiver and USB Cable ....................................................................... 87
2.3.1 Specifications ................................................................................................. 87
2.3.2 Illustration ....................................................................................................... 87
2.4 Carrying Case ................................................................................................ 87
Part 3. QRF700 Hardware & System Installation Illustration ................................ 88
3.1 Student Keypad .............................................................................................. 88
3.1.1 Specifications ................................................................................................. 88
3.1.2 Illustration ....................................................................................................... 88
3.2 Instructor Keypad ......................................................................................... 101
3.2.1 Specifications ............................................................................................... 101
Copyright © 2012 All Rights Reserved by QOMO HiteVision.
www.qomo.com 2
Page 3

3.2.2 Illustration ..................................................................................................... 102
3.3 Main Receiver and USB Cable ..................................................................... 121
3.3.1 Specifications ............................................................................................... 121
3.3.2 Illustration ..................................................................................................... 121
3.4 Carrying Case .............................................................................................. 122
Part 4. QRF500 Hardware & System Installation Illustration .............................. 123
4.1 Student Keypad ............................................................................................ 123
4.1.1 Specifications ............................................................................................... 123
4.1.2 Illustration ..................................................................................................... 123
4.2 Instructor Keypad ......................................................................................... 125
4.2.1 Specifications ............................................................................................... 125
4.2.2 Illustration ..................................................................................................... 126
4.3 Main Receiver and USB Cable ..................................................................... 135
4.3.1 Specifications ............................................................................................... 135
4.3.2 Illustration ..................................................................................................... 135
4.4 Carrying Case .............................................................................................. 136
Part 5. QRF300 Hardware & System Installation Illustration .............................. 137
5.1 Student keypad ............................................................................................ 137
5.1.1 Specifications ............................................................................................... 137
5.1.2 Illustration ..................................................................................................... 137
5.2 Instructor keypad .......................................................................................... 138
5.2.1 Specifications ............................................................................................... 138
5.2.2 Illustration .................................................................................................... 138
5.3 Main Receiver and USB Cable ..................................................................... 139
5.4 Keypad pack ................................................................................................. 140
Part 6. Converter Tool ............................................................................................ 141
Part 7. Freestyle Application ................................................................................. 142
7.1 Freestyle Overview ....................................................................................... 142
7.1.1 Quiz Setup .................................................................................................... 142
7.1.2 Freestyle Toolbar.......................................................................................... 143
7.1.3 Start a Quiz .................................................................................................. 143
7.1.4 Screen Capture Tool .................................................................................... 146
7.1.5 Drawing Tool ................................................................................................ 147
Part 8. FCC Warning Statement ............................................................................... 149
Copyright © 2012 All Rights Reserved by QOMO HiteVision.
www.qomo.com 3
Page 4

QOMO ARS Overview
Thank you for purchasing the QOMO Audience Response System (ARS). The QOMO Audience
Response System is user friendly and it provides instant feedback from all of the participants (up to
1,000 persons). Working with Microsoft PowerPoint, the QClick software is easy to learn and easy to
use. Some of the student clickers display the question being asked on its own screen. Both the
questions and the answers can be easily and quickly created using built-in PowerPoint templates; or
by using existing PowerPoint presentations. Furthermore, you can use hardcopy tests and have
your students answer using QClick. The QClick’s Instant Questions setting allows instructors to add
questions during the test.
The system is composed of hardware (instructor keypad, student keypad, RF receiver, etc.) and
software.
With multiple question type selections—Multiple Choice, Short Answer, and True/False—QOMO
ARS encourages the participants to be involved in various activities—Normal, Rush, and
Vote/Survey—and combines them in one quiz session. Generally, Normal Quiz, Elimination,
Homework, and Paper Quiz are used to conduct the tests.
The instructor keypad incorporates a remote mouse and some PC keyboard functions allowing
control of the slide selection as well as other software functions. The remote mouse functionality of
the keypad gives the instructor the freedom of not having to use a computer to conduct the tests.
The QOMO ARS allows the instructor to display instant test results in the form of a histogram and a
score board after each question is completed.
Copyright © 2012 All Rights Reserved by QOMO HiteVision.
www.qomo.com 4
Page 5

Part 1: Software
Software Overview
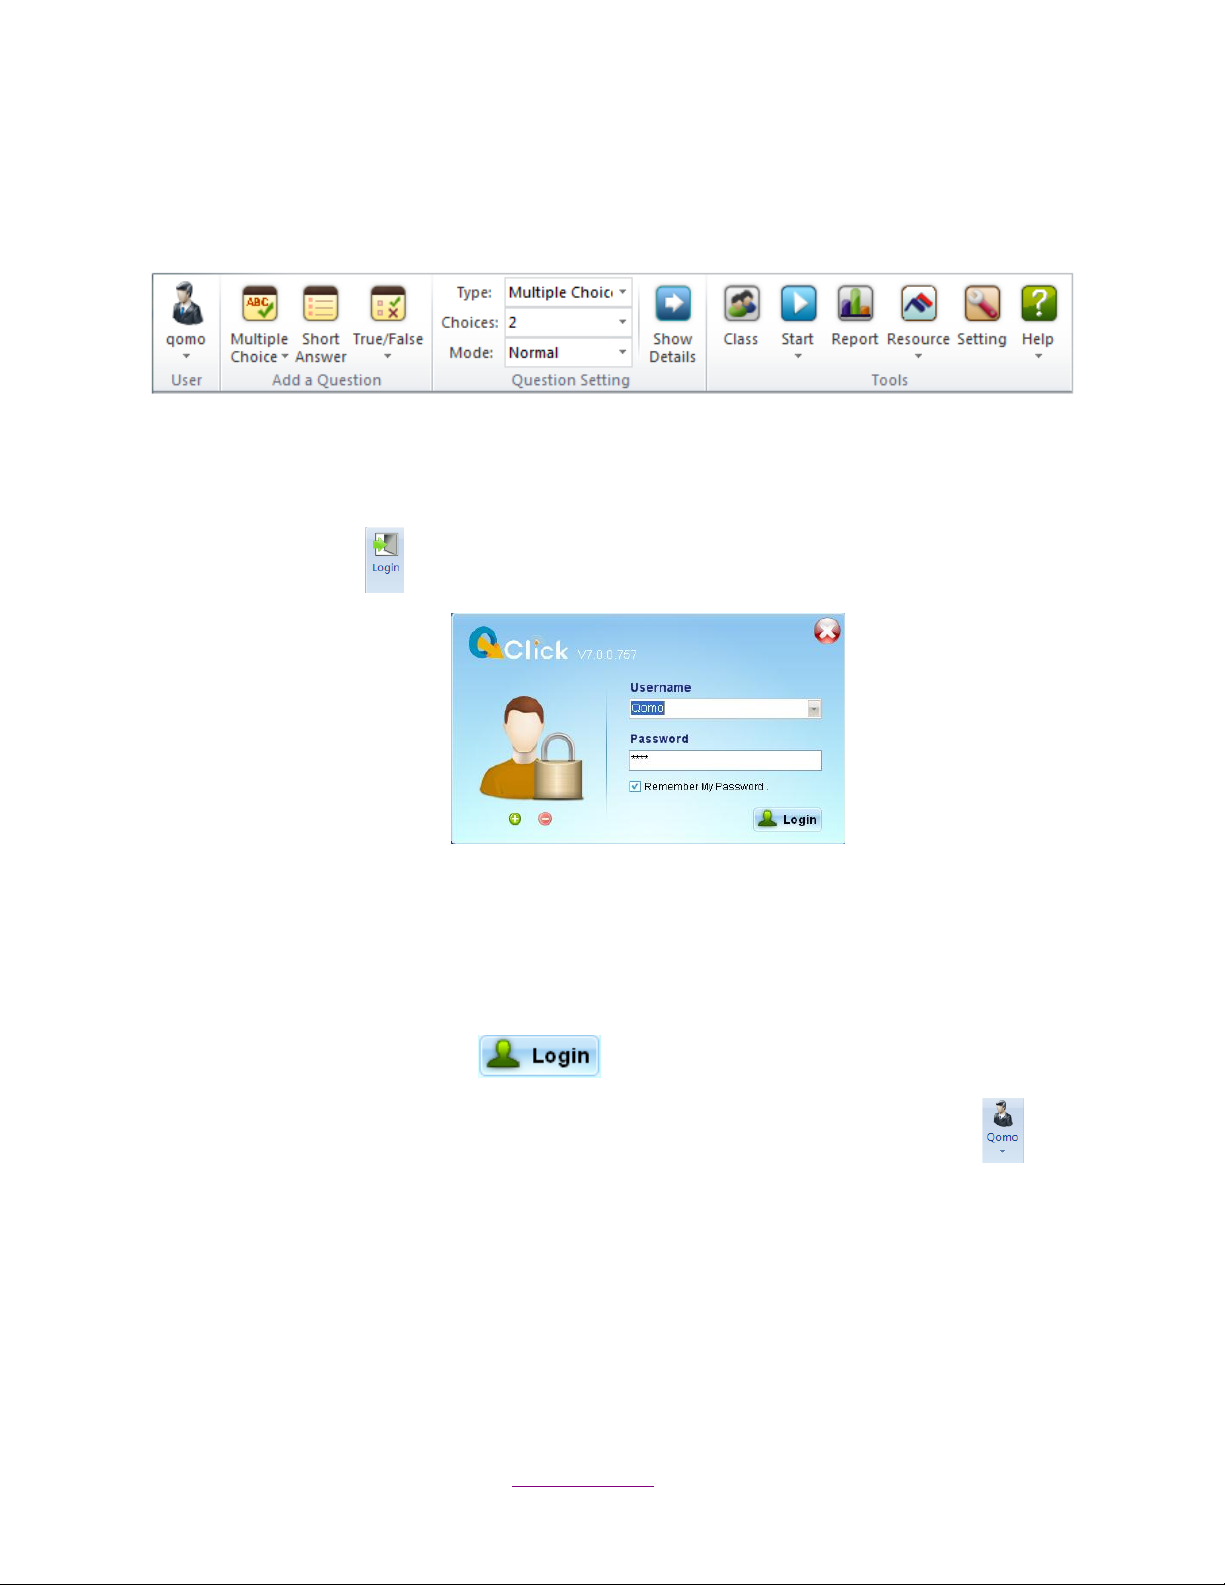
QClick software has four sections: User, Add a Question, Question Settings, and Tools.
The User section allows you to login/logout the system and to manage user profiles.
The Add a Question section allows the selection of question mode, and the creation and editing of
the PowerPoint exam slides.
The Question Setting section allows you to create and edit the slide questions, as well as the
answer selections.
The Tools section is designed for class management, quiz process settings, session management,
and the system set up.
System Requirements
Windows 7 (both 32 and 64 bit), Vista (32 bit) and Windows XP (32 bit) operating system
Office 2007, Office 2010 with Office PowerPoint and Office Excel installed
Intel or AMD 600 Mhz class processor (1 GHz or higher recommended)
256 MB RAM
245 MB hard disk space (an additional 187 MB is required if you do not have Microsoft .NET
Framework 3.5 installed or higher)
1024 x 768 resolution at 32-bit color or higher
Standard USB 1.1/2.0 port (for USB-based hardware devices)
Installation
1. Place the software disk into your computer CD drive.
2. Open the disk and double click on the “QClick.exe” file in the root directory.
3. Follow the instructions displayed during the installation.
If the program has been previously installed, we suggest you remove the older version of the
program prior to installing the new program.
The default installation path is: C:\QOMO and will produce one shortcut icon on the desktop: .
Copyright © 2012 All Rights Reserved by QOMO HiteVision.
www.qomo.com 5
Page 6
Using the QClick Software
1.1 User
1.1.1 User Login
To login the system, follow these steps:
1. Click the Login icon and the User Login window will display.
2. Select the user name from the Username drop-down list, or directly enter the username and
password in the textboxes.
3. Click the check box in front of Remember My Password and the system will save your
password automatically.
4. Then click the Login button to log into the system.
Note: User login the system, username will be displayed on the User Section, like this .
1.1.2 User Management
The default username and password is “qomo”. This is also the administrator login which is used to
manage other user profiles.
To manage user profiles, follow these steps:
Copyright © 2012 All Rights Reserved by QOMO HiteVision.
www.qomo.com 6
Page 7
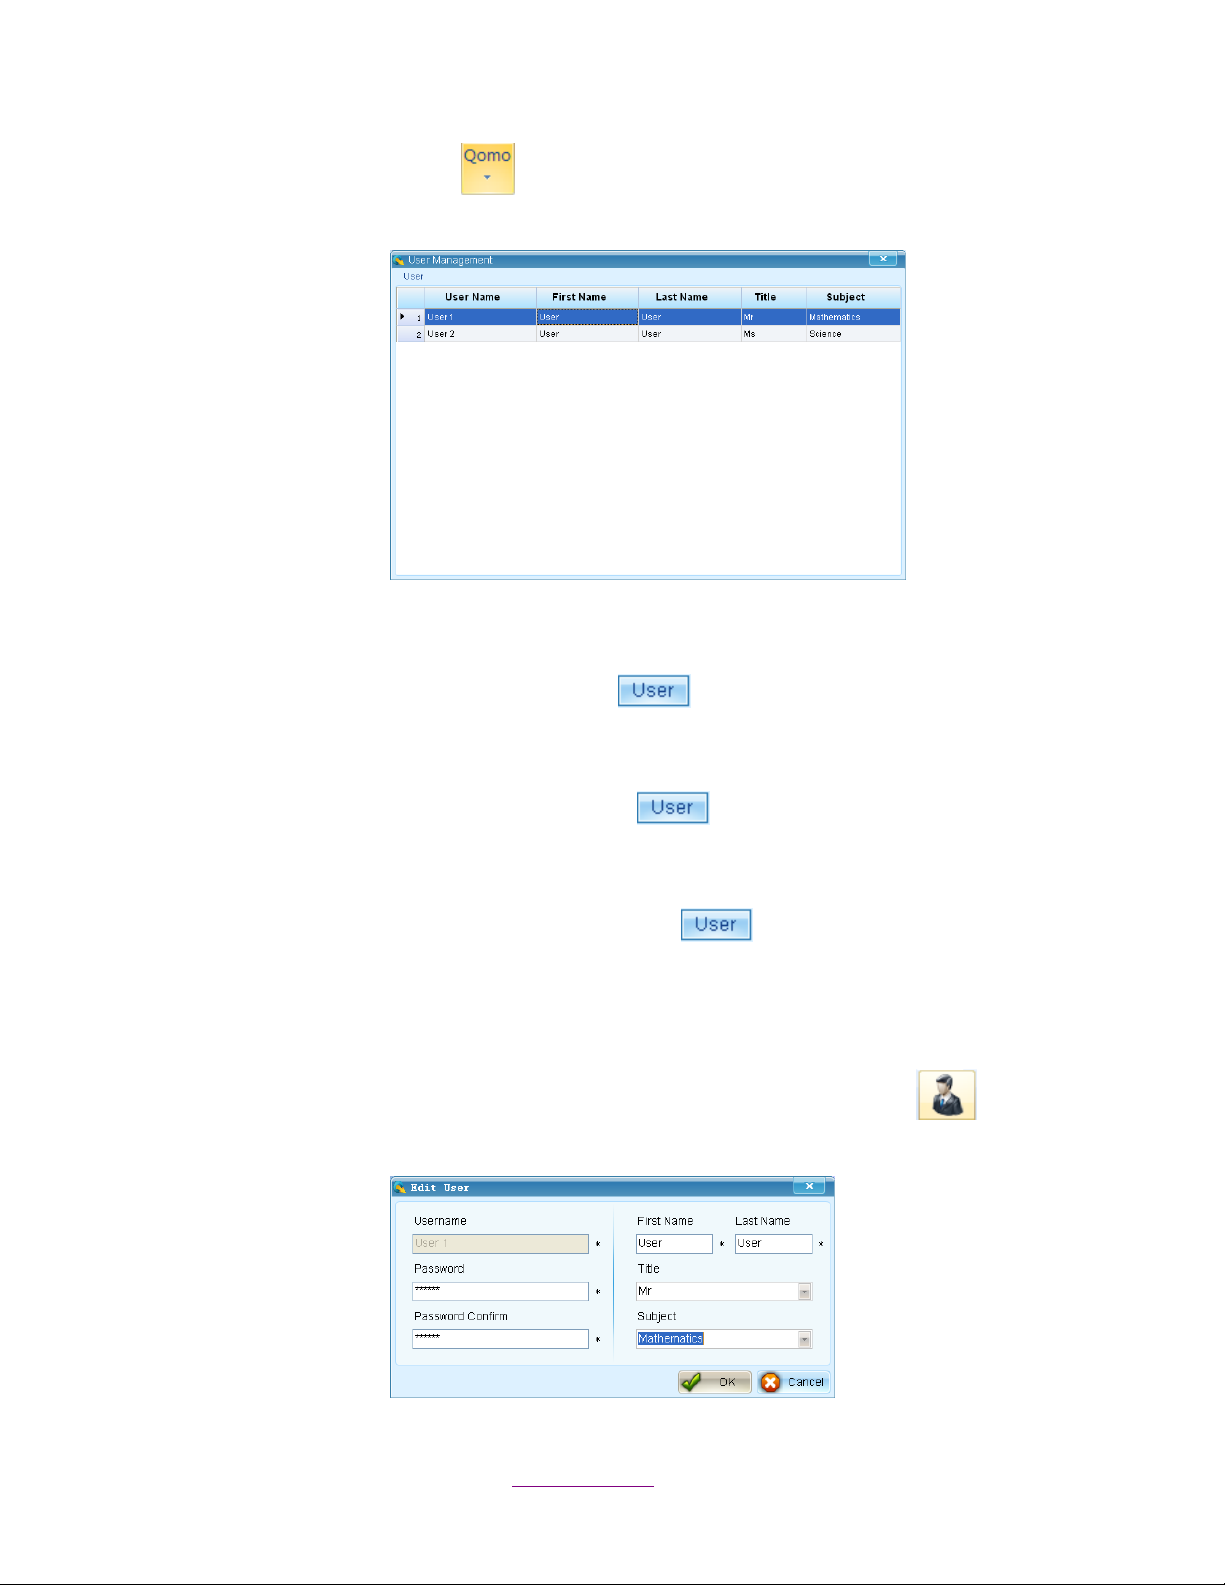
1. Click the username icon then click the selection of User Management. The User
Management window will pop up.
2. All user profiles will be displayed on the table, including User Name, First Name, Last Name,
Title, and Subject.
3. To add a new user, click the User button on the top left of the window and select
Add from the option menu. Or, right click the username data and then select Add a User
from the drop-down menu.
4. To edit a selected user, click the User button on the top left of the window and select
Edit from the option menu. Or, right click the username data and select Edit the User from
the drop-down menu. The Edit User window will pop up.
5. To delete a selected user, click the User button on the top left of the window and
select Delete from the option menu. Or, right click the username data and then select
Delete the User from the drop-down menu.
Note: Only the system default username “Qomo” can be used for user management.
Note: All users can edit a personal profile by clicking the avatar icon above the
username and then the Edit User window will pop up.
Copyright © 2012 All Rights Reserved by QOMO HiteVision.
www.qomo.com 7
Page 8
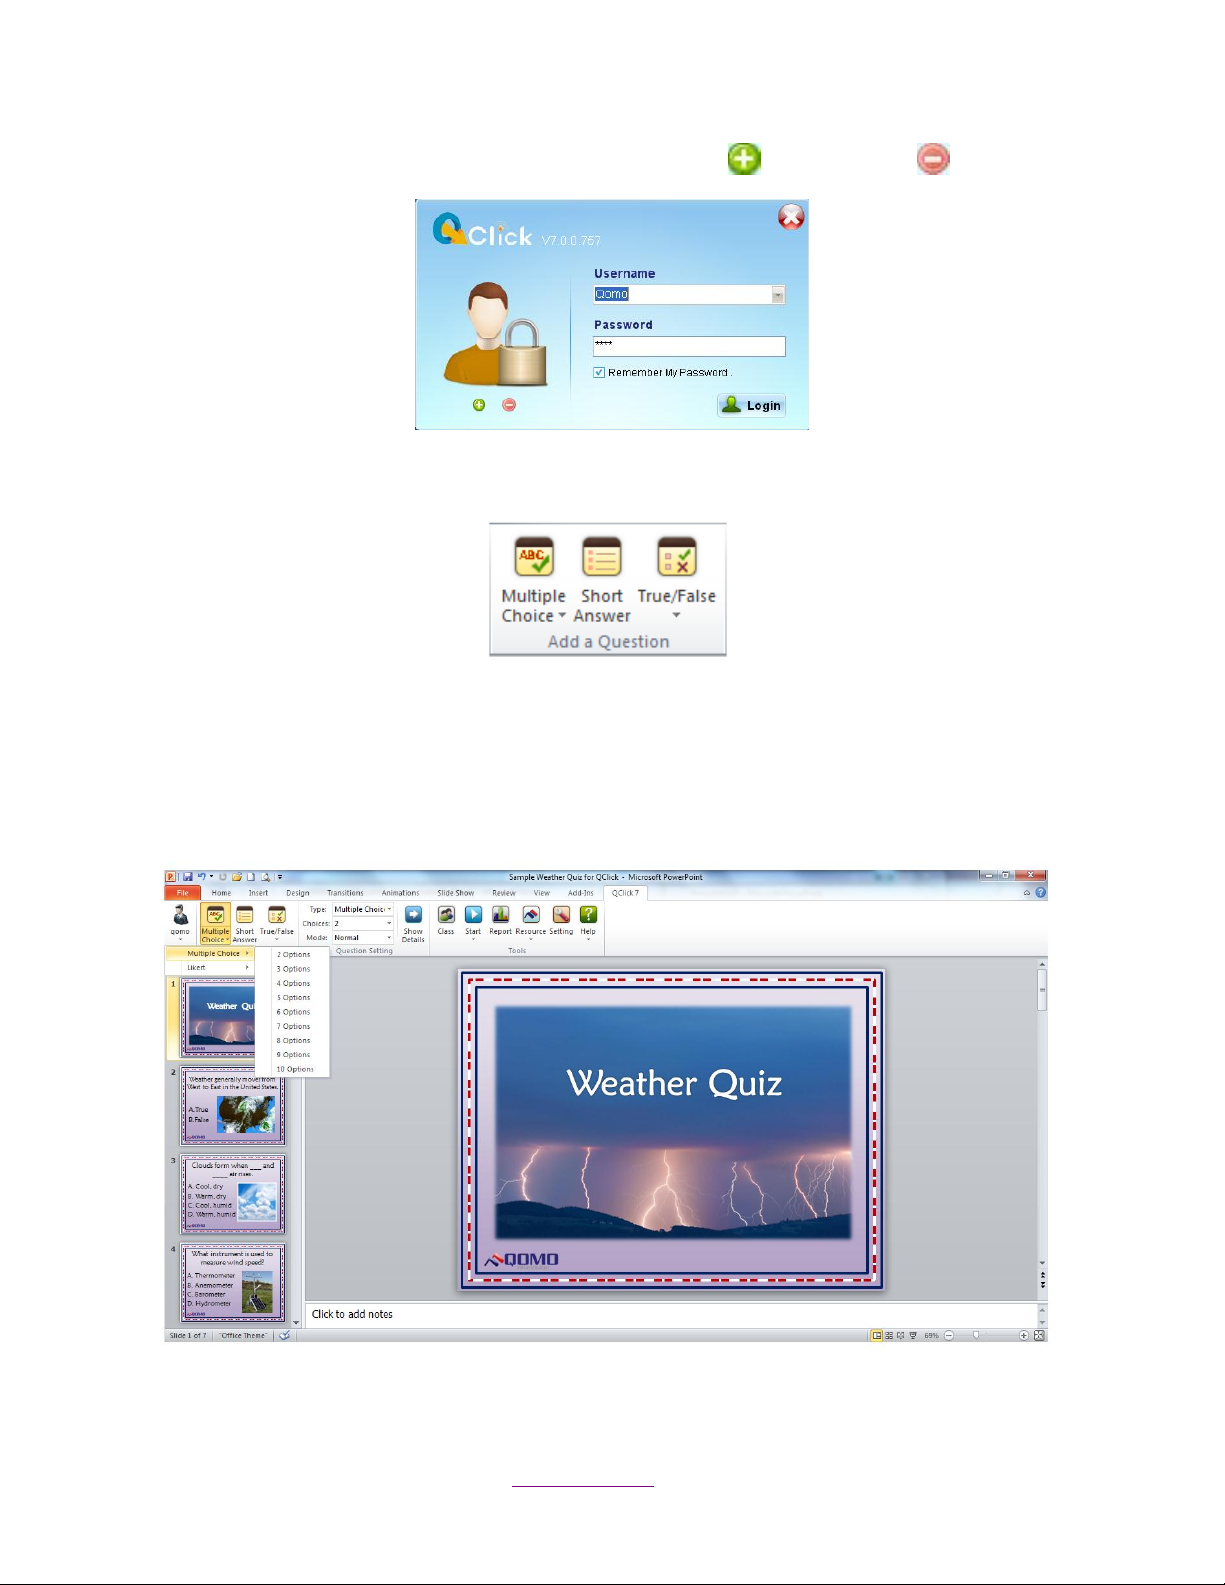
Add or delete a user in User Login window by clicking the Add or Delete button .
1.2 Add a Question
In this section, there are three types of slide templates to choose from: Multiple Choice, Short
Answer and True/False.
1.2.1 Multiple Choice:
Copyright © 2012 All Rights Reserved by QOMO HiteVision.
www.qomo.com 8
Page 9
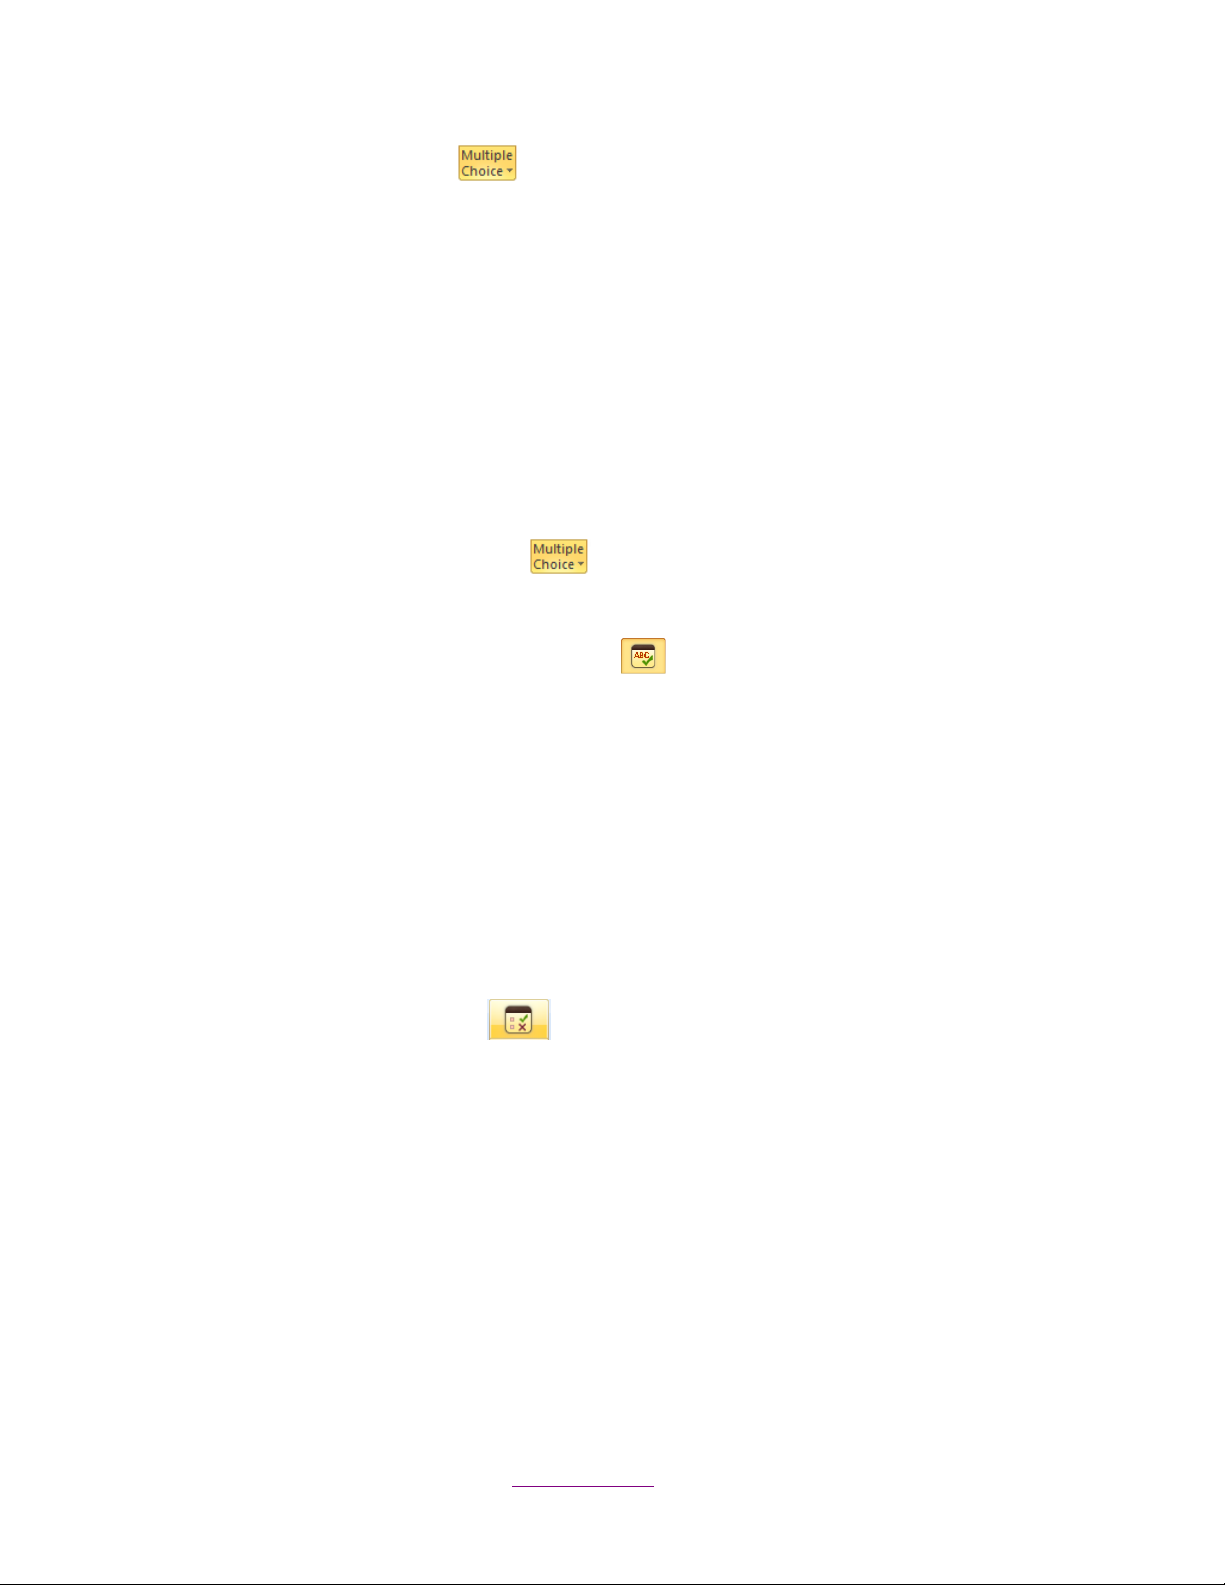
Click the Multiple Choice button . An option menu popup with two question selections will
appear: Multiple Choice and Likert.
Multiple Choice: Set for two types of questions—Single Answer & Multiple Answers and
choose from 2 to 10 selections.
o Single Answer: Multiple options question with only a single correct answer choice.
o Multi Answer: Multiple options question with the option of more than one correct
choice.
Likert: Mostly used for Vote and Survey questions. There are dozens of likert templates in
the QClick system.
To add a Multiple Choice slide follow these steps:
1. Click the Multiple Choice button . The question selections menu pops up.
2. Click the question options to complete the question setup.
Note: When you click on the Multiple Choice icon a blank four option slide will be added.
1.2.2 Short Answer
This type of template is designed for text input questions.
Clicking the Short Answer button will add a blank slide to the presentation.
1.2.3 True/False:
To add a new True/False question, follow these steps:
1. Click on the True/False icon . A slide with the True/False options will be added.
Copyright © 2012 All Rights Reserved by QOMO HiteVision.
www.qomo.com 9
Page 10
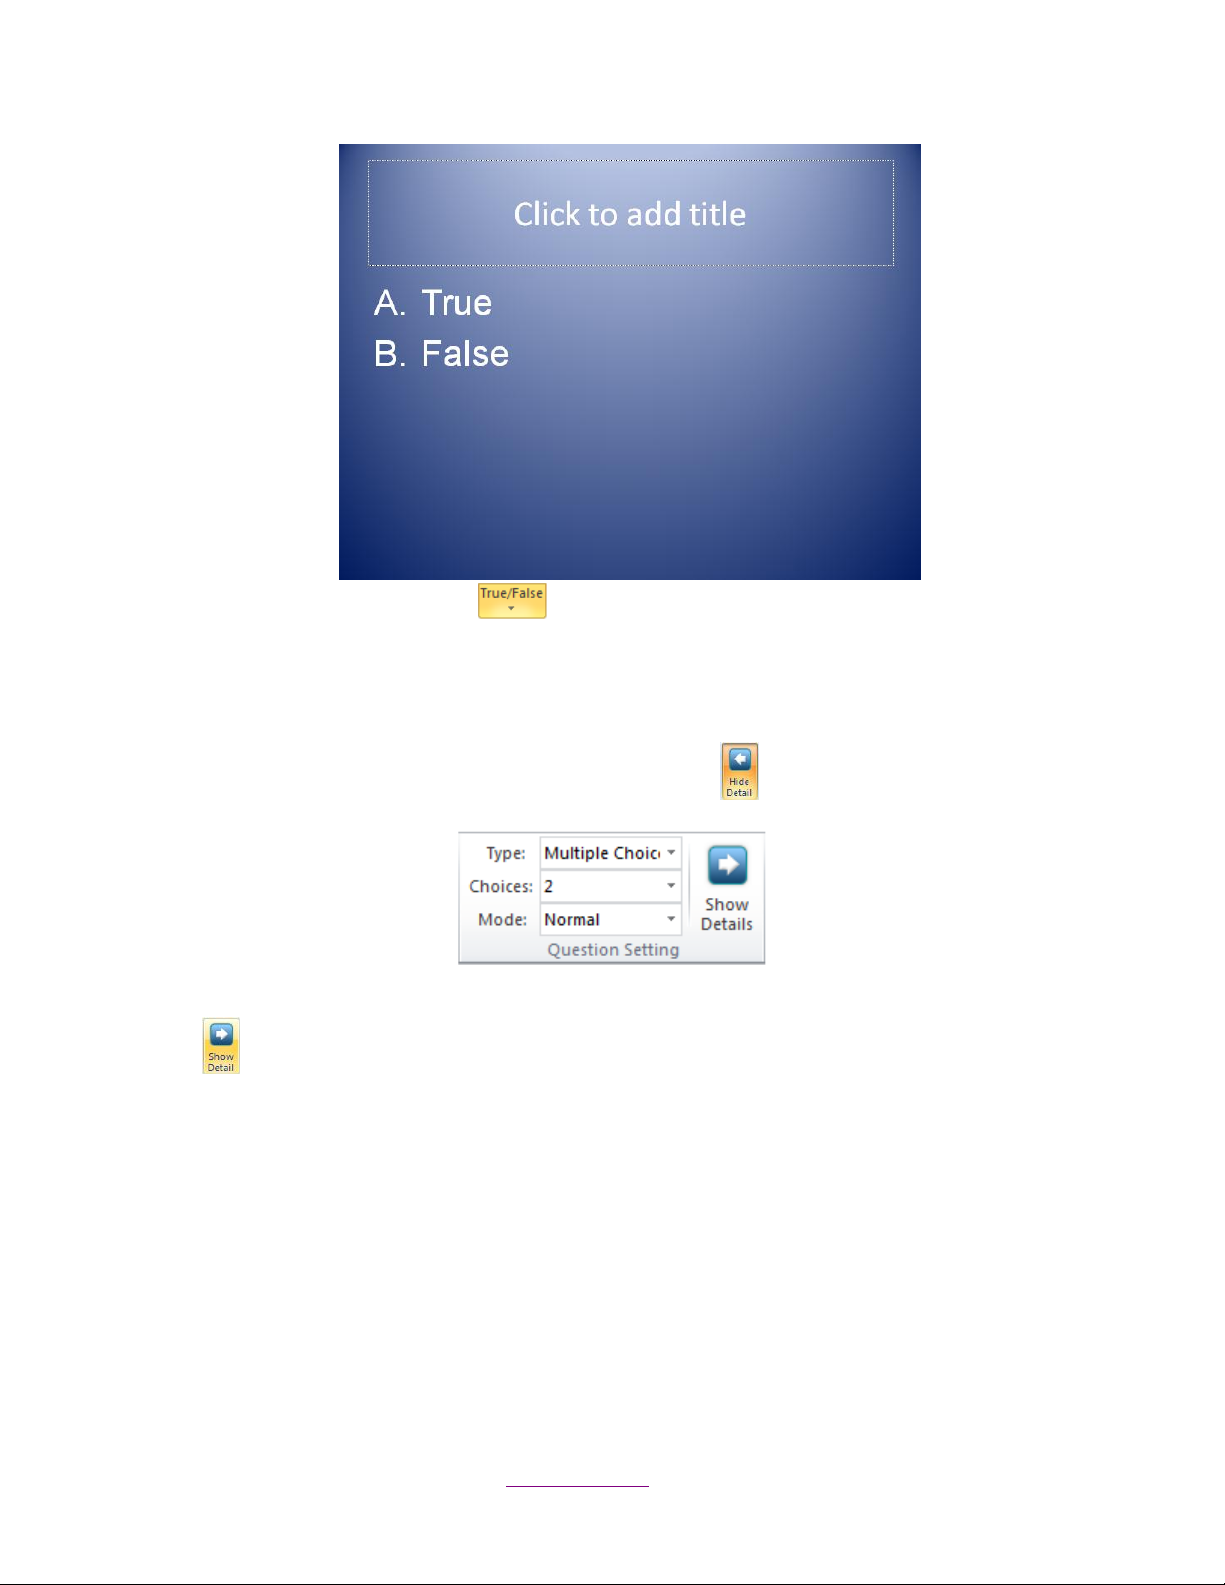
2. Click the True/False button and an option menu will pop up. Click one option and a
new slide will be added.
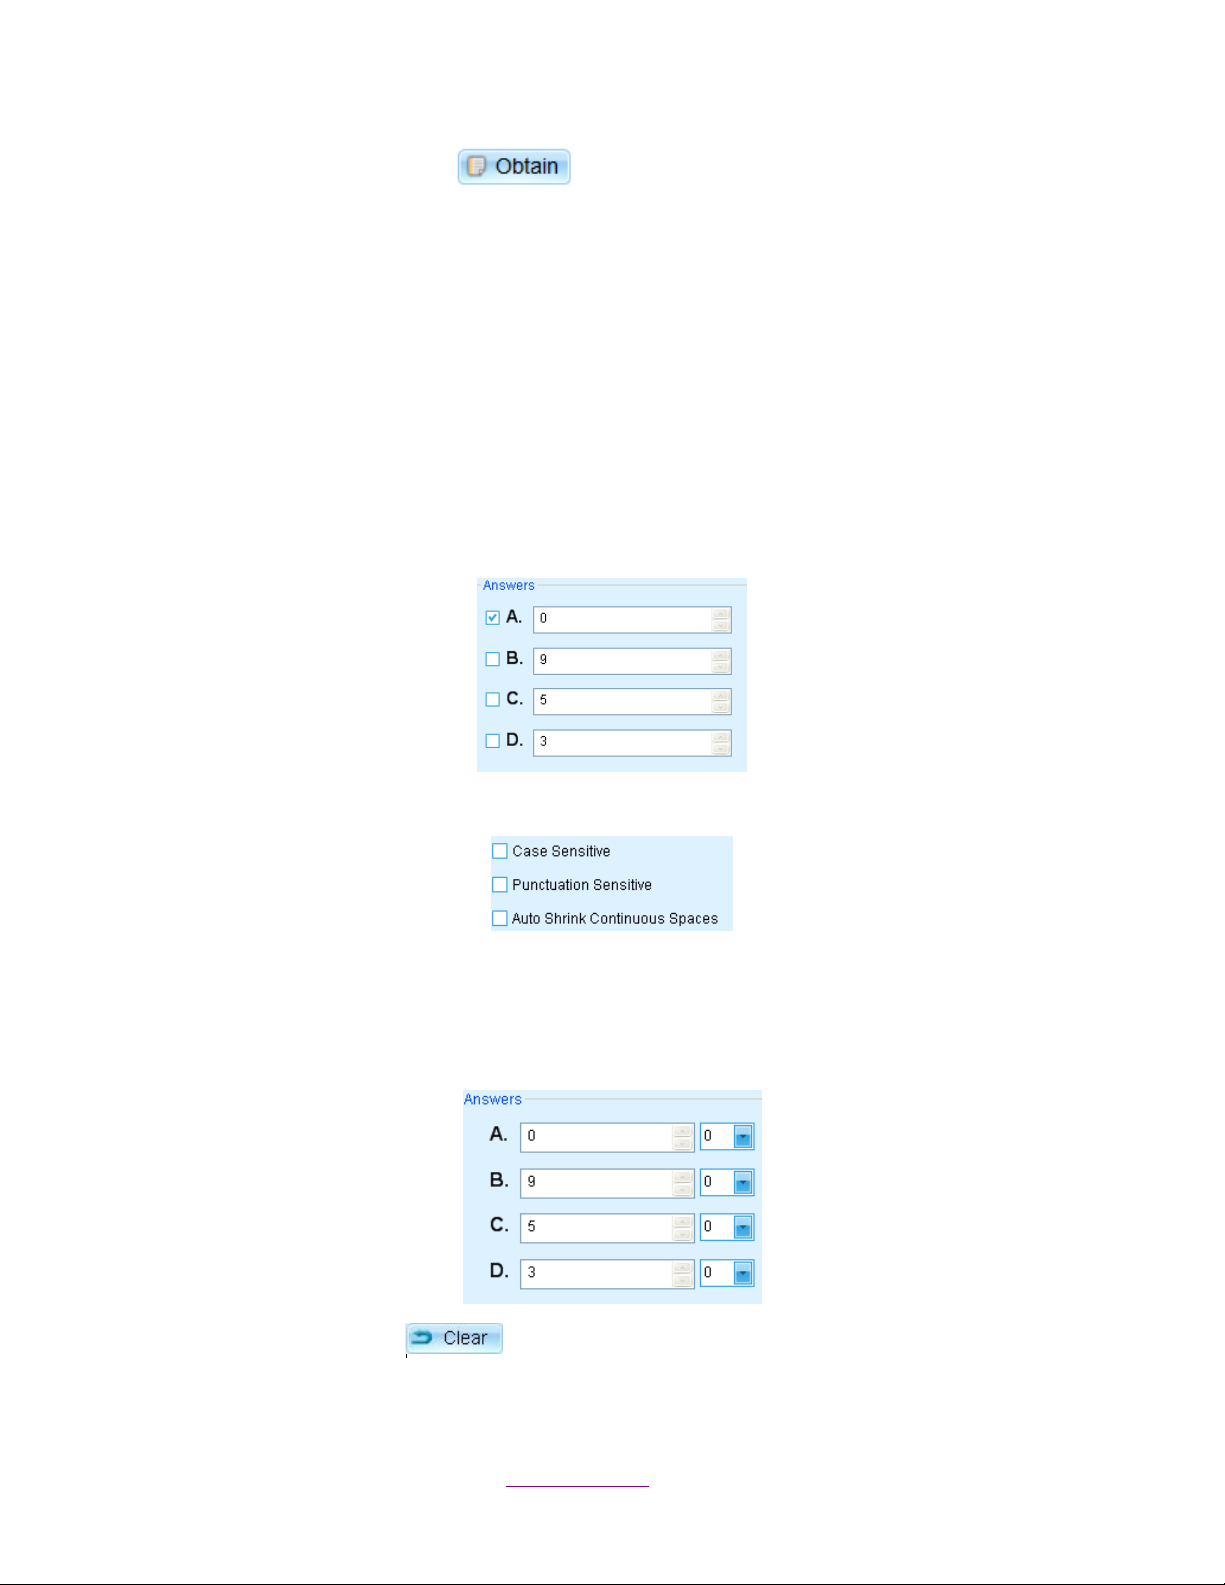
1.3 Question Setting
Question Setting window has two parts, hidden by the button .
To set up the PowerPoint questions, go to the Question Setting section and click the Show Detail
button . The Question Setting window will be fully displayed. One is Question Setting located
on the main toolbar; the other is Question Detail located on the right of the screen next to the slide
setting window.
Copyright © 2012 All Rights Reserved by QOMO HiteVision.
www.qomo.com 10
Page 11

1.3.1 Question Setting
1.3.1.1 Type
Type: Select the question type you desire to set up from the Type drop-down list. The three question
types to choose from are Multiple Choice, True/False, and Short Answer.
1.3.1.2 Choices
Choices: Select the answer options you desire to set up from the Choices drop-down list. Choose
2 to 10 answer options for a multiple choice question.
Note: Short Answer questions have no choice setting and True/False questions defaults to 2
options.
Copyright © 2012 All Rights Reserved by QOMO HiteVision.
www.qomo.com 11
Page 12

1.3.1.3 Mode
Mode: Select a question mode from the Mode drop-down list for the question setting. There are
three question modes: Normal, Rush and Vote/Survey. The default setting is Normal.
Normal: A quiz file must be provided with the correct answers for each question prior to
starting the quiz.
Rush: The first student who presses any effective “Rush Quiz” button locks out the rest of
the students from answering and is the only person able to respond to this particular
question.
Vote/Survey: The activity is used for subjective responses. The audience’s response is
either a positive or a negative with no correct or incorrect answer.
Note: Short Answer can only be used in Normal and Rush mode.
1.3.1.4 Timer
Timer: Select a time from the drop-down list and set the time limit from 10 to 60 seconds—the
default value is set at 30 seconds. Or type a number in the Timer textbox directly—the valid time is
from 1 to 900 seconds. The session running timer copies this time limit value when each question
starts.
1.3.1.5 Answer
Answer: For Short Answer questions, type in the correct answer. For Multiple Choice and
True/False questions, the correct answers are selected and edited through the Question Details
screen.
Note: Answers cannot be edited when the question mode is set up for Vote/Survey.
1.3.1.6 Points
Points: The point value is specified for correct answers. In the Point drop-down list, there are 5
options to choose from: 1, 2, 5, 10 and 20. The valid point is from 1 to 250, and the default value is
set at 10. Users can type any valid number in the Point textbox directly.
Note: Points cannot be edited when the question mode set up for Vote/Survey.
1.3.2 Question Detail
Question Detail is designed to set up the question details and the correct answer.
To set up the questions, follow these steps:
Copyright © 2012 All Rights Reserved by QOMO HiteVision.
www.qomo.com 12
Page 13
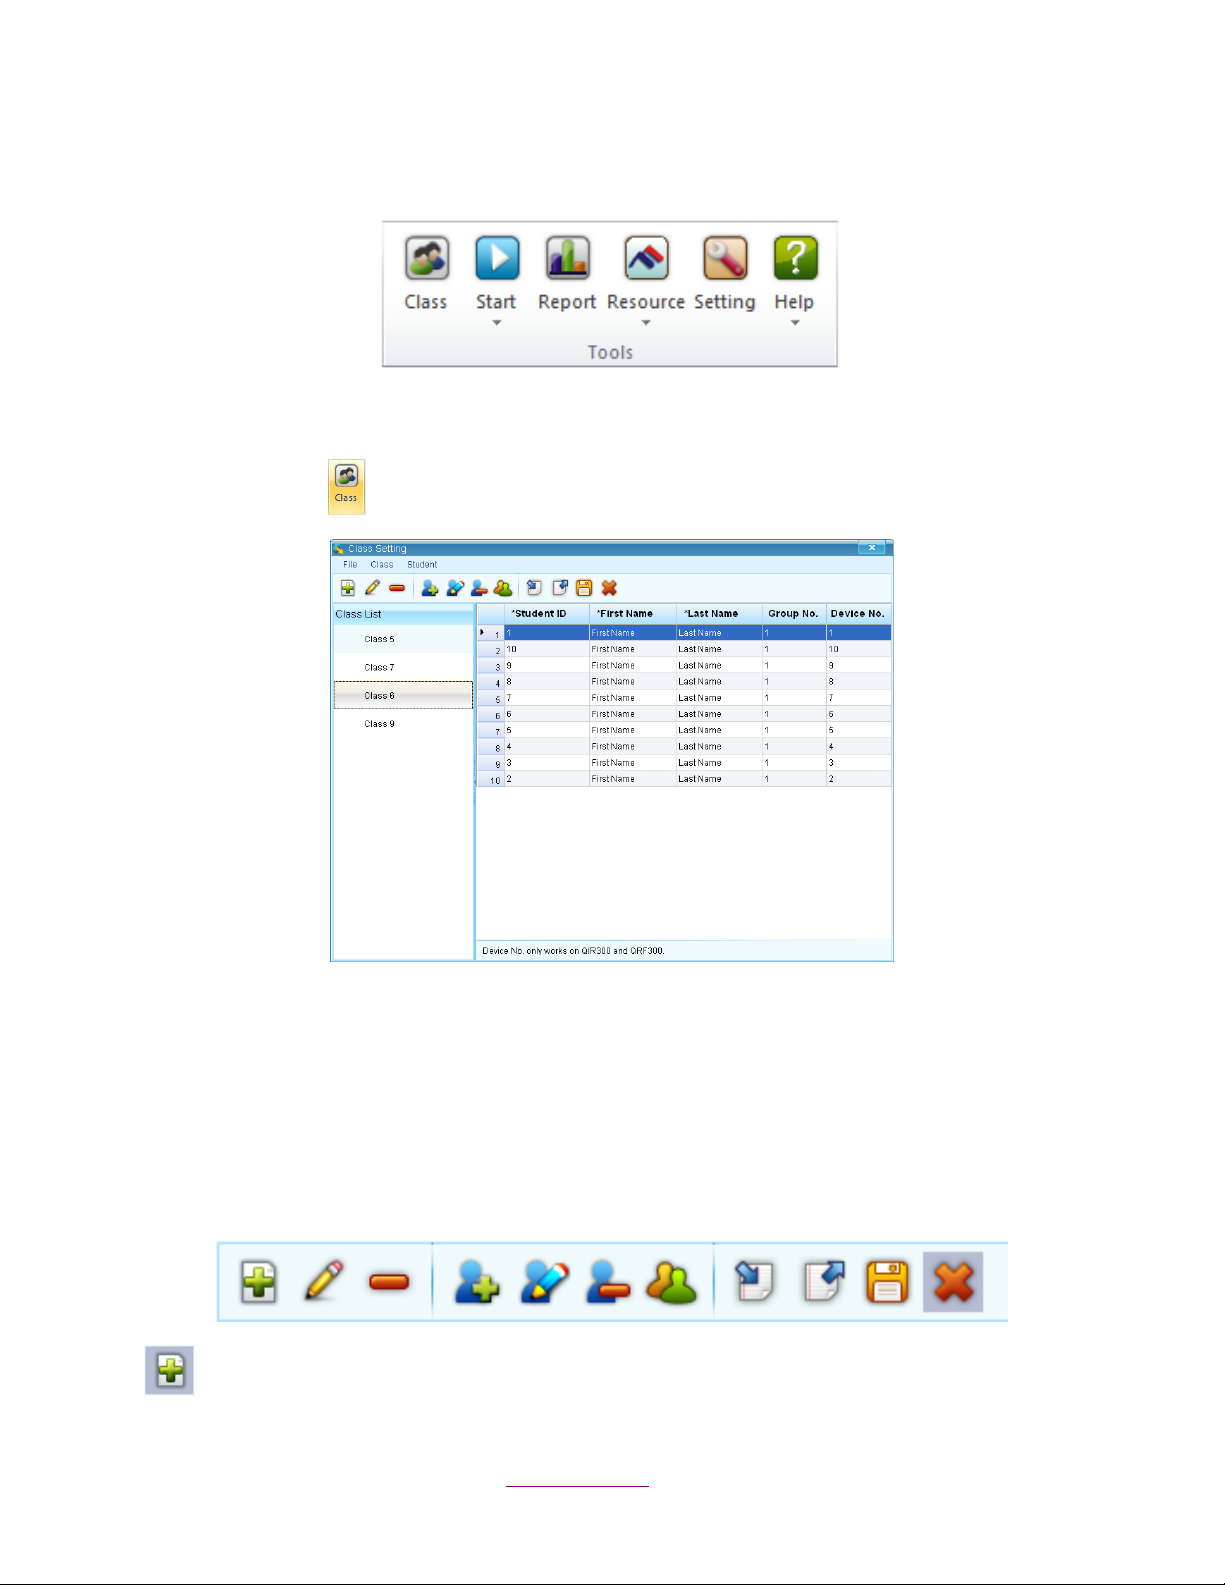
1. Click the Obtain button and the question content will be displayed in the
textboxes from the current slide.
The question title will be displayed in the textbox under Text.
The answer options will be displayed in the textboxes under Answers.
Note: Obtain has two functions for question data storage: sending questions to Student
Responders (QRF900) and keeping the question title stored in the Session Record.
To edit the question content, users can also select and drag the current editing
question into the Text & Answers textboxes.
2. Set up the correct answer manually:
Set the correct answer for the Multiple Choice & True/False questions by clicking
the check box in front of the answer options.
Type the answer in the textbox directly for Short Answer questions.
Note: You can click or not click the check box of the selections under the Answers textbox
for the text format.
Select a point value from the drop-down list for the corresponding answers for
Vote/Survey types of questions.
3. Click the Clear button to clear all changes of the current editing slide.
Copyright © 2012 All Rights Reserved by QOMO HiteVision.
www.qomo.com 13
Page 14
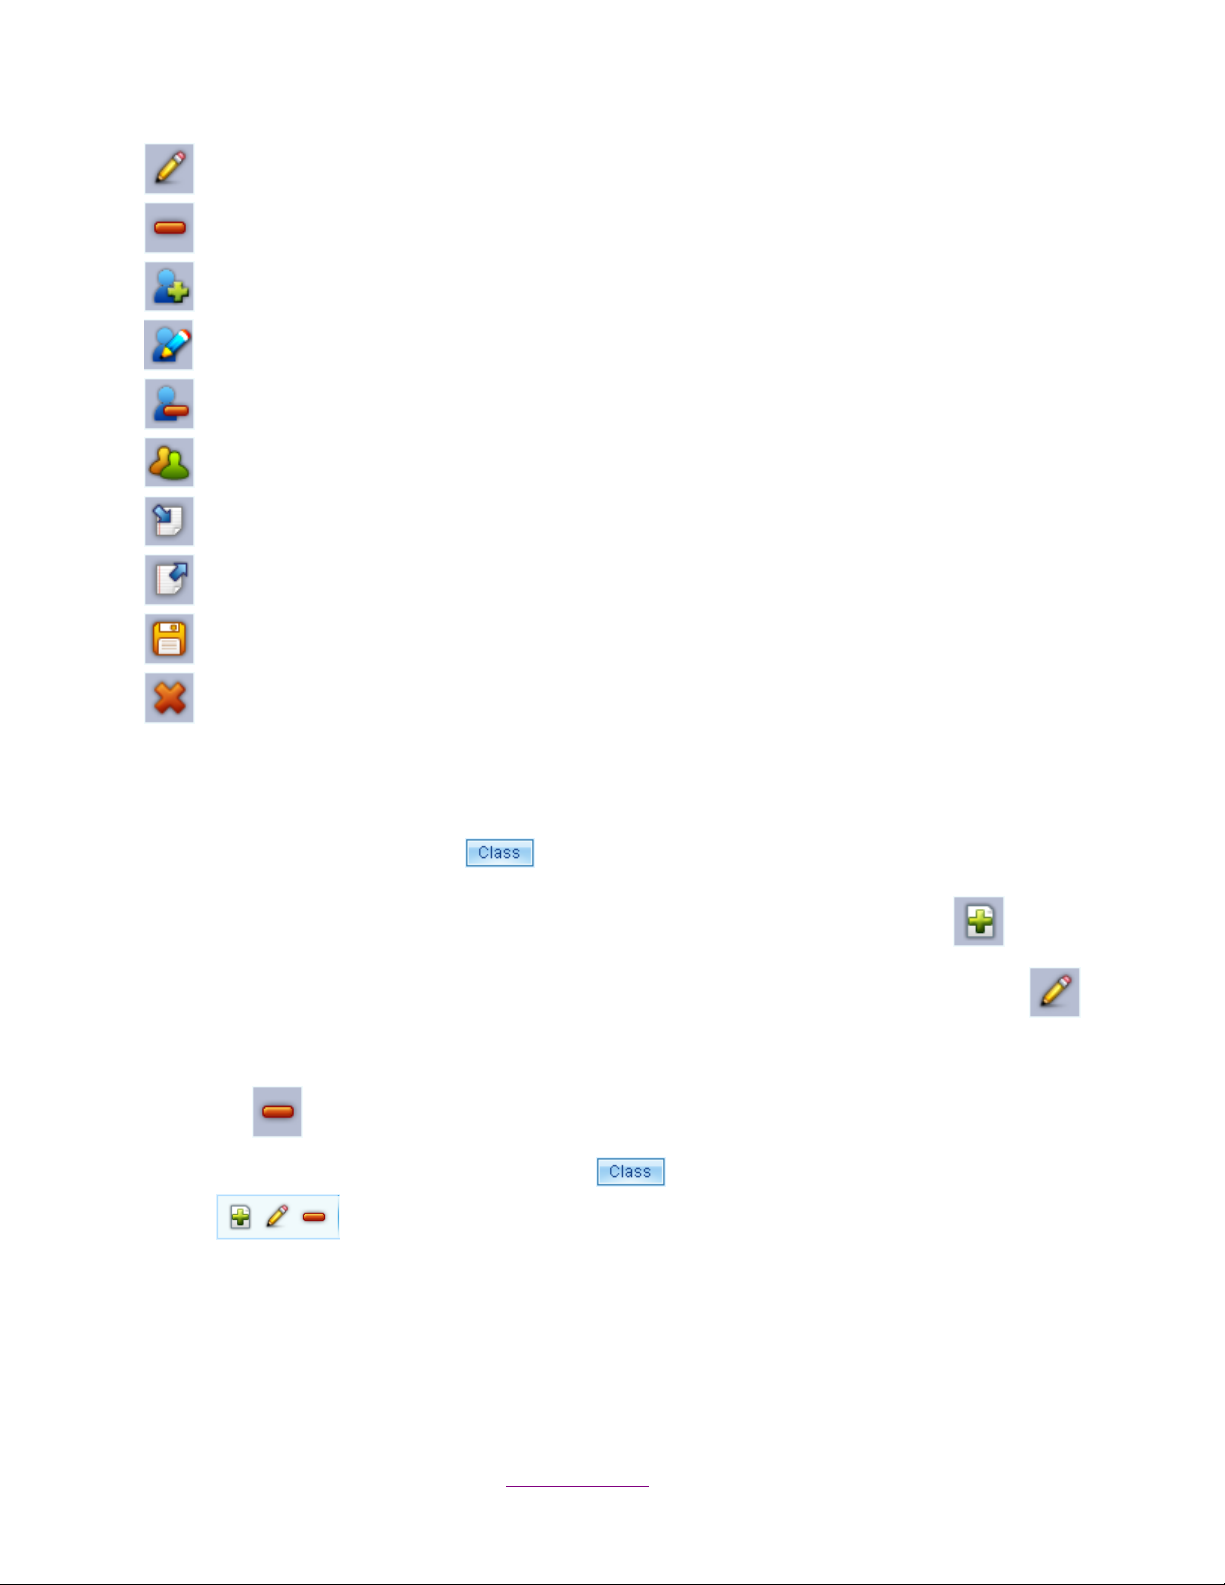
1.4 Tools
1.4.1 Class
Click the Class Tab in the Tools window. The Class Setting window will be displayed.
Windows Menu:
1. File—import, export, save, or exit the file.
2. Class—add, rename, or delete a class.
3. Student—add, edit, delete, or group students.
Controls on the toolbar:
Add a new class in Class List
Copyright © 2012 All Rights Reserved by QOMO HiteVision.
www.qomo.com 14
Page 15
Edit the selected class name in Class List
Delete the selected class
Add a new student to the student list
Edit the selected student profile
Delete the selected student
Group the students
Import a Class List
Export the selected Class List
Save
Exit the Class Setting window
Class Setting
To create, select, or modify class information follow these steps:
1. Click the Class button in the Class Setting windows menu. An option menu will
pop up.
2. To add a new class, select Add from the option menu or click the Add icon .
3. To edit the class name, select Rename from the option menu, click the Edit icon
or double click Class Name.
4. To delete the selected class, select Delete from the option menu or click the Delete icon
.
Note: The functions of the Class button are the same as the controls on the toolbar
.
Student Setting
To create or modify student profiles, follow these steps:
Copyright © 2012 All Rights Reserved by QOMO HiteVision.
www.qomo.com 15
Page 16
1. Click the Student button in the Class Setting windows menu. An option menu
will pop up.
2. To add a new student, select Add from the option menu, click the Add icon , or
right click on the student roster table.
3. To edit the selected student profile, select Edit from the option menu, click the Edit icon
, or click the needed cell on the student roster table.
4. To delete the selected student, select Delete from the option menu, click the Delete icon
, or right click on the student roster table.
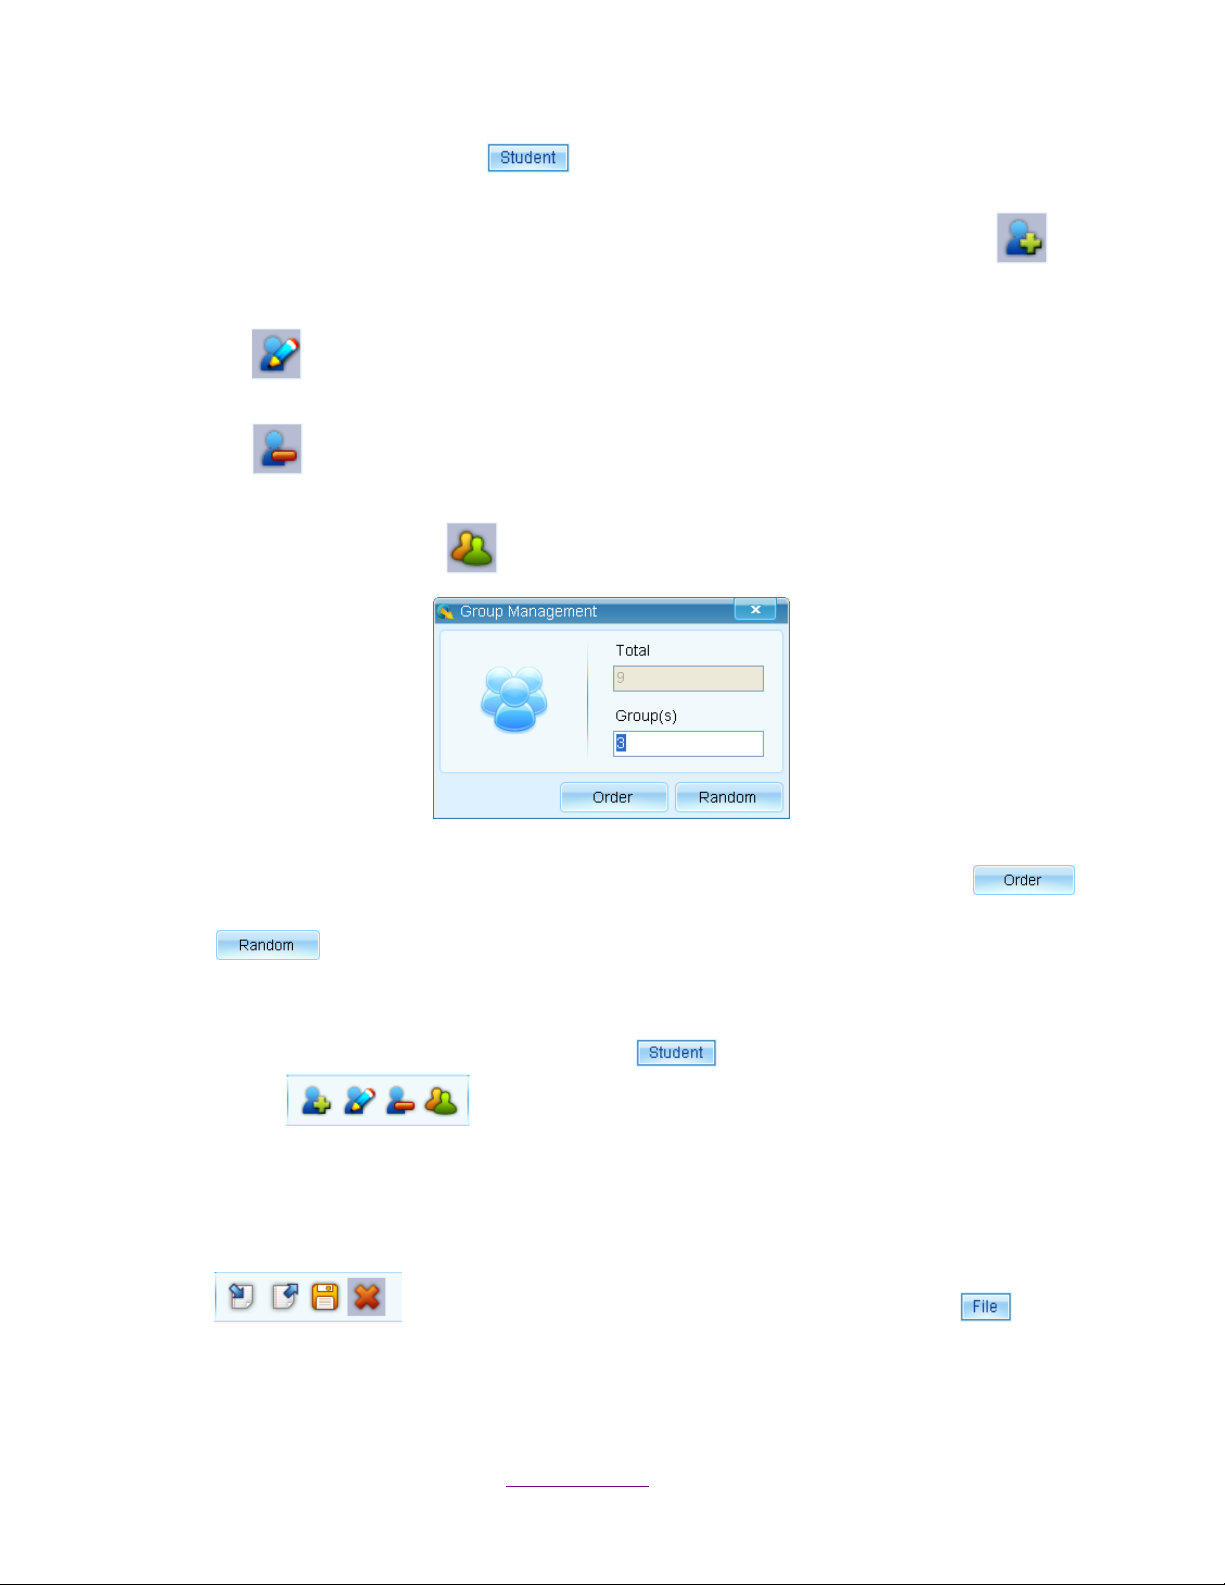
5. To set up groups for the students in the class, select Group from the option menu or
click the Group icon to display the Group Management window.
There are two grouping methods displayed on the window: Order and Random. For orderly
grouping, type in the number of groups that you want and click the Order button .
The software will automatically group the students in order. Click the Random button
for the random grouping. The software will randomly select students for the
grouping. Students can be grouped manually by double clicking the cells on the student
roster table.
Note: The functions of the Student button are the same as the controls on the
toolbar .
Other Settings
The other settings are Import, Export, Save and Exit. You can find these controls displayed on the
toolbar and displayed in an option menu by clicking the File button .
Import Class List
To import a class list, follow these steps:
Copyright © 2012 All Rights Reserved by QOMO HiteVision.
www.qomo.com 16
Page 17
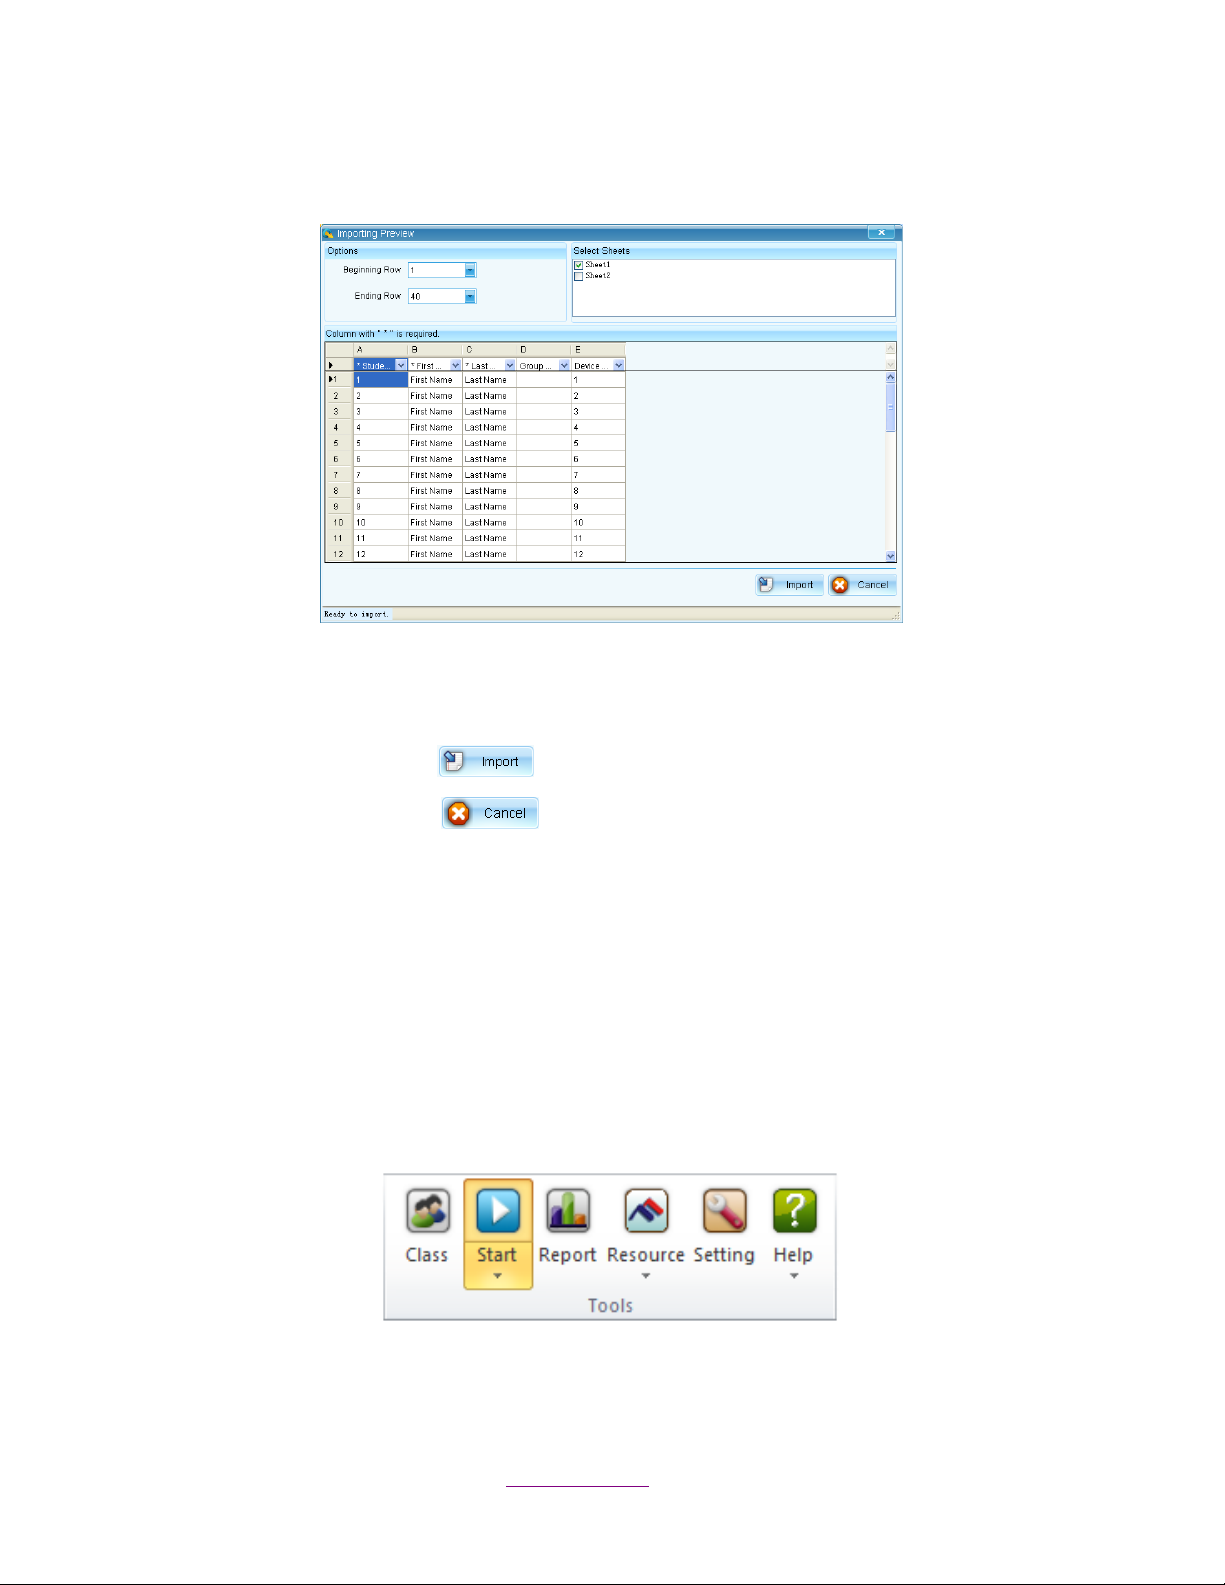
1. Click Import and a file browser will pop up.
2. Select a file and an Importing Preview window will display.
3. Choose the Beginning Row and Ending Row from the drop-down list under the Options
tab.
4. Choose the spreadsheet under the Select Sheets tab.
5. Click the Import button to begin importing.
6. Click the Cancel button to stop current importing.
Export a Class List
To export a file, follow these steps:
1. Select the class list you want to export.
2. Click Export and a file browser will pop up.
3. Type in the file name of the exporting report in the File Name text box.
4. Click the Save button to begin exporting.
1.4.2 Quiz
When the Question Settings and the Class Settings are configured you can start the quiz. The
Copyright © 2012 All Rights Reserved by QOMO HiteVision.
www.qomo.com 17
Page 18

default activity mode is Normal Quiz and will start by directly clicking the Start icon . If you
select the Start button , the activity mode window will display four choices: Normal,
Elimination, Homework, and Paper Quiz.
1.4.2.1 Normal Quiz
In the Normal Quiz mode, a quiz file must be provided with the correct answer for each question
prior to starting the quiz. The instructor controls the pace of the question answering session.
1.4.2.1.1 Quiz Setting
To set up the Quiz Settings, follow these steps:
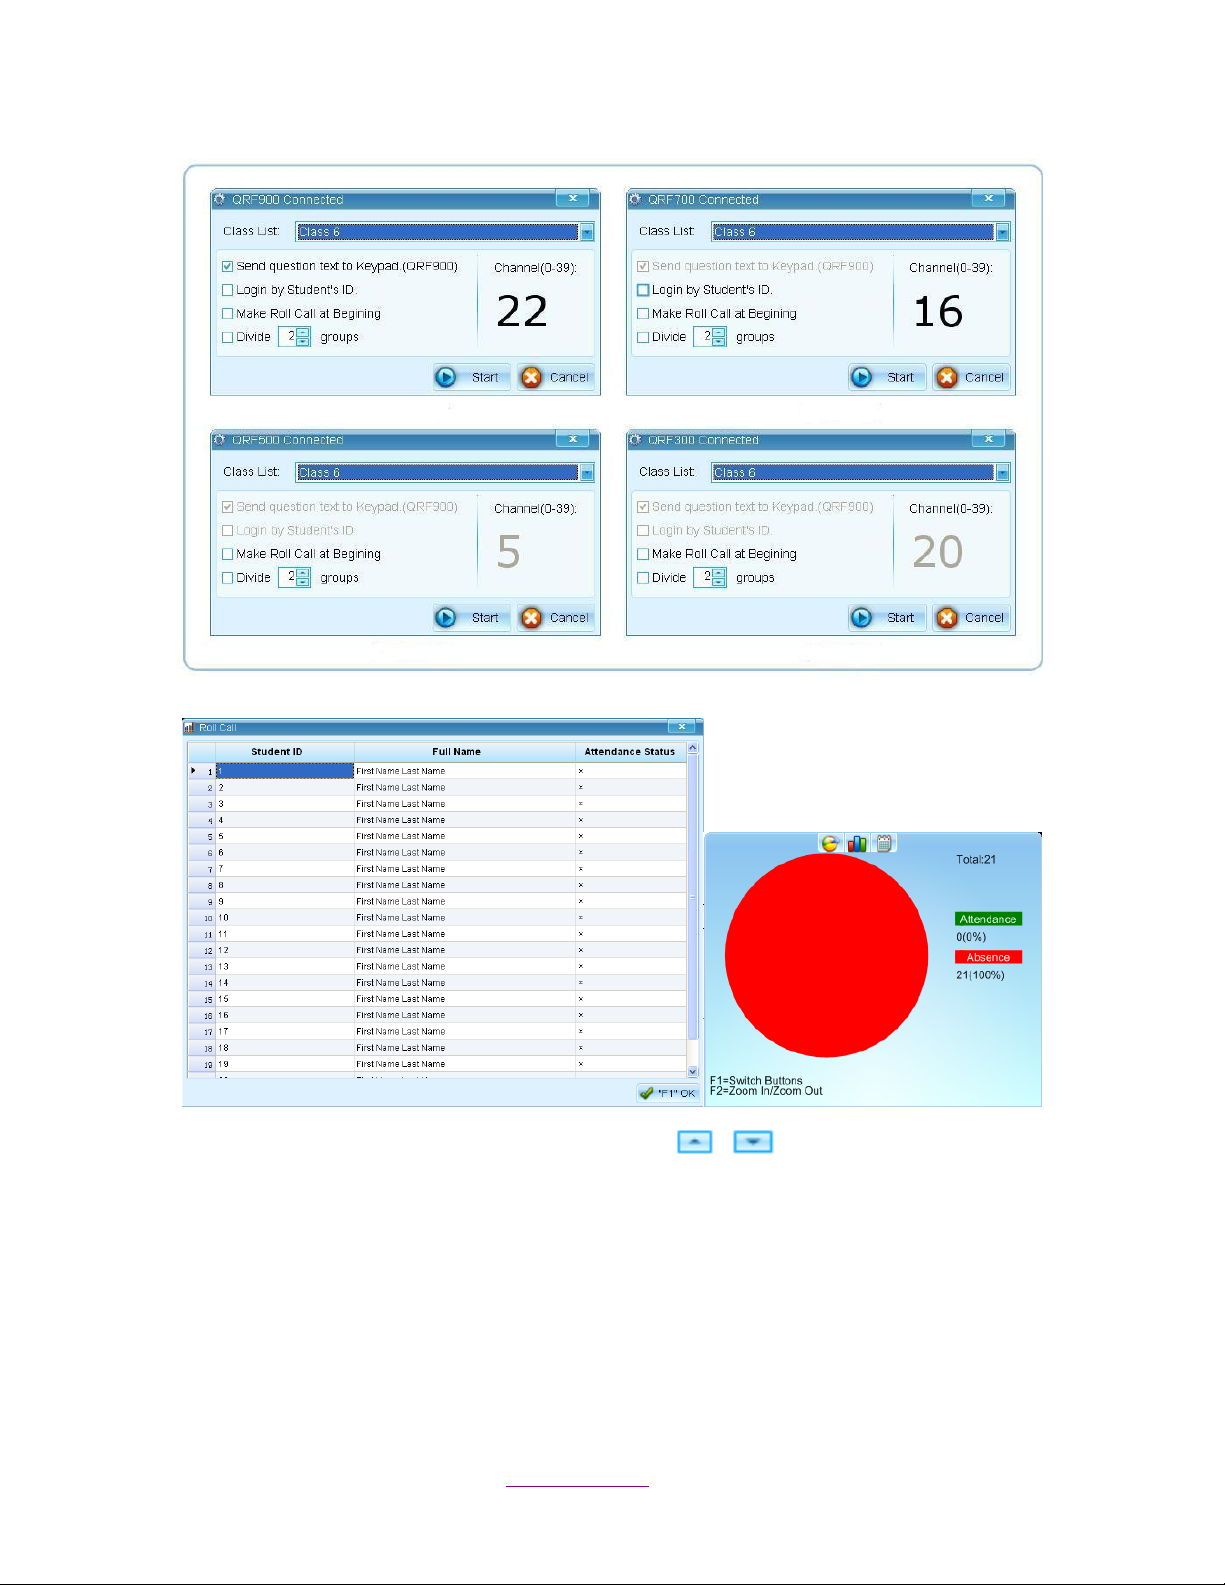
1. Select Normal as the current activity mode and a Quiz Setting window will pop up. The
window toolbar will appear “QRF Connected” or “No Host”. If it shows “No Host” unplug
and replug the dongle back in. If there is a connection, the channel number will display on
the screen. The valid channel number is from 1 to 39. If the host is not connected, the
channel number shows 0.
2. Select a class from the Class List drop-down list.
3. The checkbox labeled Send Question Text will display the questions on the student
responders. (QRF900 only)
4. The checkbox labeled Login by Student ID only allows the students listed in the selected
class list to take the exam when it is checked, other students are not allowed. If the check
box is not selected, all the students can take the exam. (QRF700 and QRF900 only)
5. The checkbox labeled Make Roll Call at Beginning will allow teachers to take attendance
before the quiz starts.
Copyright © 2012 All Rights Reserved by QOMO HiteVision.
www.qomo.com 18
Page 19
6. Click the “Divide groups” check box, then click or to select the groups; or edit the
groups manually, typing a valid number from 1 to 10. Before the quiz starts, students can
choose a group freely. If the check box is not selected, it will start a quiz directly.
The students will select A, B, C, or D on their responders to join a group.
Copyright © 2012 All Rights Reserved by QOMO HiteVision.
www.qomo.com 19
Page 20
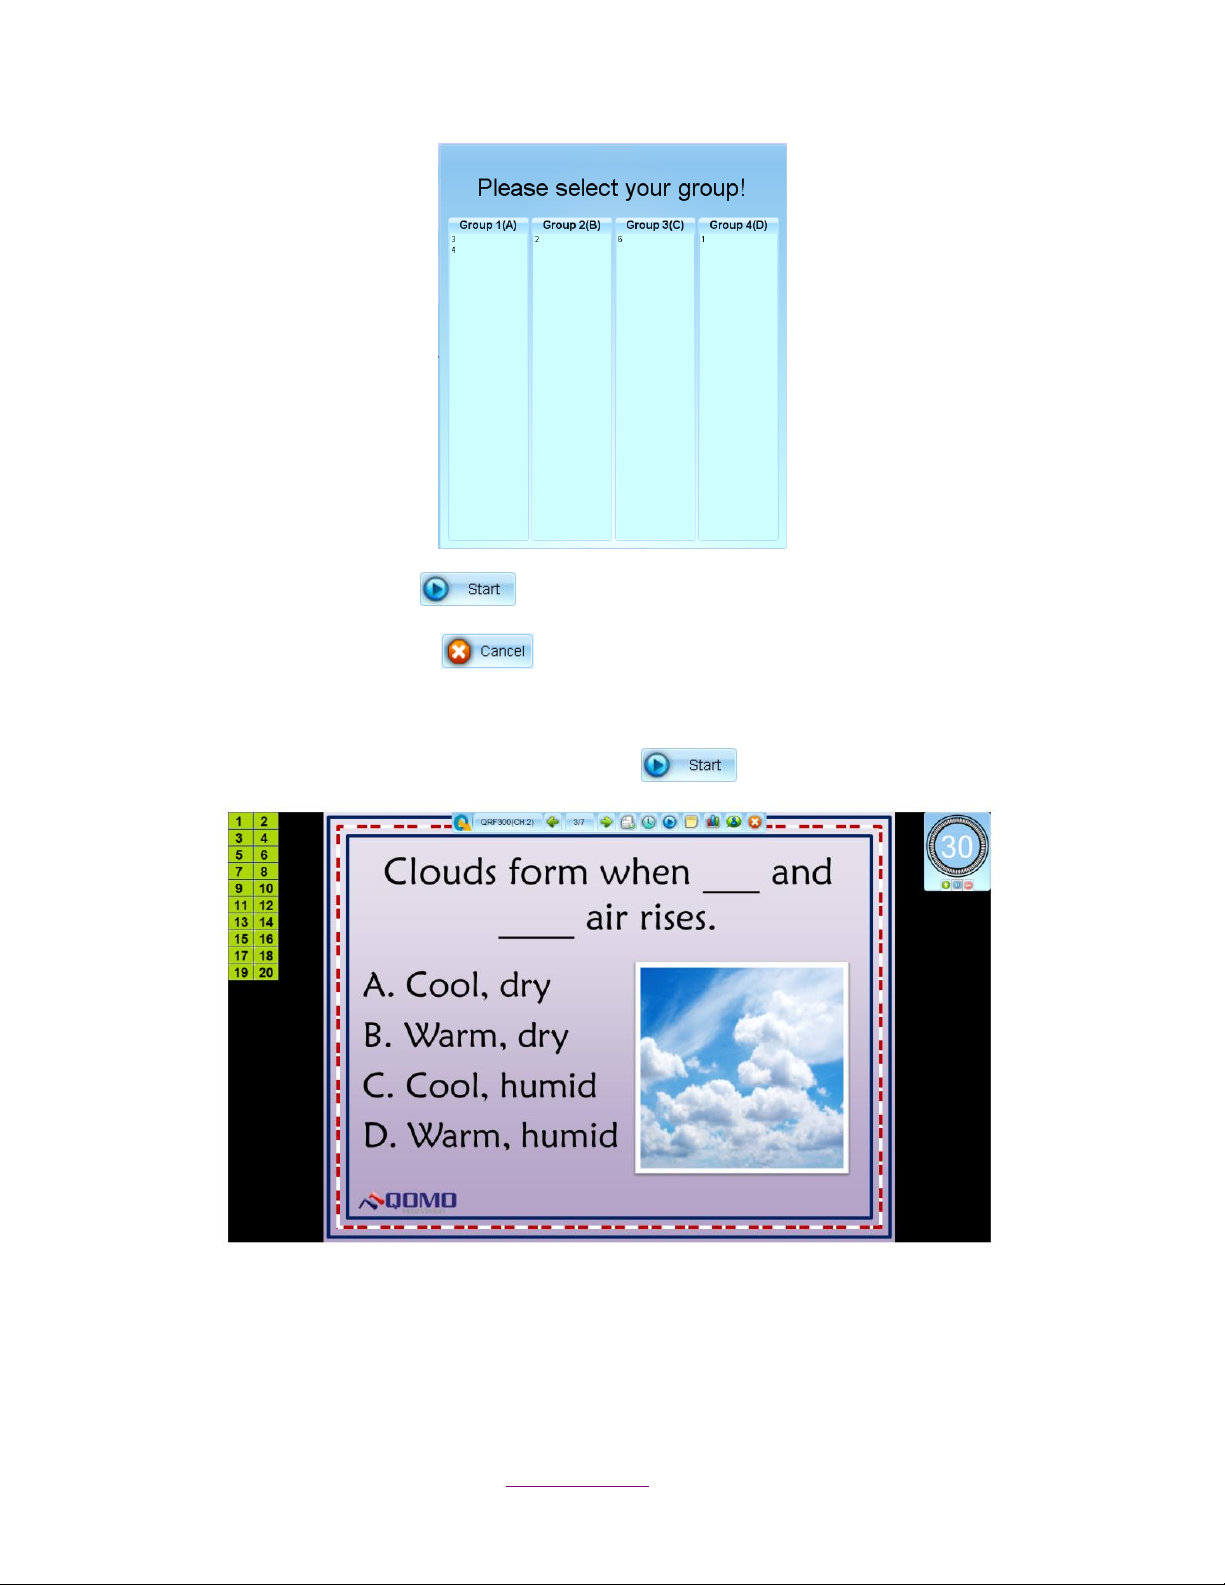
7. Click the Start button to run the quiz.
8. Click the Cancel button to cancel the settings.
1.4.2.1.2 Start a Quiz
A Normal Quiz will start by clicking the Start button in the quiz setting window.
The display screen is divided into four segments:
Student Register Number/Answer Status Bar
Timer Clock
Copyright © 2012 All Rights Reserved by QOMO HiteVision.
www.qomo.com 20
Page 21

Quiz Tool Bar
Questions display
Student Register Number/Answer Status Bar:
This displays the students’ logged-in register number . The number is displayed in
successive order on the left side of the screen. For the QRF700 and QRF900 models, the student
numbers are in order based on the order when they log into the system.
The register numbers can be moved around the screen by using the mouse. Click and hold
the boxes and move them to your desired location.
The register numbers can be zoomed in, zoomed out, or hidden by pressing the F2 key on
the teacher remote.
The background colors of the student register numbers have different meanings:
Login/Logout Signal:
Green – indicates that student remote is logged in.
Gray – indicates that student remote is logged out.
Response Signal:
Dark Green –indicates that students have answered the question.
Light Green –indicates that students have not responded to the question.
Orange – indicates that students have changed their answer.
Timer:
Press the F1 key on the Instructor Keypad or right click the timer clock that will switch it to another
setting that shows hours/minutes/seconds. To hide the timer, you can right click the timer and
select Hide, or press the F1 key on the Instructor keypad.
Copyright © 2012 All Rights Reserved by QOMO HiteVision.
www.qomo.com 21
Page 22
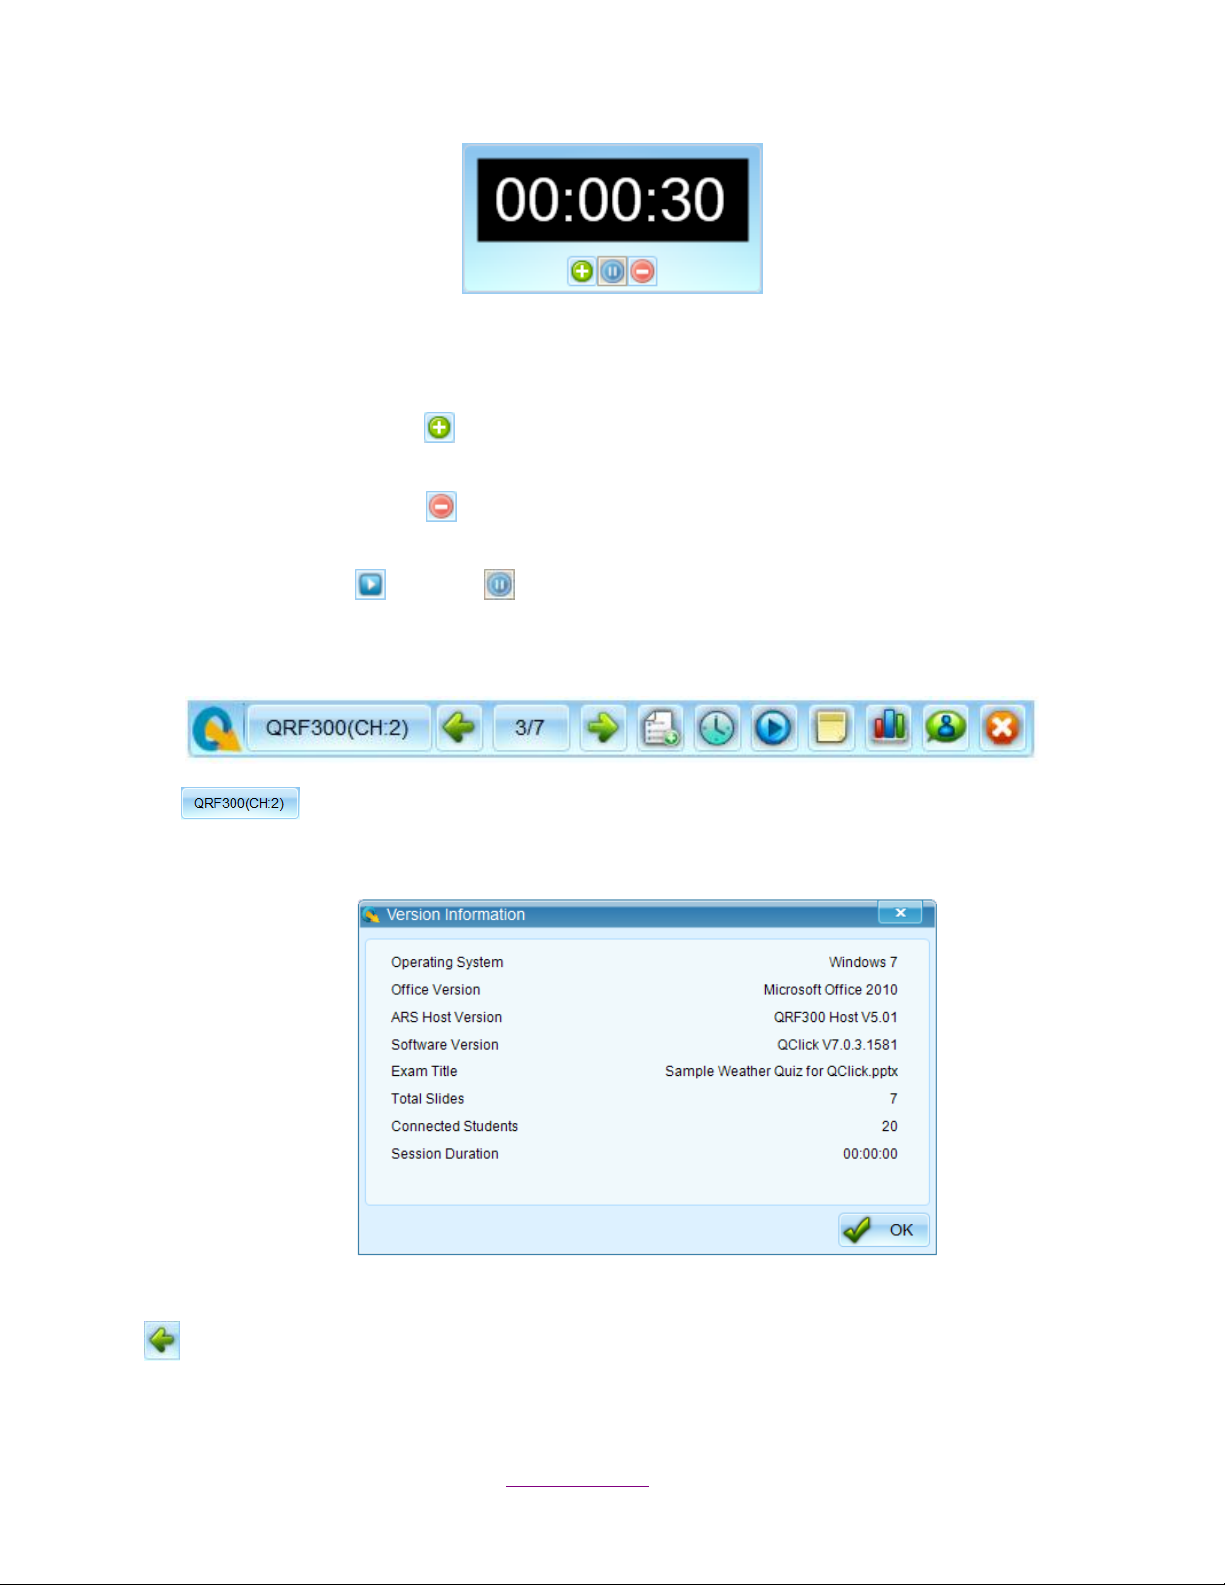
This displays the response time to a question. The default value is set at 30 seconds. The session
running timer copies the time limit set in the Question Setting window. To hide the timer, press the
F1 key on instructor remote.
Click the Add button under the timer clock to increase the time. 5 seconds will be
added for each click.
Click Reduce button under the timer clock to reduce the time. 5 seconds will be
reduced for each click.
Click the Start or Pause button to start or pause the quiz, or with the Start/Pause key
on the instructor remote.
Quiz Tool Bar
Version Information: provides information about the version of your computer’s
OS, version of Microsoft Office, ARS host, QClick software, as well as the exam title, total slides,
number of logged-in students and session time.
Previous Question: Return to the previous question page.
Copyright © 2012 All Rights Reserved by QOMO HiteVision.
www.qomo.com 22
Page 23
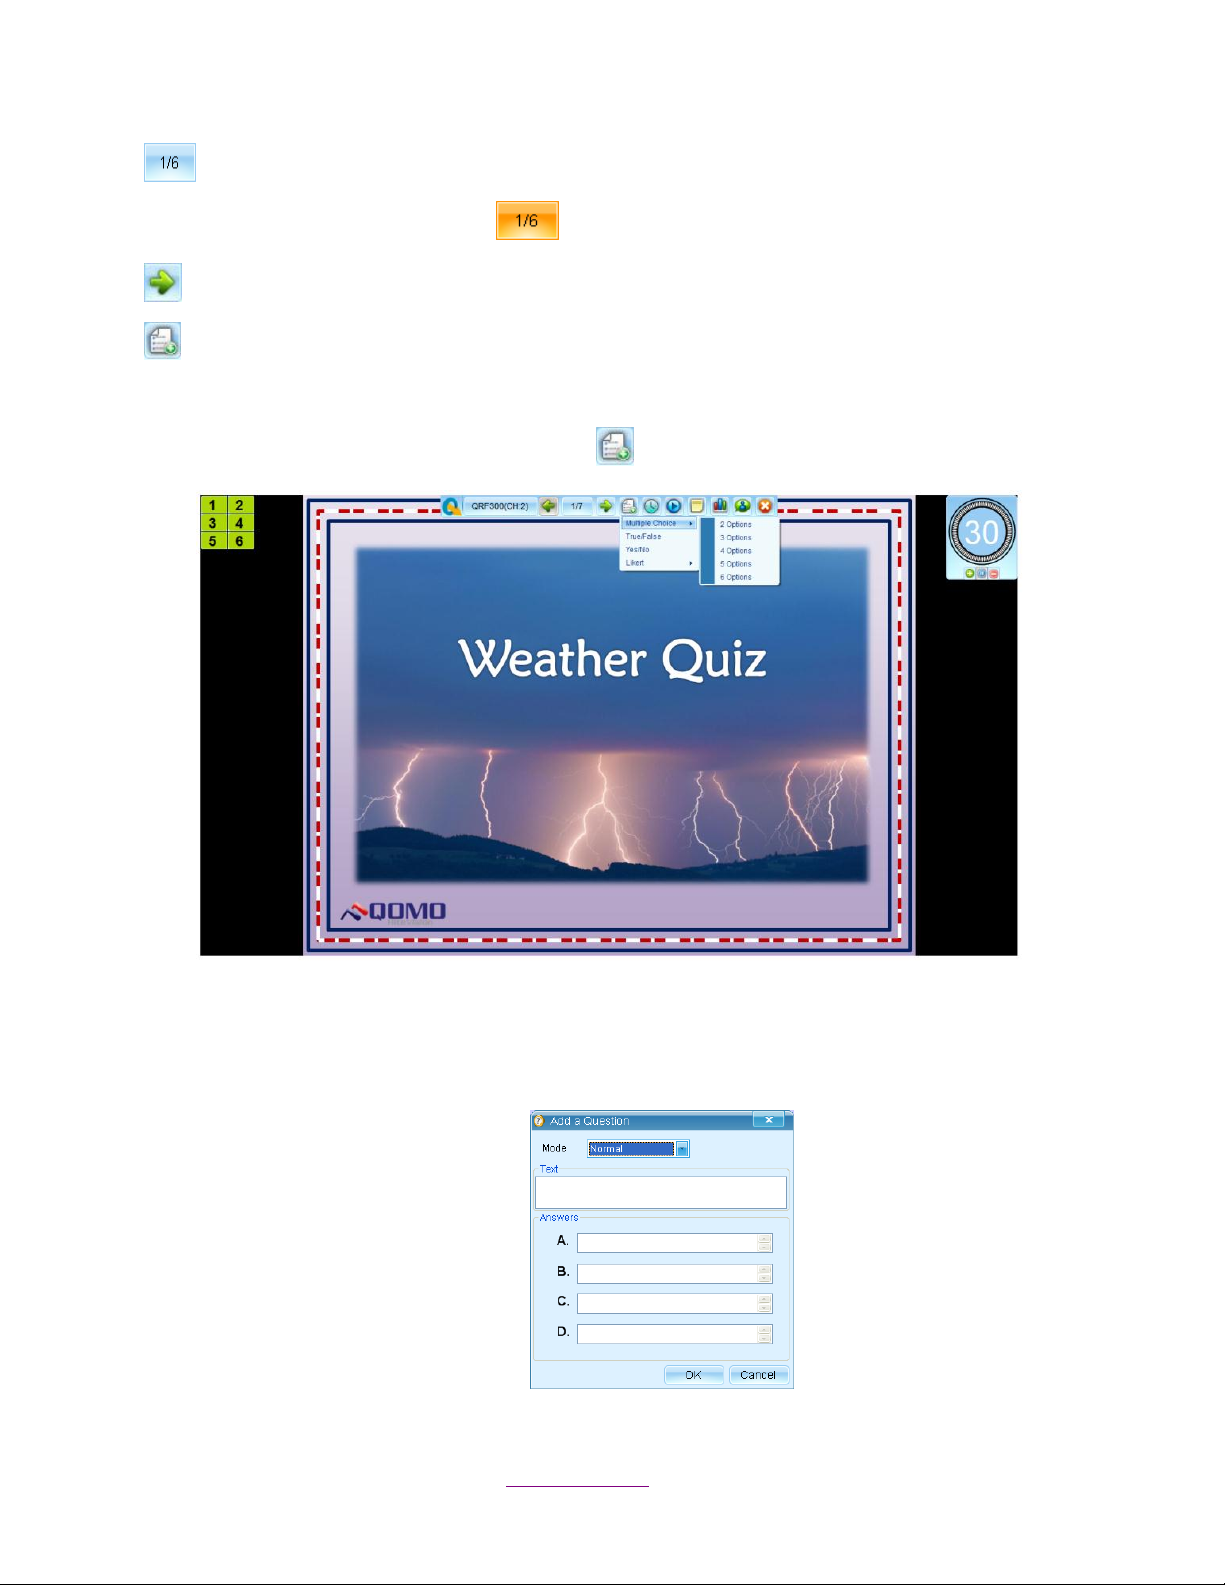
Slides: Shows the current slide number and the total number of slides in the quiz.
Note: The button will be orange when the question is answered.
Next Question: Go to the next question page.
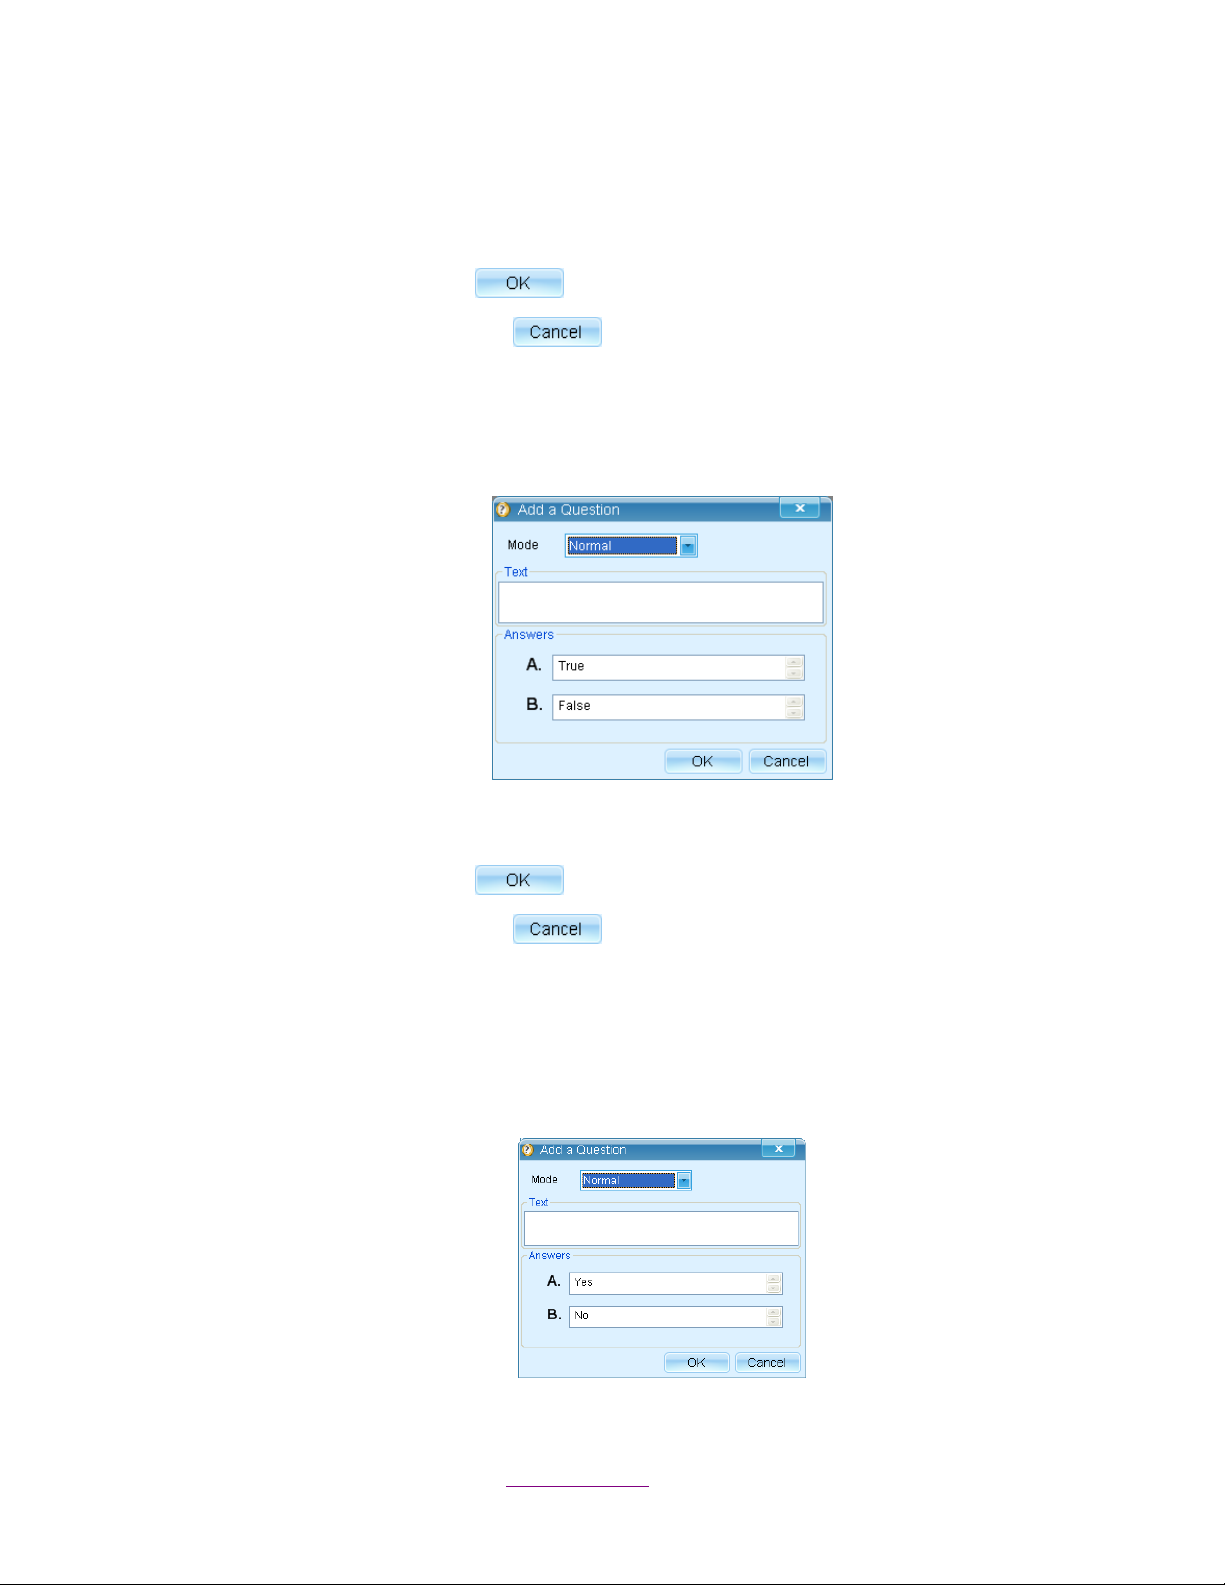
Instant questions: Add questions during the quiz.
Follow these steps to add questions:
1. Click the Instant Questions button and the question modes menu will pop up.
2. Add a Multiple Choice question
Click Multiple Choice and select a template from the submenu and the Add a
Question window will pop up.
Copyright © 2012 All Rights Reserved by QOMO HiteVision.
www.qomo.com 23
Page 24
Select the question mode from the Mode drop-down list.
Edit the question title in the textbox.
Edit the answer options in the Answers textboxes.
Click the OK button to complete the settings.
Click the Cancel button to exit the editing window.
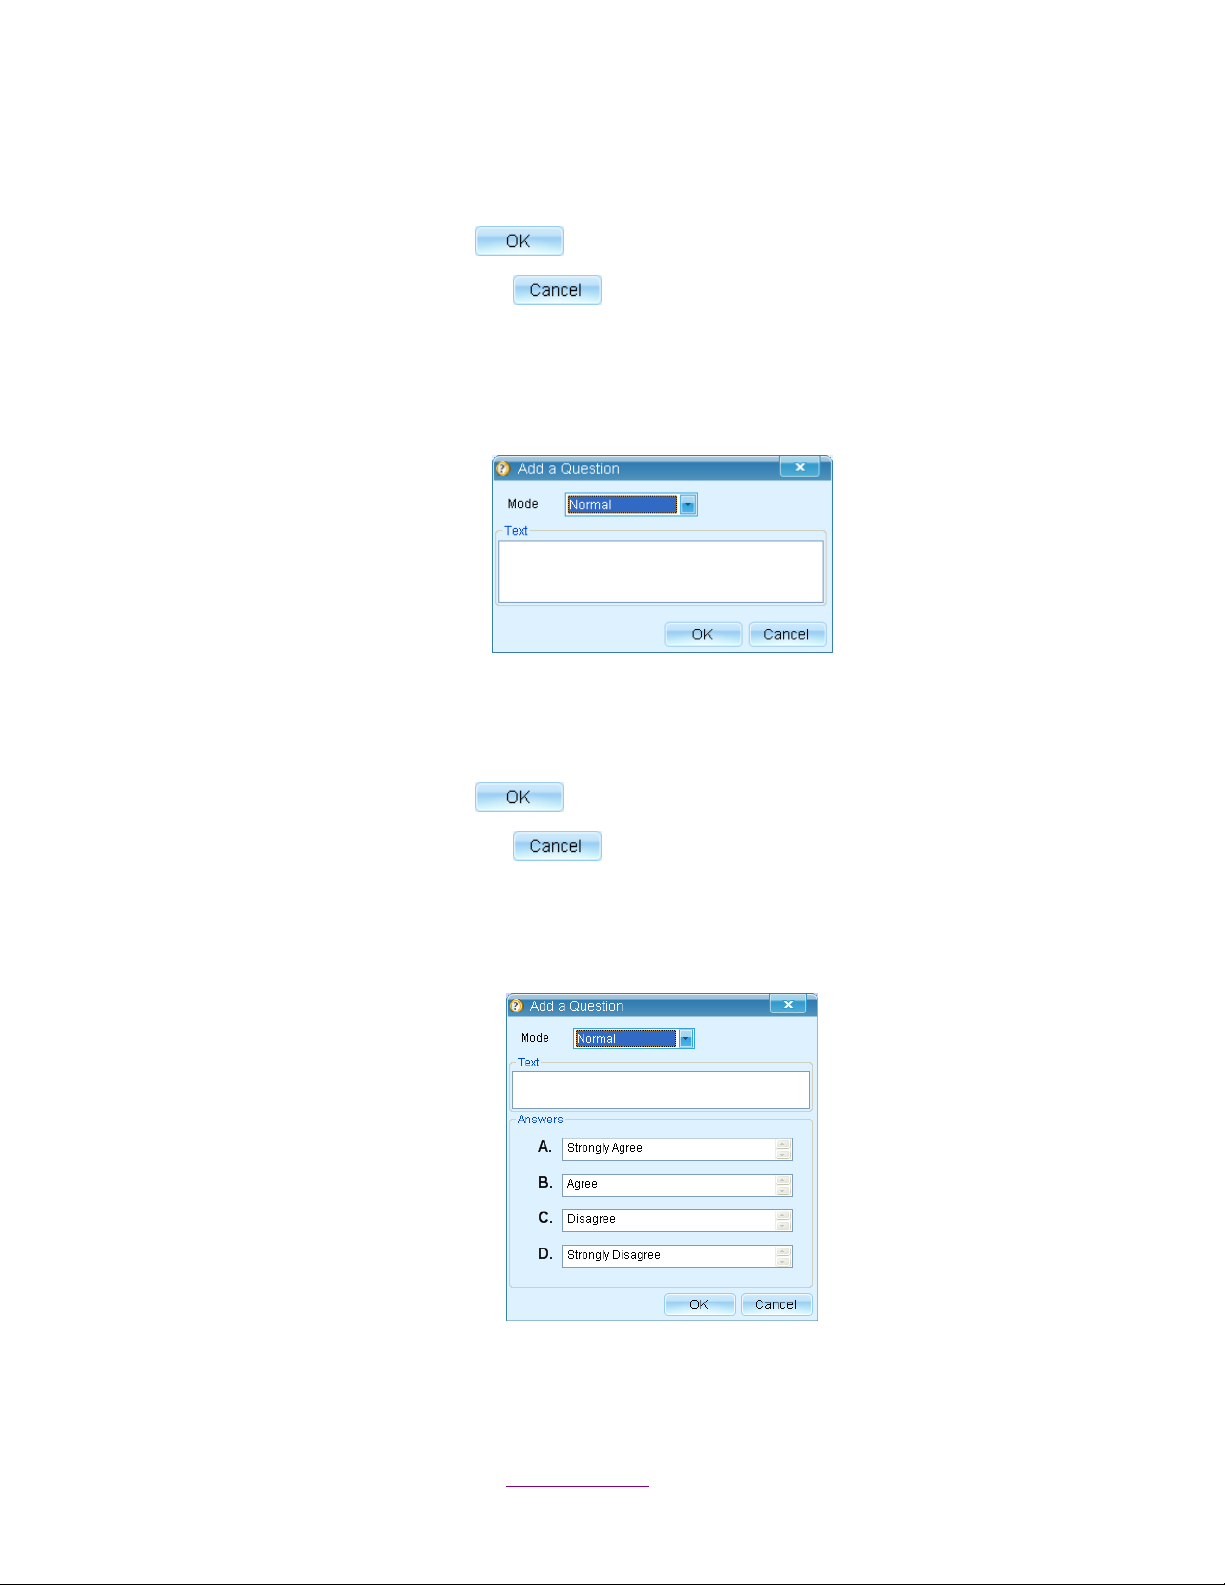
3. Add a True/False Question
Click True/False and the Add a Question window will pop up.
Select the question mode from the Mode drop-down list.
Edit the question title in the textbox.
Click the OK button to complete the settings.
Click the Cancel button to exit the editing window.
4. Add a Yes/No question
Click Yes/No and the Add a Question window will pop up.
Copyright © 2012 All Rights Reserved by QOMO HiteVision.
www.qomo.com 24
Page 25
Select the question mode from the Mode drop-down list.
Edit the question title in the textbox.
Click the OK button to complete the settings.
Click the Cancel button to exit the editing window.
5. Add a Short Answer question
Click Short Answer and the Add a Question window will pop up.
Select the question mode from the Mode drop-down list.
Note: Short Answer questions are unavailable in the Vote/Survey mode.
Edit the question title in the textbox.
Click the OK button to complete the settings.
Click the Cancel button to exit the editing window.
6. Add a Likert question
a. Click Likert and select a template from the submenu. The Add a Question window
will pop up.
Select the question mode from the Mode drop-down list.
Edit the question title in the textbox.
Copyright © 2012 All Rights Reserved by QOMO HiteVision.
www.qomo.com 25
Page 26
Click the OK button to complete the settings.
Click the Cancel button to exit the editing window.
Assigning a correct answer setting for Instant Questions can be done two ways:
1. Set the correct answer in the Question Detail window after the quiz. (Click cancel when the
answer setting box pops up.)
2. Set the correct answer after each question answered; refer to 4.4.2 Exam Session for
details.
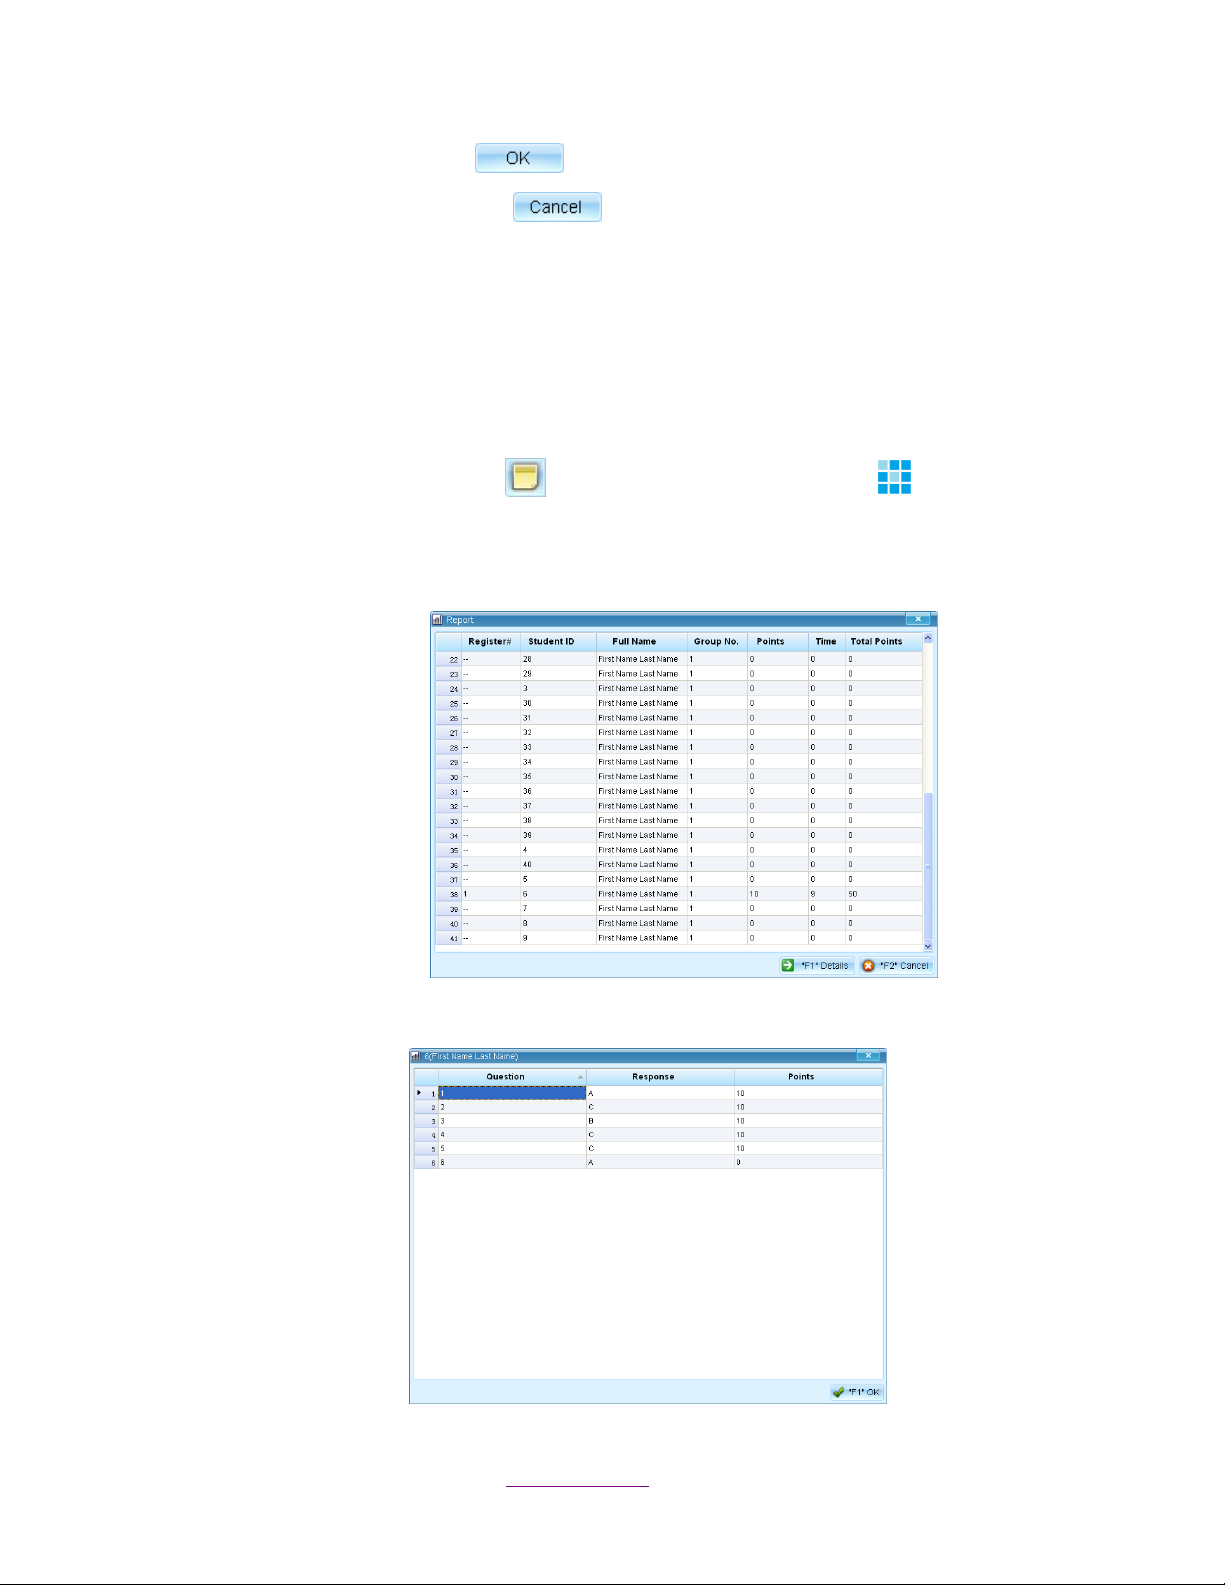
By pressing the Report button , or through the instructor’s Report key, the instructor
can view the individual student responses. The results are displayed in a table. The table
shows the register number,student ID, student names, group number,points earned, and
the response time.
Press the F1 key to show the detail responses of the student you selected.
Copyright © 2012 All Rights Reserved by QOMO HiteVision.
www.qomo.com 26
Page 27

Result: Show response result in a graph.
By pressing the Result button , or on the instructor remote , the instructor can view the
responses to the individual quiz questions. Results are displayed in graphs.
The user can change the graphs through the buttons displayed on the top of the
graph window or by pressing F1 key on the instructor remote.
The pie chart is the default chart.
The graph can be changed to a histogram by pressing the chart button .
Answer details can be viewed by pressing the grid button .
Copyright © 2012 All Rights Reserved by QOMO HiteVision.
www.qomo.com 27
Page 28
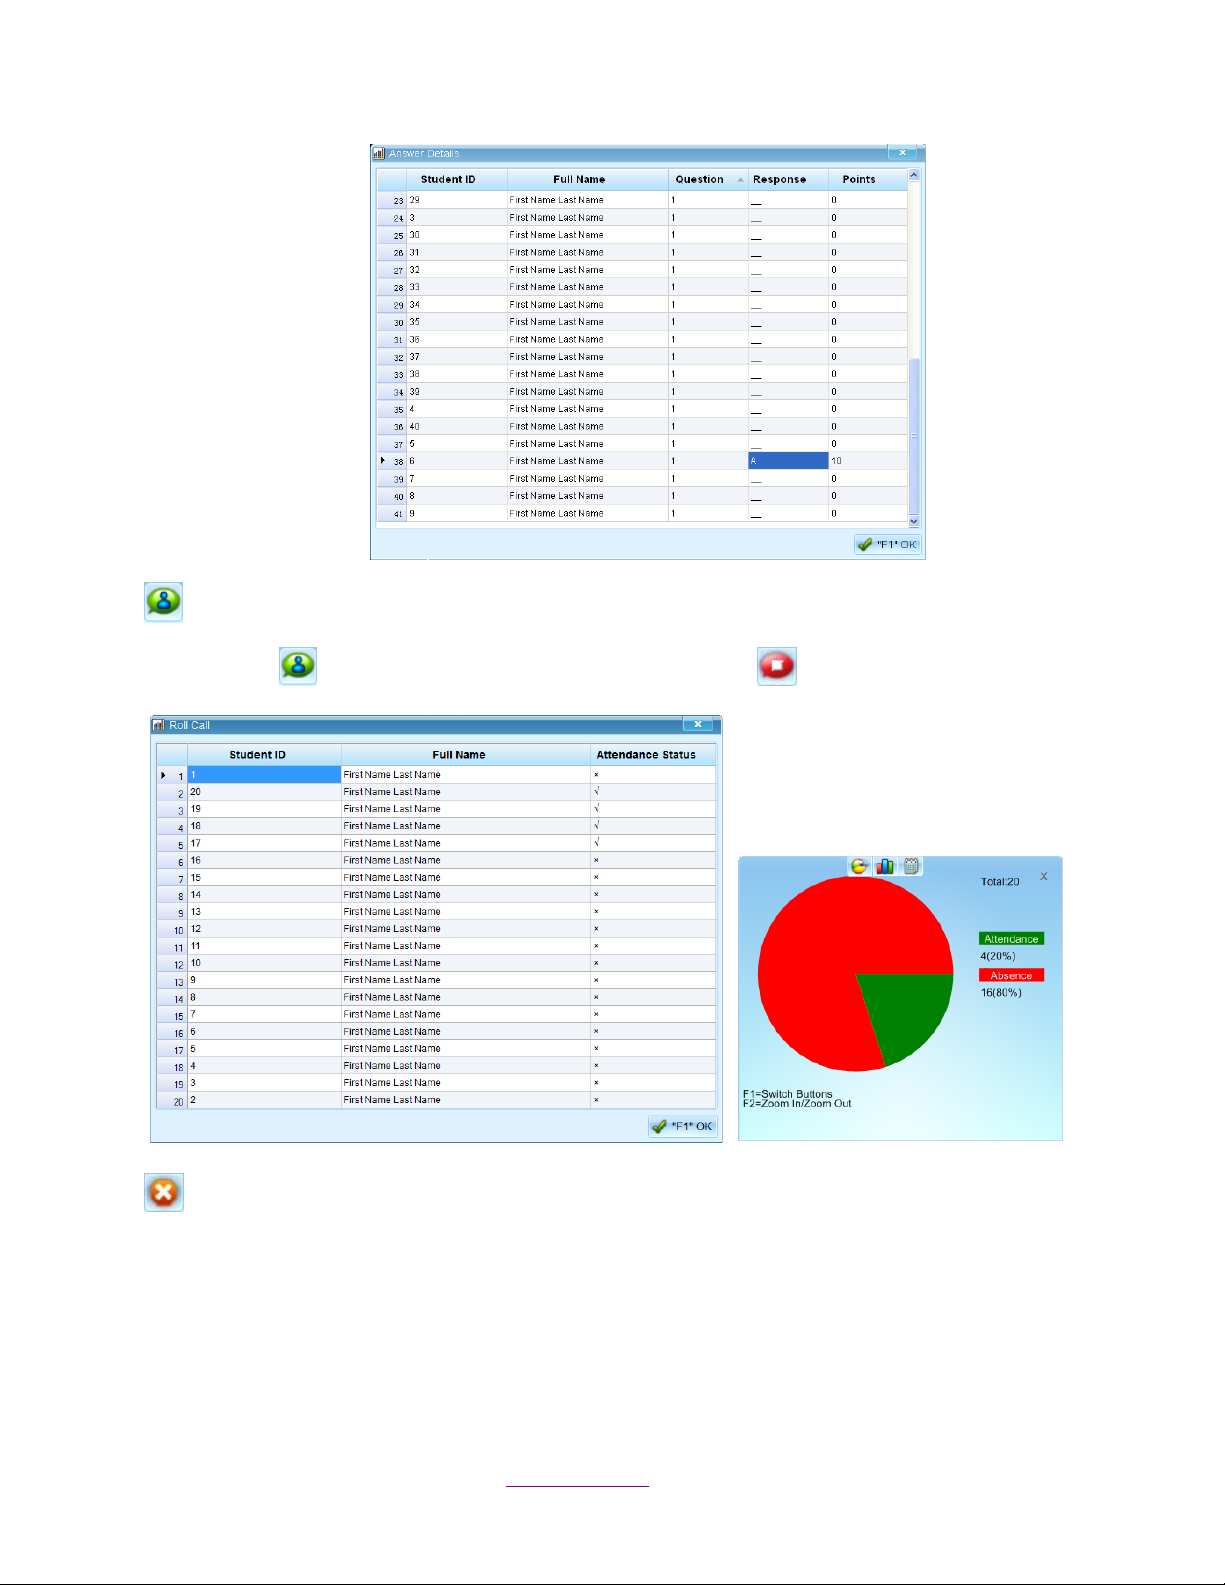
Roll Call: Take attendance during the quiz. The Roll Call window will pop up by pressing the
roll call button and it will be closed by clicking the stop button .
Exit: Exit the current quiz session.
Follow these steps to exit the current quiz session:
1. When the quiz is closed the system will prompt: “Are you sure to exit this activity?”
Copyright © 2012 All Rights Reserved by QOMO HiteVision.
www.qomo.com 28
Page 29
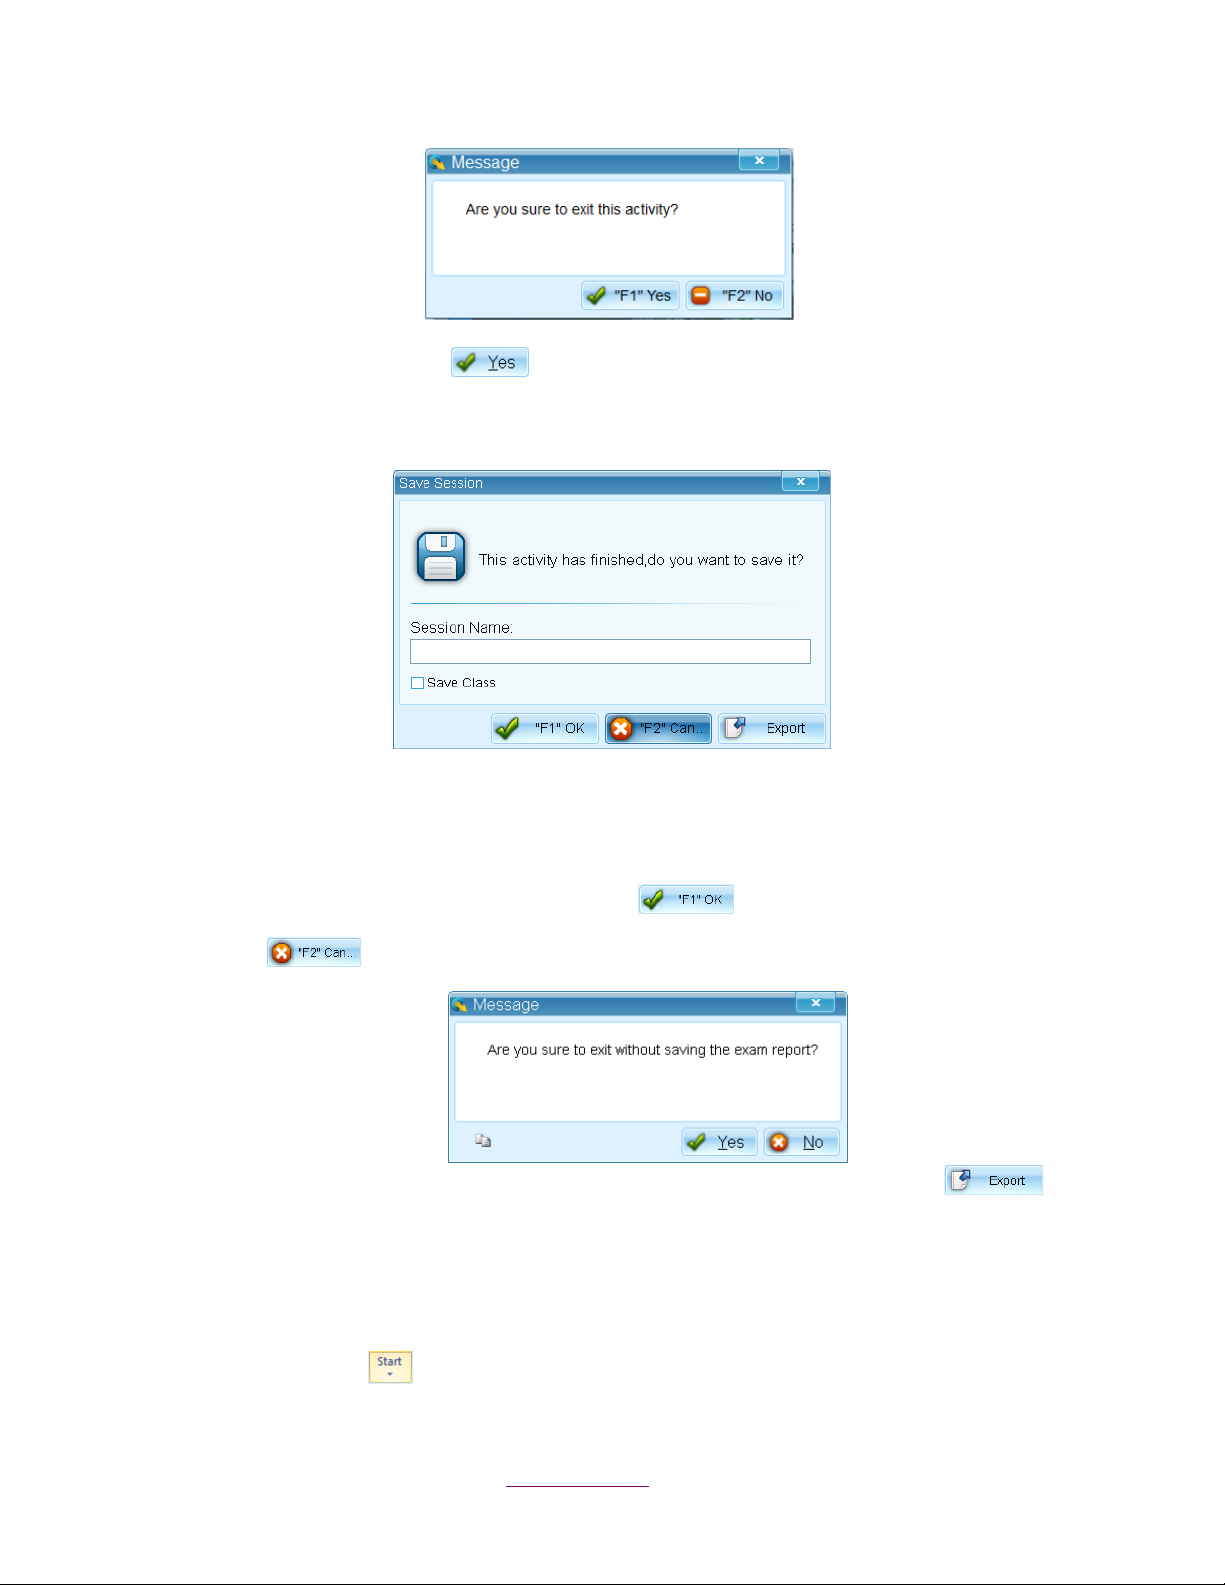
2. Clicking the Yes button will go to the next step and save the session record to
system.
Note: If it isn’t saved, all session data will be lost.
3. Type the session name in the Session Name textbox.
4. Click the Save Class checkbox. The unlisted students who have taken the exam will be
saved in the selected class list (QRF700 and QRF900 only).
5. Save session to system by pressing “F1”OK , and exit the quiz session.
6. Click to exit current session without saving the record.
7. You can export the session record to an .xml file by clicking the Export button .
1.4.2.2 Elimination
Elimination is similar to Normal but in this mode only those students who answer correctly can
move on to the next question. Those answering incorrectly are automatically eliminated.
Select the Start button in the Tools window and select Elimination from the option menu to
start the quiz. Elimination has the same quiz setting interface as a Normal quiz, but the different
Copyright © 2012 All Rights Reserved by QOMO HiteVision.
www.qomo.com 29
Page 30
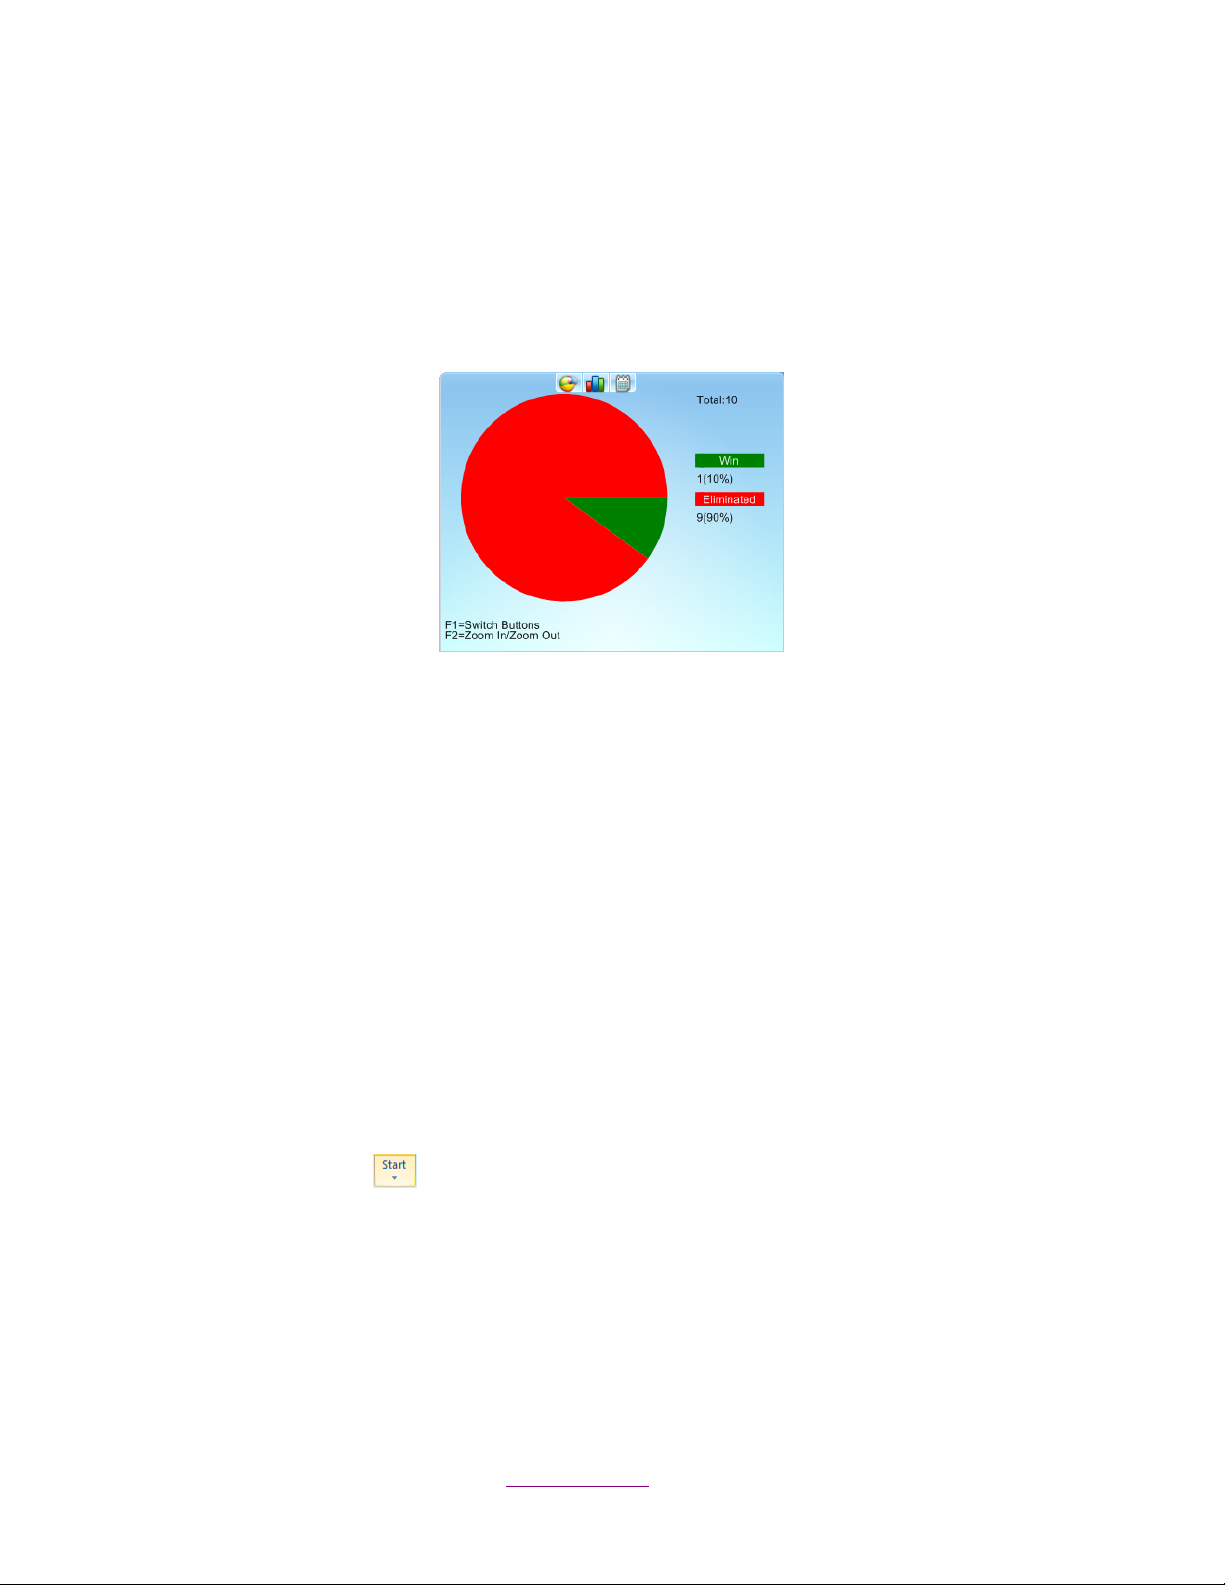
background colors on the Student Register Number/Answer Status Bar indicate different information:
Blue –indicates that students have answered correctly.
Burgundy –indicates that students have answered incorrectly.
Brown – indicates that students are eliminated.
Note: A graph will display after each question to indicate the number of students that are eliminated.
1.4.2.3 Homework & Paper Quiz
Homework:
Homework mode allows homework questions to be sent to the student remotes so the students can
take their exams outside of the classroom. The homework answers are received from the student
remotes and the correct answers are either embedded in the PowerPoint file or from the answer
sheet. These files should be loaded prior to starting the homework session.
Note: Homework mode is only supported by the QRF700 and QRF900 models.
Paper Quiz
Using the Paper Quiz, no quiz file is necessary. The questions are displayed on hardcopy paper.
However, the answer sheet associated with the paper quiz must be loaded prior to starting the
session.
1.4.2.3.1 Quiz Setting
Select the Start button in the Tools window and choose Homework as the current activity
mode to start the quiz.
Copyright © 2012 All Rights Reserved by QOMO HiteVision.
www.qomo.com 30
Page 31

To set up a Homework quiz, follow these steps:
1. Select Homework as current activity mode and the Quiz Setting window will pop up. The
window toolbar will appear “QRF Connected” when the host is connected; or it will show “No
Host” if it isn’t connected. If it shows that it isn’t connected, unplug then re-plug the dongle
back in.
2. Select a class from the Class List drop-down menu.
3. The checkbox labeled Send Question Text will display the questions on the student
responders. (QRF900 only)
4. The checkbox labeled Login by Student ID only allows the students listed in the selected
class list to take the exam when it is checked; other students are not allowed. If the check
box is not selected, all the students can take the exam. (QRF700 and QRF900 only)
5. Type any number into the textbox under Exam ID from 1 to 9999. If the textbox is blank, the
system will assign a four- digit number for the Exam ID.
6. To change the channel number, type the number directly on the channel number shown. The
valid channel number is 0 to 40.
7. Click the Start button to run the quiz.
8. Click the Cancel button to cancel the settings.
Copyright © 2012 All Rights Reserved by QOMO HiteVision.
www.qomo.com 31
Page 32

1.4.2.3.2 Start a Quiz
There aren’t any questions on the screen, but the QClick background picture displayed when the
quiz starts. Exam ID and Exam Title will also show on the top left of the background picture.
To start the quiz, click the start button on the toolbar or press the start key on the instructor
keypad.
To stop a question, click the stop button on the toolbar or press the stop key on the instructor
keypad.
To check the response time, view the timer.
The default time value is set at 90 minutes. Right click on the timer to choose to view the clock by
hours/minutes/seconds.
Copyright © 2012 All Rights Reserved by QOMO HiteVision.
www.qomo.com 32
Page 33

Click the Add button under the timer clock to increase time—5 minutes will be added
for each click.
Click the Reduce button under the timer clock to reduce time—5 minutes will be
reduced for each click.
Click the Start /Pause button to start or pause the quiz, or click the Start/Pause key on
the instructor keypad.
Click the exit button to exit the current quiz session.
1.4.3 Report
Select the Report button in the Tools window. The Session window will show on the screen.
Copyright © 2012 All Rights Reserved by QOMO HiteVision.
www.qomo.com 33
Page 34

The session data is recorded in the system once a session has been completed and saved. On the
left of the session interface, there are several filters to help you select a needed session. If you
select All for a filter selection, the filtering functioning is Off. The filters are:
Exam Title: Related to an individual electronic or paper test title used in the system.
Activity Mode: The mode selected during a test. These modes include Normal Quiz,
Homework, Elimination and Paper Quiz.
Class: Select a class name to filter a session.
Subject: Select a subject to filter a session.
Host: Select a Host to filter a session.
From…To: Select a period of time to cover a date that an activity has taken place in order to
accurately locate a session.
On the right of the Session interface, the session list displays associated information, including
session name, exam title, activity mode, class, and subject, as well as the date of exam and host
version.
1.4.3.1 Record Management
Users can handle data management through the File button on the top left of the window.
Click on it and an option menu will pop up.
1.4.3.1.1 Edit the session
Click the File button and select Edit from option menu to open the edit session window, or
double click the session you selected directly in the list.
Copyright © 2012 All Rights Reserved by QOMO HiteVision.
www.qomo.com 34
Page 35

The session name is displayed on the top of the window. Users can change the session name, exam
title, the point value and response time, if desired. All question information contained in the session
can be modified.
1.4.3.1.2 Delete the Session
Click the File button and select Delete from the option menu to delete the selected session.
1.4.3.1.3 Import a session
Click the File button and select Import from the option menu to import a session into the
system.
1.4.3.1.4 Export a session
Click the File button and select Export from the option menu to export the selected session to
a file.
1.4.3.1.5 Merge two or more sessions
From the session list window, select two or more existing sessions with the same class and subject
and then click the File button and select Merge from the option menu to begin the merging
function. The merge function is useful when you have a make-up session but don’t want to keep two
separate sessions. A make-up session and a regular session can be merged together to form a
single session. To begin the merge function, follow these steps:
1. Select two or more sessions with the same class and subject from the session list window by
holding the Ctrl key and clicking the sessions.
An alternative method to select multiple sessions would be to hold the Shift key and then
click the start and the end session in the list. All of the sessions between the start and end
session are now selected.
2. The Merge button becomes available after step 1. Click the File button and select
Merge from the option menu.
Copyright © 2012 All Rights Reserved by QOMO HiteVision.
www.qomo.com 35
Page 36

3. The sessions to be merged must have the same class, subject name, quiz file and
number of questions, so that the merge window will appear; otherwise, an error message
will prompt you to select the same class and the same subject to merge.
4. The Merge Guide 1 window consists of two sections. The top section lists all the sessions to
be merged, and the lower section lists two options: Question & Class.
Users can merge the class when the selected sessions have the same class and
same subject in the same activity mode, but not the same test paper.
Users can merge the questions when the selected sessions have the same text
paper and same subject in the same activity mode, but not the same class.
5. Type the new session name in textbox in the Merge Guide 2 window.
6. Click the Finish button to complete the merge function.
7. Click the Cancel button to exit the merge settings.
1.4.3.2 Create Report
Select a session record then click the Report button . The Create Report window will pop up.
Copyright © 2012 All Rights Reserved by QOMO HiteVision.
www.qomo.com 36
Page 37

The QClick reporting system generates various category reports using the student class activity
performance data. A sample of the report will be displayed beside the icon to show you what the
report looks like when the cursor hovers over the icons.
To preview a session record, users can select a report icon and click the Preview button
or click the File button to open a report in the .xml format.
The QClick system generates these reports for the session selected:
Student Session Report
Student Response Result
Study Guide
Question Report
Group Report
Roll Call
The QClick system provides these reporting functions.
Generate reports
Control of previewing a report
Export reports
All reports include a Report Title which includes:
Class Name
Date of Session
Subject Name
Teacher Name
Session Name
Copyright © 2012 All Rights Reserved by QOMO HiteVision.
www.qomo.com 37
Page 38

STUDENT SESSION REPORT
The Student Session Report lists the students overall performance in the session. This list includes:
Report Title
Student name and ID
Correct answer ratio relating to the total number of questions.
Correct answer percentage.
Total points for student performance in the Session
Copyright © 2012 All Rights Reserved by QOMO HiteVision.
www.qomo.com 38
Page 39

STUDENT RESPONSE RESULT
The Student Response Result provides detailed information for each question by students. This
report includes:
Report Title
Student name and the total points earned during the session
Questions and option content
The student’s answer and the correct answer
Copyright © 2012 All Rights Reserved by QOMO HiteVision.
www.qomo.com 39
Page 40

STUDY GUIDE
The Study Guide report provides a list of incorrect answers per student. The Study Guide report
includes:
Report Title
Incorrect Question and option identification per student
Correct/Incorrect answer comparison per question for each student
Copyright © 2012 All Rights Reserved by QOMO HiteVision.
www.qomo.com 40
Page 41

QUESTION REPORT
The Question Report provides a composite analysis of each question. This report includes:
Report Title
Question and option content
Answer Key per question
Distribution bar chart for the selected options.
Copyright © 2012 All Rights Reserved by QOMO HiteVision.
www.qomo.com 41
Page 42

GROUP REPORT
The Group Report provides a list of the points for each student in the group. The Group Report
includes:
Report title
The total number of each group
The total point of each student
Copyright © 2012 All Rights Reserved by QOMO HiteVision.
www.qomo.com 42
Page 43

ROLL CALL
The Roll Call lists the names of student who are absent. The Roll Call report list includes:
Report Title
Total numbers of students
Percentage of attendants and absentees
The names of absent students
Copyright © 2012 All Rights Reserved by QOMO HiteVision.
www.qomo.com 43
Page 44

PREVIEWING A REPORT
The tool bar on the top of the Report window provides optional controls for previewing a report.
Export the report.
Print the report.
Toggle the report display window
Go to the first page of report viewing.
Go to the previous page of report viewing.
Go to the next page of report viewing.
Go to the last page of report viewing.
Go to the particular page you wish by typing the page number in the Go to Page
dialogue window.
Find the text you wish by typing the text in the Find Text dialogue window.
Select a zoom control from the Zoom drop-down list to view a report properly.
1.4.4 Setting
The System Settings View contains General, Exam Session, and Advanced options. Select one of
the categories to begin the selection of your settings.
Copyright © 2012 All Rights Reserved by QOMO HiteVision.
www.qomo.com 44
Page 45

1.4.4.1 General
1.4.4.1.1 General
General contains a General, User, and Personal setting.
The General setting contains a Software Language Setting and provides software version
information.
The Software Language setting allows the selection of languages for the program. Click on the
language drop-down list, and select the language you desire. English is the system default
language.
Click the Save button to save your setting.
1.4.4.1.2 User
Copyright © 2012 All Rights Reserved by QOMO HiteVision.
www.qomo.com 45
Page 46

Click the Auto Login by Default Username check box to have the system automatically log in by the
default username.
1.4.4.1.3 Personal
When selecting the “Display answers in the tool bar” checkbox, the Question Setting window will be
fully displayed with the two parts: Question Setting & Question Detail, and Show Details or Hide
Details.
1.4.4.2 Exam Session
Exam Session has settings to adjust how the program operates during an exam session.
1.4.4.2.1 Sound Settings
The Sound Settings allows the selection of sounds to be used while entering a quiz, starting a quiz,
Copyright © 2012 All Rights Reserved by QOMO HiteVision.
www.qomo.com 46
Page 47

and completing a quiz. If the check box is not checked, the sound will be disabled for that activity.
To set up the audio, follow these steps:
1. Select the Setting tab and the System Setting window will display.
2. Select the Exam Session in the catalog and the setting items will display on the right of the
window.
Note: Sounds are enabled as the default setting.
3. Click on the Browse button—this will display the sound file browser. Select the desired
sound file for the activity and then click on the Save button to save the sound selection into
the system.
4. Repeat step 4, if you wish to set up additional sounds for other activities.
1.4.4.2.2 Report & Result Setting
To select the items of information which will automatically appear as a question is answered during a
quiz, click one of the buttons of Display Report/Result at the end of a Question.
None: Nothing will be displayed.
Report: Report window will be displayed automatically as each question is answered.
Result: Result graphics will be displayed as each question is answered.
1.4.4.2.3 Quiz Setting
Automatically Start the Exam When Turned to Next Question allows you to start the next
question without pressing the Start or Pause button each time you advance to the next
question.
Include the statistics of not logged in students in the histogram allows unlisted students in the
selected class to be displayed on the report table and result graphs.
Show answer setting after finishing the current question allows you to set the correct answer as
each question is answered. During the exam, the Set Correct Answer window will pop up. It can be
used in Instant Questions and with the questions that weren’t assigned correct answers in the
Question Detail settings.
Copyright © 2012 All Rights Reserved by QOMO HiteVision.
www.qomo.com 47
Page 48

1.4.4.3 Advanced
1.4.4.3.1 Channel
The Hardware settings feature is used to check the communication of the main receiver, instructor
remote control, and the student remote.
The Channel setup will read the channel number of the main receiver connected to the system and
will also be used to set a new channel number for the main receiver. The channel number is preset
when a main receiver delivered, but it can be changed.
Change the Channel on the Receiver
To set up a new channel number for the receiver, you can simply click the or to set the
channel number, or type the number directly in the textbox. The valid channel number is from 1 to 40.
Note: If two classrooms are using the system simultaneously with the same channel number,
interference may happen. It is recommended that both classes run with two different channels.
Change the Channel on the Student Remotes
Click the Set Remote ID button to change the remote ID on the student remotes.
Follow the directions to change the remote channel as listed in the window.
Copyright © 2012 All Rights Reserved by QOMO HiteVision.
www.qomo.com 48
Page 49

Change the Channel on the Teacher Remote
Click on the teacher tab in the Set Remote ID window. Follow the directions to change the remote
channel as listed in the window.
1.4.4.3.2 Hardware Test
Hardware Test is used to check the communication of the main receiver, instructor remote, and the
student remote. All settings require the user to log in the system to perform.
Hardware Test for QRF900 & QRF700
To use the hardware test tool for QRF700 and QRF900, follow these steps:
Click on the Hardware Test button to check that the remotes are communicating with
the dongle receiver.
Copyright © 2012 All Rights Reserved by QOMO HiteVision.
www.qomo.com 49
Page 50

A Hardware Test window will open. On the student remotes, go to the main menu and select
Hardware Test. Fill in the channel number and click ok. If the communication is successful, the
student’s ID will fill in on the Hardware Test chart.
Copyright © 2012 All Rights Reserved by QOMO HiteVision.
www.qomo.com 50
Page 51

Part 2. QRF900 Hardware & System
Installation Illustration
2.1 Student Keypad
2.1.1 Specifications
Dimensions (L× W× H): 5 inches x 2 inches × 1 inch
Keys: 21
Power required: 2 AA Batteries
RF transmission distance: ~200 feet
Battery life: Depends upon use or up to 6 months
Function: Transmit response signals
Note:
Each of the clickers is battery operated. Insert two “AA” batteries into
the port on the back of the clicker as indicated on the hardware. Slide
the back plate into place. For a more secure closure, use the
screwdriver to insert the screw. The screws and screwdriver are
provided for your convenience.
2.1.2 Illustration
2.1.2.1 Student Keypad Layout
1. LCD: Color display
2. Power: Turns the unit on and off
3. Left Soft Key : Confirms the operation which appears on the bottom left of the screen
4. Up Key : Scrolls the screen display up
5. Right Soft Key : Confirms an operation that appears at the bottom right of the screen; when
exiting from the answer screen during homework or paper quiz mode, this button is also used to
Copyright © 2012 All Rights Reserved by QOMO HiteVision.
www.qomo.com 51
Page 52

enter into the function selection menu.
6. Left Key : Scrolls to the left
7. Menu/OK Key : Confirms a selection or enters into the main menu
8. Right Key : Scrolls to the right
9. Del Key : Deletes an exam during the paper quiz or homework mode and is also used to
backspace.
10. Down Key : Scrolls the screen display down
11. Send Key : Sends a response. May also be used as a shortcut key to register for a class.
12. Selection Keys : Labeled “A1” to “J0” and “a” to “z” for alpha numeric inputs.
13. Operation +/- /. Key : Used to enter the plus "+", the minus "-"or the decimal point “.”
Signs.
14. Shift Key : Toggles between upper and lower case letters during typewriting functions
15. Operation Key : Used to enter a space, the division / or the asterisk * signs
16. Alpha-Numeric Key : Toggles between multiple choice options, and alphabet and
numeric key functions
2.1.2.2 Student Keypad Instruction
2.1.2.2.1 No Host Screen
The following information is displayed on the NoHost screen:
RF signal strength is displayed in the upper left corner
The battery indicator is displayed in the upper right corner
Student ID number and user name.
The following functions can be performed under this display:
Copyright © 2012 All Rights Reserved by QOMO HiteVision.
www.qomo.com 52
Page 53

Enter the main menu by pressing the “Menu/OK Key” .
Enter the main menu by pressing the “Menu” “Left Soft Key” .
Short cut key to register by pressing the “Send Key” .
Log into the class by pressing “Login” “Right Soft Key” .
2.1.2.2.2 Menu Screens
Operations under these menu displays:
Use the “Up Key” or “Down Key” to scroll through the selection of the menu
items. The item selected will be highlighted.
Press the “Menu Key/OK” or “OK” Left Soft Key to select the menu item.
To use the shortcut to select a menu item, press the “Selection Key” corresponding to the
item number in front of the item. For example, to enter “3. Exam List” sub menu, press key
“3” .
2.1.2.2.3 Input Screens
Operations under these menu displays:
The displayed cursor will prompt the user to input characters or numbers.
The user can press the “Selection Keys” to enter the desired characters.
The “Del Key” serves as the backspace key.
The “Send Key” serves as the sending answer key.
Note: For the convenience of entering multiple lines of answers, once you enter one field and press
Copyright © 2012 All Rights Reserved by QOMO HiteVision.
www.qomo.com 53
Page 54

the “Menu/OK Key” , the cursor will automatically advance to the next field. When a page is
abc
abc 1 A
1
A
completed, the content of that page is stored into the memory.
If the input area is the multiple choice or an alpha numeric type, there will be an input type
indicator , or on the upper right corner of the screen. These signs indicate whether the
current input mode is the multiple choice input, numeric, or alpha.
Use the “Alpha-Numeric Key” to toggle through the input modes from multiple choice
input or numeric input or alpha input .
“Shift Key” is used to toggle between upper and lower case letters.
2.1.2.2.4 Confirmation Screens
Operations under these menu displays:
Note: Some operations require the user’s confirmation because these operations are not
recoverable. For example, deletion of an exam is not recoverable. Once it is deleted, it is
permanently removed.
Press the “OK” “Left Soft Key” or “Menu/OK Key” to confirm an operation.
Press the “Return” “Right Soft Key” to cancel the current operation.
2.1.2.2.5 Connecting student clickers to a host
Operations under these menu displays:
After a keypad is connected to a host receiver, students can:
Login to a class.
Begin an exam by pressing the Selection Keys to respond to the questions in the normal,
rush, and elimination activities.
Start receiving the test ID and the test titles in the paper and homework activities.
Ask a question during the quiz.
2.1.2.2.6 Functions and Operations
(1) Setting the Student ID and the User Name
Note: Before logging in, a valid Student ID and user name (stored in the class database) must be set
for each student keypad. The Student ID is used in the software but the user name is not used in the
software.
Copyright © 2012 All Rights Reserved by QOMO HiteVision.
www.qomo.com 54
Page 55

To set a Student ID, follow these steps:
1. Under the No Host screen, press the “Menu Key/OK” to enter into the main menu.
2. Select “4.SetStudentID” submenu or directly press number “4”.
3. Under the “Set Student ID” screen, enter a valid Student ID and then press the “Menu Key/OK”
to save it. The Student ID can be the combination of numeric and alpha.
To set a username, follow these steps:
1. Under the No Host screen, press the “Menu/OK” key to enter into the main menu.
2. Select “5.Set User Name” submenu or directly press number “5”.
3. Under the “SetUserName” screen, enter a valid user name and press the “Menu/OK” key
to save.
Note: All submenu items can be selected by directly pressing their corresponding item numbers
displayed at the front of each item.
(2) Login to a class:
To login to a class, follow these steps:
Under the No Host screen, select the “Login” right soft key to directly login to your class.
OR
1. Under the No Host screen, press the “Menu/OK” key or “menu” “Left Soft Key” to
enter the main menu.
2. Select “Login” to login into your class.
Note: The clicker will detect the active class in the closest proximity.
(3) Set Channel:
Copyright © 2012 All Rights Reserved by QOMO HiteVision.
www.qomo.com 55
Page 56

If the clicker does not automatically detect the right class you would like to attend, you may manually
set your clicker communication channel to the channel number used by that class. The class
channel number is the channel number which the main receiver is set to. .
Note: The main receiver channel can be set in the software. Refer to the software channel session.
To set the clicker channel, follow these steps:
1. Under the No Host screen, press the “Menu/OK” key to enter into the main menu.
2. Select “2.Set Channel” submenu or directly press number “2”.
Under the “Set Channel” screen, enter a valid channel number.
(4) Login to the last same channel class:
To login to the last same channel class, follow these steps:
Under the No Host screen, press the “Send Key” to directly log into the class you had last
logged into if the channel is not changed.
After successfully logging in, the LCD login screen will show various displays according to the
software activity mode selected. These will be introduced in operation (5). Once the student has
logged in, an assigned registration number will be displayed on the top of LCD screen.
If the login fails, one of the following messages will be displayed:
“Failure!” Not able to connect to a host at this time.
“Wait to Start!” The exam is not ready to begin.
“Invalid ID!” The software is not able to recognize the student ID. Be sure your student
keypad ID is listed in the class the instructor has selected.
Copyright © 2012 All Rights Reserved by QOMO HiteVision.
www.qomo.com 56
Page 57

(5) Operations after a successful login:
One of the following LCD screens will display according to the activity mode:
a) Normal Exam Screen:
This kind of display will be shown if the instructor selects the activity modes: Normal Quiz, Rush
Quiz, Elimination, Multiple Mode, Survey, and Vote.
Under the Normal Exam screen, the following functions can be performed:
After your login to the class—before the exam begins—the screen will prompt you to get the
question content or ask a question, if the software is configured to send the question content.
If the exam has started, you can manually request the question content. However, if the
exam has not yet started, you will not be able to get the question content. Once the exam
starts, the question content will be automatically pushed into your clicker display.
Enter your answer by pressing the “Choice Keys” and then press the “Send Key or
“Menu/OK” key to send your answer. A message will be displayed to acknowledge the
operation. The student responses will be displayed on the individual student screen for
reference.
To ask a question, press the “Left Key” to enter into the “Hand Raise List”, and then
press the “Menu/OK” key . The software will display a marker at the bottom of the main
exam question display window to raise the instructor’s attention. The instructor may look on
his or her keypad LCD screen to view the student who is asking the question.
Copyright © 2012 All Rights Reserved by QOMO HiteVision.
www.qomo.com 57
Page 58

Press the “Send Key” to re-register if the software is logged out. For example, if you
choose to logout to see another part of the keypad menu setting and then choose to return
to the quiz, you will need to re-register to rejoin the quiz.
Press the “Right Soft Key” to select the function “Return” if you want to exit the exam.
The keypad will prompt you for confirmation. Press the “Menu/OK” key to confirm the
exit or press “Return” “Right Soft Key” to cancel the operation and return to the
previous display. If the “Menu/OK” key is pressed, the keypad will display the NoHost
screen.
b) Paper Quiz Screen:
This will appear when the instructor has selected the Paper Quiz and Homework activity modes.
There are two applications for the Paper Quiz Screen:
1) If the exam ID selected for the quiz is already saved in the student keypad, the exam title
name with the test ID will display on the screen. The student can start the exam by
selecting the exam.
2) If the test ID selected for the quiz has not been saved into the student keypad previously,
then creating a new test screen will display. Only the test title can be modified on this
screen. Press the “OK” “Left Soft Key” to start the exam.
Copyright © 2012 All Rights Reserved by QOMO HiteVision.
www.qomo.com 58
Page 59

The following functions can be performed in the Paper Quiz Screen:
Enter your answers by pressing the “Choice Keys”.
Press the “Menu/OK” key or the “Down Key” to save the answers into your
keypad. The cursor will advance to the next question. Going to the next page, the previous
page answers will be saved to the student keypad.
If the software is configured to send the question contents, and when the instructor presses
the “F1 Send Question” button on the Status Tool Bar or presses the “F1” key on
the instructor keypad, the question contents will be pushed into the student keypad. The
question contents will be shown on the LCD screen.
Use the “Del Key” to delete the inputs if an answer needs to be modified.
Press “Option” “Right Soft Key” to enter into the paper quiz “Option” menu. Select a
menu item and press the “Menu/OK” key to confirm the operation.
Copyright © 2012 All Rights Reserved by QOMO HiteVision.
www.qomo.com 59
Page 60

c) Rush Quiz or Roll Call Screen:
This appears when the instructor has selected the Rush Quiz or Roll Call activity modes.
In the Rush Quiz or Roll Call Screens, the following functions can be performed:
Press any key (except “Up Key” , “Down Key” , “Left Key “ , “Right Key”
and “Right Soft Key” ) to respond to the Rush Quiz or Roll Call. If it is in Rush Quiz,
the Normal Exam Screen will be displayed to allow a student to submit an answer. After the
answer has been sent, the display will return to the Rush Quiz or the Roll Call Screen.
If you want to ask a question, press the “Down Key” to enter the “Raise Your Hand
Screen” and then press the “Menu/OK” key . The software screen will display a marker
at the bottom of the main question screen to alert the instructor. The names of students
who are asking questions can be displayed on the instructor’s keypad screen.
Press the “Send Key” to re-reregister for the class.
Press the “Right Soft Key” to select “Return” to exit the exam. You will be prompted
for confirmation. Press the “Menu/OK” key to confirm the exit or “Return” “Right Soft
Key” to cancel the operation and return to the previous screen. If the “Menu/OK” key
is pressed, the keypad will display the NoHost screen.
Copyright © 2012 All Rights Reserved by QOMO HiteVision.
www.qomo.com 60
Page 61

2.1.2.2.7 Homework Mode
To use the student keypad for the homework management offline, follow these steps:
Under the main menu, select “3.ExamList” to enter into the Homework submenu.
The Homework submenu consists of the following items:
ID & Title List: All tests saved in the student keypad will be displayed when the item ID &
Title List is selected. Each line corresponds to one test. Use the “Up Key” or “Down
Key” to select the desired test. Selected tests will be highlighted. Press the
“Menu/OK” key to go to the Exam Screen; Press the “Del Key” if you want to
delete the test.
FindByExamID: The FindByExamID screen will be displayed when the item FindByExamID
is selected. Enter an exam ID number to find an exam. After entering the exam ID number,
press the “Menu/OK” key to start searching. If there is a match, a listing of matched
tests will be displayed. Otherwise, a “no match” message will be displayed. Only a numeric
ID number can be entered. Use the “Del Key” to modify the input.
FindByTitle: The FindByTitle screen will be displayed when the item FindByTitle is selected.
Enter a test title to search. There is no need to enter the complete title name. All close
matches will be displayed on the test list screen. For example, if you only enter the letter ‘A’,
all tests with a test title starting with the letter ‘A’ will be listed.
Note: The cell phone style keypad provides an easy way to enter a character. Use the “Del Key”
to modify your inputs. After entering your title search, press the “Menu/OK” key to start
your search.
Copyright © 2012 All Rights Reserved by QOMO HiteVision.
www.qomo.com 61
Page 62

BeginNewExam: Selecting the item BeginNewExam will allow you to create a new test
answer frame. Once a frame is created, it can be used to store answers.
To create a new test answer frame, follow these steps:
1) “Exam ID:” The ID will be used to identify the homework when the homework is submitted
and the ID is also used for identification when searching for an exam later. The ID will be
assigned if the exam is in electronic format which is delivered through the software when
the instructor chooses the Homework or Paper Quiz Mode. If an exam is distributed in
paper format, the exam ID will be assigned by the instructor and the ID will be entered
manually by the students using their keypads.
2) “Total Questions:” This refers to the total number of questions. This item will determine
how many questions are in an exam. The number of questions will be assigned if the exam
is in electronic format, delivered through the software when you choose the Homework or
Paper Quiz Mode. If the exam is distributed in paper format, the number of questions will
need to be filled in by the students to match the total number of questions assigned in the
paper.
3) “Exam Name:” This is used for easily locating an exam later. The QClick Software does
not use this information. Therefore, it can be assigned by students to any easily
remembered text title.
4) When these settings are complete, press the “Menu/OK” key . The homework question
screen (when the instructor send questions) or answer screen will be displayed. Press
“Return” “Right Soft Key” to return to the previous menu.
5) You may start to work on the questions and save the answers to the keypad and then
submit them the next day in class; or just save the question frames to work on them later.
2.1.2.2.8 Student’s keypad special functions
Copyright © 2012 All Rights Reserved by QOMO HiteVision.
www.qomo.com 62
Page 63

(6) Hardware Test
To use the student keypad for a hardware test, follow these steps:
1. The QClick software must be in the hardware test mode in order to test the student keypad
hardware. Refer to Part 2. Software in session 2.4.3 Hardware test.
2. Under the main menu, select item “6.HardwareTest” submenu to enter into the Hardware test
screen display.
3. Enter the channel number, which is the same as the host machine’s (main receiver) channel
number selected by the PC software.
4. Press the “Menu/OK” key . If the channel number matches the host receiver channel number,
the PC software will display the student’s keypad ID on a row in a first come first serve order.
Additionally, the register number is also displayed on the keypad test screen. Otherwise, the
failure error message will be displayed on this test screen.
(7) Student keypad factory settings:
WARNING: Using this function will clear all user data stored, including all the test answers in this
keypad. It is NOT recoverable.
Sometimes it is convenient to clear all data stored in the keypad. This can be done by simply
restoring the factory settings. This is especially useful when you want to trade in your keypad.
To use the factory settings for the student keypad, follow these steps:
1. Under the main menu, select item “7.Settings” to enter into the Settings submenu.
2. Under the Setting submenu, select “4.DefaultSet” submenu in order to restore the factory
settings.
3. Press the “Menu/OK” key to confirm the operation.
4. Follow the screen prompt, and press the “Del Key” Menu/OK to initialize the setting.
2.1.2.2.9 Student keypad sleep mode
In order to increase the battery life of the response pads, a sleep mode has been implemented in the
student keypad.
To use the sleep mode settings for the student keypad, follow these steps:
1. Under the main menu, select item “7.Settings” to enter into the Settings submenu.
2. Under the Settings submenu, select “2.ScreenSaver” submenu in order to set the duration time
before going to the keypad sleep mode.
3. Press the “Up /Down Key” to increase or decrease the time setting.
Copyright © 2012 All Rights Reserved by QOMO HiteVision.
www.qomo.com 63
Page 64

4. Press the Menu/Ok Key to confirm the setting.
Form
Class Status
Is the Student
ID in the
class list?
Actions
Result
1
Offline (No class
selected)
N/A
All
Actions
No Host Display
2
Class logged in but
the quiz has not
started.
N/A
Joining
the class
Receives message “Wait
to Start”
3
The quiz is loaded
and ready to begin
but the timer has not
started.
No
Joining
the class
Receives message
“Invalid ID” and the
software will display Force
Login window.
4
The quiz is loaded
and ready to begin
but the timer has not
started.
Yes
Joining
the class
Registered for the class
and receives the register
number. The LCD
displays the register
screen.
5
The quiz is loaded
and ready but the
timer has not
started. The student
keypad joined the
class previously.
Yes
Power
Up
You can press “Send”
key to directly logon
back to previous class.
The LCD displays the
register screen.
Note: The default time setting is 2 minutes.
Note: If the clicker does not have any interaction for the period of time set in the Screen Saver, the
clicker will enter into a sleep mode which will shut down the screen’s display. The user can press
any key to wake up the keypad and return to the previous display. For additional battery life savings,
you should turn off the power of the clicker.
2.1.2.2.10 Routine steps using the student keypad
Taking a quiz with the pace controlled by the instructor
Student Keypad Operation Form
www.qomo.com 64
Copyright © 2012 All Rights Reserved by QOMO HiteVision.
Page 65

6
The quiz is loaded
and ready but the
timer has not
started. The student
keypad not
previously used for
this test.
Yes
Power
Up
No Host Display, need to
login to the class and
register.
7
The quiz is loaded
and ready but the
timer has not
started.
Yes
Enter
and
send the
answer
Receives the message
“Wait to Start”
8
The quiz is loaded
and running, the
timer started. The
student keypad
joined the class
previously.
Yes
Power
Up
You can press “Send”
key to directly logon
back to previous class.
The LCD displays the
register screen.
9
The quiz is loaded
and running and the
timer started.
Yes
Enter
and
send the
answer
Displays “Success!”
message.
Note: Before using your student keypad to join a quiz with the pace controlled by the instructor, you
should understand the function operation from using this table.
To join a quiz, follow these steps:
a) Turn on the keypad power. If the scenario is in form 5 or 8, you just need to press the “Send”
key .
b) If you did not join the class previously, you may have to login to the current class and register
for the class.
c) If you joined the current class previously, you may simply press the “Send” key to get a
short cut to directly register for the class.
d) If your keypad ID is not listed in the current class, you may need to set your keypad ID to the
one listed in the class, or try to force a login. The instructor will choose to allow the
participation of a non-registered student.
e) After you registered for the class, follow the instructor’s quiz pace.
Attending a quiz with self-controlled pace
Note: Before using your student keypad to join a quiz in the self-controlled pace, you should
understand the function operation forms on the above table before you can begin your quiz.
www.qomo.com 65
Copyright © 2012 All Rights Reserved by QOMO HiteVision.
Page 66

To join the quiz, follow these steps:
1. If you didn’t join the class previously, you may have to login to the current class and then
register and join the class.
2. If you joined the current class previously, simply press the “Send” key to get a short cut to
directly register for the class.
3. If your keypad ID is not listed in the current class, you will need to set your keypad ID to the one
listed in the class, or try to force a login. The instructor will choose to allow the participation of a
non-registered student.
4. You can begin to answer the questions at your own pace, using the Up Key /Down Key
to scroll up and down to view the questions. Use the “Menu/OK” key to save your
answers into the keypad.
After you have finished, press the “Right Soft” key to select the “Option” menu and select
the item “Send Answer” to turn in your answers.
2.2 Instructor Keypad
2.2.1 Specifications
Dimension (L × W × H): 5 inches x 2 inches x 1 inch
Keys: 21
Power required: 2 AA Batteries
RF transmission distance: ~200 feet
Battery life: 6 months to 1 year depending on use
(Not including laser pointer use and Offsite mode use)
Function: Instructor/Presenter
Note:
Each of the clickers is battery operational. Insert two “AA” batteries into the port on the back of the
clicker as indicated on the hardware. Slide the back plate into place. For a more secure closure, use
the screwdriver to insert the screw. The Screws and screwdriver are provided for your convenience.
Do not over tighten in order to avoid stripping the screw. When the batteries have expired, remove
the screw and back plate and replace the batteries with fresh ones. Re-secure the back plate and
screw, as necessary.
Enclosed in this package are the following items
Screwdriver
Screws
Copyright © 2012 All Rights Reserved by QOMO HiteVision.
www.qomo.com 66
Page 67

2.2.2 Illustration
2.2.2.1 Instructor Keypad Layout:
1. LCD: Color display
2. Power: Turns unit on and off
3. Left Soft Key : Confirms an operation that
appears on the bottom left of the screen
4. Up Key : Scrolls screen display up
5. Right Soft Key : Confirms an operation that
appears on the bottom right of the screen.
6. Left Key : Moves cursor to the left
7. Menu/OK Key : Confirms a selection or
enters the Main Menu
8. Right Key : Moves cursor to the right, views
the list of students who have questions
9. Laser pointer Key : Press and hold to
activate the laser pointer
10. Down Key : Scrolls screen display down
11. Del Key : Delete and backspace
12. Mouse Key :
In Normal Mode: Used to toggle between the mouse and keypad control
In Offsite mode: Displays student information
13. View Key :
In Normal Mode: Displays student records
In Offsite mode: Displays the current question and the correct answer
14. Question Key : Displays the names of the students who have a question
15. Start/Pause Key : Starts or pauses or logs you back into a class
Copyright © 2012 All Rights Reserved by QOMO HiteVision.
www.qomo.com 67
Page 68

16. Stop Key : Stops current activity
17. Slide Up Key : Displays previous PowerPoint slide or previous question; it is also used
as a page up key
18. Result Key : Displays histogram of results
19. Report Key : Displays Score Board
20. Slide Down Key : Advances PowerPoint slide, displays next questions, and is also used
as a page down key
21. F1 Key : Function key and toggles between upper and lower case letters during
typewriting function
22. F2 Key : Function key also used to enter the following characters: space, "/", and the
decimal point “.” sign
23. ESC Key : Escape or exit an exam and toggle among multiple choice inputs, alphabet
and numeric key functions
24. Choice Keys: Labeled “0” to “9” and “a” to “z” for alpha numeric inputs
2.2.2.2 Remote Mouse Keypad Definition:
1. Up Key : Moves cursor up
2. Laser pointer Key : Press and hold to activate the laser pointer
3. Left Key : Moves cursor left
4. Menu/ok Key : Mouse double-click
5. Right Key : Moves cursor to the right
6. Right Soft Key : Mouse right-click
7. Down Key : Moves cursor down
8. Left Soft Key : Mouse left-click
9. Mouse Key : Toggles between the mouse and keypad control
10. Question Key : Mouse left-click hold
11. View Key : “Tab key” PC keyboard
12. Slide Up Key : “Page Up Key” PC keyboard
Copyright © 2012 All Rights Reserved by QOMO HiteVision.
www.qomo.com 68
Page 69

13. Stop Key : “Enter Key” PC keyboard
14. Start/Pause/Login Key : “Up Key” PC keyboard
15. Result Key : “Left Key” PC keyboard
16. Report Key : “Right Key” PC keyboard
17. Slide Down Key : “Page Down Key” PC keyboard
18. F1 Key : “Down Key” PC keyboard
19. F2 Key : Free Style cut picture function key
20. ESC Key : “ESC Key” PC keyboard
NOTE: Using the remote mouse, the keypad will automatically take the initial flat surface as the
datum; therefore it is suggested to place the keypad at your convenient flat surface. Additionally,
please DO NOT POINT THE LASER DIRECTLY INTO EYES, it would be harmful to your eyes!
2.2.2.3 NoHost Screen
The instructor keypad works in both the Normal and the Offsite mode. Press the Up /Down
Key to select either the Normal or the Offsite mode to enter. Press the Menu/OK Key to
confirm to enter the mode you select.
2.2.2.3.1 NoHost screen display:
The following information will be displayed on this screen:
Signal strength is displayed in the upper left corner.
Battery life indicator is displayed in the upper right corner.
The instructor’s name and the name of the last class logged into.
Press the Up /Down Key to select to enter the Normal/Offsite mode.
The following functions can be performed while on this screen:
Press the Menu/OK Key to enter the main menu of your desired mode.
Copyright © 2012 All Rights Reserved by QOMO HiteVision.
www.qomo.com 69
Page 70

Press the Start Key or Right Key to log into the previously selected class.
Press the “Login” Right Soft Key to login to an existing class.
2.2.2.3.2 Operation mode selection screens:
Use the Up Key or Down Key to select the Normal mode or Offsite mode. The Normal
mode is used for the normal quiz selection. To conduct the normal quiz session, the needed
hardware will include the instructor keypad, student keypads, the main receiver, PC or a display
device. The Offsite mode is used for conducting quiz sessions using only the instructor keypad and
student keypad. The main receiver, PC and the display device are not needed for conducting this
type of quiz sessions.
2.2.2.4 Normal Mode
2.2.2.4.1 Normal mode menu display:
Operations available under these menu screens:
Use the Up Key or Down Key to scroll up or down the selections.
Press the Menu/OK Key to select the submenu and the keypad will go to the screen or
the submenu.
Copyright © 2012 All Rights Reserved by QOMO HiteVision.
www.qomo.com 70
Page 71

2.2.2.4.2 Input screen display:
Operations available under the input menu screen:
Note: The displayed cursor highlighted indicates that the user can input characters.
User can use the Up Key , Down Key , Left Key or Right Key to move
the cursor to select the desired character or number from the list of valid characters or
numbers display.
Press “OK” Left Soft Key to enter the selection.
Pressing the Del Key will backspace and remove any entered characters。
Pressing the “Return” Right Soft Key reverts to the menu one level up.
Press the Menu/ok Key to select the answer, and press “OK” Left Soft Key to save
the question setting.
2.2.2.4.3 Connecting the instructor’s keypad to the host receiver:
To connect the instructor keypad to the host receiver, follow these steps:
(1) Login to a class:
To login to a class, follow these steps:
Under the No Host screen, select “Login” Right Soft Key to login to your nearby class.
OR
1. Under the No Host screen, press the “Menu/OK” Key to enter the main menu.
2. Select item “Login” to login into your class.
Copyright © 2012 All Rights Reserved by QOMO HiteVision.
www.qomo.com 71
Page 72

(2) Set Channel:
If the clicker does not automatically detect the right class you would like to attend, you may manually
set your clicker communication channel to the channel number that the class use. The class channel
number is the main receiver channel number set.
Note: The main receiver channel can be set in the software. Refer to the software channel session.
To set the instructor clicker channel, follow these steps:
1. Under the NoHost screen, press the Menu/OK Key to enter into the main menu.
2. Select “1.SetChannel” submenu.
Under the “Set Channel” screen, enter a valid channel number.
(3) Login to the last same-channel class:
To log into the last same-channel class, follow these steps:
Under the NoHost screen, press the Start Key or Right Key to directly log into the class
you had last logged into if the channel is not changed. The name of the class, the teacher’s name
and the channel number will be displayed on the LCD screen.
After logging in, the following information will be displayed on the instructor keypad screen:
The selected activity mode
The selected class name
Copyright © 2012 All Rights Reserved by QOMO HiteVision.
www.qomo.com 72
Page 73

The instructor name
The number of registered student over the number of total students in the class.
2.2.2.4.4 Functions after login:
The following functions are available once the Instructor keypad is logged in:
The displayed PowerPoint slides can be selected up or down by pressing the Slide Up
Key or Slide Down Key .
An exam can be started, paused, or stopped by pressing the Start/Pause Key or Stop
Key .
Exit an exam by pressing the ESC Key .
View the statistics histogram of the current question answering or an instant report about the
answering by pressing the Result Key or Report Key .
View an individual student’s exam performance in the keypad screen.
1. Press the View Key to view a list of the students. Use the Up Key or Down
Key to scroll through the list of students and press the Menu/OK Key to select the
desired student.
OR
2. On the current screen, press the Menu/OK Key to enter into the Menu screen. Select
“ExamReport”, find and select the desired student and then press the Menu/OK Key to
view the results. Only the current question/answer from the exam will be displayed for the
student selected.
Note: Under the student list display, press the Menu/OK Key to toggle the display between the
student name and the answer report.
Note: A message will be displayed if the student list is empty
Copyright © 2012 All Rights Reserved by QOMO HiteVision.
www.qomo.com 73
Page 74

View the histogram of the current question and grade in the instructor keypad.
On the currently displayed screen, press the Menu/OK Key to enter into the Menu screen.
Select “ExamResult” to display the histogram.
Note: This function only applies to the Normal Quiz and Elimination activity mode.
Respond to the student’s questions:
View the name of the student who has a question:
1. On the currently displayed screen, pressing the Question Key will display a list of
the students who have a question.
OR
2. On the currently displayed screen, press the Menu/OK Key to enter into the Menu screen.
Select the item “Hand raise List” to view the list of students who have questions.
Note: After responding to the student’s request, select the student name and press the Menu/OK
Key to remove the student from the list.
Set up an instant question:
In the Free Style mode, the instructor can ask the instant questions using the clicker. To set the
Copyright © 2012 All Rights Reserved by QOMO HiteVision.
www.qomo.com 74
Page 75

instant question type and the instant question correct answers, follow these steps:
1. On the currently displayed screen, press the Menu/OK Key to enter into the Menu
screen. Select “SetQuestion” to view the question type list.
2. Select a question type from the list and then press the Menu/OK Key to go into the Set
Question screen.
3. In the item “Option Sum:” choose the total number of choices for this question and in the
item “Answers:” choose the correct answer for the question.
4. Use the Left Key or Right Key to select the Option Sum number and then use the
Down Key to go to the correct answer selection.
5. Use the Left Key or Right Key to select the correct answer. After all the selection,
press “OK” Left Soft Key to send the selection. The quiz will start automatically once the
information is successfully sent and received.
2.2.2.4.5 Instructor keypad in sleep mode:
In order to extend the life of the battery, a sleep mode has been implemented.
To use the sleep mode settings for the instructor keypad follow these steps:
1. Under the main menu, select item “4.Setting” to enter into the Settings submenu.
2. Under the Hardware submenu, select “2.ScreenSaver” submenu in order to set the
duration time before going to the sleep mode.
3. Press the Up /Down Key to adjust and select time.
Copyright © 2012 All Rights Reserved by QOMO HiteVision.
www.qomo.com 75
Page 76

4. Press the Menu/OK Key to confirm the setting.
Note: If the clicker stays without any interaction for a period of time that set in Screen Saver, the
keypad will enter into a sleep mode which will shut down the screen’s display. The user can press
any key to wake up the keypad and return to the previous display.
2.2.2.4.6 Instructor keypad factory settings:
WARNING: Using this function will clear all user data stored, including all the exam question
contents in the instructor keypad. It is NOT recoverable.
Sometimes it is convenient to clear all data stored in the keypad. This can be done by simply
restoring the factory settings. This is especially useful when you want to trade in your keypad.
To use the factory settings for the instructor keypad, follow these steps:
1. Under the Normal submenu, select “4. DefaultSet” in the submenu to restore the factory
settings.
2. Press the Menu/OK Key to confirm the operation.
3. Follow the screen prompt, and press the “Del Key” to initialize the setting.
2.2.2.5 Offsite Mode
The instructor clicker will consume more power when it is running in the Offsite mode. The clicker
with new batteries can last about 35 hours for continuing using under this mode. In the Offsite mode,
the instructor’s clicker will act as the main receiver, working as the host to directly receive the
student keypad responses in a quiz session. Before the instructor clicker can be used to conduct a
quiz session, the instructor should download at least one class setting with the student information
and at least one set of the quiz correct answers into the instructor’s keypad. The Offsite mode has
these functions:
Begin Session
Loading Info
Upload session
Class List
Exam List
Copyright © 2012 All Rights Reserved by QOMO HiteVision.
www.qomo.com 76
Page 77

Session List
2.2.2.5.1 Begin Session:
At least one class must be loaded in the instructor keypad before using the Begin Session function.
If you choose the No Free Style mode, at least one set of answers must be loaded into the keypad.
It is not necessary to have the correct answers ready when choosing the Free Style mode. To
conduct a quiz in the Offsite mode, follow these steps:
Note: No main receiver or a PC is needed for conducting a session in this mode.
1. Select the Offsite mode in the instructor keypad.
2. Select the function Begin Session. If the keypad has reached maximum storage, you must
purge some of the existing data. Refer to session 3.2.2.5.6 Session List for detailed
instructions.
Note: Before purging data, make sure you have uploaded the session into the QClick database
system. Otherwise, the session data will not be recovered after the purging.
The LCD screen will display a list of classes previously loaded.
3. Move the highlight using Up /Down Key to the class area and then select the
desired class by pressing the Menu/OK Key . If there are no classes loaded in the
keypad, the screen will display “NoClasslist!”.
Once you have successfully selected a class, choose an activity mode from the list displayed on the
LCD screen.
Copyright © 2012 All Rights Reserved by QOMO HiteVision.
www.qomo.com 77
Page 78

4. Move the highlight using Up /Down Key to the ExamList area and then select
the desired exam by pressing the Menu/OK Key . If there is no exam loaded in the
keypad, the ExamList area is blank. If you choose one of the Free Style activities, which
include FreeNormal, FreeRush and FreeEliminate, you will not need to load an exam prior
to conducting the quiz. However, if you choose one of the No Free Style activities, then you
must load an exam. If no exams are downloaded into the instructor’s keypad, then after
beginning a session, the LCD screen will display this message “NoExamList”
5. Press the Left Soft Key to start the Offsite session. The following screen will display
based on the activity mode selected.
6. Under No Free Style Activity mode, the instructor can push the question contents into the
student clickers. To implement this function, follow these steps:
(1) On the activity mode display, enter the menu, and then choose the SendOption
Copyright © 2012 All Rights Reserved by QOMO HiteVision.
www.qomo.com 78
Page 79

(2) If you select YES, the student keypad will display the question contents when the
exam begins. Press the “OK” Left Soft Key to confirm the operation,
(3) You may choose ViewQuestions to view the question contents. Use the
Left /Right Key to scroll the next or previous question contents.
7. Press the Start/Pause Key to start or pause a session. When the session starts, the
running time set for each question will be displayed on the screen. You may increase or
decrease the test time by pressing the Up Key or Down Key . Each key press
will increase or decrease the time by 5 seconds. Press the Stop Key to stop the
current question response. Use the Slide Up Key or Slide Down Key to go to
the previous or next question. The current question number over the total question number
also shows on the instructor clicker screen.
8. Press “Return” Right Soft Key to complete the current session. The display will prompt
you to confirm the exit. Enter the session name and then press Menu/OK Key to save
the conducted session into the instructor clicker.
Copyright © 2012 All Rights Reserved by QOMO HiteVision.
www.qomo.com 79
Page 80

The control keys function in the session saving includes:
Menu/OK Key – Confirm enter the session name
Right Soft Key – “Return” to exit the session saving
Del Key – Delete a numeric number or a character
Left Soft Key – Confirm the OK operation
Shift Key –Toggles between upper and lower case letters during typewriting
function
If you have chosen the Free Style Mode, after press the “Return” Right Soft Key to exit the
session conducting, the numeric EXAM ID and the default exam name “EXAM#” will be saved to the
clicker memory. Afterward, you may go to the ExamList menu to view the saved free style exam.
In whatever activity mode you select, when exiting the session, the session name needs to be
entered to save the conducted session. But if you don’t want to save the session, you can press the
“Return” Right Soft Key again when the display prompts you to save the session name. The
keypad will prompt you for confirmation of exit without saving. Press the Menu/OK Key to
confirm the cancellation of saving or press “Return” Right Soft Key to return to the saving
screen.
Copyright © 2012 All Rights Reserved by QOMO HiteVision.
www.qomo.com 80
Page 81

Control Functions for Conducting a Session:
This display shows a Rush Quiz session example. There are a total of 6 questions and the keypad is
currently on question 1. No students have registered for the selected class and there are 34 students
in this class. The third line shows the testing time in seconds.
These functions can be operated under the activity display:
Press the Menu/OK Key to enter the main menu for the control function selection for this
session.
Press the Report Key to view the current list of registered students. Select a student name
and then press the Menu/OK Key to view the student question responses.
Press the Question Key to view the list of students who have raised questions.
Copyright © 2012 All Rights Reserved by QOMO HiteVision.
www.qomo.com 81
Page 82

Press the View Key to view the current question correct answer.
Press the Start/Pause Key to start/pause the test timer. While using the timer, you can press
the Up Key or Down Key to increase or decrease the time by 5 seconds.
Press the Stop Key to stop the timer.
Press the Slide Up /Down Key to select the previous or next question.
Press the Report Key to view the answers of a registered student for the current question.
Note: This funciton is only active when the timer is stopped.
Press the “Return” Right Soft Key to exit the session.
Assigning or receiving function for the homework mode.
Before pressing the Start/Pause Key , the session homework mode stays in the Assigning
homework mode. After pressing the Start/Pause Key the session is in the Receiving
homework mode.
2.2.2.5.2 Loading Information
Download student’s information
Copyright © 2012 All Rights Reserved by QOMO HiteVision.
www.qomo.com 82
Page 83

To download the students’ information, follow these steps:
Note: In the QClick software, a class should be selected and an answer sheet or PowerPoint which
contains the answer information should be loaded and Ran.
1. Plug in the main receiver to the PC USB port.
2. In the QClick software, select a Class and then select the activity mode, Refer to Part 2
Software session 2.1.1.1 Class for detailed instruction.
3. Select the Offsite mode in the instructor keypad.
4. Select the LoadingInfo function. The instructor keypad will automatically begin searching for
the available classes. Select the desired class.
Note: While loading the class information and the answer sheets, keep the main receiver plugged in.
5. Select LoadStudentInfo and load the class and student information into the instructor’s keypad.
6. The instructor’s keypad can store up to 8 classes. If the keypad has reached its maximum
storage, the LoadStudentInfo will not operate. You will need to go to the function ClassList
and delete some classes to allow more storage before you can continue. Refer to session
3.2.2.5.4 Class List for detailed instruction.
Download exam information
To download the exam information, follow these steps:
1. Go to the Loading Info selection screen.
2. Select the function LoadExamInfo to start loading the answer sheet into the instructor’s
keypad.
3. The instructor’s keypad can store up to 8 exams. If the keypad has reached its maximum
storage, the LoadExamInfo will not operate. You will need to go to the function ExamList
and delete some of the exams to allow more storage capacity. Refer to session 3.2.2.5.5
ExamList for detailed instructions.
4. The display will remind the instructor to load an answer sheet and start the session in the
QClick software. Refer to Part 2 Software. Click the Menu/OK Key on the keypad to
Copyright © 2012 All Rights Reserved by QOMO HiteVision.
www.qomo.com 83
Page 84

confirm the answer sheet has been loaded or click “Return” Right Soft Key to cancel
the loading.
Download All Information:
If you want to load both students and exam information at the same time, follow these steps:
1. Go to the Loading Info selection screen.
2. Select the function LoadAllInfo to start loading students and exams into the instructor’s
keypad.
3. The instructor’s keypad can store up to 8 classes and 8 exams. If the keypad has reached its
maximum storage, the LoadAllInfo will not operate. You should delete the class and the
exams you stored. Refer to session 3.2.2.5.4 Class List and session 3.2.2.5.5 ExamList for
detailed instruction.
2.2.2.5.3 Upload sessions
To upload the session data, follow these steps: (You must have at least one stored session to be
uploaded)
Note: The main receiver and a PC are needed for uploading the session data
1. Plug the main receiver into a PC.
2. Set the QClick software to the Receiving Session Data mode. Refer to Part 2 Software,
2.3.2 Receive Session for detailed instruction.
3. Select the Offsite mode in the instructor keypad. Then select the function UploadSession.
4. The LCD screen will display a list of available sessions.
5. Select the desired session and press the Menu/OK Key .
6. The LCD will display the selected information. Click the Menu/OK Key to confirm or click
“Return” Right Soft Key to quit uploading. After successfully uploading, the session
data will not be purged. To purge the session data, go to the function Session List.
Copyright © 2012 All Rights Reserved by QOMO HiteVision.
www.qomo.com 84
Page 85

2.2.2.5.4 Class List:
The Class List function provides the list of classes which have been downloaded into the instructor
keypad as well as the selection of classes you desire to delete from the keypad memory in order to
make room for downloading new classes. The maximum number of classes the instructor keypad
can store is 8. To view and delete a class from the class list, follow these steps:
1. Select the Offsite mode in the instructor keypad, and then select the function ClassList.
2. The classes which have been downloaded in the keypad will be displayed on the LCD
screen. Use the Up /Down Key to scroll through the selections. Press the Del
Key and then press Menu/OK Key to delete the selected class. Press “Return”
Right Soft Key to return to the Offsite mode main menu.
If you press the Del Key to delete the selection, the keypad will prompt you for confirmation.
Press the Menu /OK Key to confirm the deletion or press “Return” Right Soft Key to cancel
the deletion. After the operation, the keypad will display the previous class list menu.
2.2.2.5.5 Exam List:
The Exam List function provides the list of exams which have been downloaded into the instructor
keypad and the selection of exams that you desire to delete from the keypad memory in order to
make room for downloading new exams. The maximum number of exams the instructor keypad can
store is 8. To view and to delete an exam from the answer sheet list, follow these steps:
Copyright © 2012 All Rights Reserved by QOMO HiteVision.
www.qomo.com 85
Page 86

1. Select the Offsite mode in the instructor keypad, and then select the ExamList function.
2. The exams which have been downloaded in the keypad will be displayed on the LCD screen.
Use the Up /Down Key to scroll through the selections. Press the Del Key to
delete the selected exam and then press the Menu/OK Key to confirm the operation.
Press “Return” Right Soft Key to return to the Offsite mode main menu.
If you press the Del Key to delete the selection, the keypad will prompt you for confirmation.
Press the Menu/OK Key to confirm the deletion or press “Return” Right Soft Key to cancel
the deletion. After the operation, the keypad will display the previous exam list menu.
2.2.2.5.6 Session List:
The Session List function provides the list of sessions which have been conducted and stored in
the instructor keypad and the selection of session’s data you desire to delete from the keypad
memory in order to make room for storing new session data. The maximum number of sessions the
instructor keypad can store is 8. If all storage is used, you will not be able to conduct a session using
the Offsite mode. To view and delete session data from the session list, follow these steps:
Note: Before purging a session data, make sure that you have uploaded the session into the QClick
database system; otherwise, the session data will not be recovered after purging.
1. Select the Offsite mode in the instructor keypad, and then select the SessionList function.
2. The sessions which have been stored in the keypad will be displayed on the LCD screen.
Use the Up /Down Key to scroll through the selections. Press the Menu/OK Key
to delete the selected session. Press “Return” Right Soft Key to return to the Offsite
mode main menu.
If you press the Del Key to delete the selection, the keypad will prompt you for confirmation.
Press the Menu/OK Key to confirm the deletion or press “Return” Right Soft Key to cancel
the deletion. After the operation, the keypad will display the previous session list menu.
Copyright © 2012 All Rights Reserved by QOMO HiteVision.
www.qomo.com 86
Page 87

2.3 Main Receiver and USB Cable
The main receiver is used to send and receive signals to and from the remote keypads and to
exchange data with the host computer. The main receiver can be plugged into a computer’s USB
port or connected to a computer through a USB cable.
2.3.1 Specifications
Dimensions (L × W × H) 3.4 in ×.96 in ×.4in
Weight: .50 oz
Operating Temperature: 0-104 degree F
Operating Relative Humidity: 0-90%
Transmitting and receiving distance: ~200 feet radial
2.3.2 Illustration
1- QRF900 Main Receiver
2- Extension USB: extends the connection between the main receiver and the computer.
2.4 Carrying Case
Copyright © 2012 All Rights Reserved by QOMO HiteVision.
www.qomo.com 87
Page 88

Part 3. QRF700 Hardware & System
Installation Illustration
3.1 Student Keypad
3.1.1 Specifications
Dimensions (L× W× H): 4.5’’ x 1.8’’x0.71’’
Keys: 21
Power required: 2 AAA Batteries
RF transmission distance: ~200 feet
Battery life: Depends upon use or up to 6 months
Function: Transmit response signals
Note:
Each of the clickers is battery operational. Insert two “AAA” batteries into the port on the back of the
clicker as indicated on the hardware. Slide the back plate into place. For a more secure closure, use
the screwdriver to insert the screw. The Screws and screwdriver are provided for your convenience.
Do not over tighten in order to avoid stripping the screw. When the batteries have expired, remove
the screw and back plate and replace the batteries with fresh ones. Re-secure the back plate and
screw, as necessary.
Enclosed in this package are the following items
Screwdriver
Screws
3.1.2 Illustration
3.1.2.1 Student Keypad Layout
17. Power: Turns unit on and off
18. Screen Display
19. Left Soft Key : Confirms the operation which appears on the bottom left of the screen
Copyright © 2012 All Rights Reserved by QOMO HiteVision.
www.qomo.com 88
Page 89

20. Up Key : Scrolls the screen display up
21. Right Soft Key : Confirms an operation that
appears at the bottom right of the screen; when
exiting from the answer screen during homework
or paper quiz mode, this button is also used to
enter into the function selection menu
22. Left Key : Scrolls to the left
23. Menu/OK Key : Confirms a selection or
enters into the main menu
24. Right Key : Scrolls to the right
25. Send Key : Sends a response. May also be
used as a shortcut key to register to a class
26. Down Key : Scrolls the screen display down
27. Del Key : Deletes an exam during the
paper quiz or homework mode and is also used
to backspace
28. Selection Keys : Labeled “A1” to “J0” and “a” to
“z” for alpha numeric inputs
29. Shift Key : Toggles between upper and
lower case letters during typewriting functions
30. Operation Key : Used to enter a space,
the division "/" or the asterisk “*”signs
31. Alpha-Numeric Key : Toggles between multiple choice options, and alphabet and
numeric key functions
3.1.2.2 Student Keypad Instruction
3.1.2.2.1 NoHost Screen
The following information is displayed on the NoHost screen:
Copyright © 2012 All Rights Reserved by QOMO HiteVision.
www.qomo.com 89
Page 90

RF Signal strength is displayed in the upper left corner
The battery indicator is displayed in the upper right corner
Student ID number
Note: Press the “Down Key” to show the user name.
The following functions can be performed under this display:
Enter the main menu by pressing the “Menu/OK Key” .
Enter the main menu by pressing “Menu” “Left Soft Key” .
Short cut key to register by pressing the “Send Key” .
Log into the class by pressing “Login” “Right Soft Key” .
3.1.2.2.2 Menu Screens
Operations under these menu displays:
Use the “Up Key” or “Down Key” to scroll through the selection of the menu items.
The item selected will be highlighted.
Press the “Menu Key/OK” or Left Soft Key to select the menu item.
To use the shortcut to select a menu item, press the “Selection Key” corresponding to the
item number in front of the item. For example, to enter “3.FindByTitle” sub menu, you press
key “3”.
3.1.2.2.3 Input Screens
Operations under these menu displays:
The displayed cursor prompts the user to input characters or numbers.
The user can press the “Selection Keys” to enter the desired characters.
The “Del Key” serves as the backspace key.
Copyright © 2012 All Rights Reserved by QOMO HiteVision.
www.qomo.com 90
Page 91

The “Send Key” serves as the sending answer key.
abc
abc 1 A 1 A
Notes: When the question ends, you can input the answer directly and the system
automatically deletes the previous answer before that. The input has the limitation of 32
letters, which will automatically shrink to fit the screen once it is more than 7 letters.
If the input area is the multiple choice or an alpha numeric type, there will be an input type
indication , or on the upper right corner of the screen. These signs indicate whether the
current input mode is the choice input, numeric or alpha.
Use the “Alpha-Numeric Key” to toggle through the input modes from choice input
or numeric input or alpha input .
“Shift Key” is used to toggle between upper and lower case letters.
3.1.2.2.4 Confirmation Screens
Operations under these menu displays:
Note: Some operations require the user’s confirmation because these operations are not
recoverable. For example, deletion of an exam is not recoverable. Once it is deleted, it is
permanently removed.
Press “Left Soft Key” or “Menu/OK Key” to confirm an operation.
Press “Return” “Right Soft Key” to cancel the current operation.
3.1.2.2.5 Connecting student clickers to a host
Operations under these menu displays:
After a keypad is connected to a host receiver, students can:
Login to a class.
Begin an exam by pressing the Selection Keys to respond to the questions in the normal,
rush and elimination activities.
Start receiving the test ID and the test titles in the paper and homework activities.
Ask a question during the quiz.
3.1.2.2.6 Functions and Operations
(1) Setting the Student ID and the User Name
Note: Before logging in, a valid Student ID and user name (stored in the class database) must be set
for each student keypad. The Student ID is used in the software but the user name is not used in the
Copyright © 2012 All Rights Reserved by QOMO HiteVision.
www.qomo.com 91
Page 92

software.
To set a Student ID, follow these steps:
1. Under the NoHost screen, press the “Menu Key/OK” to enter into the main menu.
2. Press Down Key or Right Key to select SET STUDENT ID menu.
3. Under the “SetStudentID” screen, enter a valid Student ID and then press the “Menu
Key/OK” to save it. The Student ID can be the combination of numeric and alpha.
To set a username, follow these steps:
1. Under the NoHost screen, press the “Menu/OK” key to enter into the main menu.
2. Press Down Key or Right Key to select Set User Name menu.
3. Under the “SetUserName” screen, enter a valid user name and press the “Menu/OK” key
to save.
(2) Login to a class:
To login to a class, follow these steps:
Under the NoHost screen, select the “Login” right soft key to directly login to your class.
OR
1. Under the NoHost screen, press the “Menu/OK” key or “menu” “Left Soft Key”
to enter the main menu.
2. Select “Login” to login into your class.
Note: The clicker will detect the active class in the closest proximity.
(3) Set Channel:
If the clicker does not automatically detect the right class you would like to attend, you may manually
set your clicker communication channel to the channel number that the class use. The class channel
number is the main receiver channel number set.
Copyright © 2012 All Rights Reserved by QOMO HiteVision.
www.qomo.com 92
Page 93

Note: The main receiver channel can be set in the software. Refer to the software channel session.
To set the clicker channel, follow these steps:
1. Under the NoHost screen, press the “Menu/OK” key to enter into the main menu.
2. Press Down Key or Right Key to select SET CHANNEL menu.
Under the “SetChannel” screen, enter a valid channel number.
(4) Login to the last same channel class:
To login to the last same channel class, follow these steps:
Under the NoHost screen, press the “Send Key” to directly log into the class you had last
logged into if the channel is not changed.
After successfully logging in, the login screen will show various displays according to the software
activity mode selected. These will be introduced in operation (5). Once the student has logged in, an
assigned registration number will be displayed on the top of screen.
If the login fails, one of the following messages will be displayed:
“Failure!” Not able to connect to a host at this time.
“Wait to Start!” The exam is not ready to begin.
“Invalid ID!” The software is not able to recognize the student ID. Be sure your student
keypad ID is listed in the class the instructor has selected.
(5) Operations after a successful login:
One of the following screens will display according to the activity mode:
d) Normal Exam Screen:
This kind of displays will be shown if the instructor selects the activity modes: Normal Quiz, Rush
Quiz, Elimination, Multiple Mode, Survey and Vote.
Under the Normal Exam screen, the following functions can be performed:
Enter your answer by pressing the “Choice Keys” and then press the “Menu/OK” key or
“Send” key to send your answer. A message will be displayed to acknowledge the
operation. The student responses will be displayed on the individual student screen for
Copyright © 2012 All Rights Reserved by QOMO HiteVision.
www.qomo.com 93
Page 94

reference.
To ask a question, press the Down Key to enter into the “Hand Raise List”, and then
press the “Menu/OK” key . The software will display a marker at the bottom of the main
exam question display window to raise the instructor’s attention. The instructor may look on
his or her keypad LCD screen to view the student who is asking the question.
Press the “Send Key” to re-register if the software is logged out. For example, if you
choose to logout to see another part of the keypad menu setting and then choose to return to
the quiz, you will need to re-register to rejoin the quiz.
Press the “Right Soft Key” to select the function “Return” if you want to exit the exam.
The keypad will prompt you for confirmation. Press the “Menu/OK” key to confirm the
exit or press “Return” “Right Soft Key” to cancel the operation and return to the previous
display. If the “Menu/OK” key is pressed, the keypad will display the NoHost screen.
e) Paper Quiz Screen:
This applies when the instructor has selected the Paper Quiz and Homework activity modes.
There are two applications for the Paper Quiz Screen:
3) If the exam ID selected for the quiz is already saved in the student keypad, the exam title
name with the EXAM ID will display on the screen. The student can start the exam by
selecting the exam.
4) If the EXAM ID selected for the quiz is not saved in the student keypad previously, then
creating a new test screen will display. Only the test title can be modified on this screen.
Press “OK” “Left Soft Key” to start the exam.
The following functions can be performed in the Paper Quiz Screen:
Copyright © 2012 All Rights Reserved by QOMO HiteVision.
www.qomo.com 94
Page 95

Enter your answers by pressing the “Choice Keys”.
Press the “Menu/OK” key or the “Left Soft Key” to save the answers into your
keypad. The cursor will advance to the next question. Going to the next page, the previous
page answers will be saved to the student keypad.
Use the “Del Key” to delete the inputs if an answer needs to be modified.
Press “Option” “Right Soft Key” to enter into the paper quiz “Option” menu. Select a
menu item and press the “Menu/OK” key to confirm the operation.
f) Rush Quiz or Roll Call Screen:
This applies when the instructor has selected the Rush Quiz or Roll Call activity modes.
In the Rush Quiz or Roll Call Screens, the following functions can be performed:
Press any key (except “Right Soft Key” and “Down Key”) to respond to the Rush Quiz or
Roll Call. If it is in Rush Quiz, the Normal Exam Screen will be displayed to allow a student to
submit an answer. After the answer has been sent, the display will return to the Rush Quiz or
the Roll Call Screen.
If you want to ask a question, press the Down Key to enter the “Raise Your Hand
Copyright © 2012 All Rights Reserved by QOMO HiteVision.
www.qomo.com 95
Page 96

Screen” and then press the “Menu/OK” key . The software screen will display a marker
at the bottom of the main question screen to alert the instructor. The names of students
who are asking questions can be displayed on the instructor’s keypad screen.
Press the “Send Key” to re-reregister the class.
Press the “Right Soft Key” to select “Return” to exit the exam. You will be prompted for
confirmation. Press the “Menu/OK” key to confirm the exit or “Return” “Right Soft Key”
to cancel the operation and return to the previous screen. If “Menu/OK” key is
pressed, the keypad will display the NoHost screen.
3.1.2.2.7 Homework Mode
To use the student keypad for the homework management offline, follow these steps:
Under the main menu, Press Down Key or Right Key to select EXAM LIST menu enter
into the Homework submenu.
The Homework submenu consists of the following items:
ID & Title List: All tests saved in the student keypad will be displayed when the item ID & Title
List is selected. Each line corresponds to one test. Use the “Up Key” or “Down Key”
to select the desired test. Selected tests will be highlighted. Press the “Menu/OK” key
to go to the Exam Screen; Press the “Del Key” if you want to delete the test.
FindByExamID: The Find By Exam ID screen will be displayed when the item FindByExamID
is selected. Enter an exam ID number to find an exam. After entering the exam ID number,
press the “Menu/OK” key to start searching. If there is a match, a listing of matched
tests will be displayed. Otherwise, a “no match” message will be displayed. Only a numeric
ID number can be entered. Use the “Del Key” to modify the input.
FindByTitle: The Find By Title screen will be displayed when the item FindByTitle is selected.
Copyright © 2012 All Rights Reserved by QOMO HiteVision.
www.qomo.com 96
Page 97

Enter a test title to search. There is no need to enter the complete title name. All close
matches will be displayed on the test list screen. For example, if you only enter letter ‘A’, all
tests with a test title starting with letter ‘A’ will be listed.
Note: The cell phone style keypad provides you an easy way to enter a character. Use the “Del
Key” to modify your inputs. After entering your searching title, press the “Menu/OK” key
to start your search.
BeginNewExam: Selecting the item BeginNewExam will allow you to create a new test
answer frame. Once a frame is created, it can be used to store answers.
To create a new test answer frame, follow these steps:
6) “Exam ID:” The ID will be used to identify the homework when the homework is submitted
and the ID is also used for identification when searching for an exam later. The ID will be
assigned if the exam is in electronic format which is delivered through the software when
the instructor chooses the Homework or Paper Quiz Mode. If an exam is distributed in
paper format, the exam ID will be assigned by the instructor and the ID will be entered
manually by the students using their keypads.
7) “Total Questions:” This refers to the number of questions. This item will determine how
many questions are in an exam. The number of questions will be assigned if the exam is in
electronic format, delivered through the software when you choose the Homework or
Paper Quiz Mode. If the exam is distributed in paper format, the number of questions will
need to be filled in by the students to match the total number of questions assigned in the
paper.
8) “Exam Name:” This is used for easily locating an exam later. The QClick Software does
not use this information. Therefore, it can be assigned by students to any easily
remembered text title.
9) When these settings are complete, press the “Menu/OK” key . The homework question
screen (when the instructor send questions) or answer screen will be displayed. Press
“Return” “Right Soft Key” , to return to the previous menu.
10) You may start to work on the questions and save the answers to the keypad and then
submit them the next day in the class; or just save the question frames to work on them
later.
Copyright © 2012 All Rights Reserved by QOMO HiteVision.
www.qomo.com 97
Page 98

3.1.2.2.8 Student’s keypad special functions
(8) Hardware Test
To use the student keypad for a hardware test, follow these steps:
1. The QClick software must be in the hardware test mode in order to test the student keypad
hardware. Refer to Part 2. Software in session 2.4.3 Hardware test.
2. Under the main menu, Press Down Key or Right Key to select HARDWARE
TEST menu to enter into the Hardware test screen display.
3. Enter the channel number, which is the same as the host machine’s (main receiver) channel
number selected by the PC software.
4. Press the “Menu/OK” key . If the channel number matches the host receiver channel
number, the PC software will display the student’s keypad ID on a row in a first come first
serve order. Additionally, the register number is also displayed on the keypad test screen.
Otherwise, the failure error message will be displayed on this test screen.
(9) Student keypad factory settings:
WARNING: Using this function will clear all user data stored, including all the test answers in this
keypad. It is NOT recoverable.
Sometimes it is convenient to clear all data stored in the keypad. This can be done by simply
restoring the factory settings. This is especially useful when you want to trade in your keypad.
To use the factory settings for the student keypad, follow these steps:
1. Under the main menu, Press Down Key or Right Key to select SETTINGS menu
to enter into the Settings submenu.
2. Under the Setting submenu, select “5.DefaultSet” submenu in order to restore the factory
settings.
3. Press the “Menu/OK” key to confirm the operation.
4. Follow the screen prompt, and press the “Del Key” to initialize the setting.
Copyright © 2012 All Rights Reserved by QOMO HiteVision.
www.qomo.com 98
Page 99

3.1.2.2.9 Student keypad sleep mode
For
m
Class Status
Is the Student
ID in the
class list?
Actions
Result
1
Offline (No class
selected)
N/A
All
Actions
NoHost Display
2
Class logged in but
the quiz has not
started.
N/A
Joining
the class
Receives message “Wait
to Start”
3
The quiz is loaded and
ready to begin but the
timer has not started.
No
Joining
the class
Receives message
“Invalid ID” and the
software will display Force
Login window.
In order to increase the battery life of the response pads, a sleep mode has been implemented in the
student keypad.
To use the sleep mode settings for the student keypad, follow these steps:
1. Under the main menu, Press Down Key or Right Key to select SETTINGS menu
to enter into the Settings submenu.
2. Under the Hardware submenu, select “3.ScreenSaver” submenu in order to set the
duration time before going to the keypad sleep mode.
3. Press the “Up Key” , Right Key or “Down Key” , Left Key to increase or
decrease the time setting.
4. Press the Menu/ok Key to confirm the setting.
Note: If the clicker stays without any interaction for a period of time that set in Screen Saver, the
clicker will enter into a sleep mode which will shut down the screen’s display. The user can press
any key to wake up the keypad and return to the previous display. For further saving the battery life,
you should turn off the power of the clicker.
3.1.2.2.10 Routine steps using the student keypad
Taking a quiz with the pace controlled by the instructor
Student Keypad Operation Form
www.qomo.com 99
Copyright © 2012 All Rights Reserved by QOMO HiteVision.
Page 100

4
The quiz is loaded and
ready to begin but the
timer has not started.
Yes
Joining
the class
Registered for the class
and receives the register
number. Display the
register screen.
5
The quiz is loaded and
ready but the timer
has not started. The
student keypad joined
the class previously.
Yes
Power
Up
You can press “Send”
key to directly logon
back to previous class.
Display the register
screen.
6
The quiz is loaded and
ready but the timer
has not started. The
student keypad not
previously used for
this test.
Yes
Power
Up
NoHost Display, need to
login to the class and
register.
7
The quiz is loaded and
ready but the timer
has not started.
Yes
Enter
and
send the
answer
Receives the message
“Wait to Start”
8
The quiz is loaded and
running, the timer
started. The student
keypad joined the
class previously.
Yes
Power
Up
You can press “Send”
key to directly logon
back to previous class.
Display the register
screen.
9
The quiz is loaded and
running and the timer
started.
Yes
Enter
and
send the
answer
Displays “Success!”
message.
Note: Before using your student keypad to join a quiz with the pace controlled by the instructor, you
should understand the function operation from using this table.
To join a quiz, follow these steps:
f) Turn on the keypad power. If the scenario is in form 5 or 8, you just need to press the “Send”
key .
g) If you did not join the class previously, you may have to login to the current class and register
for the class.
h) If you joined the current class previously, you may simply press the “Send” key to get a
www.qomo.com 100
Copyright © 2012 All Rights Reserved by QOMO HiteVision.
 Loading...