

Page 1
1
Hot Key Legend
Home
New
Slide
Background
Settings
Previous
Slide
Next
Slide
Animations
Insert
Media
Select
Tool
Tools
Switch
Undo
Hot Key Legend cont.
Pen
Settings
Pen
Tray
Eraser
Color
Palette
Pen
Paint
Brush
Highlighter
Laser
Pen
Texture
Pen
Show/Hide
Toolbar
Clear
Page
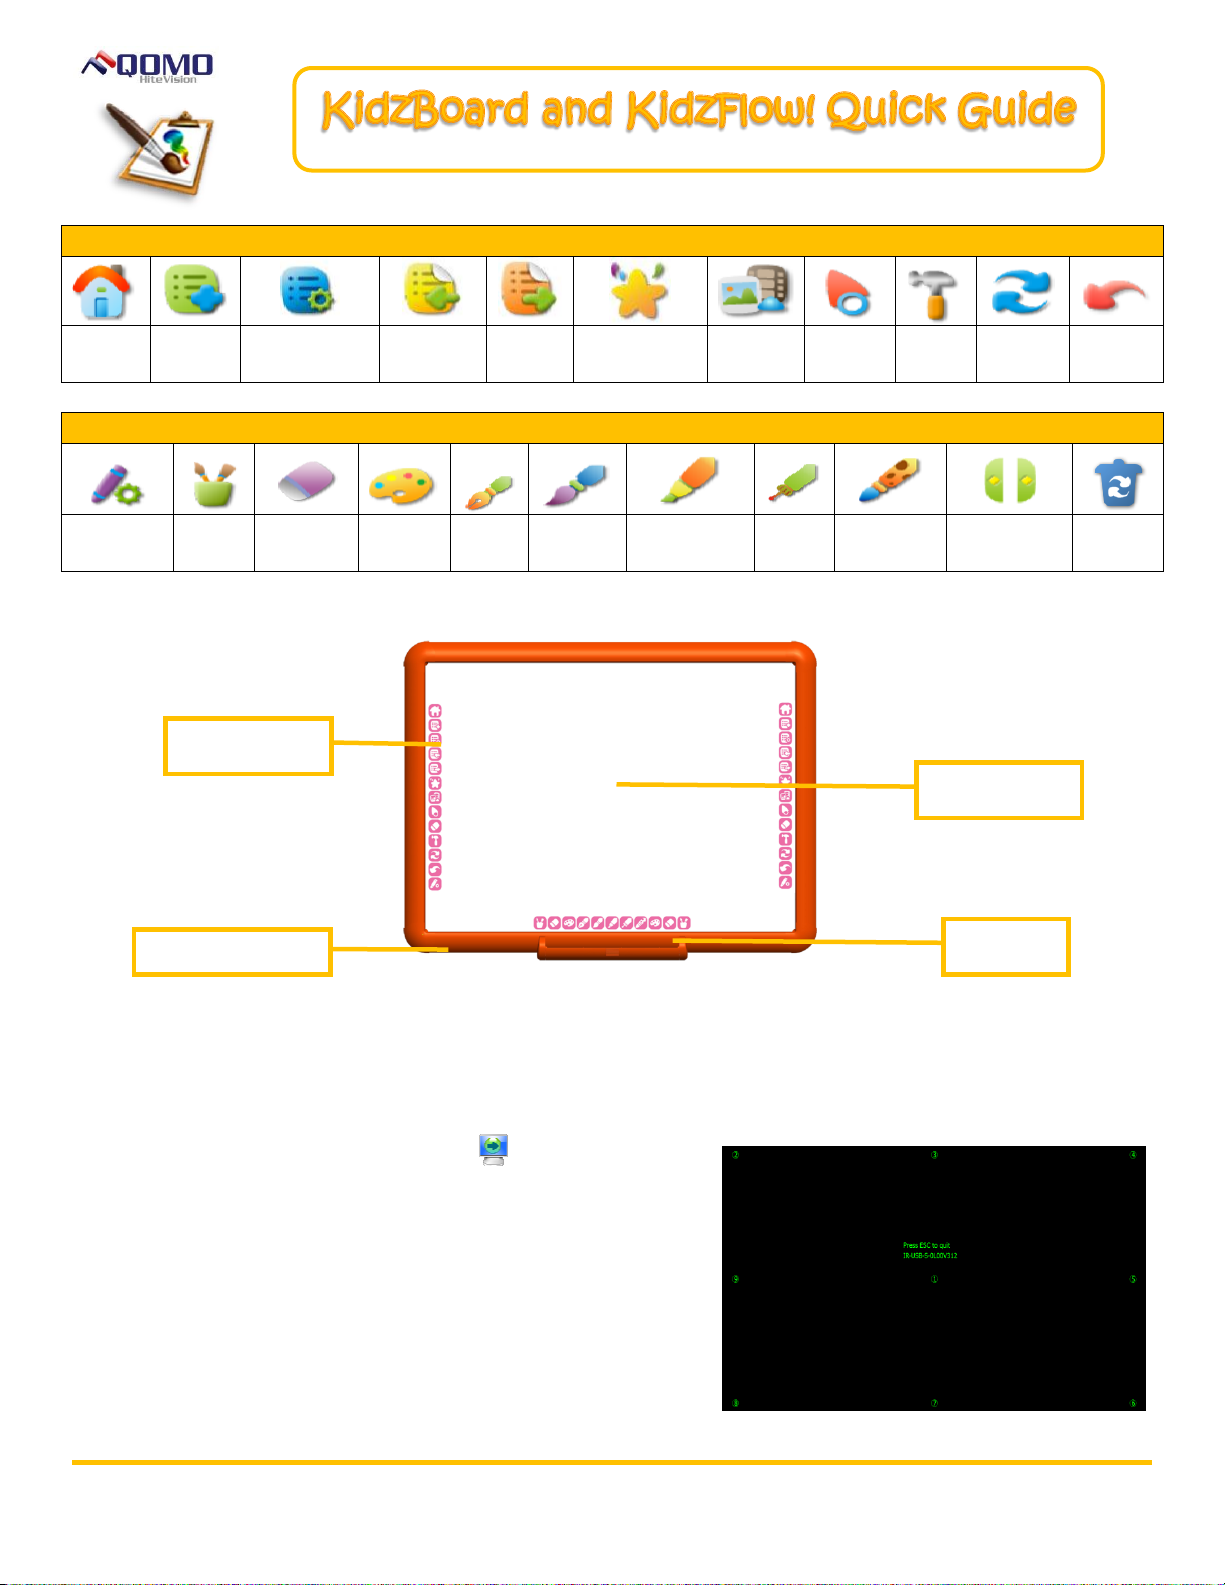
Hot Keys
Active Area
Pen Tray
USB connection
Parts of the Board
How to Calibrate the Board
The board needs to be calibrated to assure proper functioning. When the board is disconnected from
the computer, it will need to be recalibrated when it is reconnected.
1. Left click on the board icon in the taskbar.
2. Click on Calibrate.
3. Follow the calibration points around the board as
indicated in the calibration setup.
© Copyright 2012 QOMO HiteVision, LLC. All Rights Reserved
Note: If the board icon is red, the board is not
connected to the computer and the calibration
menu won’t appear. Simply unplug and plug the
USB back into the board.
Page 2
2
Basic Board Functions
Left Mouse Click: Use your finger, a pen, or the wand and tap the board. Tap twice for a double click.
Right Mouse Click: Use your finger, a pen, or the wand, touch the board and hold it for 3 seconds.
Pen Tray: The pens and eraser can be used instead of your finger to draw or erase on the board. The
pen color is determined by which pen slot is vacant on the pen tray. If all of the pens are removed, it
defaults to black.
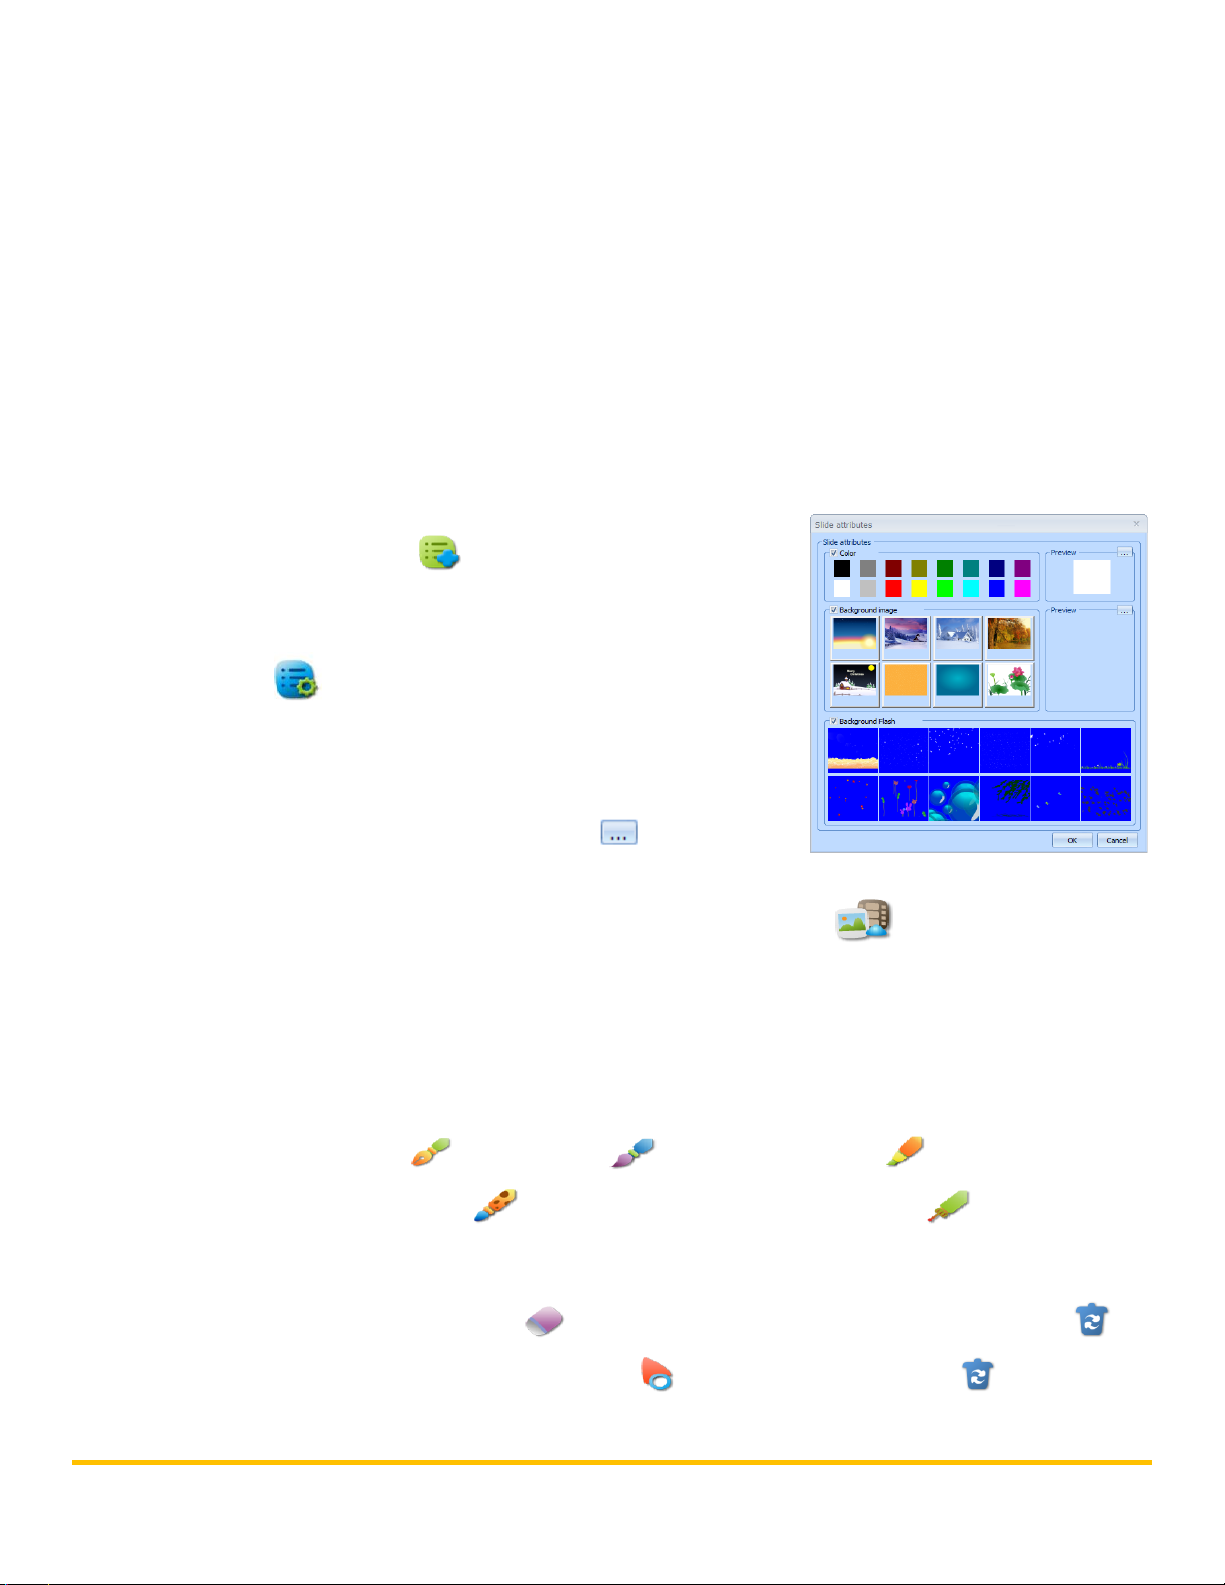
Creating a Lesson
The software makes it easy to design eye catching and fun lessons for the kids. The background can be
customized and various forms of media can be added to the lesson.
1. Click on the New Slide button to add a slide to the
presentation.
2. To change the background, click on the Background
Settings button.
a. Select the background color, image, and/or flash
file.
b. To insert an image from your computer or customize
the color, click on the three dots button in the
preview box.
3. To insert an image, audio, video, or flash file click on the Media button.
a. Select the media that you would like to insert into your presentation.
b. Your cursor will become a plus sign. Choose the location where you want the media and
click and drag the media file into your presentation.
Writing, Drawing, and Erasing
To write or draw, select the Pen or Paint Brush tool. The Highlighter creates a semi-
transparent mark and the Texture Pen creates a colorful mark. The Laser Pen creates a line
that flashes to draw attention to a certain area. The mark also disappears when a new mark is drawn.
Marks can be deleted with the pixel Eraser tool. To clear the entire slide, click on the Trash
button. To delete an object, select it using the Select tool and click on the Trash button.
© Copyright 2012 QOMO HiteVision, LLC. All Rights Reserved
Page 3

3
Setting Up the Pen Tools
Pen properties can be changed, such as the pen color and pen width. The
pen tray allows you to customize several different pens to use at the
same time.
1. To customize the pen that you are currently using, click on the
Pen Settings icon to change the color and the line width.
The Color Palette can also be selected to change the
color of the pen.
2. To customize multiple pens to use at once, click on the Pen Tray button. An empty pen
tray will appear.
a. Click on the Pen Settings icon. A pen
properties window will appear.
b. Click the Add tab in the Pens box to add a pen.
c. Select what type of pen you want, the color of
the ink, the line width, and line type.
d. Add additional pens with different properties.
Click ok to save the settings.
How to Animate an Object
1. Select an object or text that you wish to animate by using the Selecting tool .
2. Click on the Animations button.
3. Select the animation that you wish to apply to the object.
Note: Two animations can be applied to an object at once.
4. To stop the most recent animation, click on the green star .
5. To stop the animations of all of the objects, click on the orange star .
Note: To delete an animated object from the slide, select the object, stop the
animation, then click on the trash button.
© Copyright 2012 QOMO HiteVision, LLC. All Rights Reserved
Page 4

4
Annotating Over Other Documents or Programs
KidzFlow! allows you to annotate over other documents or programs. Annotations can be saved in the
whiteboard presentation or embedded into other documents.
1. Click on the Switch button. KidzFlow!
and the other program or file will run
together.
2. Select a writing utensil. This will switch
you to the screen annotation mode.
3. If you are annotating over a MS Office application you will get a toolbar on
the screen.
4. To embed your annotations into your Office document, click on the Embed button.
5. To navigate through a PowerPoint, click the previous and next buttons. This will also
copy the PowerPoint slides into the KidzFlow! presentation.
How to Save the File
Files can be saved as a KidzFlow! presentation file.
1. Click on the Home button.
2. Select File then choose Save or Save as.
Note: Files are saved as an .hht file and can only be opened with the
KidzFlow! or Flow! Works program.
How to Export the File
Files can be saved as an image file, PowerPoint, PDF, HTML, and doc file to
make it easy to share your presentation with other people.
1. Click on the Home button.
2. Select Export and choose the desired format.
© Copyright 2012 QOMO HiteVision, LLC. All Rights Reserved
Page 5

5
Show/Hide Toolbar
The Show/Hide Toolbar function makes it easy to toggle between the KidzFlow! program and other
applications when working at your computer.
1. Click on a Show/Hide button to exit KidzFlow!, hide the KidzFlow! buttons, and make the
program inactive.
2. To go back into the KidzFlow! program, click on the Show/Hide button again.
Note: The Show/Hide feature is available only when KidzFlow! is running and the computer is not
connected to a KidzBoard.
© Copyright 2012 QOMO HiteVision, LLC. All Rights Reserved
 Loading...