

QMS SC-100 User Manual

QMS SC-100
User's Manual

Trademarks
Microsoft is a U.S. registered trademark of Microsoft Corporation.
Windows and MS-DOS are trademarks of Microsoft Corporation.
IBM, PC, AT, XT are registered trademarks of International
Business Machines Corp.
Other brands and product names herein are trademarks or
registered trademarks of their respective holders.
Copyright
All rights reserved. No part of this publication may be
reproduced, transmitted, transcribed, stored in a retrieval
system, or translated into any language or computer language,
in any form or by any means, electronic, mechanical, magnetic,
optical, chemical, manual, or otherwise, without the prior
written permission of the manufacturer.
Material scanned by this product may be protected by
governmental laws and other regulations, such as copyright
laws, the customer is solely responsible for complying with all
such laws and regulations.
ii

Warranty
The information contained in this document is subject to change
without notice.
The manufacturer makes no warranty of any kind with regard to
this material, including, but not limited to, the implied
warranties of fitness for a particular purpose.
The manufacturer shall not be liable for errors contained herein
or for incidental or consequential damages in connection with
the furnishing, performance, or use of this material.
iii

FCC Radio Frequency Interference Statement
This equipment has been tested and found to comply with
the limits for a class A digital device, pursuant to Part 15 of
the FCC rules. These limits are designed to provide
reasonable protection against harmful interference when the
equipment is operated in a commercial environment. This
equipment generates, uses, and can radiate radio frequency
energy and, if not installed and used in accordance with the
instruction manual, may cause harmful interference to radio
communication. Operation of this equipment in a
residential area is likely to cause harmful interference in
which case the user will be required to correct the
interference at his own expense.
You are cautioned that changes or modifications not
expressly approved by the party responsible for compliance
could void your authority to operate the equipment.
Warning
This is a Class A product. In a domestic environment
this product may cause radio interference in which case
the user may be required to take adequate measures.
iv

Table of Contents
1. INTRODUCTION............................................................ 1-1
2. QMS SC-100 INSTALLATION...................................... 2-1
2.1 PRECAUTIONS .......................................................................... 2-1
2.2 UNLOCKING THE QMS SC-100................................................2-2
2.3 CONNECTING THE CABLE...................................................... 2-3
2.3.1 CONNECTING QMS SC-100 TO WORK AS A COPIER. 2-3
2.3.2 CONNECTING QMS SC-100 TO WORK AS A SCANNER2-4
2.4 DOCUMENT PLACEMENT....................................................... 2-5
3. QMS SC-100 DRIVER INSTALLATION......................3-1
3.1 INSTALLATION PROCEDURE.................................................. 3-1
3.2 UNINSTALL THE QMS SC-100 DRIVER.................................. 3-3
4. USING QMS SC-100 AS A COPIER..............................4-1
4.1 THE CONTROL PANEL............................................................. 4-1
4.2 BEFROE MAKING COPIES ....................................................... 4-4
4.3 MAKING SIMPLE COPIES ........................................................ 4-6
4.4 MAKING COPIES WITH COPY FEATURES ............................. 4-7
5. SCANNER OPERATION & DOCUMENT PRINTING5-1
5.1 IMAGE TYPE ............................................................................. 5-3
5.2 SCANNING PARAMETERS & IMAGE CONTROL................... 5-5
5.3 SCANNING.................................................................................5-9
5.4 PRINTING ................................................................................. 5-10
6. MAINTENANCE .............................................................6-1
7. TROUBLESHOOTING ..................................................7-1
7.1 QUESTIONS AND ANSWERS ................................................... 7-1
7.2 TECHNICAL SERVICE.............................................................. 7-5
8. SPECIFICATIONS..........................................................8-7
v

1. INTRODUCTION
Congratulations on your purchase of QMS SC-100.
QMS SC-100, as the name suggests, is a scanner and a
digital copier. Integrated with the module of scanner and
copier, QMS SC-100 allows you to edit your image and
produce a far better printing quality than a normal copy
machine.
Introducing an innovative digital solution, QMS SC-100
produces better printing quality and is free maintenance
compared with a traditional copy machine. Its high
printing quality, free maintenance and affordability makes
QMS SC-100 the best copier solution for office.
The following sections introduce the unpacking,
hardware and software installation, the operation, and
maintenance information to you. Please do take a few
minutes to read through them to keep quality scanning
result possible.
Figure 1-1 shows how the QMS SC-100 is packed.
Please check all the items against your checklist
contained in the box or against Figure 1-1. If there is any
missing or damaged, please contact your nearest dealer
immediately for the replacement.
1-1
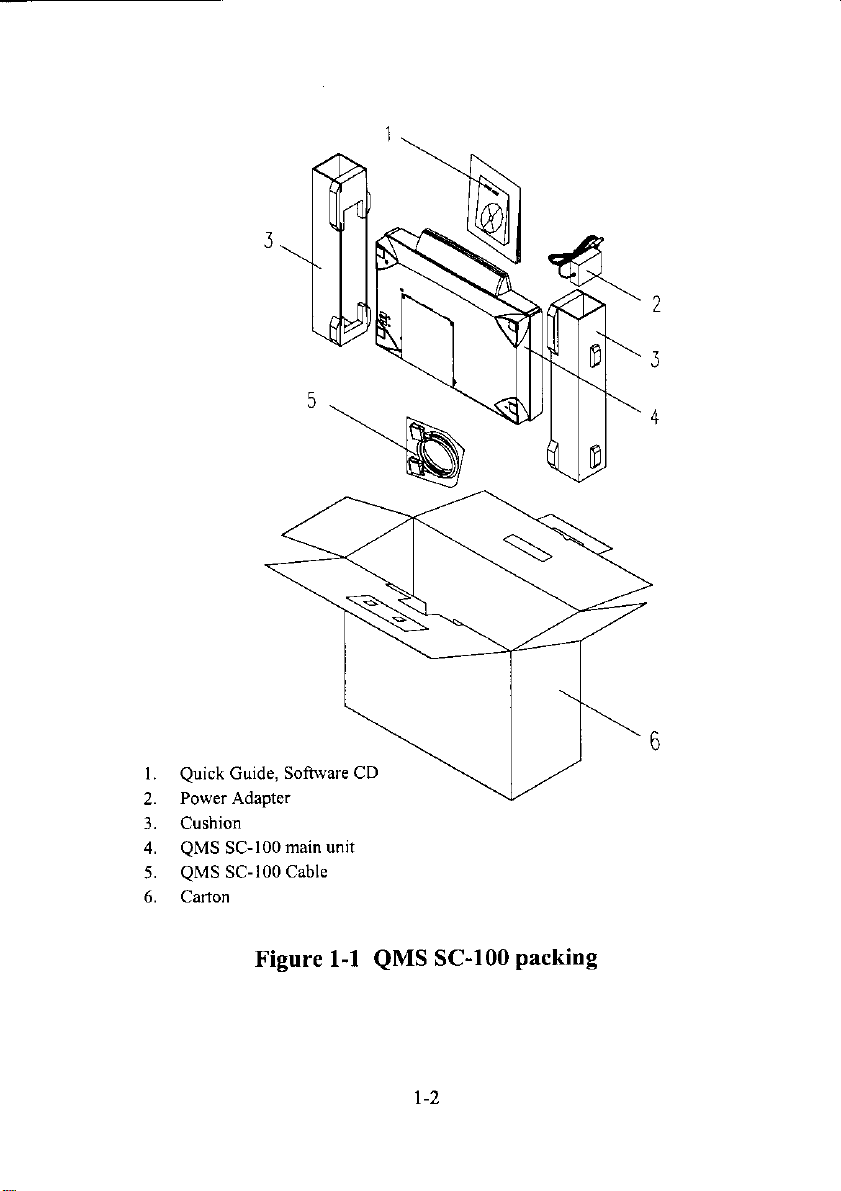
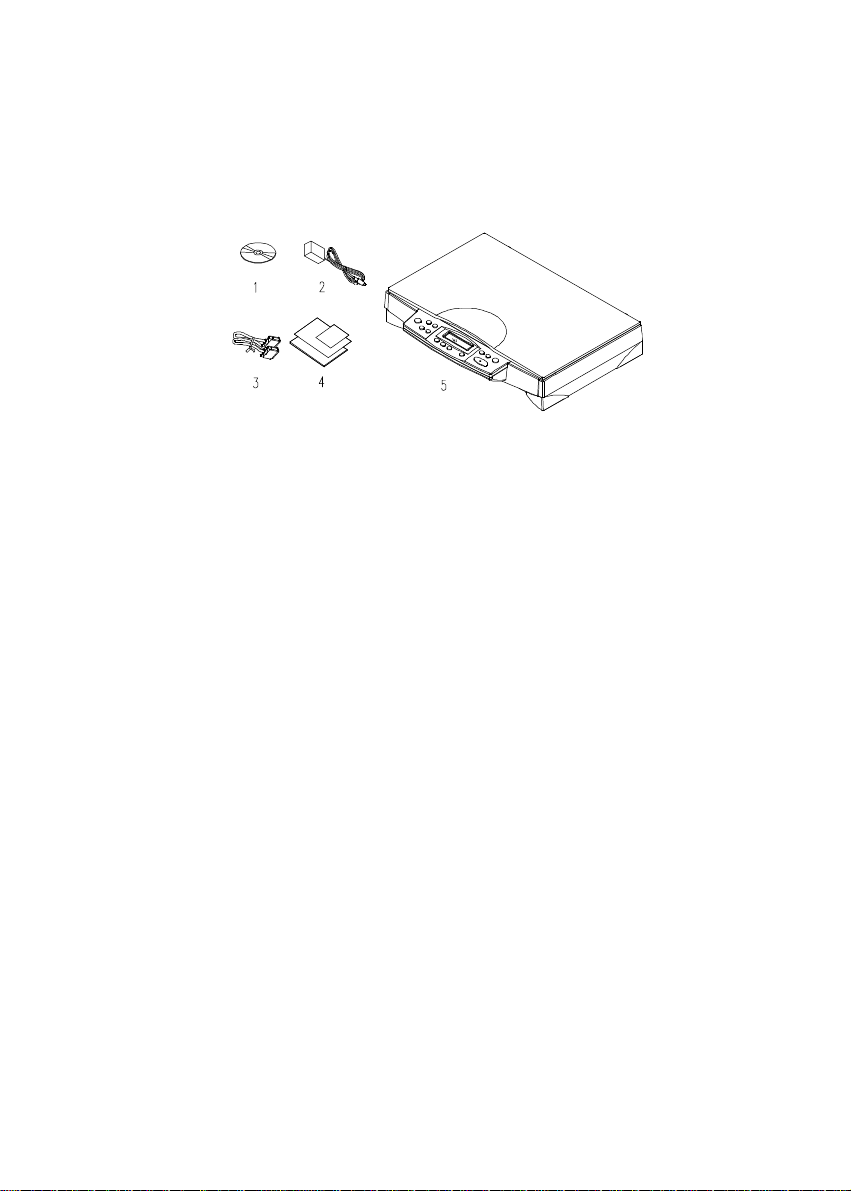
Package Contents
1. Software CD
2. Power Adapter
3. QMS SC-100 Cable
4. Quick Installation Guide
5. QMS SC-100 main unit
1-3

2. QMS SC-100 INSTALLATION
2.1 PRECAUTIONS
Ÿ Keep the QMS SC-100 out of direct sunlight.
Direct exposure to the sun or excessive heat may
cause damage to the unit.
Ÿ Do not install the QMS SC-100 in a humid or
dusty place.
Ÿ Be sure to use the proper AC power source.
Ÿ Place the QMS SC-100 securely on an even, flat
surface. Tilted or uneven surfaces may cause
mechanical or paper-feeding problems.
Ÿ Retain the QMS SC-100 box and packing
materials for shipping purposes.
2-1
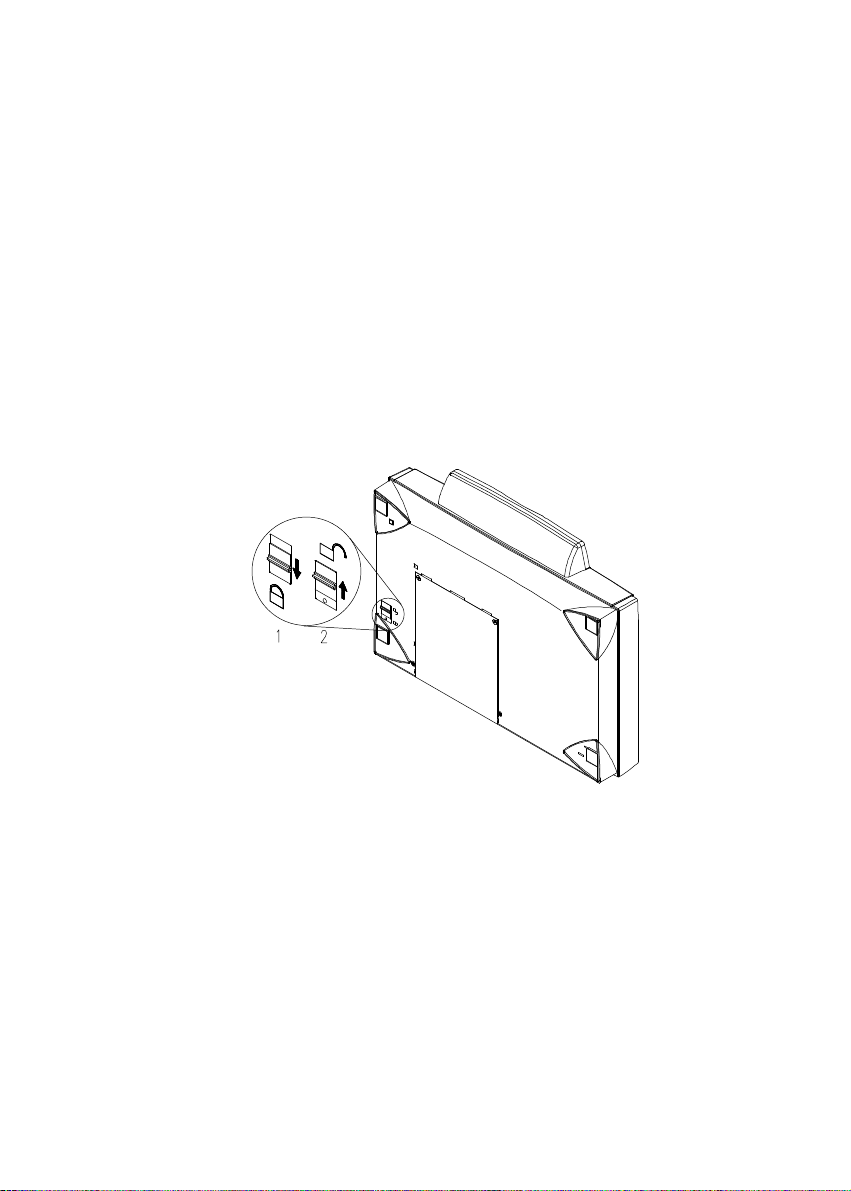
2.2 UNLOCKING THE QMS SC-100
To protect the scanning head from damage during
shipment, the QMS SC-100 is designed with a lock
switch under the main unit. Therefore, before using
the QMS SC-100, it is required to unlock QMS SC100 by moving the lock switch to the Use
position.(See Figure 2-1)
1. “Shipping” Position 2. “Use” Position
Figure 2-1 Unlocking the QMS SC-100
2-2
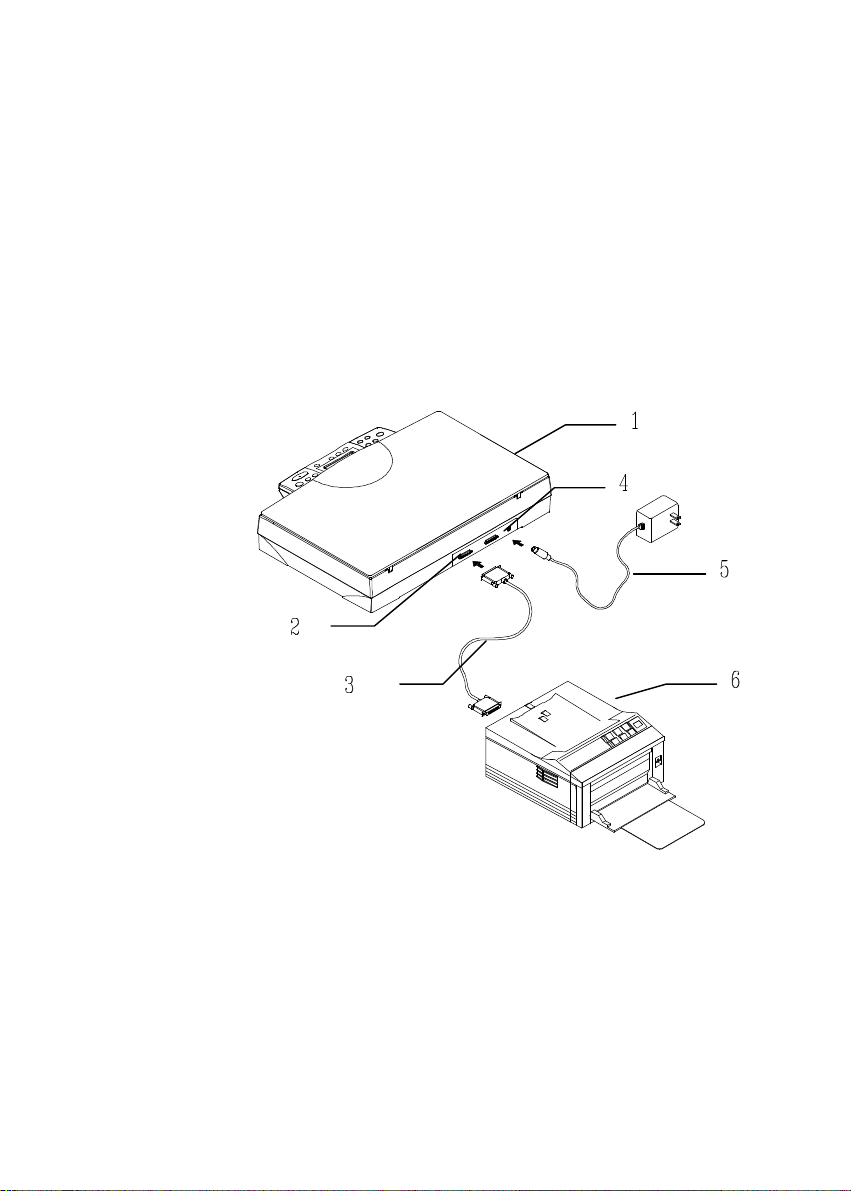
2.3 CONNECTING THE CABLE
1. QMS SC-100 main unit
2.3.1 CONNECTING QMS SC-100 TO WORK AS A
COPIER
Connect the power cable and signal cable as shown
below.
2. “To Printer” port
3. Printer Cable
4. Power Jack
5. Power Adapter
6. Printer
Figure 2-2 Connect QMS SC-100 to a printer
2-3

2.3.2 CONNECTING QMS SC-100 TO WORK AS A
SCANNER
1. QMS SC-100 main unit
2. Power Adapter
3. QMS SC-100 Cable
4. PC Parallel Port
5. Printer Cable
Figure 2-3 QMS SC-100 Cable Connection
2-4
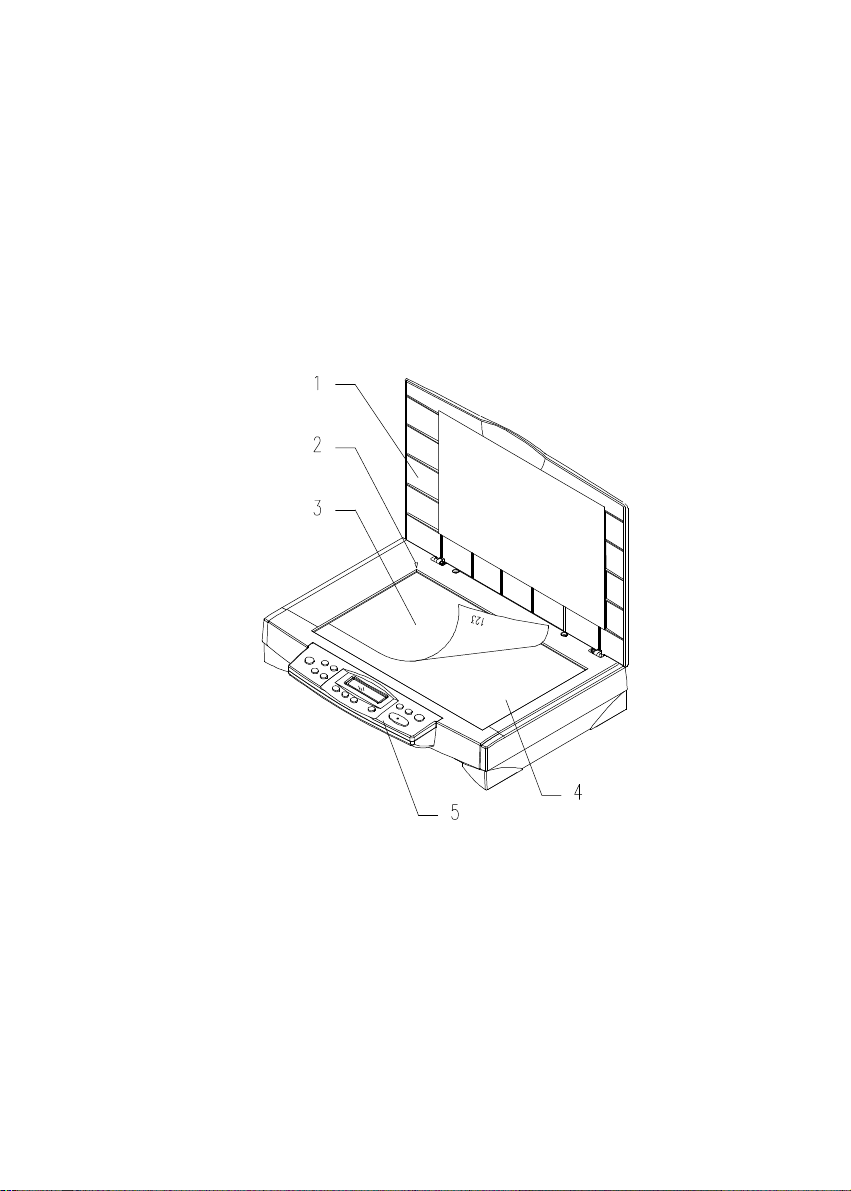
2.4 DOCUMENT PLACEMENT
As shown in Figure 2-3, place the document on the
glass with the text facing away from you.
1. Document Cover
2. Home Position Mark
3. Document
4. Document Glass
5. Control Panel
Figure 2.4 Document Placement
2-5

3. QMS SC-100 DRIVER
INSTALLATION
To run QMS SC-100 at optimum speed, the following
minimum requirements are recommended:
• IBM compatible PC 386/486, Pentium or later;
• Microsoft Windows 3.1,Windows 95, Windows
NT;
• One printer port available (enhanced parallel port
recommended);
• Megabytes of available hard disk space for
installation;
• Megabytes of RAM (16 Megabytes or higher
recommended);
• A video graphics array (VGA) monitor;
• A Microsoft Windows-compatible pointing device
(e.g., mouse);
• A CD ROM drive.
3.1 INSTALLATION PROCEDURE
Installation procedures of QMS SC-100 driver are as
follows:
1. Start Windows 3.1 or Windows 95.
2. Insert software CD into your CD ROM drive.
In Windows 3.1 or higher
3. From the File Menu, choose RUN, type d:\driver\SC-
100.exe (d represents the letter for your current CDROM drive). Click O.K.
3-1
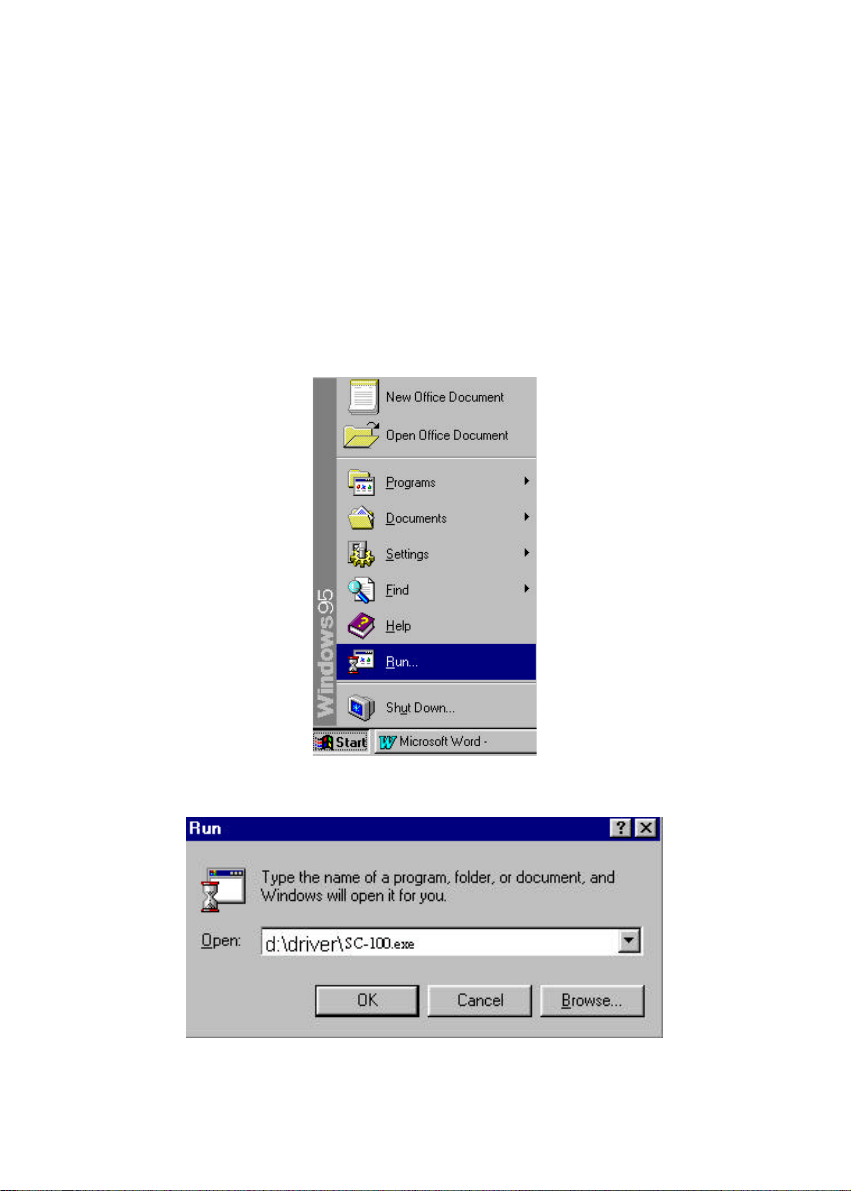
In Windows 95 or Windows NT
3. Press the Start button, choose RUN, type d:\driver\SC-
100.exe (d: the CD-ROM drive in use), and then click
O.K. (See Figure 3-1,3-2)
4. Follow the on-screen instructions to complete the
installation.
Fig. 3.1
Fig. 3.2
3-2
 Loading...