

Page 1
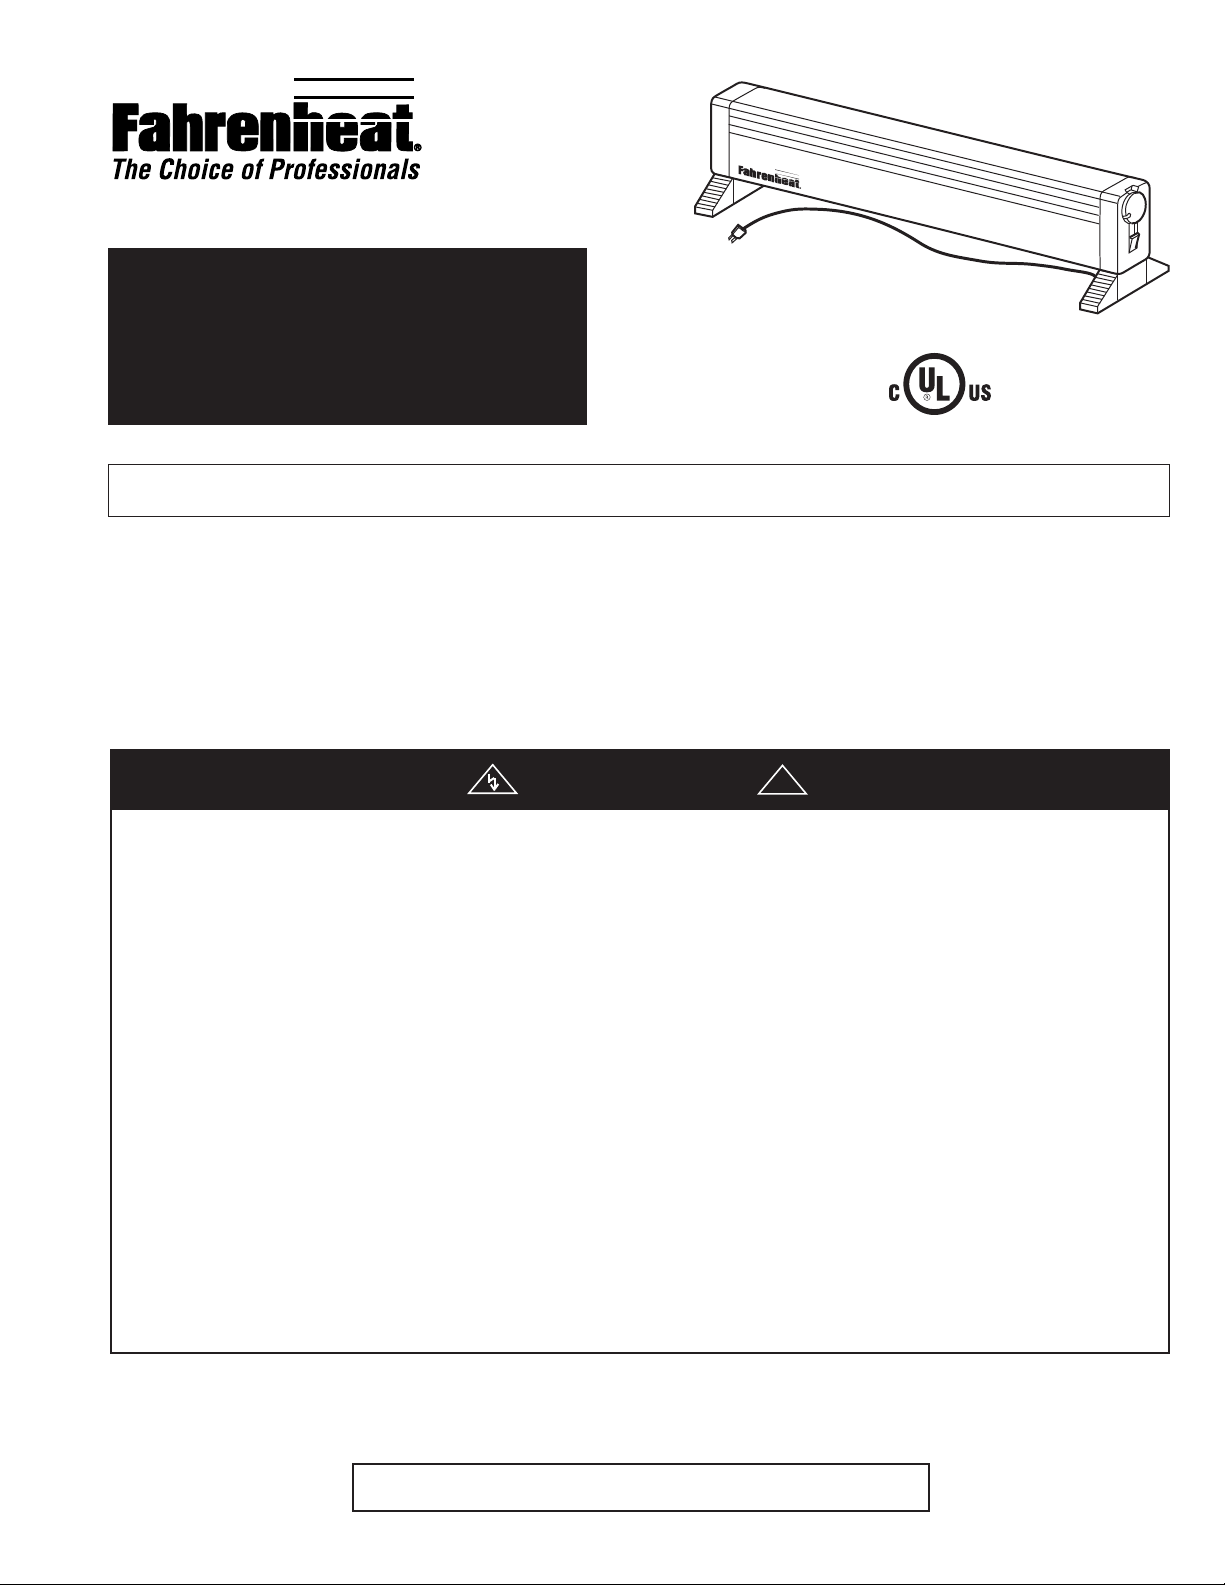
LFP6152
Portable Electric/Hydronic
Baseboard Heater
Installation, Operation & Maintenance Instructions
IMPORTANT INSTRUCTIONS
FILE #E37116
WARNING
WHEN USING ELECTRICAL APPLIANCES, BASIC PRECAUTIONS SHOULD ALWAYS BE FOLLOWED TO REDUCE
THE RISK OF FIRE, ELECTRIC SHOCK, AND INJURY TO
PERSONS, INCLUDING THE FOLLOWING:
1. Read all instructions before using the heater.
2. Use this heater only as described in this manual. Any other
use not recommended by the manufacturer may cause fire,
electric shock, or injury to persons.
3. Always plug heaters directly into a wall outlet/receptacle.
Never use with an extension cord or relocatable power tap
(outlet/power strip).
4. Do not operate any heater with a damaged cord or plug or
after the heater malfunctions, has been dropped or damaged in any manner. Discard heater or return to an authorized service facility for examination, and/or repair.
5. Do not run cord under carpeting. Do not cover cord with
throw rugs, runners, or similar coverings. Do not route cord
under furniture or appliances. Arrange cord away from traffic area and where it will not be tripped over.
6. Always unplug heater when not in use.
7. To disconnect, rotate thermostat to the LO set point or flip
ON-OFF switch to off. Then grip plug (not cord) and pull
from outlet.
!
8. A heater has hot and arcing or sparking parts inside. Do not
use in areas where gasoline or flammable liquids are used
or stored.
9. This heater is hot when in use. To avoid burns, do not let
bare skin touch hot surfaces. Keep combustible materials,
such as furniture, pillows, bedding, papers, clothes, and curtains away from heater.
10. To prevent a possible fire, do not block air intakes or
exhaust in any manner. Do not use on soft surfaces, like a
bed, where openings may become blocked.
11. Do not insert or allow foreign objects to enter any ventilation
or exhaust opening as this may cause an electric shock or
fire, or damage the heater.
12. This heater is not intended for use in bathrooms, laundry
areas and similar indoor (wet) locations. Never locate
heater where it may fall into a bathtub or other water container.
13. Do not operate heater without support legs installed – see
ASSEMBLY INSTRUCTIONS.
SAVE THESE INSTRUCTIONS
Page 2
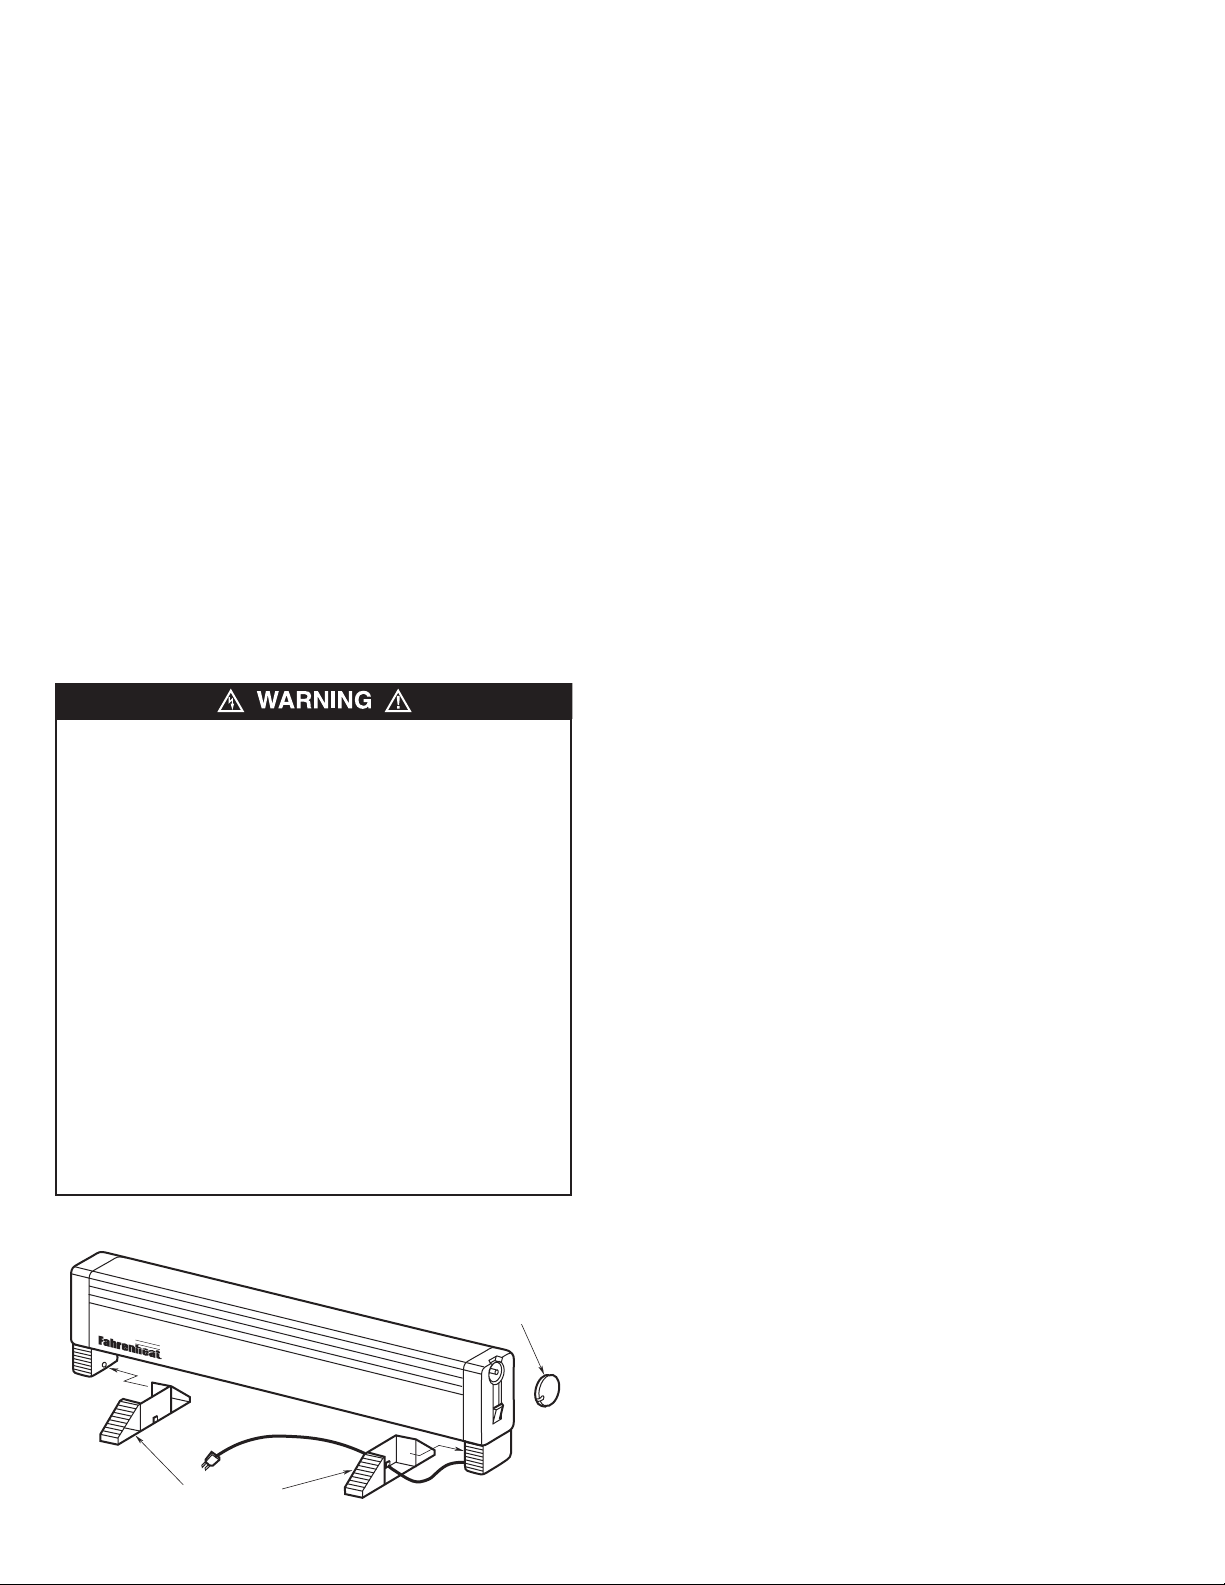
ASSEMBLY INSTRUCTIONS
THERMOSTAT KNOB
SUPPORT LEGS
1. After removing the heater from its carton, carefully inspect it
for possible shipping damage. Return damaged units to point
of purchase.
2. Remove one plastic support leg and thermostat knob from
packaging in bottom of heater. The right hand support leg is
pre-assembled to the power cord and requires only to be
snapped into place as shown in Figure 1.
3. Fit left hand support leg onto heater and snap into position
as shown in Figure 1.
4. Position thermostat knob onto thermostat shaft as shown in
Figure 1.
NOTE:
The knob will only fit onto shaft in one way.
OPERATING INSTRUCTIONS
IMPORTANT NOTICE: This heater is a major electrical appliance and requires adequate electrical power. The outlet to
which this heater is connected must be a 120 volt (AC) circuit
protected by a 15 or 20 amp fuse or circuit breaker. No other
major electrical appliance should be operated in the same circuit
as the heater.
Care must be given in locating and using the heater to avoid
blocking the heater in any way to allow air to flow freely through
the heater. Keeping the heater clean will also improve the efficiency and prevent overheating - see Maintenance Instructions.
1. The heater plug must fit tightly into outlet. A loose fitting or
worn outlet may allow for the plug connection to heat, damage to the plug and/or outlet and may cause a fire. If outlet
is loose or worn, discontinue using heater until the outlet
can be replaced.
CAUTION
2.
Drapes, And Other Furnishings Away From Heater. Do not
allow curtains or other furnishing to contact heater.
Maintain at least 6 inches (152 mm) clearance around the
heater at all times.
3. To reduce the risk of fire, do not store or use gasoline or
other flammable vapors and liquids in the vicinity of the
heater.
4. Do not operate heater without support legs attached as
shown in Figure 1.
5. Do not allow heater to operate in any position except as
shown in this manual.
6. Do not use this heater near water (as in a wet basement or
swimming pool area) or in a very humid environment.
7. This heater is to be used on the floor only. Do not use on
a shelf, table, or any location except the floor.
– High Temperature, Keep Electrical Cords,
light (in switch), low and high output pilot lights, and a
“smartstat” temperature control thermostat.
2. To operate your heater simply:
a. Plug heater power supply cord into 120 volt outlet (see
warning 1).
b. Push on/off switch to on position. NOTE: The power on
pilot light in switch will be on.
c. Rotate smartstat thermostat knob in a clockwise direction
until it stops.
3. Allow the heater to operate normally until the room temperature is comfortable to you. Then simply rotate the smartstat
knob counterclockwise until both the red and amber pilot
lights go out. The smartstat thermostat will automatically turn
on low or high heat as needed to maintain the desired room
temperature.
SPECIAL NOTE:
the heater will operate on the low heat output setting unless
there is a need for more heat (such as during colder winter
weather). If additional heat is needed, the smartstat will turn on
the high heat output. On low heat output, the amber pilot light
will be on. When the smartstat energizes high heat output, the
red pilot light will also come on. This feature saves you money
by using only the amount of electricity needed to maintain the
desired comfort level.
NOTE:
You may notice a new smell coming from your heater
during initial use. It should go away within the first few hours of
operation. You may also notice it does not heat up immediately.
Because of the special tubular element design, it takes a few
minutes before you can feel the warmth through the cabinet.
Due to the automatic feature of the smartstat,
1. Your heater is provided with an on/off switch, power on pilot
Figure 1
2
Page 3
MAINTENANCE INSTRUCTIONS
3
2
1
L
O
O
F
F
H
I
For efficient and safe operation and to extend the life of your
heater it should be cleaned and inspected for damage at least
annually (preferably at the beginning of the heater season) or
more often in dirty environments. Other than cleaning, your
heater requires no other preventative maintenance. The user
can perform some basic cleaning of the heater. All other servicing is to be done by qualified service personnel.
TO PREVENT A POSSIBLE ELECTRIC SHOCK, ALWAYS
UNPLUG HEATER FROM OUTLET BEFORE CLEANING OR
SERVICING.
ALLOW HEATER TO COOL BEFORE CLEANING TO
PREVENT A POSSIBLE BURN.
1. Heater cabinet may be cleaned using a damp cloth to
remove dust that may have accumulated on surfaces. Do
not use harsh cleaners and waxes on surfaces since these
could damage the finish or discolor in use.
2. A vacuum cleaner and /or compressed air may be used to
remove dust and lint that may have accumulated inside
heater around element fins. If heater must be dissembled for
cleaning, use care when cleaning element fins to avoiding
damaging fins.
FINS ARE SHARP AND MAY CAUSE CUTS SO AVOID
CONTACT.
3. After cleaning and servicing, reassemble by replacing any
hardware removed and check unit to make sure it are operates properly.
THERMAL SAFETY SWITCH: Your heater is provided with an
automatic-resetting thermal safety switch that will disconnect
power to the heating element should the heater be placed into
an abnormal condition (such as a blockage) to prevent a fire.
When the heater cools, the safety switch will reset allowing the
heater to return to normal operation.
1
2
3
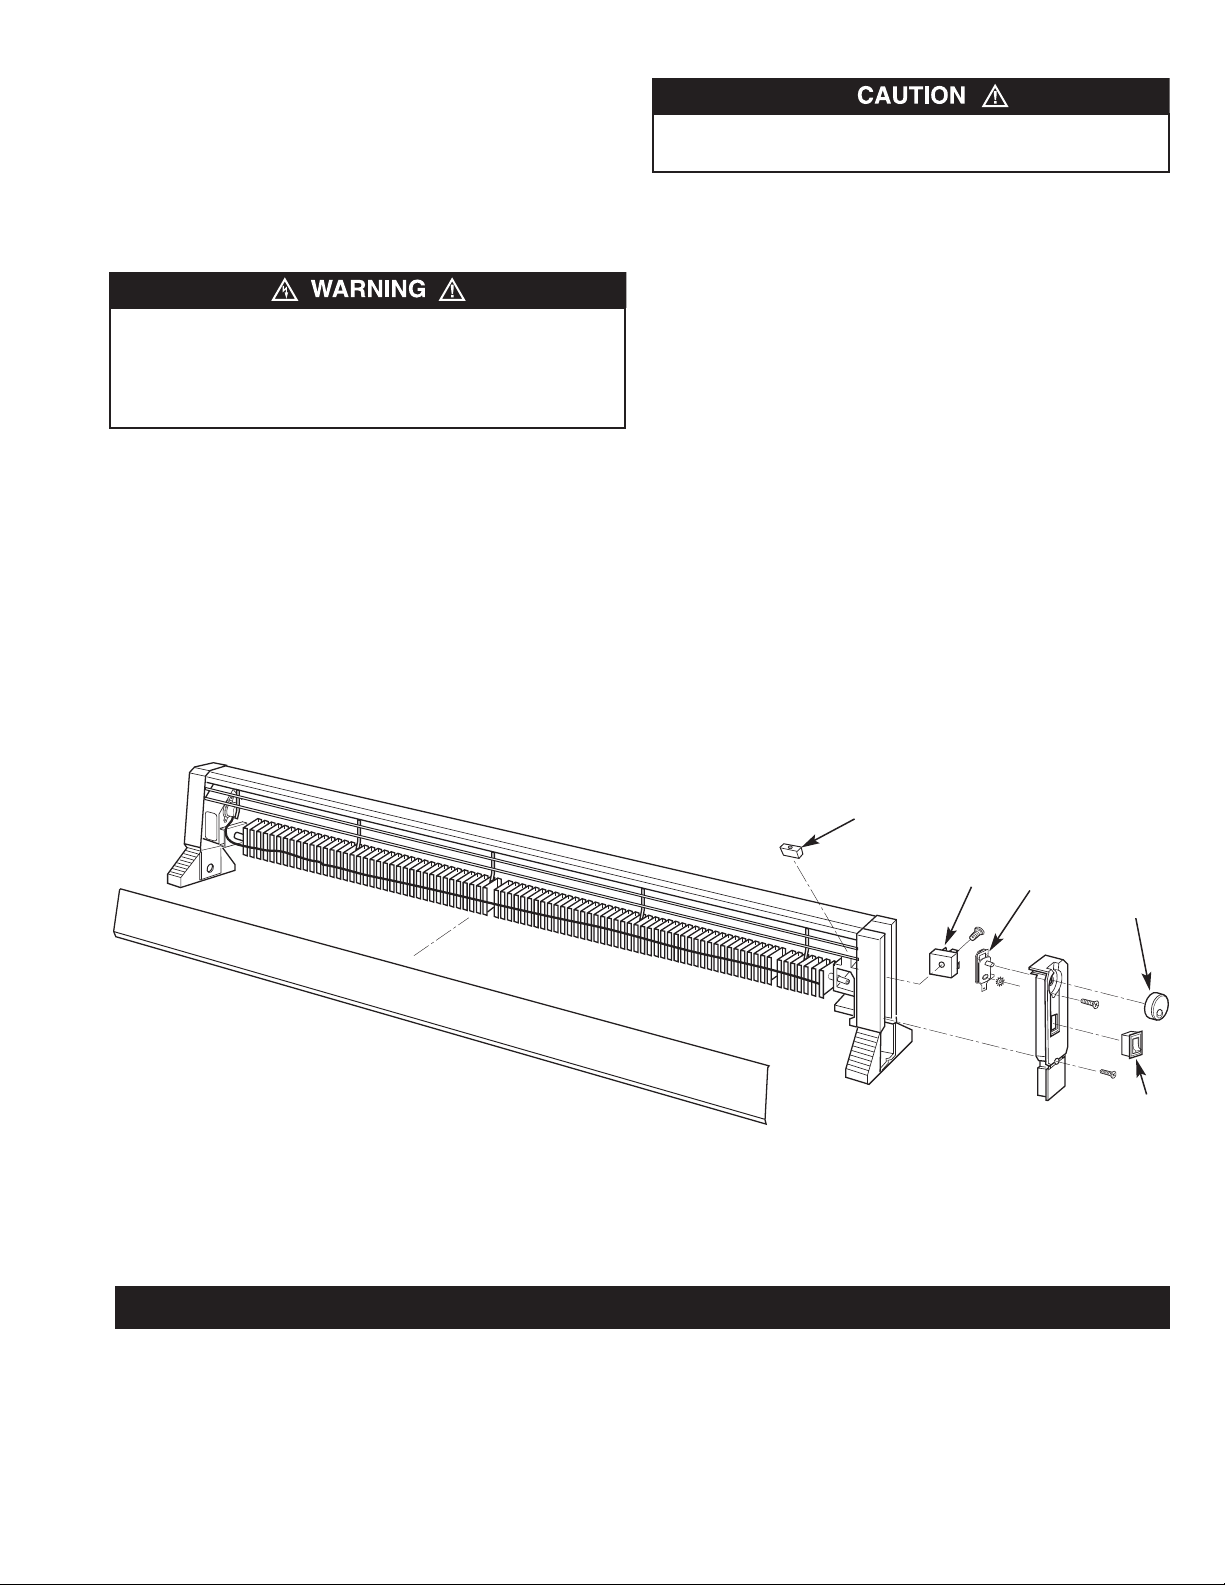
Figure 2 – Repair Parts
Repair Parts List for Portable Electric/Hydronic Baseboard Heater
Reference
Number Description Part Number Quantity
1 Pilot Light 3510-2006-000 1
2 Diode 1610-2002-000 1
3 Thermostat 5813-2019-000 1
4 Knob 3301-2011-001 1
5 Switch 5216-2007-000 1
4
5
3
Page 4
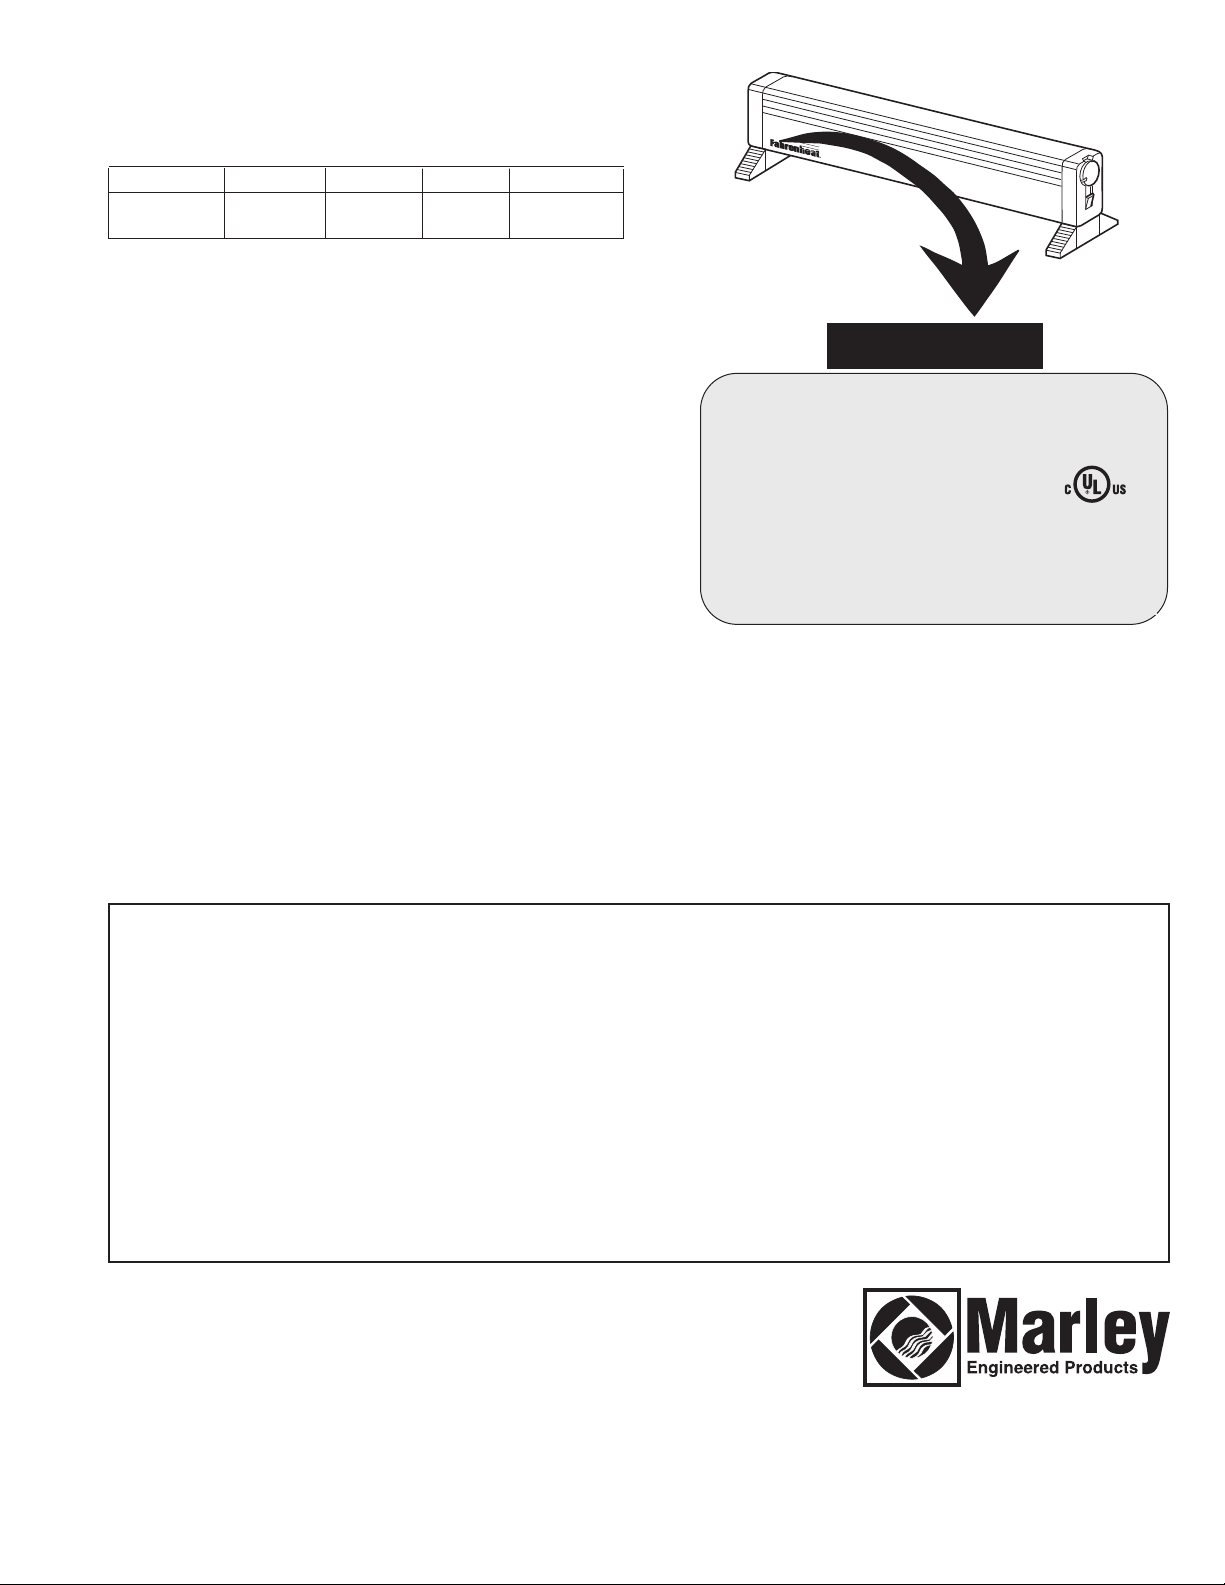
SPECIFICATIONS
Model Volts Watts Amps BTU/Hr
LFP6152E
120V
750 6.3 2560
1500 12.5 5120
NAMEPLATE
ODEL NO.
M
LFP6152E
ATE CODE
D
1005
VOLTS: 120 AC
WATTS
4E1 LISTED
1500/750
AHRENHEAT
F
BENNETTSVILLE, SC 29512
5
BASEBOARD HEATER
ATENT PENDING
P
4104-2144-000
LIMITED WARRANTY
All products manufactured by Marley Engineered Products are warranted against defects in workmanship and materials for one year from date of installation, except
heating elements which are warranted against defects in workmanship and materials for five years from date of installation. This warranty does not apply to damage from
accident, misuse, or alteration; nor where the connected voltage is more than 5% above the nameplate voltage; nor to equipment improperly installed or wired or
maintained in violation of the product’s installation instructions. All claims for warranty work must be accompanied by proof of the date of installation.
The customer shall be responsible for all costs incurred in the removal or reinstallation of products, including labor costs, and shipping costs incurred to return products
to Marley Engineered Products Service Center. Within the limitations of this warranty, inoperative units should be returned to the nearest Marley authorized service center or the Marley Engineered Products Service Center, and we will repair or replace, at our option, at no charge to you with return freight paid by Marley. It is agreed that
such repair or replacement is the exclusive remedy available from Marley Engineered Products.
THE ABOVE WARRANTIES ARE IN LIEU OF ALL OTHER WARRANTIES EXPRESSED OR IMPLIED, AND ALL IMPLIED WARRANTIES OF MERCHANTABILITY AND
FITNESS FOR A PARTICULAR PURPOSE WHICH EXCEED THE AFORESAID EXPRESSED WARRANTIES ARE HEREBY DISCLAIMED AND EXCLUDED FROM
THIS AGREEMENT. MARLEY ENGINEERED PRODUCTS SHALL NOT BE LIABLE FOR CONSEQUENTIAL DAMAGES ARISING WITH RESPECT TO THE
PRODUCT, WHETHER BASED UPON NEGLIGENCE, TORT, STRICT LIABILITY, OR CONTRACT.
Some states do not allow the exclusion or limitation of incidental or consequential damages, so the above exclusion or limitation may not apply to you. This warranty gives
you specific legal rights, and you may also have other rights which vary from state to state.
For the address of your nearest authorized service center, contact Marley Engineered Products in Bennettsville, SC, at 1-800-642-4328. Merchandise returned to the factory must be accompanied by a return authorization and service identification tag, both available from Marley Engineered Products. When requesting return authorization,
include all catalog numbers shown on the products.
HOW TO OBTAIN WARRANTY SERVICE AND
WARRANTY PARTS PLUS GENERAL INFORMATION
1. Warranty Service or Parts
2. Purchase Replacement Parts
3. General Product Information
Note:
When obtaining service always have the following:
1. Model number of the product
2. Date of manufacture
3. Part number or description
1-800-642-4328
1-800-654-3545
www.marleymep.com
Part No. 5200-2096-004
ECR38678
01/11
470 Beauty Spot Rd. East
Bennettsville, SC 29512 USA
Page 5

Calefactor eléctrico/hidróni-
co de zócalo portátil
LFP6152
REGISTRO Nº E37116
Instrucciones de instalación, operación y mantenimiento
INSTRUCCIONES IMPORTANTES
ADVERTENCIA
AL UTILIZAR ARTEFACTOS ELÉCTRICOS, PARA REDUCIR
EL RIESGO DE INCENDIO, CHOQUE ELÉCTRICO Y
LESIONES PERSONALES DEBEN OBSERVARSE SIEMPRE
ALGUNAS PRECAUCIONES BÁSICAS, COMO LAS SIGUIENTES:
1. Lea todas las instrucciones antes de utilizar el calefactor.
2. Utilice este calefactor únicamente en la forma descrita en
este manual. Cualquier otra forma de uso no recomendada
por el fabricante puede ser causa de incendio, choque eléctrico o daños personales.
3. Enchufe siempre los calefactores directamente en un tomacorriente de pared. No use nunca un cable de extensión ni
una toma de energía reubicable (tira de tomacorrientes).
4. No haga funcionar ningún calefactor si el cordón o el
enchufe están dañados, o después de que el calefactor
haya funcionado mal, o se haya caído o dañado de algún
modo. Deseche el calefactor o regréselo a un centro de servicio autorizado para su revisación y/o reparación.
5. No tienda el cordón por debajo de las alfombras. No cubra
el cordón con alfombrillas, caminos protectores de alfombra
o coberturas similares. No encamine el cordón debajo de
muebles o artefactos. Disponga el cordón fuera de las
zonas de tránsito, y donde nadie pueda tropezar con él.
6. Desenchufe siempre el calefactor cuando no esté en uso.
7. Para desconectarlo, haga girar el termostato hasta la
posición BAJO (LO), o pase el interruptor de encendido a la
posición APAGADO (OFF). Luego agarre el enchufe (no el
!
cordón) y extráigalo del tomacorriente.
8. Un calefactor tiene en su interior piezas calientes, y piezas
en donde se producen arcos o chispas. No lo utilice en
áreas en las que se utilice o almacene gasolina o líquidos
inflamables.
9. Cuando está en funcionamiento, el calefactor está muy
caliente. Para evitar quemaduras, no deje que su piel haga
contacto directo con las superficies calientes. Mantenga
lejos del calefactor los materiales combustibles como
muebles, almohadas, ropas de cama, papeles, ropas y
cortinas.
10. Para evitar un posible incendio, no bloquee de ningún modo
las entradas o la descarga de aire. No lo utilice en superficies blandas, como una cama, en las que las aberturas
puedan quedar bloqueadas.
11. No inserte ni permita que entren objetos extraños en ninguna abertura de ventilación o de descarga, porque esto
puede ser causa de choque eléctrico o incendio, o de daños
al calefactor.
12. Este calefactor no está destinado para utilizarse en baños,
áreas de lavandería u otras ubicaciones interiores húmedas
similares. No coloque nunca el calefactor en un lugar desde
el que pueda caer en una bañera u otro recipiente con
agua.
13. No haga funcionar el calefactor sin tener instaladas
sus patas de soporte. Vea las INSTRUCCIONES DE
MONTAJE.
GUARDE ESTAS INSTRUCCIONES
Page 6

INSTRUCCIONES DE MONTAJE
THERMOSTAT KNOB
SUPPORT LEGS
1. Después de extraer el calefactor de su caja, inspecciónelo cuidadosamente para ver si ha sufrido daños durante el transporte.
Regrese las unidades dañadas al punto de compra.
2. Extraiga del embalaje que está en la parte inferior del calefactor una
pata de soporte plástica y la perilla del termostato. La pata de
soporte derecha viene unida al cordón de alimentación eléctrica, y
sólo se la debe encajar en su lugar como se muestra en la Figura 1.
3. Coloque la pata de soporte izquierda en el calefactor, y encájela en
su posición como se muestra en la Figura 1.
4. Coloque la perilla del termostato en el eje del mismo, como se muestra en la Figura 1.
NOTA:
hay una sola manera de instalar la perilla en el eje.
INSTRUCCIONES DE OPERACIÓN
AVISO IMPORTANTE: este calefactor es un artefacto eléctrico importante, y requiere una alimentación eléctrica adecuada. El tomacorriente
al que se conecte este calefactor debe estar en un circuito de 120 volts
CA protegido por un fusible o interruptor automático de 15 o 20 A. No
se debe operar ningún otro artefacto eléctrico importante en el mismo
circuito del calefactor.
Debe tenerse cuidado al colocar y utilizar el calefactor, para evitar
cualquier tipo de bloqueo y asegurar que el aire circule libremente por
él. Mantener el calefactor limpio mejorará también la eficiencia e
impedirá el sobrecalentamiento. Vea las Instrucciones de
mantenimiento.
2. Para operar su calefactor, sólo necesita hacer lo siguiente:
a. Enchufe el cordón de alimentación eléctrica del calefactor en un
tomacorriente de 120 volts (vea la Advertencia 1).
b. Lleve el interruptor Encendido/Apagado a la posición Encendido.
NOTA: la luz indicadora de encendido del interruptor se encenderá.
c. Haga girar la perilla del termostato ‘smartstat’ en sentido horario
hasta que llegue a un tope.
3. Deje funcionar normalmente el calefactor hasta que la temperatura
de la habitación le resulte confortable. Luego haga girar la perilla del
‘smartstat’ en sentido antihorario hasta que las luces indicadoras
roja y ámbar se apaguen. El termostato ‘smartstat’ conectará
automáticamente el calor bajo o alto según sea necesario para mantener la temperatura elegida en la habitación.
NOTA ESPECIAL:
debido a la función automática del ‘smartstat’, el
calefactor funcionará en la posición de calor bajo a menos que se necesite más calor (como durante el clima más frío del invierno). Si se necesita calor adicional, el ‘smartstat’ pasará a la posición de calor alto. En
la posición de calor bajo se encenderá la luz indicadora ámbar. Cuando
el 'smartstat' energice la salida de calor alto, se encenderá también la
luz indicadora roja. Esta función le hace ahorrar dinero, porque sólo utiliza la cantidad de electricidad necesaria para mantener el nivel de confort deseado.
NOTA:
durante el uso inicial, es posible que note un nuevo aroma que
viene de su calefactor. Este aroma debe disiparse después de las
primeras horas de funcionamiento. También puede notar que la unidad
no calienta de inmediato. Debido al diseño tubular especial de su elemento calefactor, deben transcurrir algunos minutos hasta que usted
sienta el calor a través del gabinete.
1. El enchufe del calefactor debe insertarse en el tomacorriente en
forma ajustada. Un ajuste flojo o un tomacorriente gastado pueden
hacer que la conexión del enchufe se caliente y dañe el enchufe
y/o el tomacorriente, y pueden originar un incendio. Si el tomacorriente está flojo o gastado, interrumpa el uso del calefactor hasta
que el tomacorriente se pueda reemplazar.
ATENCIÓN:
2.
alta temperatura. Mantenga lejos del calefactor los
cordones de alimentación eléctrica, cortinados y otros elementos
del mobiliario. No deje que las cortinas u otros elementos del
mobiliario entren en contacto con el calefactor. Mantenga un espacio libre de 15 cm (6 pulgadas) como mínimo alrededor del calefactor en todo momento.
3. Para reducir el riesgo de incendio, no almacene ni use gasolina u
otros vapores y líquidos inflamables en las cercanías del calefactor.
4. No haga funcionar el calefactor sin tener instaladas sus patas de
soporte, como se muestra en la Figura 1.
5. No deje que el calefactor funcione en ninguna posición que no sea
la que se muestra en este manual.
6. No utilice este calefactor cerca del agua (por ejemplo, en un sótano
mojado o cerca de una piscina) o en un entorno muy húmedo.
7. Este calefactor es para utilizar únicamente en el piso. No lo use
sobre un estante, mesa u otra ubicación que no sea en el piso.
1. Su calefactor cuenta con un interruptor Encendido/Apagado, una luz
indicadora de encendido (en el interruptor), luces indicadoras de salida alta y baja, y un termostato de control de temperatura ‘smartstat’.
Figura 1
PATAS DE
SOPORTE
PERILLA DEL
TERMOSTATO
6
Page 7

INSTRUCCIONES DE MANTENIMIENTO
3
2
1
L
O
O
F
F
H
I
Para garantizar un funcionamiento eficiente y seguro y para extender la
vida útil de su calefactor, el mismo debe limpiarse e inspeccionarse para
ver si presenta daños una vez al año como mínimo (preferiblemente al
comienzo de la temporada de uso del calefactor), o más a menudo en
entornos muy cargados de suciedad. Su calefactor no requiere ningún
otro mantenimiento preventivo que la limpieza. El usuario puede realizar
la limpieza básica del calefactor. Los demás servicios deben estar a
cargo de personal de servicio calificado.
PARA EVITAR UN POSIBLE CHOQUE ELÉCTRICO, DESENCHUFE SIEMPRE EL CALEFACTOR DEL TOMACORRIENTE ANTES DE LA LIMPIEZA O EL SERVICIO.
ANTES DE LIMPIAR, PERMITA QUE EL CALEFACTOR SE
ENFRÍE PARA EVITAR UNA POSIBLE QUEMADURA.
1. El gabinete del calefactor puede limpiarse con un paño húmedo
para eliminar el polvo que pueda haberse acumulado en las superficies. No utilice limpiadores o ceras agresivas en las superficies, ya
que podrían dañar el acabado o alterar el color durante el uso.
2. Para eliminar el polvo y la pelusa que se podrían haber acumulado
dentro del calefactor y alrededor de las aletas de los elementos
calefactores, puede utilizarse una aspiradora y/o aire comprimido. Si
se debe desmontar el calefactor para la limpieza, tenga cuidado al
limpiar las aletas del elemento calefactor para evitar dañarlas.
LAS ALETAS SON AGUZADAS Y PUEDEN CAUSAR
CORTES; POR ESO, EVITE EL CONTACTO.
3. Después de la limpieza y el servicio vuelva a montar la unidad
cuidando de colocar todos los accesorios de montaje que se
quitaron, y verifique que esté funcionando correctamente.
INTERRUPTOR TÉRMICO DE SEGURIDAD: su calefactor está provisto
de un interruptor térmico de seguridad con reposición automática, que
desconecta la alimentación eléctrica del elemento calefactor en caso de
que se encuentre en una condición anormal (como un bloqueo), a fin de
prevenir un incendio. Cuando el calefactor se enfríe el interruptor de
seguridad efectuará la reposición, para permitir que la unidad vuelva a
su operación normal.
1
2
3
Figura 2. Piezas para reparación
Lista de piezas para reparación para el Calefactor eléctrico/hidrónico de zócalo portátil
Número de
referencia Descripción Número de parte Cantidad
1 Luz indicadora 3510-2006-000 1
2 Diodo 1610-2002-000 1
3 Termostato 5813-2019-000 1
4 Perilla 3301-2011-001 1
5 Interruptor 5216-2007-000 1
4
5
7
Page 8

ESPECIFICACIONES
Modelo Tensión Potencia Corriente BTU/Hr
(volts) (watts) (amperes)
LFP6152E
120 V
750 6.3 2560
1500 12.5 5120
PLACA DE CARACTERÍSTICAS
ODEL NO.
M
LFP6152E
ATE CODE
D
1005
VOLTS: 120 AC
WATTS
4E1 LISTED
1500/750
AHRENHEAT
F
BENNETTSVILLE, SC 29512
5
BASEBOARD HEATER
ATENT PENDING
P
4104-2144-000
GARANTÍA LIMITADA
Todos los productos fabricados por Marley Engineered Products están garantizados contra defectos de fabricación y de materiales por 1 año desde la fecha de
instalación, excepto los elementos calefactores los cuales están garantizados contra defectos en manufactura y materiales durante cinco años a partir de la
fecha de instalación. Esta garantía no se aplica a daños debidos a accidente, mal uso o alteración, ni a los casos en que la tensión eléctrica conectada supere
a la tensión nominal -indicada en la placa de características- en más de 5 %, ni a equipos que hayan sido instalados o cableados incorrectamente, o mantenidos
en forma que no cumpla lo indicado en las instrucciones de instalación del producto. Todo reclamo por trabajos en garantía debe acompañarse con una prueba
de la fecha de instalación.
El cliente será responsable de todos los costos incurridos en el retiro o reinstalación de productos, incluyendo los costos de mano de obra y los costos de envío
incurridos para regresar productos a un Centro de Servicio de Marley Engineered Products. Dentro de las limitaciones de esta garantía, las unidades que no
funcionan deben regresarse al centro de servicio autorizado Marley más cercano, o al Centro de Servicio de Marley Engineered Products, y nosotros lo
repararemos o reemplazaremos, a nuestra opción, sin cargo para usted, con el flete de retorno pagado por Marley. Se acuerda que tal reparación o reemplazo
es el único recurso que Marley Engineered Products pone a su disposición.
LAS GARANTÍAS EXPUESTAS MÁS ARRIBA TOMAN EL LUGAR DE TODA OTRA GARANTÍA, EXPRESA O IMPLÍCITA, Y POR LA PRESENTE SE
DECLINA Y EXCLUYE DE ESTE ACUERDO TODA GARANTÍA IMPLÍCITA DE COMERCIABILIDAD Y ADECUACIÓN A UN PROPÓSITO PARTICULAR QUE
EXCEDA LAS GARANTÍAS EXPRESAS ANTEDICHAS. MARLEY ENGINEERED PRODUCTS NO SE HARÁ RESPONSABLE POR DAÑOS CONSIGUIENTES
QUE SE PRODUZCAN CON RESPECTO AL PRODUCTO, EN BASE YA SEA A NEGLIGENCIA, AGRAVIO, RESPONSABILIDAD ESTRICTA, O CONTRATO.
Algunos estados o jurisdicciones no permiten la exclusión o limitación de daños incidentales o consiguientes, de modo que la exclusión o limitación expresada
más arriba puede no aplicarse a su caso. Esta garantía le da derechos legales específicos, y usted puede tener también otros derechos, que varían de un estado o jurisdicción a otro.
Para obtener la dirección de su centro de servicio autorizado más cercano comuníquese con Marley Engineered Products en Bennettsville, SC, Estados Unidos,
llamando al 1-800-642-4328. Toda mercadería regresada a la fábrica debe ser acompañada por una autorización de retorno y una etiqueta de identificación de
servicio, disponibles ambas en Marley Engineered Products. Cuando solicite la autorización de retorno, incluya todos los números de catálogo mostrados en los
productos.
CÓMO OBTENER SERVICIO EN GARANTÍA, PIEZAS DE
REPUESTO E INFORMACIÓN GENERAL
1. Servicio o repuestos en garantía
2. Compra de repuestos
3. Información general sobre productos
Nota:
cuando solicite servicio, siempre dé la información que sigue:
1. Número de modelo del producto
2. Fecha de fabricación
3. Número de parte o descripción
Número de parte 5200-2096-004
1-800-642-4328
1-800-654-3545
www.marleymep.com
ECR 38678
01/11
470 Beauty Spot Rd. East
Bennettsville, SC 29512 USA
Page 9

LFP6152
Radiateurs-plinthes électriques/
hydroniques portables
Instructions d’installation, d’utilisation et d’entretien
INSTRUCTIONS IMPORTANTES
FILE #E37116
AVERTISSEMENT
LORS DE L’UTILISATION D’APPAREILS ÉLECTRIQUES, DES
PRÉCAUTIONS DE BASE DOIVENT TOUJOURS ÊTRE SUIVIES
AFIN DE RÉDUIRE LE RISQUE DE DÉPART D'INCENDIE, DE
COMMOTION ÉLECTRIQUE ET DE BLESSURES AUX PERSONNES, INCLUANT CELLES QUI SUIVENT :
1. Lisez toutes les instructions avant d’installer ou d’utiliser le radiateur.
2. N’utilisez ce radiateur que comme c’est décrit dans ce manuel.
Toute autre utilisation non recommandée par le constructeur peut
causer un départ d’incendie, une commotion électrique ou des
blessures corporelles.
3. Branchez toujours les radiateurs directement dans une prise secteur
murale. Ne jamais les utiliser avec un cordon de rallonge ou un boîtier/une barrette de prises relocalisable.
4. Ne faites fonctionner aucun radiateur avec son cordon ou sa fiche
secteur en mauvais état, ou après avoir présenté des dysfonctionnements, être tombé ou avec subi de quelconques dommages.
Mettez le radiateur au rebut, ou retournez-le à un centre de service
agréé pour un examen et/ou une réparation.
5. Ne faites pas passer le cordon d’alimentation sous un tapis. Ne
recouvrez pas le cordon avec des carpettes, des passages ou
d’autres camouflages. Ne faites pas passer le cordon sous des
meubles ou des appareils. Disposez le cordon hors de la zone de
trafic et à un endroit où il ne fera pas trébucher.
6. Débranchez toujours le radiateur quand il n’est pas en utilisation.
7. Pour couper le radiateur, tournez son thermostat sur le réglage bas
(LO) et basculez son interrupteur M/A sur la position d’arrêt. Puis
!
prenez la fiche (pas le cordon) et sortez-la de la prise secteur.
8. Un radiateur comporte à l’intérieur des parties chaudes, et pouvant
produire un arc ou des étincelles électriques. Ne l’utilisez pas
dans des zones où de l’essence ou des liquides inflammables sont
utilisés.
9. Ce radiateur est chaud quand il est en fonctionnement. Pour éviter
des brûlures, ne laissez pas de peau nue toucher ses surfaces
chaudes. Maintenez les matières combustibles, comme les
meubles, les oreillers et la literie, les papiers, les habits et les
rideaux, à distance du radiateur.
10. Pour éviter un possible départ d’incendie, n'obstruez en aucune
façon les admissions et les échappements d’air. Ne l’utilisez pas sur
des surfaces molles, comme un lit, où des ouvertures pourraient
être obstruées.
11. N’insérez pas d’objets étrangers, et ne permettez pas qu’il en entre,
dans toute ouverture d’admission ou d’évacuation, car cela peut
causer une commotion électrique ou un départ d’incendie, ou
endommager le radiateur.
12. Le radiateur n’est pas prévu pour une utilisation dans des salles
d’eau, des buanderies ou des pièces d’intérieur similaires
(humides). Ne placez jamais le radiateur à un emplacement d’où in
pourrait tomber dans une baignoire ou un autre conteneur avec de
l’eau.
13. Ne faites pas fonctionner le radiateur sans que ses pattes de support soient montées Voyez les INSTRUCTIONS DE MONTAGE.
CONSERVEZ CES INSTRUCTIONS
Page 10

INSTRUCTIONS DE MONTAGE
THERMOSTAT KNOB
SUPPORT LEGS
1. Après avoir sorti le radiateur de son carton, inspectez-le soigneusement pour déceler de possibles dommages dus au transport.
Renvoyez les unités endommagées à leur point d’achat.
2. Enlevez une patte de support en plastique et un bouton de thermostat de l’emballage au fond du radiateur. La patte de support du côté
droit est déjà montée avec le cordon d’alimentation et n’aura plus
besoin que d’être enfiché en place comme montré en figure 1.
3. Adaptez les pattes de support de gauche et de droite sur le radiateur
en les encliquetant en place comme montré en Figure 1.
4. Posez le bouton de thermostat sur la tige de thermostat comme
montré en Figure 1.
REMARQUE :
Ce bouton n’entrera sur la tige que d’une seule façon.
INSTRUCTIONS D’UTILISATION
REMARQUE IMPORTANTE : Ce radiateur est un appareil électrique
important qui nécessite une alimentation électrique adéquate. La prise
secteur sur laquelle est branché le radiateur doit être l’extrémité d’un circuit en 120 V (CA) protégé par un fusible ou un disjoncteur de 15 ou 20
ampères. Il ne doit pas y avoir d’autre appareil électrique important fonctionnant sur le même circuit que celui du radiateur.
Vous devrez faire attention en positionnant et en utilisant le radiateur
pour éviter d’obstruer d’une quelconque manière le flux d’air qui doit circuler librement dans le radiateur. Le fait de maintenir le radiateur propre
aidera également à maintenir son efficacité et à éviter une surchauffe.
Consultez les instructions d’entretien.
1. La fiche d’alimentation du radiateur doit s’enfoncer étroitement
dans la prise secteur. Un raccordement lâche ou une prise usée
peuvent faire que la connexion de la fiche chauffe, avec des dommages pour la fiche et/ou la prise, avec un possible départ d’incendie. Si la prise est lâche ou usée, cessez d’utiliser le radiateur
sur cette prise jusqu’à ce qu’elle ait été remplacée.
2. ATTENTION – Du fait de la température élevée, maintenez les cordons électriques, les draperies et autres textiles domestiques à l’écart du radiateur. Ne permettez pas que des rideaux ou d’autres
garnitures touchent le radiateur. Gardez un écartement d’au moins
6 pouces (152 mm) autour du radiateur en permanence.
3. Pour réduire le risque de départ d’incendie, n’entreposez pas et
n’utilisez pas d’essence ou d’autres produits inflammables sous
forme de liquide ou de vapeurs à proximité du radiateur.
4. Ne faites pas fonctionner le radiateur sans que ses pattes de support soient fixées comme montré en Figure 1.
5. Ne faites pas fonctionner le radiateur dans toute position autre que
celle montrée dans ce manuel.
6. N’utilisez pas ce radiateur près de l’eau (comme sur un soubassement mouillé ou autour d’une piscine), ou dans un environnement
très humide.
7. Ce radiateur doit être utilisé exclusivement au sol. Ne le placez pas
sur une étagère, une table, ou sur tout support autre que le sol.
2. Pour faire fonctionner votre radiateur, il suffit de :
a. Brancher la fiche du cordon d’alimentation dans une prise secteur
de 120 V (Voir le premier avertissement).
b. Passer l’interrupteur M/A en position de marche (On).
REMARQUE : Le voyant témoin de mise sous tension doit alors être
allumé.
c. Tourner le bouton du thermostat en sens horaire jusqu’à ce qu’il
soit stoppé.
3. Laissez le radiateur fonctionner normalement jusqu’à ce que la température de la pièce vous semble confortable. Puis tournez simplement le bouton du thermostat smartstat un peu en sens antihoraire
jusqu’à ce que les voyants rouge et ambre s’éteignent tous les deux.
Le thermostat smartstat va automatiquement activer le chauffage à
régime faible ou fort selon le besoin pour maintenir la température
voulue pour la pièce.
NOTE SPÉCIALE :
smartstat, le radiateur va fonctionner à un régime de chauffe faible sauf
s’il y a un besoin de plus de chaleur (comme durant les jours les plus
froids de l’hiver). Si plus de chaleur est nécessaire, le thermostat smartstat va activer le régime de chauffage fort. À faible régime, le voyant
ambre sera allumé. Quand le régime de chauffage élevé est activé, le
voyant rouge s’allume également. Cette capacité vous économise de
l’argent en n’utilisant que la quantité d’énergie nécessaire pour le maintien du niveau de confort voulu.
REMARQUE :
radiateur à son utilisation initiale. Elle doit disparaitre dans les premières
heures de fonctionnement. Vous pouvez aussi remarquer qu’il ne
chauffe pas immédiatement. Du fait de la conception tubulaire spéciale
de son élément, il faut quelques minutes pour que vous ressentiez la
chaleur au travers de son coffret.
Du fait des possibilités automatiques du thermostat
Vous pouvez déceler une nouvelle odeur sortant de votre
1. Votre radiateur est fourni avec un interrupteur M/A, un voyant témoin
de mise sous tension (dans l’interrupteur), des voyants pour régime
faible ou fort, et un thermostat de contrôle de température “smartstat”.
BOUTON DE THERMOSTAT
Figure 1
PATTES DE SUPPORT
10
Page 11

INSTRUCTIONS D’ENTRETIEN
3
2
1
L
O
O
F
F
H
I
Pour un fonctionnement efficace et sûr et pour prolonger la durée de
service de votre radiateur, il faut le nettoyer et l’inspecter pour des dommages éventuels au moins une fois par an (de préférence au début de
la saison de chauffage), ou plus souvent dans des environnements
sales. En dehors de ce nettoyage, votre radiateur ne demande pas
d’autre entretien préventif. L’utilisateur peut effectuer lui-même un nettoyage élémentaire du radiateur. Toute autre intervention est réservée
au personnel de service qualifié.
POUR ÉVITER UN CHOC ÉLECTRIQUE, DÉBRANCHEZ TOUJOURS LE RADIATEUR DE LA PRISE SECTEUR AVANT TOUTE
INTERVENTION DE NETTOYAGE OU DE SERVICE.
LAISSER LE RADIATEUR REFROIDIR AVANT DE LE NETTOYER
POUR ÉVITER DE POSSIBLES BRÛLURES.
1. Le carter de radiateur peut être nettoyé en utilisant un chiffon
humide pour enlever la poussière qui peut s’être accumulée sur les
surfaces. N’utilisez pas de nettoyants forts ni de cires sur les surfaces car cela pourrait endommager leur finition ou la décolorer à
l’usage.
2. Un aspirateur et/ou de l’air comprimé peuvent être utilisés pour
enlever la poussière et la peluche qui peuvent s’être accumulées
dans le radiateur autour des ailettes d’élément. Si le radiateur a
besoin d’être démonté pour son nettoyage, faites attention en nettoyant les ailettes d’élément pour ne pas les abîmer.
LES AILETTES SONT TRANCHANTES ET PEUVENT CAUSER DES
COUPURES, ÉVITEZ DONC DE LES TOUCHER DIRECTEMENT
3. Après l’intervention de nettoyage ou de service, remettez bien en
place au remontage toute la visserie enlevée, et vérifiez le bon fonctionnement des unités.
THERMOCONTACT DE SÉCURITÉ : Votre radiateur est fourni avec un
thermocontact de sécurité à restauration automatique qui coupe l’alimentation vers l’élément de chauffe si le radiateur se trouve dans une
condition anormale (comme une obstruction), afin d’éviter un départ d’incendie. Quand le radiateur s’est refroidi, ce thermocontact se restaure et
permet au radiateur de revenir en fonctionnement normal.
1
2
3
Figure 2 – Pièces de rechange
Liste de pièces de rechange pour radiateur-plinthe électrique/hydronique portable
N° de
référence Description Numéro de pièce Quantité
1 Voyant témoin 3510-2006-000 1
2 Diode 1610-2002-000 1
3 Thermostat 5813-2019-000 1
4 Bouton 3301-2011-001 1
5 Commutateur 5216-2007-000 1
4
5
11
Page 12

SPÉCIFICATIONS
Modèle Volts Watts Ampères BTU/H
LFP6152E
120 V
750 6,3 2 560
1 500 12,5 5 120
PLAQUE SIGNALÉTIQUE
ODEL NO.
M
LFP6152E
ATE CODE
D
1005
VOLTS: 120 AC
WATTS
4E1 LISTED
1500/750
AHRENHEAT
F
BENNETTSVILLE, SC 29512
5
BASEBOARD HEATER
ATENT PENDING
P
4104-2144-000
GARANTIE LIMITÉE
Tous les produits fabriqués par Marley Engineered Products sont garantis contre des défauts dus à la main d’œuvre et aux matériaux pendant un an à partir de la date
d’installation, saufs les éléments de chauffe qui sont garantis de la même façon pendant cinq ans. Cette garantie ne s’applique pas pour des dommages résultant d’accident, de mésusage ou d’altération ; ni si la tension secteur envoyée fait 5 % ou plus au-dessus de la tension nominale de la plaque signalétique ; ni sur l’équipement
est incorrectement installé ou câble, en violation avec les instructions d’installation. Toutes les demandes d’exercice de la garantie devront être accompagnées de la
preuve de date d’installation.
Le client doit être responsable de tous les coûts occasionnés pour le démontage ou la réinstallation des produits, incluant les coûts de main-d’œuvre, et les coûts d’expédition pour renvoyer les produits au centre de service de Marley Engineered Products. Dans le cadre des limitations de cette garantie, les unités ne fonctionnant pas
doivent être renvoyées au centre de service agréé Marley le plus proche, ou directe au centre de service de Marley Engineered Products, où ils seront réparés ou remplacés, à notre choix, sans frais pour vous avec le port de retour payé par Marley. Il est convenu que cette réparation ou ce remplacement sera le seul remède à attendre de Marley Engineered Products.
LES GARANTIES QUI PRÉCÈDENT TIENNENT LIEU DE TOUTES LES AUTRES GARANTIES, EXPLICITES OU IMPLICITES, ET TOUTES LES GARANTIES
IMPLICITES DE VALEUR MARCHANDE ET D’ADÉQUATION POUR UNE FINALITÉ SPÉCIFIQUE QUI EXCÉDERAIENT LES DISPOSITIONS DE GARANTIE
PRÉCÉDEMMENT ÉNONCÉES SONT ICI REJETÉES ET EXCLUES DE CET ACCORD. MARLEY ENGINEERED PRODUCTS NE SERA PAS TENU POUR RESPONSABLE DES DOMMAGES CONSÉCUTIFS SURVENANT EN RELATION AVEC LE PRODUIT, QU’ILS SOIENT À BASE DE NÉGLIGENCE, TORT, RESPONSABILITÉ
PURE OU CONTRACTUELLE.
Certains États ne permettent pas l’exclusion ou la limitation des dommages consécutifs ou annexes, de ce fait l’exclusion ou la limitation qui précède peut ne pas s’appliquer à votre cas. Cette garantie vous donne des droits légaux spécifiques, qui varient d’un État à un autre.
Pour obtenir l’adresse de votre centre de service agréé le plus proche, contactez Marley Engineered Products à Bennettsville, SC, USA, au 1-800-642-4328. Toute
marchandise retournée à l’usine doit être accompagnée d’une autorisation de renvoi et d’une étiquette d’identification pour le service, ces deux documents étant
disponibles auprès de Marley Engineered Products. En demandant une autorisation de retour, fournissez tous les numéros de catalogue indiqués sur les produits.
COMMENT OBTENIR DU SERVICE ET DES PIÈCES DANS LE CADRE DE LA
GARANTIE ET DES INFORMATIONS GÉNÉRALES
1. Service et pièces sous garantie
2. Pièces détachées à acheter
3. Informations générales sur les produits
Remarque :
Pour obtenir le service sous garantie vous devez toujours avoir préparé :
1. Référence de modèle du produit
2. Date de fabrication
3. Numéro ou description de pièce
1-800-642-4328
1-800-654-3545
www.marleymep.com
N° de document 5200-2096-004
ECR38678
01/11
470 Beauty Spot Rd. East
Bennettsville, SC 29512 USA
 Loading...