

Operating Instructions
HC1000
Heater / Circulator
Prepared by:
Quality Lab Accessories, LLC
100 Emlen Way, Suite 108
Telford, PA 18969
P/N HC1000
Revision 2.x
07/03/17

Table of Contents
1.0 General Information ...................................................................................................................... 4
1.1 Introduction ................................................................................................................................. 4
1.2 Safe Operation …………………………………………………………………………………4
1.2.1 General Safety ........................................................................................................ 4
1.2.2 Electrical Hazards ................................................................................................... 4
1.3 Safety and Information Symbols .................................................................................. 5
1.4 Product Specifications .............................................................................................................. 5
2.0 Unpacking ........................................................................................................................................ 6
3.0 Overview ......................................................................................................................................... 6
3.1 Front Panel ................................................................................................................................. 7
4.0 Installation ...................................................................................................................................... 8
4.1 Electrical Connections ............................................................................................................... 8
4.2 Liquid Connections – Single Bath System ............................................................................. 9
4.3 Liquid Connections – Dual Bath System .............................................................................. 10
5.0 Operations ..................................................................................................................................... 11
5.1 Priming the System ................................................................................................................. 11
5.2 Setting Temperature ................................................................................................................ 11
5.3 External Temperature Probe Calbration .............................................................................. 12
5.4 Settng Time and Date ............................................................................................................. 12
5.5 Data Logging ............................................................................................................................ 13
6.0 Maintenance ................................................................................................................................. 13
6.1 Updating Firmware ………………………………………………………………………..…13
6.2 Temperature Offset ……………………………………………………………………...…..13
7.0 Quaification and Validation ................................ ............................................................ 14
8.0 Warranty ......................................................................................................................... 14
Part number, Rev 2.x Page 2
Rev.
Description
Revised By
Revised On
Approved By
Approved On
A
INITIAL RELEASE
JUSTIN M.
07/11/17
Revision History
Part number, Rev 2.x Page 3

1.0 General Information
1.1 Introduction
Thank you for purchasing the QLA HC1000 Heater / Circulator. The HC1000 has been
precision engineered and designed to create the optimal testing conditions as described
in the monograph, and be compatible with all dissolution baths.
1.2 Safe Operation
The HC1000 Heater / Circulator has been designed to operate safely with any dissolution
machine. Guidelines for safety provided in this operating manual are to keep the
operator and unit safe during operation.
If the unit is used in a manner not specified by Quality Lab Accessories, the operator
and/or unit may be at risk. Please read the safety information provided and use the
HC1000 Heater / Circulator for its intended purpose only.
Please observe all relevant safety practices during the operation of this unit.
1.2.1 General Safety
Operation of the HC1000 Heater / Circulator involves aqueous liquids in
conjunction with a heating element and electrical components. Improper or
careless use of this unit may create shock, fire, or other hazards which may
cause serious injury to personnel or equipment. The disassembly of this unit
may present an unsafe operating environment.
1.2.2 Electrical Hazards
Electrical components used in the heater / circulator operate at dangerous
voltages. Improper use and/or contact with these electrical components can
cause death or serious injury.
Application of the wrong supply voltage, an improperly wired outlet, or the
absence of proper electrical grounding could create a hazardous environment for
the operator, and cause damage to the HC1000 Heater / Circulator. Be sure to
always use a three-wire outlet with a ground connection adequate to the load
output by the unit, and that complies with all local, state, and federal safety
regulations.
Part number, Rev 2.x Page 4
Parameter
Specification
Model #
HC1000
Range
30°C – 45°C
Accuracy
±.1°C
Voltage
115V
Flow Rate
2.7g / 1 min.
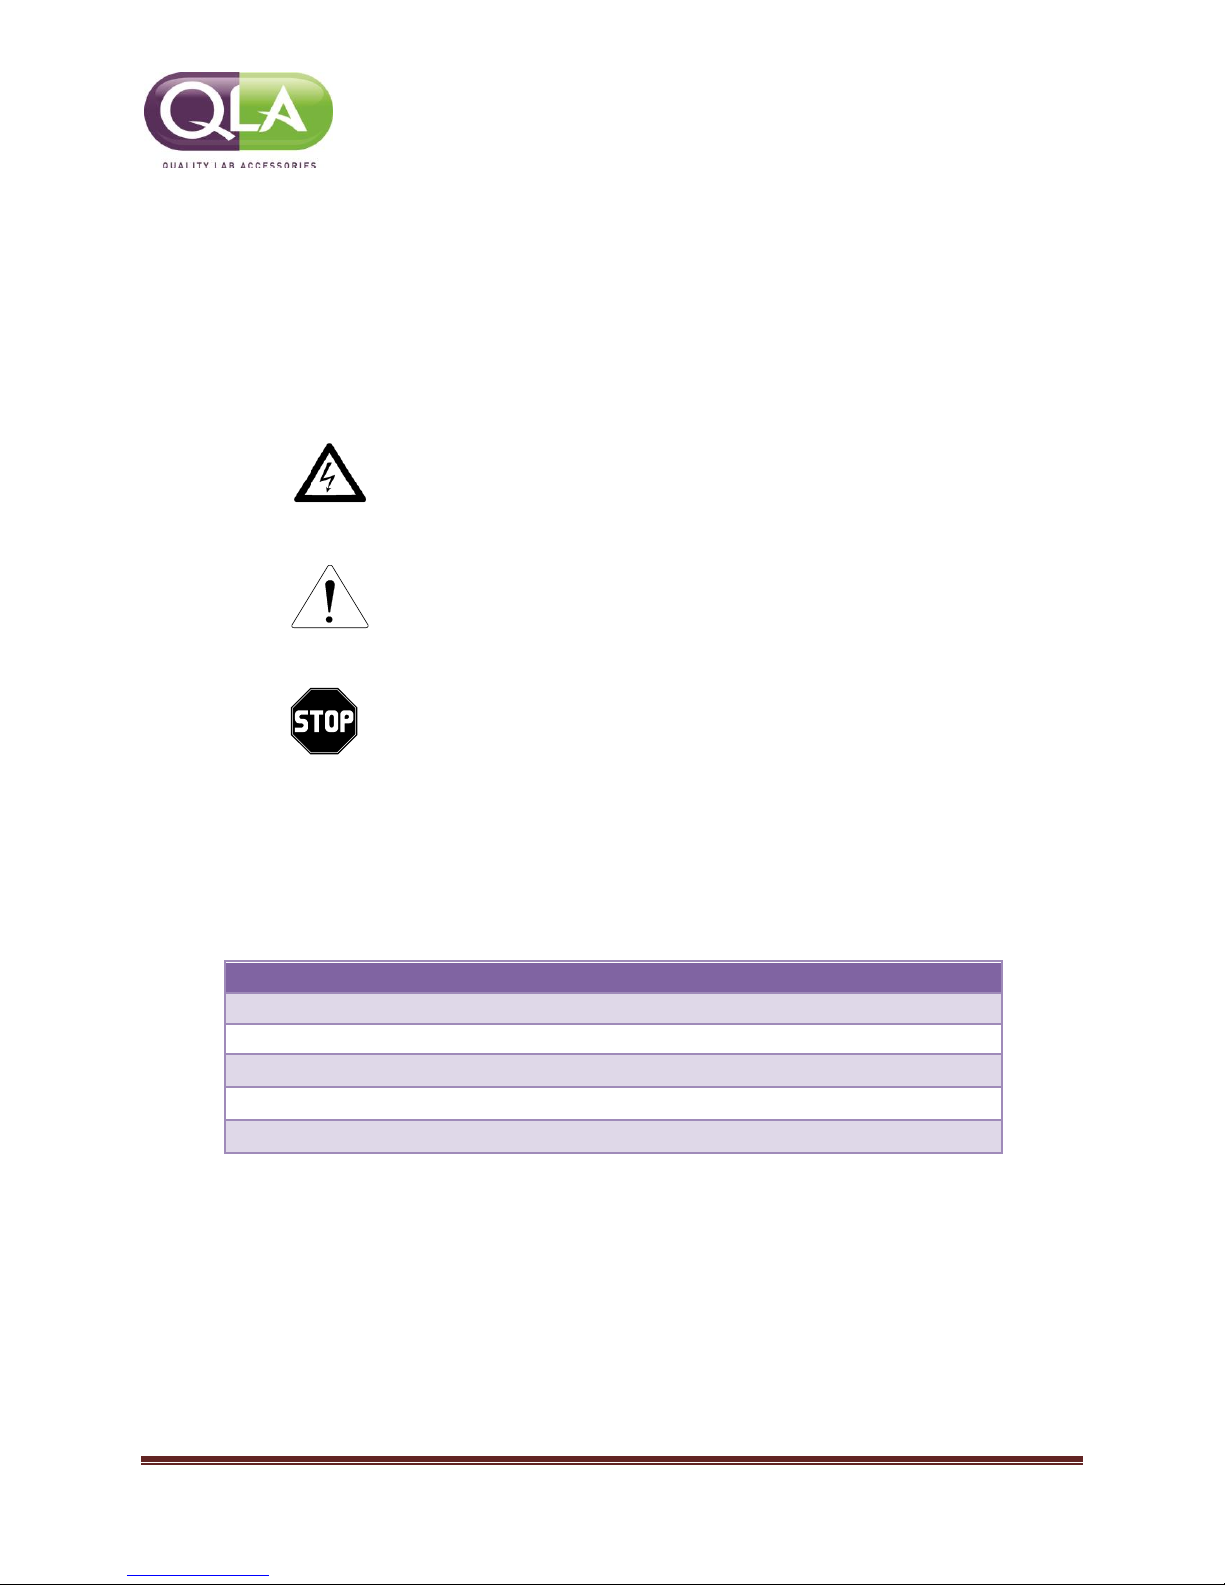
1.3 Safety and Information Symbols
Symbols included in this manual denote “ATTENTION” and should read carefully along
with any note alongside them. Failure to observe these warnings could be deemed
hazardous.
Electrical shock Indicates potential electrical hazard. Failure to observe
this symbol or notes in connection to this warning could result in death or injury.
Warning Indicates the potential for personnel or equipment damage.
Refer to accompanying notes.
Stop Indicates an important note associated with procedure or step. Refer to
accompanying notes.
1.4 Product Specifications
Part number, Rev 2.x Page 5

2.0 Unpacking
The HC1000 Heater / Circulator has been packaged to protect the unit from shipping and
handling. Please complete the following steps to unpack your HC1000 Heater / Circulator:
1. Carefully remove all items from shipping container.
2. Check all items for damage that may have occurred during shipping. If any damage
to the unit is evident, please contact both your shipping provider and Quality Lab
Accessories.
3. Check the shipping container for any loose parts before discarding.
4. Place the unit on a clean, dry, and level surface as close to your dissolution bath as
necessary. It is recommended to leave approximately 6 inches of open area behind
the unit to allow for access to the rear power control and hose hookups.
This unit includes electrical components. Please ensure a dry area around the unit
before plugging in the main power supply.
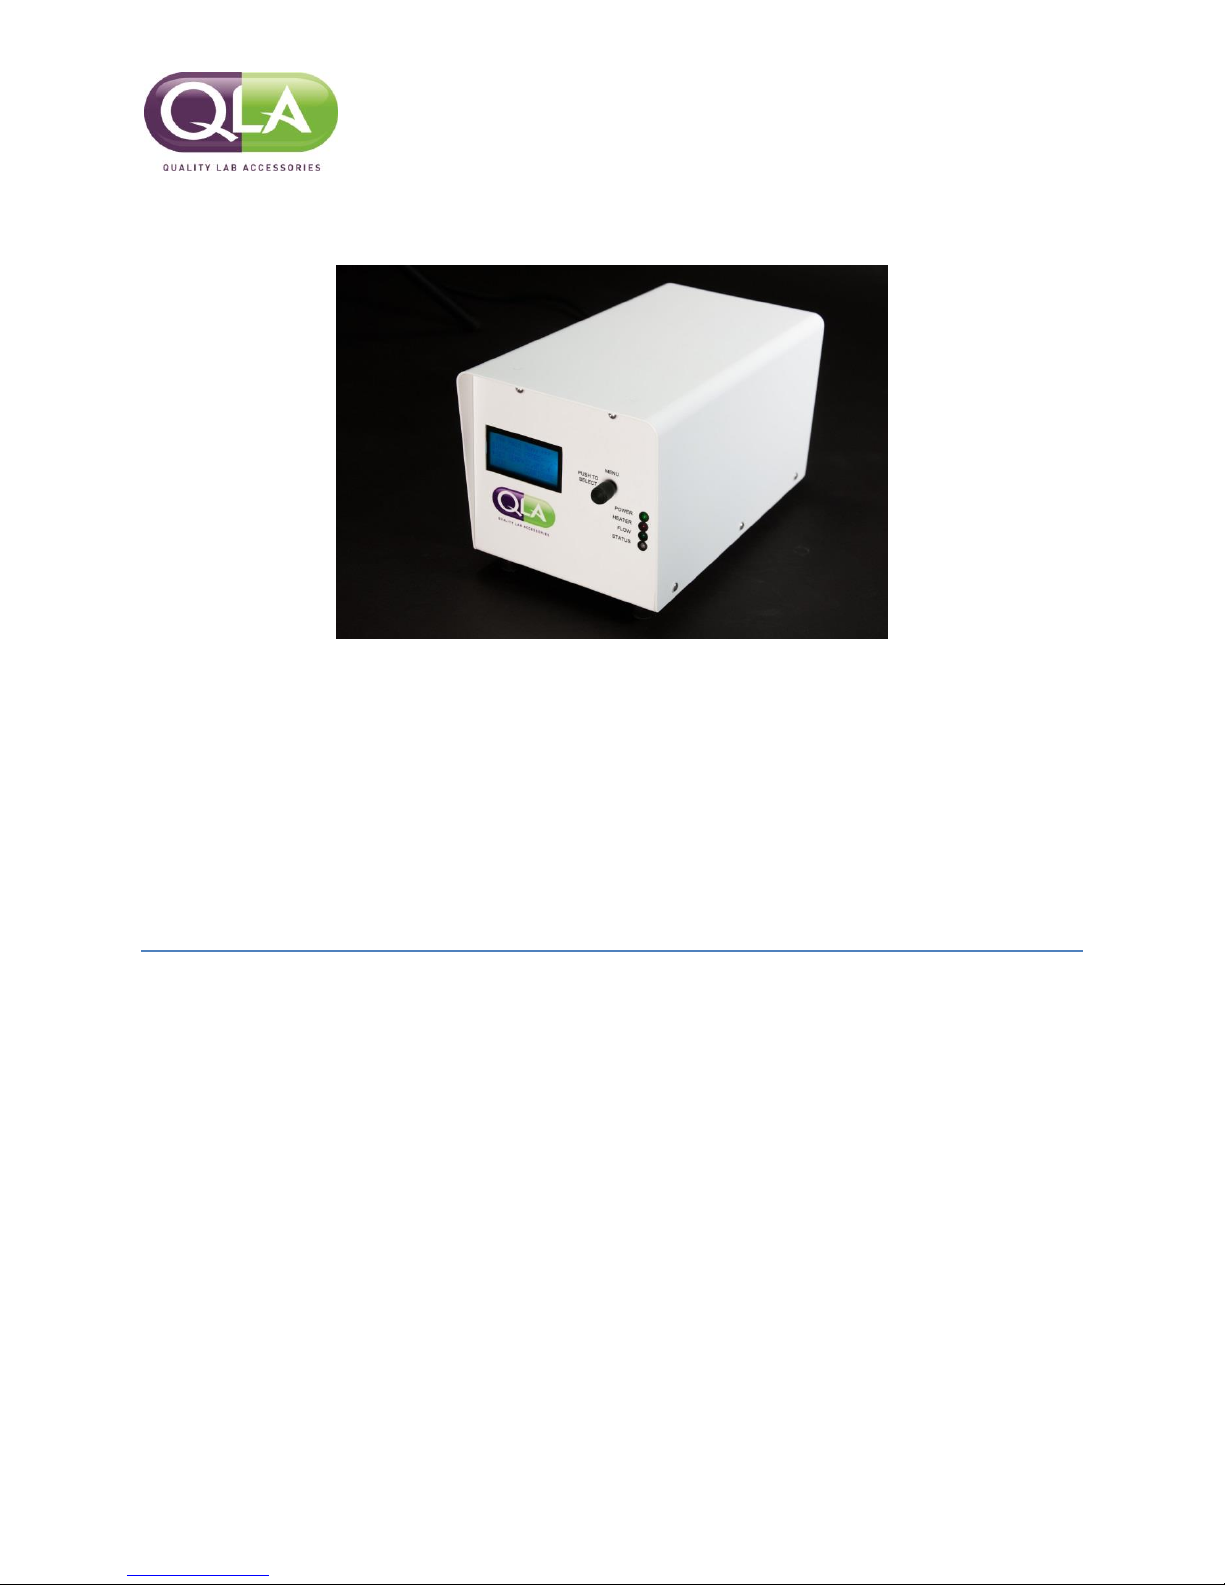
3.0 HC1000 Heater / Circulator Overview
The HC1000 Heater / Circulator was designed to function with any dissolution machine, and
provide precise temperature control of your dissolution bath water, within a range of ambient
temperature to 45°C. Operating functions can be monitored on a front panel display. Set and
current temperature are also displayed on the front panel display. A single button/dial makes
operation of the unit quick and easy.
An optional external temperature probe can also be used for increased accuracy and assurance
of bath temperature. Without the external probe, an internal probe measures temperature with
accuracy of ±.1°C.
Part number, Rev 2.x Page 6

Item #
Description
1
LCD Display
2
Highlighted Feature
3
Control Dial
4
Power LED
5
Heater LED
6
Flow LED
7
Status LED
3.1 Front Panel HC1000
Figure 1
- Note that when a feature on the LCD screen is “highlighted”, it is surrounded by two arrows.
- Select a highlighted feature by depressing the control dial.
Covers retained by fasteners which require the use of a tool to remove may only be
opened by QLA trained service professionals, or QLA authorized engineers.
Part number, Rev 2.x Page 7

Item #
Description
1
External Temperature Auxiliary Jack
2
USB Output
3
Power Switch
4
Water Outlet
5
Power Cord Adapter
6
Water Inlet
4.0 Installation
Figure 2
4.1 Electrical Connections
1. Ensure power switch (SEE FIGURE 2 / ITEM 1) on the rear panel is in the OFF
position.
2. Connect the power cord to the AC power connector (SEE FIGURE 2 / ITEM 2) on
the rear panel of the unit.
3. Plug the other end of the cord into an outlet of the proper voltage.
The supplied power cord is standardized to the United States. Confirm that any power
cord you use meets all local safety regulations and is rated to carry at least 10 amps.
A circuit breaker triggers an automatic shutdown of the unit if a power surge occurs.
Simply switch off and restart the unit. If the problem persists, contact a QLA Lab
Services Professional or authorized QLA engineer.
Part number, Rev 2.x Page 8

FIGURE 3
4.2 Liquid Connections – Single Bath System (FIGURE 2)
1. Locate your ½” diameter tubing and hose clamps. (Hose kit sold separately).
2. Slip one end of your tubing over the barbed fittings on the inlet and outlet fittings of
your water bath. Slide the tubing as far up the fittings as possible.
3. Slip a hose clamp over the free end of the tubing and secure over barbed fitting.
Tighten each hose clamp to avoid leaks. To avoid damage to the tubing, do not
over tighten.
4. Slip hose clamps over the free ends of tubing, and slide each end onto the INLET
and OUTLET fittings on the rear panel of the unit. Be sure that the hose coming
from the inlet of the water bath is attached to the fitting on the rear of the HC1000
unit labeled OUTLET, and that the hose coming from the outlet of the water bath is
attached to HC1000 fitting labeled INLET. To avoid damage to the tubing, do not
overtighten.
5. Double check that all tubing and hose clamps are fitted correctly.
Part number, Rev 2.x Page 9
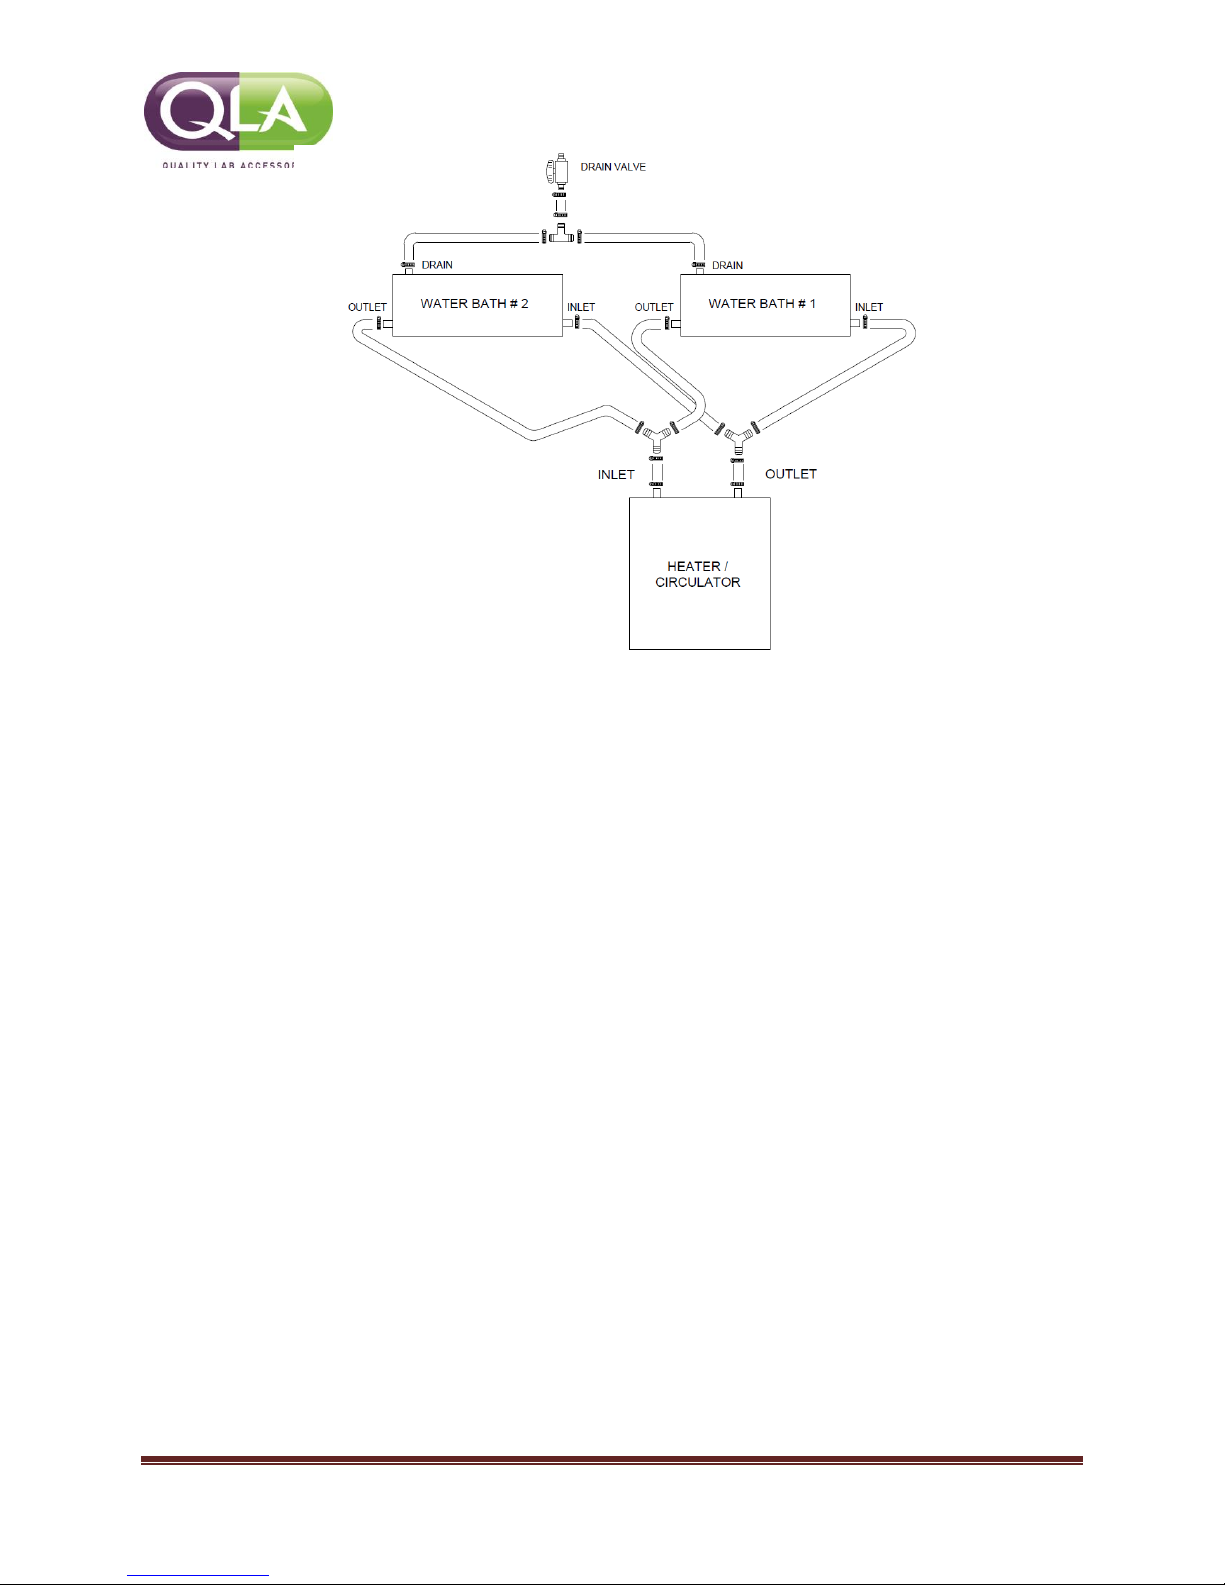
FIGURE 4
4.3 Liquid Connections – Dual Bath System (FIGURE 3)
When using the HC1000 Heater / Circulator with two dissolution baths, the output is divided
between the two water baths, and then recombined at the inlet. Both water baths share a drain to
ensure equal bath levels.
1. Locate your two short lengths of tubing (Dual bath hose kit sold separately).
2. Slip one end of each over the INLET and OUTLET fittings on the rear panel of the
HC1000 Heater / Circulator. Slip a hose clamp over the free ends of each piece of
tubing, and secure over fittings. To avoid damage to tubing, do not over tighten.
3. Slip a hose clamp over the free ends of tubing and slip each end of tubing over its
own Y connector (supplied in dual bath hose kit). Secure the hose clamps over the
Y connector fittings. To avoid damage to the tubing, do not over tighten.
4. Slip a length of tubing over both branches of the Y connector coming from the
HC1000 Heater / Circulator OUTLET. Slip a hose clamp over the free end of each
piece of tubing, and secure over the Y connector fittings. To avoid damage to the
tubing, avoid over tightening.
5. Slip a hose clamp over the free end of each piece of tubing, and slip the tubing over
the inlet fitting of each water bath. Secure the hose clamps over the fittings. To
avoid damage to the tubing, avoid overtightening.
6. Repeat steps 4 - 5 to attach the HC1000 Heater / Circulator INLET fitting to the
water bath outlets.
7. Using the tubing connected to the drain valve. Slip a hose clamp over the free ends
of tubing and slip the tubing over the drain fitting of each water bath. Secure the
hose clamps over the fittings. To avoid damage to the tubing, avoid over tightening.
8. Double check that all tubing and hose clamps are fitted correctly.
Part number, Rev 2.x Page 10

5.0 Operation
5.1 Priming The System
Priming the HC1000 Heater / Circulator is an essential part of setting up the unit to run as
efficiently as possible. Please follow the steps below to prime your HC1000 Heater /
Circulator.
1. Fill the water bath to a level approximately 2 – 3 inches above the bath outlet fitting.
2. Turn on the HC1000 Heater / Circulator.
3. Using the control dial, highlight and select CONFIGURE.
4. Once in the Configure Menu, highlight and select BATH OPTIONS.
5. In the Options Menu highlight and select PUMP PRIME IS OFF. PUMP PRIME IS
6. Your unit is now priming. Allow up to 5 minutes for the unit to prime. For faster
7. The FLOW light will illuminate green when the unit is primed.
8. Highlight and select ESC to return to the main menu.
ON is now displayed.
priming results, tilt the rear of the unit up to allow air inside the unit to flow out
naturally. You should see and hear air being expelled through the outlet tubing.
If an excessive distance of tubing is needed between the water bath and Heater / Circulator, more
water may be necessary to prime the unit. The water level should stay above the outlet fitting on the bath as
the unit is priming. Add water as needed.
It is suggested that you use deionized water when possible to minimize scale and mineral buildup.
The use of algaecide can help inhibit mold and bacteria growth. Check the label before use to ensure the
formulation is safe to use with the plastic materials used in the water bath.
After priming, the flow sensor will trigger an automatic shutdown of the system if the flow rate
drops below .5 G per minute. Simply switch off and restart the unit. If the problem persists, contact a QLA
Lab Services Professional or authorized QLA engineer.
5.2 Setting Temperature
Setting, changing, and checking the temperature on the HC1000 Heater / Circulator is a quick
and easy process. Please follow the steps below to set the temperature on your HC1000 Heater
/ Circulator.
1. On the main screen highlight and select SET TEMP.
2. NEW TEMP is now displayed. Turn the control dial clockwise to increase
temperature, and counter clockwise to decrease temperature.
Part number, Rev 2.x Page 11

3. Once the desired temperature is located, select it with the control dial.
4. Your desired temperature is now set.
5. You can now highlight and select RUN from main menu to start your HC1000 Heater
/ Circulator.
6. If your desired temperature is higher than the current bath temperature, the red
HEATER light will illuminate, signifying that the heater is active.
5.3 External Temperature Probe Calibration
An external temperature probe (sold separately) can be used with the HC1000 Heater /
Circulator. The temperature reading is displayed as “Probe” next to the bath temperature reading
for easy comparison. If an external probe is not in use, a dashed line will take the place of the
temperature reading.
1. Turn on the unit.
2. Highlight and select CONFIGURE from the main menu.
3. Highlight and select PROBE CALIBRATION from the Configure Menu.
4. From the Calibration Menu, highlight and select CALIBRATE EXTERNAL PROBE.
5. Insert the 30°C calibration standard into the RC jack on the rear panel of the unit, and
highlight and select OK.
6. Once the unit is done calculating, you will be prompted to insert the 40°C calibration
standard into the RC jack.
7. Once the 40°C calibration standard is inserted, highlight and select OK.
8. After the unit calculates, you are finished calibrating the external temperature probe.
The unit will return you back to the main menu.
9. Plug your external temperature probe into RC jack on the rear of the unit, and pace
the probe into your water bath.
10. The reading from your external temperature probe is now displayed as “Probe” next
to the bath temperature on the Main Menu screen.
The temperature sensor will trigger an automatic shutdown of the system if the heater
exceeds 65°C. Simply switch off restart the unit. If a problem persists, contact a QLA Lab Services
Professional, or authorized QLA engineer.
5.4 Setting Time and Date
1. From the menu highlight and select CONFIGURE.
2. Highlight and select SET CLOCK from the Configure Menu.
3. From the Clock Menu use the control dial to select the time and date.
4. Date is changed by the Month / Day / Year
5. Time is changed by the Hour : Minute : Second. Time is displayed in a
24-hour format.
Part number, Rev 2.x Page 12

5.5 Data Logging
The HC1000 has the ability to log temperature, with respect to time and date. To enable the data
logging feature, follow the procedure below.
1. Using the control dial, highlight and select CONFIGURE.
2. From the Configure menu, select Bath Options.
3. Highlight and select Log Data.
4. Use the control dial to select how often you would like the unit to log data.
(1,2,3,5,10,15,30, or 60 minutes)
5. Your unit will now log data to a USB drive under a text file named “SAH_LOG”
6.0 Maintenance
The HC1000 Heater / Circulator has been checked for defects before being shipped from Quality
Lab Accessories. Any maintenance requiring the removal of panels and fasteners may only be
done by a QLA Services Professional, or an authorized QLA Engineer. Some maintenance may
be done by the owner / operator.
6.1 Updating Firmware
As updated firmware is developed, it will be provided to the customer either through an email or a
more preferred method by the customer. To update the firmware, follow the procedure below.
1. Insert USB thumb drive with file named “image.hex” into USB port on back of unit.
2. With the unit OFF, hold down the control dial.
3. Turn power switch to the ON position. You will be prompted that a firmware update is
taking place.
4. Remove the USB thumb drive. Your firmware update is complete.
6.2 Temperature Offset
Due to a change in the system or to the environment which the system operates, a temperature
reading may be altered. The easiest method to keep accurate readings against an external
temperature probe is to offset the internal temperature reading.
1. From the Main Menu highlight and select CONFIGURE.
2. Highlight and select PROBE CALIBRATIONS from the Configure Menu.
3. From the Probe Calibrations menu, highlight and select PROBE OFFSETS.
4. In the Probe Offsets Menu you can choose to offset either the external, or bath
temperature readings.
5. Highlight and select BATH OFFSET.
6. Using the control dial you can now choose the desired offset. Use the control dial to
highlight and select the offset.
7. To offset the external probe, highlight External Offset and follow steps 5 – 6.
Part number, Rev 2.x Page 13

7.0 Qualification and Validation
Prior to shipment, the HC1000 Heater / Circulator is checked for accuracy and efficiency.
8.0 Warranty
The HC1000 Heater / Circulator is warranted to be free from defects in materials and
workmanship under normal use and service for a period of (1) year from the date of purchase as
shown on the purchase order receipt. The obligation of QLA under this warranty shall be limited
to repair or replacement (at our option) during the warranty period, provided the product is
returned to QLA with transportation charges prepaid. This warranty shall be invalid if the product
is damaged as a result of defacement, misuse, accident, destruction or alteration of the serial
numbers, repair alteration or maintenance by any person or party other than our own service
facility or authorized QLA service technician.
Part number, Rev 2.x Page 14
 Loading...