

QFX PSBX-412401BTS User Manual

R
www.qfxusa.com
SBX-412401BTS
User Manual for SBX-412401BTS Portable Speaker

TABLE OF CONTENTS
P1...Quick Setup Guide
• 6 Step Setup Guide
• Bluetooth Connection
• FM Radio Setup
P2...Global Functions
• Global Functions
• Display Settings
• TWS Connection
• Mic.Priorty
P3...Control Panel
• Controls, Features,
Inputs
P4...Back Panel & Remote
Control
• Back Panel Layout
• Back Panel Inputs
• Remote Control Features
P5...Fog Machine
• Fog Machine Panel
Layout
• Operating the Fog
Machine
• Customer Support
Contact
TABLA DE CONTENIDO
P1 ... Guía de Instalación Rápida
• Guía de configuración de 6
pasos
• Conexión Bluetooth
• Configuración de radio FM
P2 ... Funciones Globales
• Funciones globales
• Configuración de pantalla
• Conexión TWS
• Micrófono
P3 ... Panel de Control
• Controles, funciones, entradas
P4 ... Panel Trasero y Control
Remoto
• Disposición del panel trasero
• Entradas del panel posterior
• Funciones de control remoto
P5 ... Máquina de Humo
• Disposición del panel de la
máquina de humo
• Preparar la máquina de humo
• Contacto de atención al
cliente
TABLE DES MATIÈRES
P1 ... Guide d'installation rapide
• Guide de configuration en 6
étapes
• Connexion Bluetooth
• Configuration de la radio FM
P2 ... Fonctions globales
• Fonctions globales
• Paramètres d'affichage
• Connexion TWS
• Mic.Priorty
P3 ... Panneau de configuration
• Commandes, fonctionnalités,
entrées
P4 ... Panneau arrière et télécommande
• Disposition du panneau arrière
• Entrées du panneau arrière
• Fonctions de la télécommande
P5 ... Machine à brouillard
• Disposition du panneau de la
machine à brouillard
• Préparation de la machine à
brouillard
• Assistance clientèle
Definitions:
MODE: The MODE button allows you to toggle through and select the speaker functions of your choice:
Bluetooth, USB, SD Card, AUX, FM Radio.
: Press the Loop button to loop the current .mp3 track, play list, or shuffle.
TWS: Press to play or pause the selected .mp3 track. Press and hold down the button for TWS Sync TWS.
: Press to select the previous .mp3 track. In FM MODE, use this button to select the previous FM radio
station..
: Press to select the next .mp3 track. In FM MODE, use this button to select the next FM radio station.
FM Radio: Frequency-Modulated stations operate in a frequency band extending from 87.8 MHz to 108 MHz.
MIC.PRIORTY: Press the MIC.PRIORTY button to prioritize the microphone over the music.
TRS: Tip, Ring, Sleeve: A 3.5mm or 6.35mm balanced audio connector. Carries 2 balanced mono signals.
Also known as 1/8” and 1/4”.
TS: Tip, Sleeve: A 3.5mm or 6.35mm unbalanced audio cable. Also known as 1/8” and 1/4”.
Instrument Cable: Unbalanced 6.35mm audio cable.
RCA: An Audio/Video connection type: Radio Corporation of America (RCA).
HDMI: High-Definition Multimedia Interface: Transmits digital audio and video signals.
MP3: Compressed audio file typically 1/10th of a broadcast .wav file. MPEG Audio Layer-3.
EQ: Equalizer: Use the EQ to boost or cut audio frequencies to shape the sound.
LED: Light Emitting Diode: A semiconductor diode which glows when a voltage is applied.
RGB: Light color values: Red, Green, Blue.
USB: Universal Serial Bus: Used to transport digital information between digital components.
TF Card: TransFlash card is used to carry digital information. Also known as a Micro SD Card.

QUICK SETUP GUIDE
1 Back Panel
1
3
Top Panel
3
6 - STEP SETUP GUIDE
1
Step Plug the AC power cord to the SBX-
2
1
6
Font Side
4
412401BTS. You will find the connection
terminal on the back panel.
2
Step Find a power outlet (AC 120V/60Hz)
and connect the AC cord to the socket to
supply the unit with power.
3
Step On the back panel there are two
power switches, set the LED POWER and BALL
LIGHT POWER to the “ON” position. Check the
front side for of the SBX-412401BTS for flashing
party lights. If the party lights are not on try a
different power outlet.
4
Step Move to the top panel and set the
POWER switch to the “ON” position. The
display screen should turn on. The
SBX-412401BTS should now be ready to play
music.
5
Step Insert a USB flash drive or SD card
into the corresponding port, found directly
under the display screen, to play your .mp3
5
content. The SBX-412401BTS will automatically
read the .mp3 files when inserted.
6
Step The MASTER VOLUME will increase
and decrease the entire volume evenly. Make
sure that the L and R Channel Knobs are turned
to max before gradually raising the MASTER
VOLUME.
SBX-412401BTS BLUETOOTH
Bluetooth Mode: Use the MODE button to enable Bluetooth on the SBX-412401BTS. Open the
Bluetooth settings on your mobile device and search for QFX SBX-412401BTS. Select the option to pair
both devices together. You can now sit back and enjoy the music from your favorite app. You won't need
reconnect the Bluetooth again when switching through modes.
SBX-412401BTS FM RADIO:
FM Radio: Frequency-Modulated stations operate in a frequency band extending from 87.8 MHz to 108
MHz. Use the MODE button to select the FM mode. In FM mode, press and hold the Play/Pause button
to scan availble frequencies in the area. Extend the telescoping antena to enhance reception.
SBX-412401BTS Recording Function
Insert a USB or SD card in the slot. Connect a wired microphone and set the desired volume level.
Press and hold the “REC/PLAY ” Button to start recording. Press the “REC/PLAY” button again to
playback the recording. To exit the recording function press “REC/PLAY” again.
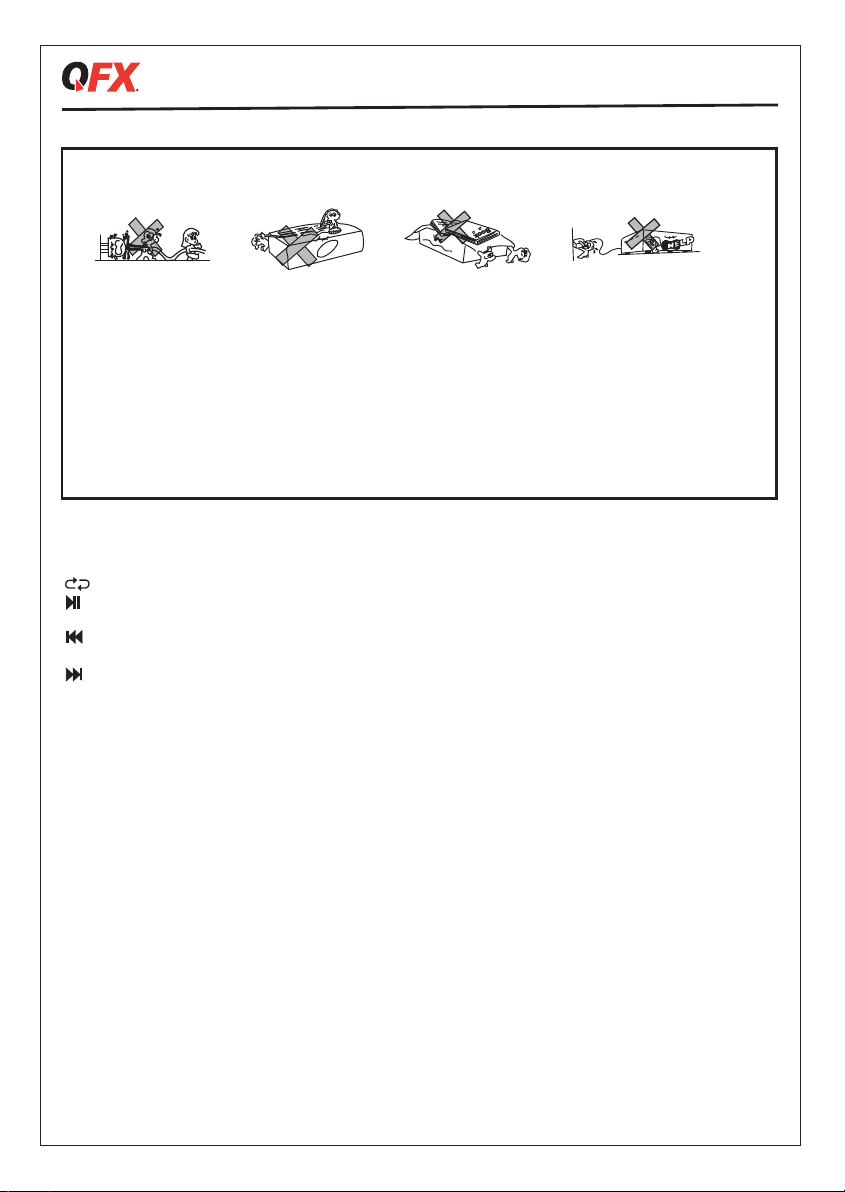
IMPORTANT SAFETY MEASURES
Before using this machine, please read all the safety and operating instructions. These safety
and operating instructions should be kept in condition of consultation.
1. Electric Power Supply Line: Keep the power cord safe from being tramped on,
pressed on by heavy objects, or pierced. Make sure that the cord has ample space to rest on the
ground and is not stressed. DO NOT pull or drag or the power supply line.
2. Ventilation:This unit must be set in a ventilated space. DO NOT cover the vents on the back panel
for any reason. If placed alongside a wall, distance the unit a minimum of 10cm to allow air
flow. DO NOT surface that might restriced good air flow.
3. Dismantling: DO NOT dismantle or open the unit. This is a high powered unit that can cause
serious harm if tampered with. DO NOT Open.
4. Smoke: Please unplug the power supplies cord from the
wall outlet immediately if unsual smoke appears and contact customer support.
GLOBAL FUNCTIONS:
MODE: The MODE button allows you to toggle through and select the speaker functions of your choice:
Bluetooth, USB, SD Card, AUX, FM Radio.
: Press the Loop button to loop the current .mp3 track, play list, or shuffle.
TWS: Press to play or pause the selected .mp3 track. Press and hold down the button for TWS Sync
(See TWS Connection instructions).
: Press to select the previous .mp3 track. In FM Mode, use this button to select the previous FM radio
station.
: Press to select the next .mp3 track. In FM Mode, use this button to select the next FM radio station
SBX-412401BTS DISPLAY SYSTEM SETTINGS
1. Mode: The LED display screen will display mode information: USB/SD/BLUE/LINE/FM RADIO.
When a USB flash drive/SD Card is inserted into the USB/SD input, the unit will automatically switch to
USB/SD mode and begin playing .mp3 audio files.
2. Track Number: The current track playing.
3. FM Mode: All FM channels display here. Press "Play/Pause/TWS" button to auto scan all FM Radio
channels.
TWS CONNECTION
1. TWS connection: TWS Connection is only for two speakers of the same make and model.
2. Enable Bluetooth: Turn on both speakers and set them to BLUETOOTH mode.
3. TWS Sync: On one unit press and hold the Play/Pause (TWS) button for 3 seconds.
The two speakers should connect together.
4. Mobile Device: Open the Bluetooth settings on your mobile device and search for QFX SBX-412401BTS.
Select the option to pair both devices.
5. Music Playback: Select music from the phone and enjoy True Wireless Stereo.
6. Exit TWS: Press and hold the Play/Pause/(TWS) button for 3 seconds to exit the TWS function.
MIC.PRIORTY:
Press the MIC.PRIORTY button to prioritize the microphone over the music.

MIC 1 MIC 3 GTR 1
MIC 4MIC 2
MIC.VOL
BASS
EQ
MID
EQ
TREBLE
EQ
MIC.VOL
BASS
EQ
MID EQ
TREBLE
EQ
GTR 2
GTR.
VOL
BASS
EQ
TREBLE
EQ
KAREOKE SPEAKER SYSTEM
GTR 3
GTR
VOL
MASTER
VOL
BASS
EQ
TREBLE
EQ
MIC.PRIORTY
ON
OFF
USB
RCA
AUX
SENSITIVITY
INPUT
AUX INPUT
RCA INPUT
LIGHT
POWER
ON
OFF
POWER MIXER / 5-WAY PROFESSIONAL SPEAKER
MODE
SD/MMC CARD
TWS /CH- /CH+
USB
REC.PLAY
ECHO
• Mic Input 1
• Mic Input 2
• Mic Volume
• Bass EQ
• MID EQ
• Treble EQ
• Echo
Mic Input: Insert a 6.35mm (TS) Mic cable.
Mic Volume: Increase and decrease Mic volume gain.
Guitar Input: Insert a 6.35mm (TS) instrument cable.
Guitar Volume: Increase and decrease Gtr volume gain.
Bass EQ: Boost or cut 15dB.
•Microphone •Guitar •Master
Mid EQ: Boost or cut 15dB.
•Microphone
Treble EQ: Boost or cut 15dB.
•Microphone •Guitar •Master
5 Band Graphic EQ: Boost or Cut 10dB @
100hz, 300Hz, 1kHz, 3kHz, 10kHz
Echo: Add Echo to the Microphone
RCA Inputs: Stereo RCA Input. Left and Right
Auxilary Input: 3.5mm input
Lighting Sensitivity: Dim or Brighten the lights
ECHO
• Mic Input 3
• Mic Input 4
• Mic Volume
• Bass EQ
• MID EQ
• Treble EQ
• Echo
• Gtr Input 1
• Gtr Input 2
• Gtr Volume
• Bass EQ
• Treble EQ
• Gtr Input 3
• Gtr Vol
• Master Vol
• Bass EQ
• Treble EQ
• RCA Input L
• RCA Input R
• Aux Input
• Light Sens
• POWER
Power: ON/OFF switch
Display Screen: Displays current mode informationUSB
Port: Insert a USB device
SD Card Port: Insert an SD Card
Global Controls:
•Mode: Toggle through USB/SD/BLUE/LINE/FM RADIO.
•Loop: Loop one track, all tracks, or Shuffle
•Play/Pause/TWS: Play or Pause Track. TWS Sync
•Rewind: Previous Track or FM Station
•Forward: Next Track or FM Station
•Rec.Play: Record to a USB or SD Card
Mic.Priority: Enable Microphone Priority
Input: Enable USB or RCA/Aux Input
L-Channel: Left Channel volume control
R-Channel: Right Channel volume control
Master Volume: Master volume control
• Display
• USB Port
• SD Port
• Functions
• MIC.PRIOR
• Input Select
• L Channel
• R Channel
• MID EQ
• Trebble EQ
• Echo
• 100 Hz
• 300 Hz
• 1 kHz
• 3 kHz
• 10 kHz

SBX-412401BTS BACK PANEL
RCA Input: Stereo input
RCA Output: Stereo output
Ball Light: ON/OFF
AC Power: 120V, 60Hz
LED Power: ON/OFF
Antenna: Telescoping Antenna
SBX-412401BTS REMOTE CONTROL
1. Mute: Mute the audio
2. STANDBY: Enable standby mode.
3. Scan: Scan folder or FM Station
4. Number Keys: 0-9
5. Mode: Toggle between USB, SD, FM, LINE, BT
6. REP: Repeat the playing track
7. USB: Press to select USB or SD Card.
8. AUX: Select AUX mode (back panel only)
9. FM: Press to select FM mode
10. Rewind: Select previous track or FM channel
11. Forward: Select next track or FM channel
12. PLAY/PAUSE: Play or Pause current track
13. EQ: Enable
14. VOL+: Increase the master volume
15. VOL-: Decrease the master volume
WHERE THE PARTY STARTS
1-2
6-9
10-15
USB
R
 Loading...