

Page 1
MAINTENANCE INSTRUCTION
The fan requires little maintenance. Do not try to fix it by yourself. Refer it to
qualified service personnel if service is needed.
1. Before cleaning and assembling, do not plug the pins into the socket.
2. To ensure adequate air circulation to the motor. Keep vents at the rear of the
motor housing from dust, fluff and etc. A vacuum cleaner can not be used to
clean these vents before unplug. Do not disassemble the fan remove fluff.
3. Please wipe the exterior parts with a soft cloth soaking a mild detergent.
4. Do not use any abrasive detergent or solvents to avoid scratching the sufrace.
Do not use of the following as a cleaner: gasoline, thinner, bending.
5. Do not allow water or any other liquid into the motor housing or interior parts.
CLEANING
1. Be sure to unplug from the electrical supply source before cleaning.
2. Plastic parts should be cleaned with a soft cloth moisten with mild soap.
Thoroughly remove soap film with dry cloth.
DISPOSAL:Do not dispose of electrical appliances as unsorted
municipal waste, use separate collection facilities. Contact your
local government for information regarding the collection systems
available. If electrical appliances are disposed of in landfills or
dumps, hazardous substances can leak into the groundwater and get into the food
chain, damaging your health and well-being.
OPERATING INSTRUCTIONS
Model: KF00407
3 Speed
3
CAUTION
Read Rules for Safe Operation and Instructions Carefully.
WARNING
1. Do not leave the fan running unattended.
2. Keep electrical appliances out of reach from Children or infirm persons. Do not
let them use the appliances without supervision.
3. Ensure that the fan is switched off from the supply mains before removing the
guard.
4. If the supply cord is damaged, it must be replaced by manufacturer or its service
agent or a similarly qualified person in order to avoid a hazard.
5. This appliance is not intended for use by persons (including children) with
reduced physical, sensory or mental capabilities, or lack of experience and
knowledge, unless they have been given supervision or instruction concerning
use of the appliance by a person responsible for their safety.
6. Children should be supervised to ensure that they do not play with the appliance.
WARNING INSTRUCTIONS
PLUG REPLACEMENT
This appliance is supplied with a BS1363 3 pin plug fitted with a 3 Amp fuse. Should
the fuse require replacement, it must be replaced with a fuse rated at 3 Amp and
approved to BS1362.
In the event the mains plug has to be removed/
replaced for any reason, please note:
IMORTANT: The wires in the mains lead are
coloured in accordance with the following code:
Blue – Neutral
Brown – Live
As the colours of the wires in the mains lead of this appliance may not correspond
with the coloured markings identifying the terminals in your plug, proceed as follows.
The blue wire must be connected to the terminal marked with an N or coloured black.
The brown wire must be connected to the terminal marked with an L or coloured red.
WARNING: Never connect live or neutral wires to the earth terminal of the plug.
NOTE: If a moulded plug is fitted and has to be removed take great care in disposing
of the plug and severed cable, it must be destroyed to prevent engaging into a socket.
Oscillating
Tower Fan
FITTED WITH
BS1363
BSI APPROVED PLUG
Read these instructions and keep for future reference
RULES FOR SAFE OPERATION
1. Never insert fingers, pencils, or any other object through the grille when fan is
running.
2. Disconnect fan when moving from one location to another.
3. Disconnect fan when removing grilles for cleaning.
4. Be sure fan is on a stable surface when operating to avoid overturning.
5. DO NOT use fan in window, rain may create electrical hazard.
6. Indoor use only.
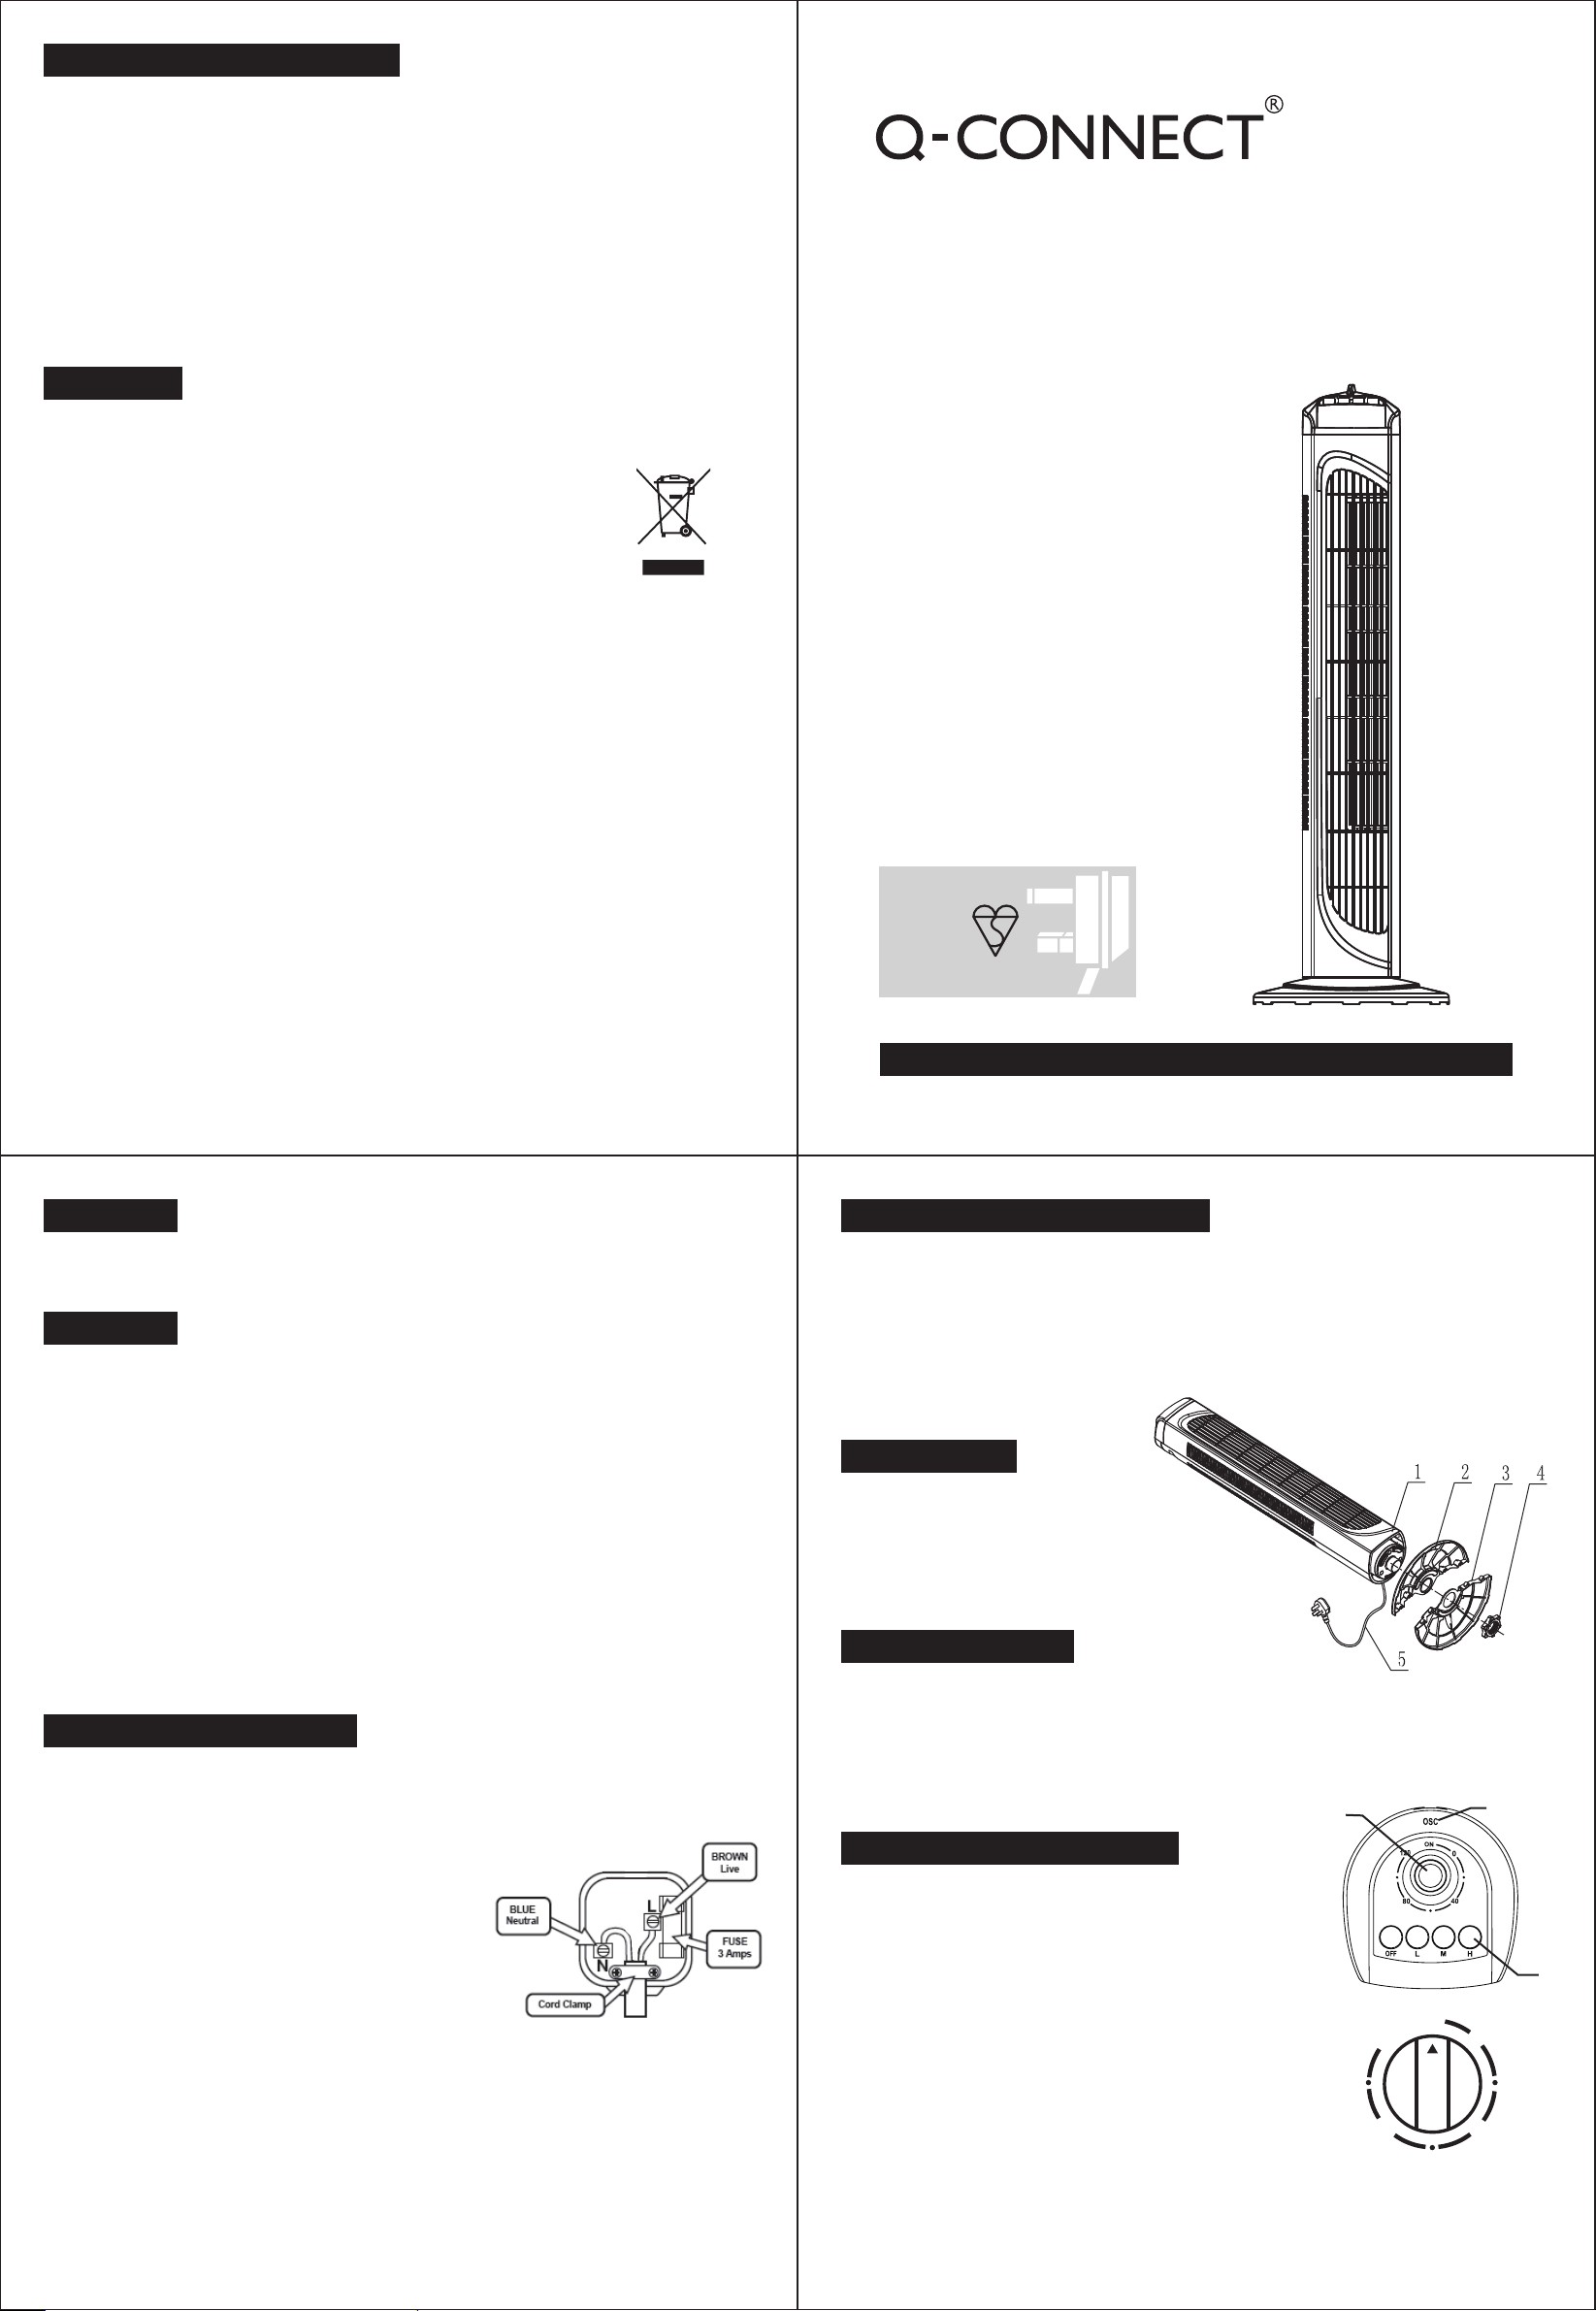
PART FIGURE
1. Body
2. Front base
3. Rear base
4. Base clip
5. Power cord
PARTS ASSEMBLY
1. Pull power cord (5) out slightly.
2. Put the rear base (2) on the body (1) by inserting the cylinders under the body to
blind holes on rear base as shown on diagram.
3. Put front base on rear base (3) and fix the body, the rear base and front base by
base clip (4) as shown.
1
OPERATING INSTRUCTIONS
a. Control parts description:
1. Timer 2. Body oscillating switch 3. Speed switch
b. Instructions:
1. Plug the power cord into a wall outlet.
2. The air flow can be set to oscillate to left or right by
pushing the button of body oscillating switch (2). If
you want to stop oscillation, push it again.
3. Automatic 120-minute timer. Turn the knob of the
timer (1) to the desired time you want, the fan will
stop when the time is over. The longest time set is
120 minutes. If the timer is not required and constant
fan operation is required, then set Timer to “ON” position.
4. Speed is controlled by selecting the speed switch (3) on the top of the body.
There are 4 positions: OFF ; L--Low ; M--Medium ; H--High
120
2
3
ON
0
4080
1
2
 Loading...