

Page 1
EURO mini - Quick Reference User Guide
Page 1
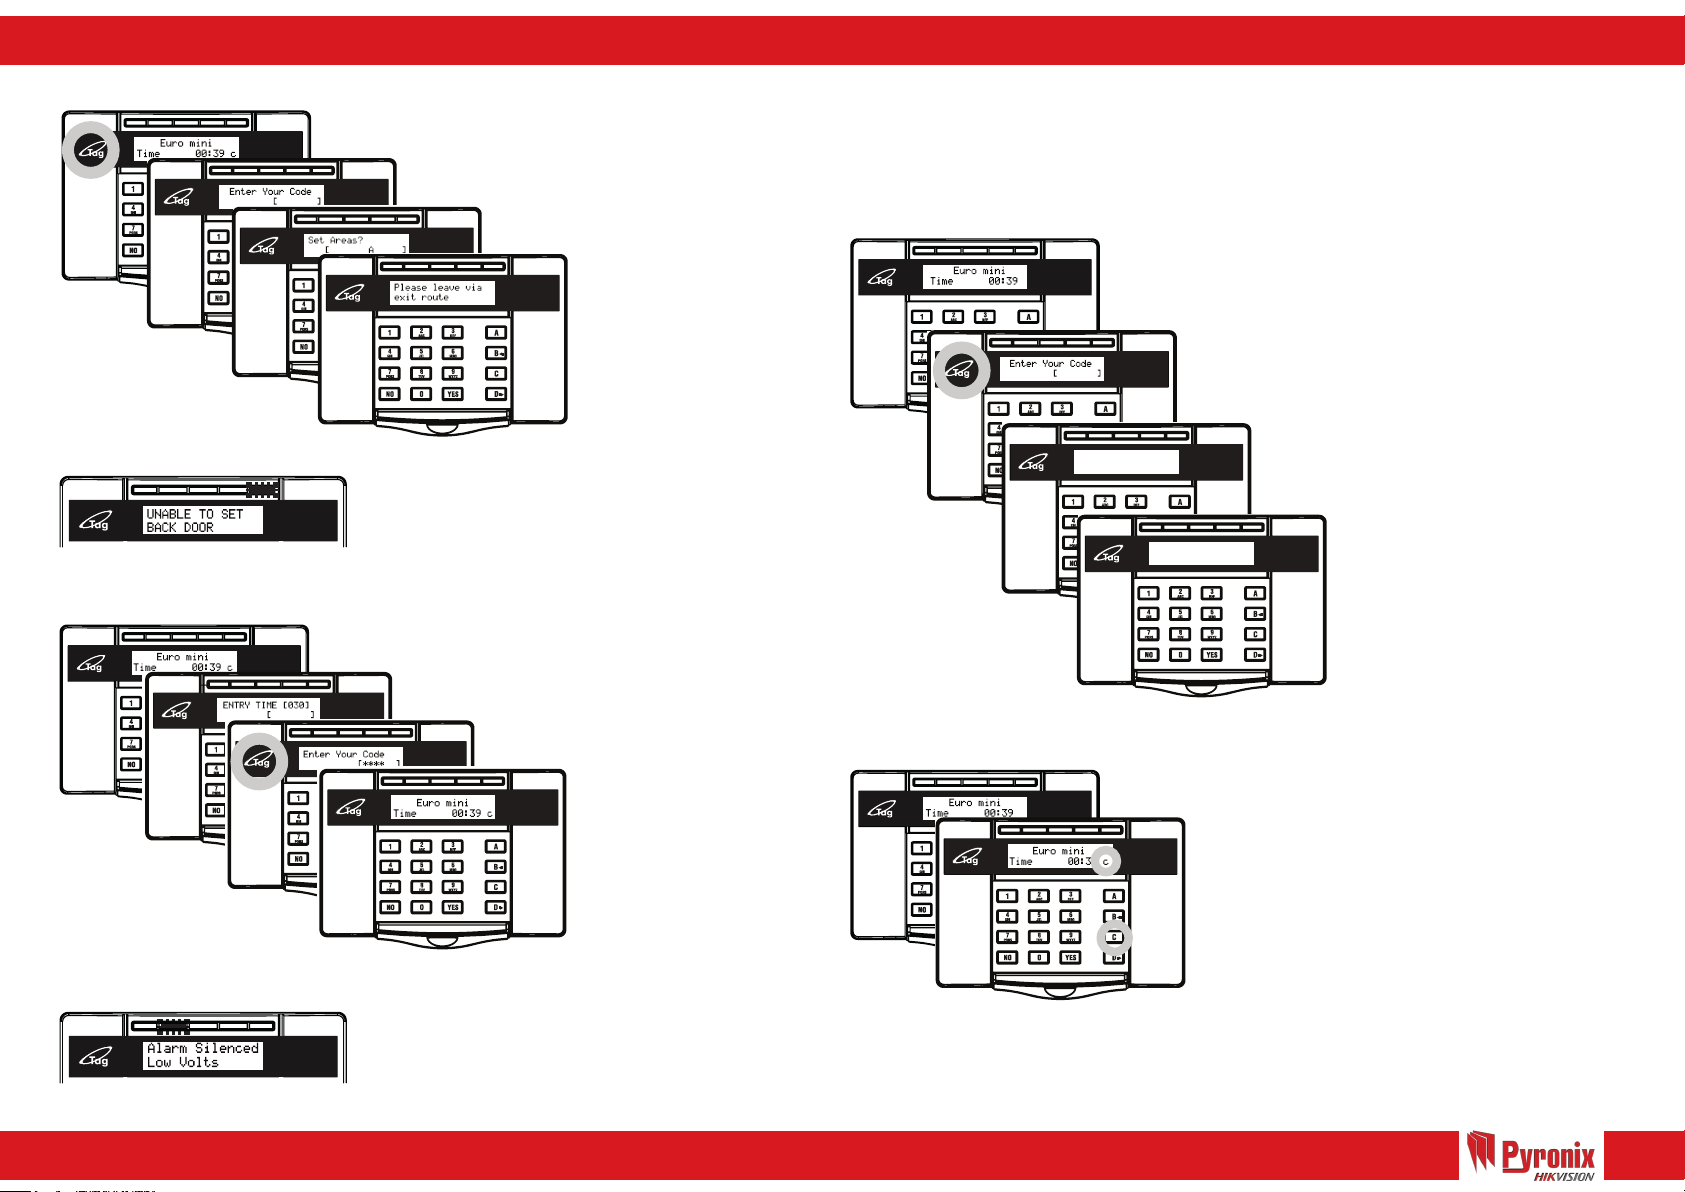
Set the EURO mini
1
2
3
4
Unable to Set
Unset the EURO mini
1 - Whilst in unset/day mode.
2 - Enter your code/present a valid tag.
3 - Select the Area (A, B, C or D) to set.
4 - Exit the building.
If a warning appears on the display:
- Press the ‘NO’ key.
- Resolve the issue.
- Set the EURO mini again.
1 - Whilst the EURO mini is set.
2 - Walk into the premises.
3 - Enter your code/present a valid tag.
4 - The EURO mini will be unset.
Omitting An Input
1
OMIT INPUT?
2
3
4
1 - Whilst in unset/day mode.
2 - Enter your code/present a valid tag and
select the Area (A, B, C or D) to set.
3 - Press ‘YES’. ‘OMIT INPUT’ will be
displayed.
4 - Select the input(s) to be
omitted/bypassed. Press ‘YES’ after
selecting the input. After 10 seconds the
EURO mini will set.
NOTE: These inputs will be
omitted for this one set period
only.
Omit Input [01]
1
2
3
4
Unsetting After An Alarm
The Chime Feature
1
2
- Enter your code/present a valid tag.
- The Alarm will stop sounding.
- The display will indicate the problem.
- Press the ‘YES’ Key.
Enter your PIN or present your Tag to view any
further information if required.
1 - Whilst in unset/day mode.
2 - Press the ‘C’ Key.
If the door opens you will be alerted by the
‘chime’ tone.
To cancel the ‘Chime’ function, press ‘C’ again.
Page 2
EURO mini - Quick Reference User Guide
Page 2
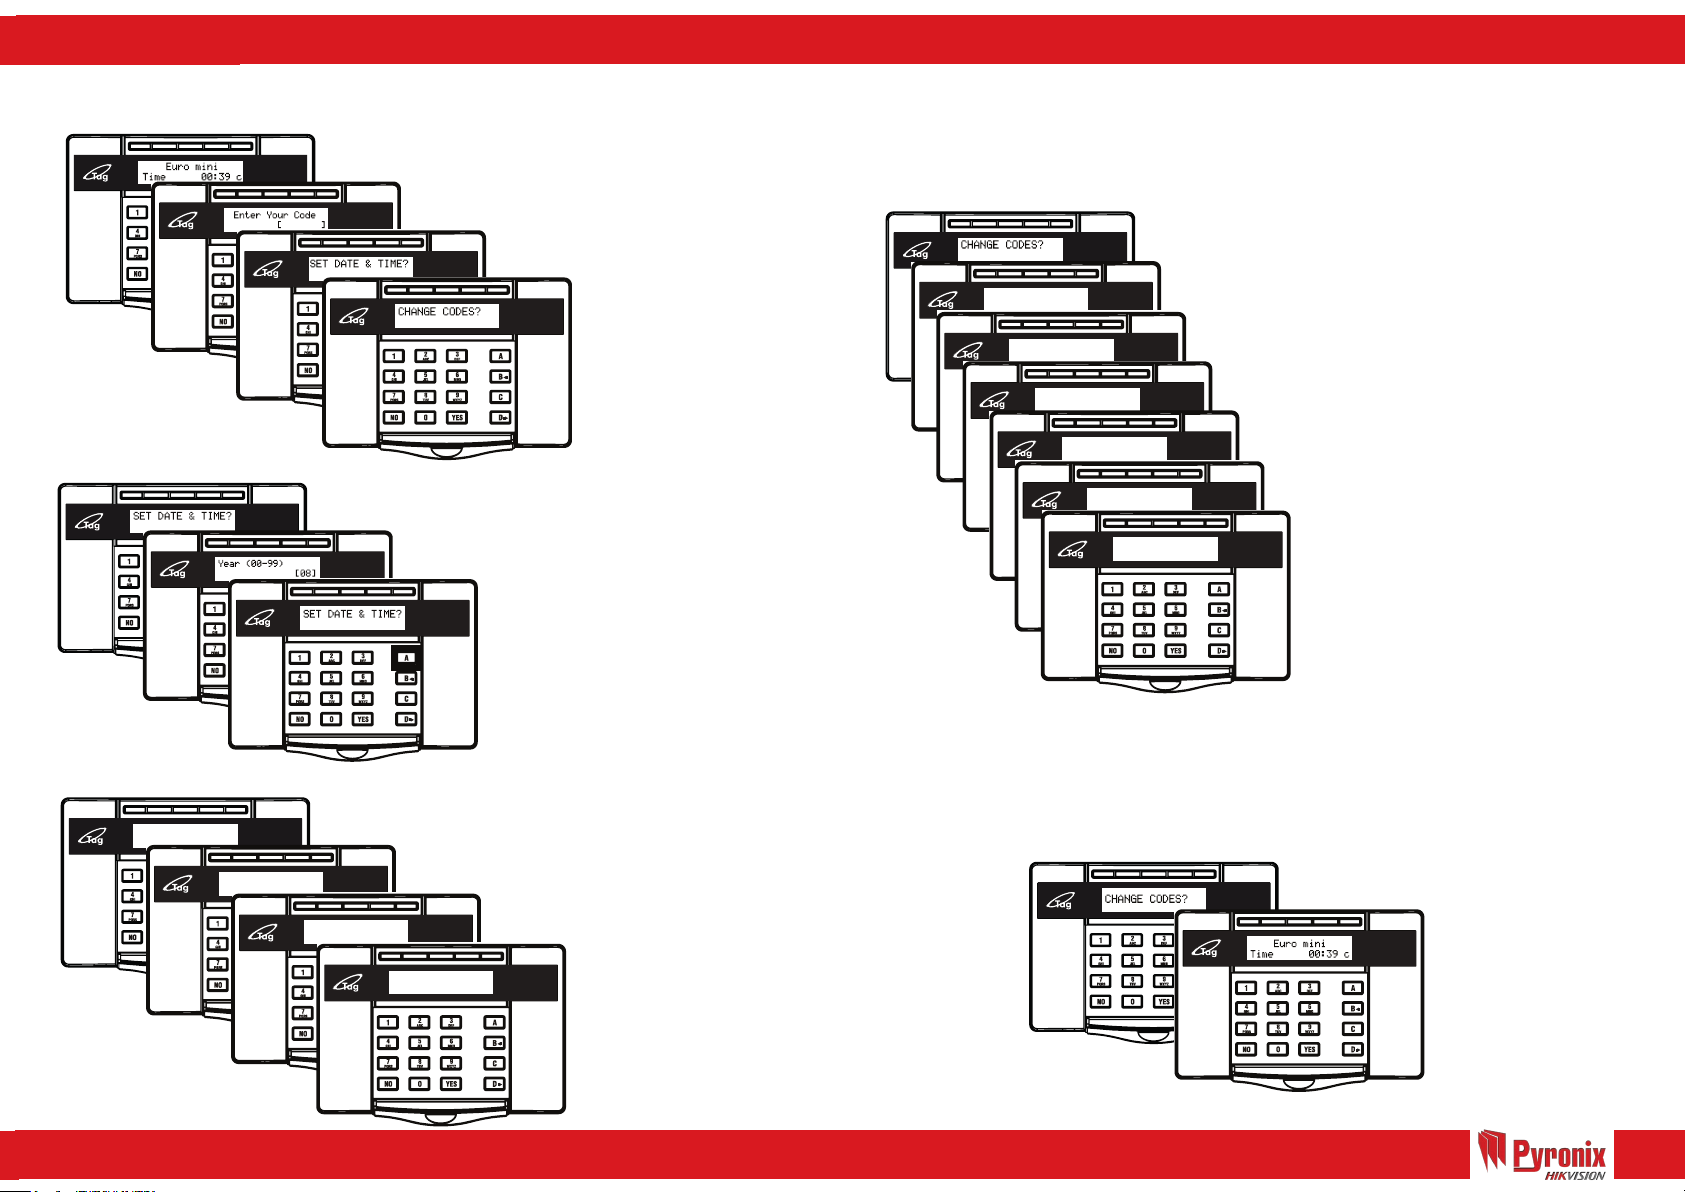
Entering The Master
Manager Menu
1
2
3
4
Set Date & Time
1
2
1 - Whilst in unset/day mode.
2 - Press the ‘D’ key and enter the
Master Manager code/present the tag.
3 - ‘SET DATE & TIME’ will be displayed.
4 - Use the ‘B’ and ‘D’ keys to scroll
through the menu’s.
1 - Enter the Master Manager Menu and
press ‘YES’ until ‘SET DATE & TIME’.
2 - Enter the Year, Month, Day, Hours
and Minutes, while pressing YES to
confirm each change.
3 - Press the ‘A’ key to exit the menu.
Change Codes
User Number [02]
Enter User Code
1
User Type
2
User Areas
3
4
5
6
7
Flexi Set
1 - Enter the Master Manager Menu and
press ‘YES’ to ‘CHANGE CODES’.
2 - Select the user code using the arrow
keys.
3 - Enter a new code, present a new tag or
to delete a code, press the ‘C’ key.
4 - Select the user type (Manager or User)
using the arrow keys.
5 - Select the user areas (A, B, C or D),
press YES and select the user set options
using the arrow keys.
6 - Enable/Disable Flexi Set using the arrow
keys.
7 - Enter the user name.
User Name
3
Walk Test
WALK TEST?
Walk Test Area?
[ABCD]
Walk Test Inps?
1
Front Door
2
3
4
Walk Test
Completed!
1 - Enter the Master Manager Menu and
press ‘YES’ until ‘WALK TEST?’.
2 - Enter the Areas and Press ‘YES’ .
3 - Alternatively, Press ‘NO’ and walk test
selected individual inputs.
4 - Once all inputs have been walk tested
successfully, ‘Walk Test Completed’ will
be displayed.
Exiting The Master
Manager Menu
1
2
1 - Whilst in the master manager menu,
Press the ‘A’ Key.
2 - Day mode/Unset mode .
 Loading...