

Pyle view PLVWR910 Instruction Manual
H T T P : / / W W W . P Y L E A U D I O . C O M
Instruction Manual
One instruction manualOne remote
1. Never connect the car adaptor to cigarette lighters for such as trucks or
buses which use 12V DC power.
2. Do not expose the monitor to high humidity, dust, steam, oily smoke, direct
sunlight etc.
3. For your safety, turn power OFF when not in use and unplug the adaptor.
4. Never attempt your own maintenance. Consult your TV dealer or the
company.
5. Avoid dropping and strong impact.
6. For your safety, the driver should not watch the monitor or operate the
controls while driving.
Attentions:
Accessories
POWER MENU
9" High Resolution Widescreen TFT-LCD Flip-Down
Roof Mount Monitor w/IR Transmitter
PLVWR910
Four screwsOne fix board
Warning: Do not watch TV while vehicle is in motion it can be hazardous.
POWER MENU
Thank you for purchasing the TFT LCD color monitor. To enjoy the features
of this device and to ensure years of trouble-free operation, please read
this manual carefully and follow the instructions.
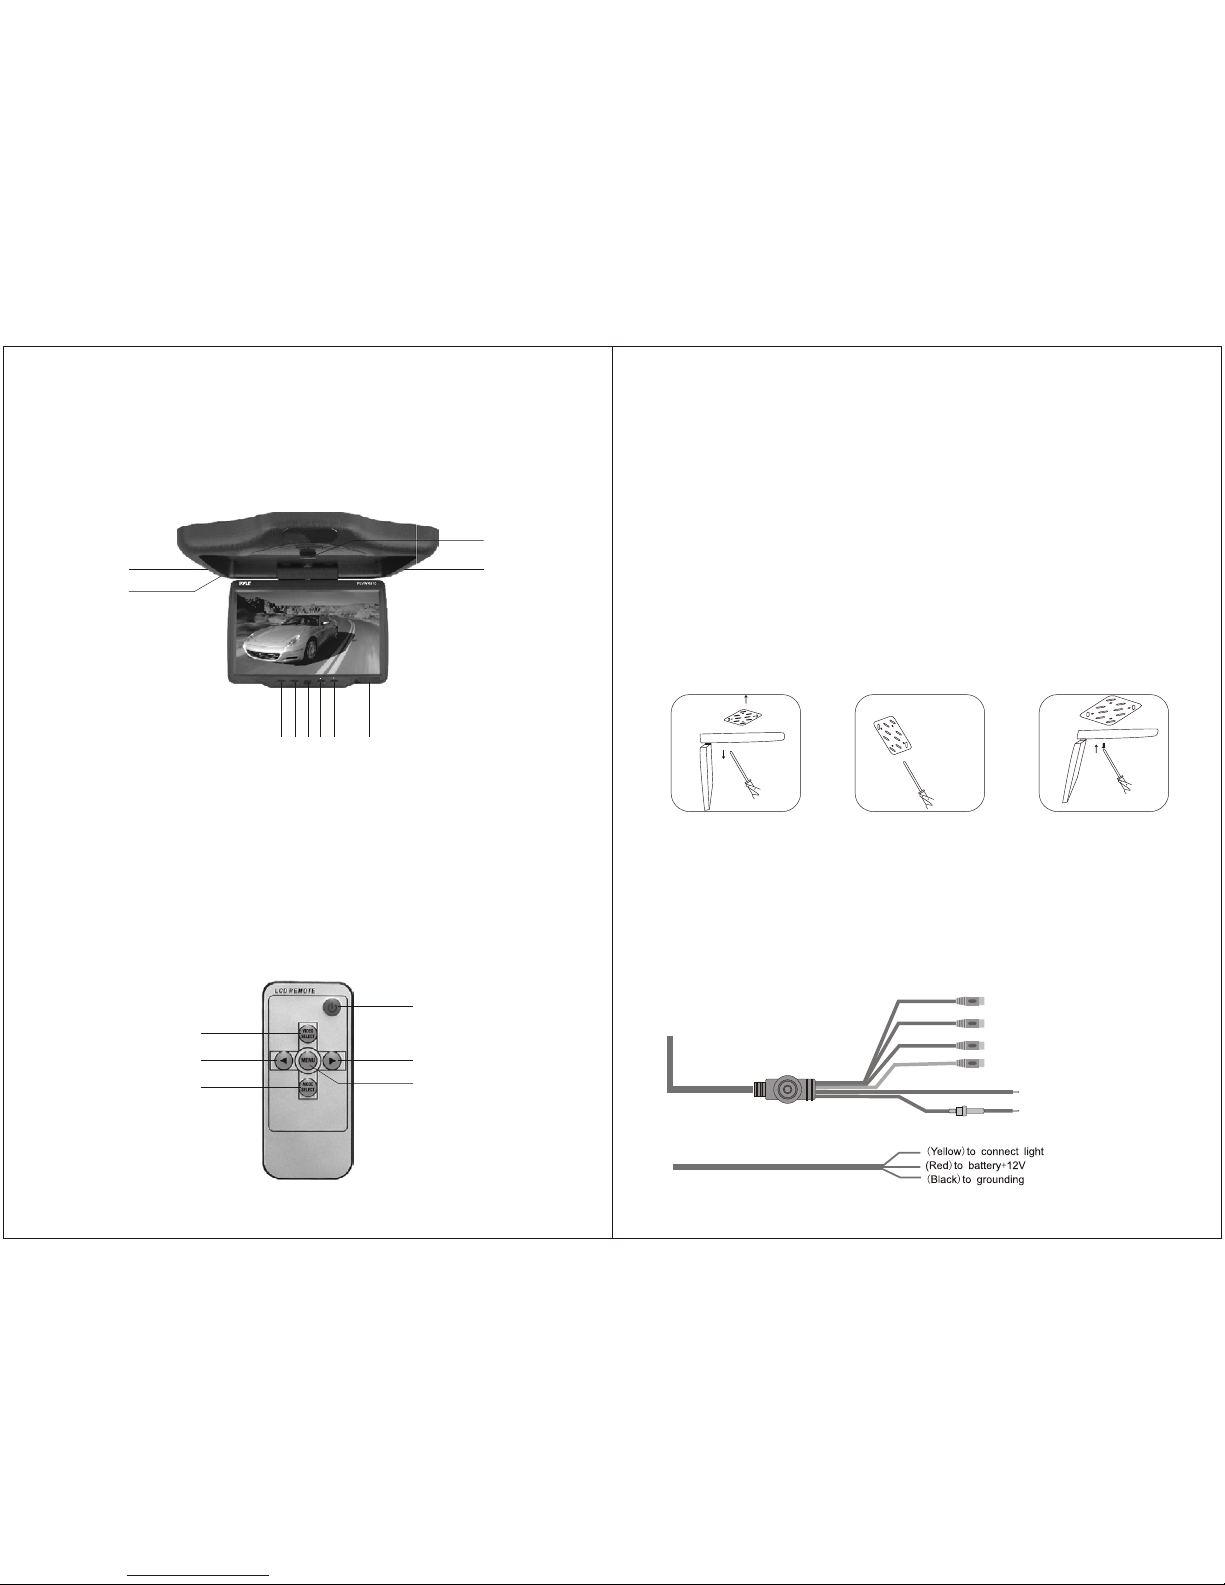
Front Panel
1. Power
2. Activation of menu indicator
3. Remote sensor
4. Negative adjustment
5. Positive adjustment
Remote control
1 2 3 4 5 6
7
8
9
Power ON/OFF
Analog variable increase
Menu button
V1/V2 conversion
Analog variable decrease
Switch for mode
Specification
Screen type: 9 inch TFT LCD
Display format: 16:9
System: NTSC/PAL
Power source: DC 12V ±10%
Power consumption: <=12W
Video Input: 2 input Composition video signal
Operating Temperature: 0°C ~ 60°C
Storage Temperature: -20°C ~ 80°C
Built-in IR transmitter
Built-in dome lights
Installation Diagram
(Yel low) Vi deo 1 inp ut
(Red) Au di o right i nput
(Whit e) Au dio lef t input
(Blac k) G round ing
(Red) B at tery +1 2V
(Yel low) Vi deo 2 inp ut
8
6. IR wireless transmitter
7. Light switch
8. Dome lights
9. Monitor release button
Monitor installation
1. First of all, unscrew the four screws on the mounting plate connected to the unit
and take off the mounting plate.
2. Fix up mounting plate on the suitable position of the vehicle with four screws.
3. Then install the unit with four screws on the mounting plate to fix the unit.
1 2 3
 Loading...