

Page 1
Pyle Home PVC2
Wall Mount Impedance Matching
Vertical Sliding Volume Control
User Manual
www.pyleaudio.com
Thank you for purchasing the Pyle Home PVC2! The PVC2 is a great way to
control the volume of your home speaker system using an already-existing
wall-mounted junction box in your home. This manual contains installation
instructions and a wiring diagram for your convenience. Your product
includes a one year limited warranty from the time of purchase.
Caution: This volume control is limited to a maximum of 50 watts RMS /
100 watts maximum per channel.
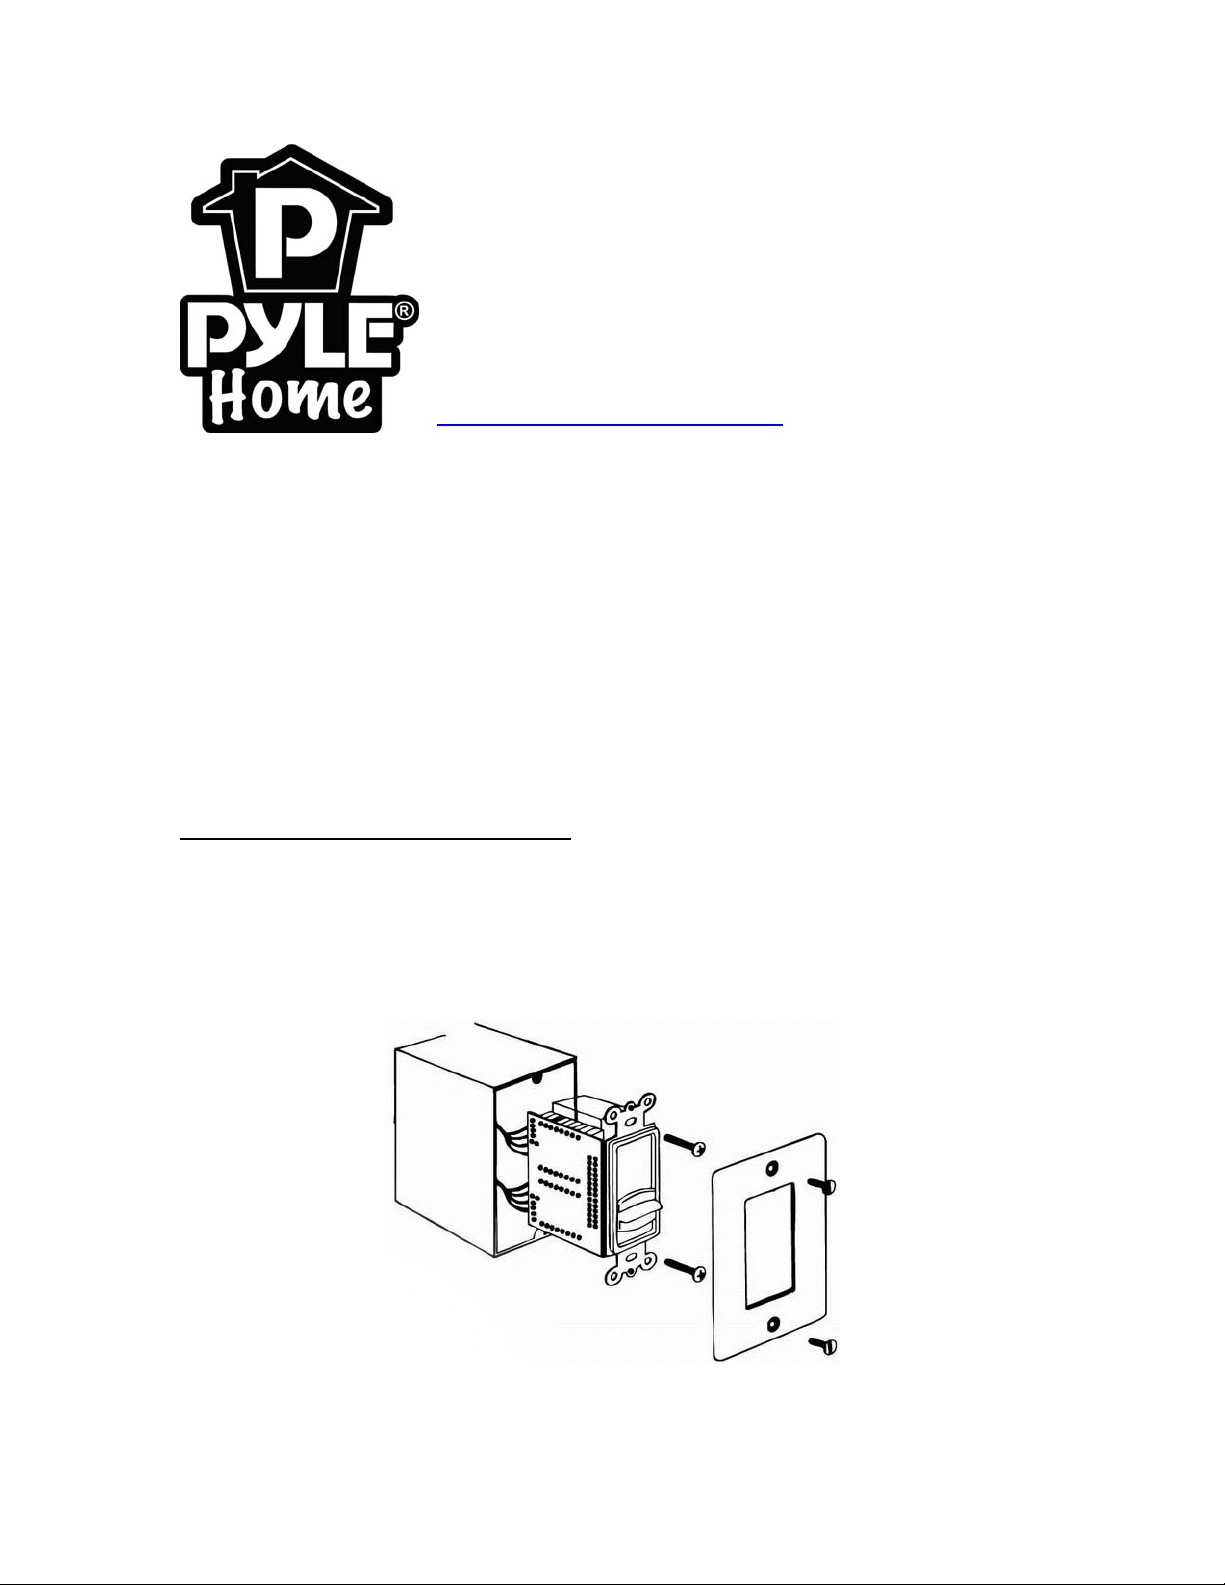
Mounting The Volume Control
The volume control is designed to be mounted in a standard electrical wall
box. Select a location that is within reach of the speaker wires and easy to
reach for using the volume control. Warning: You must mount the volume
control in a standard electrical box -- do not mount it directly on a wall.
Page 2
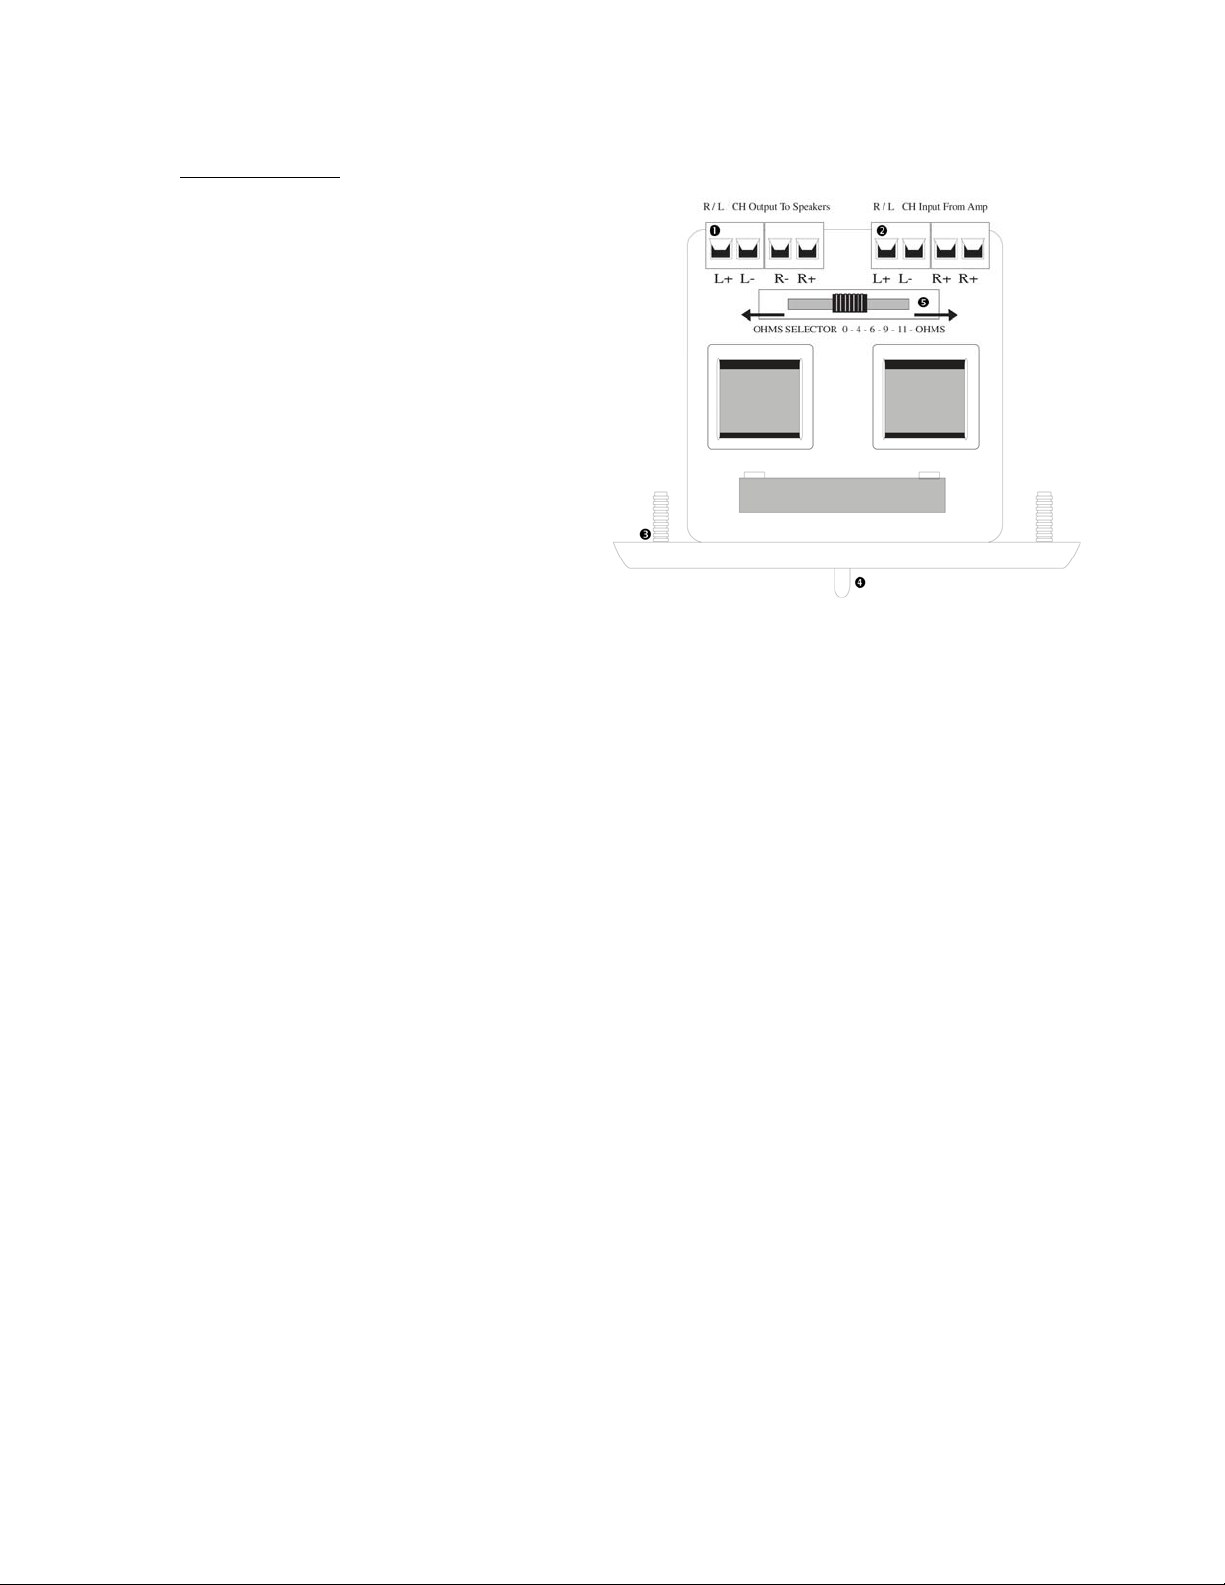
Connections
1.) Run 4-Conductor speaker cable
from the amplifier (positive and
negative for both the left and right
channel) to the volume control marked and . Similarly, run 2conductor speaker cable from each
of the first pair of speakers to the
volume control. Label the cables for
future reference.
2.) Measure the depth of the
volume control to make sure your
Volume Control will fit in the j-box.
3.) Connect the speaker cable to the volume control:
a. Strip ¼” of insulation from the end of each cable
b. Tightly twist the wires in each cable until there are no frayed ends.
c. Insert the 4-conductor speaker cable from the amplifier into the input
terminals.
d. Insert the two 2-conductor speaker cables from the first pair of
speakers into the output terminals.
4.) Connect additional speakers in parallel.
5.) Make sure that all connections between your amplifier and the volume
control, and between the volume control () and each speaker, are in
“phase”, that is (+) to (+) and (-) to (-).
6.) Adjust impedance using the Ohm Selector () (note: if you do not know
what this is, leave in the default position.)
6.) Turn the volume knob to the “off” position (all the way down.)
7.) Screw J-box into place
8.) Put on faceplate and screw in place using the screws ().
Page 3

Specifications
10 volume positions
Control volume from any room
Works with all audio & video systems
Standard & Decora wallplates included
Mounts in-wall
Frequency Response: 20 Hz-20 kHz
Power Handling: 100 Watts (RMS) / Channel
Attenuation: 100 Watts MAX / Channel
- 1st position (slider at bottom): Full off
- 2
- 4th through 9th position: attenuate 3 +/- 1 dB per step
- 10
Insulation Resistance: 100 megaohm @ 500 V D.C.
Dielectric Withstanding Voltage: 500 V AC, 1 minute
Weight: 10.3 oz.
nd
and 3rd position: attenuate 6 +/- 1 dB per step
th
position: Full on
 Loading...