

Page 1

PSCHD60
Page 2

2
Functions
Thank you for pu rchasing this camera! With high -performance chip s, this product can produce high-definition
videos with excellent continuity o f dynamic images. It su pports H.264 HD video format and can create sharp
photos for you . The uniqu e ultraportable design is adopted for thi s video ca mera and it i s applicabl e in various
fields to enable your daily life convenient, sa fe and colorful. Make sure to read this manual carefully and k eep
properly for reference in the futur e.
This u ser's manu al ha s referred t o the latest information during compiling. The screen display a nd illustra tions
are used in this user's manual for the purpose of introducing d etails of this digital camera in a more specific a nd
direct way. Difference may ar ise between these di splays and illustrations and the digital camera actually
available for you due to difference in technological development and production batch, under which case, the
actual functions of this video camera shall prevail.
Announcements
Please read the Announcements carefully before using this video cam era for proper and safe operation, so as to
bring its optimum performance i nto play and extend its service life.
Do not expose the video camera to sunshine directly, nor point its lens to sunlight. Otherwise, the image
sensor of t he video camera may be damaged.
Take good care of the video camera and prevent water or sand pa rticles from e ntering the vi deo camera
Page 3

3
when it is used on the beach or n ear water, becau se water, sand particles, dust or component containing salt
may damage the video camera.
Keep the video camera contaminated free of dust and chemica l materials. Place it in a cool, dry and well
ventilated place. D o not pl ace the vi deo camer a in a hi gh temperature, moist or dusty place to avoid failure
of the video camera.
Be sure to u se the vi deo camera regularly du ring its long time storage. Please check if the vid eo camera can
operate normally b efore use.
If dirt or stain is accumulated on the video cam era or on its lens, use soft, clean and dry rag to wipe it away
gently. If th e video camera or its lens is stained with sand particles, blo w them a way gently. Do not use
cloth to wip e arbitrarily. Otherwise, it may scratch the surface of video camera or its lens.
If it is requ ired to clean camera su rface, firstly blow away the sand dust accumulated on this surface, and
then wipe t he camera gently with rag or tissue applicable to optica l equipments. Plea se use the cleaning
agent of video cam era for wiping i f necessary. Do not use orga nic solvent t o clean the video camera.
Do not touch the lens surface with fingers.
Please back up the data if the memory card inside this digital camera is used for the first time. After that,
format the memory ca rd of this video camera at one ti me.
Page 4

4
The externa l SD memor y card i s made of pr ecision electroni c components. The following situations may
cause loss or dama ge of your da ta:
1. Improper use of th e memory ca rd
2. The memory card i s bent, dropped or collided.
3. Place it under high temp erature or moist environment or expose to sunshine directly.
4. Electrostatic or electromagnetic field exi sts around the memor y card.
5. Take out this memory card or interrupt the po wer supply when this camera or computer is connected
to the memory card (i.e. during reading, writing and formatting).
6. Touch the metal c ontact surface o f the memory card with finger s or meta l materials.
7. The service life of the memory card expires (please repla ce the me mory car d regula rly).
Product Introduction
This product is small in size and easy for installation.
With high-performance chips, this product can produce high-definition videos with excellent continuity of
dynamic images, even under low illumination co nditions, and supports H.264 HD video forma t.
The video mode supports four modes, i.e. VGA (120FPS), HD (60FPS), HD (30FPS) and FHD (1920x1080
30FPS).
The photo mode su pports four sizes, i.e. 12 M, 10M. 8M and 5M.
Page 5

5
Support high-speed USB2.0
System Requ irements
Operating System
Microsoft Windows20 00, XP, Vista, 7
performance
Internal Memory
Larger than 512 MB
Sound Card a nd
Display Card
version.
CD Driver
Speed of 4 times or faster
Hard Disk
Free space o f more than 500MB
Others
One standard USB1 .1 or USB2.0 port
It supports a Min SD card with a capacity expa nsion up to 32G.
This product supports video output a nd live playback functions. Videos can be ou tput to high-definition TVs
for playing clear and sharp pictures.
System Requirements
CPU Intel Pentium III of more t han 800MHz or other CPU with equiva lent
The sound card and video ca rd shall support DirectX8 or higher
Page 6

6
Intr oduction to A ppearanc e and Keypad
Infrared light
CCaammeerraa
lens
SSccrreeeenn--ooffff lliigghhtt
SSccrreeeenn--ooffff
t
sswwiittcchh
lliigghht
t
BBuussyy lliigghht
// cchhaarrggiinngg lliigghhtt
TFT LC D
Page 7

7
TTrriippoodd nnuut
MMiiccrrooSSDD sslloott
Reset key
t
MMiiccrroopphhoonnee
PPoowweerr kkeeyy
SShhuutttteer
HHDDMMII iinntteerrffaaccee
USB interface
r Key
Page 8

8
e __
UUSSBB CCaabblle
e
UUssaagge
1. Charge the built-in lithium battery
_____
To charge the camera , connect it to the computer. Then, the cha rge indicator light (red) will be on. After the
camera is fully charged, the charge indicator light will be o ff. In general, it can be fully charged after 2 -4 hours.
Page 9

9
2. Use of Memory Card
1. Push the Micro SD card into the card slot according to th e concave letter ing beside the slot of memory
card till it is completely inserted.
2. To take out the Micro SD card, gently press the end o f the memory card inward a nd it will pop up.
Note: No built-in memori zer is a vailable in this video camera. Make sure to insert memory card be fore using.
(Advise using Micro SD card higher speed than class 4)
Page 10
10
3. Startup/Shutdown
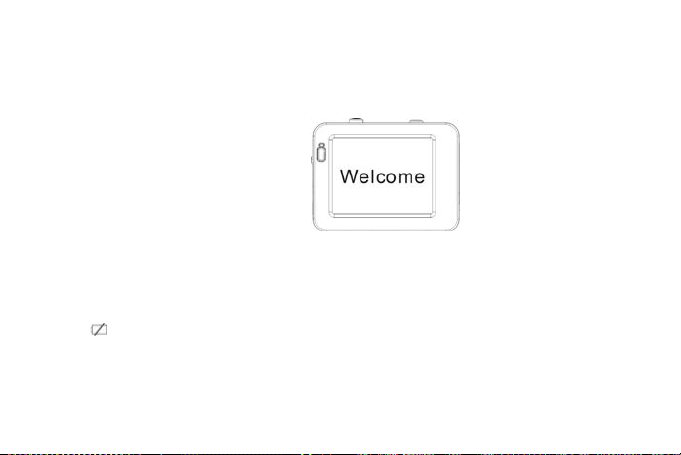
3.1 Startup: Press and h old the POWER button for 2 seconds. The screen of the di splay is
3.2 Shut down: Press the POWER Key once under idle condition, and t he camera will be shut down. .
3.3 Auto Screen-off: When t he idle time of the camer a reache s the au tomatic s creen-off time, it will
activated and the camera is turned o n.
automatically turn off the screen to save pow er. After turning o ff the screen, the screen-off light will
beon.3.4. Shutdown at low battery level: When the battery capacity drop s to a low level, the icon:
will appear on the LCD display. Please charge the battery timely. When the icon turns red and
flickering, the video camera will be shut down automatically.
Page 11
11
4. Conversion Between Function Modes
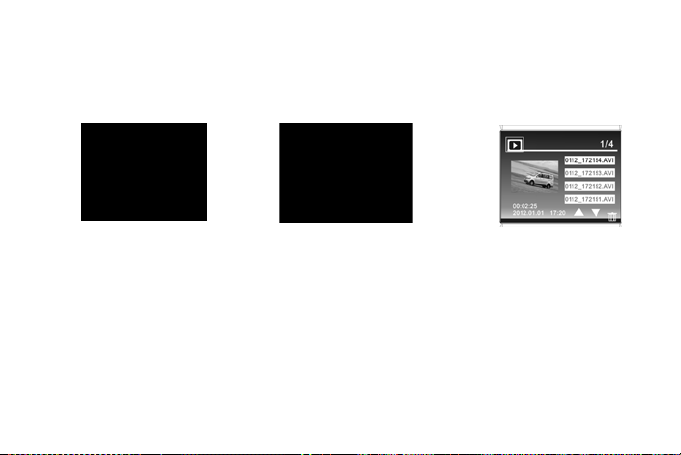
The camera has three modes: video recording mode, photo mode and playback mode. T hese modes can be
switched over by clicking the icon in the upper left corner of the LCD display after startup.
Video recording mode Photo mode Pla yback mode
Vehicle mod e
Page 12

12
5. Indicator light
Busy indicator light (blue): When the camera is working (e.g.: recording videos, shooting pictures,
automa tic screen-off, etc.), the busy indicator light will blink.
Charging indicator light (red): It indicates the camera is being cha rged when it is on permanently. After the
camera is fully charged, it will be off automatically.
Page 13
13
6. Video recording mode
1 2 3 4 5 6 7 8 9
10
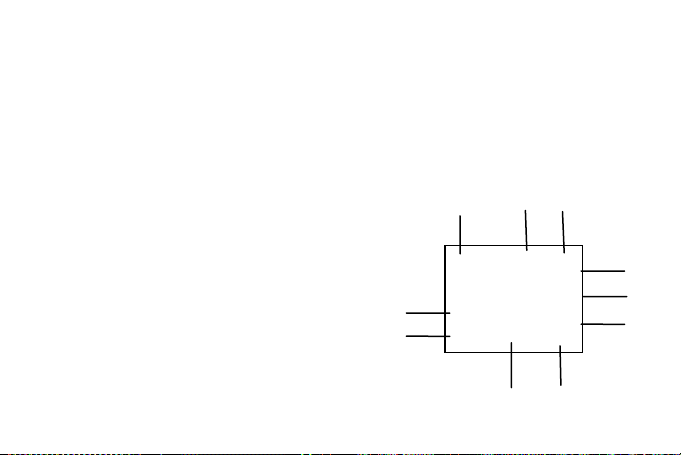
After turning on the D V camera, it will directly g et to the video recording mode. You can start recording
videos by pressin g the shutter bu tton in the pre view state. To stop video r ecording, ju st press this shutter
button again. When the memory car d is full or th e battery drops to a low lev el, the camera will also
automatically stop video recording:
1 Mode icon: indica ting currently i n the AVI mode.
2 Video size: available in FHD/HD(60FPS)/HD(30FPS) .
3 Recording time: i ndicating the l ength of remaining time
4 Icon of setting the time and da te
5 Battery icon: indicating the current capacity of the battery.
6 Digital zoom-in icon: to zoom in by clicking it.
7 Digital zoom magni fication (x).
8 Digital zoom-out icon: to r ecover by clicking it.
9 Menu icon: to be activated by clicking other icons.
10 Playback icon: to activate th e corresponding menu by click ing it.
to be recorded.
Page 14
14
7. Photo mode:
12 235 4
6 7 8
9
10
11
1
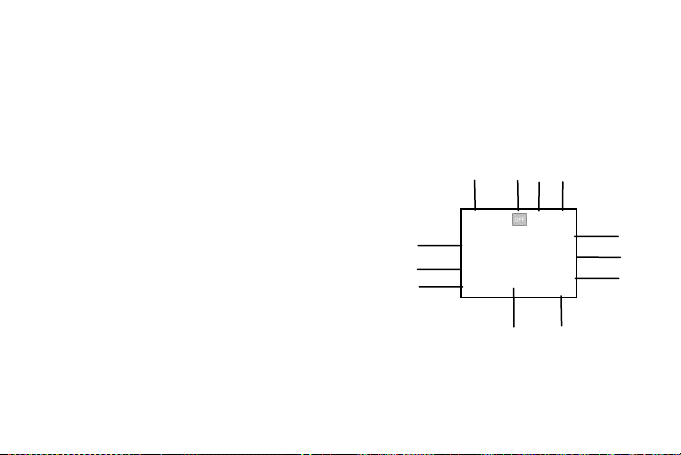
After turning on the DV camera, it will directly get to t he video recording mode. To switch to the photo
mode, click the mode icon in the upper left corner of the LCD display. You can shoot a photo by pressin g
the shutter bu tton in the preview state.
1 Mode icon: indica ting currently in the photo mode.
2 Photo size: available in 5M/8M/10M/12M.
3 Counter: Indica ting the number o f photos to be taken
4 Indicating the face detection function is activated.
5 Icon for s etting the tim e and date.
6 Battery icon: indicating the current capacity of the battery.
7 Digital zoom-in icon: to zoom in by clicking it.
8 Digital zoom magnification (x).
9 Digital zoom-out icon: to re cover by clicking it.
10 Menu icon: to b e activated by clicking other i cons.
11 Playback icon: to activate the corresponding menu by clicking it
12 Photo mode: (Normal/1 0s Self-Timer/Triple Sequence)
Page 15

15
8. Vehicle mode:
1
2
3
6 5 4
7
1 Mode icon: indica ting currently in the vehicle mode.
2 Video size: available in FHD/HD(60FPS)/HD(30FPS)
3 Recording time: indicating th e length of r emaining time to be recorded.
4 Icon of setting time and date.
5 click this icon, the camera can b e flipped 180 degrees to
take video normally.
6 Battery icon: indicating the current capacity of the battery.
7 Playback icon: to activate the corresponding menu by
clicking it.
Note: click this icon, the camera can be flipped 180 degrees to ta ke video normally, click a gain to
recover it. This featur e is available only in vehicle mode.
Page 16

16
9. Playba ck mode:
9.1 After turning on the camera and enabling the Preview state, press the Playback icon ( ) in the lower
right corner of the LCD display to activa te the menu (
file list mode. Then you can pla yback video clips by clicking a file name in the list.
). Click the / to switch to the
Indicate normal video files
Indicate vehicle video files
Indicate phot o files
Page 17

17
9.2 Playback movie clips:
In the playback mode, click it to pause. Aft er selecting th e fast pla yback function , click it
9.3 Playback photos:
After turning on th e camera and ena bling the Preview state, pres s the Playback icon (
right corner of the LCD display to activa te the menu (
playback mode. Then you can view photos by cl icking the icon "◄" or "►".
to fast rewind. Click STOP to exit the playback mode to retur n to the list m ode.
) in the lower
). Click the to switch to the photo
Page 18

18
9.4 File deletion:
After clicking the Delete Fil e icon , the scree n will appear as shown in the right figu re:
Click YES to delete the current file immediately, or click NO to cancel the deletion operation.
Page 19
19
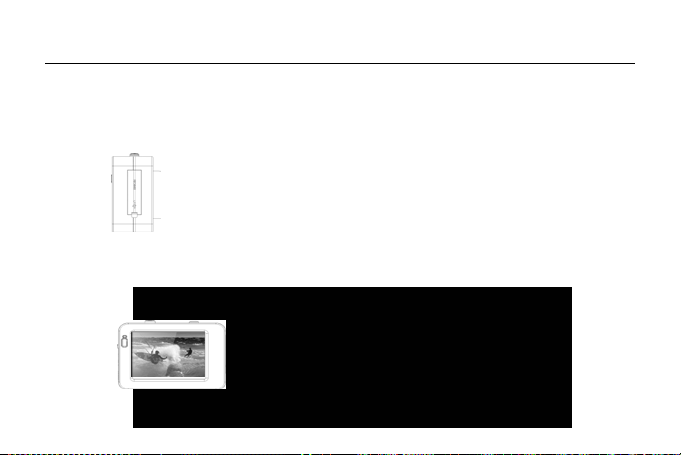
Connecting the camera to a high-definition TV:
Connect the ca mera to a high-definition TV with a HD cable (as shown below). Then video signals from
the camera will be automatically output to the high-definition TV, and you can enjoy HD videos and photos
that you have recorded on the high-definition TV.
连接图示
Page 20
20
Application on the personal computer___ ____
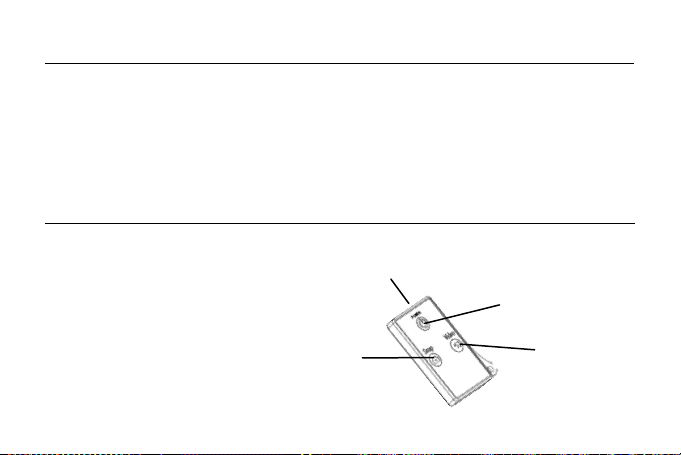
SNAP key
Connect the camera to a PC
The camera is provi ded with the plug and pla y function . Connect th e device to the computer with USB line
under turning-on state, then it will be switched into the movable hard di sk mode.
Icon of movable di sk will appear on t he window o f “my computer” . The photos you have taken can be
saved in the re movable disk under the fil e folder I: \jpg (“I” is the removable disk of the camera). Your
video files will be saved under the folder of I:\video.Note: if movable disk function i s used in windows
2000 or windows op erating system with a higher edition, it i s unnecessary to install drivers.
Application of remote control:
1 Keys of re mote contr ol
The keys on the rem ote control are shown in the right figur e
Signal transmis sion port
OFF key
REC key
Page 21
21
2 Use of rem ote control:
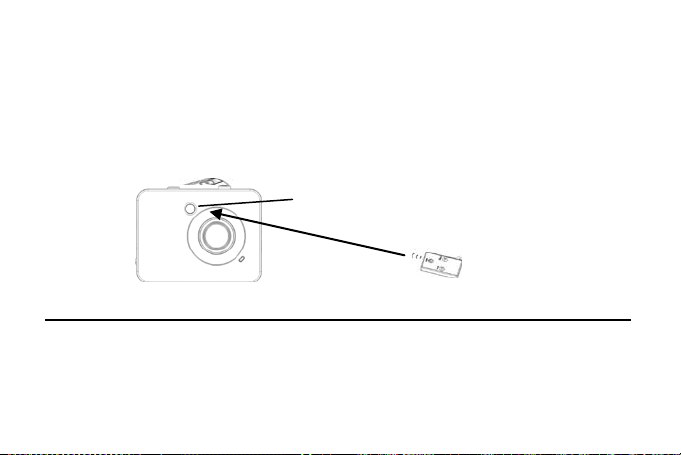
Using the remote control will h elp you rea lize video recording, photo snapping and shutting down
functions withou t operating the camera itself.While using the remote control, place its signal
transmitter port toward t he infrared signal re ceiver light of the camera. Then you can record videos,
take photos or shut down the camera by pressin g the corresponding buttons.
Infrared receiver light
Waterproof Case Using Notice
Before sealing the waterproof case, keep the ca mera housing’s rubber seal clean, a single hair or grain of
sand can cause a leak. You can test by closing the case without inserting the camera. Submerse the case
completely in water for about a minute. Remove the case from the water , dry off its exterior with a towel,
then open the case. I f the entire inter ior is dry, the ca se is safe for us e under wa ter.
Page 22

22
Remember to pu t the Mode Swit ch in your desired recording po sition before inserting the camera in the
Image sensor
5M pixels (CMOS)
Function mode
Video recording, photo, remova ble disk
Camera l ens
F3.1 f=2.9mm
Digital zooming
4X
Shutter
Electronic shutter
LCD display screen
2.4-inch touch screen
Image resolution
12M (4000 × 3000), 10M (3648x273 6), 8 M (3264 x2448), 5M (2560 ×1920)
VGA: 640x480 (120 frames / sec), HD: 1280x720 (60 frames/ sec.) FHD:
White balance
Automatic
Exposure
Automatic
waterproof case. There is no external button for the Mode S witch.
After every use in salt water you will need to rinse the outside o f the housing with no n-salt water and dry.
Not doing this ca n eventually cause corrosion of the hinge pin and salt buildup in the seal, which can ca use
failure.
To clean the seal, rinse in fresh water and shake dry (drying with a cloth may ca use lint to compromi se the
seal). Re-install the seal into the grooves in the backdoor of the housing.
Technical parameters
Video resolution
1920x1080 (30 frames/sec.)
Page 23

23
File formats
Photo
JPEG
USB interface
High-speed USB 2.0 interface
Dimension (length ×
width × height)
Storage medium MicroSD ca rd (Supporting up to 32GB),( without build-in flash memory)
Power Supply Built-in 3.7V rechargeable lithium
Weight Approx. 72g
Video AVI
74*52*33mm
Page 24

 Loading...