

Page 1

CONTENTS
We very thank for your purchase.
Please read this user,s Manual in detail and use the set properly.
Precautions 3
System features and controls 4
Installation and electrical connections 5
Remote Function 7
Selecting the input mode 7
Programming channels for TV 7
Selecting channels and adjusting the sound 8
Providing A/V audio to your car radio 8
Transmitting audio to your car radio 9
Changing the remote battery 10
Specifications 10
TV TUNER SYSTEM
R
PLTK300
OWNER,S MANUAL
2
Page 2
Selecting channels and adjusting the sound
Use the CH+ and CH- buttons for selecting channels.
Use the VOL+ and VOL- buttons to increase or decrease audio volume.
You will see a Volume Bar on screen indicating relative volume level.
Pressing the MUTE button will disable the audio output. To cancel the
muting function, press MUTE again.
Please note :VOL+, VOL- and MUTE buttons are of no effect in AV
mode.
Providing A/V audio to your car radio
This system offers you two ways of playing the A/V audio through your car radio
system. If your radio has AUX line-level inputs, you can attach the A/V audio output
connectors to these inputs with RCA-RCA interconnect cables.
MUTE
Installation and Electrical Connections
POWER
AVC
AUTO
CH+
VOL-
VOL+
MENU
CH-
TVTUNER
REMOTE
1.Find a suitable location for the tuner unit and mount it securely
in place. Be sure to place it in an area away from moisture and
dirt, and where incoming cables will not be walked on or pulled
accidentally.
2. Make all required audio, video and power connections to the
appropriate connectors on the tuner as indicated in the drawing
below to suit you system installation. Install the infrared remote
eye in a located you know will be available in line-of-sight with
the remote control use location.
If your car radio lacks these AUX line level input, your other option is to use the tuner
audio transmission ability to broadcast the audio signal within your car directly to
the radio FM modulation.
8
Changing the battery in the remote
1.The remote battery is held in a small drawer on one edge
of the remote. To open this drawer, press and hold the small
button on the edge of this drawer(as show below) and slide
the drawer out
2. Insert a new battery and push the drawer back fully into the
remote.
Specifications
Signal System
Audio/Video Inputs
Audio/Video Outputs
FM transmitter
TV Channel
Tuner Box, Overall Dimensions
Tuner Box, Weight
NTSC
Audio R/L 2, Video 2
Audio R/L 1, Video 1
4 Channel FM(87.7/87.9/88.1/88.3MHz)
Channels 2-81
L)7 (W)4.5 (H)1.1 inch
0.47Kg
Battery
Release button
Please note that the drawing below describes connections
for all system possibilities and your particular system may
vary from this.
5
Precautions
Please read this manual completely and carefully prior to attempting to install the equipment.
1.Do not operate this equipment while-safe driving should always be your highest priority.
2.Do not install these components in an area which are susceptible to rain, moisture, direct sunlight, extreme
heat or cold, excessive dust, dirt or humidity.
3.Immediately unplug the power cord and send the monitor to your local dealer or service center as soon as
+
possible:
a) If there is smoke or any peculiar odor present during use.
b) If there is damage to any of the component casings.
4.To avoid damage and risk of electronic shock, do not permit this equipment to become damp or wet from
water or drinks. If this dose occur, immediately unplug the power cord and send the unit to your local dealer
or service center as soon as possible.
5.Do not attempt to repair, open or diassemble any of the components. Dangerous high voltages are present
which may result in electric shock.
6.Use only a power source with 12 Volts DC (negative ground).
7.Do not place objects on or suspend objects from the power cord, as this may damage the cord.
8.Do not twist or place the power cord near any source of heat in the vehicle.
9.Do not attempt to repair a damaged, broken or faulty power cord. Replace it with a new one immediately.
10
3
Page 3

Connection
AUDIO
HEAD UNIT
(RADIO, CD, RECEIVER)
A/V SOURCE1
(VIDEO GAME,
VCR orDVD PLAYER)
VOL-
VOL+
MENU
AV
POWER
LCD MONITOR
VIDEO VIDEO
AUDIOL AUDIOL
AUDIOR AUDIOR
A/VINPUT 1
A/VINPUT 2
TV TUNER SYSTEM
A/VOUTPUT
VIDEO VIDEO DC12VFM ANTINPUT
AUDIOL
AUDIOR
REMOTE
POWER
ANTENNA
A/V SOURCE2
(VIDEO GAME,
VCR orDVD PLAYER)
INFRARED
REMOTE RECEIVER
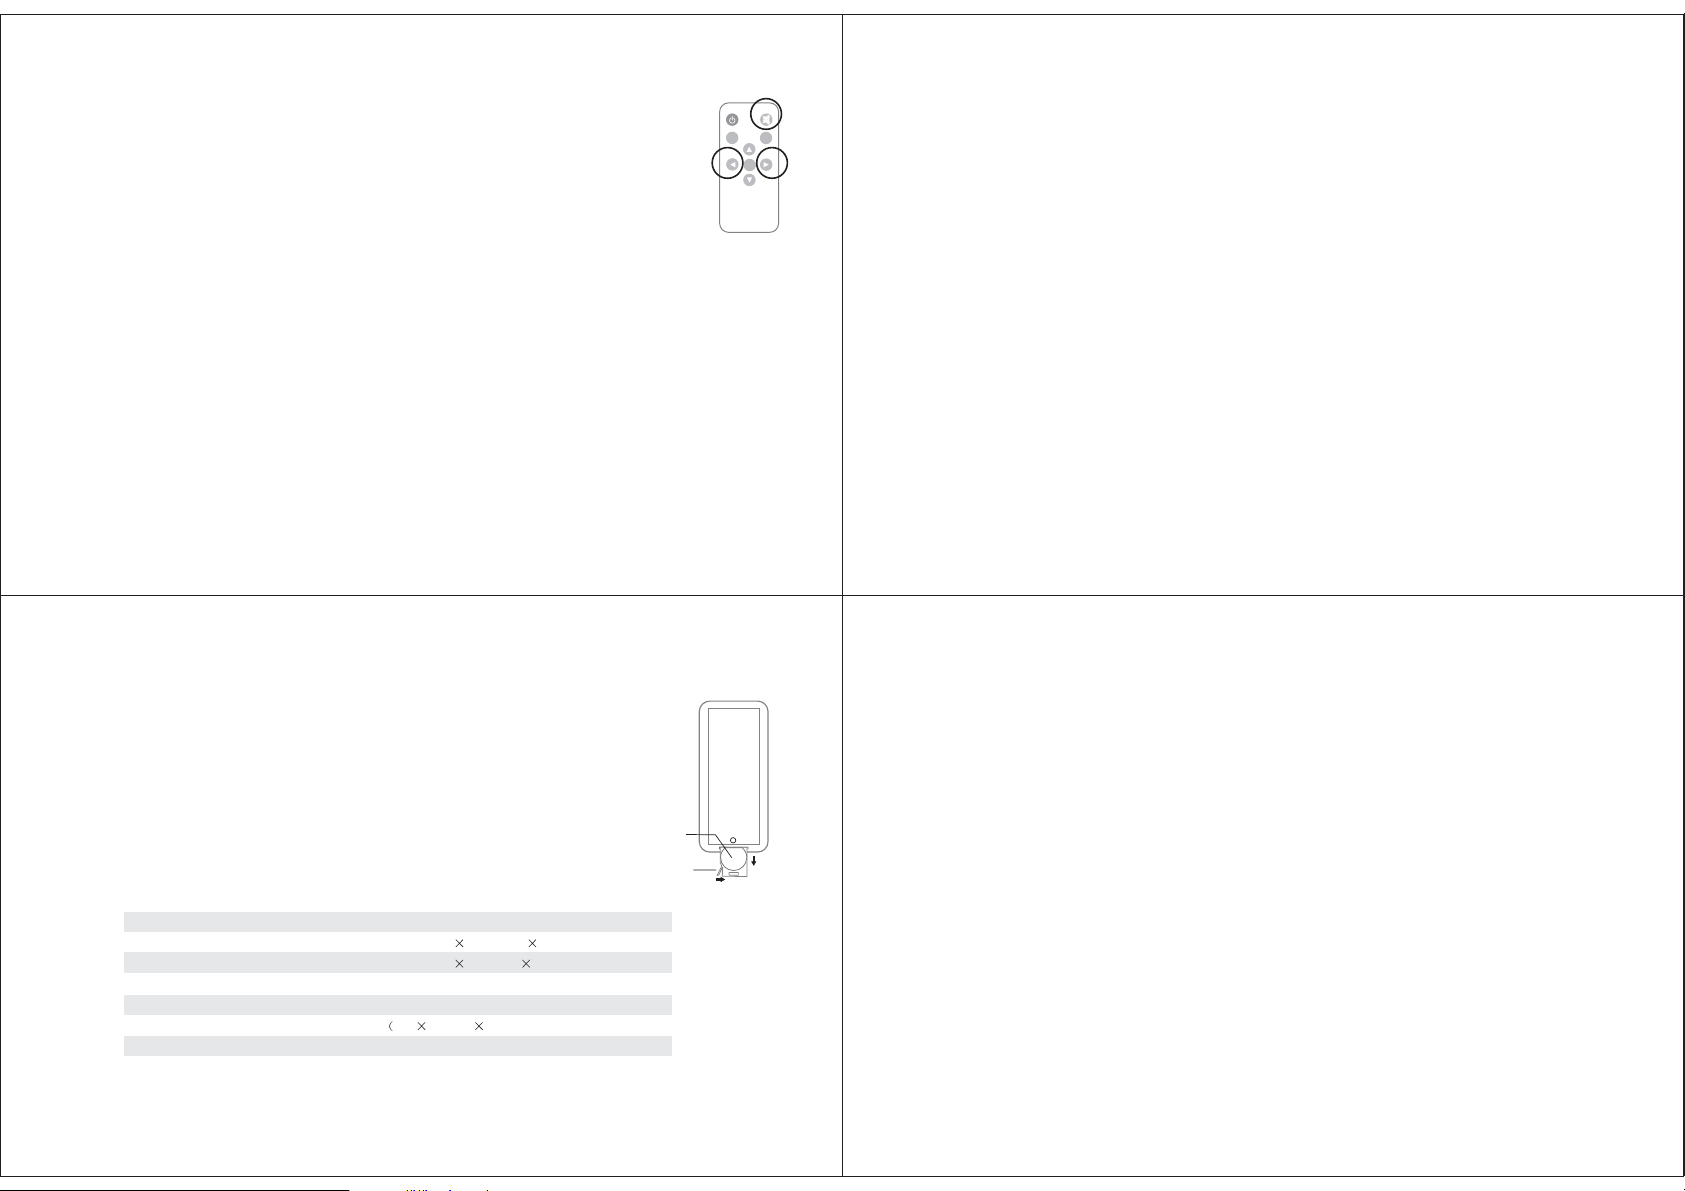
Remote function
1.POWER:Power on/off
2.MENU: In AV mode push the MENU button to access on screen menu.
There are three menus. Using CH- or CH+ button to move on screen
point to next or previous command item.And use VOL+ or Vol- button
to increase or decrease current option value. In TV mode MENU is
invalidated.
Selecting the input mode
Tuner can switch between three different video sources using the
remote control. There mode are as follows:
TV Mode: for receiving TV Channels
AV1:external audio and video inputs for DVD,VCD or video game
AV2:external audio and video inputs for DVD,VCD or video game
Programming channels for TV
The tuner system can memorize channels in both TV mode. Press the
AUTO button on the remote, the tuner will begin scanning all of the
available channels and put then into memory.
MUTE
POWER
AVC
AUTO
CH+
VOL-
VOL+
MENU
CH-
TVTUNER
REMOTE
MUTE
POWER
AVC
AUTO
CH+
VOL-
VOL+
MENU
CH-
TVTUNER
REMOTE
MUTE
POWER
AVC
AUTO
CH+
VOL-
VOL+
MENU
CH-
TVTUNER
REMOTE
6
SYSTEM FEATURES AND CONTROLS
Tuner Box REMOTE CONTROL
CH+
MENU
CH-
TV TUNER
REMOTE
MUTE
AUTO
VOL+
VIDEO VIDEO
AUDIOL AUDIO L
AUDIOR AUDIOR
A/VINPUT 1
A/VINPUT 2
TV TUNER SYSTEM
A/VOUTPUT
VIDEO VIDEO DC 12VFM ANTINPUT
AUDIOL
AUDIOR
REMOTE
POWER KEY
POWER
POWER
AVC KE Y
AVC
VOL-
VOL- KEY
CH- KEY
4
MUTE KEY
AUTO KEY
CH+ KEY
VOL+ KEY
MENU KEY
7
Transmitting audio to you car radio
This tuner system is able to transmit the audio signal car radio in the FM radio
spectrum.By tuning your radio to a corresponding channel, you can listen to the
audio from your program source. This function is particularly important when
installing in a car whose radio lacks AUX line level inputs.
Push the MENU button to access OSD . Using CH+ or CH- button, scroll to SYSTEM
and use VOL+ or VOL- button to set SYSTEM as SYS 1(FM TRANSMITTER is effect-
-ive in SYS1.) You should be able to hear your AV audio system . If you do not, go back
into the fm mode of the menu system and select FM channel to broadcast your video
sound thru your car radio. If you stop broadcasting your video sound thru your car
radio , turn the FM band to any other channel or enter the menu and select SYS2 in
the SYSTEM menu.
The FM Channel can be selected from 87.7MHz to 88.3MHz .The Frequency Selector
Slide Switch was set 87.7MHz at the factory. You can change the position of the
Frequency Select switch on the side of the tuner.
FREQUENCY SELECTOR SWITCH
12
Frequency(MHz)
Frequency(MHz)
87.7MHz
87.7MHz
87.9MHz
87.9MHz
88.1MHz
88.1MHz
88.3MHz
88.3MHz
9
 Loading...