


PRECAUTION
CAUTION
RISK OF ELECTRIC SHOCK
DO NOT OPEN
CAUTION:TO REDUCETHE RISK OF ELECTRIC SHOCK, DO NOT REMOVE
COVER (OR BACK). NO USER SERVICEABLE PARTS INSIDE. REFER
SERVICING TO QUALIFIED SERVICE PERSONNEL.
The lightening flash with arrowhead symbol, within an equilateral triangle, is
intended to alert the user to the presence of uninsulated dangerous voltage
within the products enclosure that may be of sufficient magnitude to constitute
a risk of electric shock to persons.
The exclamation point within an equilateral triangle is i ntended to alert user to
the presence of important operating and maintenance (servicing) instructions
!
in the literature accompanying the appliance.
WARNING: TO REDUCE THE
RISK OF FIRE OR ELECTRIC
SHOCK, DO NOT EXPOSE
!
THIS APPLIANCE TO RAIN OR
MOISTURE.
CLASS 1 LASER PRODUCT
Laser product symbol:located on the rear panel of the unit, indicate this player is a class
laser product, only use weak l aser and no hazardous radiation outside of the unit.
1.Read through this instruction manual before installation and use.
2.Do not touch the power plug with wet hand.
3.Switch off the main power when the unit is not in use. (Disconnect the power plug from
the power outlet when you do no t intend to use the unit for a prolonged period of time.)
Before moving the unit, remove the disc from the unit/ tray first.
4.Do not open the cover or touch any of the components exposed out of the unit, only for
qualified technicians.
5.Do not expose the unit u nder direct sunlight or nearby objects that radiate heat to avoid
damage the unit.
6.Do not place the unit in moist and humid conditions, which effect the pick-up of the unit
leadto outofwork.
7.Pla ce the unit on a flat surface and ventilative condition. Please ensure the ventila tion
holes are not covere d to avoid overheating and malfunction.
8.Clear the panel and case with soft dry cloth only, do not apply any kind of thinner,
alcohol or sprays.
9.The apparatus shall not be exposed to dripping or splashing and that n o objects filled
with liquids, such as vases, shall be placed on the apparatus .
PDF created with FinePrint pdfFactory trial version http://www.pdffactory.com

6. Specification
Contents
General Specification
Power Supply Requirement..................................................DC 12V
Maximum Power Output...................4 x 80W(measured at DC 14.4 V)
Dimensions(wxhxd)........................................178 x 50.5 x 162mm
DVD Deck Specification
Format.....................................DVD/VCD/JPEG/MP4/MP3/WMA/CD
Video System....................NTSC/PAL/PAL-M/PAL-N/AUTO(optional)
Audio System..............................................................24 bit/96KHz
Loading System.......................................................... Auto Loading
Mounting Angle.................................................................0 to +/-30
Video
Specification
Video Type...................................................................16:9 and 4:3
Video Output level......................................Composite:1.0 0.2Vp-p
Load impedance: 75 ohms
Horizontal Resolution................................................................500
Audio
Specification
+0
Audio Output(Analog audio)..........................................2.0 Vrms
-1.0
Frequency Resp onse.............................20Hz ~ 20KHz(at 1KHz 0 dB)
S/N Ratio(Audio)............................................. 90dB
(at 1KHz 0 dB)
Separation..............................................................................50dB
Radio
Specification
FM Section
Frequency range..............................................87.5MHz - 107.9MHz
Usable sensitivity......................................................................3uV
I.F Frequency....................................................................10.7MHz
AM Section
Frequency..........................................................530KHz - 1710KHz
1. Before Operation...........................................................................................3
1.1 Glossary................................................................................................ 3
1.2 Precautions............................................................................................3
1.3 Maintenance and Cleaning of Discs..........................................................4
1.4 Battery Information of the Remote Control.................................................4
1.5 The Remote Control Description...............................................................5
1.6 The Locations and Names of Controls on or in the unit................................6
1.7 Wires Connection Description..................................................................7
1.8 Unit Installation.......................................................................................8
2. Common Operation........................................................................................9
3. Radio Operation...........................................................................................10
4. Disc, USB and Card Operation......................................................................11
4.1 Load/unload Disc, USB or Card...............................................................11
4.2 Pause Playback.....................................................................................13
4.3 Stop Playback .......................................................................................13
4.4 Select Chapter/Track with the >>|/|<< Buttons..........................................13
4.5 Select Chapter/Track with the Number Buttons.........................................13
4.6 Select Chapter/Track with the Root/PBC Menu.........................................13
4.7 Playback with Speed..............................................................................14
4.8 Playback with Slow Speed......................................................................14
4.9 Display Still Frame Step by Step.............................................................15
4.10 Playback Repeatedly...........................................................................15
4.10.1 One/All Repeat.................................................................................15
4.10.2 A-B Repeat.......................................................................................15
4.11 Playback in Scan Mode.........................................................................16
4.12 Playback from a specified Chapter/Track or a Specified Time...................16
4.13 Playback inRandom.............................................................................16
4.14 Playback in Different View-Angle...........................................................16
4.15 Playback in Zoom Mode........................................................................16
4.16 Change the Caption Language..............................................................17
4.17 Change theAudio Language.................................................................17
4.18 Change the Video Signal System..........................................................17
4.19 Look over the Playback Status..............................................................17
4.20 Program Playback...............................................................................18
4.21 Playback IMAGE files..........................................................................18
4.22 Playback MP4 files..............................................................................19
4.23 ESP and Function..........................................................................19
4.24 The DVD System Menu Setup Operation................................................19
* The Region Code.................................................................................23
.
5 The Trouble Shooting...................................................................................24
6. Specification...............................................................................................25
ID3
PDF created with FinePrint pdfFactory trial version http://www.pdffactory.com

1. Before Operation
1.1 Glossary
PBC (playback control)
It is a kind of signal(menu) recorded in the disc with SVCD or VCD2.0
format used for the playback control. For the discs contained PBC, It can
playback interactive software with the menu displayed on monitor screen.
If the disc contain still images, it can playback high definition of still image.
Title
Generally, the title is the important part of DVD disc. for example, the
theme part of movie is title 1, the part described how to make movie is title
2, the cast is title 3, etc. Every title contain a serial number that is easy to
look up.
Chapter
A title can be divided into several blocks, so that every block can be operated
as a unit, the unit is called chapter. The chapter contain a unit at least.
Track
It is the biggest component of VCD. Generally, every song of karaoke disc
is a track.
1.2 Precautions
Safety
1. Power Source: The unit should be connected to power supply only of
the type described in the operating instructions or as marked on the unit.
2. The unit is designed for negative terminal of the battery which is
connected to the vehicle metal. Please confirm it before installation.
3. Do not allow the speaker wires to be shorted together when the unit is
switched on. Otherwise it may overload or burn out the power amplifier.
4. Do not install the detachable panel before connecting the wire.
Environment
1. Do not use this unit when water and moisture is near it.
2. If moisture forms inside the Lens, it may not operate properly. To correct
this problem, wait about one hour for the moisture to evaporate.
3. If the car interior is extremely hot, do not use the player until the car has
been driven for a while to cool off the interior.
5. The Trouble Shooting
Please read the user’s manual carefully before using the DVD player. If you have any troubles
in using this play er, try to solve the problems by the suggestions mentioned below. If you can
not remove the trouble after using all the sugges tions, please contact the company or the
technical service center authorized by us. For the sake of your safety, ple ase do not open the
cover and repair the player by yourself, if that, it may c ause electric shock.
NO PICTURE, SOUND AND INDIC ATION
* Ensure that the power switch is on.
* Ensure that the wall inlet is ok.
* Ensure that the power cord is not damaged or the fuse is not blown.
* Ensure that the pow er plug is connected to the inlet tightly.
NO SOUND BUT HAVE PICTURE
* Ensure that the player ’s audio output has a good connection with monitor’s audio input.
* Check w hether the audioconnector is damaged.
* Check whether you have turned down t he volume.
* Ensure that you hav e set the right AUDIO setup of the player.
* Ensure that the audio is no t under mute.
NO PICTURE BUT HAVE SOUND
* Ensure that the player ’s video output has a good connection with monitor’s video in put.
* Ensure that you hav e turned you r monitor to the AV input c hannel connecting to your player.
* Check w hether the video connector is damaged.
* Ensure that you hav e set the right VIDEO settings of the player.
BLACK AND WHITE PICTURE OR SCREEN ROLLING
* Ensure that you have set the right TV SYSTE M (e.g. PAL, NTSC) setting.
FLAWS OF PICTURE OR SOUND
* Check whether the s etting of AUDIO is right.
* Check whether the disc is scratched or stained.
* Check whether the AV connector and the output terminal i s stained.
* Check whether there is condensation inside the Lens. If so, leave the player off for an hour
or so, then try again.
* Check w hether the installation angle is less than 30 .
DISPLAY NO DISC OR BAD DISC
* Ensure that you have put the disc on the tray.
* Check whether the disc is put in the reverse side.
* Check whether the disc is distorted.
* Check whether the d isc is stained or scratched badly.
* Ensure that the disc format is compatible to the player.
* Ensure that the temperature inside the car is not too high. If so, cool of f till the ambient
temperature returns to normal.
* Replace another disc to in sert it into the disc compartment.
REMOTE CONTROL IS INSENSITIVE OR DOES NOT WORK
* Checkthe batteries of remotecontrol and make sure that theyare to be powerful and
good conductivity.
* Direct the remote control to the IR sensor of the player.
* Check whether there are some obstacles between the remote control and IR sensor.
SOME FUNCTION BUTTONS DO N OT WORK
* Turn off the power, then turn on again.
* Reset the unit to zero, then turn on again.
* Remove the front panel from the unit, then install it again and then turn on again.
THE RADIO DOES NOT WORK
* Check whether the antenna cable is connected firmly. Or m anually tune for a station.
PDF created with FinePrint pdfFactory trial version http://www.pdffactory.com
* The Region Code
Q: Not begin to playback but to display REGION ERROR after inserting disc into
disc compartment. Why ?
A: Because the DVD player and disc has respective region c ode. If the region codes
of them are not match with each other, the DVD player can not play the disc.
1.3 Maintenance and Cleaning of Discs
Disc Maintenance
keep the disc clean, andle the disc by its edge, do not touch the disc
1. To h
surface of the play side.
2. Do not stick paper or tape on the disc. If there is glue (or analog) on the
disc surface, must wipe it up before using.
3. Do not expose the disc to direct sunlight, or nearby heat sources such as
caliduct, or leave it in a car parked in direct sunlight where there can be a
considerable rise in temperature.
4. Put the disc inside disc case to keep temperature after finishing playback.
Appendix: The region code of DVD:
The Motion Picture Association of America (MPAA) divided the world into 6
regions, and named every region a code, namely region code. The region codes
and the countries or areas represented by the region codes as follows:
Region 1: America, Canada, East-Pacific Inlands;
Region 2: Japan, West Europe, North Europe, Egypt, SouthAfrica, Middle East;
Region 3: Taiwan, Hong Kong, South Korea,
South-east Asian countries include
Thailand, indonesia, etc.;
Region 4: Australia, New Zealand, Central South America, South Pacific Inlands;
Regio n 5: Russia, Mongolia, Indian Peninsula, Middle Asia, East Europe, North
Korea, North Africa, North-west Asia etc.;
Regio n 6: Chin a mainland.
Basically, when a DVD movie disc for the version of region 6 was decided not to
issue, we need to purchase another DVD player that can play the DVD movie disc
for the version of non-region 6. In order to view this disc, viewer who does not have
the non-region 6 DVD player facilities will have to spend extra sum of money to buy
it. The problems caused from the area code inconsistency between the disc and the
DVD player has pushed for the production of Unlock-Version DVD player facilities,
and some DVD disc sets allow user to modify the area codes for a limited number of
times.Butnotethatonlythediscsproducedbythe8biggestfilmmakingcompanies
of America restrict so, they are not one of original DVD format. That is to say, the
DVD movie discs not produced by
the 8 biggest filmmaking companies of America
were not restricted by the rule of region code. Generally, they are called
FreeRegionCode discs or Full Region discs. The 8biggest filmmaking companies
of America are as follow s:
1. WarnerBros;
2. Columbia;
3. 20thCenturyFOX;
4. Paramount;
5. Universal;
6. UA(UnitedArtist);
7. MGM(MetroDogwynMayer);
8. WaltDisney
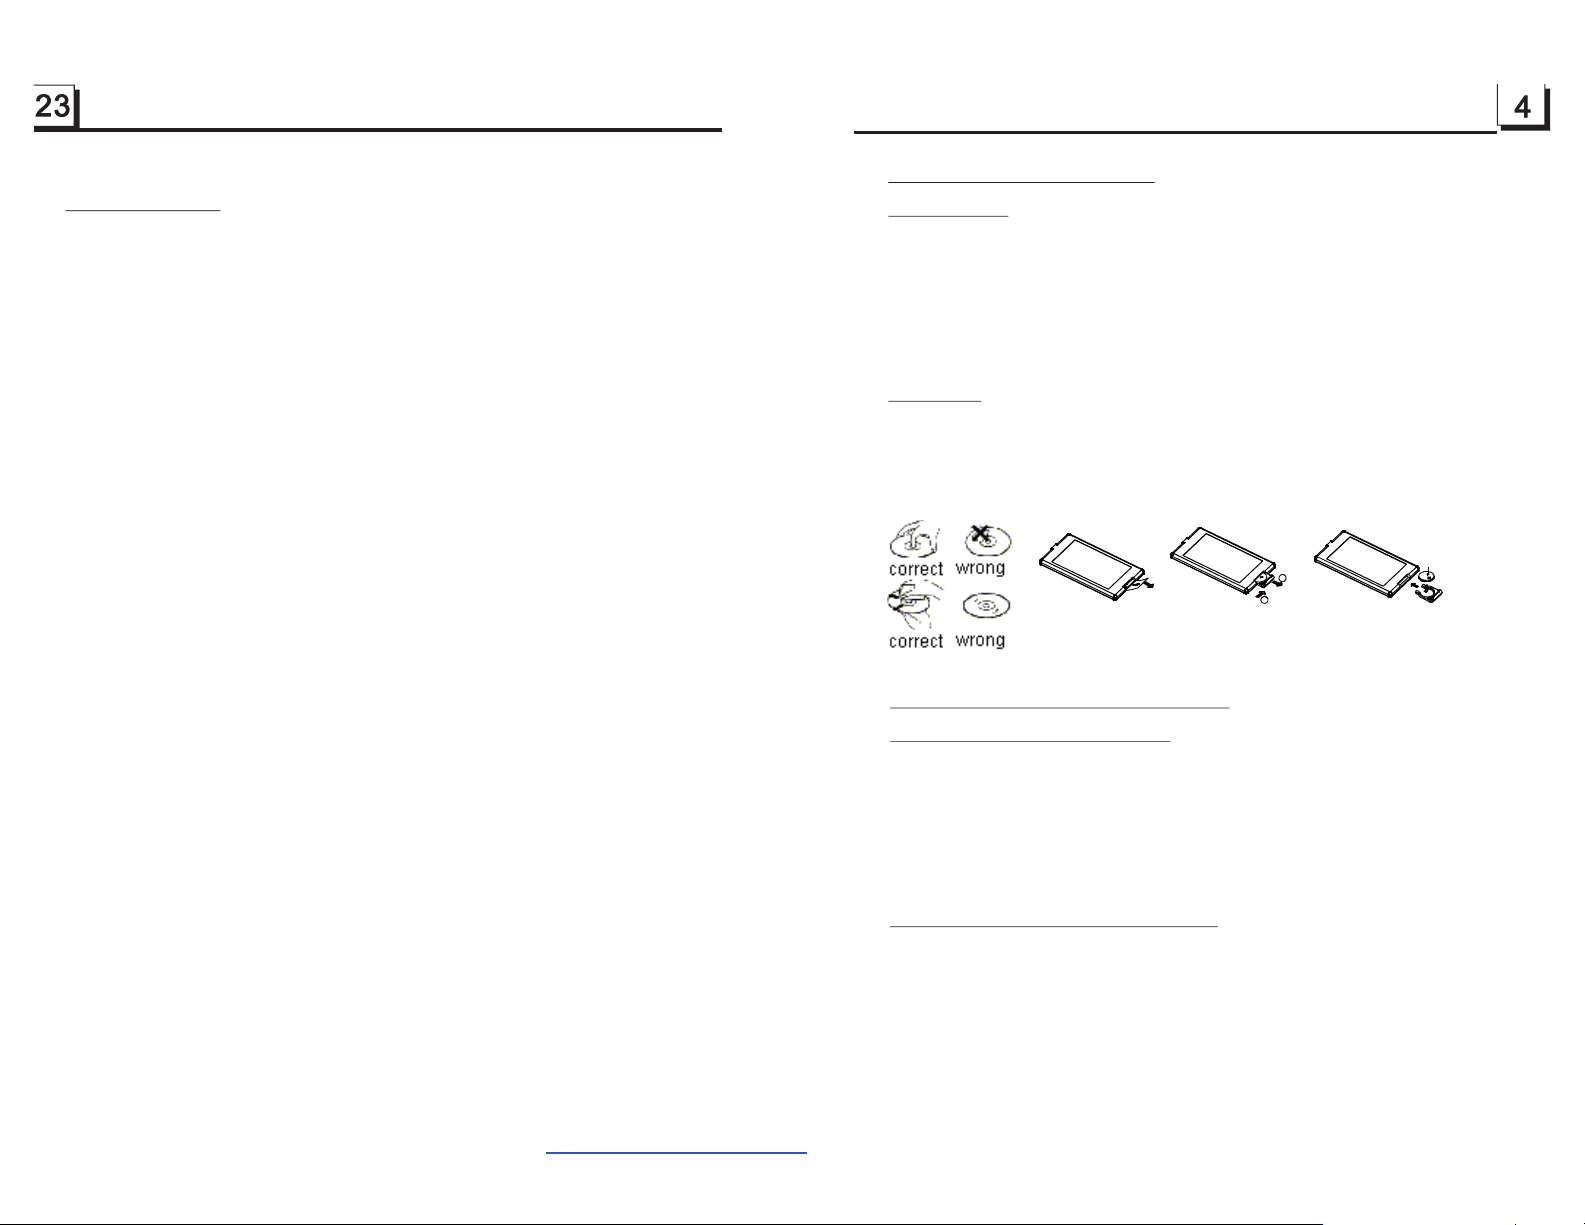
Disc Cleaning
1.
Before playing, wipe the disc with a clean lint. wipe the disc outwards from
the disc center.
Do not use petrel, thinner. commercially cleaner or anti-static spray can
2.
damage the unit.
B
A
Fig.1
Fig.2
Fig.3
1.4 Battery Information of the Remote Control
Replace Battery in the Remote Control
1.Before using the remote control for the first time, pull the insulating
sheet out of the remote control as the direction indicated by the
arrow.(see fig.1)
2.Press the movable block hold as the direction indicated by the A arrow
(See fig.2), then pull the battery holder out of the remote control as
the direction indicated by the B arrow(see fig.2).
3.Replace the old battery by a new battery with (+) polarity side upward.
(See fig.3).
4.Insert the battery holder to the original position in remote control.
(See fig.3).
Note about the Battery of the Remote Control::
1.
Improper use of battery may cause overheating or explosion. so that
Result in injury or fire .
2.Battery leakage may cause damage to the remote control(Battery
Life: 6 months with normal use in normal room temperature).
3.Do not short the battery.
4.Do not throw the battery into the fire.
5.To avoid the risk of accident, keep the battery out of reach of children.
+ side up
PDF created with FinePrint pdfFactory trial version http://www.pdffactory.com

1.5 The Remote Control Description
27
3
PWR
MU
SEL
+
-101+10
596
CLK
SLOW_FWD
LOC
ZOOM
A-B
PROG
EQ
MODE
SETUP
2
ST
INT
AUDIO
OSD LOUD
14
29
32
9
34
13
31
30
24
28
21
22
26
25
23
16. SEARCH BUTTON
17. RDM BUTTON
18. RPT BUTTON
19. SUBTITLE BUTTON
20. TITLE/PBC BUTTON
21. ANGLE/ST BUTTON
22. ZOOM BUTTON
23. AUDIO BUTTON
24. CLK BUTTON
25. A-B BUTTON
26. INT BUTTON
27. EQ BUTTON
35
P/N
BAND
0K
3
7
0/10
SEARCH
RPT RDM
1
4
MENU
4
8
10+
APS
SUBTITLETITLE/PBC
STEP
2
33
6
8
5
7
10
11
12
16
15
18
17
19
20
1. TILT B UTTON
2. MENU BUTTON
3. POWER BUTTON
4. ^ BUTTON
5. >>| BUTTON
6. > BUTTON
7. |<< BUTTON
8. v BUTTON
9. SEL BUTTON
10. PLAY/PAUSE BUTTON
11. NUMBER(0~10,+10
-10) BUTTONS
12. 10+ BUTTON
13. SETUP BUTTON
14. MODE BUTTON
15. APS BUTTON
28. LOC/SLOW-FWD BUTTON
29. MUTE BUTTON
30. STOP BUTTON
31. VOLUME- BUTTON
32. < BUTTON
33. OK BUTTON
34. VOLUME+ BUTTON
35. BAND AND P/N BUTTON
36. PROG BUTTON
37. OSD BUTTON
38. LOUD BUTTON
39. STEP BUTTON
HUE
It is for adjusting the hue of the video output.
SATURATION
It is for adjusting the saturation of the video output.
SHARPNESS
It is for adjusting the sharpness of the video output.
4.24.5 SPEAKER SETUP
DOWNMIX
It is for selecting your desired sound effect when there is not central speaker
and sub-woofer. There are 3 mode: LT/RT, STEREO, VSS.
LT/RT: When playing a disc with PRO LOGIC Dolby stereo effect, choose the
item, so it will output audio signal with vivid theatre effect.
STEREO: If you choose the item, when outputting audio signal with 5.1 channels,
it will output the left and right channels of signal ; when outputting audio signal
with 2 channels, it will output the common 2 channels of stereo signal.
VSS: If you choose the item, when playing a disc recorded with 5.1 channels,
the main channel speakers can output audio signal with VSS effect.
4.24.6 DIGITAL SETUP
OP MODE
It is for selecting audio output mode
LINE OUT: It can linearly compress the audio signal. So the volume level is lower.
You should select the item at night.
RF REMOD: It can make the volume level higher. You should select it at daylight.
DYNAMIC R ANGE
After selecting the compression mode of LINE OUT, set the item, so you can
adjust the linear compression ratio. If you set it to be FULL, the Peak-to-Peak
value of the audio signal is the minimum; if you set it to be OFF, the Peak-toPeak value is the maximum.
DUAL MONO
It is for selecting a desired audio output mode for the left and right ways of signal.
It is mainly for Karaoke of Ac3. There are 4 modes in all as follows:
STEREO, MONO L, MONO R, MIX MONO.
PDF created with FinePrint pdfFactory trial version http://www.pdffactory.com

4.24.2 LANGUAGE SE TUP
1.6 The Locations and Names of Controls on or in the unit
OSD LANGUAGE
This item is for selecting the language of the SYSTEM MENU and all operating
prompt interface displayed during playback.
AUDIO LANG
This item is for selecting a audio language.
SUBTITLE LANG
This item is for selecting a subtitle language.
MENU LANG
This item is for selecting a disc menu language.
4.24.3 A UDIO S ETUP
AUDIO OUT
there is only ANALOG mode, i.e. SPDIF/OFF, not optional.
KEY
It is for selecting your desired basic music tone(from low to high).
4.24.4 VIDE O SETUP
BRIGHTNESS
It is for adjusting the brightness of the video output.
CONTRAST
It is for adjusting the contrast of the video output.
7" TFT
/MU
RESET
1
7
The Diagram of the Face o f the Front Panel
The Diagr am of the F ace of the Unit After Sliding down the Front Pan el
MODE
234
ANG
1. POWER/MUTE button
2. MODE button
3. PLAY/PAUSE button
4. ANG button
5. + and - buttons
_
5
+
SD/MMC
EJECT
8
6. IR remote sensor
7. RESET button
8. EJECT button
9. Disc slot
10. SD/MMC Card slot
6
9
10
PDF created with FinePrint pdfFactory trial version http://www.pdffactory.com

1.7 Wires Connection Description
The Description of the Input/Output Interface of the Rear Cabinet
Fixed ISO Female C onnector
Clip of the other wires
The Description of the Other Wires Through the Clip
For the DVD System Menu, there are 6 setup pages in all. They display as follows:
4.24.1 SYSTEM SETUP
RadioAnt
Clip
AUXIN-R
AUX IN-L
AUX IN-V
CAMERA
VIDEO OUT 1
VIDEO OUT 2
PARK IN G
REVERSE
RCA-R
The Description of the Fixed ISO Female Connector
CONNECTOR A
1.
2.
3.
4. Memory +12V
5. Auto Antenna O utput
6.
7. 12V (To Ignition Key )
8. GROUND
CONNECTOR B
1. Rear Righ t Speaker (+)
2. Rear Righ t Speaker (-)
3. Front Righ t Speaker (+)
4. Front Righ t Speaker (-)
5. Front Left S peaker (+)
6. Front Left S peaker (-)
7. Rear Left Speak er (+)
8. Rear Left Speak er (-)
RCA-L
SUBWOOFER
USB SOCK ET
TV SYSTEM
This product supports output of various TV system.
If your TV set has only NTSC or PAL system, the screen will blink and become
colorless when a wrong TV system is selected. In this case, press the N/P button
to switch the right TV system to match the TV color system.
TV TYPE
The setup item is for matching TV screen size.
4:3 PS: Choose the item when connecting a TV set with 4:3 screen. When playing
the pictures with 16:9 size, the left and right parts of the video will be cut out,
and display in full screen.
4:3 LB: Choose the item when connecting a TV set with 4:3 screen. When playing
the pictures with 16:9 size, the top and bottom parts of the TV screen will be
turned into a black square respectively.
16:9: Choose the item when connecting a TV set with 16:9 wide screen.
PASSWORD
This setup item is for locking or unlocking the rating level of the Parental Control.
The defaulted state is locked. The defaulted password is 0000.
You can set a new password that you like: Select the PASSWORD item and then
press the > button to enter it, then input the original password 0000, and then
press the OK button to unlock it. Press the > button to enter it again, then input
a new password that you like and then press the OK button to make it effective.
Before the other persons see the Manual, you should get the password in mind
and cut out the part of PASSWORD in the Manual.
RATING
The item is for setting a new rating level of the Parental Control.
1. Select the PASSWORD item and then press the > button to enter it, then input
the password mentioned above, and then press the OK button to unlock the
setting of the rating level of the Parental Control.
2. Select the RATING item and then press the > button to enter it, then use the
direction buttons to select your desired rating level, then press the OK button
to confirm.
3. Select the PASSWORD item again and then press the > button to enter it, then
input the password, and then press the OK button to lock the new setting of
the rating level of the Parental Control.
DEFAULT
This item is for making all setup items change back to original status.
PDF created with FinePrint pdfFactory trial version http://www.pdffactory.com

3. During IMAGE playback, press one of the >/</^/v buttons to change the angle of
viewing picture that is displaying as follows:
>: 90 deg cw; <: 90deg ccw; ^:UP<-->DOWN; v: LEFT<-->RIGHT
During IMAGE playback, press the PROG button to change the mode of refresh picture.
During IMAGE playback, press the STOP button to stop playing and return to the root
menu.
* During IMAGE playback, the following buttons are not available: SLOW-FWD,
SUBTITLE, TITLE, ANGLE, AUDIO, RDM, INT and A-B.
* In IMAGE mode, the other operations are same as ones in MP3/WMA mode.
Description of Connecting the Parking Brake Line to the Parking Brake System Built in th e Car
Parking brake
Parking b rake line(green)
4.22 Playback MP4 files
1. The root menu is displayed on TV when beginning to switch on Mp4 mode, then it will
automatically play the first file.
During playback, press the STOP button to stop playing and return to the root menu.
2. When displaying the root menu, press the direction buttons to select your desired
FOLDER ,file or file sort icon, then press the OK or PLAY button to open the FOLDER,
open the files of the file sort icon or play the selected file.
When displaying the root menu, you can also use the number buttons to select the
serial number of the file and play the file.
* The ANGLE, PROG, RDM, INT and TITLE/PBC button are not valid.
* The other functions are same as ones in DVD mode; but the RPT function is same as
one in MP3/WMA mode.
4.23 ESP and Function
ID3
There is ESP function for all formats of discs.
In MP3/WMA mode, during playback, the information of the file name, folder name,
song s title, artist and album
current playing music contains relevant tag information in version 1.0/2.0
MP3 ID3
will be scrolling on the LCD display. As long as the
format, the 3 items underlined above will be scrolling on the LCD display; otherwise,
they will not.
4.24 The DVD System Menu Setup Operation
1. Press the SETUP button on the remote control to access the DVD System Menu on
the monitor.
2. There are 6 setup pages in all for the System Menu. Press the > or < button to select
an desired setup page.
3. Press the ^ or v button to select an setup item in the selected setup page.
4. Press the > button to enter the setup item. Then press the v or ^ button to select a
desired mode of the setup item, finally press the OK button to confirm it.
Parking brake switch
(inside the c ar)
NOTE: after connecting the Parking Line, the video on the small monitor of the front panel will be d isplay only after br aking the car.
To metallic body or chassisof the car
1.8 UNIT INSTALLATION
INSTALLATION INSTRUCTIONS
1)REMOVE TH E2 DEC KTRA NSPORT SCREWS BEFORE INSTA LLATION.
2)PLEASE DOTHE CONNECTION OF THEPOW ER, SPEAKERSA NDANTENNA
ACCORDING TO THE REQUIREMENT OFTH EINSTRUCTION BOOK .
3)IF THELEFT AND RIGHTINSTALLATION BRACKETS SUPPLIED BYFACTORY
ARE FITFOR YOUR CAR, PLEASEFIX THEM ONT HECHASSIS AND THEN
FIX THE UNIT IN THE CAR WITH SCREWS ACCORD ING TOTHE FOL LOWING
DIAG RAM; OT HERW ISE, P LEAS E USE TH E LEFT A ND RIGHT IN STAL LATIO N
BRACKETS SUPPLIEDBY YOUR CAR SUPPLIER.
DASH BOARD
TRANSPORT SCREWS
RIGHT INSTALLATIO NB RACKET
COMPLETEDUN IT
PLASTIC FRAME
LEFT INSTALLATION BRACKET
* Press the < button to return to the upper level.
* Press the SETUP button again or use the direction buttons to highlight the item of the
EXIT SETUP and then press the OK button to exit the System Menu.
PDF created with FinePrint pdfFactory trial version http://www.pdffactory.com

2. Common Operation
1. To turn on/off the unit
In power off mode, short press the POWER button to turn on the unit.
In power on mode, long press the POWER button on the front panel or short
press the POWER button on the remote control to turn off the unit.
2. To select an optimal angle of the monitor of the Car Audio System
To select an optimal angle of the monitor of the Car Audio System, press the ANG
button on the front panel or TILT button on the remote control repeatedly.
3. To select function mode
Press the MODE button to select RADIO, DISC
(After inserting a disc), USB(After inserting a USB
storage), CARD(After inserting a card) or AUX
mode.
During playback, tapping the icon after popping
up Keyboard interface can pop up Mode Menu as
right. then tap one icon in it to select your desired
mode.
.
4 To adjust sound level
press or hold the + or - button to directly adjust the
volume level.
5. To mute sound
Press the MUTE button on the remote control to turn on/off MUTE mode.
pressing the POWER button on the front panel shortly also can turn on/off MUTE
mode.
6.
To display and adjust the clock time
Press the CLK button to display clock time on the screen of the monitor.
Long press the CLK button to change the color of the hour of the clock, then press
the + or - button to adjust the hour; and then briefly press the CLK or SEL button
to change the color of the minute of the clock, then press the + or - button to adjust
the minute.
7. To select a desired
Press the EQ button on the remote control to select one of the preset music
equalizer curves: POP, ROCK, CLAS, FLAT. The sound effect will be changed.
. To turn on/off LOUD mode
8
Press the LOUD button to turn on/off LOUD mode.
When turning on LOUD mode, it will enhance bass level immediately when bass
is not enough.
9. To reset the player
When the monitor display wrongly or some buttons are not available or sound is
distorted, press the RESET button to rehabilitate the distorted program to zero.
EQ mode
Mode Menu
4.20 Program Playback
It allows you to enter the order in which you want some chapters/tracks in
DVD/VCD/MP3/WMA/CD to play.
1 During playback, press the PROG button to enter a program interface as
follows:
for DVD for VCD/MP3/WMA/CD
2 Use the direction buttons to move cursor onto the desired place for inputting
the sequence number.
3 Use the number button to input desired sequence number of title/chapter/
track with desired sequence.
4 Use the direction button to move cursor onto Play item, then press the OK
button to play the programmed titles/chapters/tracks in programmed order;
only pressing the PLAY button also can play the programmed titles/chapters
/tracks in programmed order.
* To exit program playback, firstly press the STOP button, then press the PLAY
button to enter sequence playback; or press the PROG button twice again.
* To remove the all programmed sequence numbers, move the cursor onto
Clear item, then press the OK button.
* To change the programmed sequence, move the cursor onto the item you
want to change, input the desired sequence number.
* During VCD playback, if it is in PBC ON mode, at the same time of entering
the state of program playback, it turns off PBC mode.
4.21 Playback IMAGE files
1. The root menu is displayed on the monitor when beginning to switch on IMAGE
mode. .
In the root menu, the left file sort icon is for MP3/WMA file; the middle file sort
icon is for IMAGE file; the right file sort icon is for VIDEO file. If one of these 3
file sort does not exist, you can not move cursor onto the file sort icon.
2. When displaying the root menu, press the direction buttons to select your
desired FOLDER, file or file sort icon, then press the OK or PLAY button to
open the FOLDER, or play the selected file, or play only this sort of file.
When displaying the root menu, you can also use the number buttons to
select the serial number of the file and play the file.
When you select the IMAGE file sort icon, press the ^ or > button to select the
first IMAGE file, then press the v button to select the desired IMAGE file, finally
press the OK or PLAY/PAUSE button to display the image in full screen from
the selected IMAGE file.
PDF created with FinePrint pdfFactory trial version http://www.pdffactory.com

ZOOMx2,ZOOMx3,ZOOMx4,ZOOMx1/2,ZOOMx1/3,ZOOMx1/4,ZOOM OFF.
Press one of the ^/v/>/< buttons to select the area you want to enlarge.
4.16 Change the Caption Language
In the state of DVD playing, press the SUBTITLE button repeatedly to
select the language of the caption or turn off the caption.(depend on the
media used.)
In the state of VCD/MP3/WMA/CD playing, the button is not available.
4.17 Change theAudio Language
1. In the state of DVD playing, press the AUDIO button repeatedly
on the IR remote control to select the desired language type.
(depend on the media used)
2. In the state of VCD playing, press theAUDIO button repeatedly to
select the sound mode of the MONO L, MONO R, MIX MONO and Stereo,
no language function.
3. In the state of CD/WMA/MP3 playing, the AUDIO button is invalid.
4.18 Change the Video Signal System
During playback of DVD/VCD , press the BAND(P/N) button repeatedly to
change the VIDEO SIGNAL SYSTEM mode .
4.19 Look over the Playback Status
1. In the state of DVD playing, press the OSD button repeatedly on the
remote control to turn on/off the playback status. When it is on, it will
display the information such as: the serial number of the playing title, the
serial number of the playing chapter, the elapsed
the remained time of the playing chapter, the elapsed
the remained time of the playing title,
etc.
time of the playing chapter,
time of the playing title,
2. In the state of VCD/CD playing, press the OSD button repeatedly on the
remote control to turn on/off the playback status. When it is on, it will
display the information such as: the serial number of the playing track, the
elapsed time of the playing track, the remained time of the playing track, the
elapsted time of the disc, the remained time of the disc.
3. In the state of MP3/WMA playing, press the OSD button repeatedly on
the remote control to turn on/off the playback status. When it is on, it will
display the information such as: the serial number of the playing track, the
elapsed time of the playing track, the remained time of the playing track.
11.To do general setup
To do general setup, first pop up Mode Menu as in item 2,
then tap the icon in the Mode Menu to pop up GENERAL
SETUP interface as right.
In the interface, select one of CLOCK SET, RDS MODE ,
OSD LANG, RADIO FREQ and SENSE SET on the left side
by tapping them, then set them by tapping some icons on
the right side accordingly.
* SENSE SET is used to set the sensitivity of stopping auto
searching for an available radio station. When you tap it,
it will ask you to in put a password. The password is 191713,
afte r input ting it, you can set the ite m.
12.To do calibration
To pop up Calibration interface during media playback, first
press the STOP button twice, then press the ZOOM button, finally press the ^ and v buttons
in turn.
In the interface, you can have calibration by accurately tapping the cross cursor.
3. Radio Operation
1. Enter RADIO mode
When you use MODE button or Mode Menu to enter RADIO
mode, it will display RADIO interface as right.
In RADIO interface, tapping the icon can enter Mode
Menu; tapping the icon can turn on or off TFT display;
tapping the icon can pop up AUDIO & VIDEO SETUP
interface as right; the other icons are same as the
corresponding buttonsin the unit panel or in the Remote
Control.
In the AUDIO & VIDEO SETUP interface, you can adjust
VOLUME, TREBLE, BASS, BALANCE, FADER, BRIGHTNESS, CONTRAST, COLOR, HUE; you can also turn on
or off DBAS, MBP, LOUD; you can still select your desired
transparency mode(by STD) and EQ mode(by EQ); tapping
the icon can return back to the previous status.
2. BAND BUTTON
In RADIO mode, press the BAND button on the remote control to select your desired radio band
of and AM2, and the word means which band is selected will be displayed
FM1, FM2, FM3, AM1
on the small monitor of the front panel .
3. TUNE/SEEK UP/DOWN BUTTONS
In RADIO mode:
1) Long press the >>|/ |<< button to automatically search up/down for a available station from the
current frequency.
2) Briefly press the >>| / |<< button to manually search up or down with step by step for your
desired station from the current frequency.
4. APS BUTTO N
In RADIO mode:
1) When long pressing the APS button, the radio searches from the lowest frequency and
checks the signal strength level until 1 cycle search is finished. And then the 6 strongest stations
are preset to the corresponding preset number memory bank. The AS operation is implemented
in the each bank of the selected band. When the AS operation is finished, it will scan each preset
station for 5 seconds in FM or AM band from M1 as briefly pressing APS button. After
GENERAL SETUP
RADIO interface
AUDIO & VIDEO SE TUP interface
PDF created with FinePrint pdfFactory trial version http://www.pdffactory.com

finishing a circle of scanning , it will resume broadcasting on the M1.(It can store 3x6
stations for FM and 2x6 stations for AM in all)
2) When briefly pressing the APS button, the radio will scan each preset station for 5
seconds in FM or AM band from M1.After finishing a circle of scanning, it will resume
broadcasting on the M1.
NOTE: In FM band, FM1,FM2,FM3 is checked one at a time.
In AM band, is checked one at a time.
AM1, AM2
4.11 Playback in Scan Mode
1. In the state of VCD(PBC OFF)/CD playing, press the INT button to play
the previous 15 seconds part of each track on the disc. Press the INT button
again to resume normal playback.
2. In the state of DVD/MP3/WMA playing, the INT button is not available.
4.12 Playback from a specified chapter/track or a specified time
5. PRESET STATION [ 1-6 ] BUTTONS
In RADIO mode:
1) To memorize the current frequency on the current band, long press any one of the six
preset buttons (1-6) .
2) To recall the preset memory onthe current band, press one of the preset buttons [1-6] .
6. STEREO/MONO BUTTON
Press the ST button on the remote controller to select the STEREO or MONO sound
mode for FM band.
7. LOC BUTTON
1) In RADIO mode, when the signal of the distance radio station are very weak and the
receiving effect is bad during tuning, check whether there is the word LOC on LCD. If
there is the word LOC on LCD, press this button to turn off the LOC function, then tune
again for the distance radio station;
2) In RADIO mode, when the signal of the local radio station are too strong to lead that the
interference to thereceiving effect during tuning, press this button to turn on the LOC
function to display the word LOC on LCD, then tune again for the local radio station.
4. Disc, USB and CARD Operation
4.1 Load/unlo ad disc, USB or CARD
To play files in a disc or card, press the EJECT button to slide down the monitor .
Then insert the disc or card into the disc slot or SD/MMC Card slot.
To unload the disc or card,
press the EJECT button to slide down the monitor and eject disc in the disc slot and
then remove the disc; or push the card firstly and pull it out of the card slot.
press the STOP button twice to stop playback, then
1. In the state of DVD playing, press the SEARCH button to display a
interface and highlight the title item, then use the number buttons to input
the serial number of the title; use the direction buttons to highlight the chapter
item, then use the number buttons to input the serial number of the chapter;
you can still use the direction buttons to highlight the time item, then use the
number buttons to input the desired time to start playback; finally press the
OK or PLAY button to play the selected chapter or play from the selected time.
2. In the state of VCD/MP3/WMA/CD playing, press the SEARCH button to
display a interface and highlight the track item, then use the number buttons
to input the serial number of the track; you can still use the direction buttons
to highlight the time item, then use the number buttons to input the desired
time to start playback; finally press the OK or PLAY button to play the selected
track or play from the selected time.
4.13 Playback in Random
In the state of DVD/VCD(PBC OFF)/MP3/WMA/CD playing, press the
RDM button to switch between RANDOM (ON)/RANDOM OFF. When in
RANDOM (ON) mode, it will play in random.
4.14 Playback in Different View-Angle
1. In the state of VCD/MP3/WMA/CD playing, the VIEW-ANGLE button on
the IR remote control is not available.
2. In the state of DVD playing, press the VIEW-ANGLE button repeatedly
on the IR remote control to view in different angle.(This function is only
for the DVD media withANGLE function)
4.15 Playback in Zoom Mode
In video/image mode, during playback, press the ZOOM button continuously
to enlarge a certain area of the images on the screen with these multiples:
PDF created with FinePrint pdfFactory trial version http://www.pdffactory.com

During slow forward, press the PLAY button to resume normal playback.
The function is only for video.
4.9 Display still frame step by step
To play files in an USB, insert the USB into the USB
jack connecting to the Rear cabinet.
To unload the USB, press the STOP button twice
and then remove the USB .
If the unit is currently playing video, press the TELbutton consecutively
to display still frame step by step.
Press the PLAY button to resume normal playback.
4.10 Playback Repeatedly
4.10.1 ONE/ALL Repeat
1. In the mode of DVD playback:
Press the RPT button to select REP CHAPTER, REP TITLE, REPALL
or REP OFF.
2. In the mode of VCD(PBC OFF)/CD playback:
press the RPT button to select REP ONE, REPALL or OFF.
When it is in the state of PBC ON, during VCD disc playing, the RPT
button are not available.
3. In the mode of MP3/WMA playback:
Press the RPT button to select REP ONE, REP DIR, REP ALL or OFF.
4.10.2 A-B Repeat
Press the button if you want to repeat a specific segment on a disc
A-B
that you define:
1. Press the button at a point (A) where you want it to be the start point
of the repeat segment. Press the button again at a point (B) where you
A-B
A-B
want it to be the terminal point of the repeat segment. Then it will play the
segment repeatedly.
2. To cancel theA-B repeat mode and resume normal playback, press the
button for the third time.
Note:
During VCD/MP3/WMA/CD playback, points A and B must be within the
same track.
During DVD playback, points A and B can be selected from different chapters.
A-B
Remark
MP3/WMA/MP4/JPEG files), after loading, it will
display a root as right. On the bottom side of the root,
the icon is for audio files; the icon is for
image files; the icon is for Video files. If files of
these 3 file sort does not exist, you can not move
cursor onto the file sort icon.
Remark
the root (for MP3/WMA/MP4/JPEG) or any place on
the screen (for CD/VCD/DVD/MP4/JPEG) can pop
up the keyboard interface as right.
* SET icon = SEL button.
: If the disc or USB includes folder(for
: During playback, tapping the icon in
: Tapping it can pop up Mode Menu.
: Same as the corresponding buttons
on the Remote Control.(for MP3/WMA/MP4/JPEG)
: Same as the corresponding button on the
Remote Control.(for MP3/WMA/MP4/JPEG)
: Same as the corresponding button on the
Remote Control or on the front panel.
: Same as the TITLE button on the Remote
Control (available only for DVD).
: Tapping it can stop playback and pop up the
root.(exist only for MP4/JPEG)
: Tapping one of them can select next or
previous chapter/track.
: Tapping one of them can switch on between
the speed levels of fast backward or forward.
: Tapping it can pop up theAUDIO interface of
the SET Menu as right. In the interface, you can
adjust the levels of VOLUME, BASS, TREBLE,
BALANCE and FADER; can turn on or off LOUD,
DBAS and MBP; can select your desired EQ mode.
Tapping icon can pop up the TFT VIDEO interface of the SET Menu as right. In the interface,
you can adjust the levels of BRIGHTNESS, CONTRAST, COLOR and HUE; you can also adjust
Transparency by tapping USER, STDY , BRIG,
SOFT and SHAR.
Tapping EXIT icon can exit the SET Menu.
Root interface for MP3/WMA/MP4/JPEG
Keyboard interface-1
Keyboard interface-2
SET Menu-1
SET Menu-2
PDF created with FinePrint pdfFactory trial version http://www.pdffactory.com

4.2 Pause Playback
In the state of DVD/VCD/CD/MP3/WMA playing, press the PAUSE
button on IR remote control to pause the playback, press the PLAY
button to resume normal playback.
.3 Stop Playback
4
In the state of DVD/VCD/MP3/WMA/CD playing, press the STOP button
once to pause the playback, then press the PLAY button to resume the normal
playback; press the STOP button twice to full stop the playback, then press
the PLAY button to start playback from the beginning of the first chapter/track.
.4 Select Chapter/Track with the >>| / |<< Button
4
Press the >>| / |<< button during playback to select the next or last chapter/
track to playback.
Note: Press the >>|/|<< button multiple times to advance multiple chapters/
tracks forward or backward.
.5 Select Chapter/Track with the Number Buttons
4
In the state of DVD/VCD(PBC OFF)/MP3/WMA/CD playing, press one
of the 1~9 and the 0/10 number buttons to directly select and play the 1st to
10th track/chapter (the 0/10 button is used as the 10 button).
If you want to play the track/chapter that s serial number is bigger than 10,
use the 10+, 1~9 and 0/10 button. For example 1, to play the 13th track/
chapter, firstly press the 10+ button once, then press the 3 button. For
example 2, to play the 34th track/chapter, firstly press the 10+ button for 3
times, then press the 4 button.(the 0/10 button is used as the 0 button)
Note: long pressing the +10 or -10 button can play the next 10 or last 10
chapter/track(only for MP3/WMA/CD).
.6 Select Chapter/Track with the Root/PBC Menu (If the disc includes the
4
root/PBC menu)
In the state of DVD playing
1. Press the TITLE button on the remote control to display the title list.
2. Press the direction buttons to select your desired title, and then press the OK
or PLAY button to open the root menu of the selected title.
3. Press the direction buttons to select your desired chapter, finally press the
OK or PLAY button to play the selected chapter.
During playback, pressing the MENU button can directly display the root
menu of the title that is playing.
In VCD mode
1. When starting to turn on the PBC function, it will play from the beginning of
the disc till it display the PBC menu on TV screen if the disc include the PBC
menu.
2. Press the number buttons to select your desired track to play.
In MP3/WMA mode
1. The root menu is displayed on the monitor screen all the time(and the TITLE
or MENU button is not available).
2. Press the direction buttons to select your desired FOLDER, then press the
OK or PLAY button to open the FOLDER, and then press the direction buttons
to select your desired file, finally press the OK button to play the selected file.
In CD mode, the TITLE, PBC, MENU buttons are disabled.
4.7 Playback with Speed
During normal playback, long press the >>|/|<< button on the remote control
continuously to fast forwards or backwards at the following speeds: x2, x4,
x8, x20, normal.
During speed playback, press the PLAY button to resume normal playback.
4.8 Playback with Slow Speed
During playback , press the SLOW_FWD button to execute the Slow Forward
function.
With each consecutive pressing of the SLOW_FWD button, the playback
speed decreases. The speed levels in Slow Forward as follows:
x1/2,x1/3,x1/4,x1/5,x1/6,x1/7,normal.
PDF created with FinePrint pdfFactory trial version http://www.pdffactory.com
 Loading...