

Page 1

DVD Player
Operating Instructions
STANDBY
DSVCD FMAM TVMp3 DTS A-B ALL ST
Before attempting to connect,
or operating this product.
Please read the instructions completely
REMOTE
SENSOR
Page 2
Important Precautions
Table of content
The design and manufacture of this player takes personnel
safety in to consideration. However,any improper operation may
result in electric shock, fire and other hazard. So Please adhere
tofollowingprecautions.
Safetyprecautions
There isdangerousvoltageinsidethisproduct,donotopenthe
cabinet by yourself to prevent electric shock. Any service please
contact professional technician to perform. Replacement shall
applythecomponentsrecommendedby the manufacturer;
To prevent electricity leakage or damage, do not spill
liquid,alcoholintheproduct;
Do not drop anything into the product from ventilation hole of
thecabinetoranyother opening, to prevent electricity or damage;
To power the player must be in line with the mark in the rear
panel;
When the plug of the unit is commented to the mains outlet, the
unitwillbestillconnected to AC even of thepower is turned off.
To prevent damage caused by lightening, when you are not
goingtousethisproduct, please shut off the power;
You should clean the cabinet with dry, soft cloth only after the
poweristurnedoff.
Operatingprecautions
Place the product levelly where there is little dust and good
ventilationcondition;
Prevent the product and its supplied remote control from
moisture,heating,vibrationordirectsunlight;
Condensation caused by moisture may happen to the lens
inside the product, it will affect the play effect. In such case
please turn on the power (unload the disc) to operate it for 1~ 2
hours,vaporizethecondensationwith the home-grown heat;
Do not turn on/off the product frequently. After you turning off
the product, please wait for about 10 seconds prior reopening it.
Donotplaythebroken, scratched or twisted discs;
Pleasedonotputanything other than discs into the tray;
Whenthediscisimproperly loaded, please do not force.
1 _ ______________
DVD features
2 ______________
Names of parts
2.1 Frontal panel _________________
2.2 Rear panel __________________
2.3 Remote control ________________
3 ________
Preparation before operation
3.1 unpacking and check_______________
3.2 assembling batteries of remote control _______
3.3 connections ____________ ____
__
4 ____________ __Basic operations
Play _____________________
Mute ______________________
Stop playing ___________________
The use of REMOTE SENSOR___________
5 _____________
Frequent operations
Select content to be played with menu _______ _
Play fast forward _________________
Play fast backward ________________
Slow play _____________________
Skip to next chapter/track_____________ _
Skip to previous chapter/track ____________
Select track ___________________ _
Display track List ________________ _
Repeat play_________________
Select Subtitle language _____________ _
Program play ________________ __
Display playing time and state____________
MP3 operations __________________
6 _______________
System setting
Example 1:Set TV screen ratio mode________ __
Example 2:Set sound mix output mode _______ __
Example 3:Coaxial output ______________
Example 4:Set age control grade _______ _____
Example 6:Set operation indication or menu display language_
1
2
2
2
3
4
4
4
5
8
8
9
9
9
10
10
10
11
11
11
11
11
11
12
12
12
13
13
15
15
16
17
18
18
Page 3

Table of content
7 ____
Functions of buttons in remote contro
8 ______________
Technical terms
9 ______________
Troubleshooting
10 _______ ________
Specification
l
20
24
24
25
DVD features
1. DVD features
It provides this multi-media disc player high-resolution image
with, high-quality sound and surround sound effect. The DVD
player can play not only DVD discs of various versions, but
alsoVCD,SUPER-VCD,DVCD,CD,MP3,etc.
Features
1. It is compatible to DVD,VCD, SUPER-VCD, DVCD,CD,
MP3,etc.
2. Multi languageonscreen menu.
3. High quality image with over 500 lines horizontal
pesolution.
Other features
1. Dts digital output, provides high-fidelity stereointerface.
2. Multi-language support. DVD supports up to 32-
languagecaptionand8-languagedub.
3. Multi-angle. The user can select different angle at their
optiontowatch,e.g.closerangle, full view,etc.
4. Multi-image ratio. multi-image ratio mode enables the
product to match different types of TV screen.
1
Page 4

Names of parts Names of parts
2. Names of parts
2.3 Remote control
1.POWER
ON/OFF
2.DISK TRAY
3.OPEN/CLOSE
4.LCD DISPLAY
5.PAUSE/PLAY
6.PHONE
7.STOP
8.AUDIO R
9.AUDIO L
10.VIDEO
1.COAXIAL
2.S-VIDEO
3.VIDEO
4.AUDIO L
5.AUDIO R
6.REMOTE
SENSOR INPUT
7.FUSE
8.DC 12V IN
9.12V REMOTE
OUT
10.ANT IN
2.1 Front panel
127536
2.2 Rear panel
10
RF IN
(FROM ANT)
DSVCD FMAM TVMp3 DTS A-B ALL ST
STANDBY
1
OUTPUT
DOLBY
DIGITAL
COAXIAL
1
2
3
4
5
REMOTE
SENSOR
4
10
8
9
6
7
8
9
10
11
12
1.MENU PBC
7
2.POWER
3.NUMBER
4.SUBTITLE
5.DISPLAY
6.AUDIO
7.ANGLE
8.SETUP
FUSE
INPUT
12V REMOTE
DCIN
REMOTE
SENSOR
L-AUDIO-RVIDEOS-VIDEO
DC 12V 3A
OUT
12V
_
+
9.ENTER/SELECT
10.DIRECTION KEYS
11.DVD GAME
12.VOLUME
13
14
15
16
17
18
19
20
21
22
23
24
25
26
13.TITLE
14.EJECT
15.CLEAR
16.SLOW
17.PROGRAM
18. MUTE
19.REPEAT
20.ZOOM
21.PLAY PAUSE
22.STOP
23.FORWARD
24.BACKWARD
25.NEXT
26.PREVIOUS
2 3 4 5 6 8 9
2
3
Page 5
Preparation before operation
3. Preparation before operation
3.1 Unpacking and check
Check for the following Accessories:
Remote control 1
choke 1
Names of parts
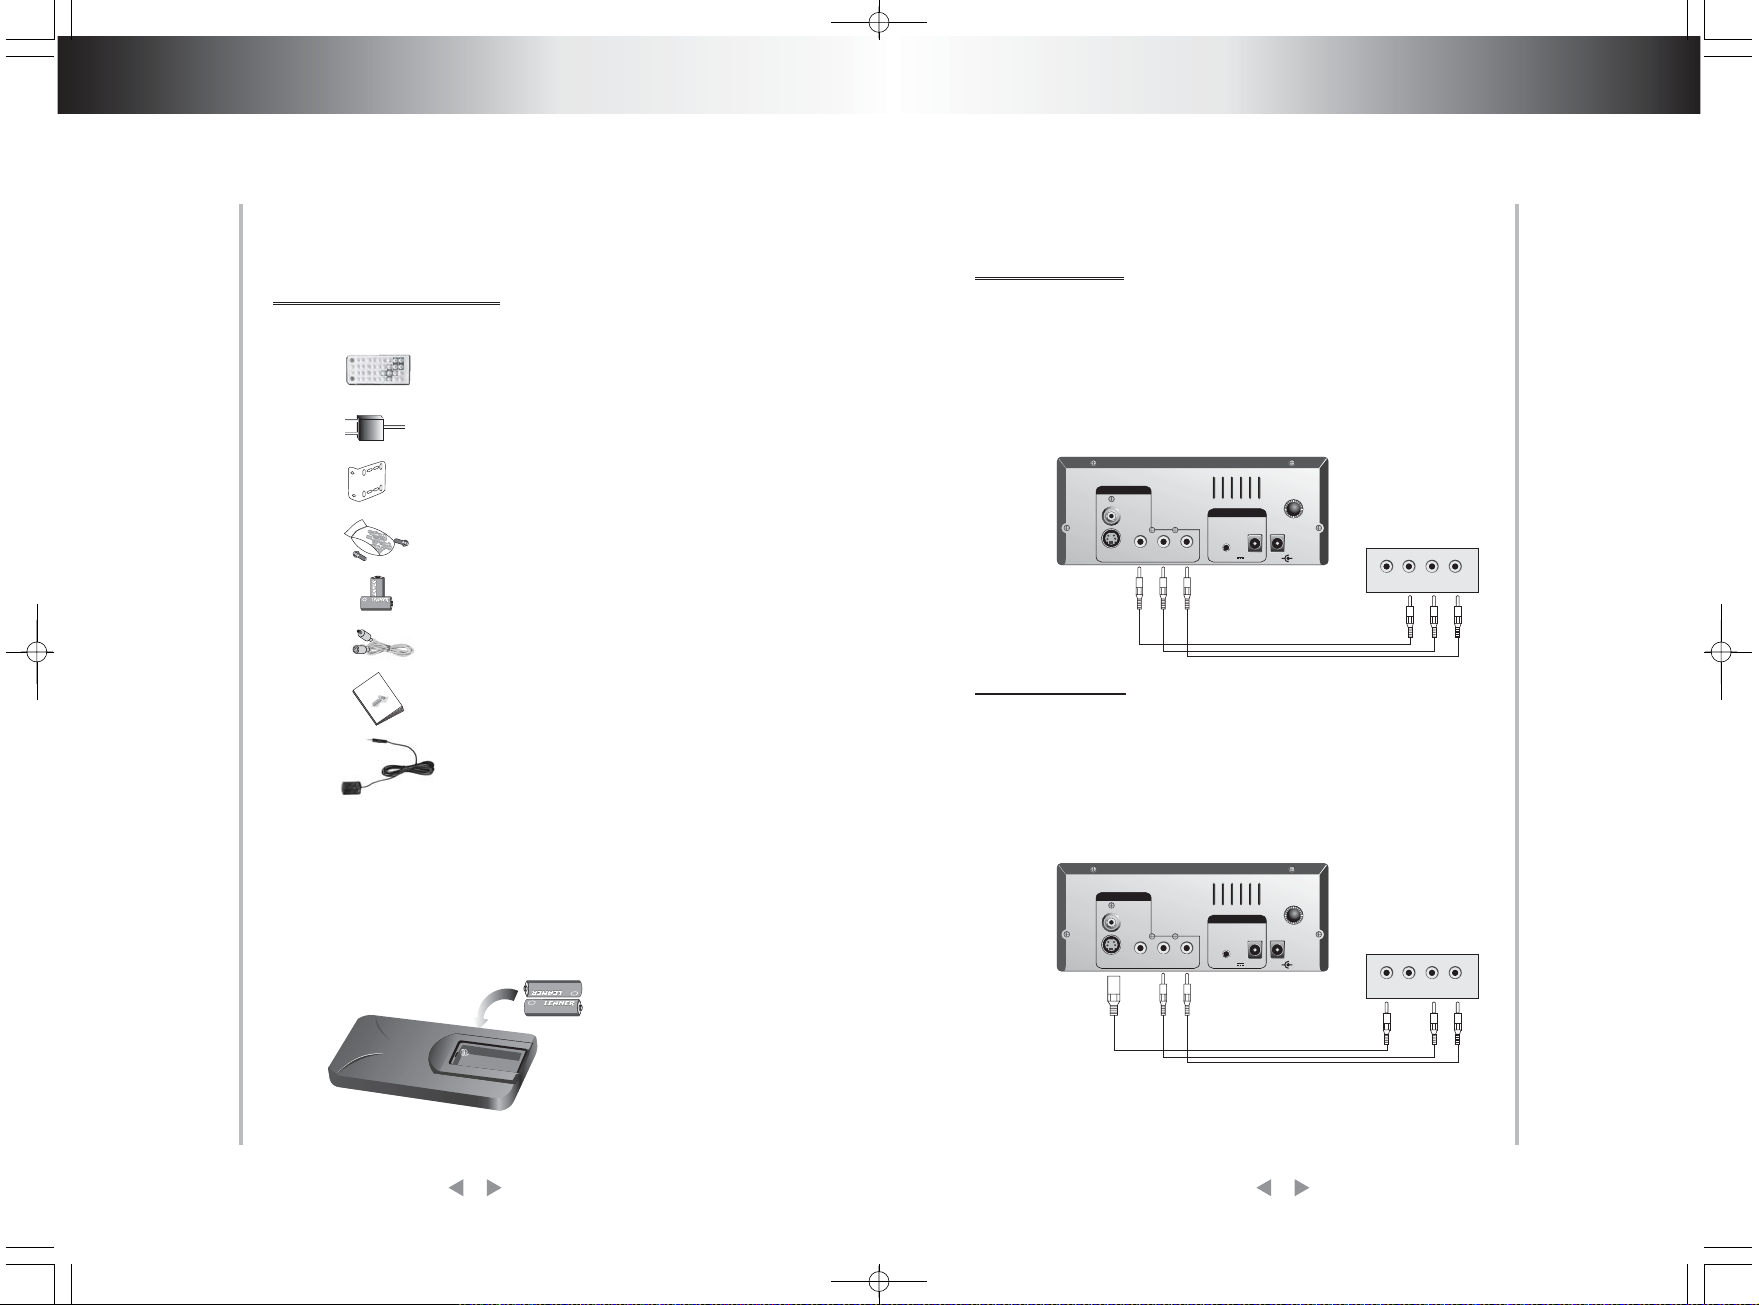
3.3Connections
The video signal is output through s-video or video output
terminal, while audio signal is output by mixing channel terminal,
coaxial terminal, dts signal is only output through or coaxial
terminal. There are many solutions to connect TV and this
product, user can select one according to the condition of the
apparatus to be connected. However, be aware to shut off all
powerpriorconnection.
DVD+TV
Hanger 2
Screw
-
Battery 2
Audio/Video cord
r
e
lay
P
D
V
D
Owner's manual 1
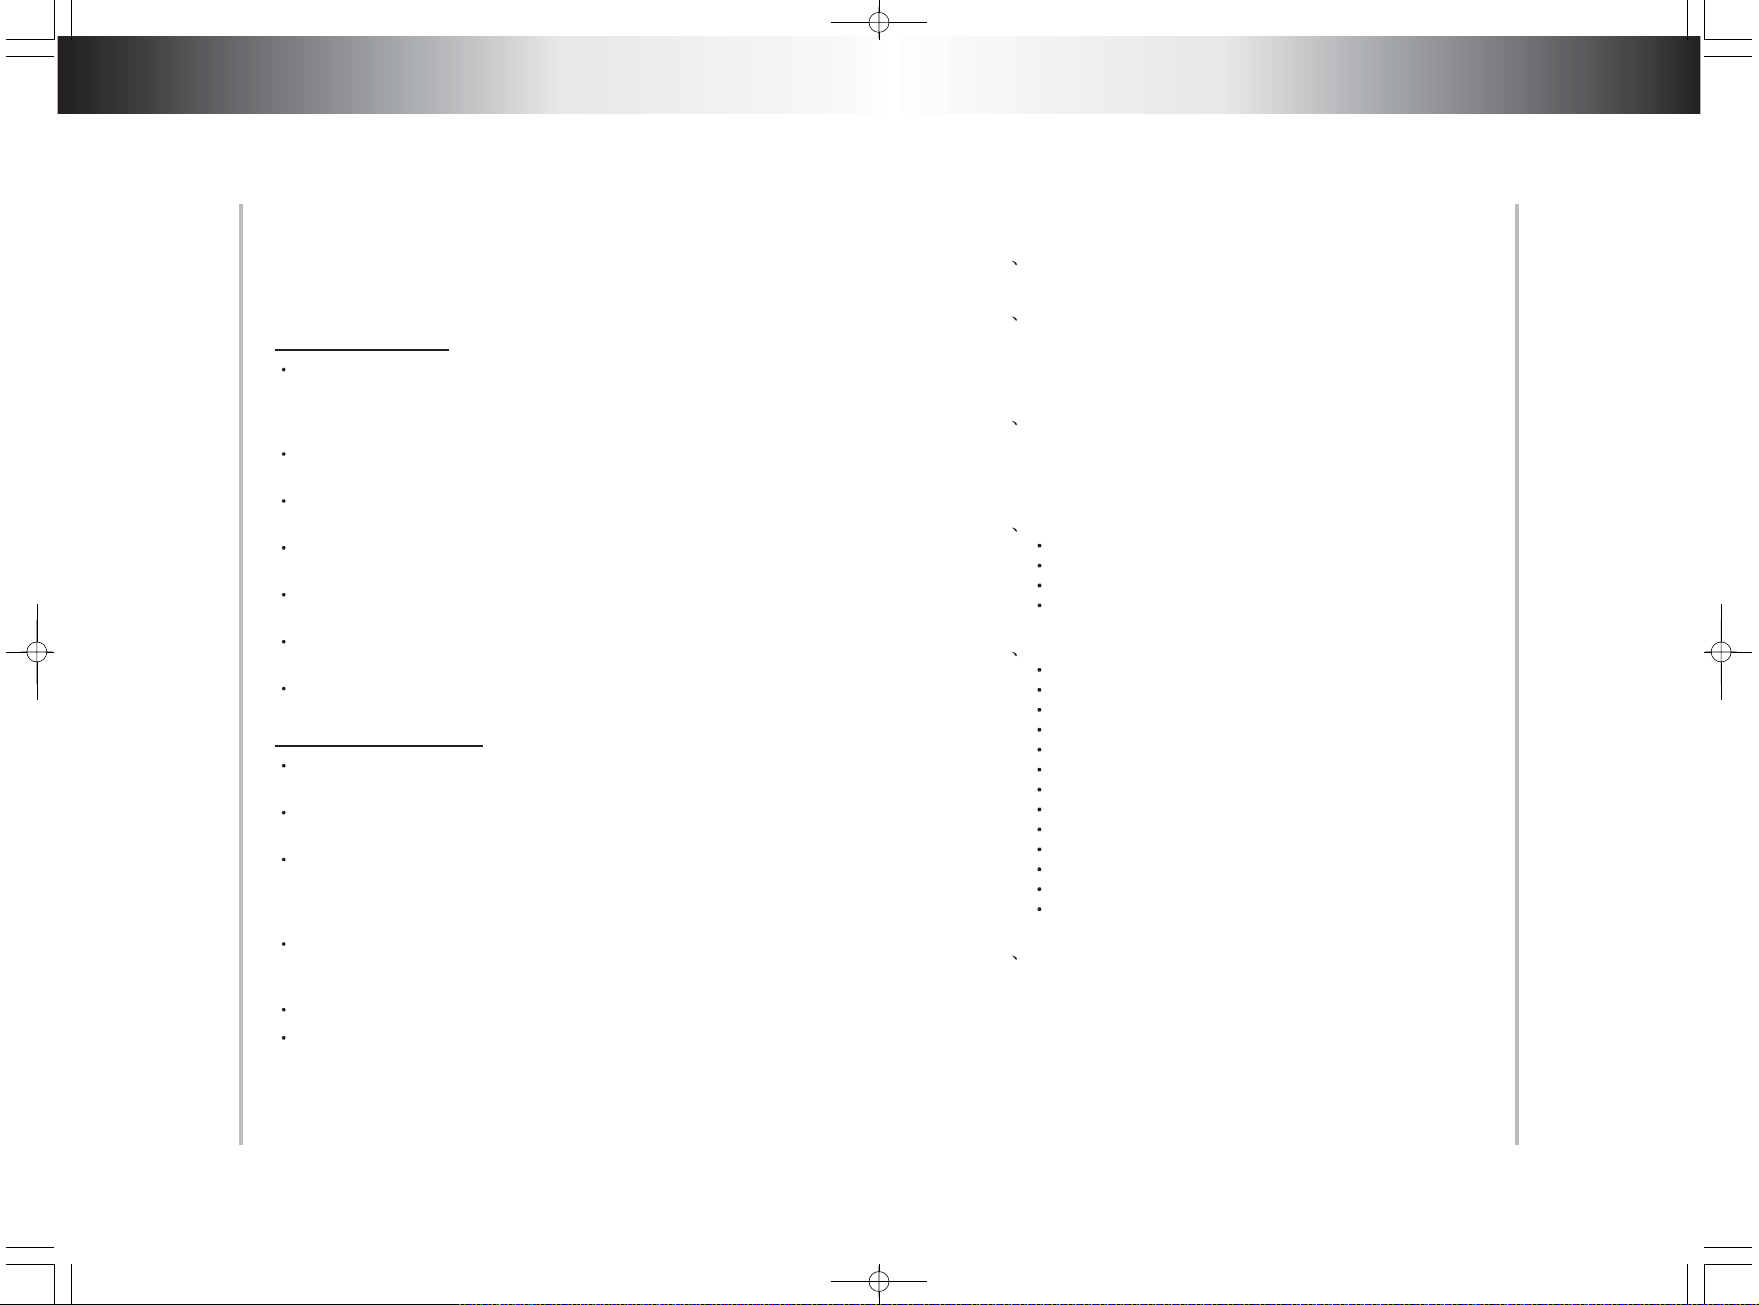
Remote sensor
3.2Assembling batteries of remote control
Open battery compartment , Insert two 7#A batteries, make sure
to match "+" and "-" of the batteries to the marks in the battery
compartment. While operating remote control, please point it to
thefrontalpanelofthe DVD player.
-
-
OUTPUT
DOLBY
DIGITAL
COAXIAL
INPUT
REMOTE
SENSOR
L-AUDIO-RVIDEOS-VIDEO
DC 12V 3A
FUSE
12V REMOTE
DCIN
OUT
12V
_
+
YELLOW
TV
WHITE
LRVIDEOS-VIDEO
RED
S-videoterminal
Plug one end of S-video cable into S-VIDEO socket in back panel
of the product, the other end into TV S-VIDEO socket, then
connect audio cable to TV (notes:do not connect video cable) .
Seediagramblow.
DVD player+TV
OUTPUT
DOLBY
DIGITAL
COAXIAL
INPUT
REMOTE
SENSOR
L-AUDIO-RVIDEOS-VIDEO
DC 12V 3A
FUSE
12V REMOTE
DCIN
OUT
12V
_
+
WHITE
TV
LRVIDEOS-VIDEO
RED
4
5
Page 6

Preparation before operation Preparation before operation
DVD+AMPDVD+AC
Power connection drawing while operating in room
Connect AC adapter to +12V input
Note:
It is recomended to connect
to+12V ignitionsource.
OUTPUT
DOLBY
DIGITAL
COAXIAL
L-AUDIO-RVIDEOS-VIDEO
INPUT
REMOTE
SENSOR
DC 12V 3A
ADAPTOR
-110V 60Hz
DVD+CHOKE
Power connection for automotive application
OUTPUT
+12V
CAR DC12V
Ground
+RED
-BLACK
DOLBY
DIGITAL
COAXIAL
L-AUDIO-RVIDEOS-VIDEO
CHOKE
INPUT
REMOTE
SENSOR
DC 12V 3A
DCIN
12V
DCIN
12V
12V REMOTE
OUT
_
12V REMOTE
OUT
_
FUSE
+
FUSE
+
OUTPUT
DOLBY
DIGITAL
COAXIAL
INPUT
REMOTE
SENSOR
L-AUDIO-RVIDEOS-VIDEO
DC 12V 3A
FUSE
12V REMOTE
DCIN
OUT
12V
_
+
YELLOW
AMP
WHITE
LRVIDEOS-VIDEO
RED
DVD WITH TV TUNER + ANTENNA (THIS CONNECTED
ONLY USE IN DVD WITH TV TUNER MODEL)
ANT
RF IN
OUTPUT
(FROM ANT)
DOLBY
DIGITAL
COAXIAL
INPUT
REMOTE
SENSOR
L-AUDIO-RVIDEOS-VIDEO
DC 12V 3A
FUSE
12V REMOTE
DCIN
OUT
12V
_
+
6
7
Page 7

Basic operation
4. Basic operation
Ifyouhaveconnectedtheproduct to TV,
all power lines have been plugged into
receptacles, and loaded the batteries
into remote control, so you can play the
player.
Turnon TV power
If you have connected amplifier, you
should also turn it on, and select proper
amplifier mode according to the type of
discstobeplayed.
playback, push [ ] again to resume
play
Mute
(available to analog audio output
Signalonly)
Push [MUTE] to silence the sound of the
player,pressit again to return to normal
state.
Basic operation
Play
1.Push[POWER]inthe player.
Control TV remote control to shift TV
topropervideoinputmode (VIDEO IN).
2. Push open/close eject player or [
EJECT] buttons on the remote control
tothetray.
Load a disc in the tray, with label side
upward (see following figure), place
singlediscinthetray,
3.Push[ ] PLAY/PAUSE
The player will close the tray
automatically and begin to read it, It can
identify different disc format then
display it on the screen of DVD frontal
panel, afterwards if automatically plays
disc, If directory or menu picture disply
in the screen, you can push the
direction buttons [UP], [DOWN],[LEFT]
and [RIGHT] buttons in the remote
control to move lighting band to desired
track, You can directly push number
buttonstoselecttrack.
While playing push [ ] to pause the
StopplayingEJECT
1.Push[EJECT]
unload the disc until the tray is
ejected. After stopping playing, unload
thediscuntilthetray is ejected.
2.Push[EJECT]toclose the tray
3.Press[POWER]toturn off the player.
Then turn off power of all connected
equipment.
The use ofREMOTE SENSOR
If you want to put the DVD player in
where you can not see, please insert
REMOTE SENSOR in the REMOTE
SENSOR INPUT, and put REMOTE
SENSOR on where you can see in
automobile, you can control the DVD
player so long as let REMOTE
CONTROLtowardREMOTESENSOR.
REMOTE
SENSOR
Attention:
Whileplaying ifyoufind the
picture is not shown in full
screenor someparthidden or
black and white image
occur,youneed tothe system,
pleaseselect rightTV system
(PAL orNTSC), Please refer
to instructions of [SYSTEM]
IN CHAPTER 6 or examples
inchapter 6.
When the symbol
shows in TV screen, it
signifies invalid operation or
your operation is not
acceptedby theplayer.
8
9
Page 8

Frequent operation
Frequent operation
5. Frequent operation
We will introduce some regular
operations of different types of function,
the user can perform one or more
operations as you like, In addition
chapter 7details purposes and
operationsofallbuttons
Select part to be played with
menu
If DVD disc to be played has menu, when
PBC. state is on you can display the
menu by pushing [MENU/PBC] or
[TITLE], whereon you select a popular
part to play. you can operate following
procedures
1.Push[MENU/PBC]
The screen display menu picture, the
content to be selected varies with
differentdisc.
2.Push[UP],[DOWN],[LEFT],[RIGHT]
Move the lighting band to the desired
itemorMadebypushing these buttons
3. Push [ENTER] to confirm selecting
theitem
This moment the screen may display a
submenu. You can also push [UP],
[DOWN]. [LEFT], [RIGHT] to confirm
selecting the push [ENTER] to comfirm
theselection
Play fast forward
While playing you can push [FF] button
to play fast forward. Four speed are
available to play forward, press it once
the speed grows by one shift, when the
speed reaches maximum speed, press
[FF]againto return to normalstate.
MENU PBC
ENTER
Playfastbackward
While playing you can push [FB] button to play fast backward.
Four speed are available to play forward, press it once the speed
grows by one shift, when the speed reaches maximum speed,
press[FB]againtoreturn to normal state.
Slowplay
While playing push [SLOW] to play slowly at different speed. You
can play slow forward or backward, three shift speed are
available for either of them. Push [SLOW] once, press it once the
speeddecreasesbyoneshift, finally it returns to normal state.
Skiptonext chapter/track
Whileplayingpush[NEXT]button.
Skipto previous chapter/track
Whileplayingpush[PREV]button.
Select track
Therearemorethanone operation procedure available
A.Push [NEXT] or [PREV] to skip to the next or the previous
trackandplay.
!
B.For those discs with track numbered directly push number
buttons to enter the No. of desired track to play. If the moment
the screen displays , so there may be three possible
reasons:(1) the track in the disc is not numbered; (2) the
number entered beyond the scope; (3) PBC is on (push [PBC] to
shiftPBCstate);
C.Selectamongthesongtrack list (refer to the next chapter).
Display the track list
For DVD discs, when PBC is on, push [MENU] to display the tradk
list, the moment firstly push [UP], [DOWN] to select a track then
push[ENTER]toplay,
For non-DVD discs, when PBC is on, while playing push
[RESUME] to display the track list, the moment you can directly
enterNo.toselect.
10
11
Page 9

Frequent operation Frequent operation
You can push [MENU/PBC] to change PBC
state.
Attention:whether the above procedures
workwillbesubjectto the type of disc.
Repeat play
While playing you can push [REPEAT] to
selectdifferentrepeat content.
1 For DVD discs.push [REPEAT] to repeat
chapter push [REPEAT] again to repeat title,
push[REPEAT] again toexit.
2 For non-DVD discs, when PBC is off, push
[REPEAT] to repeat the track content, push
[REPEAT] again to repeat all disc, push
[REPEAT]again to exit.
Select subtitle Language
(subject the Type
ofdisc)
For DVD disc, you can push [SUBTITLE] to
select the language of caption.e.g. English.
Press it once, the screen will display
availablelanguagealternatively.
Programplay
WhenPBCisoff,in the stopping state:
1.Push[PROGRAM]
The screen display following figure,
programmingoperationisavailable.
(subjecttothe type ofDisc)
Theplayerwillplayorderly as the user Defined.
Displayplayingtimeandstate
Push [DISPLAY] button, TV screen will display current play time
state, i.e.playing time, remaining time, press [DISPLAY] each
time, the screen will show a time alternatively (the time displayed
in the frontal panel accordingly changes), the content to be
displayedeachtimewillsubject to the type of thedisc.
Mp3operation
MP3 is recently introduced disc, which is recorded with MP3
format audio program. This DVD player supports MP3 disc, you
canoperatefollowingtheseprocedures:
Push [EJECT] to eject tray, load MP3 disc, push [EJECT] again,
TVscreenwilldisplayfollowing pictures
SMART NAVI
ROOT ROOT
PLAY MODE
CAST
PIC
SONGS
XTRAS
FOLDER
0
1
2
3
4
Program: P00:00
2.Push number buttons to enter the number
OfChapterortrack
Example:of the user want to firstly play track
5, thentrack3,finallytrack6,soyoucanenter
5,3,6 orderly. (You can push [CLEAR] button
toescapetheenterednumber).
3.Push[PLAY]
12
ENTER
Use Direction key to move the cursor and use
Enter key or PLAY key to enter the corresponding
directory or select the corresponding file for
playing. The option list of play modes lists some
play modes. When LEFT/RIGHT key is used to
move the cursor to a certain option, UP/DOWN key
may be used to select a play mode. After the
selection is completed, LEFT/RIGHT key may be
used again to move the cursor to the directory or
file to be played. And then press PLAY key (if it is
in the directory, it is probably required to press the
key twice) to start playing the disc.
13
Page 10

Frequent operation
System setting
Attention:
While playing, you can
push[PREVIOUS] or[NEXT]
to play the previoustrack or
thenext one.
While playing you can
push [STOP] to back to the
menupicture.
There are two kinds of file disc play mode:1. No-menu play mode.2.
Menu play mode. The factory default play mode of this unit is no-menu
play mode. Please refer to the description on [SETUP] setting menu for
the information on the switching of playmodes.
In the first play mode, after a disc is put into the player and the player
reads the disc, the player will go into [STOP] state and display [STOP]
on DVD display panel.
At this time, you can press a numerical key to select a file and play the
disc starting with the selected file or press [PLAY] key to play the disc
starting with the first file of this disc. This file may be either an MP3 file
or [MPEG] file. When an MP3 is being played, you can press [DISPLAY]
key to view file play time.
Note:1.If you are not quite familiar withthisunitand press [PROG] key
Or sslect programming function through the menu when the discs
described above are played,error operations will becaused.
2. If your disc contains files of multiple formats, press [STOP] key after
the play of the disc is finished and display the picture that you can`t
usage [UP]or[DOWN ]key controled the menu.But you may press
Previous or Next key to view track numbers in the list on the right side or
directly press a numerical key to selecta track to play.
After a JPEG file disc is read out, you can press PLAY key to start
playing.
6. System setting
Push [SETUP], the screen will display system setting menu, the
moment you can push [UP], [DOWN] to move the high lighting
band to the desired item, push [ENTER] to display sub-menu. In
the sub-menu push [RIGHT] to enter inferior sub-menu. You can
push [UP], [DOWN] to move the high lighting band in all menu
pictures. Push [ENTER] your selection will be valid. Push [LEFT]
to escape the sub-menu in the right of the screen. Any time push
[SETUP]or[EXITSETUP]you will escape system setting state.
SETUP MENU MAIN PAGE
GENERAL SETUP
SPEAKER SETUP
AUDIO SETUP
PREFERENCES
EXIT SETUP
GOTO GENERAL SETUP PAGE
Following are some examples of frequent setting the user can
settingotheritemsfollowingtheir instructions.
Example1:SetTVscreenratiomode
1.Push [SETUP] to enable the screen display the system
setting picture, make sure the high lighting band has been
located in GENERAL SETUP push [ENTER], TV screen will
displayfollowing picture.
GENERAL PAGE
TV DISPLAY
PIC MODE
ANGLE MARX
OSD LANG
CAPTIONS
SCR SAVER
MAIN PAGE
GENERAL SETUP
The high lighting band
indicatescurrentitem
The explanation to the
current item
NORMAL/PS
NORMAL/LB
WIDE
14
15
Page 11

System setting
System setting
2.Push [RIGHT] to enter the sub-menu in the sub-menu in the
right screen. If you want to set the screen to "WIDE", firstly push
[DOWN] twicetomovethehighlightingbandto"WIDE'item, then
push[ENTER],
3.Push[MAINPAGE] toexitsystemsetting.
Notes:threescreenratiomodes,i,e, 16:9 WIDE, 4:3 PS, 4:3 Lare
available for your selection to enable different discs to match TV.
the relationship between the video of disc and screen ratio mode
areasfollows:
Video of disc normal 4:3PS 4:3LB 16:9
4:3
16:9 16:9
Example2:Setsoundmixoutputmode
1. Push [SETUP] to enable TV screen display system setting
menu picture, push [DOWN] tomovethehighlightingbandtothe
item"SPEAKERSETUP",push[ENTER], TV screen will display
2. Push [RIGHT] to enter the sub-menu in the right screen, If you
once to move the high lighting band to "STEREO" item, then
push[ENTER].
3,Push[MAINPAGE] toexitsystemsettingpage.
Example3:Coaxialoutput
Iftheuserusecoaxialterminaltooutput audio signal, you need to
set the audio output "SPDIF/RAW' or "SPDIF/PCM", you can
operatefollowingtheseprocedures:
Push [SETUP] to enable TV screen display system setting menu
picture, please firstly enter general setting sub-menu,then
select the item "AUDIO OUTPUT" in the menu, then push
[ENTER],TVscreenwilldisplay:
AUDIO SETUP
AUDIO OUT ANALOG
OP MONO
DUAL MONO
DYNAMC
PRO LOGIC
LPCM OUTPUT
MAIN PAGE
DYNAMC RANGE COMPRESSION
2.Push [RIGHT] to enter the sub-menu in the right screen, push
[DOWN] to movethe high lighting band to theitem "SPDIF/RAW"
or"SPDIF/PCM",thenpush[ENTER].
3.Push[MAINPAGE] toexitsystemsetting.
Special indications: if you are not going to use coaxial output
audio signal, you need to set audio output to "ANALOG' output, so
there will be no audio signal to set audio output to "ANALOG"
output, so there will be no audio signal to be output in the
mixchannel.
SPDIF/RAW
SPDIF/PCM
want to set the sound mode to "STEREO", firstly push [DOWN]
16
17
Page 12

System setting
System setting
Example4:Setagecontrolgrade
For original DVD disc, parents can prohibit the those content
inadvisable to children to be played, you can operate following
theseprocedurestosetage control grade:
1.Push[POWER]
2.Push [SETUP] to enable TV screen display system setting
menu picture, push [DOWN] till the high lighting band move to the
item "PREFERENCE", push [ENTER], then push [DOWN]till the
high lighting band move to the item "PARENTAL",TV screen will
display:
PREFERENCES PAGE
TV TYPE
AUDIO
SUBTITLE
DISC MENU
PARENTAL
PASSWORD
DEFAUL TS
SMART NAV
2
3PG
4PG13
5
6 PG-R
7 NC-17
8 ADUL T
NO PARENTAL
SMT PARENTAL CONTROL
3. Push [RIGHT] to enter the sub-menu in the right of the screen, if
you want to change the age control grade to 3, push [DOWN] till
the high lighting band move to the item "3PG", the player will
indicate you to enter password, if the ex-factory password has
never been modifiied, you can push number buttons "4408" in the
remotecontrol.
4.Push [SETUP] to exit system setting.
Example 5: Set Operation indication or menu display
language
1.Push [SETUP] to enable TV screen display system setting
picture, push [ENTER], push [DOWN] till the high lighting band
movetotheitem"OSD LANG", TV screen will display:
GENERAL PAGE
TV DISPLAY
PIC MODE
ANGLE MARX
OSD LANG
CAPTIONS
SCR SAVER
MAIN PAGE
SET OSD LANGUAGE
ENGLISH
FRENCH
GERMAN
SPANSH
2. Push [RIGHT] to enter the sub-menu in the right of the screen. If
you want to set the language of operation indication or menu
display to English, you can push "UP" or "DOWN" to move the high
lighting band to "English", then push [ENTER], the language of the
menuinthescreenwill turn into English.
3.Push[MAINPAGE] toexitsystemsetting.
3. The submenu SMART NAV in PREFERENCES item is used to set
whether there is a menu when an MP3, MPEG file disc or JPEG file disc
is played.
PREFERENCES PAGE
TV TYPE
AUDIO
SUBTITLE
DISC MENU
PARENTAL
PASSWORD
DEFAUL TS
SMART NAV
SMART NAV TYPE
NO MENU
WITH MENU
For other description of this menu, please refer to the User Manual
provided at an earlier time.
12V REMOTE
DCIN
OUT
12V
_
12V 3A
+
12V REMOTE
12Vremote out
It provides the power
of DC 12V/0.5A when
power of the product
is on. If you turn off
power of the product,
it will have no output.
OUT
18
19
Page 13

Functions of buttons in
remote control
7. Functions of buttons in remote control
This chapter will detail the functions and operation procedures of
all buttons in theremotecontrol,forusers'instantreference.Most
operation procedures can be referred to relevant content of
chapter4,5.
8.1[ ]
When the DVD player is in stop, pause, slow play, fast forward,
fastreversestate,youcan push [ ] to resume normal playback.
Push[ ]again,theDVDplayer will be pause,push [ ] again,
itwillplay.
8.2[TITLE]
Push [TITLE] to display the title menu included in DVD disc. In the
menu picture, you can push [UP], [DOWN], [LEFT], [RIGHT] to
move the cursors to define desired item, then push [ENTER] to
selecttheparttobeplayed(orthe sub-menu, this moment you can
also push [UP], [DOWN], [LEFT], [RIGHT] to move the cursorsto
definedesireditem,then[ENTER] to play).
8.3[PROGRAM]
Whether it works depends on the type of disc, push [PROGRAM]
toenableuserstochange the playing order.
8.4[EJECT]
Push the button once,the tray will be ejected, press it again to
close the tray. When you want to load or unload disc, you canuse
thisbutton.
8.5[REPEAT]
Pushthisbuttontorepeat chapter,title&disc.
8.6[ZOOM]
While playing push this button to zoom out the image, push the
button once to enlarge the image by two times, push it twice to
enlarge it by four times, press it another time to resume normal
playback.
8.7[MENU/PBC]
While playing DVD, push this button to display the option menu
included in the disc (whether it works depends on the type of the
disc). Push this button to shift PBC state. For DVD/SVCD disc,
(whetherifworks depends onthetypeof disc)
Functions of buttons in
when PBC is off, while playing you should firstly push [STOP]
button,then[PBC]toopen yet.
()
8.8[ ]
While playing DVD disc, push the button to skip to next chapter;
while playing SVCD and other discs, push this button to skip to
nexttrack
8.9[ANGLE]
while playing DVD disc with multi-angle function, push [ANGLE]
to play the video in different angles at your option. Push the button
eachtime,theplayerwill be shift to a sceneinanotherangle.
8.10[MUTE]
Push this button to silence the sound output through analog
channel.
8.11[ ]
Pushthisbuttontoplayfast forward silently,pressit once, the disc
forward at a new speed andfinallyreturntonormal playing state.
8.12[ ]
Push this button to play fast backward silently, press it once, the
disc backward at a new speed and finally return to normal playing
state.
8.13[SLOW]
Push this button toplayslowsilently, it can be played slow forward
or backward, press it once to shift a speed and finally return to
normalplayingstate.
8.14[DISPLAY]
Push the button to display some data of time, e, g. the current
playingtime,remainingtime,etc.
8.15[ ]
While playing DVD disc, push the button to skip to previous
chapter; while playing SVCD and other discs, push this button to
skiptoprevioustrack.
8.16[ENTER]
Pushthebuttontoexecute the entered or the selected item.
whetheritworks depend onthetypeof disc
()
whetheritworks depend onthetypeof disc
remote control
20
21
Page 14

Functions of buttons in
remote control
Functions of buttons in
remote control
1234
5678
CLEAR
0/10
10+
9
8.17 [UP], [DOWN], [LEFT], [RIGHT]
When the screen display the menu of DVD disc or system menu,
the player is in waiting state, you can push these buttons tomove
thecursorthenselectthe desired item.
8.18 NUMBER BUTTONS
[0], [1].... [9] number buttons are used to enter number,e.g. No. of
track,DVDchapterNo.,time data, etc.
8.19 [10+]
When the No. of a track or a chapter is over 9, firstly push [10+]
thenpushrelevantnumberbuttons.The button is used to enter the
number in decade of the No., press it each time, the number in
decadewillincreaseby1.
8.20 [CLEAR]
When entering theprogrammed No., push [CLEAR] to cancelthe
enterednumber.
8.21 [SETUP]
Push thebutton,thescreenwilldisplaysystemsettingpicture,the
user can select some relative constant parameters. The user also
can set it as needed. Detailed operation procedures please refer
tochaptersix.
8.22 [ ]
While playing DVD, push the button once to pause playing, push it
twice to completely stop playing. Whether this function works
subjecttothetypeof disc.
While playing VCD/SVCD and PBC being on,push [STOP], you
canreturnmenu.
8.23 [SUBTITLE]
Push this button to select caption indication language, e.g.
English, etc. Press it once to change a caption Language.(This
operationworksonlyforthe disc with multi subtitle encoded).
8.24 [AUDIO]
Push this key to select the language of sound on the disc, push it
once to change to another language. (This operation works only
forthediscwithmulti language audio).
8.25 [DVD/GAME]
Push [DVD/GAME] again, the unit will turn to "GAME"state,you
can watch other program or play game by LINE INPUT on front
panel.
8.26 [VOL+, VOL-]
PushVOL+toincreasevolume, push VOL- to lower to volume.
NOTE:DVD WITH TV TUNER MODEL,THE [DVD/GAME]
KEYISEXCHANGEDBY[DVD/TV/GAME]
1.Push [DVD/TV/GAME] one time,the unit will turn to ``TV``
state,then push [SETUP],and choose AUTO SEARCH,push
[RIGHT] of direction key,and choose ON by direction key.
Then push [RIGHT].This time,the unit will search and
rememberTVproramautomatically.
2.You can choose TV program by [UP] and [DOWN] of
directionkey.
3.You can chooseTVprogrambynumberkey.
Fox example,if you want to choose 18 CH, please push [10
]thenpush[8].
4.You can tunefinelyby[LEFT]and[RIGHT]ofdirectionkey.
5.Push [DVD/TV/GAME] again,the unit will turn to
``INput``state,you can watch other program or play game by
LINEINPUTonfrontpanel.
+
22
23
Page 15

Technical terms
Specifications
8. Technical terms
TITLE:For DVD disc it is defined as a long complete segment of
image or music or a movie. Each title has a number that makes it
easytosearch.
TRACK: The image or music of a VCD or CD. Each track has a
numberforsearch.
CHAPTER:It is smaller than title among the units of a DVD, it is
defined as a long complete segment of image or music or a movie.
A title is made up of several chapters, and each chapter has a
numberforsearch.
CAPTION:The literature in TV screen bottom, generally it is
translationordialogue,alsorecorded in the disc.
ANGLE:For some DVD discs, they record pictures filmed from
different angles, the user can watch a same picture from different
anglesatyouroption.
9. Troubleshooting
Nosound
Check if the unit is connected securely with other systems
includingamplifierorTV;.
Makesureyouoperatethe TV or amplifier correctly.
Makesurethesystemsetting is correct.
Disccannotbeplayed
Makesurethedischas been properly in the tray.
.
Checkwhetherthereisonly disc in the tray.
Makesurethediscis clean
.Remote control does not work
Removebarriersfromtheremotecontrol. Replace the batteries
withnewones.
Pointtheremotecontrolat the remote control sensor of theunit.
Checkwhetherthebatteriesenergy is sufficient.
Twistingimage
Checkwhetherthediscis scratched or there is dirtwhereof.
This player is controlled by micro computer,if any trouble occurs,
please turn offthe power,reopen it till 10 minutes later,when there
isnotroublethemoment,you can normally operate the player.
Buttondoesnotwork
This may caused by unstable electricity current or other abnormal
trouble,pleaseturnoffthe power,reopenittill 10 minutes later.
10. Specifications
Playable discs:
Videoformat:
Audio format:
Signaloutput:
Functionaloperation:
Output interface:
Powervoltage:
Powerconsumption:
Frequencyresponse:
Audiosignal/noiseratio:
Weight
2.2kg
:
Productdimension: (mm)
Accessories:
DVD/SVCD/DVCD/VCD1.0,1.1,2.0(micro laser
video/audio disc) CD - DA (common music laser
CD), MP3 audio disc,CD-R,CD-RW
MPEG1,MPEG2,PCM,DOLBYDIGITAL,DTS;
MPEG1,MPEG2,PCM, DOLBY DIGITAL,
DTS;analogstereo,
videosignal:NTSCorPAL
video:1.0Vp-p
audio:mixstereo2Vp-p
pleaserefertochapter 7.
RCA output, high-resolution system (S-VIDEO)
output,coaxialdigitaloutput
DC9.5-24v
15W
DVD:20Hz-20KHz
90dB
220x160x66
audio/video cable, remote control (with
batteries),user'smanual,videoCABLE.
Notes:
Any change to the
design and
specifications will
notbeadvised.
24
25
Page 16

How To Deal With Disk
How To Deal With Disk
Attention
Don't write on the labeled
side.
Don't use pickup cleaning
preparation. phenyl,
chemical solution,
dispersing solution, antistatic electricity solution or
any otherkind of solutions to
cleandisk
Don't stick label or gluebased noteon disk(Don't use
disks with remaining glue or
damagedgluey lable)
Don't use scratchingpreventingmaterials orcover,
unlessitis assignedto useon
thismachine.
Don't put or store disk at
following environments.
straight under the sunshine.
/at moist or dusty places at
the exit of hot air or beside
heatinginstallation.
Howtoholddisk
Don'ttouchthefacecarvinginformation.
Whentherearestainsonthefaceofdisk
wipegenitallywithawet cloth and then with a dryone.
When a disk is brought from a cold environment to a hot one, there
could be steam on the face of disk. wipe with a dry, soft, smooth
clothbeforeusing.
26
 Loading...